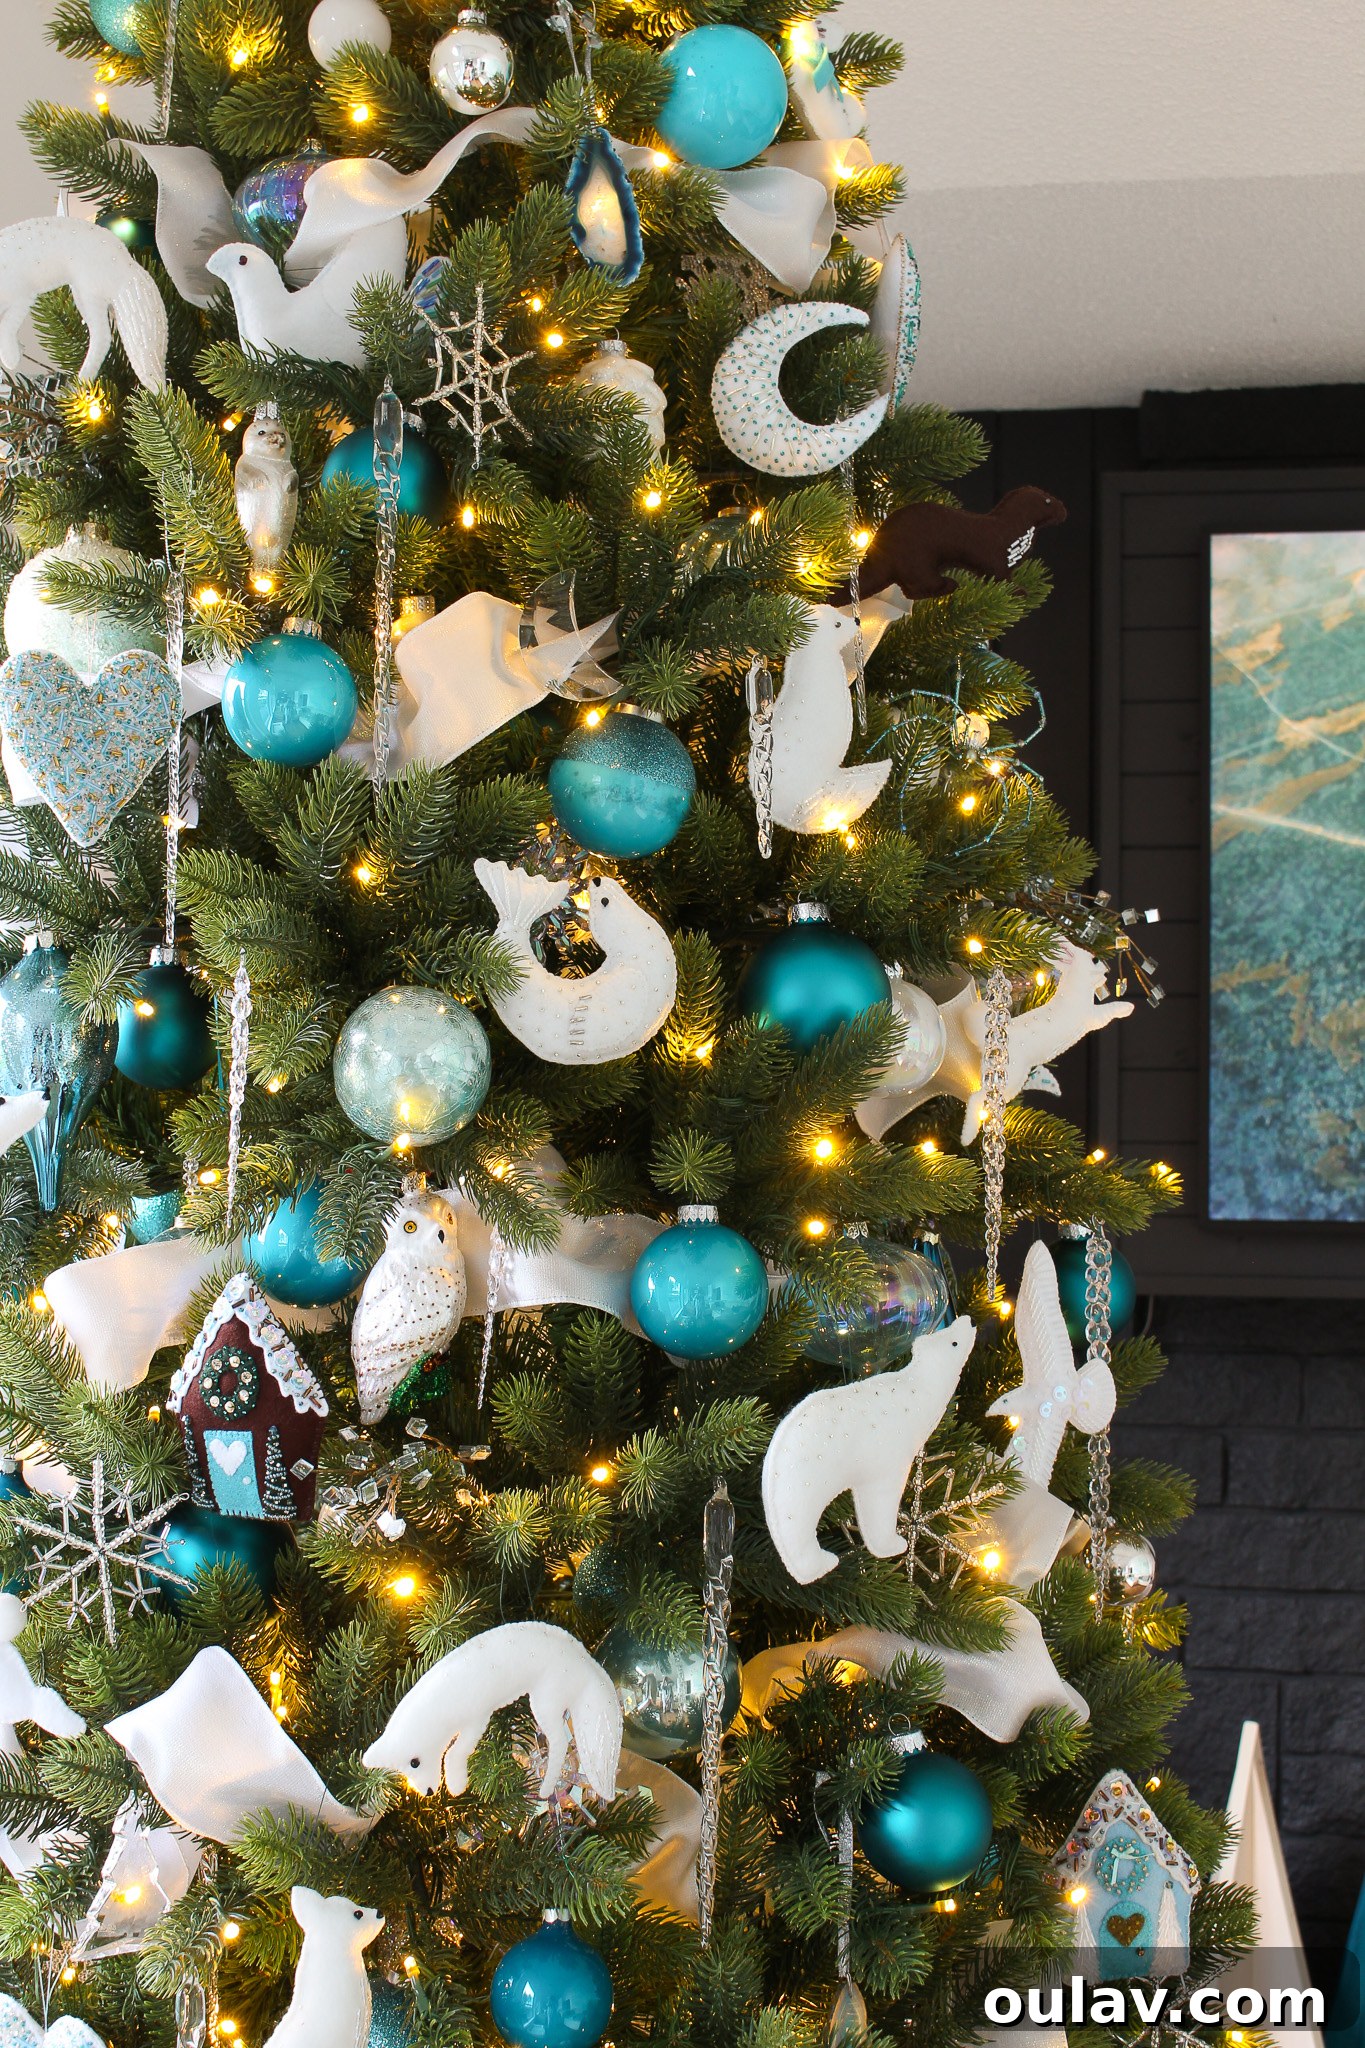
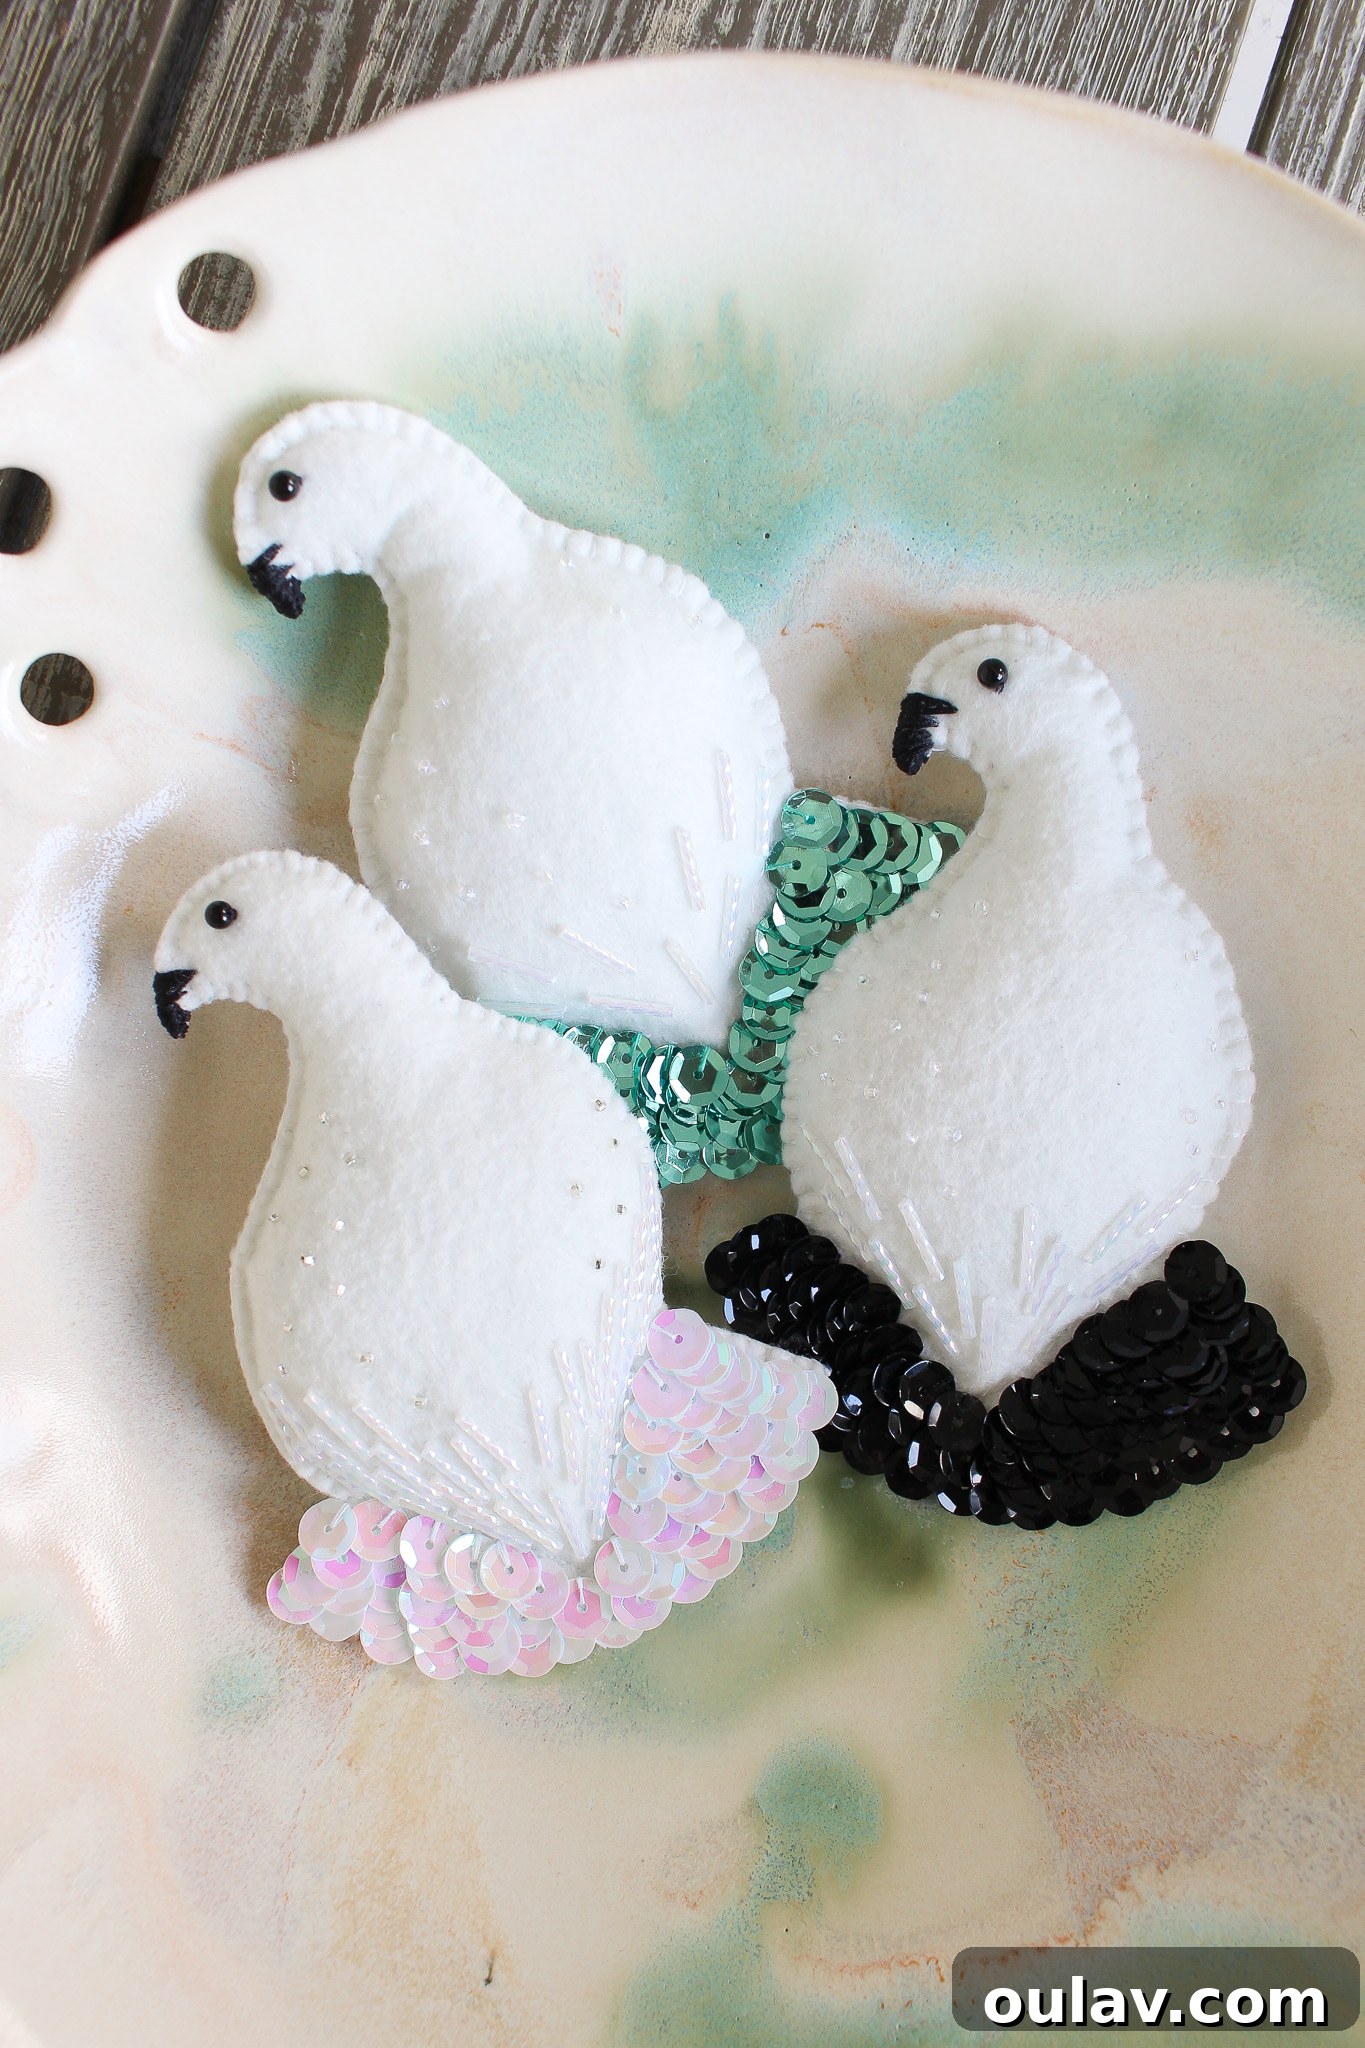
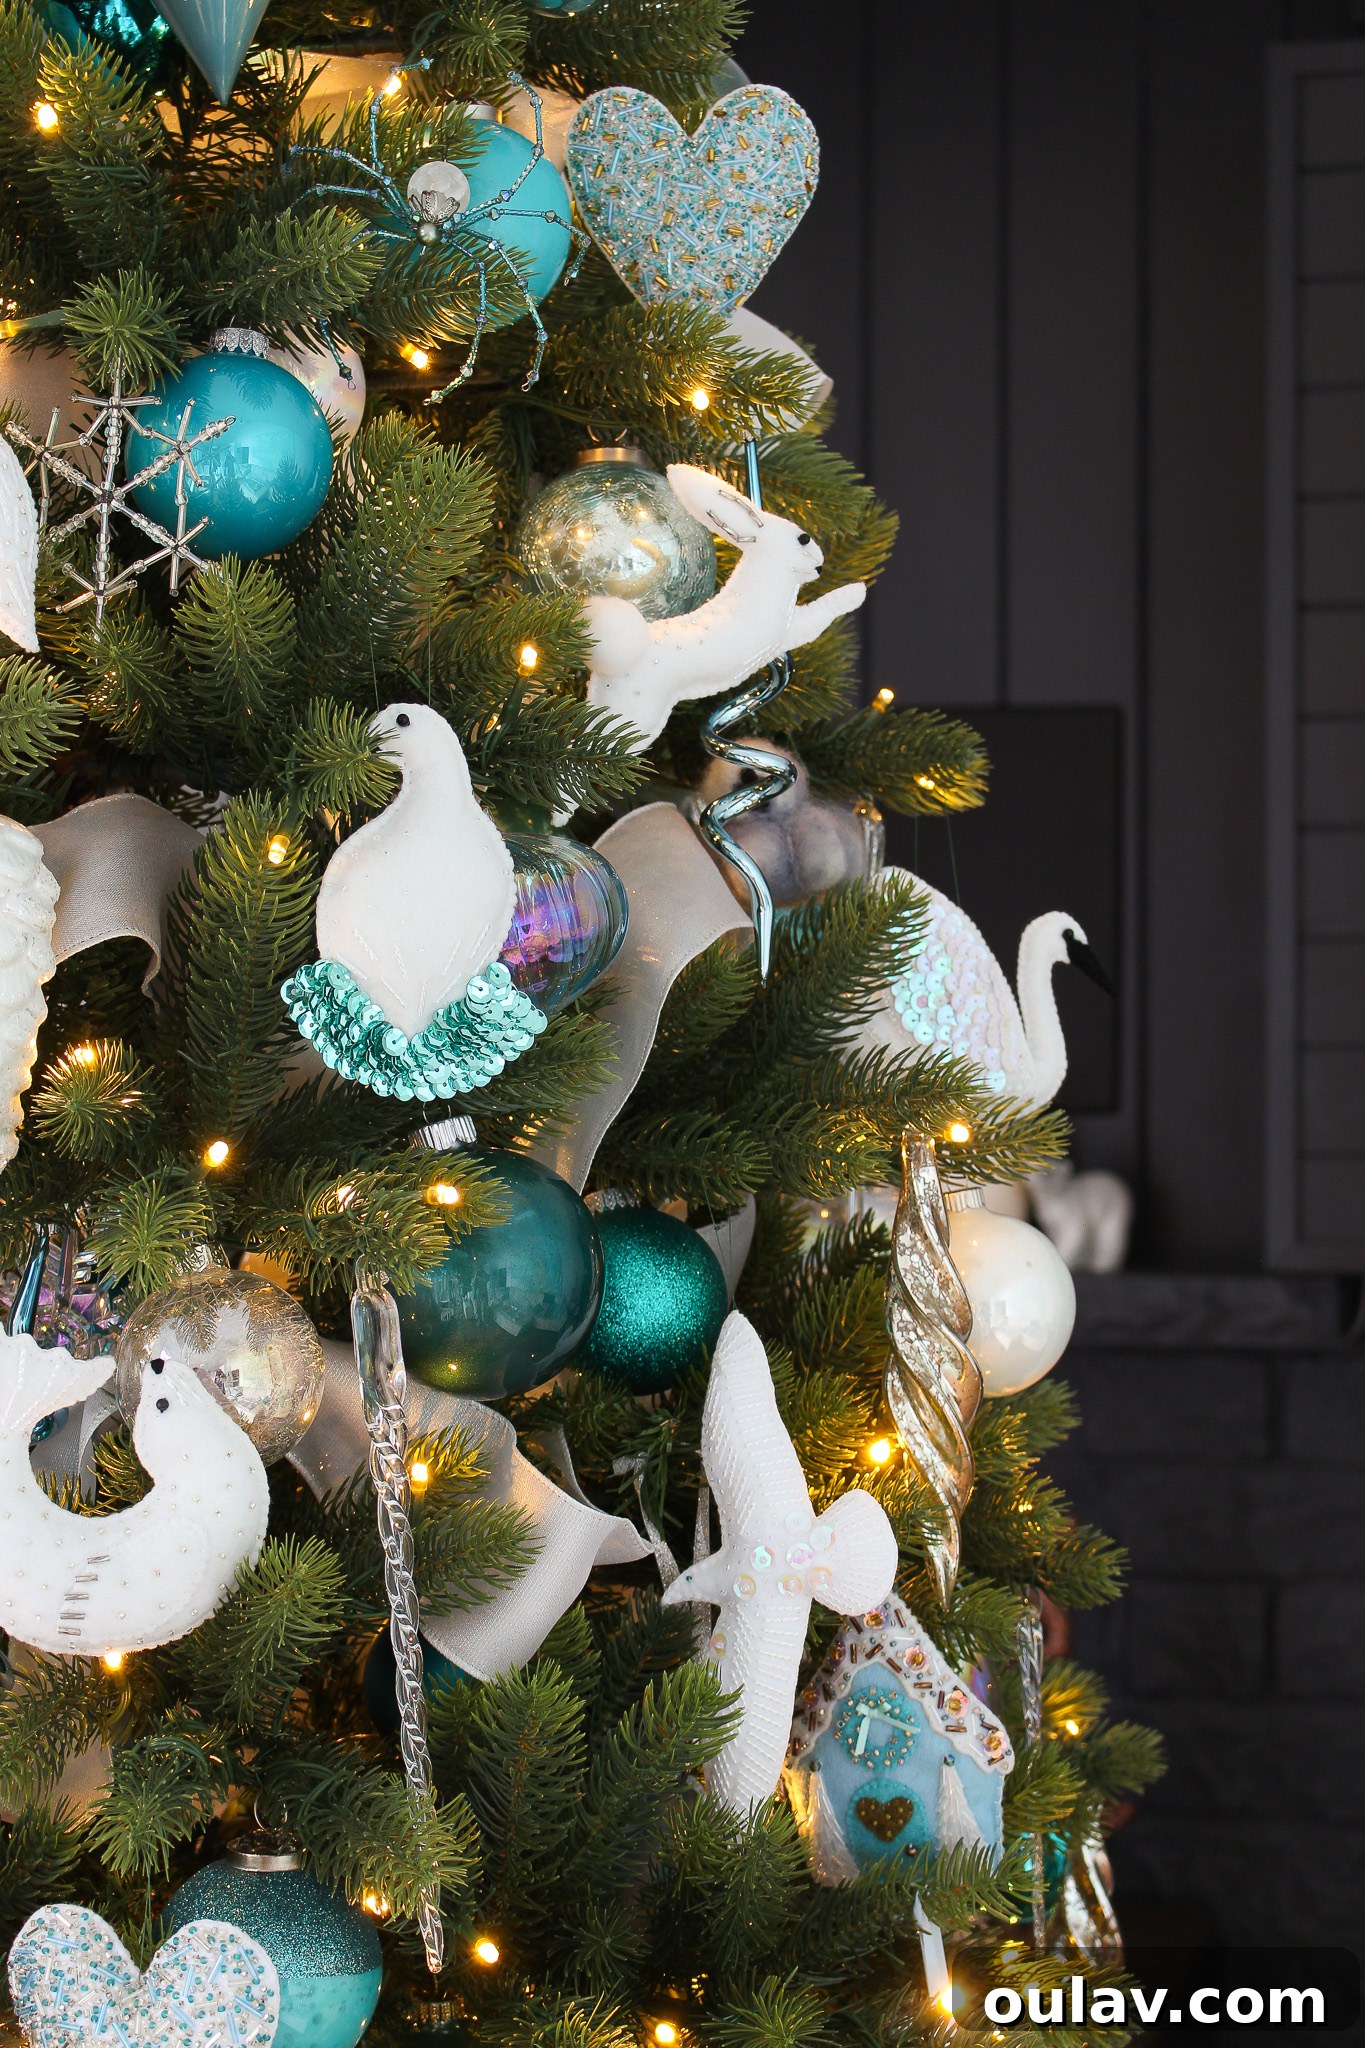
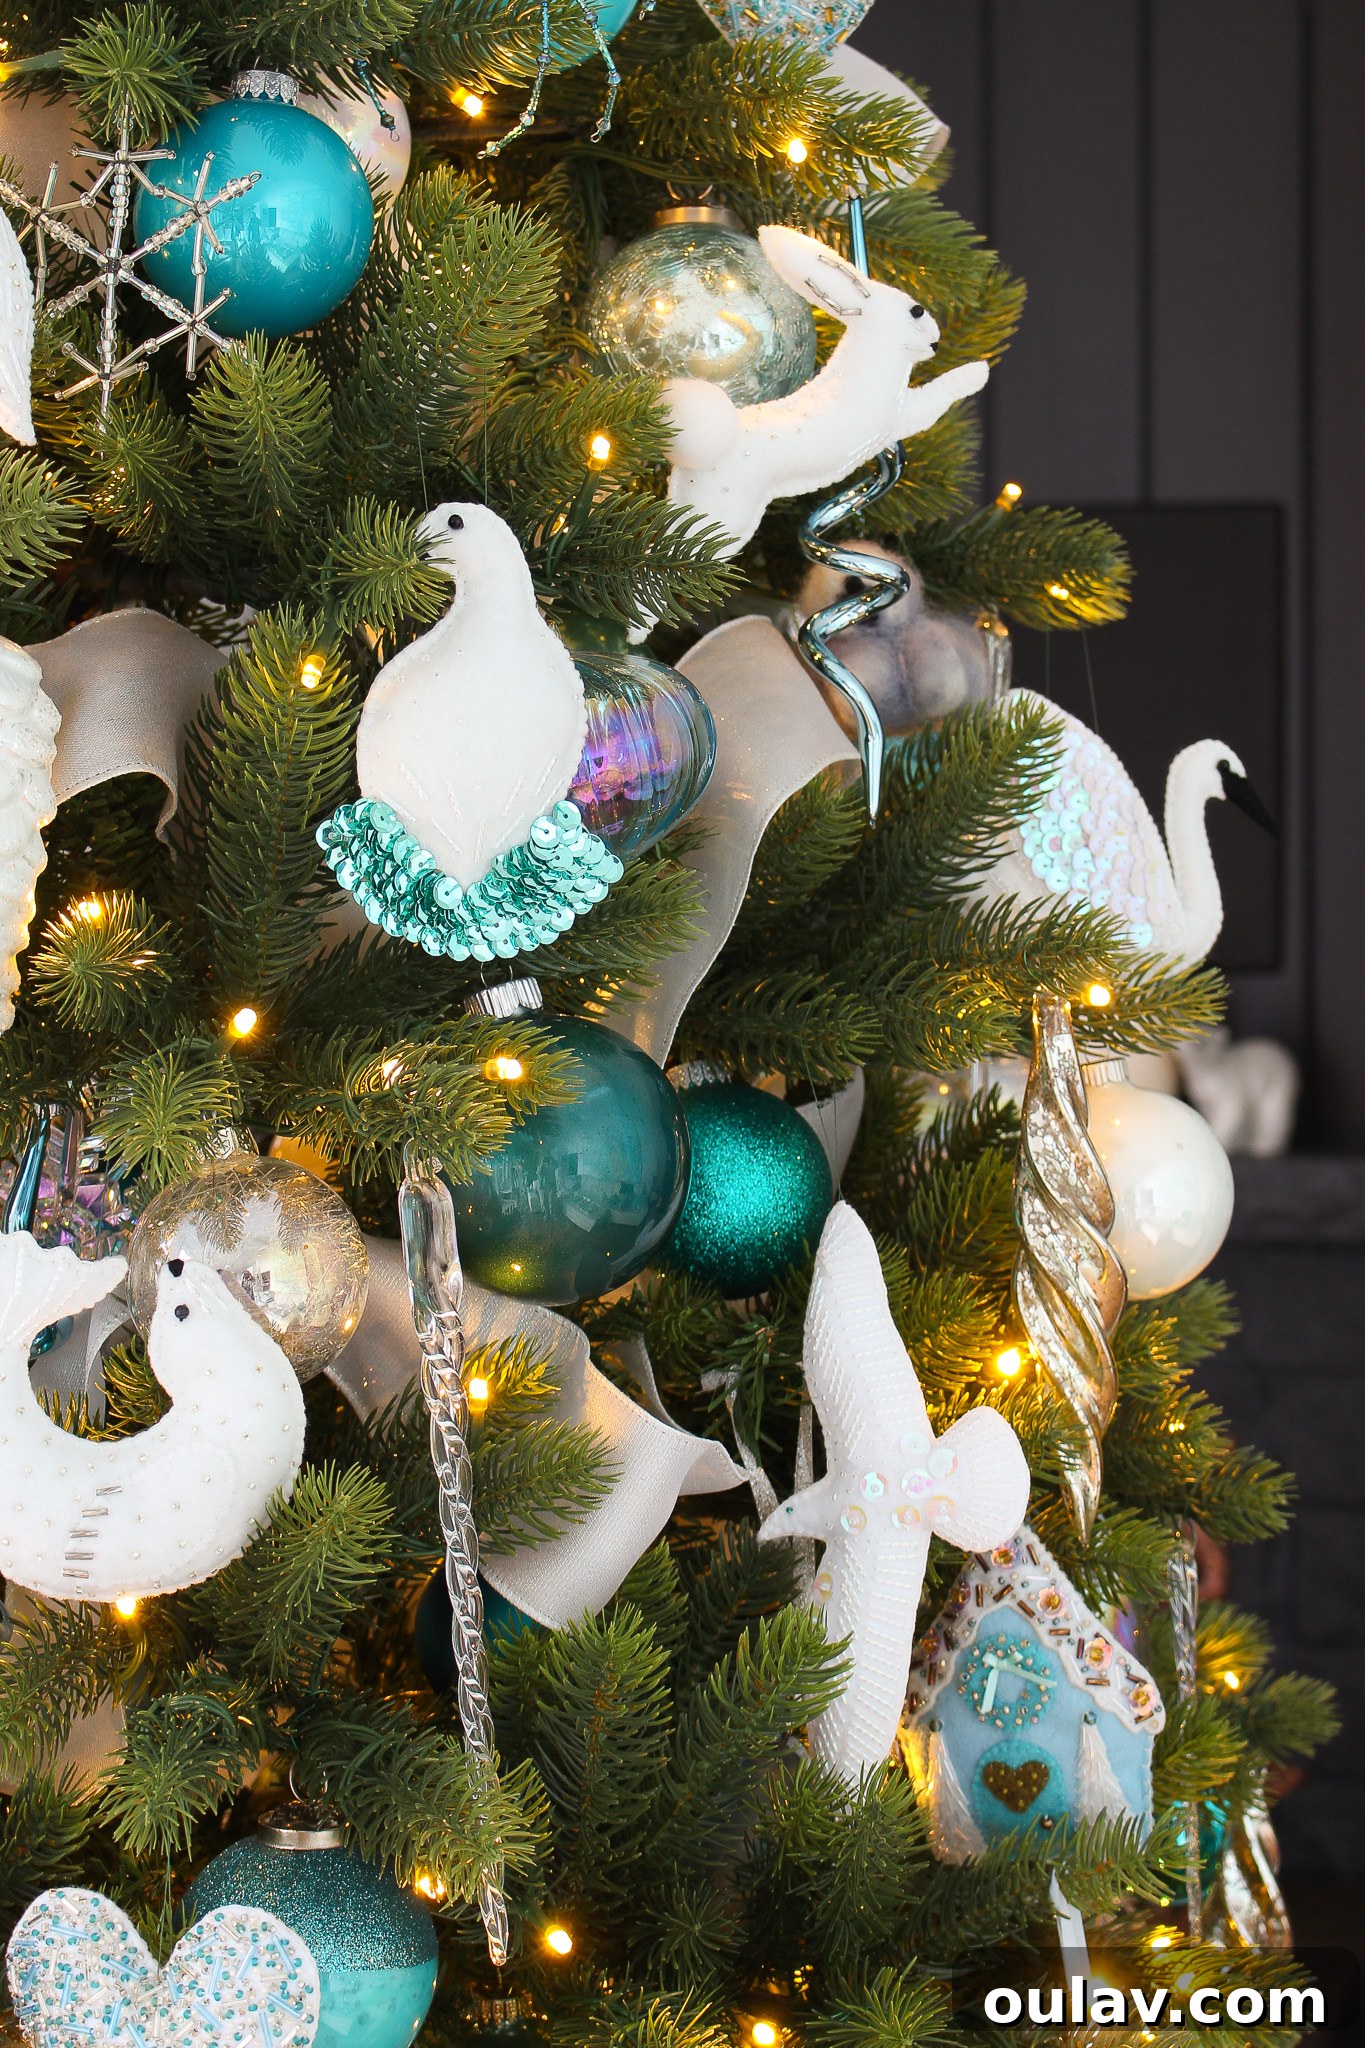
Welcome, fellow crafters, to a delightful journey into the world of handmade ornaments! This guide will walk you through creating a charming DIY felt bird ornament, specifically designed as an exquisite Ptarmigan. Imagine adding a touch of frosty elegance to your holiday decor or gifting a unique, handcrafted treasure. This beautiful felt Ptarmigan is the latest addition to our beloved Tundra felt animal ornament collection, perfectly complementing designs like the DIY felt jumping fox ornament, the DIY felt sitting fox ornament, the graceful DIY felt leaping bunny ornament, the majestic DIY felt polar bear ornament, and the adorable DIY felt seal ornament. If you’ve enjoyed crafting any of these previous designs, you’re in for a treat with this Ptarmigan, as it features slightly more advanced beading and sewing details, offering a rewarding challenge. Even if the Ptarmigan isn’t your specific muse, the versatile pattern allows you to transform this stylized bird into a serene dove, a cheerful robin, or any bird your heart desires, simply by experimenting with different felt colors, sequin choices, and bead arrangements. The creative possibilities are truly endless, allowing for a deeply personalized touch. Ready to begin? Click here to get your DIY felt Ptarmigan ornament pattern!
Essential Supplies for Your Felt Bird Ornament
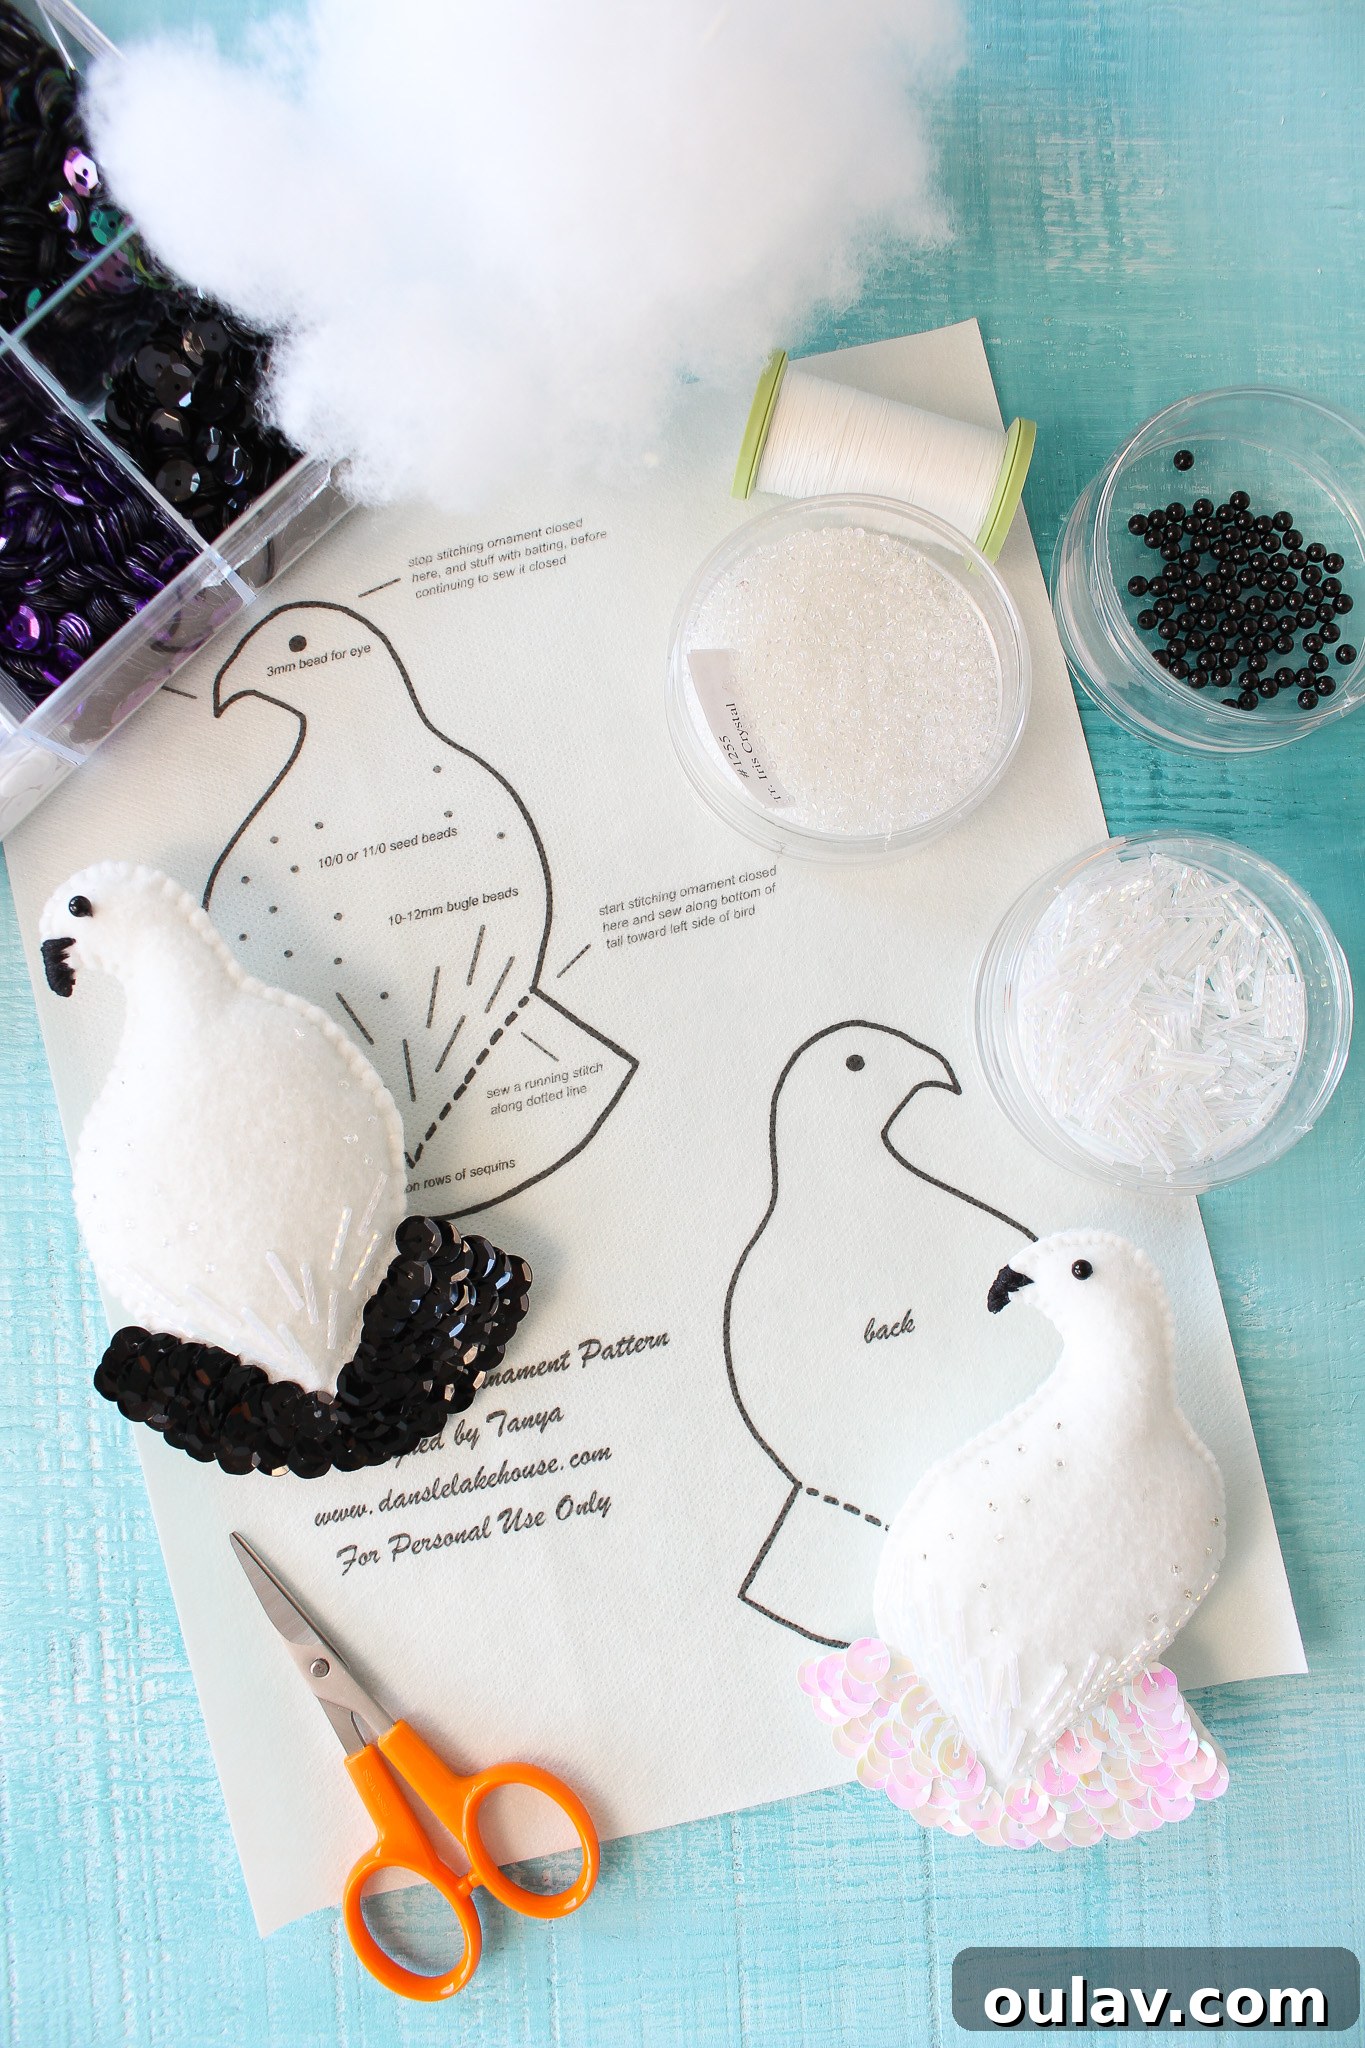
Gathering your materials is the first exciting step in any crafting adventure. For this enchanting felt Ptarmigan ornament, you’ll need the following carefully selected supplies to ensure a beautiful and durable finished piece:
- My Exclusive Ptarmigan Felt Ornament Template: Your blueprint for success.
- Premium Soft White Felt: Opt for pliable, soft felt rather than the stiff, rigid variety. This ensures your bird has a lovely drape and is easy to manipulate for stuffing and sewing.
- Durable White Thread: I highly recommend Coats & Clark Hand Quilting Thread. Its fine gauge is perfect for delicate beading, yet it boasts exceptional strength, crucial for securely assembling your ornament.
- Green Heavy Duty Thread (Optional but Recommended): Ideal for creating a subtle hanging loop that blends seamlessly with evergreen branches, making your ornament the focal point.
- Black Thread: Essential for crafting the detailed beak and securely attaching the eye bead, ensuring these crucial features stand out.
- Transparent Iridescent Glass Seed Beads: These beads, typically sizes 10/0 or 11/0, add a captivating “snow-like” sparkle. Feel free to use any seed beads you already have on hand.
- 12mm Bugle Beads: Perfect for adding textured “feathers” and intricate details, providing depth and dimension to your bird.
- 3 mm Black Bead: This will form the expressive eye of your Ptarmigan, bringing character to your creation.
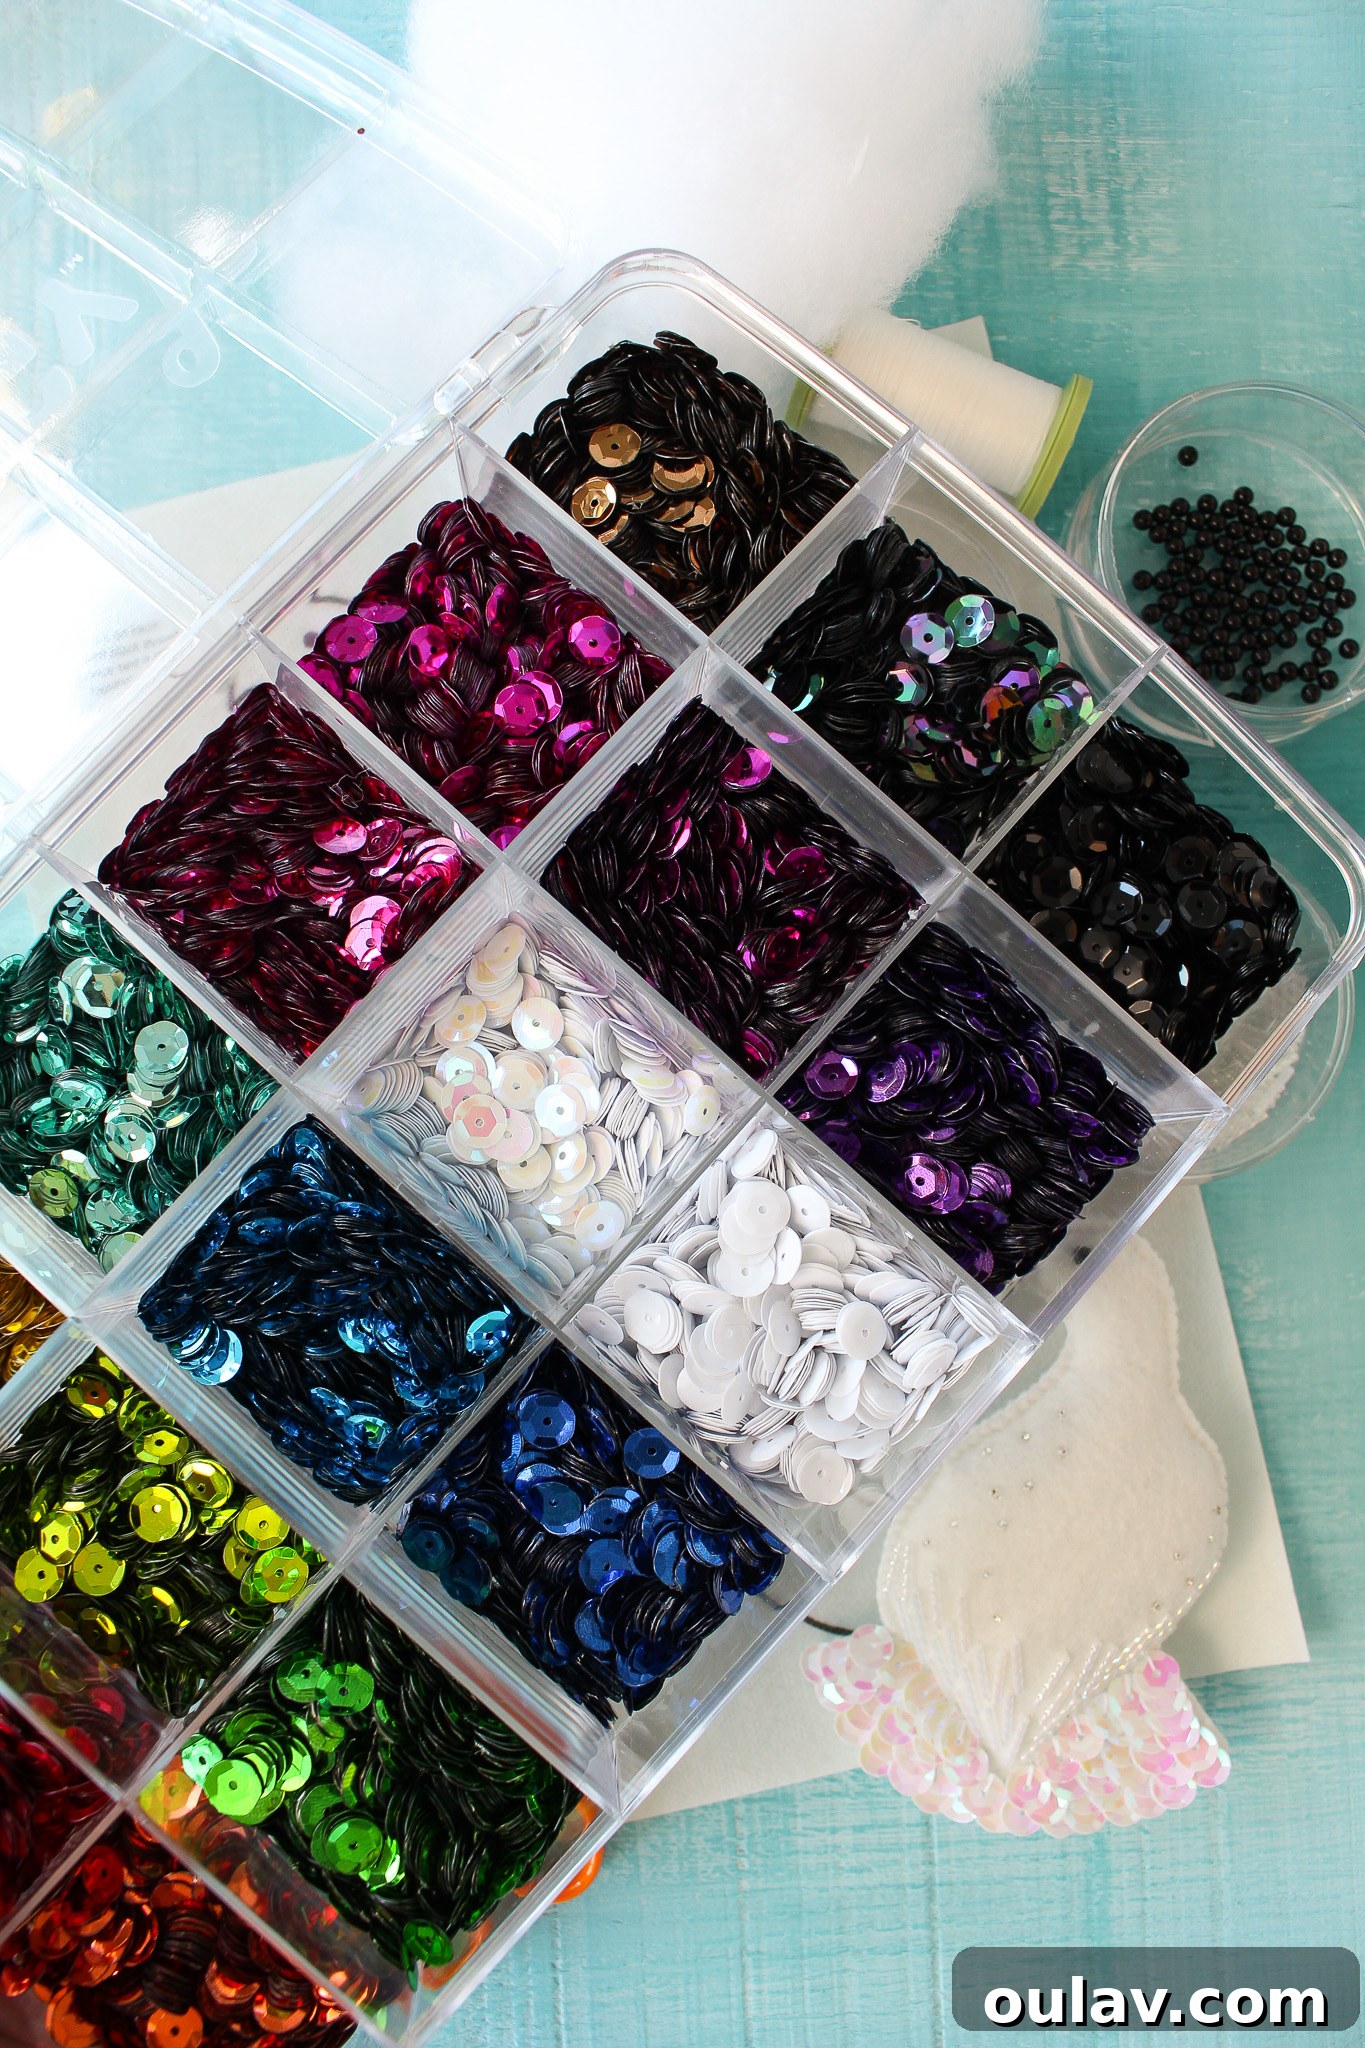
- Black or White Sequins: Sequins add a wonderful shimmer and can mimic delicate feathers. Choose black for a traditional Ptarmigan look or white for a frosted effect.
- Poly-fil or Wool Batting/Stuffing: The magic ingredient for giving your bird its plump, three-dimensional form.
- Fine Beading Needle: Crucial for working with tiny beads and ensuring precise placement.
- Standard Hand Sewing Needle: For general sewing, especially the blanket stitch that brings your ornament together.
- Sharp Short Fabric Scissors: Essential for precise cutting of felt, especially around intricate pattern details.
- Reliable Printer : To print out your digital pattern accurately.
- Fine Tipped Sharpie + Standard Printer Paper OR Gypsy Quilter Freezer Paper OR Stick N Stitch Self Adhesive Wash Away Stabilizer: These options provide different methods for transferring your pattern to felt, catering to various preferences and skill levels.
- Stuffing Tool (Optional): A helpful gadget for evenly distributing stuffing into small areas, though alternatives work just as well.
Thoughtful Notes on Your Crafting Supplies
Embarking on a DIY project doesn’t always mean buying a complete new set of supplies. Many items can be repurposed or substituted, making felt ornament crafting an incredibly economical and sustainable hobby. For additional inspiration and detailed recommendations for your felt ornament projects, explore more DIY felt ornament supply suggestions here. Remember, you absolutely do NOT need to acquire every single item on the list above. Creativity often flourishes within resourcefulness!
For example, if you already have an embroidery floss collection, you can easily skip the beading and instead add beautiful embroidered details to your bird. This adds a unique texture and charm, transforming the ornament’s character entirely. For stuffing, consider giving new life to old pillows by repurposing their filling, or use small scraps of felt and fabric from previous projects for an eco-friendly approach. If you prefer not to invest in a specialized stuffing tool or adhesive stabilizer, a simple fine-tipped Sharpie for tracing and the capped end of a pen or even a chopstick can perfectly serve as your stuffing aid.
The beauty of making DIY felt animal ornaments lies in their adaptability and affordability. While I’ve linked the specific items I personally use and recommend for optimal results, never feel pressured to purchase everything at once. Build your crafting kit gradually! If you’re looking to expand your supply collection, a multi-pack of sequins offers a fantastic variety for future projects, like our popular DIY felt gingerbread ornaments, allowing you to add sparkle to many designs this crafting season.
Maximizing Your Felt Ornament Pattern: A Step-by-Step Guide
Our Ptarmigan felt ornament pattern is designed for immediate accessibility and ease of use. As a convenient digital download, it’s ready for you the moment you complete your purchase. The pattern is perfectly scaled for standard 8.5 x 11-inch paper, ensuring compatibility with virtually any home printer. Once printed, you have several excellent options for transferring the design to your felt, each with its own advantages:
- Method 1: Standard Printer Paper for Tracing: This is the most straightforward and budget-friendly approach. Simply print the pattern onto any printer paper, carefully cut out the individual shapes, and then place them on your felt. Using a fine-tipped sharpie or a fabric marker, trace around the edges of your paper templates onto the felt. Once traced, cut out your felt shapes precisely, ensuring you cut just inside the marker lines for a clean finish.
- Method 2: Freezer Paper for Precision Cutting: For a slightly more stable and precise transfer, consider using Gypsy Quilter Freezer Paper. Print your pattern directly onto the matte side of the freezer paper. Roughly cut around each pattern piece (leaving a small border), then iron the shiny side of the freezer paper onto your felt. The heat creates a temporary adhesive bond. With the pattern securely attached, you can cut out your felt shapes with remarkable accuracy. Afterward, the freezer paper peels off cleanly, leaving no residue and a perfectly cut felt piece without any drawn lines. This method is fantastic for intricate shapes and offers a steadier cutting process.
- Method 3: Wash Away Stabilizer for Enhanced Detail and Beading: This is my preferred method, especially when intricate beading and stitching are involved. Purchase Stick N Stitch Self Adhesive Wash Away Stabilizer and print your pattern directly onto it. Roughly cut out the stabilizer shapes, then firmly stick them onto your felt. This method provides a clear guide not only for cutting but also for bead placement and embroidery details, as my patterns often include these guides. Cut out the felt shapes with the stabilizer still attached, then proceed with all your stitching and beading. Once all the decorative work is complete, the stabilizer easily dissolves with water, leaving behind only your beautifully stitched felt piece. This option is invaluable for perfectly placed embellishments and complex designs.
Important Pattern Usage Rights
Please take a moment to note: this felt ornament pattern is protected by copyright and is provided strictly for your PERSONAL USE ONLY. It is not licensed for any form of online sharing, commercial use, or resale. Your understanding and respect for these terms allow us to continue creating and sharing unique designs for personal crafting enjoyment. Thank you!
Crafting Your Own DIY Ptarmigan Felt Ornament: A Detailed Tutorial
Let’s dive into the hands-on process of bringing your felt Ptarmigan to life. Follow these steps carefully for a beautiful finish:
- Begin by printing out your newly acquired felt Ptarmigan ornament pattern onto your chosen paper or stabilizer.
- If utilizing plain printer paper: Carefully cut out both pattern shapes. Then, using a fine-tipped permanent marker, trace these shapes onto your soft white felt.
- Proceed to cut out both felt shapes using your short fabric shears, ensuring you cut just inside the marker lines to maintain a clean edge.
- If using Freezer Paper or Wash Away Stabilizer: First, roughly cut out both pattern shapes from the paper/stabilizer, leaving a small border. Then, either iron the freezer paper onto your felt (shiny side down) or stick the self-adhesive stabilizer firmly onto the felt.
- With the pattern securely attached, cut out both felt shapes precisely along the pattern lines using your short fabric shears.
- If you’ve used freezer paper, gently peel it away from the felt. However, if using wash-away stabilizer, leave it in place; it will guide your beading and stitching in the subsequent steps.
- For the next two steps, thread your beading needle with durable white thread:
- Thoughtfully stitch on a scattering of transparent iridescent glass seed beads. These will beautifully mimic delicate snowflakes or frost on your Ptarmigan.
- Next, strategically stitch on the 12mm bugle beads along the designated area for the “bum feathers,” creating a lovely textured tail.
- Continue using your beading needle, but now switch to black thread for precision:
- Carefully stitch on the 3mm black round bead to create the Ptarmigan’s eye. If a 3mm bead isn’t available, a black seed bead will also work effectively.
- Transition to your standard hand sewing needle for the structural steps that follow:
- Stitch along the marked bum/tail section of the felt bird, as indicated by the dotted line on your pattern, to join the two felt pieces partially.
- If you were using stick-on stabilizer, now is the time to gently rinse it away under warm water. Allow the felt to dry completely before proceeding.
- Stitch on rows of sequins, overlapping them slightly to create a lovely feathery texture and conceal your stitches.
- Employing a neat blanket stitch, begin to sew together the front and back pieces of your felt bird. Remember to leave a section open, typically along the right side of the bird, for stuffing.
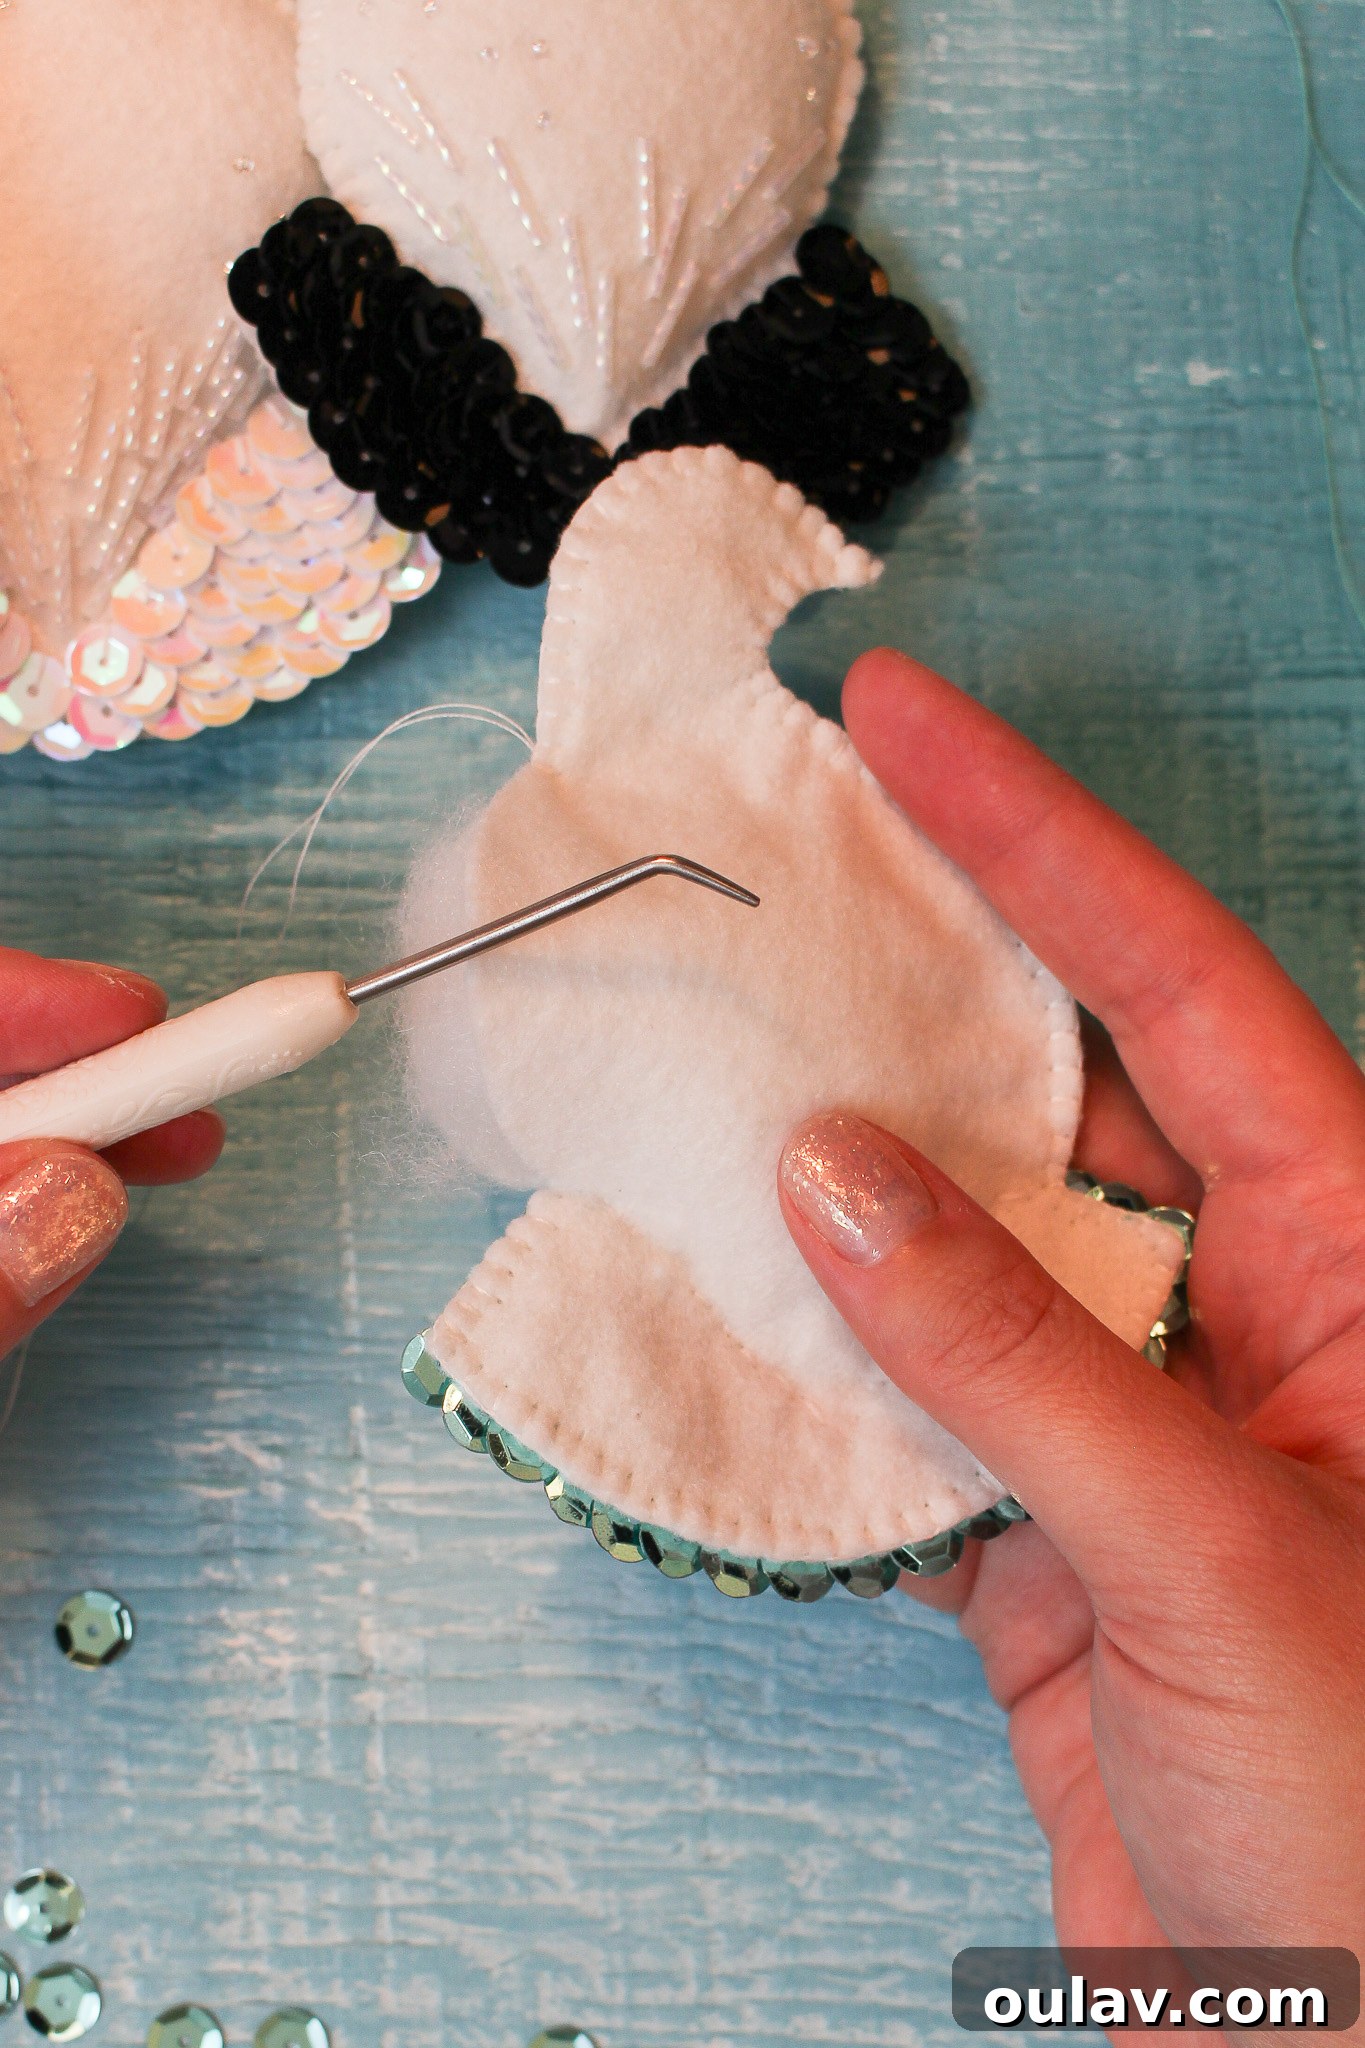
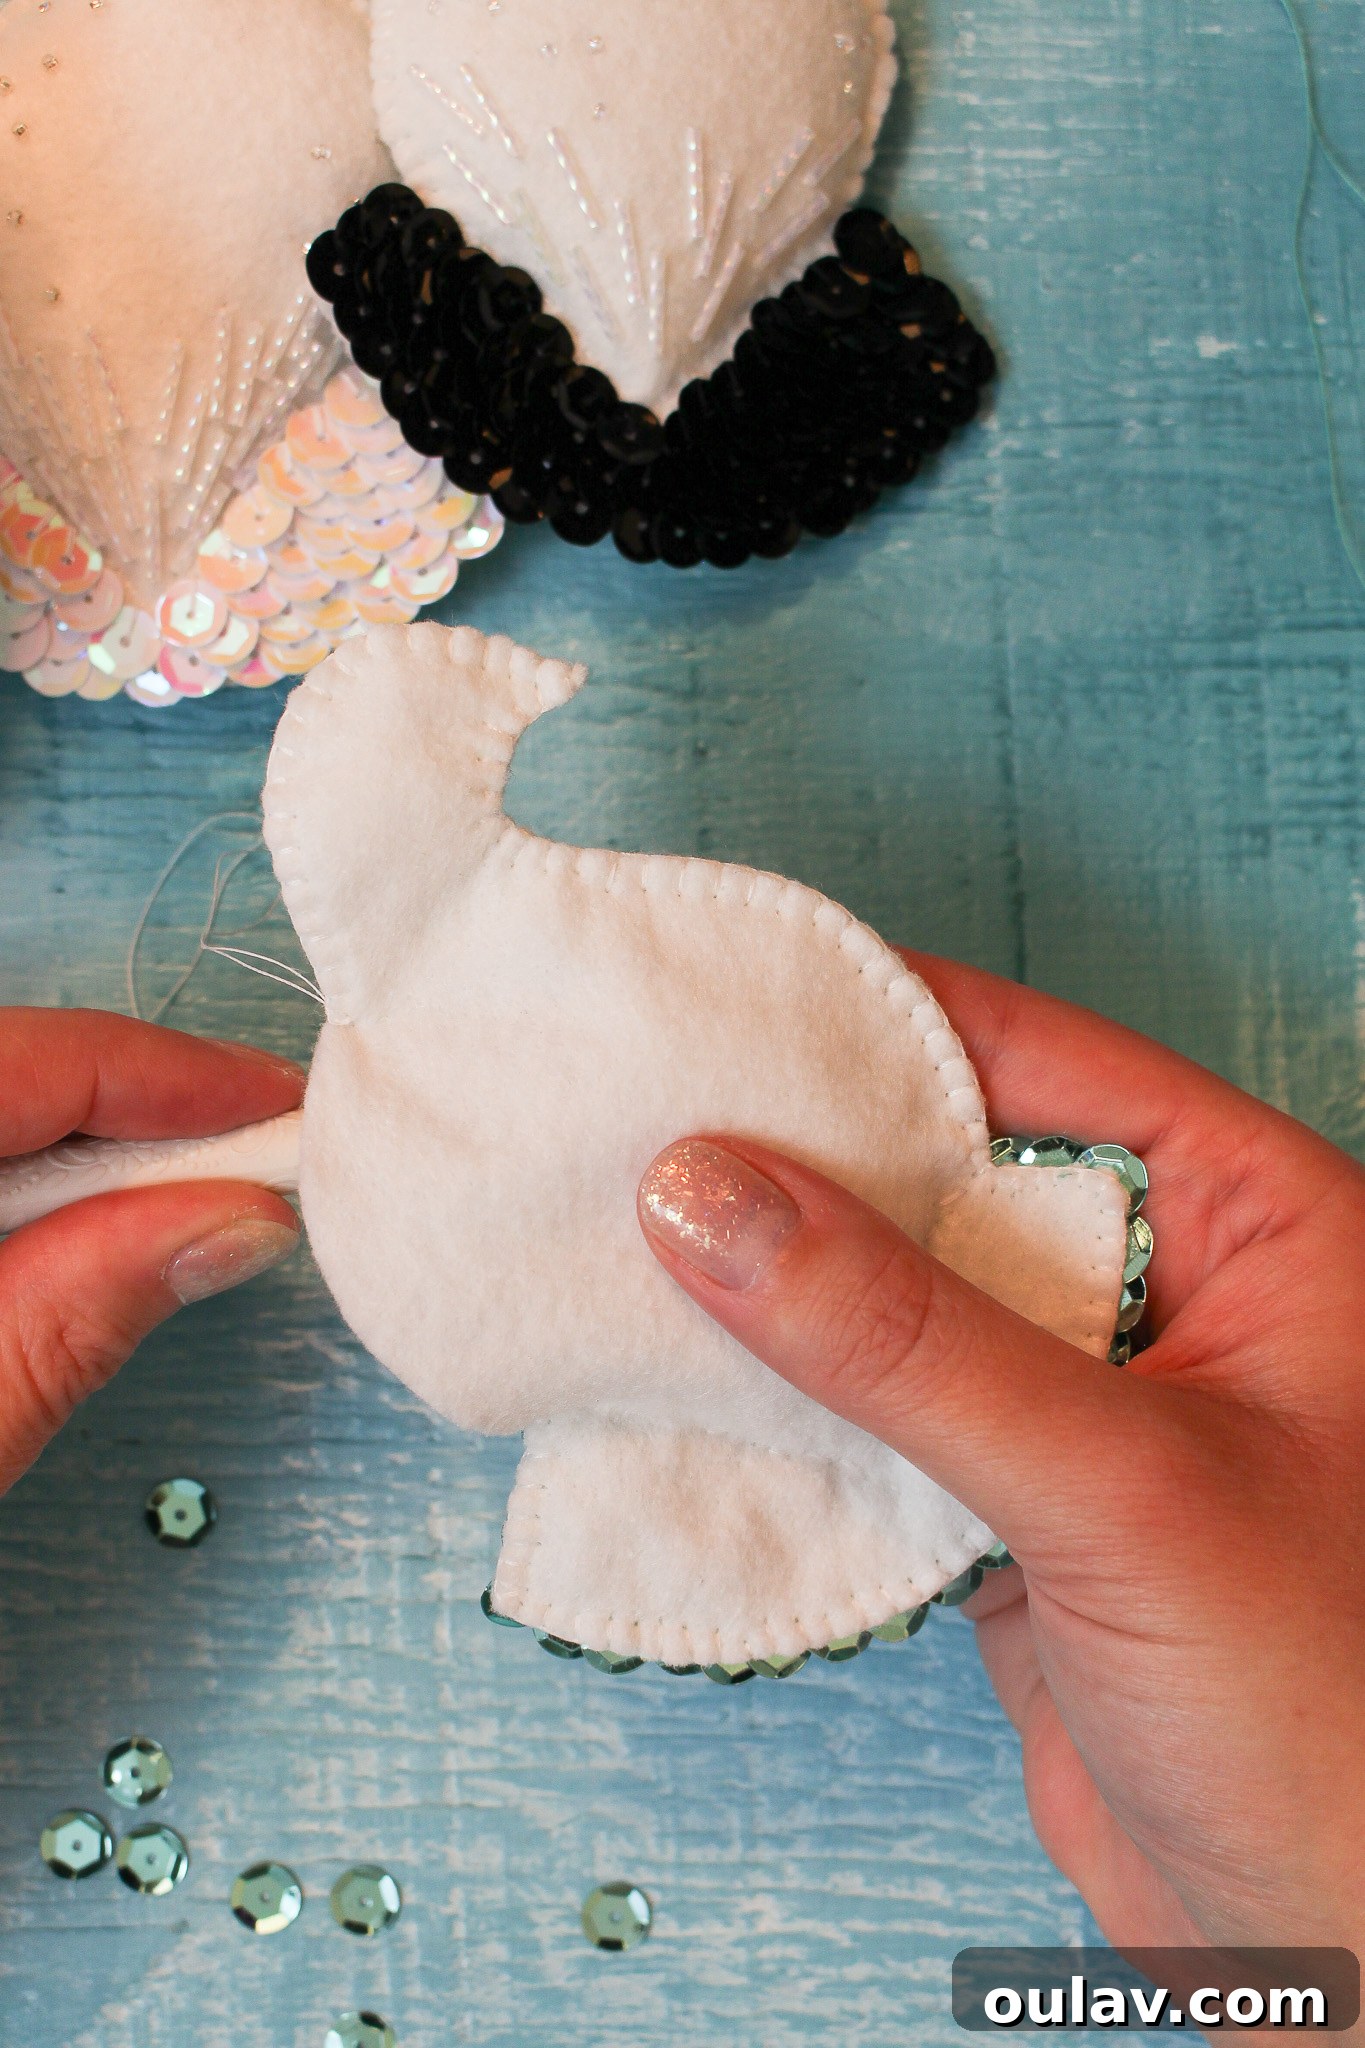
- Using a pencil, capped pen, or your dedicated stuffing tool, carefully work small sections of Poly-fil or wool batting into the face and body of the bird. Stuff firmly but evenly to achieve a smooth, plump shape.
- Continue sewing the bird closed, stopping every inch or so to add more batting. This iterative process helps maintain an even distribution of stuffing and a desirable shape.
- Repeat this “sew a little, stuff a little” method until your ornament is fully plumped and you have sewn the entire opening closed.
- Once the bird is completely sewn closed, secure your thread with a firm knot, carefully bury the thread end within the ornament, and trim any excess.
- Switch back to black thread on your hand sewing needle for the final detail:
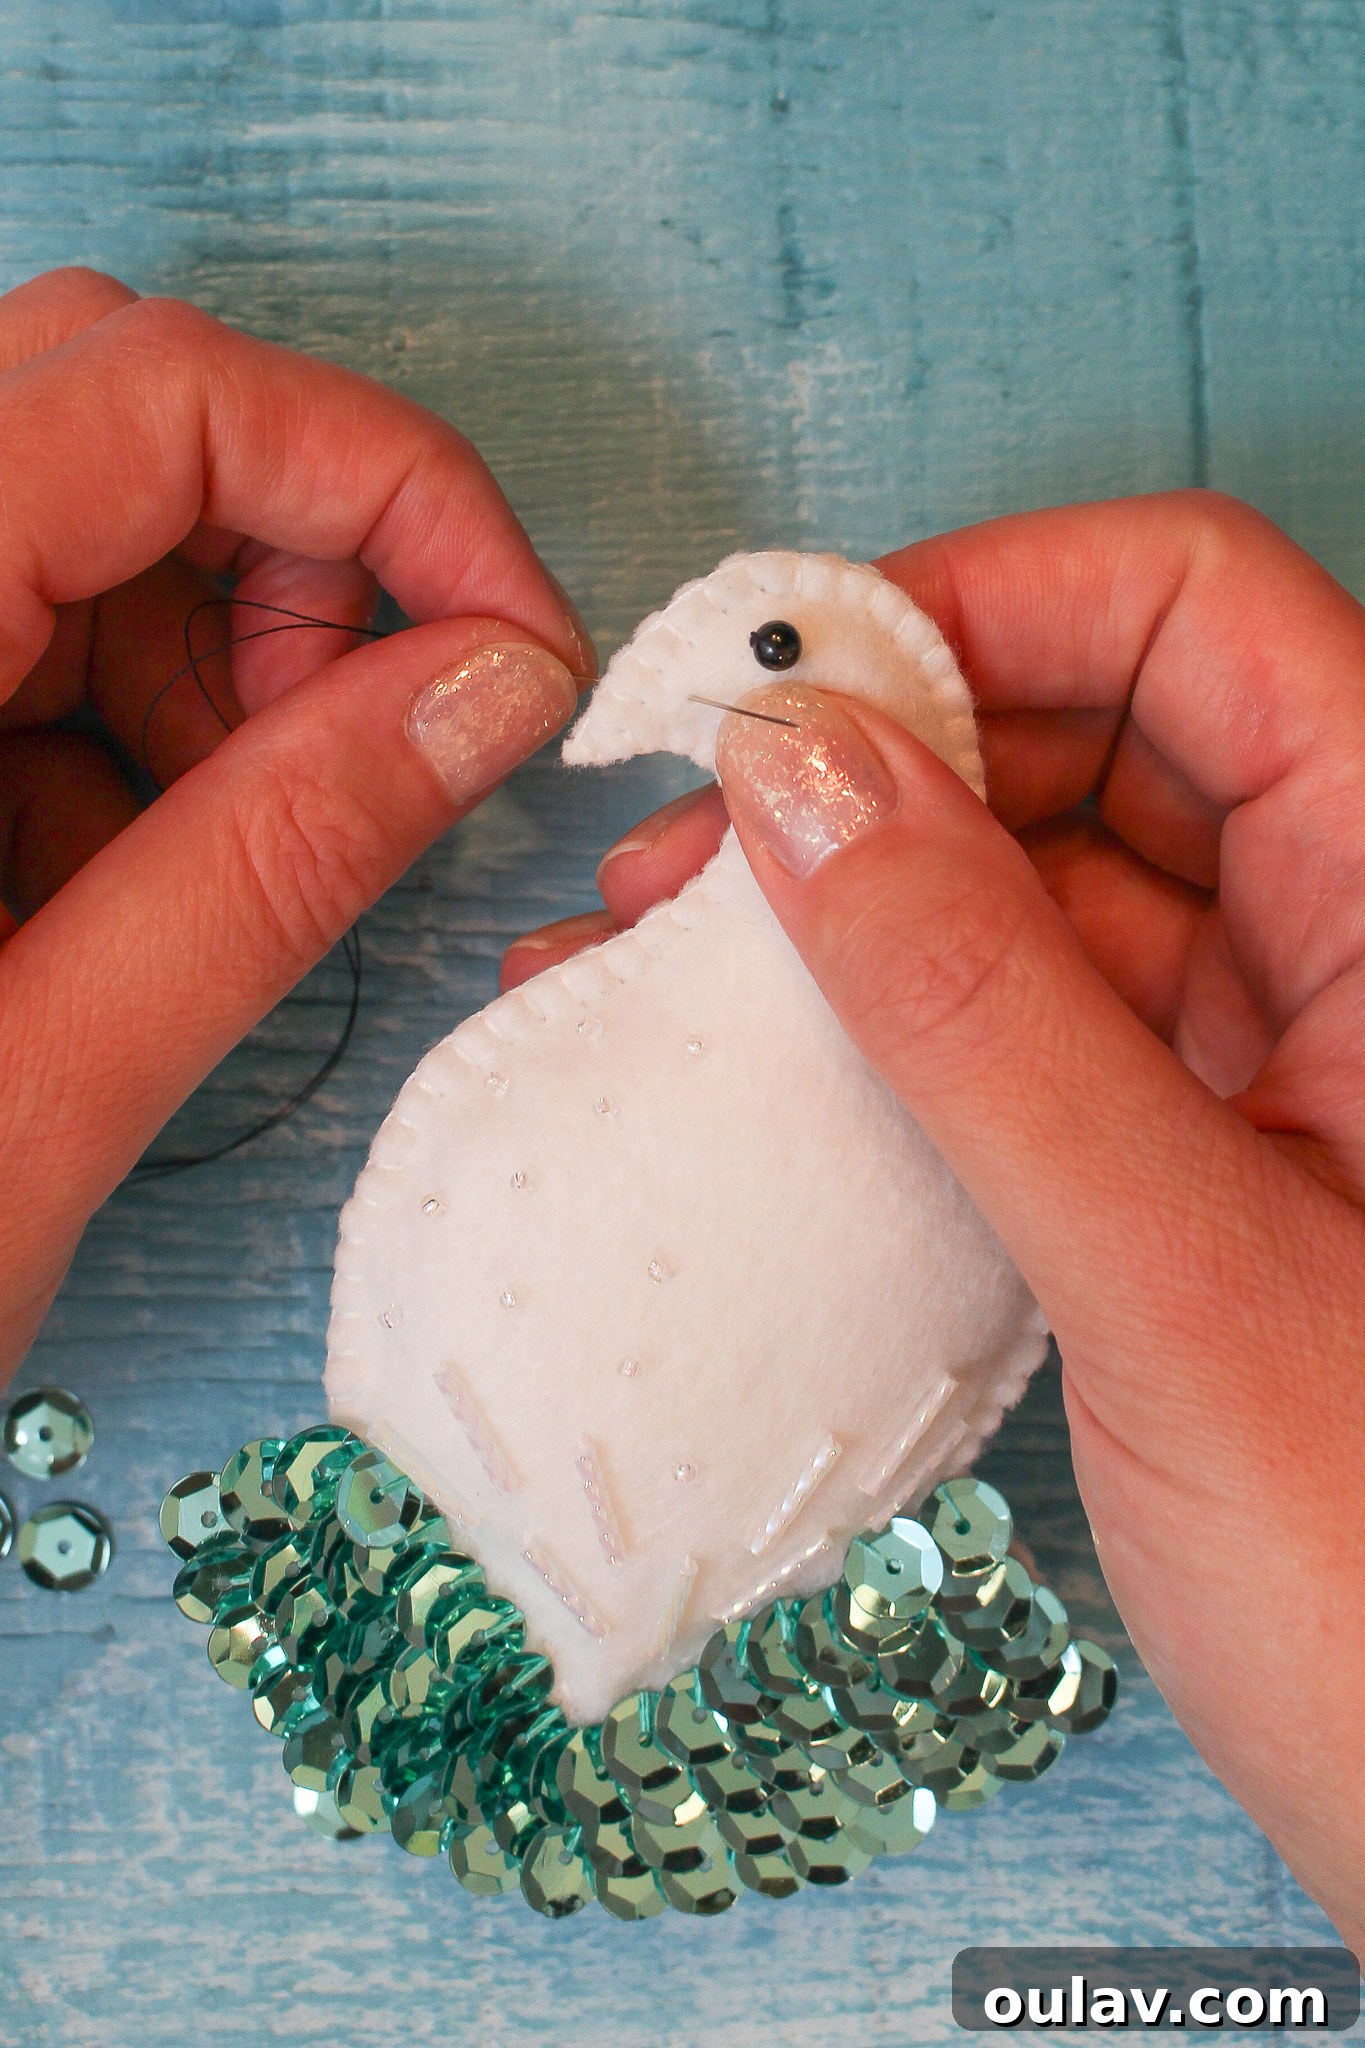
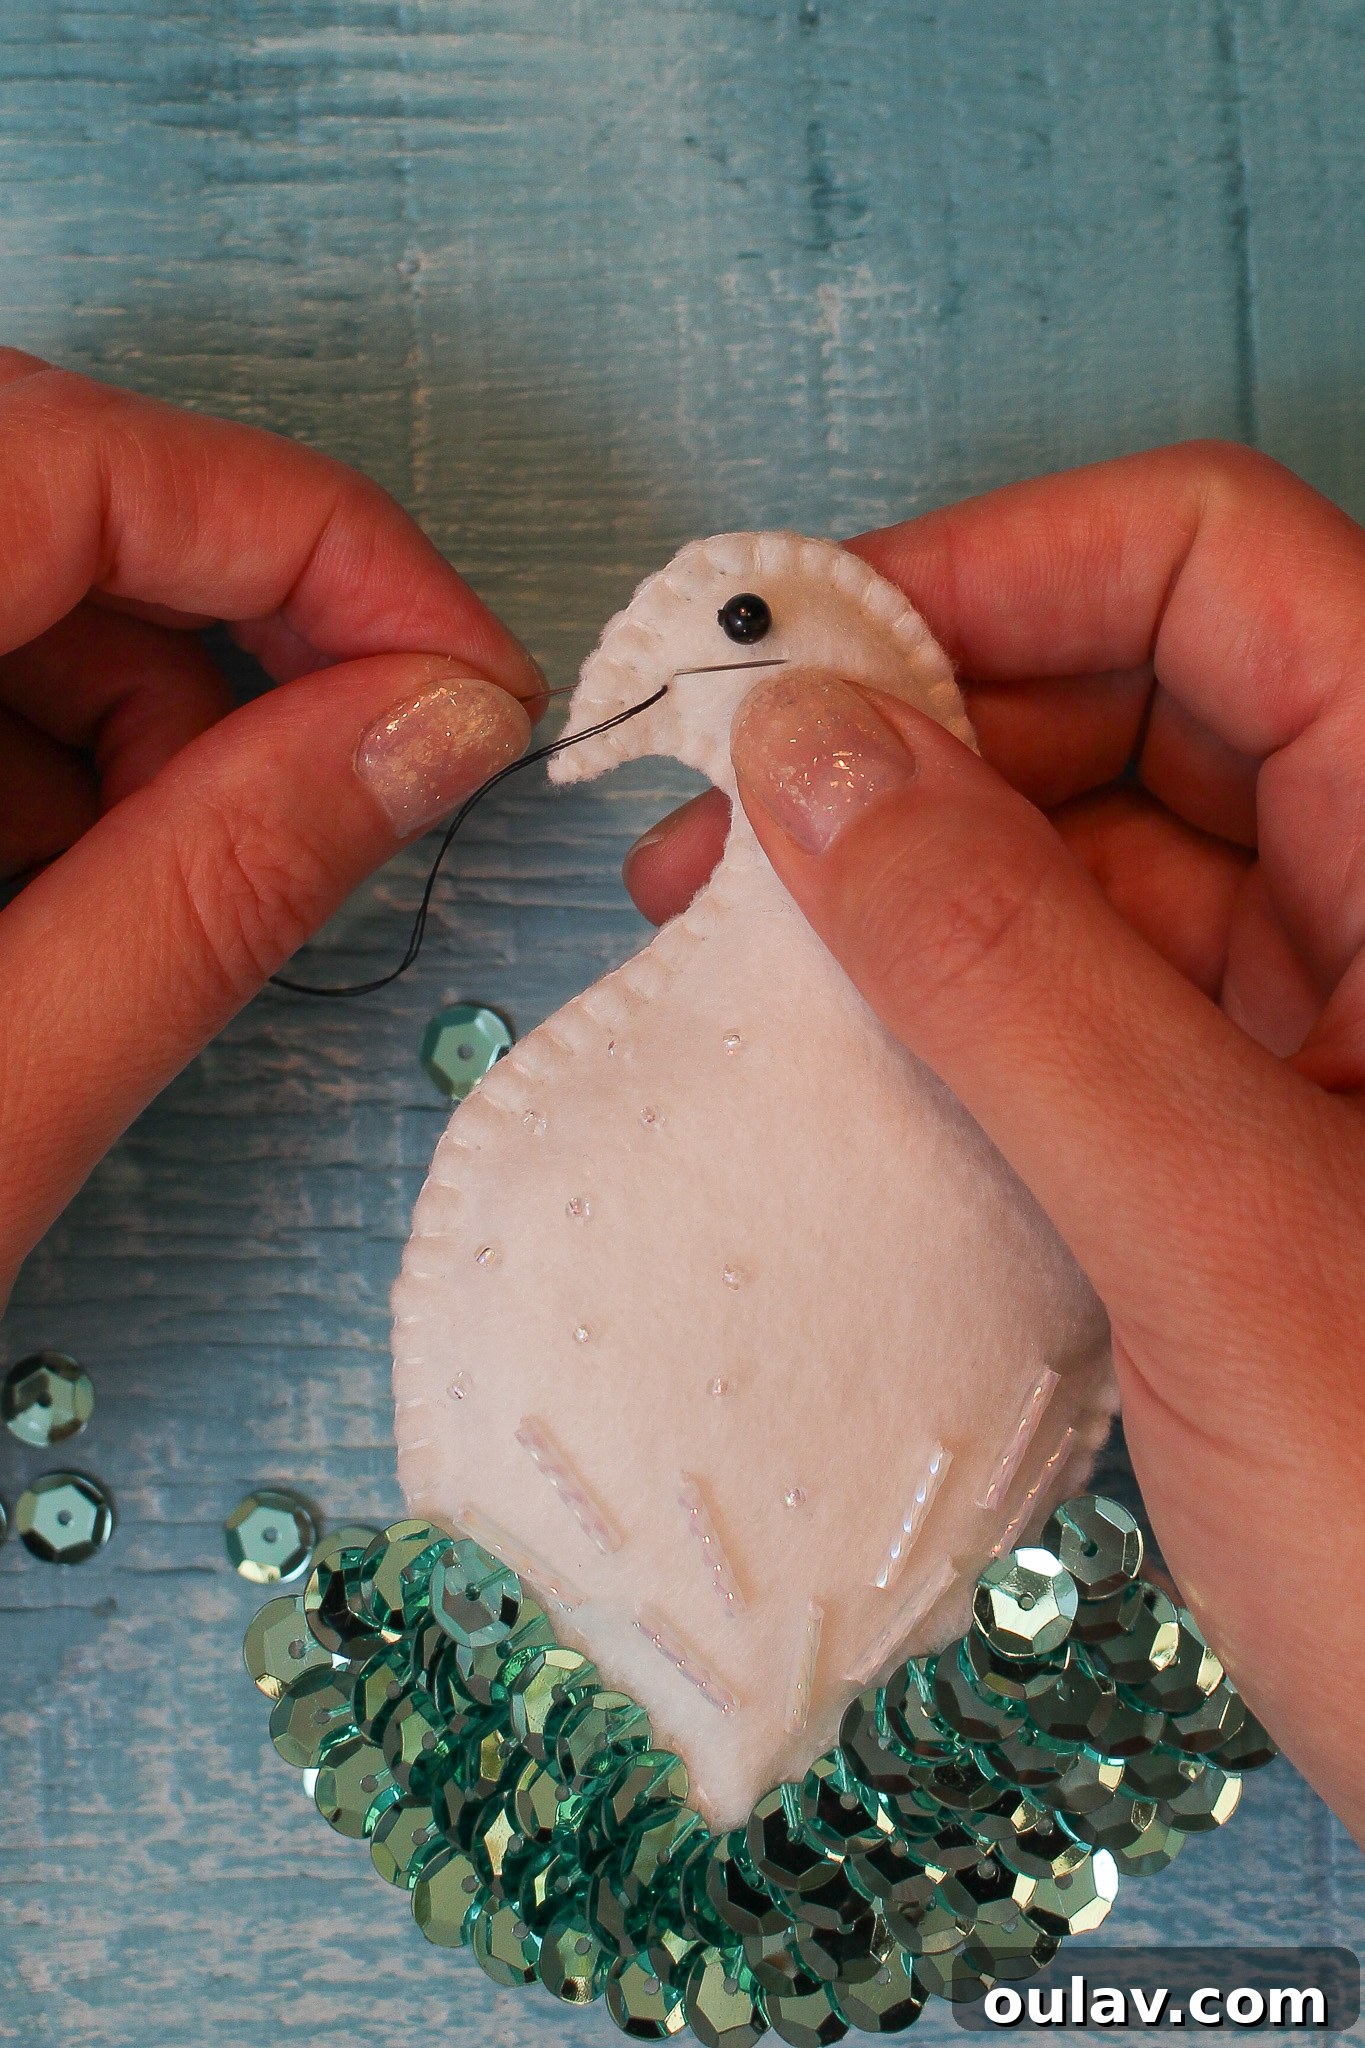
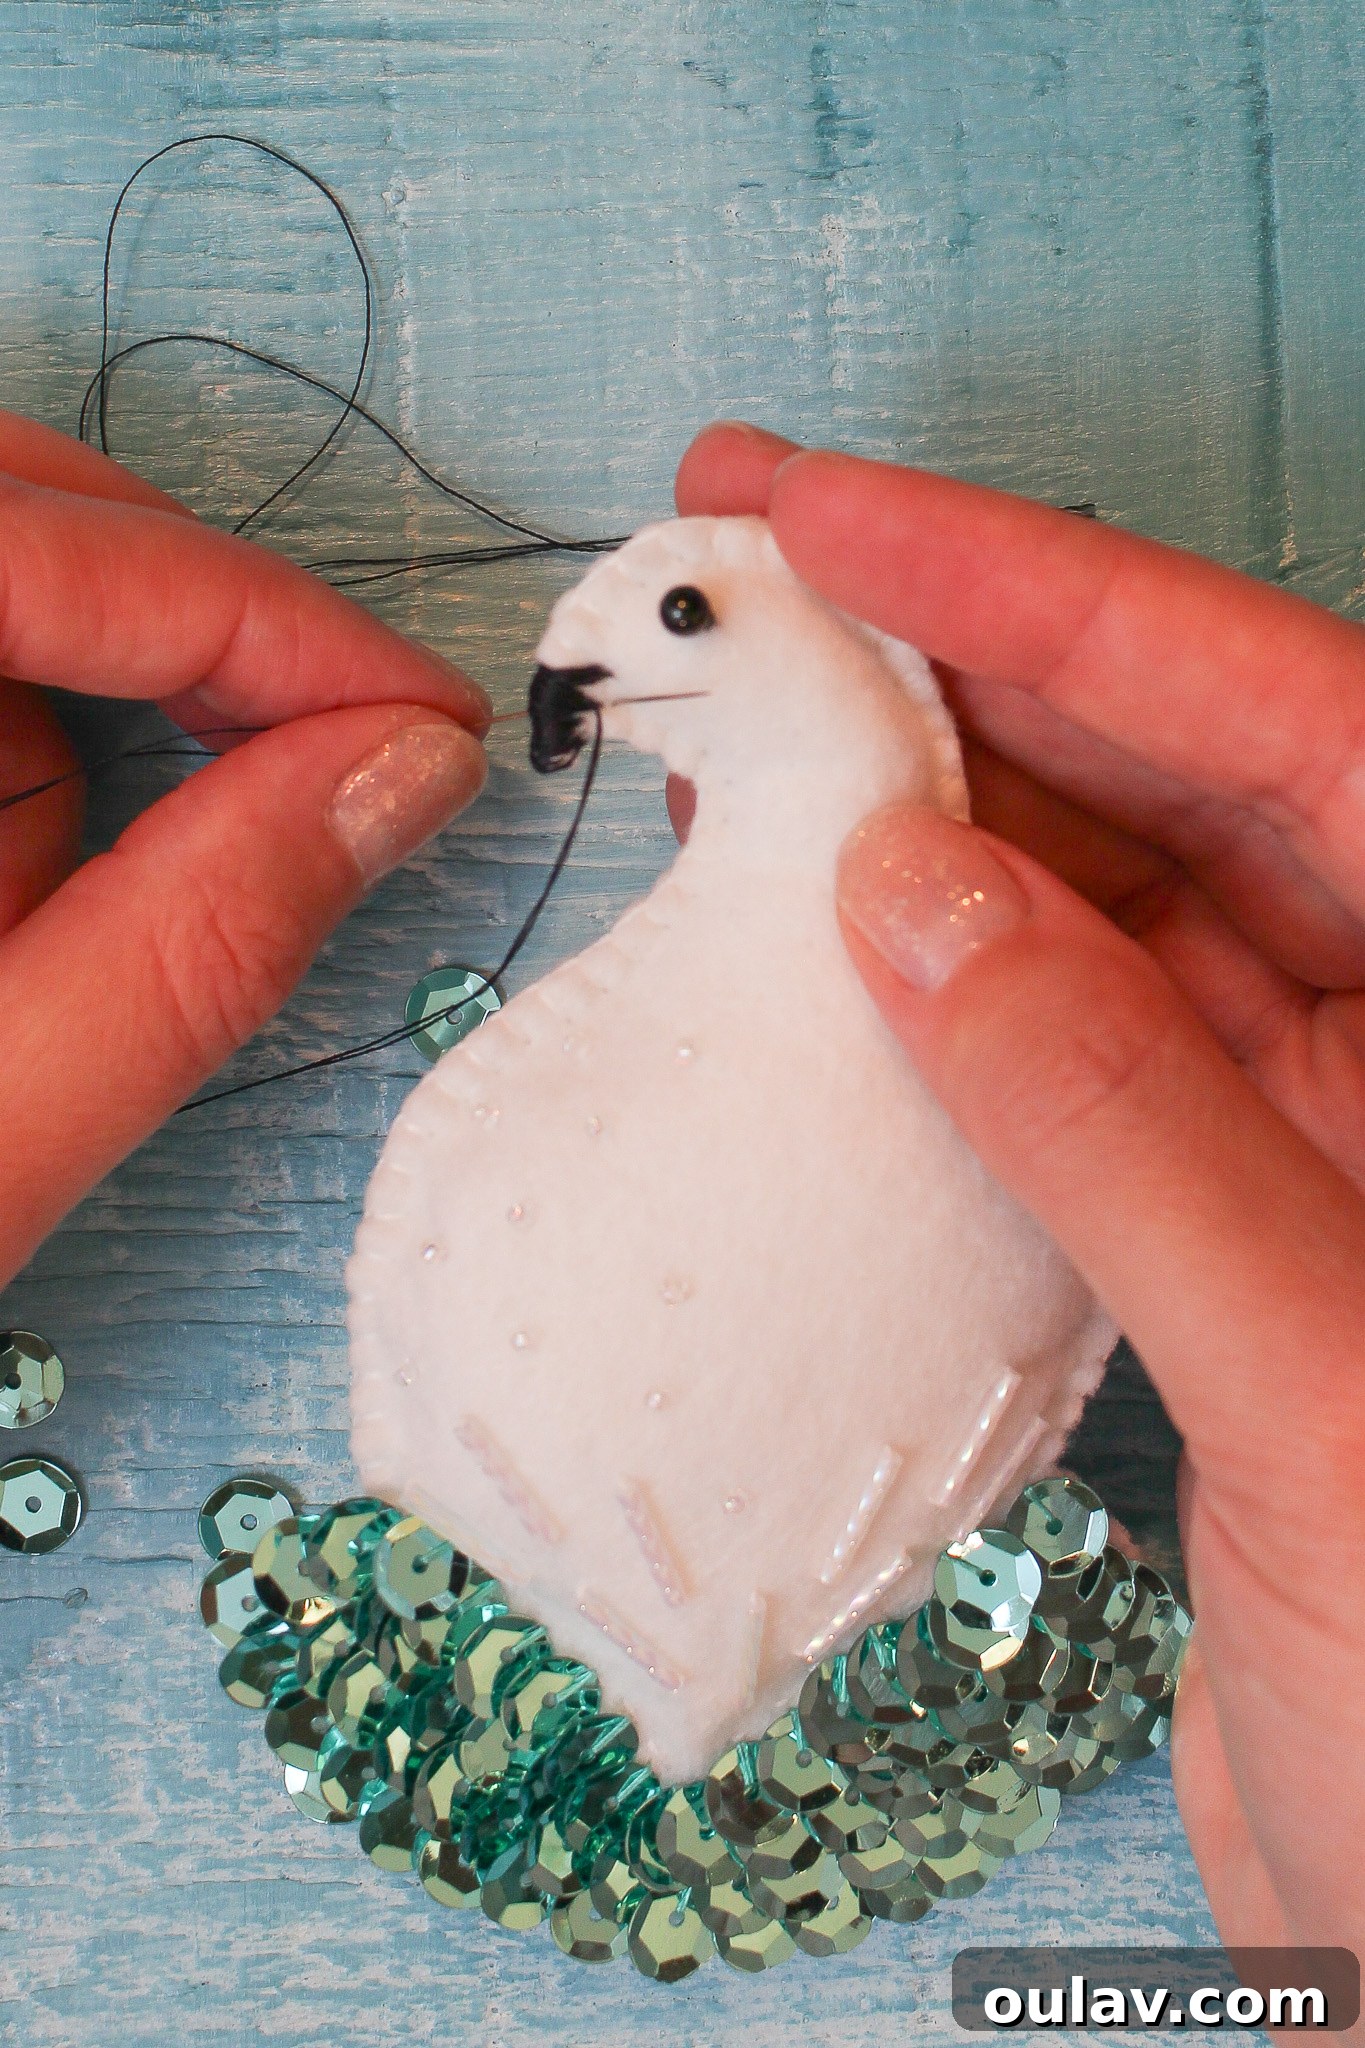
- Starting from the back of the ornament to hide the knot, add small, tight stitches to create the distinct “beak” shape. Build up the stitches to form a solid, defined beak.
- Once the beak is perfectly shaped to your liking, tie off the black thread securely at the back of the ornament, bury the end, and trim.
- Finally, using your hand sewing needle, switch to green thread for the hanging loop:
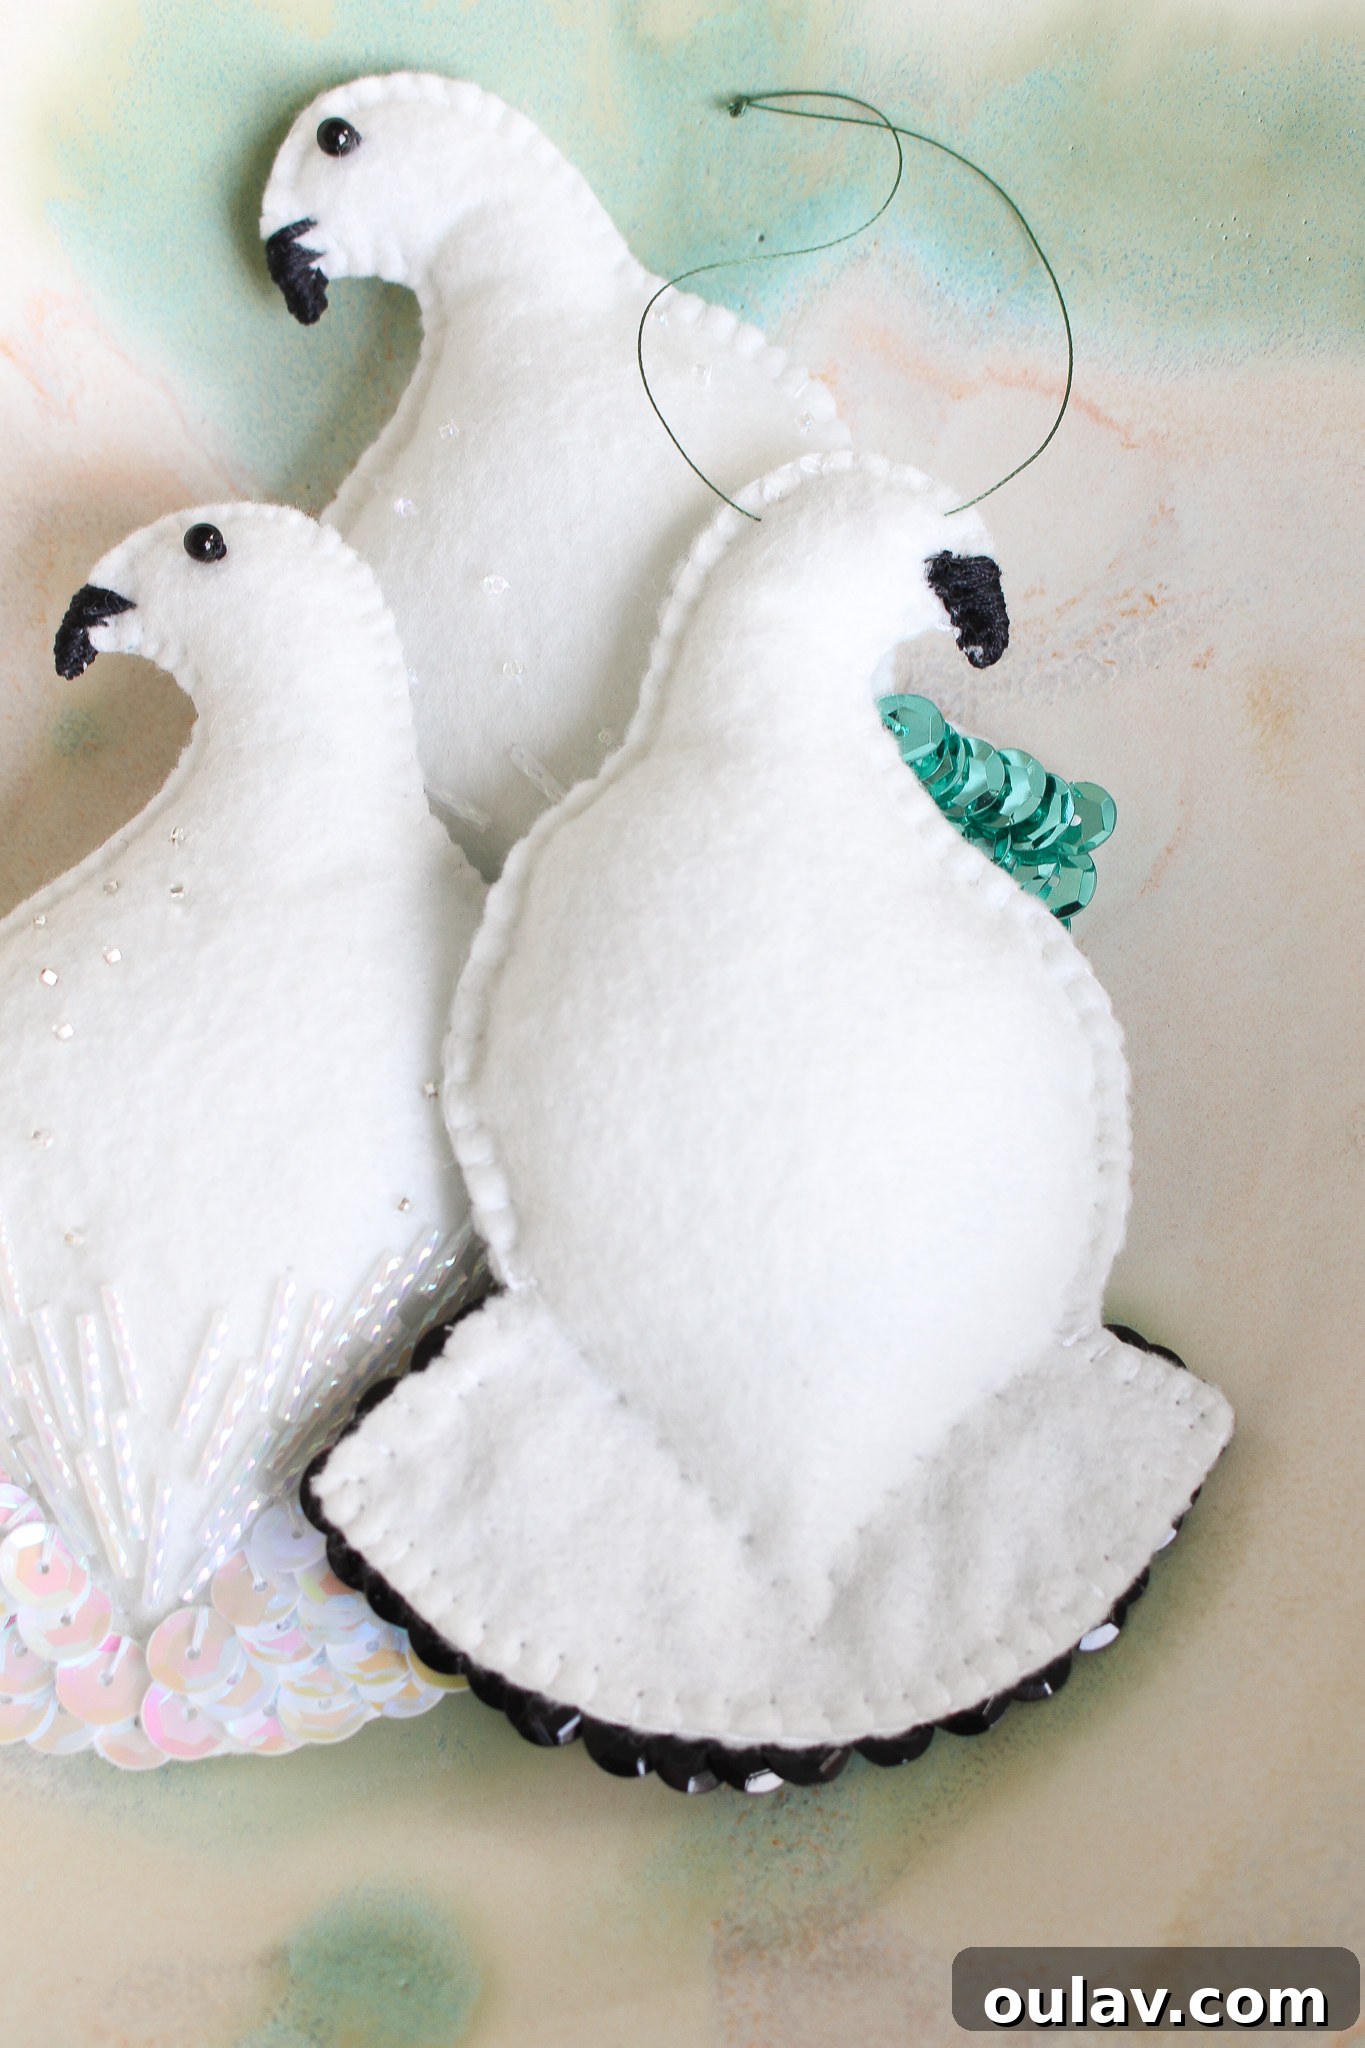
- To create a hanger, thread a length of green thread across the back of the bird.
- Form a loop with the thread, bringing the ends together, and secure it with a strong knot. This green thread will blend beautifully with Christmas tree branches.
Visualize the Process: How to Sew a DIY Felt Bird VIDEO
Sometimes seeing is believing, and a visual demonstration can clarify even the most detailed written instructions. Below, you’ll find a concise YouTube short that beautifully demonstrates the steps outlined above. For those who prefer a more in-depth visual guide, keep reading beyond this video, as I’ve included additional clips and step-by-step photos that provide a closer look at some of the more intricate hand sewing elements.
Crafting Your DIY Felt Bird Ornament: Detailed Steps with Photos & Videos
Let’s refine each step with additional insights and visual aids to ensure your Ptarmigan ornament is nothing short of perfect.
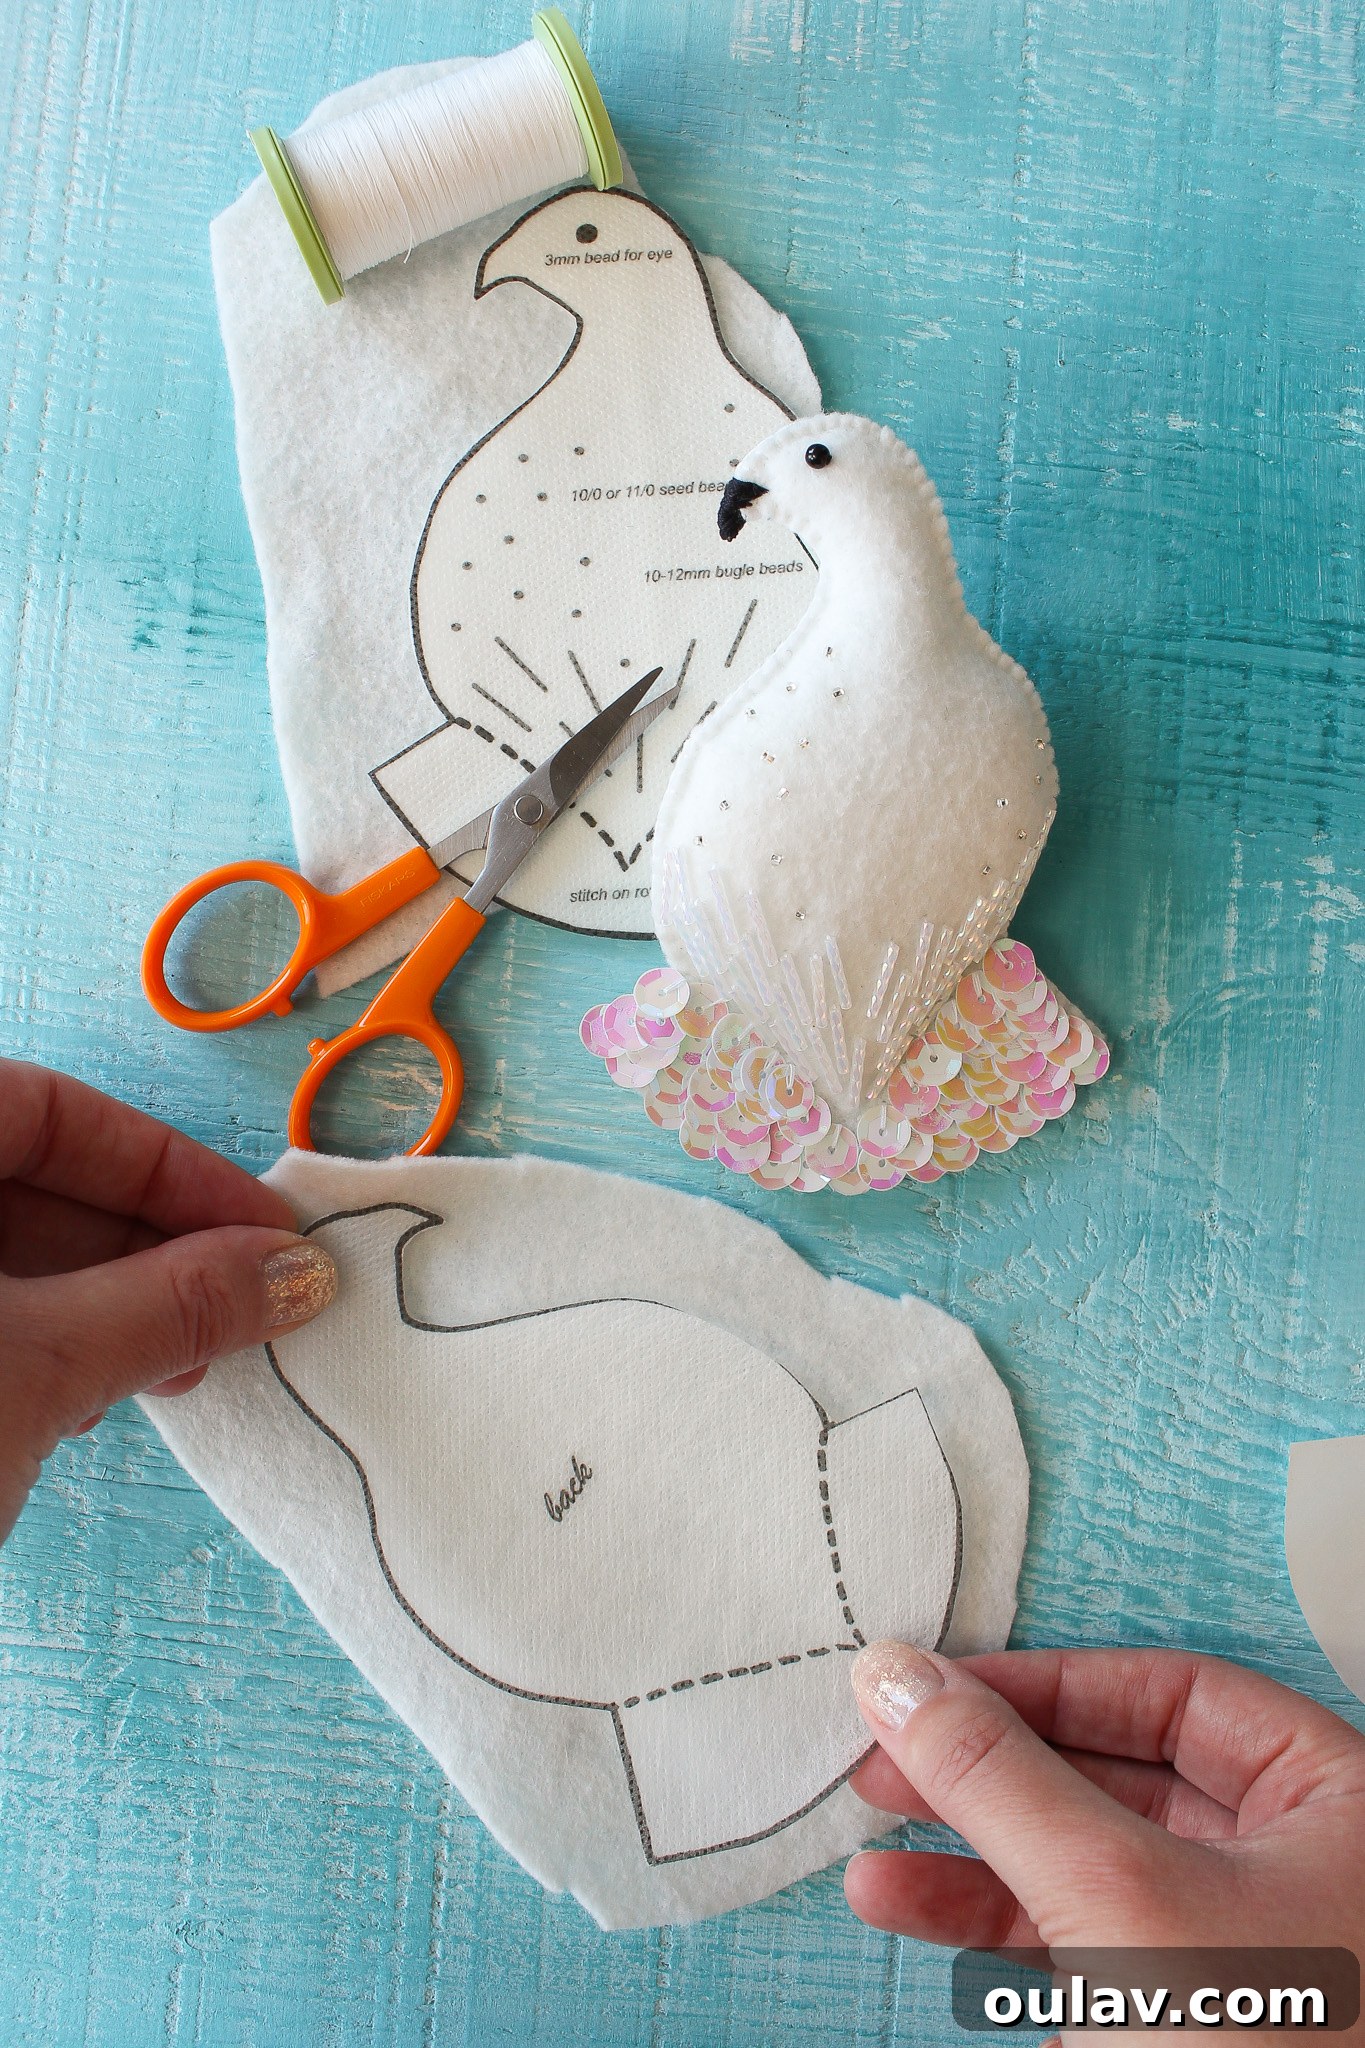
Printing and Cutting Out Your Pattern: Precision is Key
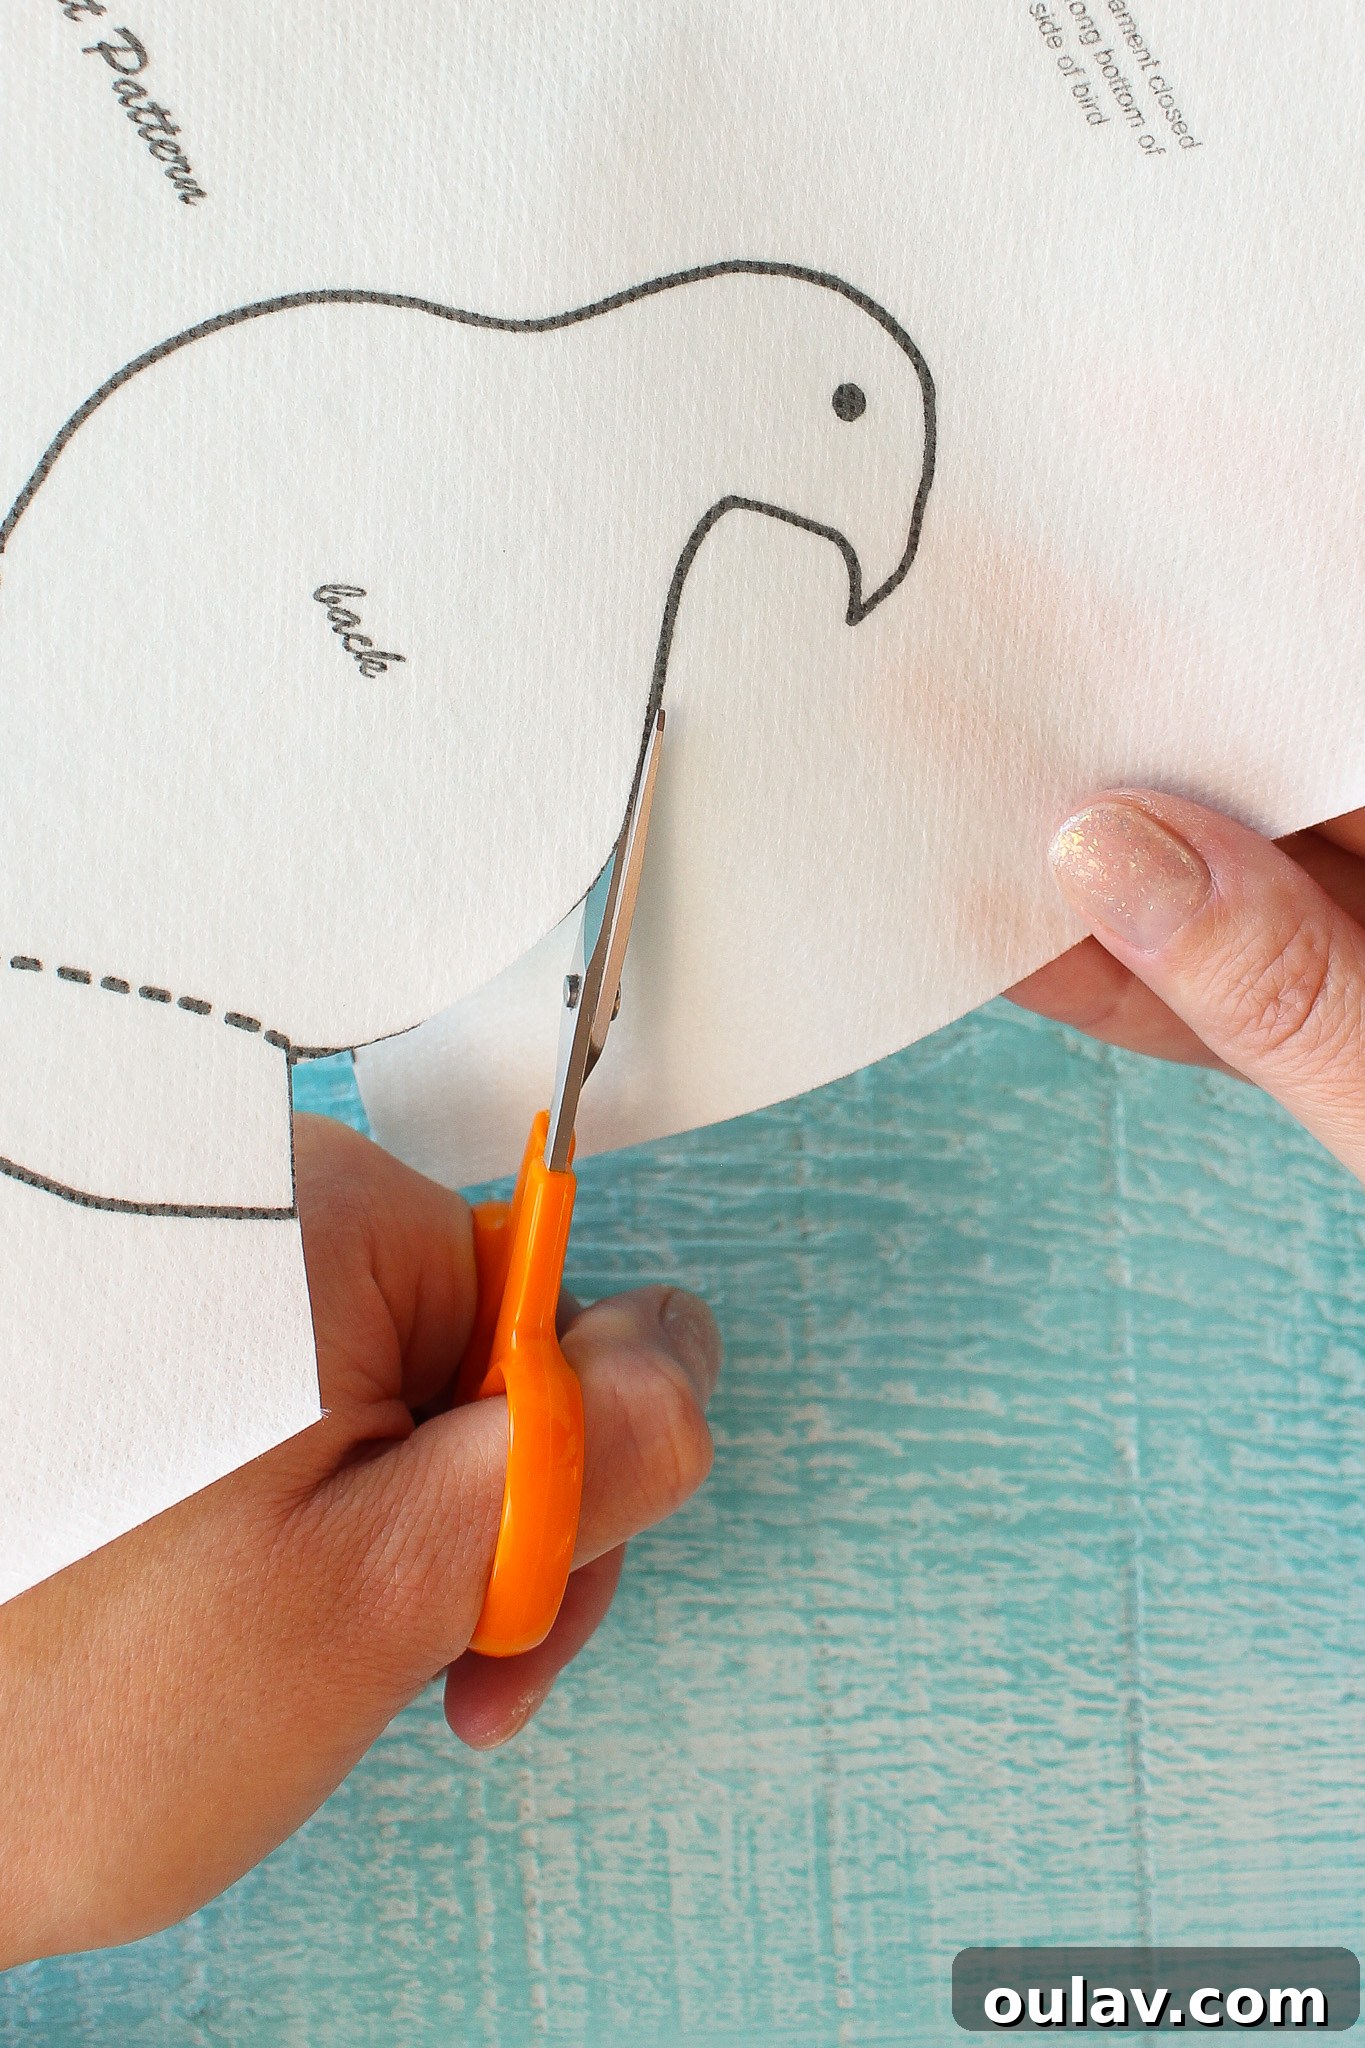
Once you’ve printed your pattern, precision in cutting is paramount. While I’ve often recommended cutting just inside the lines for clarity, if you’re working with white felt, cutting slightly *outside* the printed lines can make them more visible during the tracing process. For navigating the delicate curves and fine points of the pattern, a pair of small, sharp fabric scissors is an indispensable tool. Their size and sharpness allow for incredibly accurate cuts, especially crucial when you move on to cutting the felt itself.
Transferring or Sticking the Pattern onto Your Felt
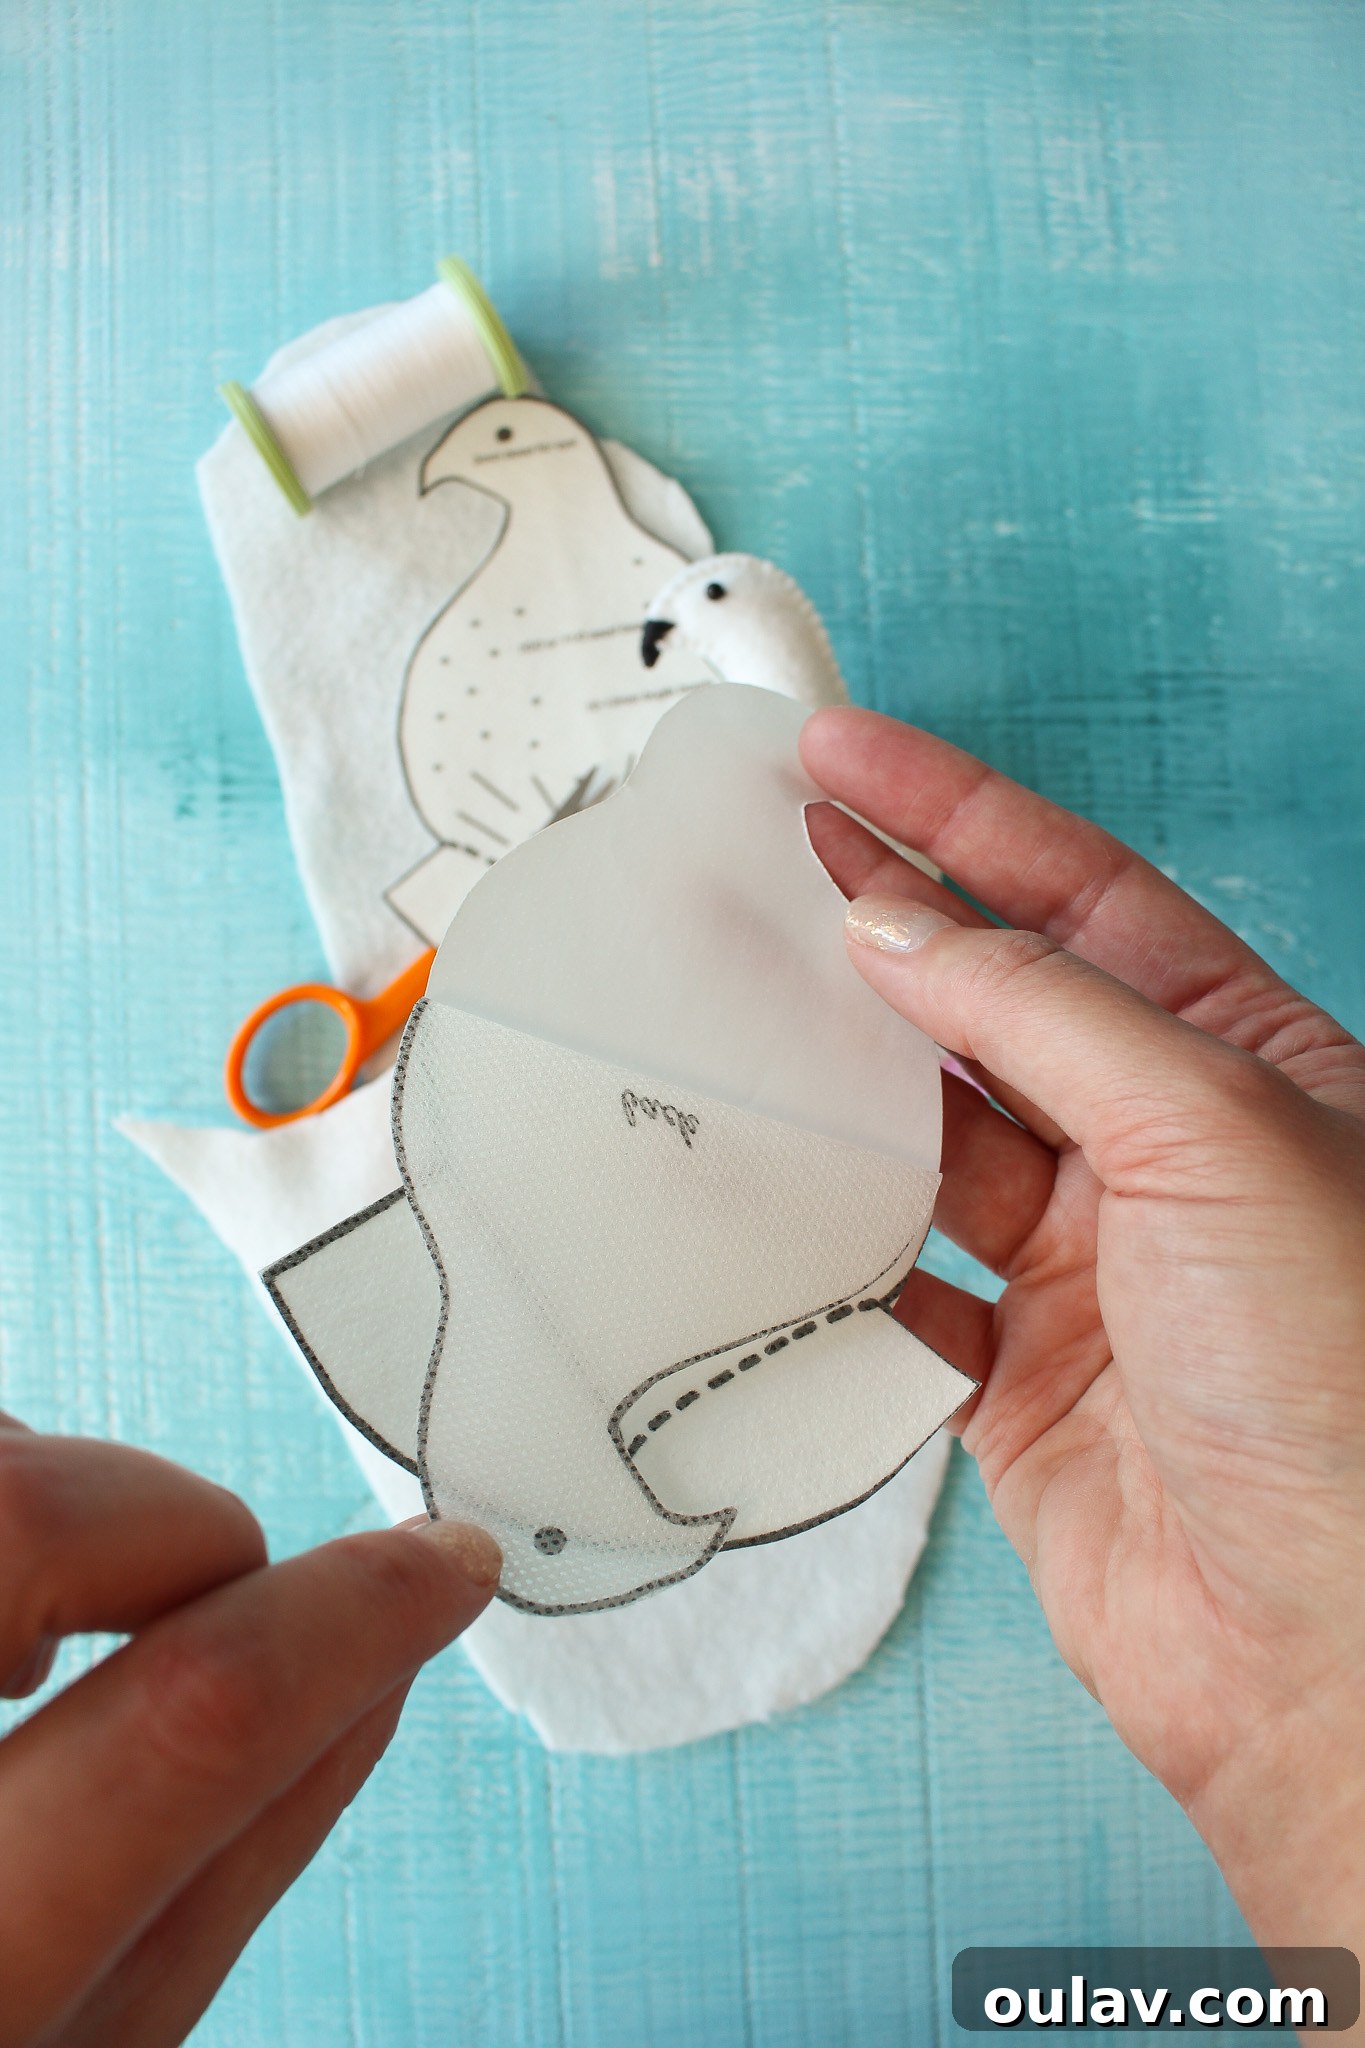
After carefully cutting out your two pattern shapes, the next step is to accurately transfer them to your chosen felt. When using a dissolving stabilizer, I prefer to adhere it to the “good” side of the felt. For some felt types, the “right” or “wrong” side is readily apparent due to slight textural differences, while for others, especially high-quality craft felts, either side can be used effectively. Consistency is key, so choose one side and stick to it.
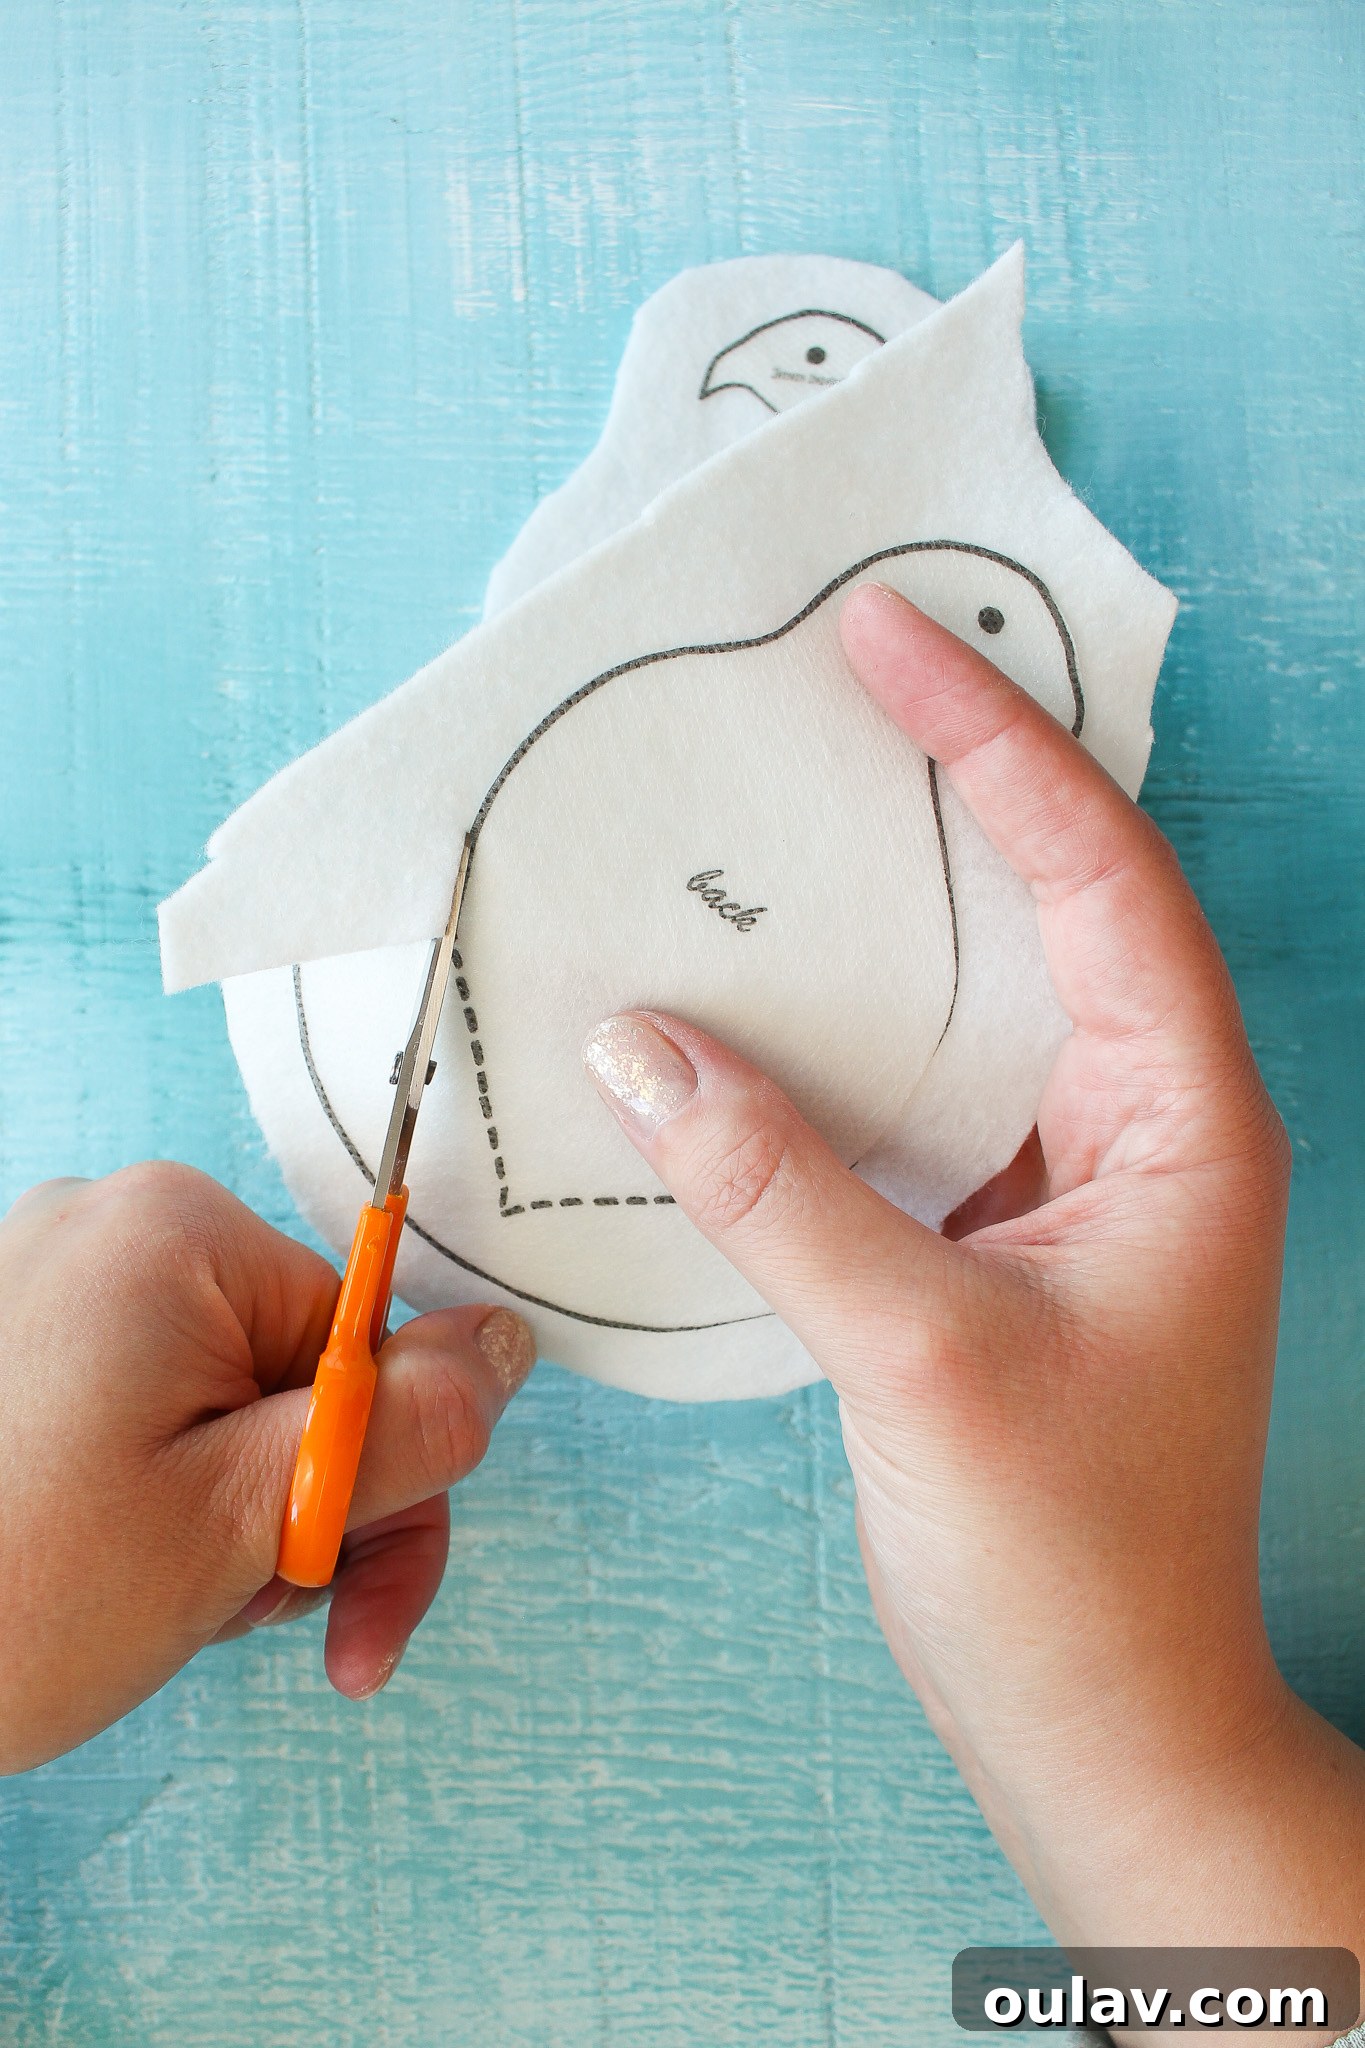
Precisely Cutting Out Both Felt Shapes
With your pattern transferred or adhered, it’s time to cut out the felt pieces. Again, those small, sharp scissors will prove invaluable for achieving clean, smooth edges, especially around the bird’s delicate curves and points. Take your time with this step, as neatly cut felt pieces are the foundation for a professional-looking ornament.
Mastering the Art of Stitching Beads and Sequins
Now for the sparkling details! Stitching on beads and sequins adds character, texture, and shimmer to your Ptarmigan. Feel free to follow the pattern for guidance or unleash your inner artist and get creative with your embellishments! You can opt for a minimalist sprinkle of beads for an understated elegance or densely bead your bird for maximum sparkle and visual impact. Below, you’ll find a detailed video showcasing various techniques for stitching on beads and sequins. If you prefer static imagery, continue reading for a comprehensive photo tutorial.
Stitching on the Beads: A Step-by-Step Visual
The fundamental technique for attaching beads to felt is quite simple, yet it yields beautiful results. Using a beading needle threaded with hand quilting thread (my personal preference for its strength and fine gauge, but always use what you have and feel comfortable with), bring your needle up from the back of the felt. Slide your chosen bead onto the thread, carefully position it exactly where you want it on the felt, and then push the needle back down through the felt at the opposite end of the bead. This secures the bead in place with a single, neat stitch.
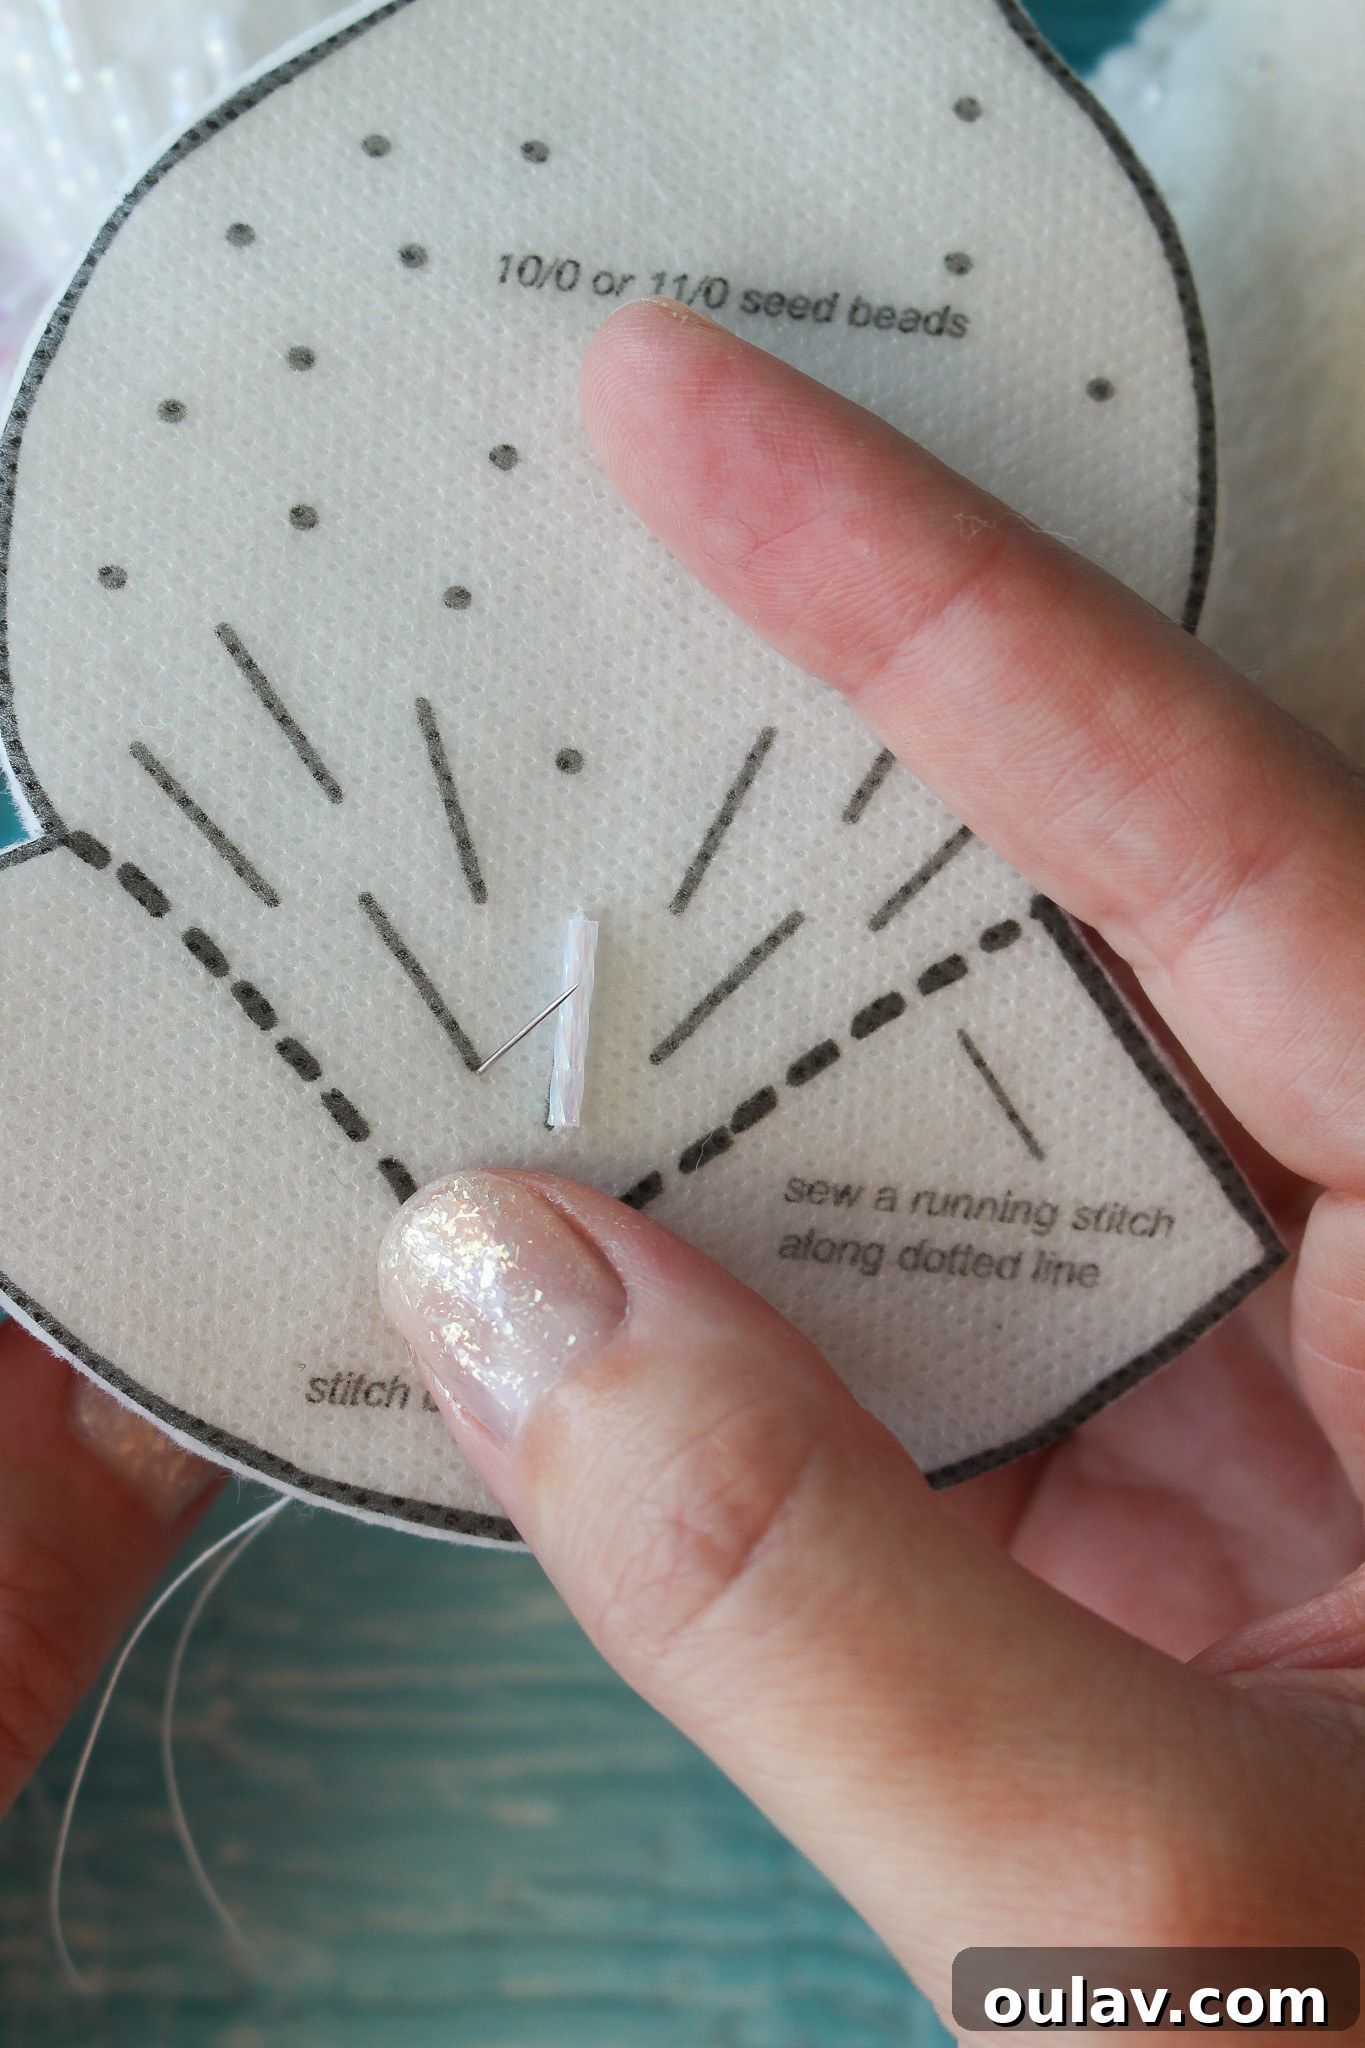
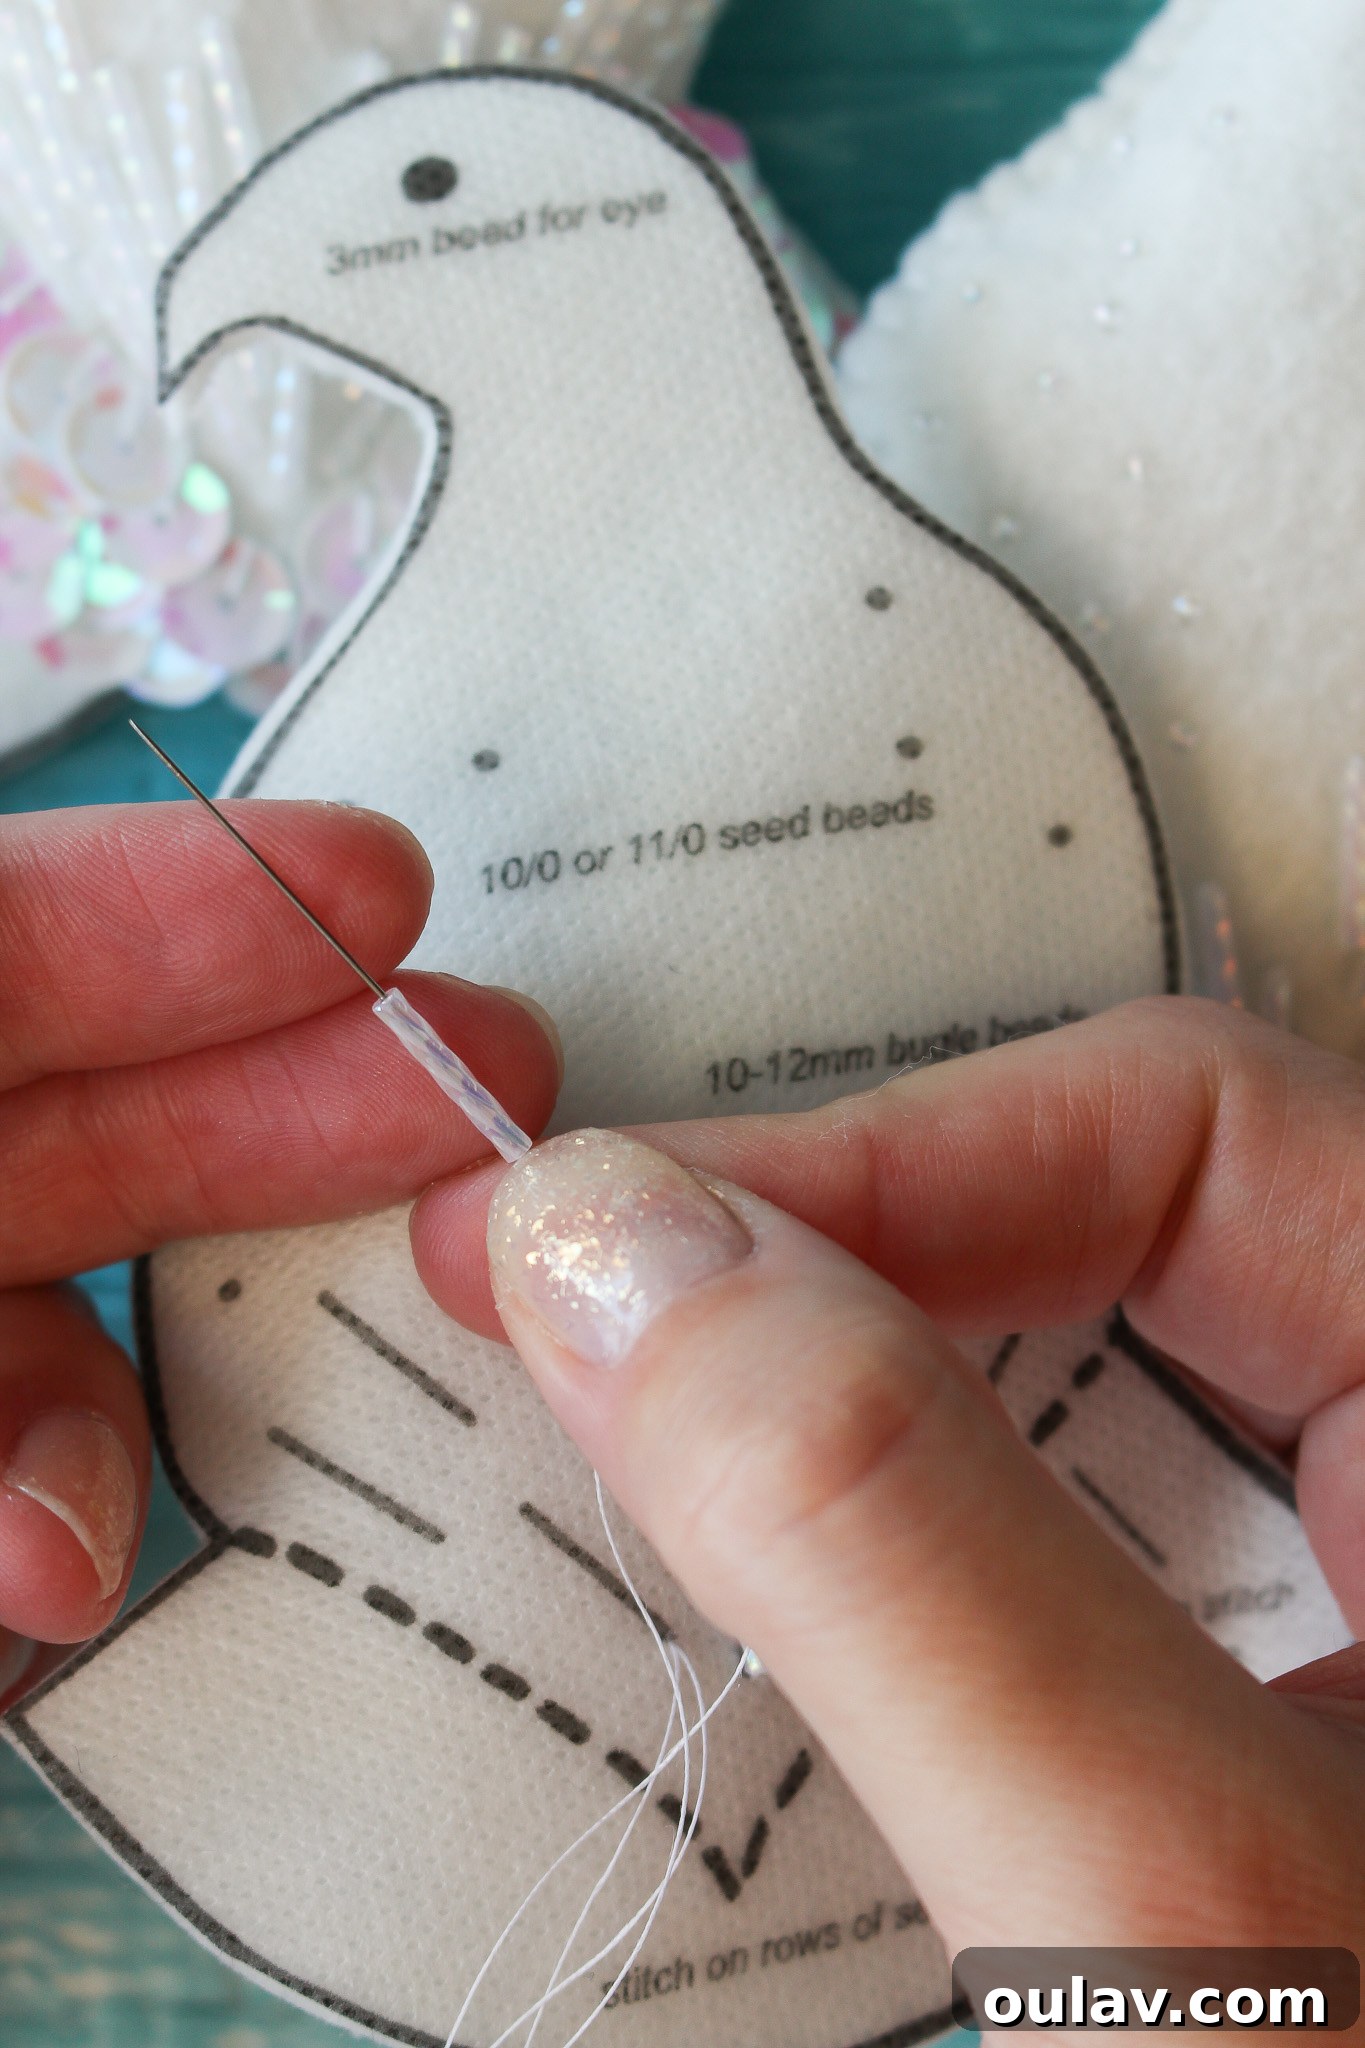
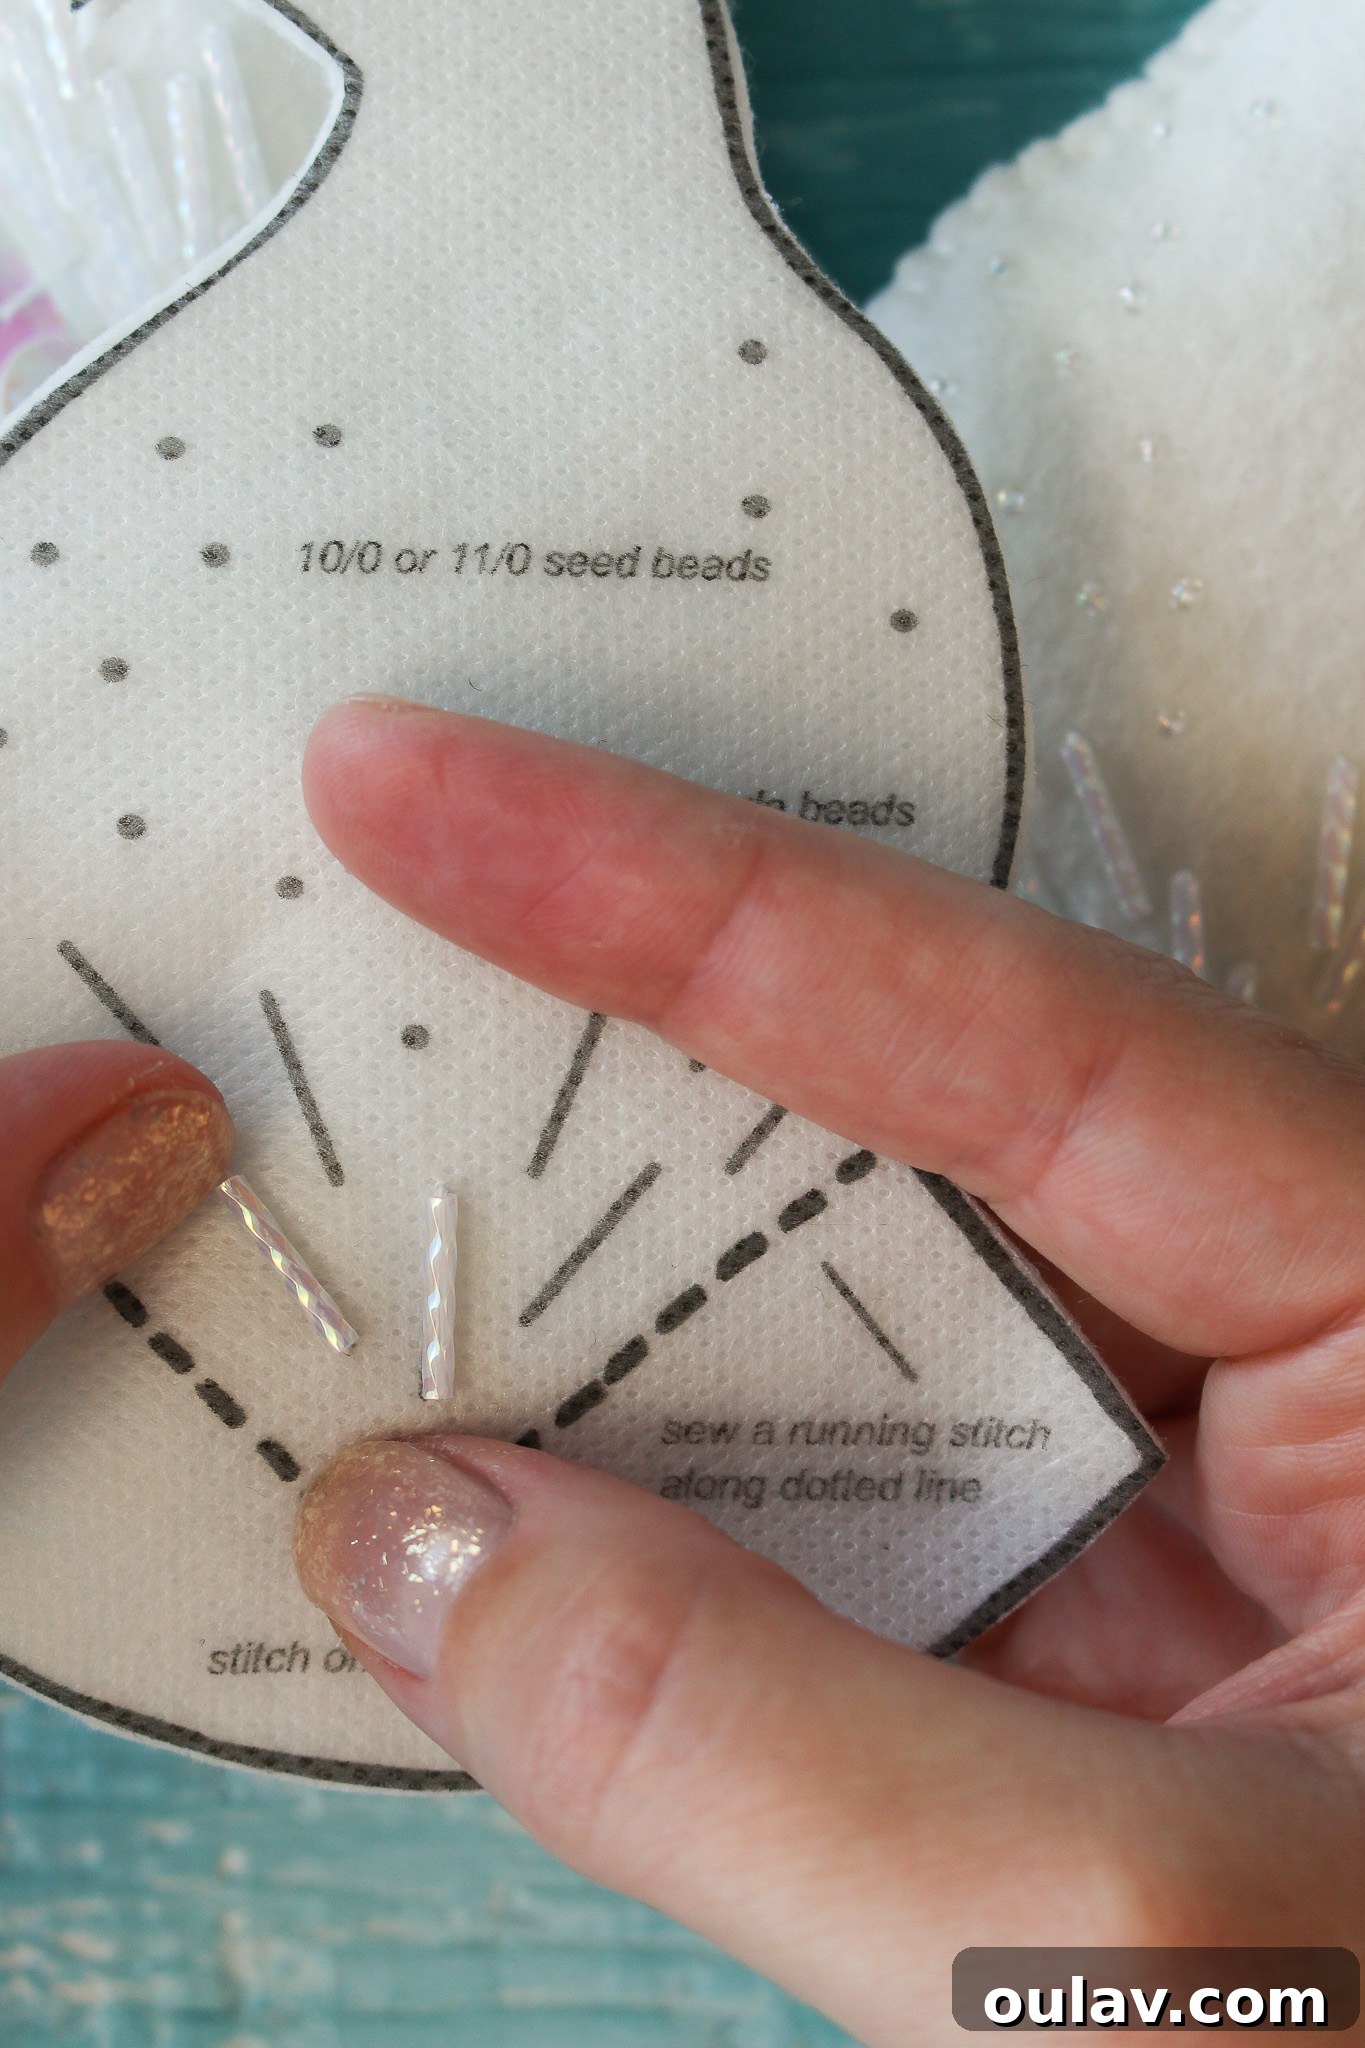
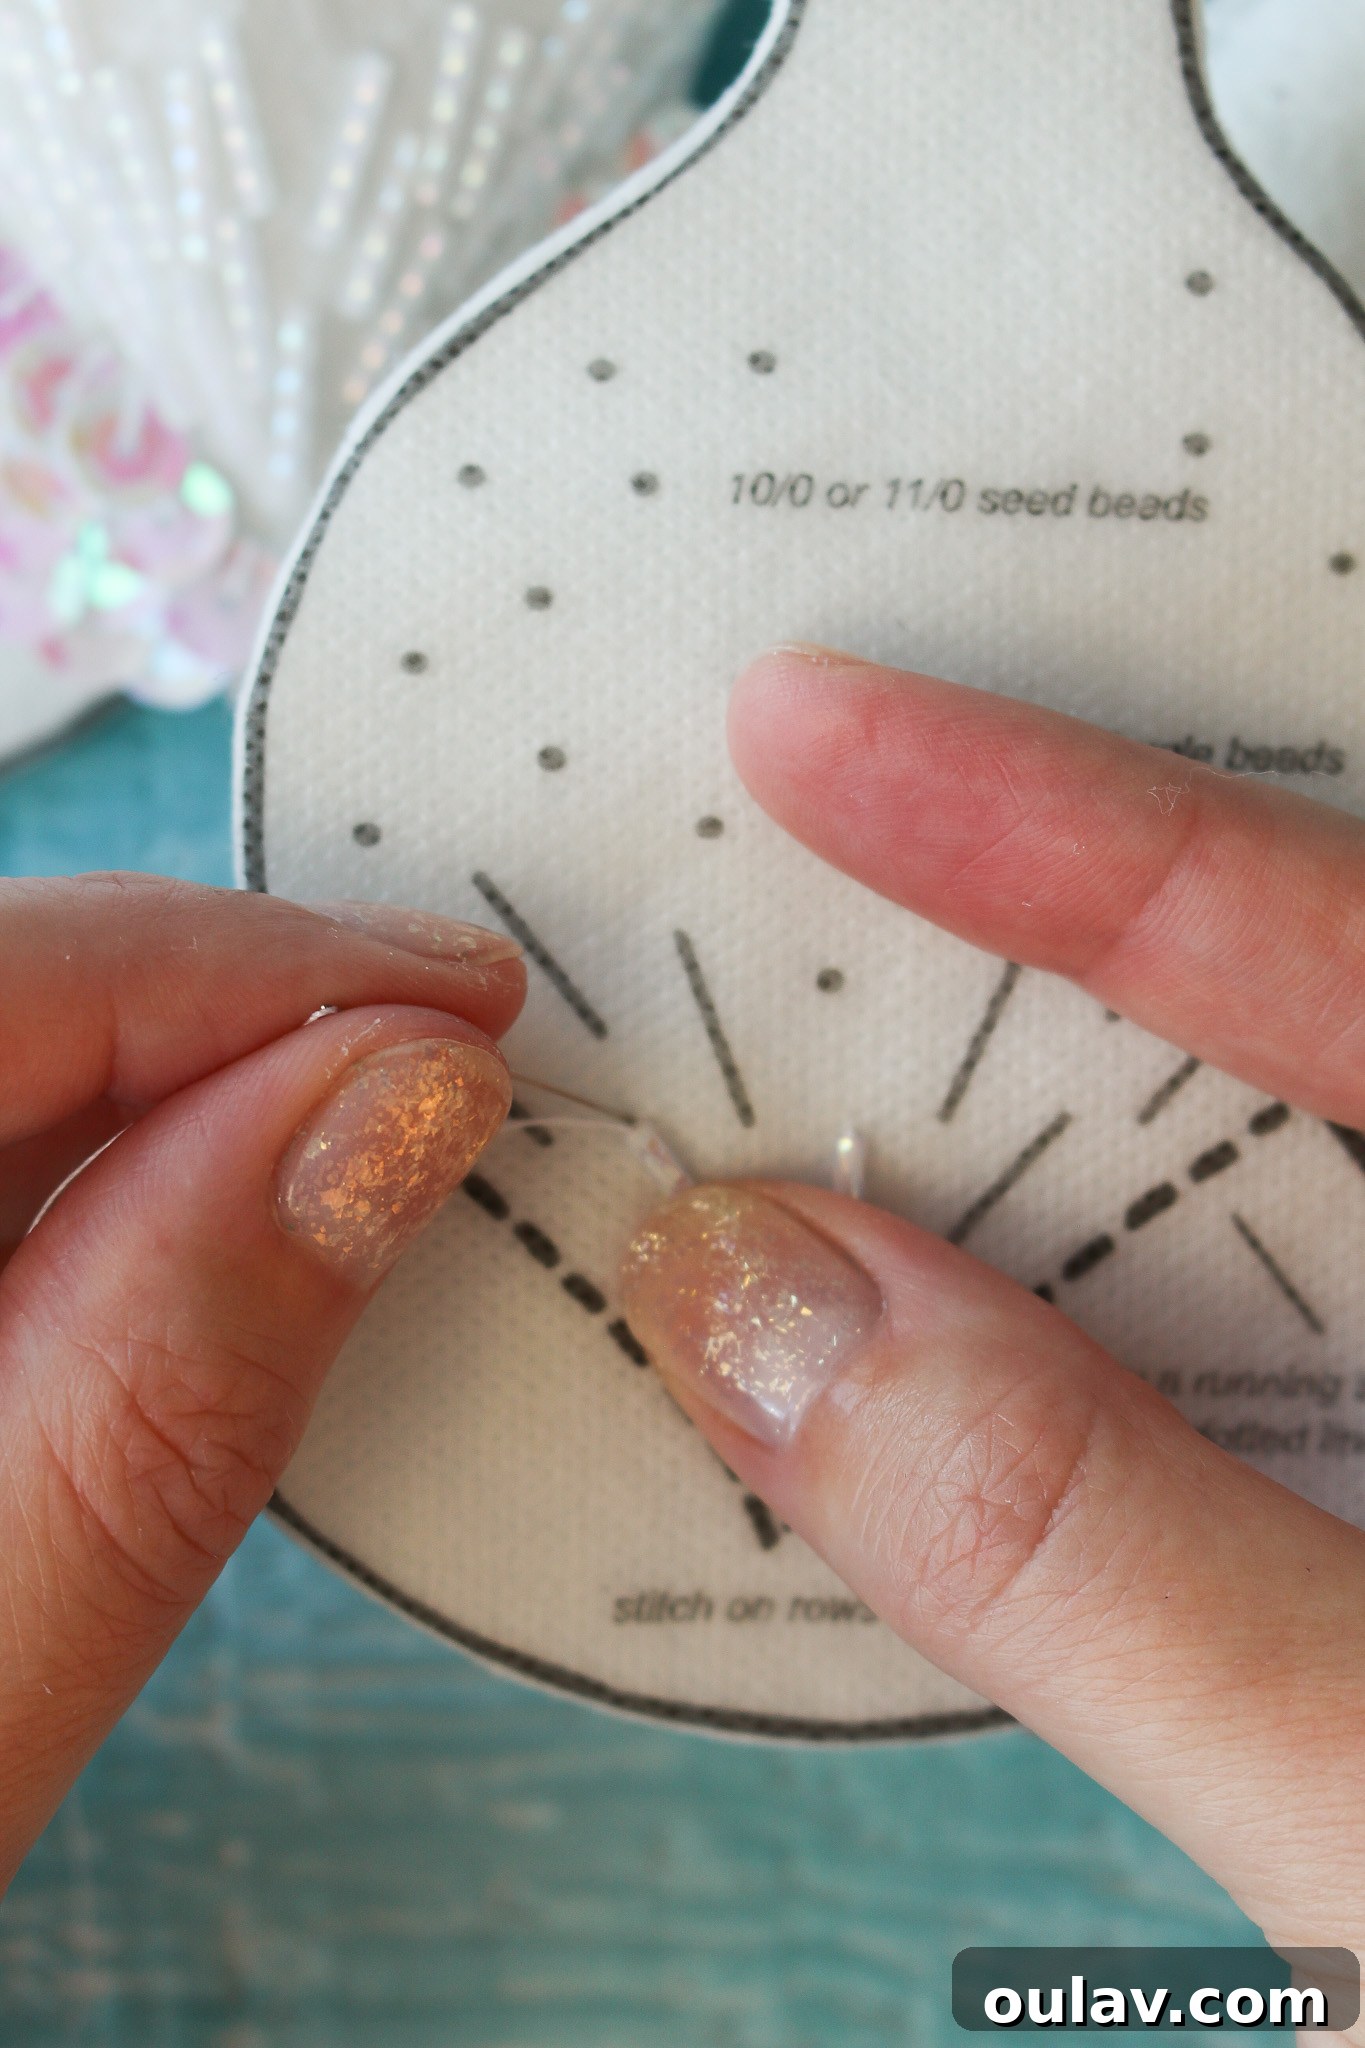
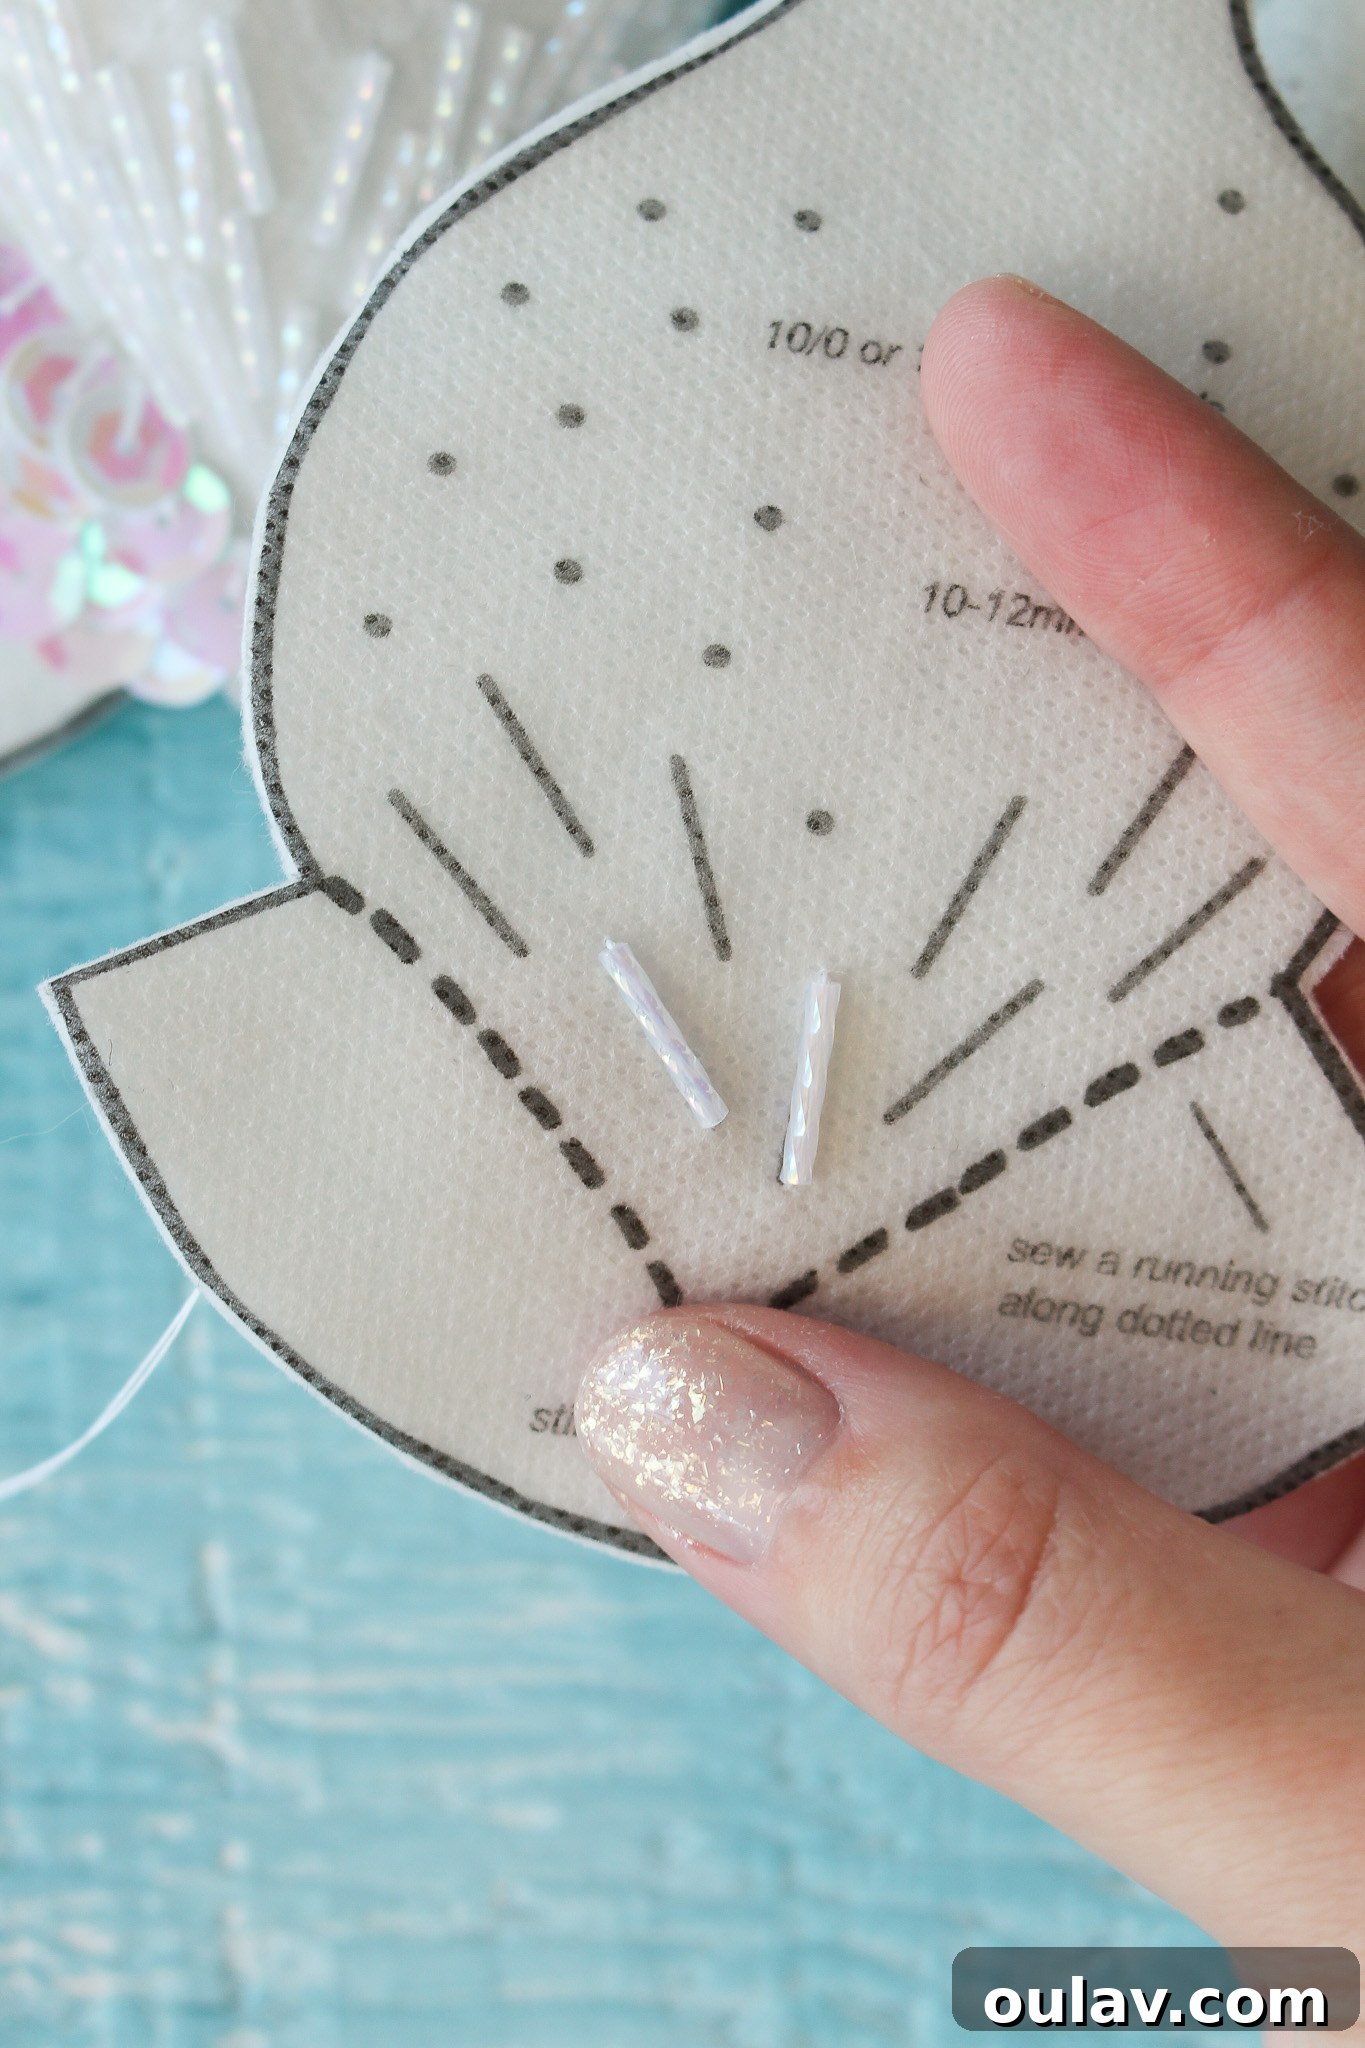
For elongated bugle beads, I recommend stitching through them twice. This extra pass provides enhanced security, preventing the bead from shifting or potentially cutting through the thread over time. However, for smaller seed beads, a single stitch is usually sufficient. The process for attaching seed beads is identical to that shown above for the bugle beads, ensuring consistent and tidy results.
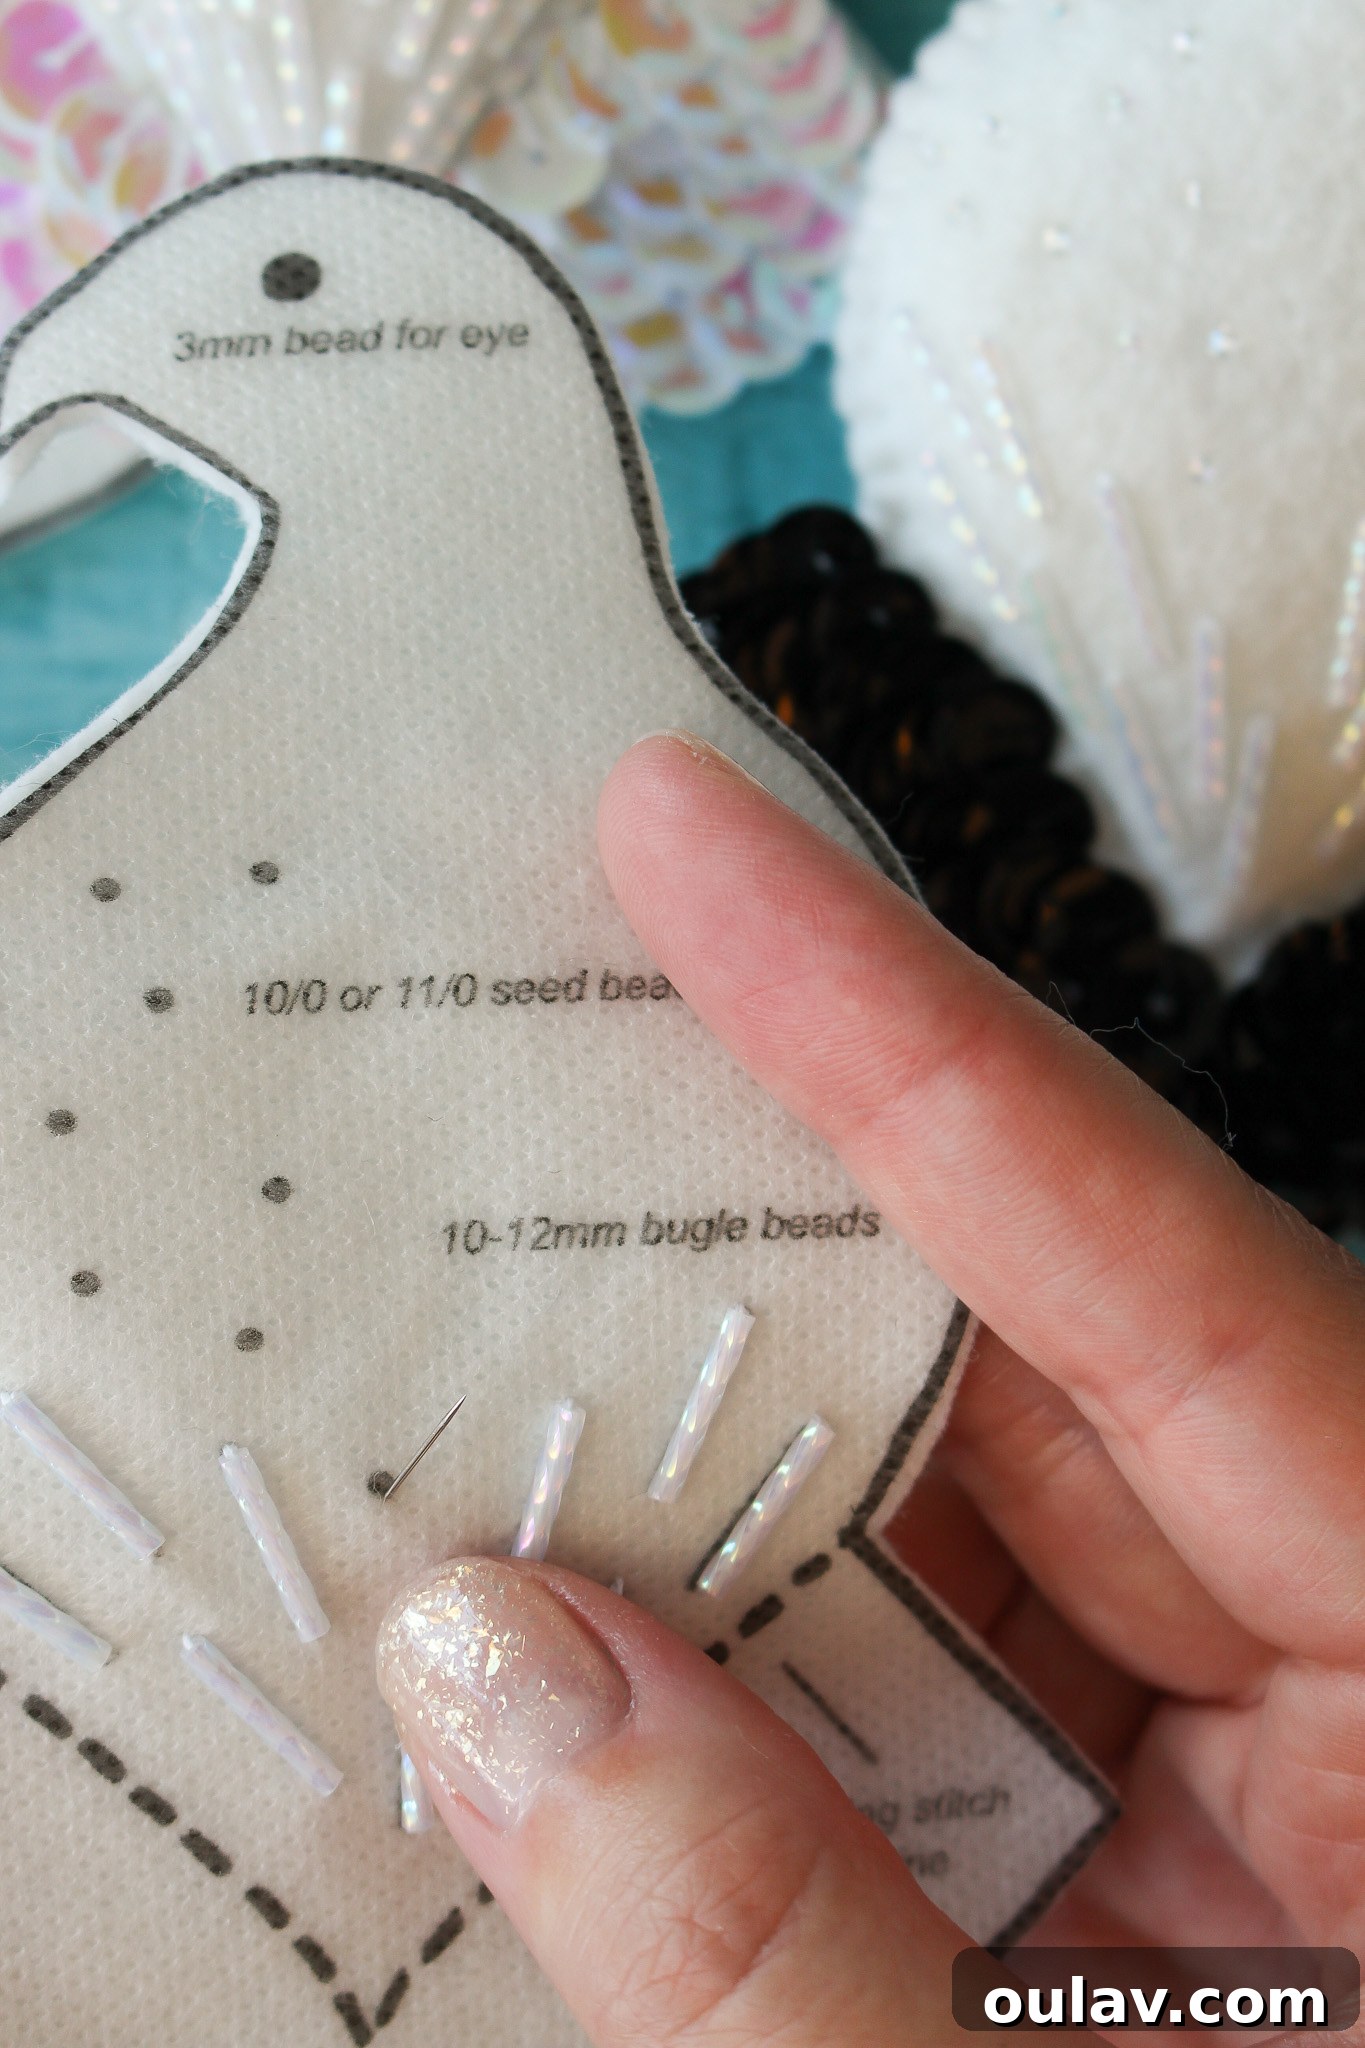
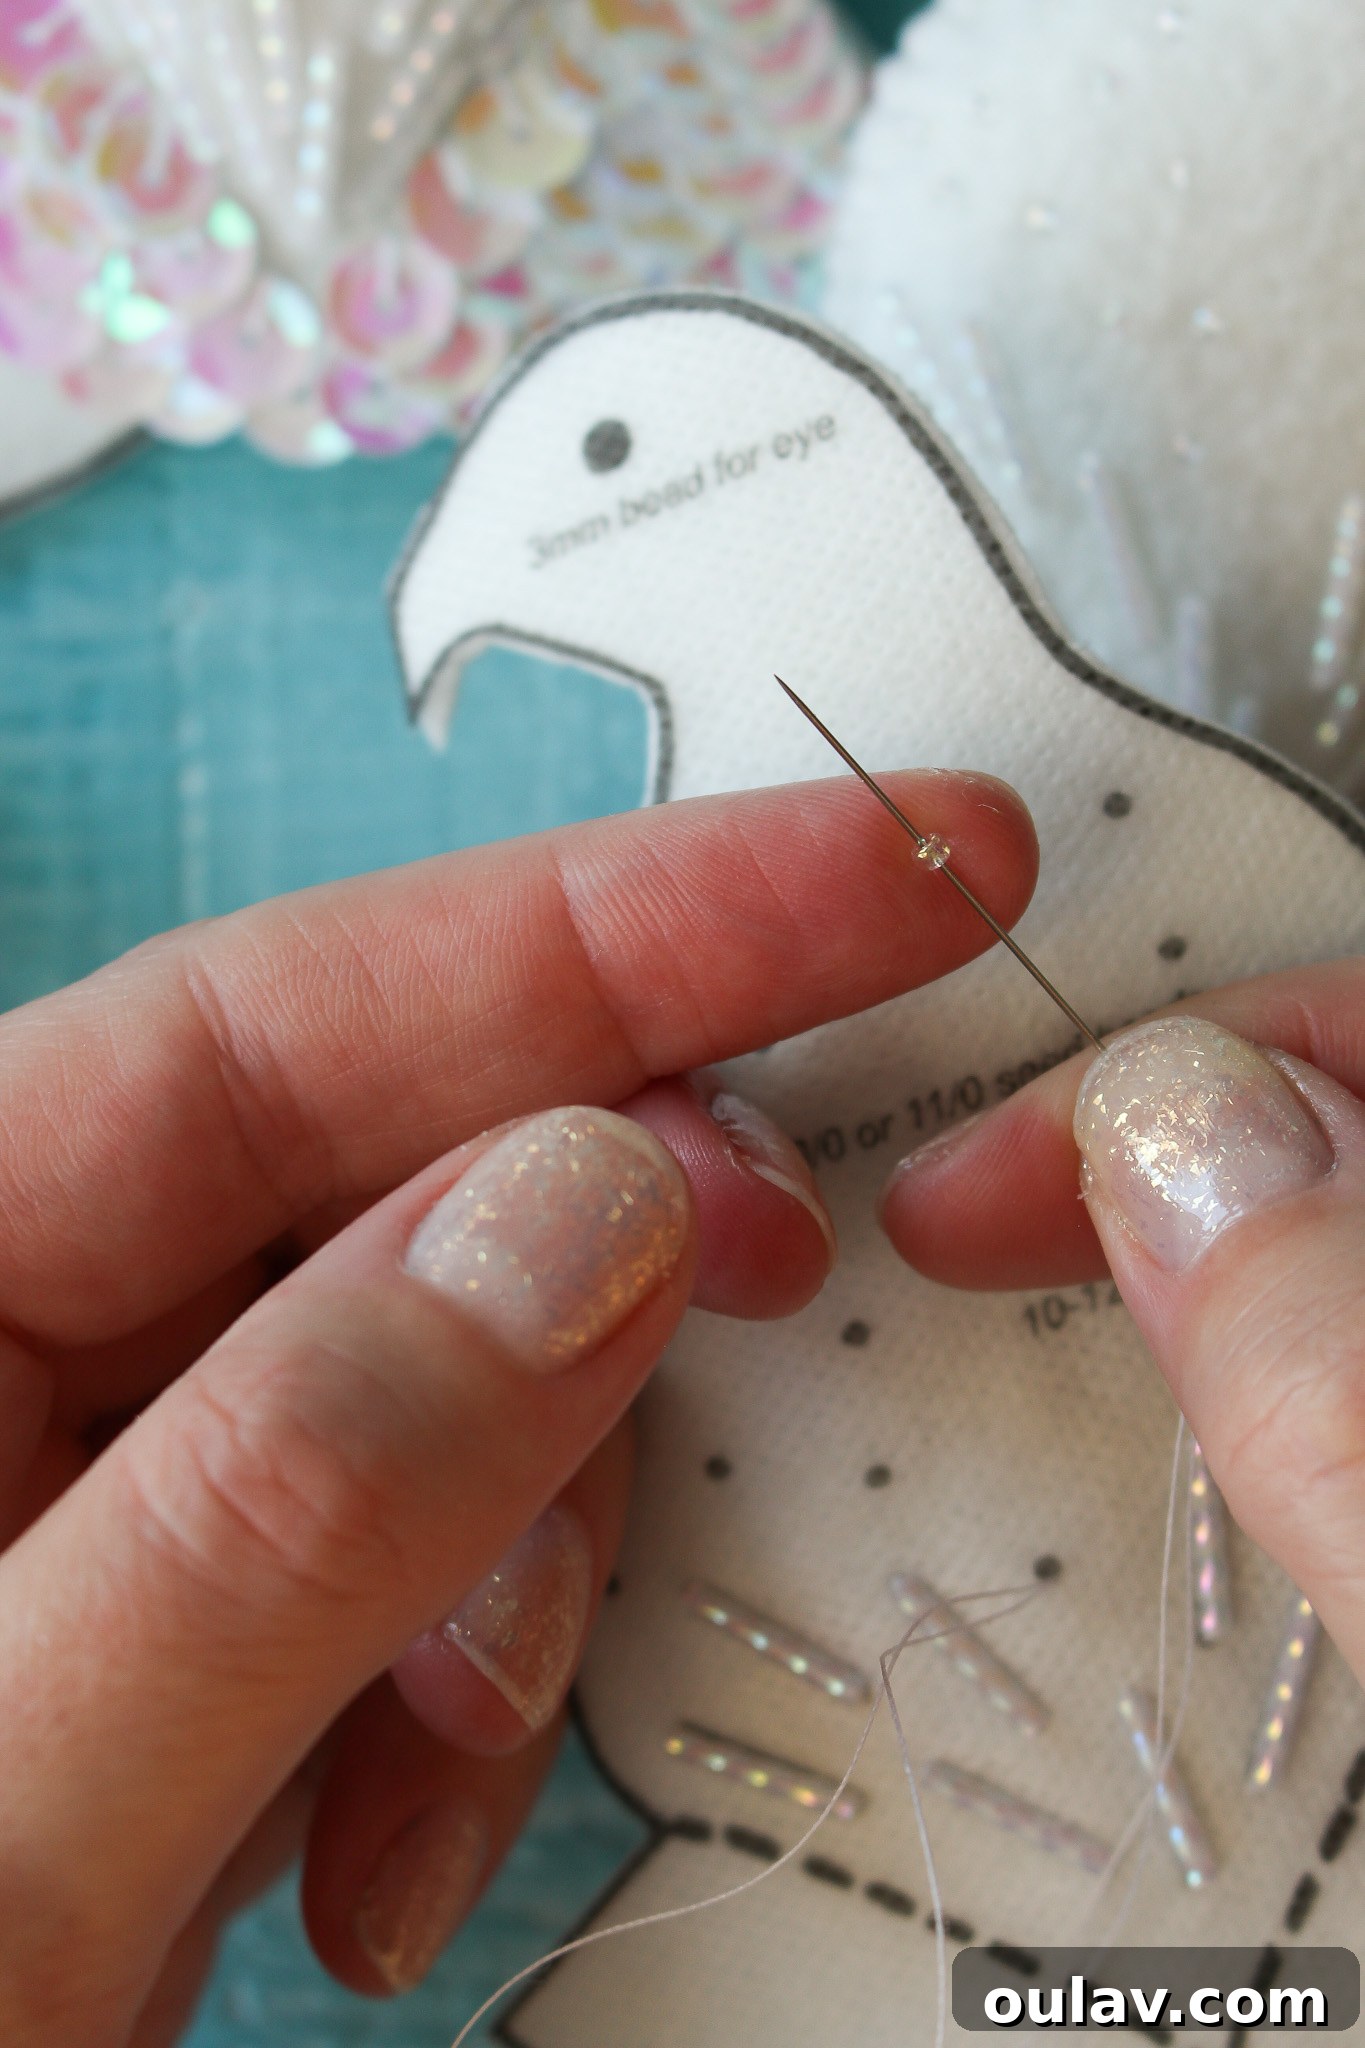
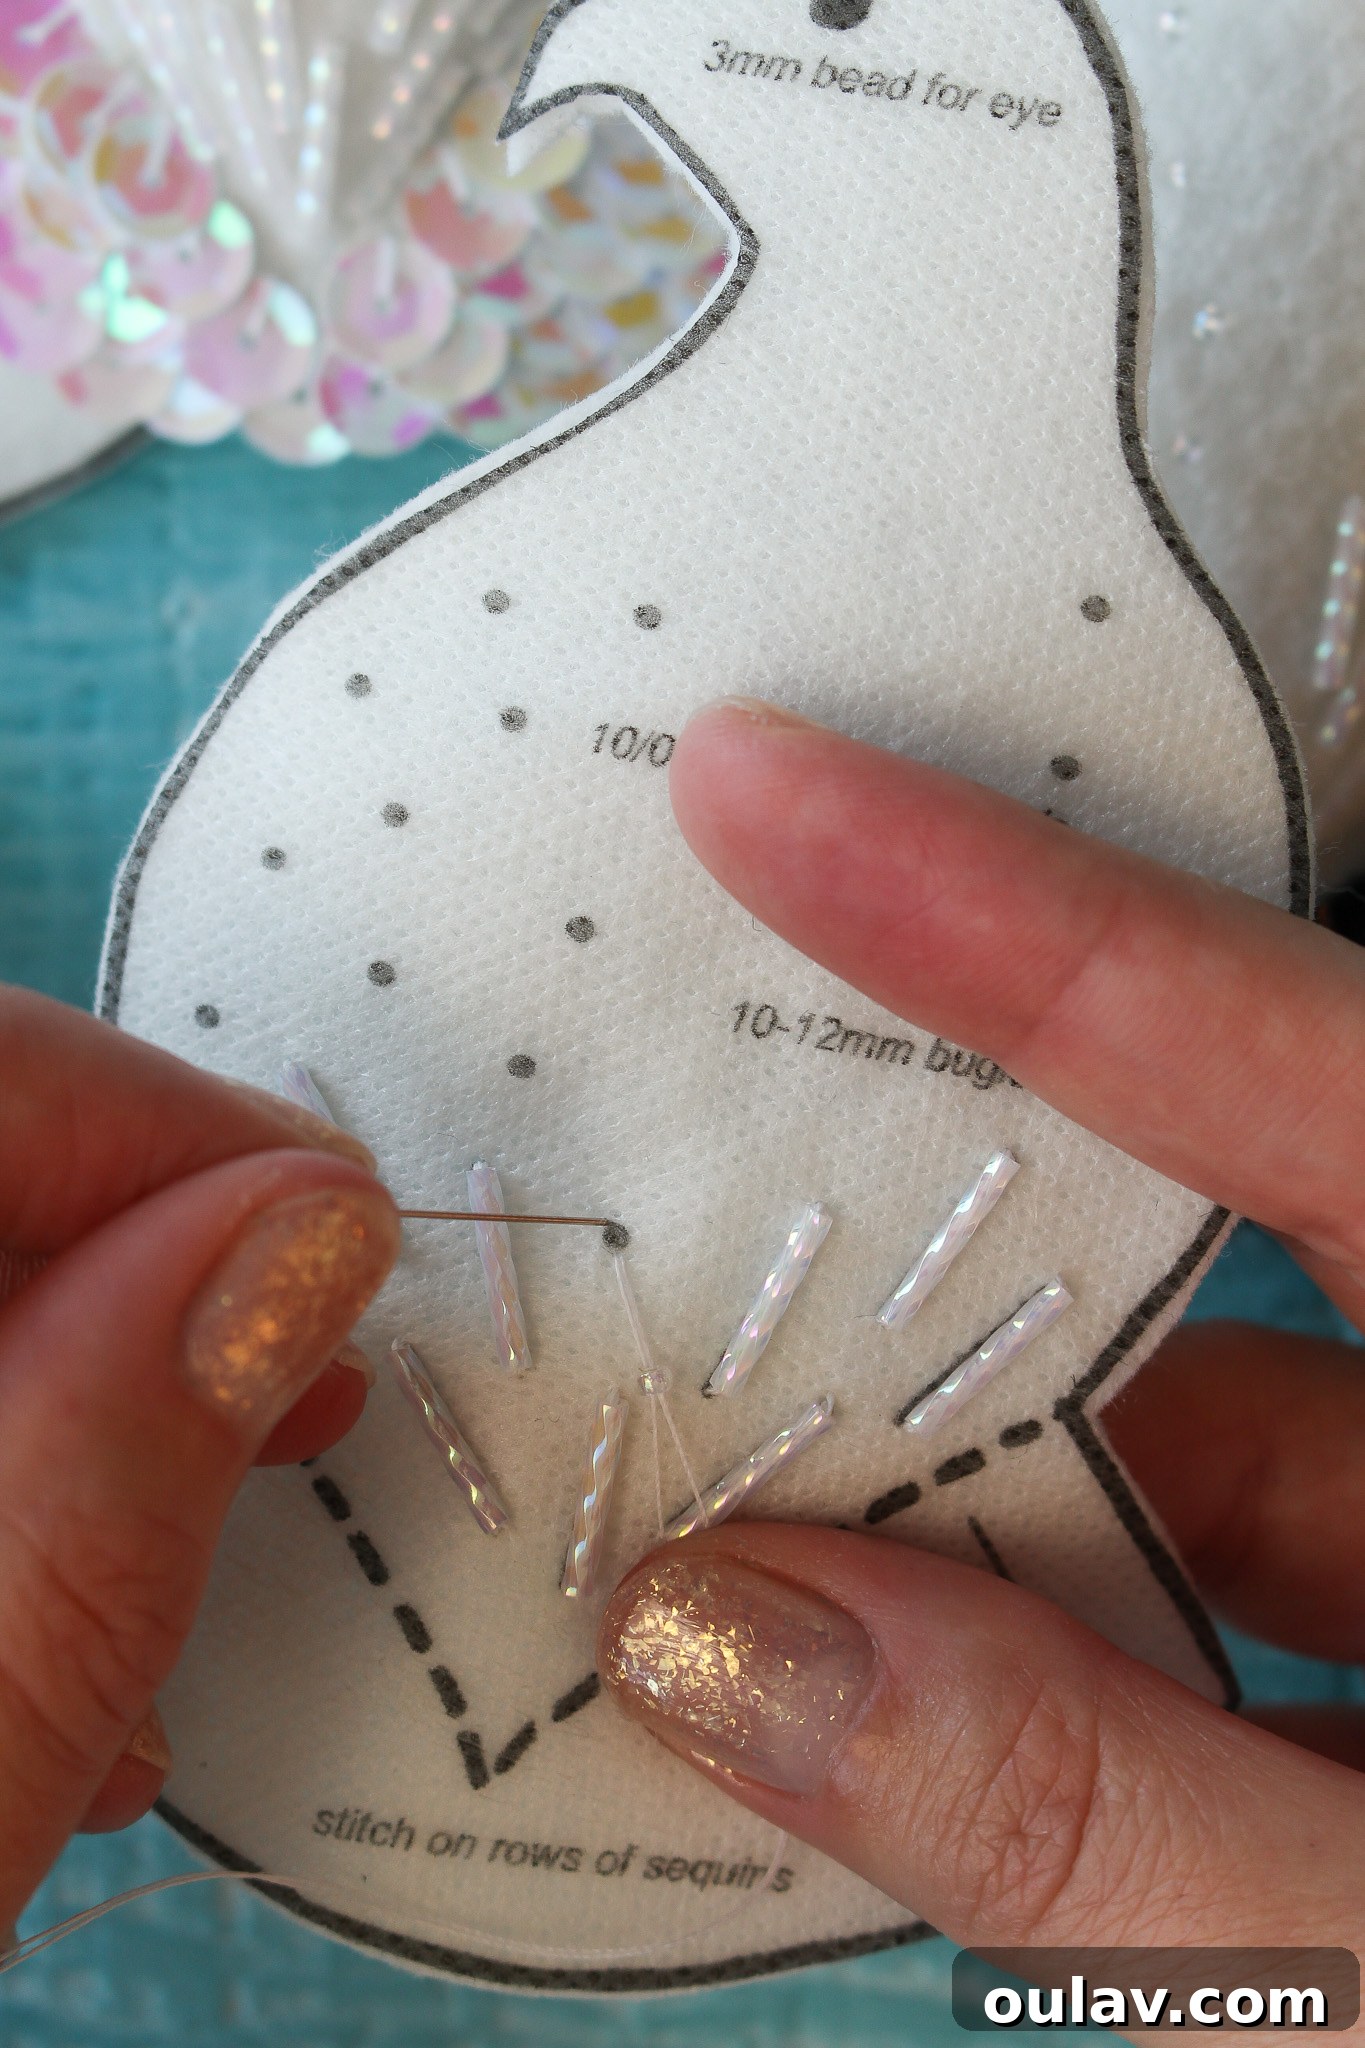
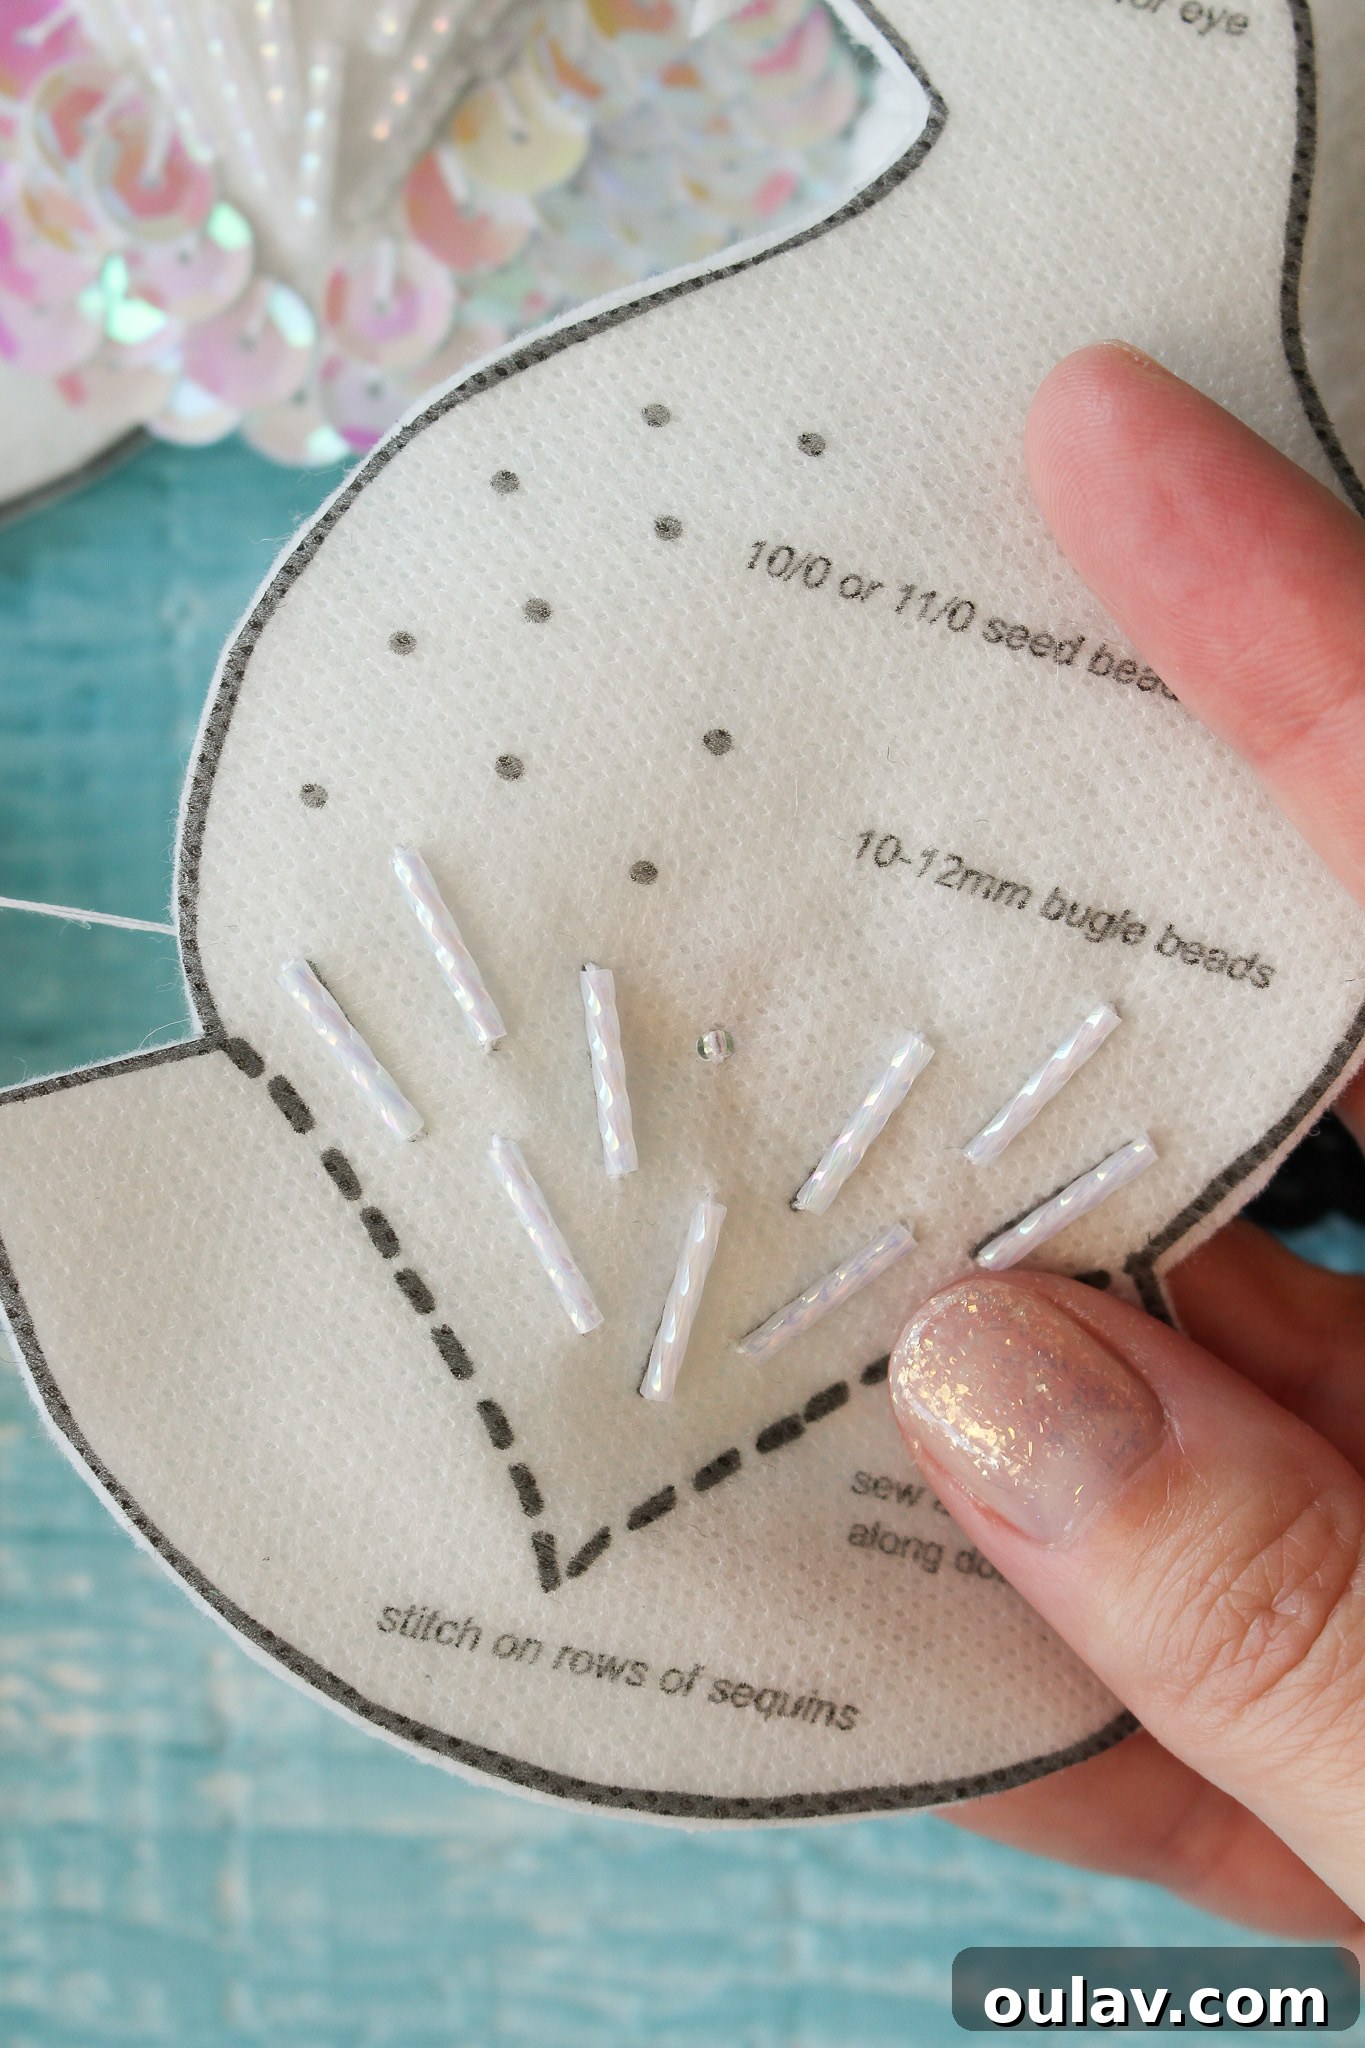
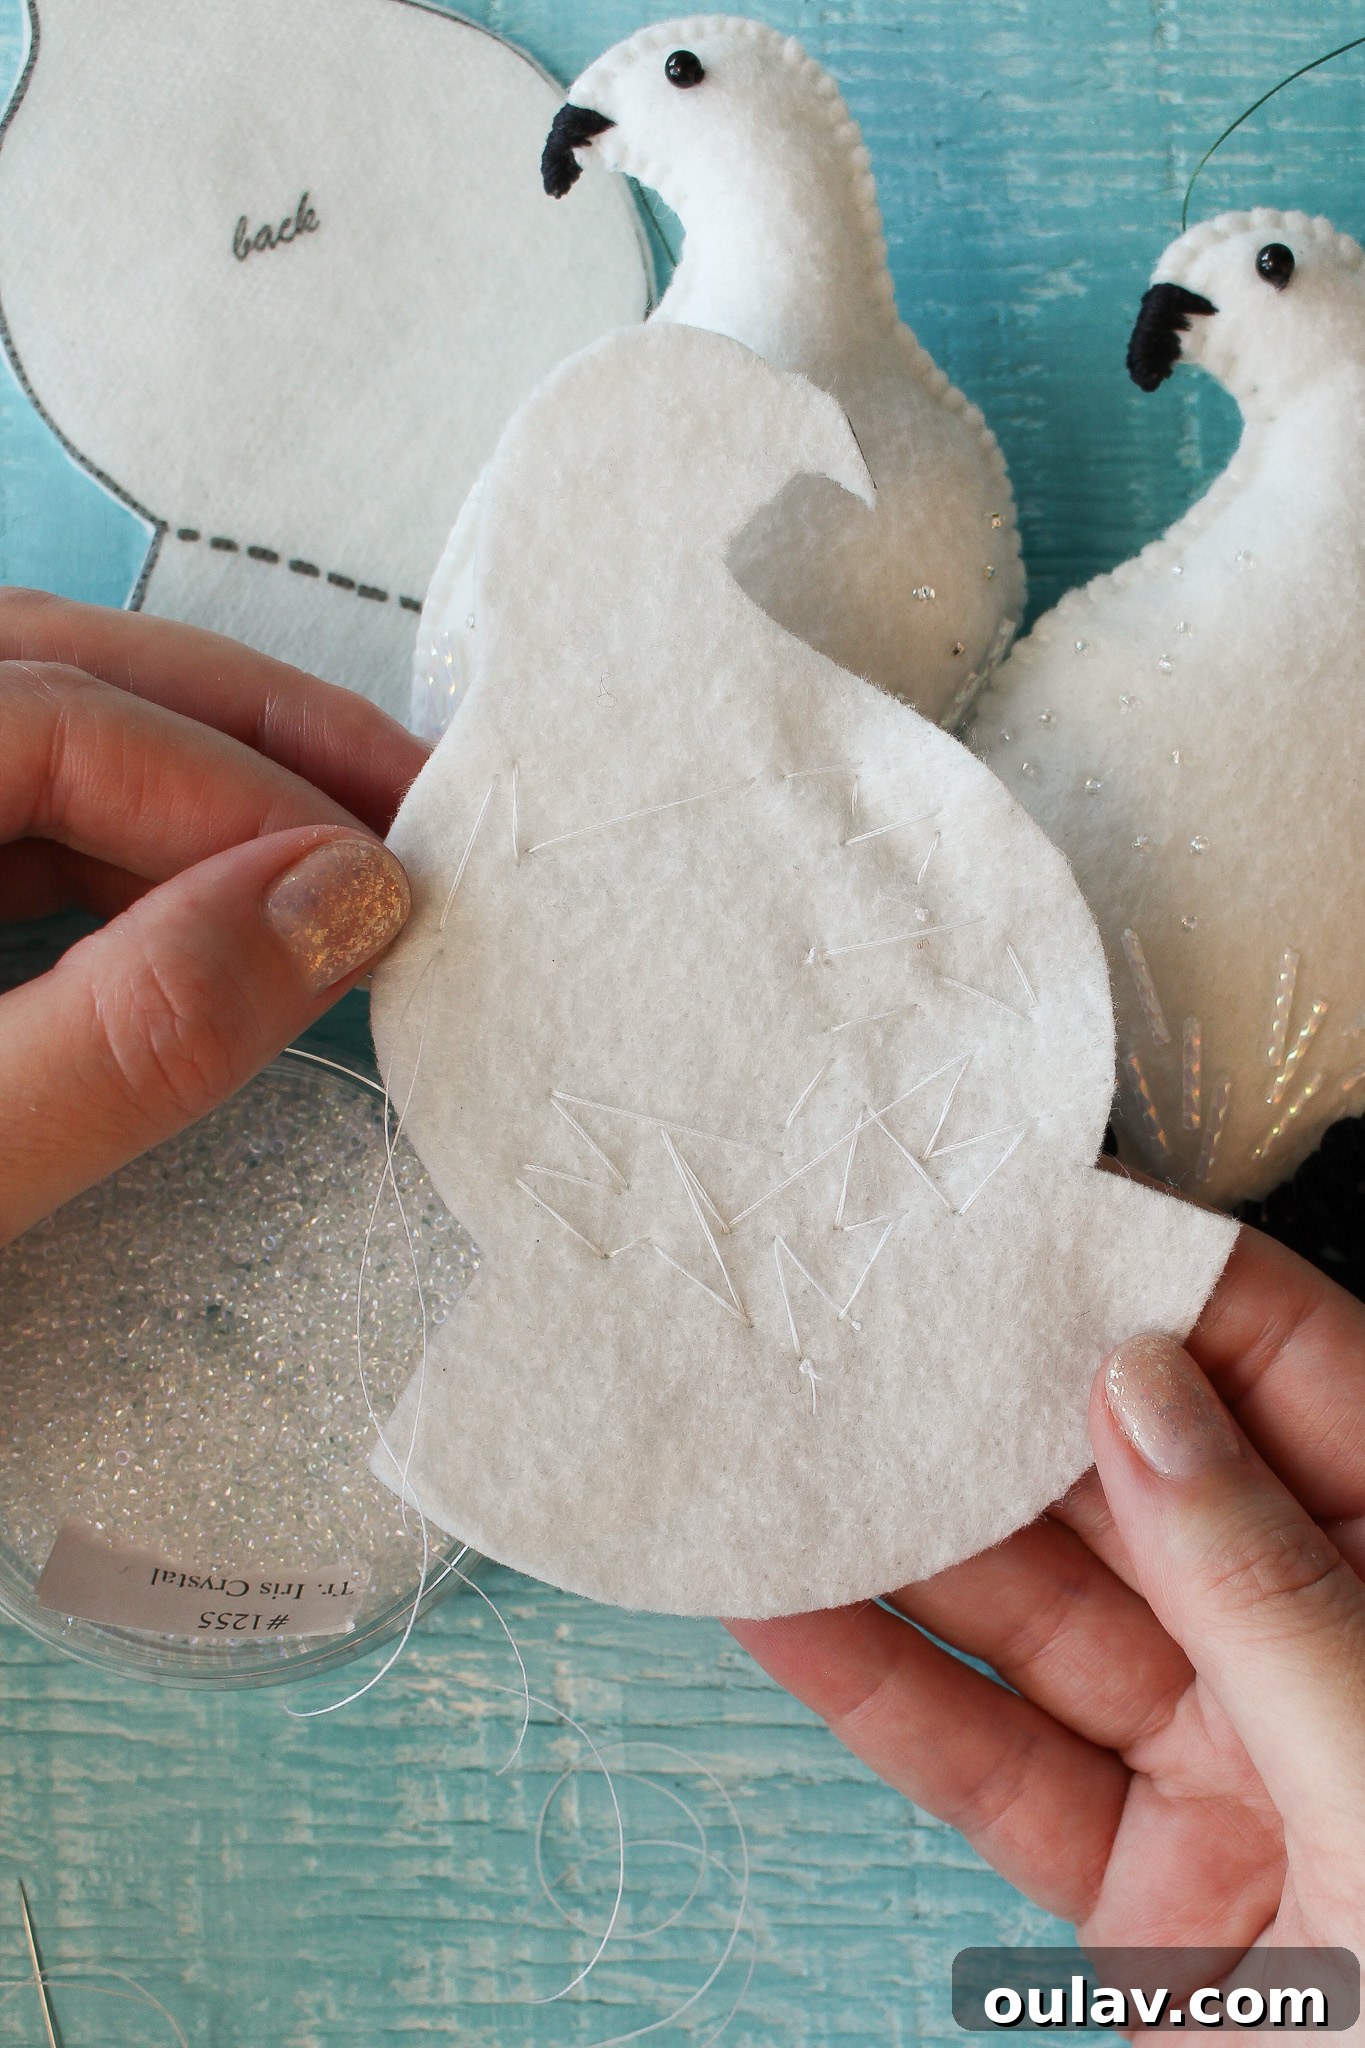
After completing your beadwork, the back of your felt piece, where the knots and thread ends are secured, will typically look something like this. While neatness is always good practice, remember that this side will be hidden once the ornament is sewn together.
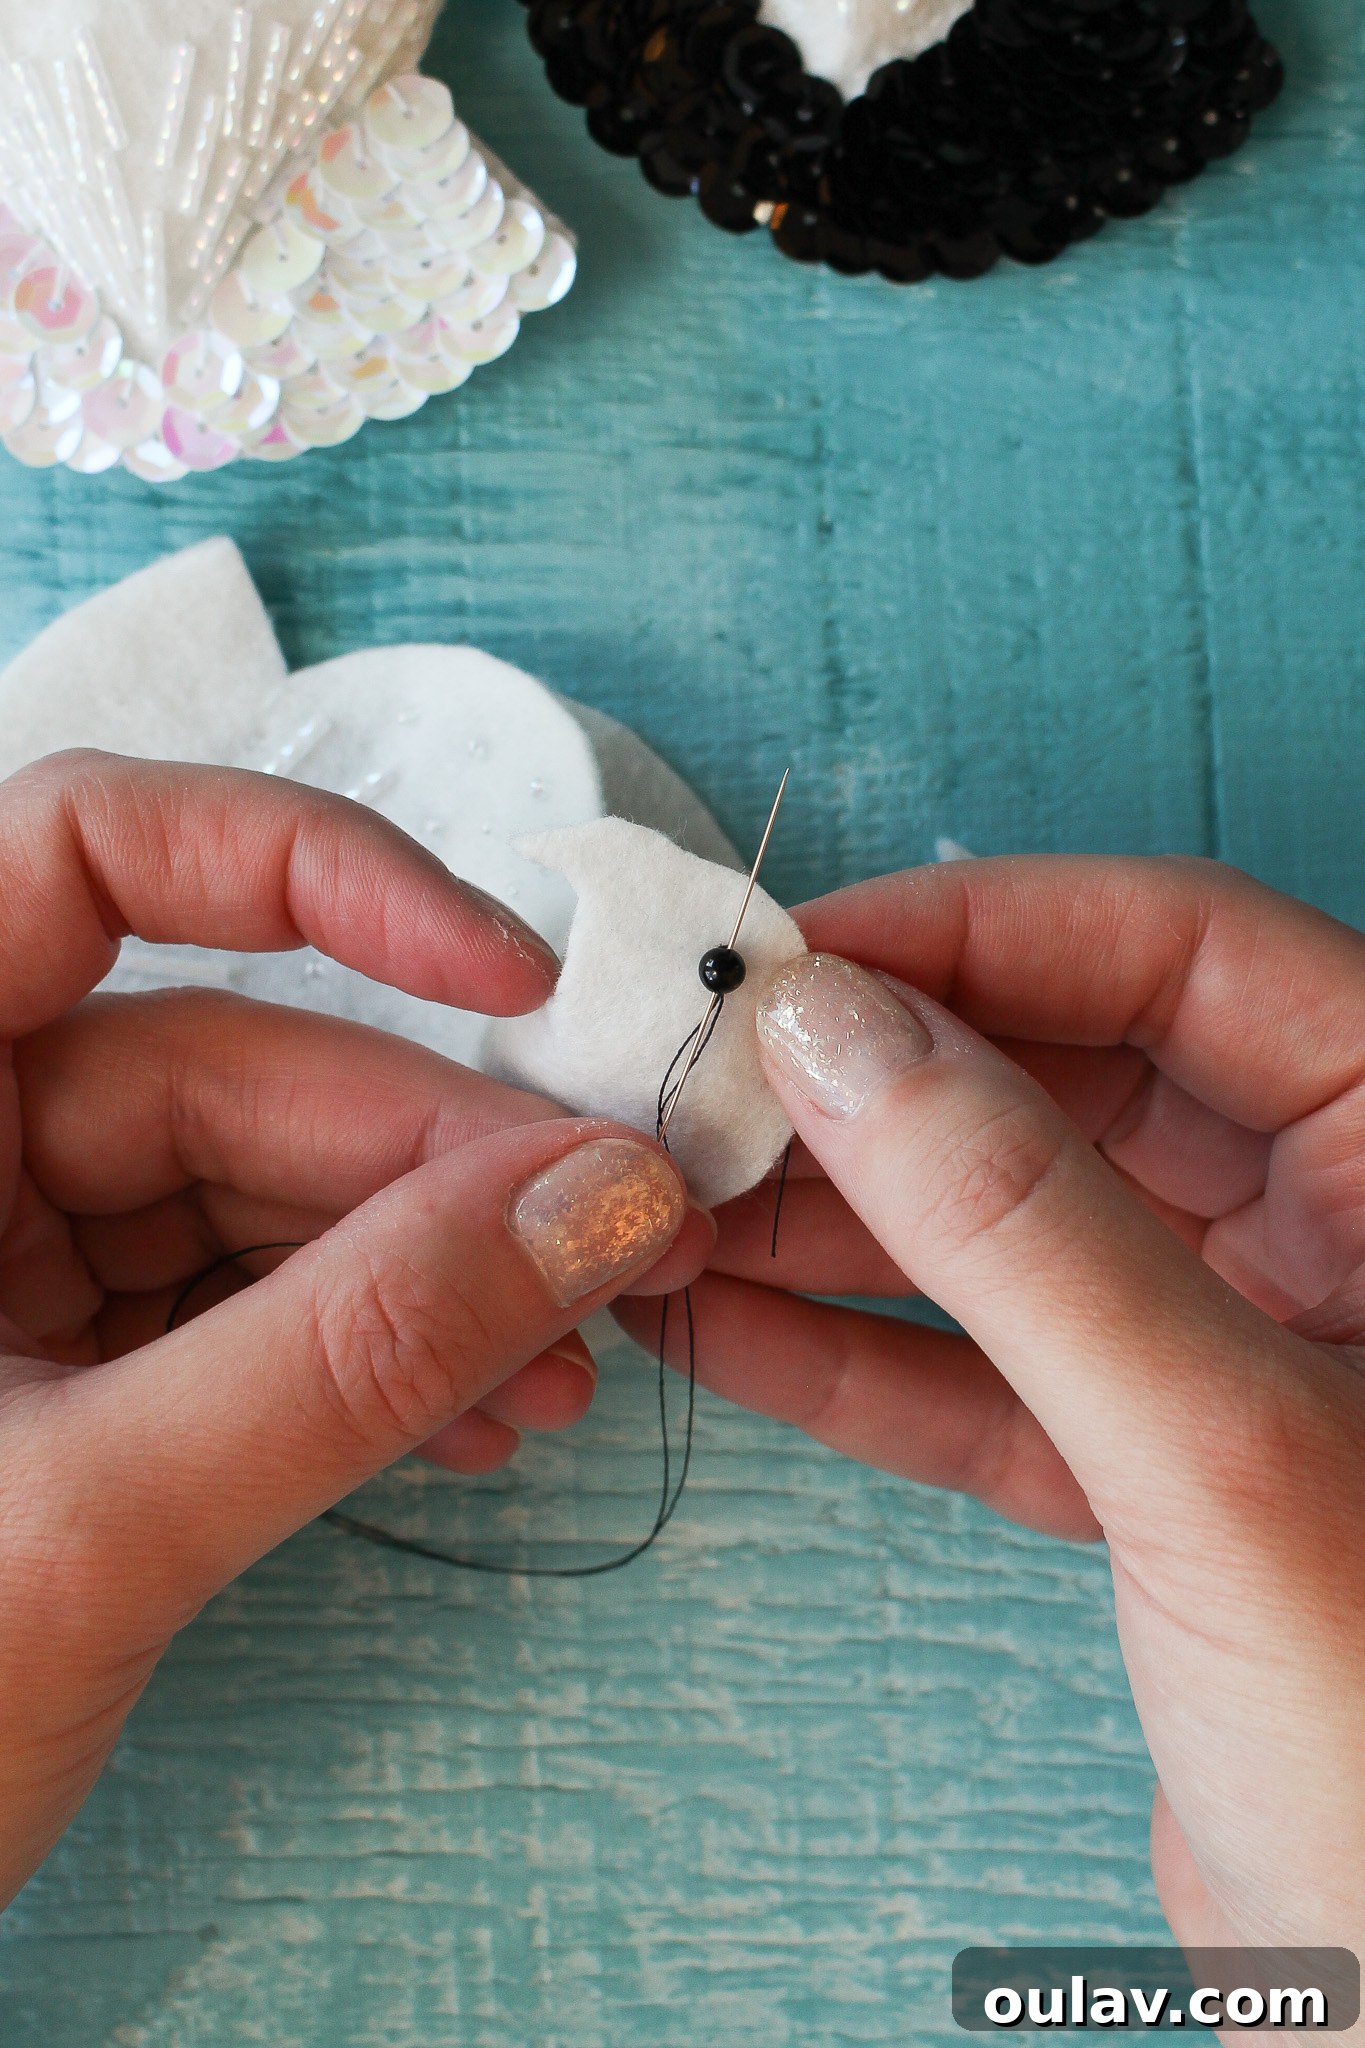
Next, stitch on the eye bead using the same technique described for other beads. For a larger bead like the eye, I highly recommend stitching through it a few times to ensure maximum security before tying and knotting your thread on the back. For a seamless look, using black thread for the black eye bead helps it blend in perfectly.
Partially Stitching the Bird Together – Tail Section Only
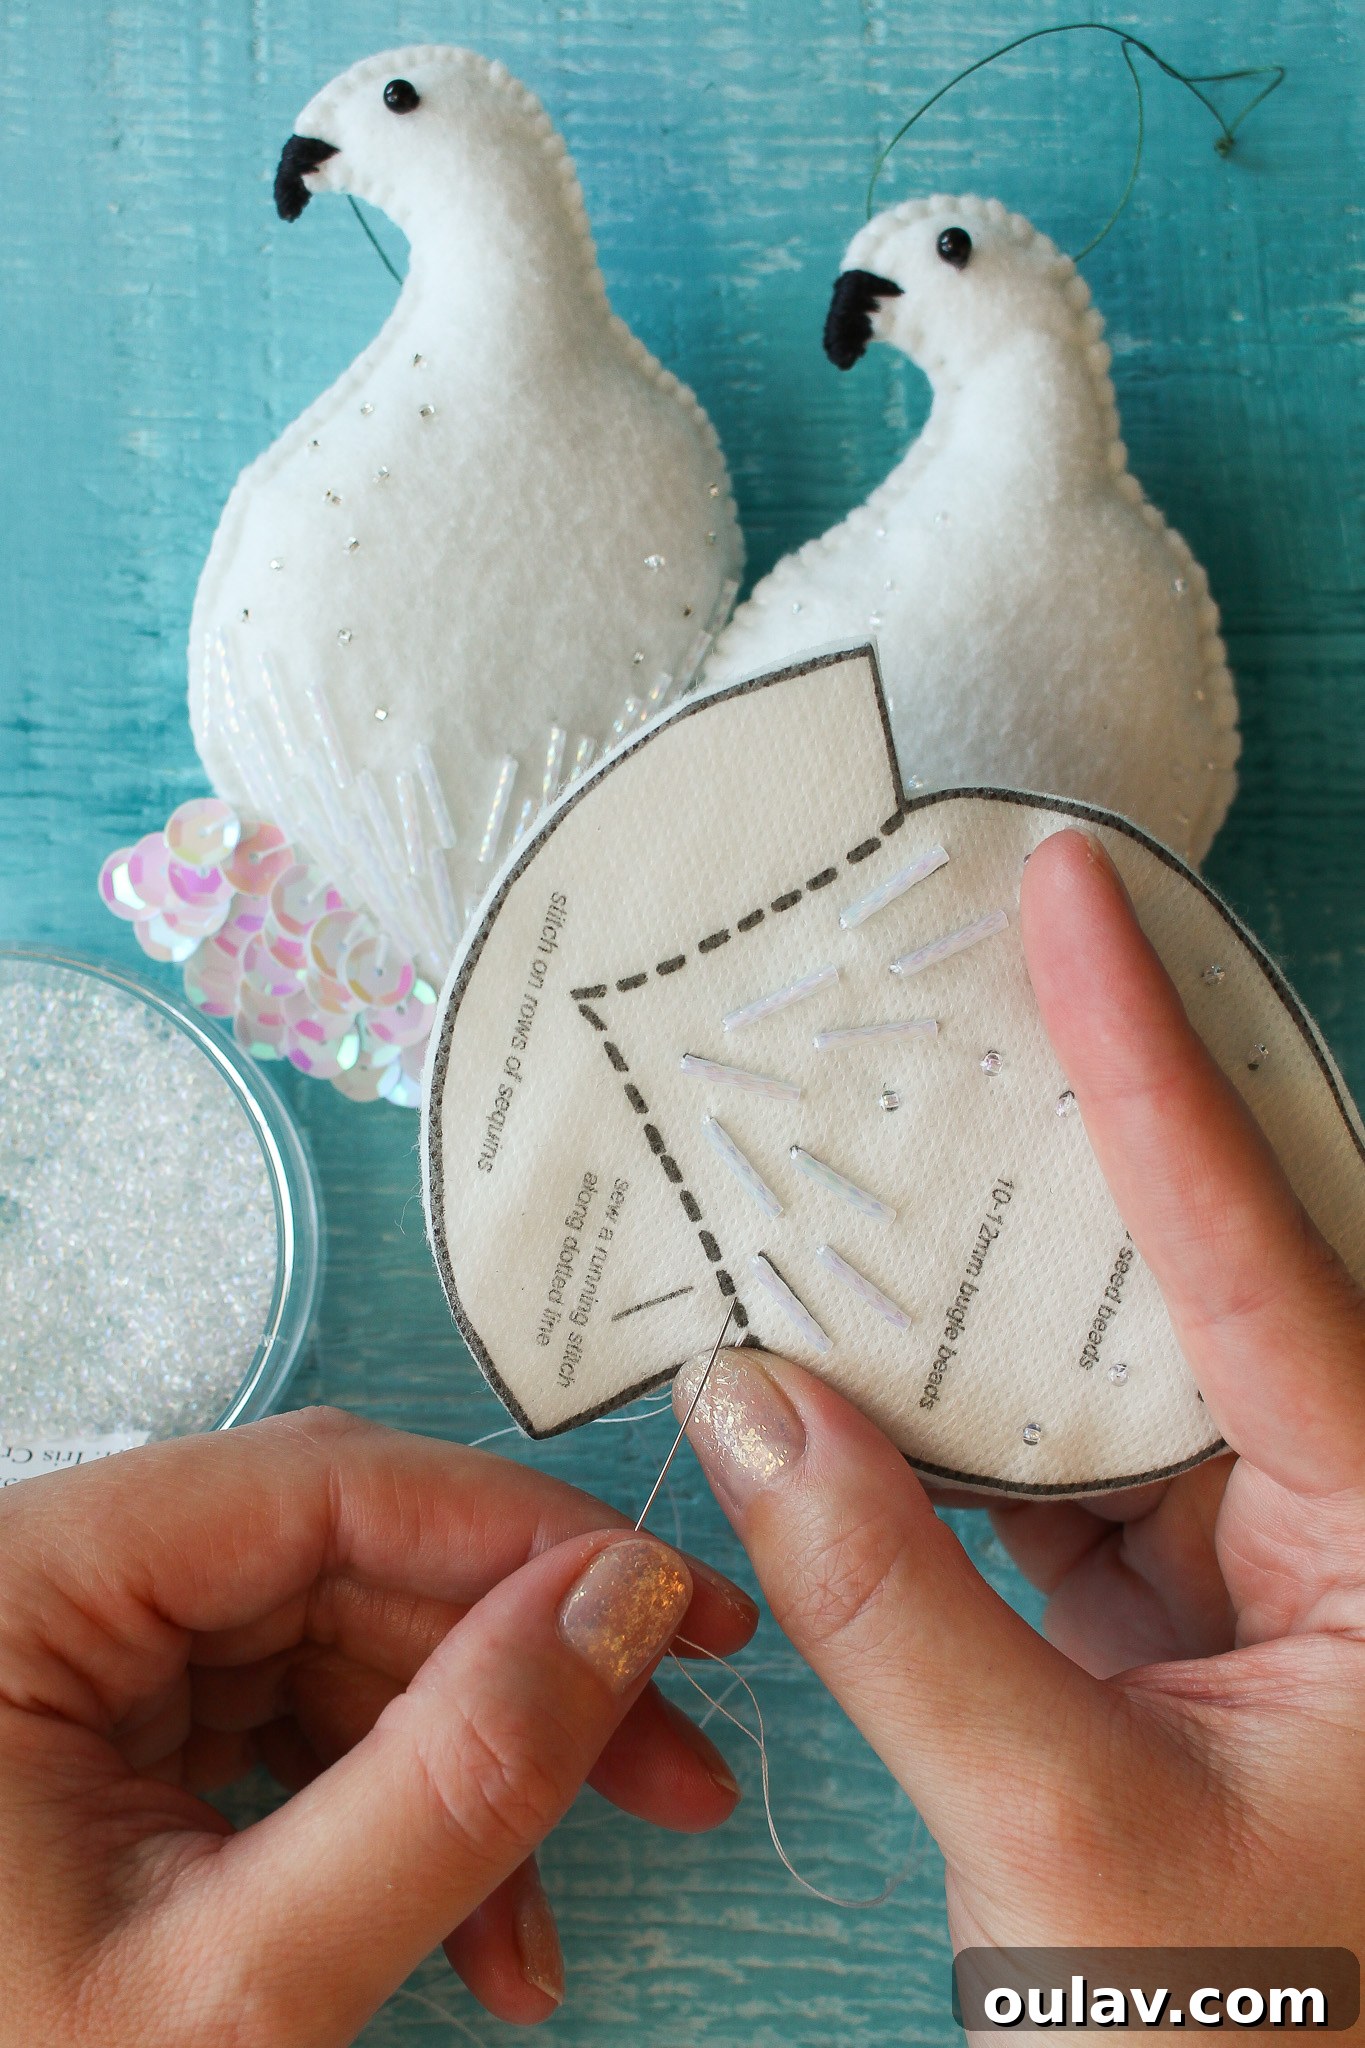
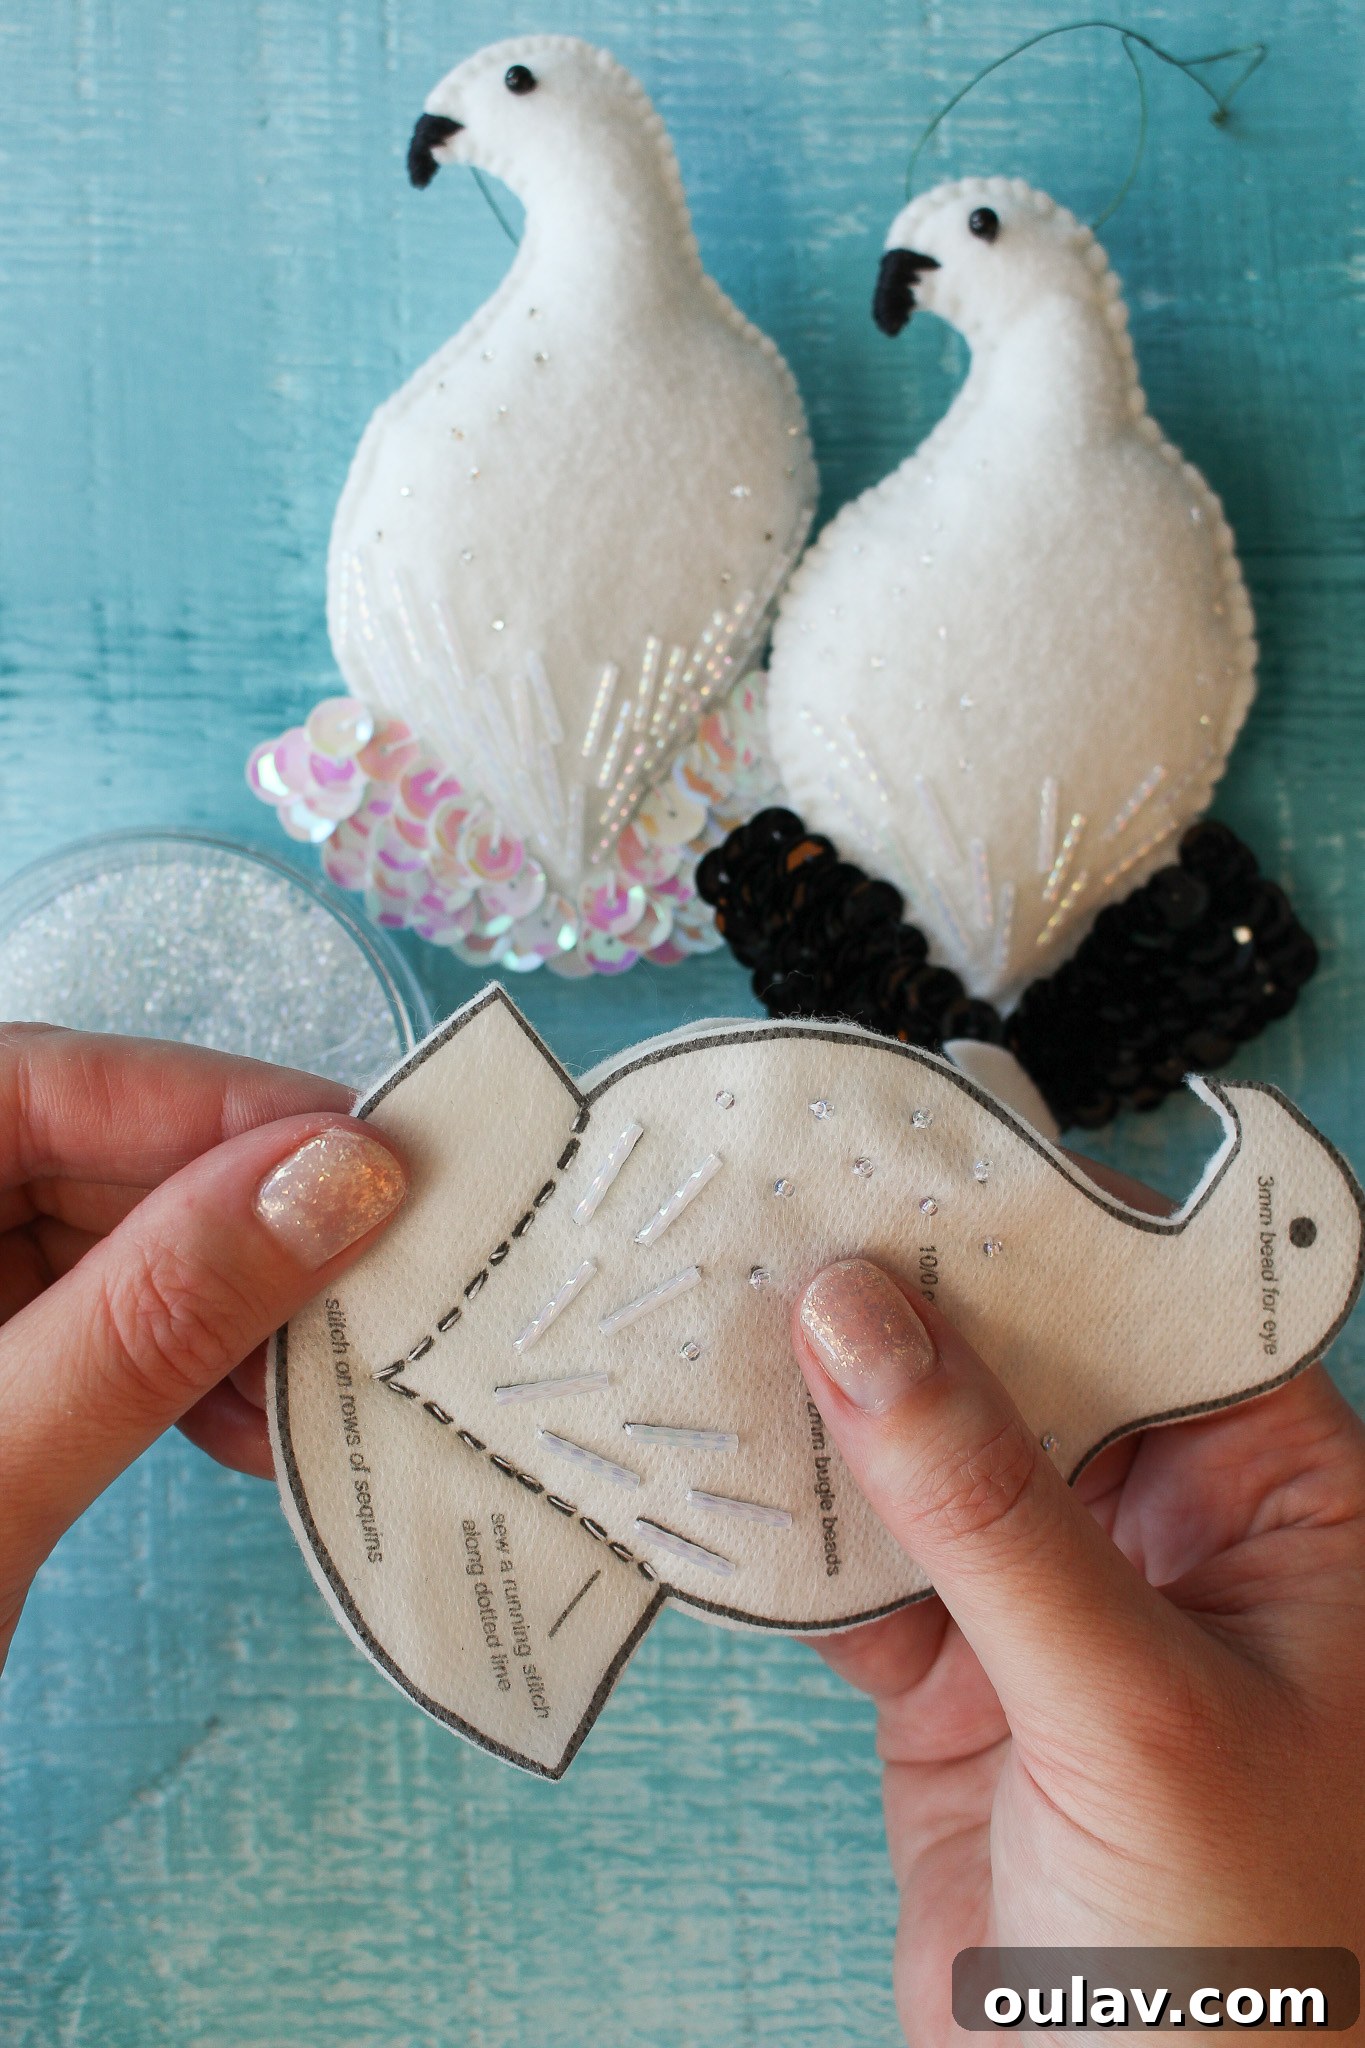
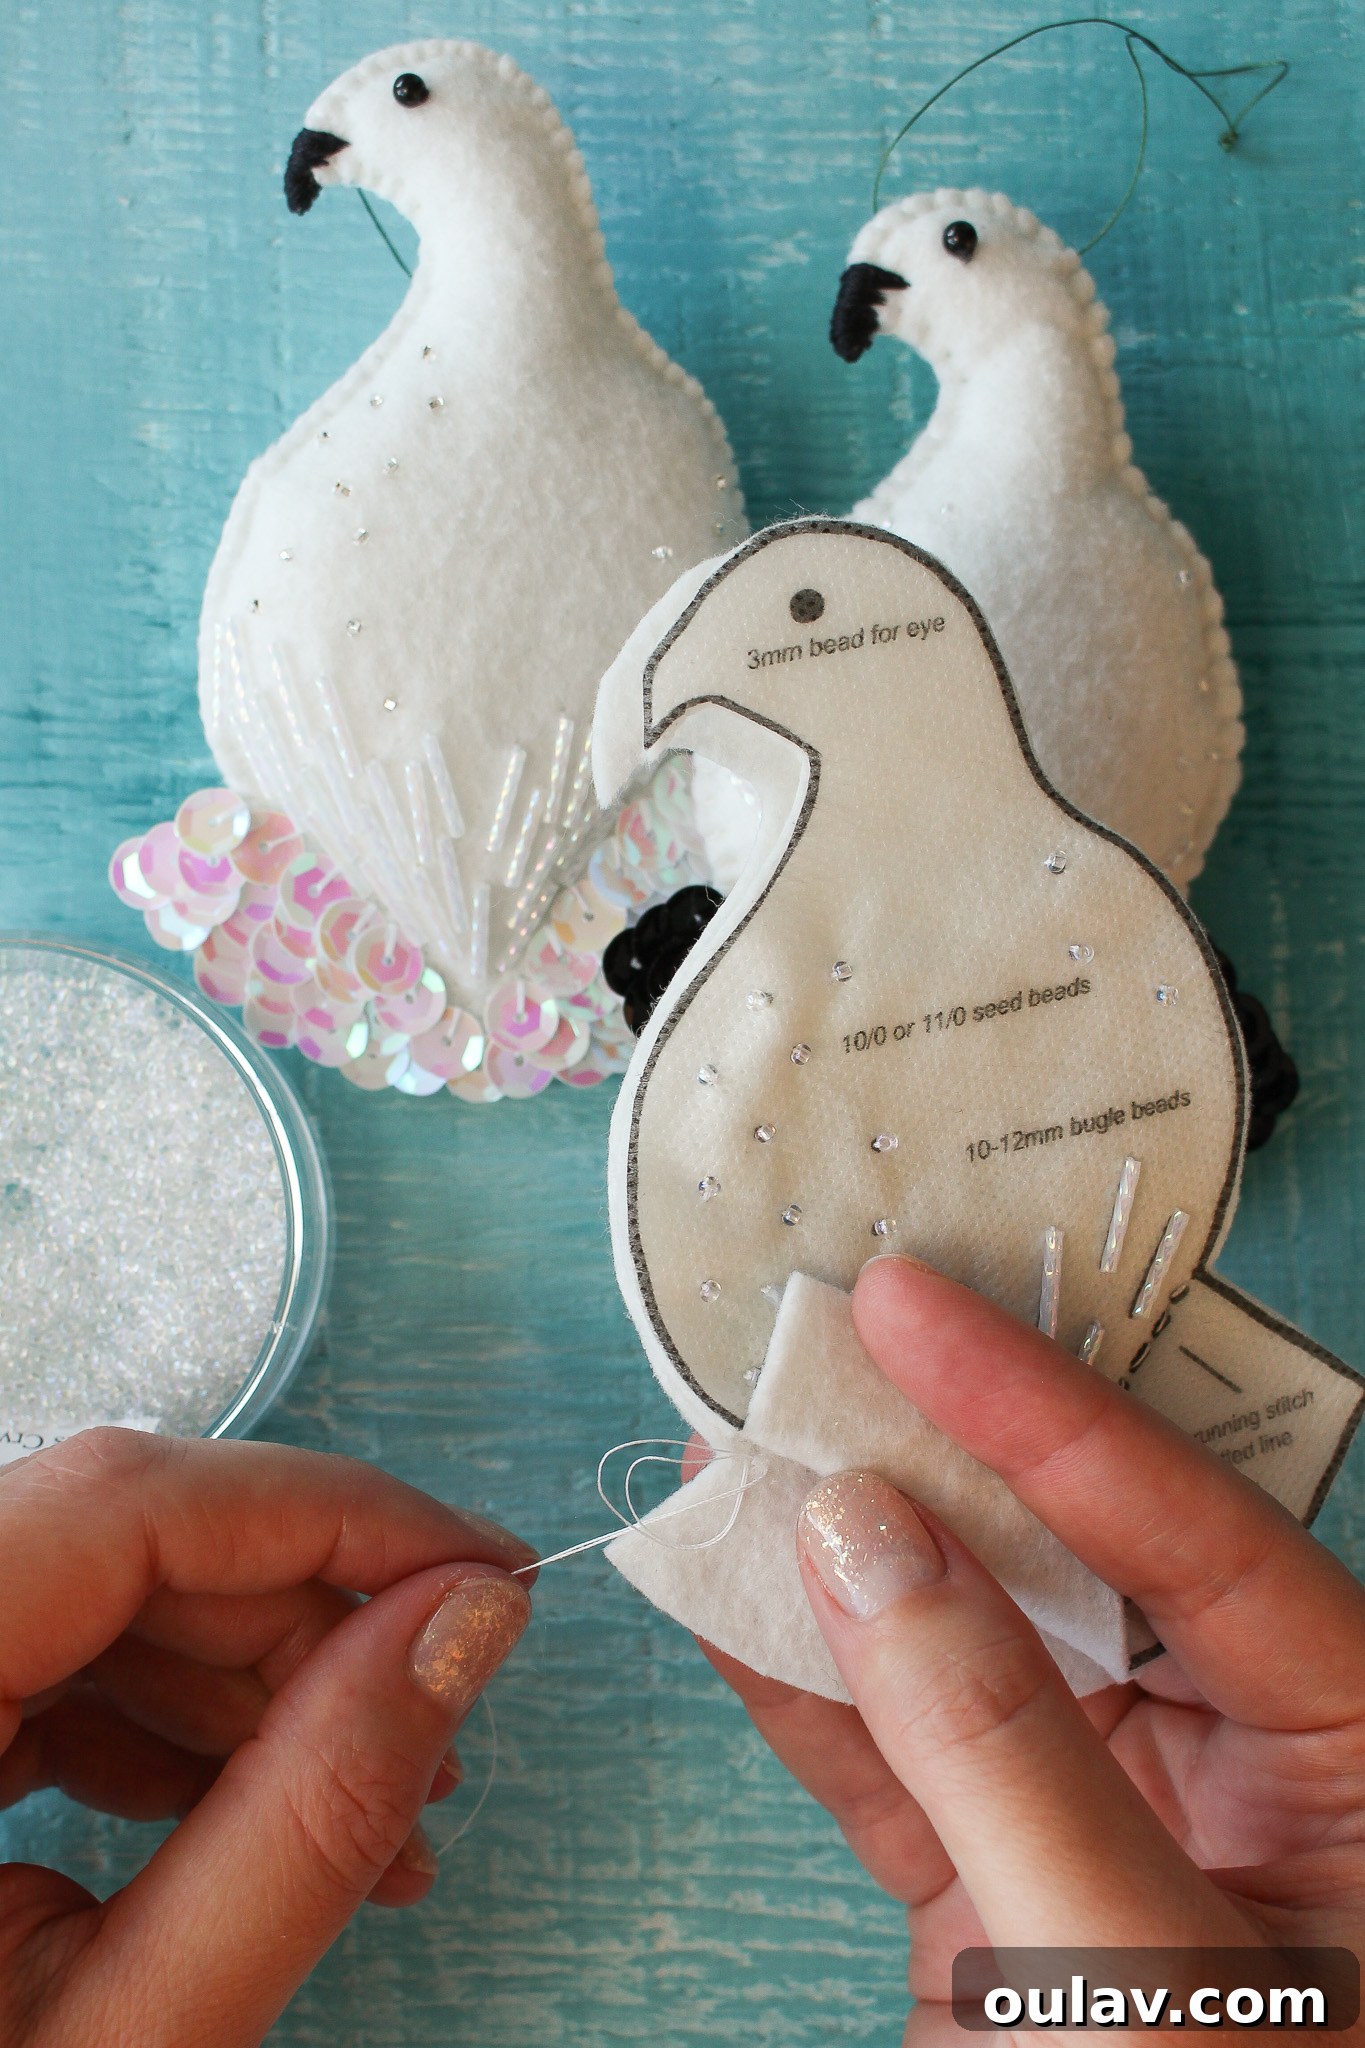
Now, it’s time to begin joining the two felt pieces of your bird. Using a simple running stitch and white thread, carefully sew ONLY along the dotted line indicated on the pattern. This initial seam forms the base of the tail, creating a natural contour before the full body assembly begins. This partial stitching is crucial for maintaining the intended shape and allowing for easier manipulation in later steps.
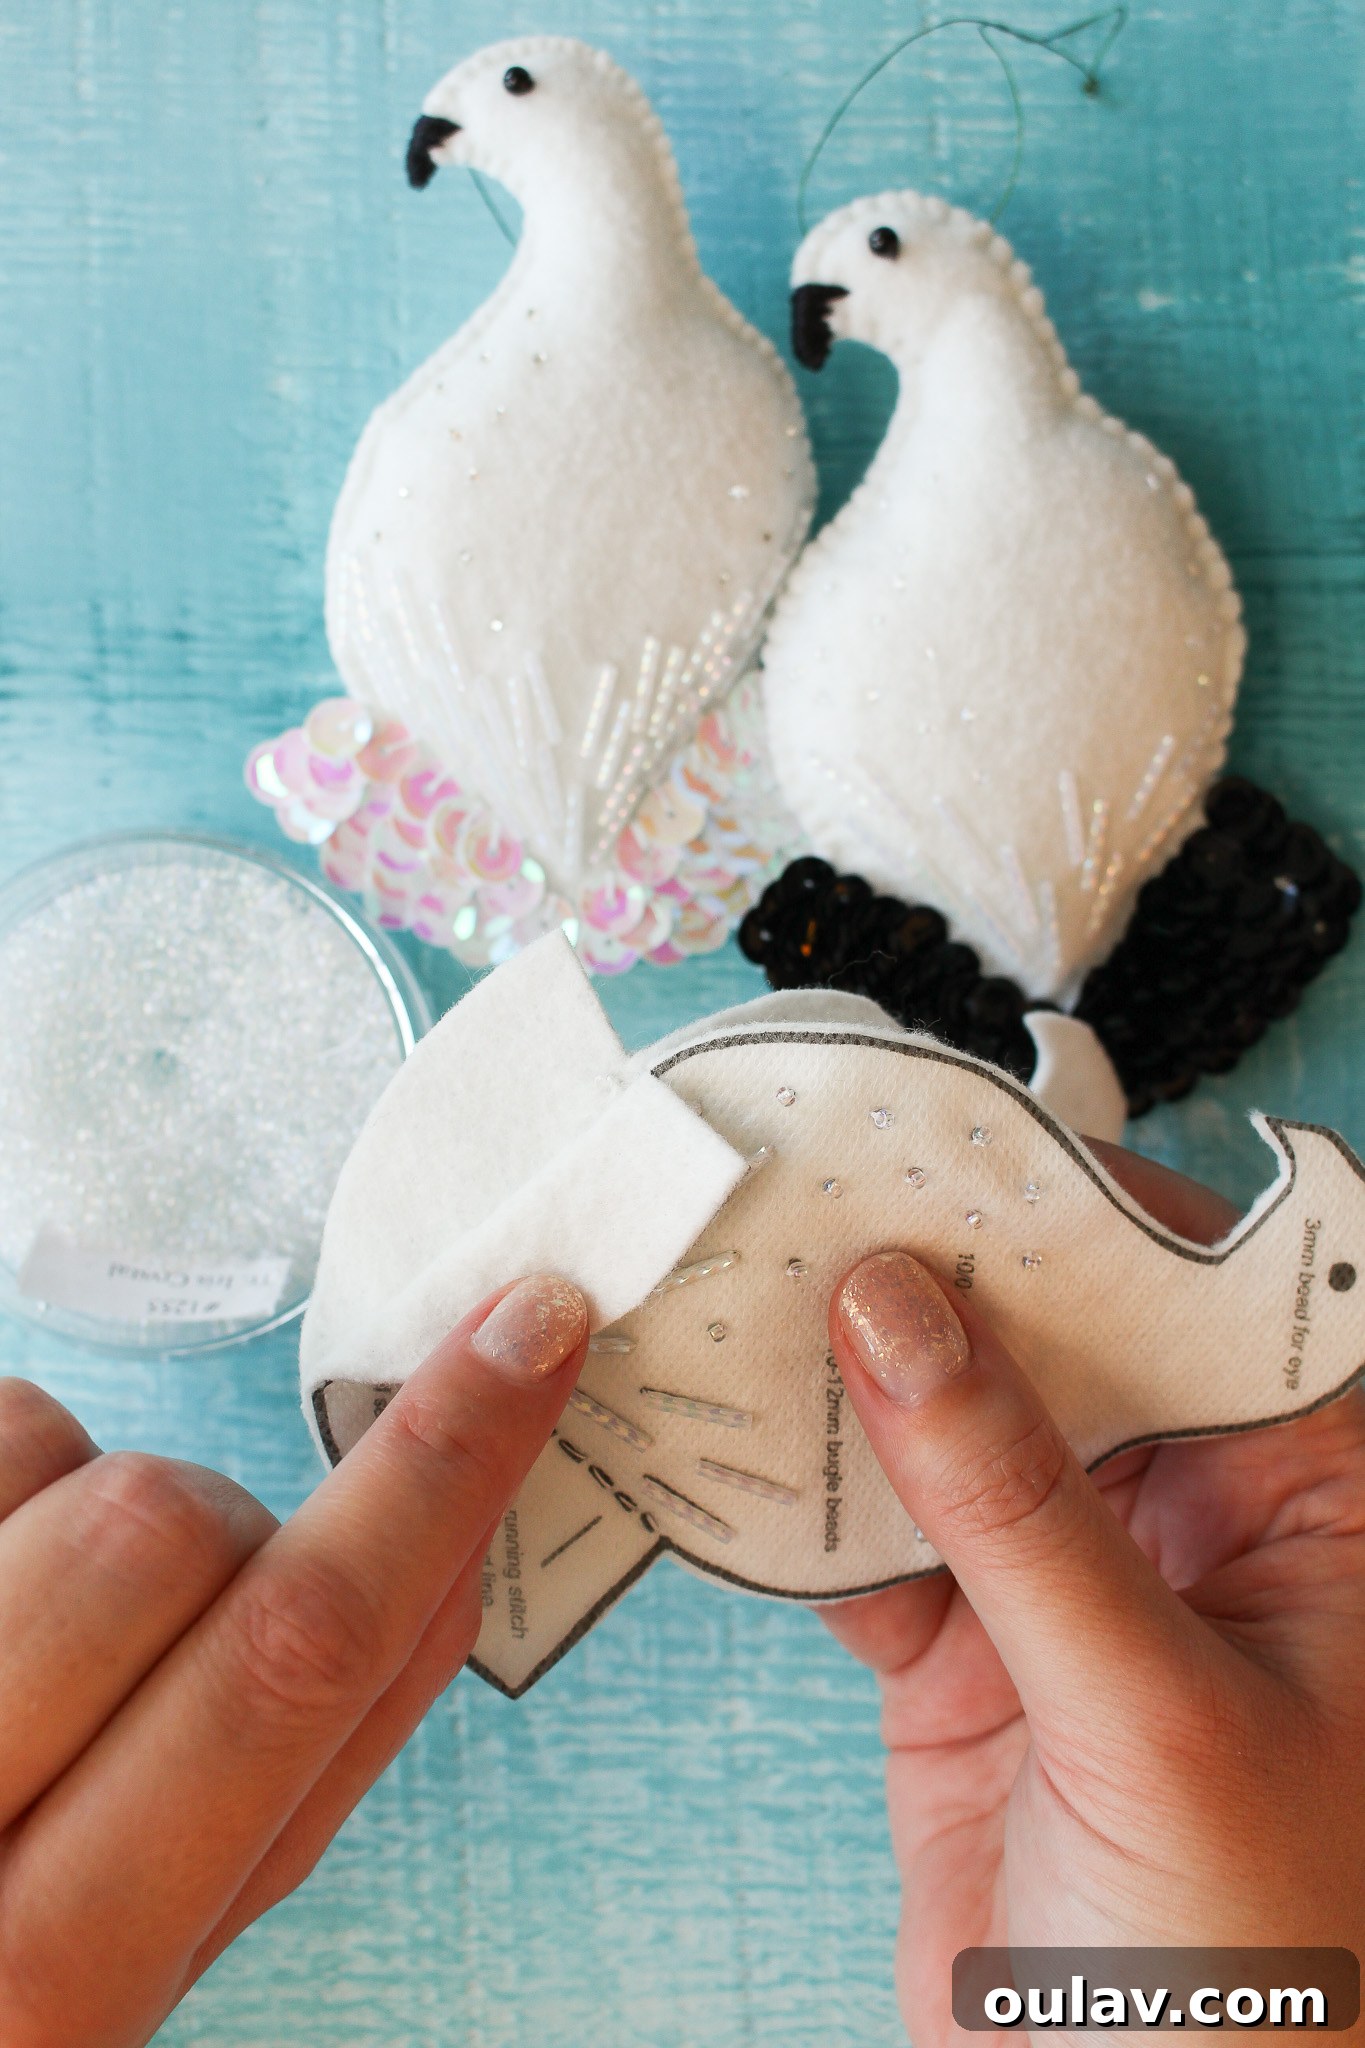
Rinsing Off the Stabilizer: A Gentle Process
If you’ve opted for the wash-away stabilizer, this is the pivotal moment to remove it. The process is quite simple: you can either immerse your ornament in a bowl of warm water for a few minutes or gently hold it under a stream of warm running water. The stabilizer is designed to break down and dissolve readily. If your stitches are particularly tight, as mine often are, a slightly longer soak or a gentle rub with your fingers over stubborn areas might be necessary. Patience is a virtue here – be gentle, and the stabilizer WILL eventually dissolve completely, leaving your felt pristine and soft.
Once the stabilizer is gone, your felt will be wet. To dry it, you have two options: allow it to air dry naturally, or gently sandwich it between layers of a clean tea towel. Then, with a warm iron set to a low heat (wool or synthetic setting), delicately press the ornament. Be exceptionally careful not to crush any beads you’ve already attached. I like to move the ornament to dry sections of the tea towel as I press, which speeds up the drying process significantly. In just a few minutes, your felt will be dry and ready for the next steps, looking something like this:
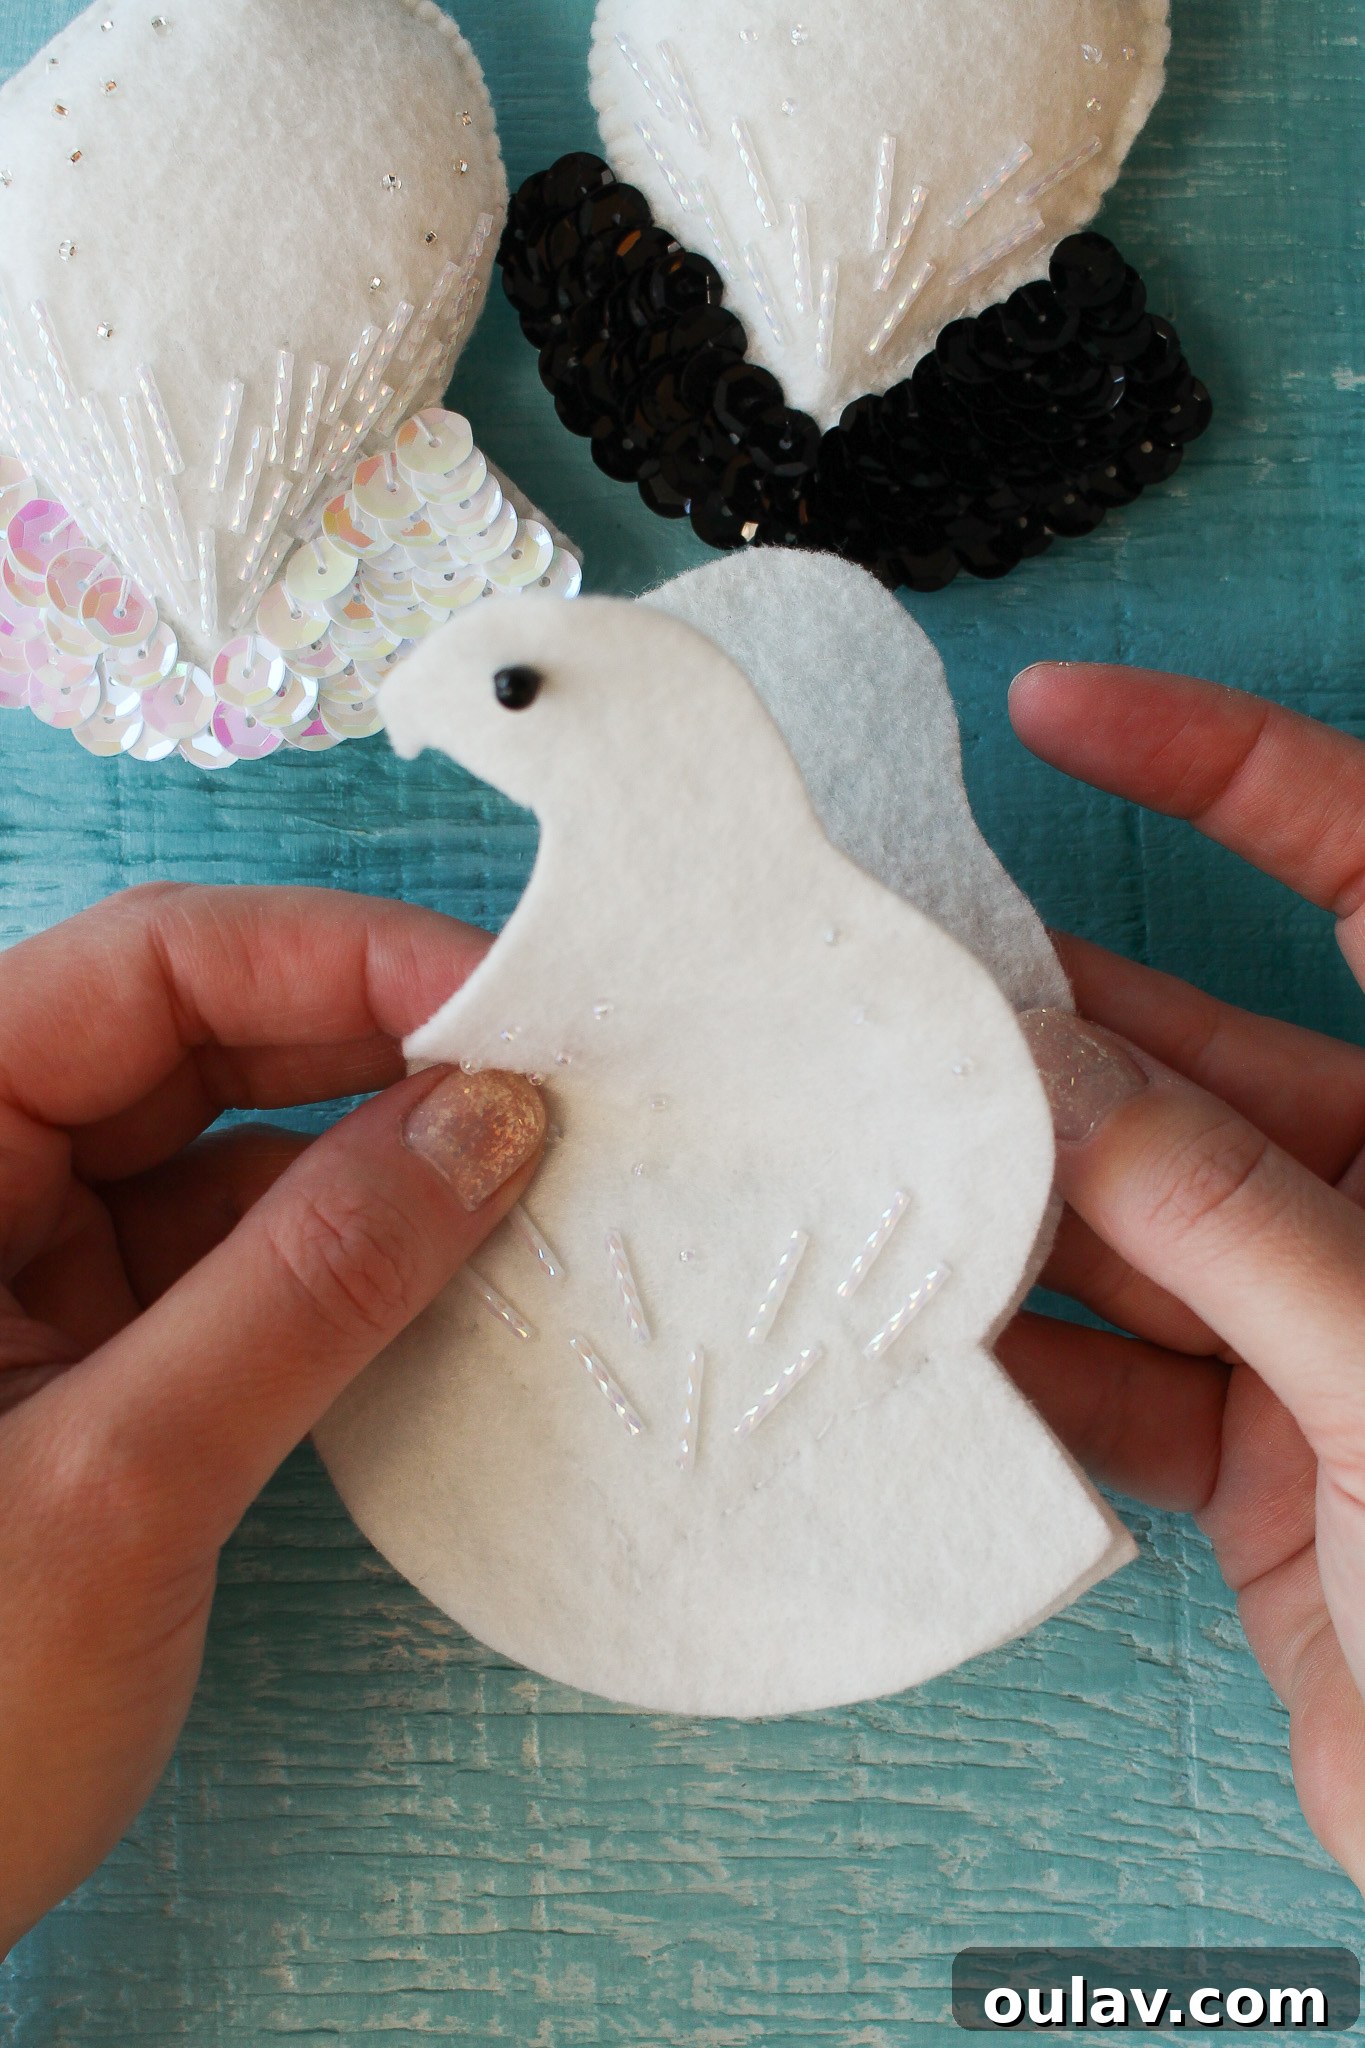
Stitching on the Sequins: Adding Feathered Glamour
As demonstrated in the video above, adding sequins can create a stunning feathery effect. Before I begin, I find it helpful to pin back the rear felt piece, which will form the underside of the tail feathers, keeping it neatly out of the way for unrestricted access to the front panel.
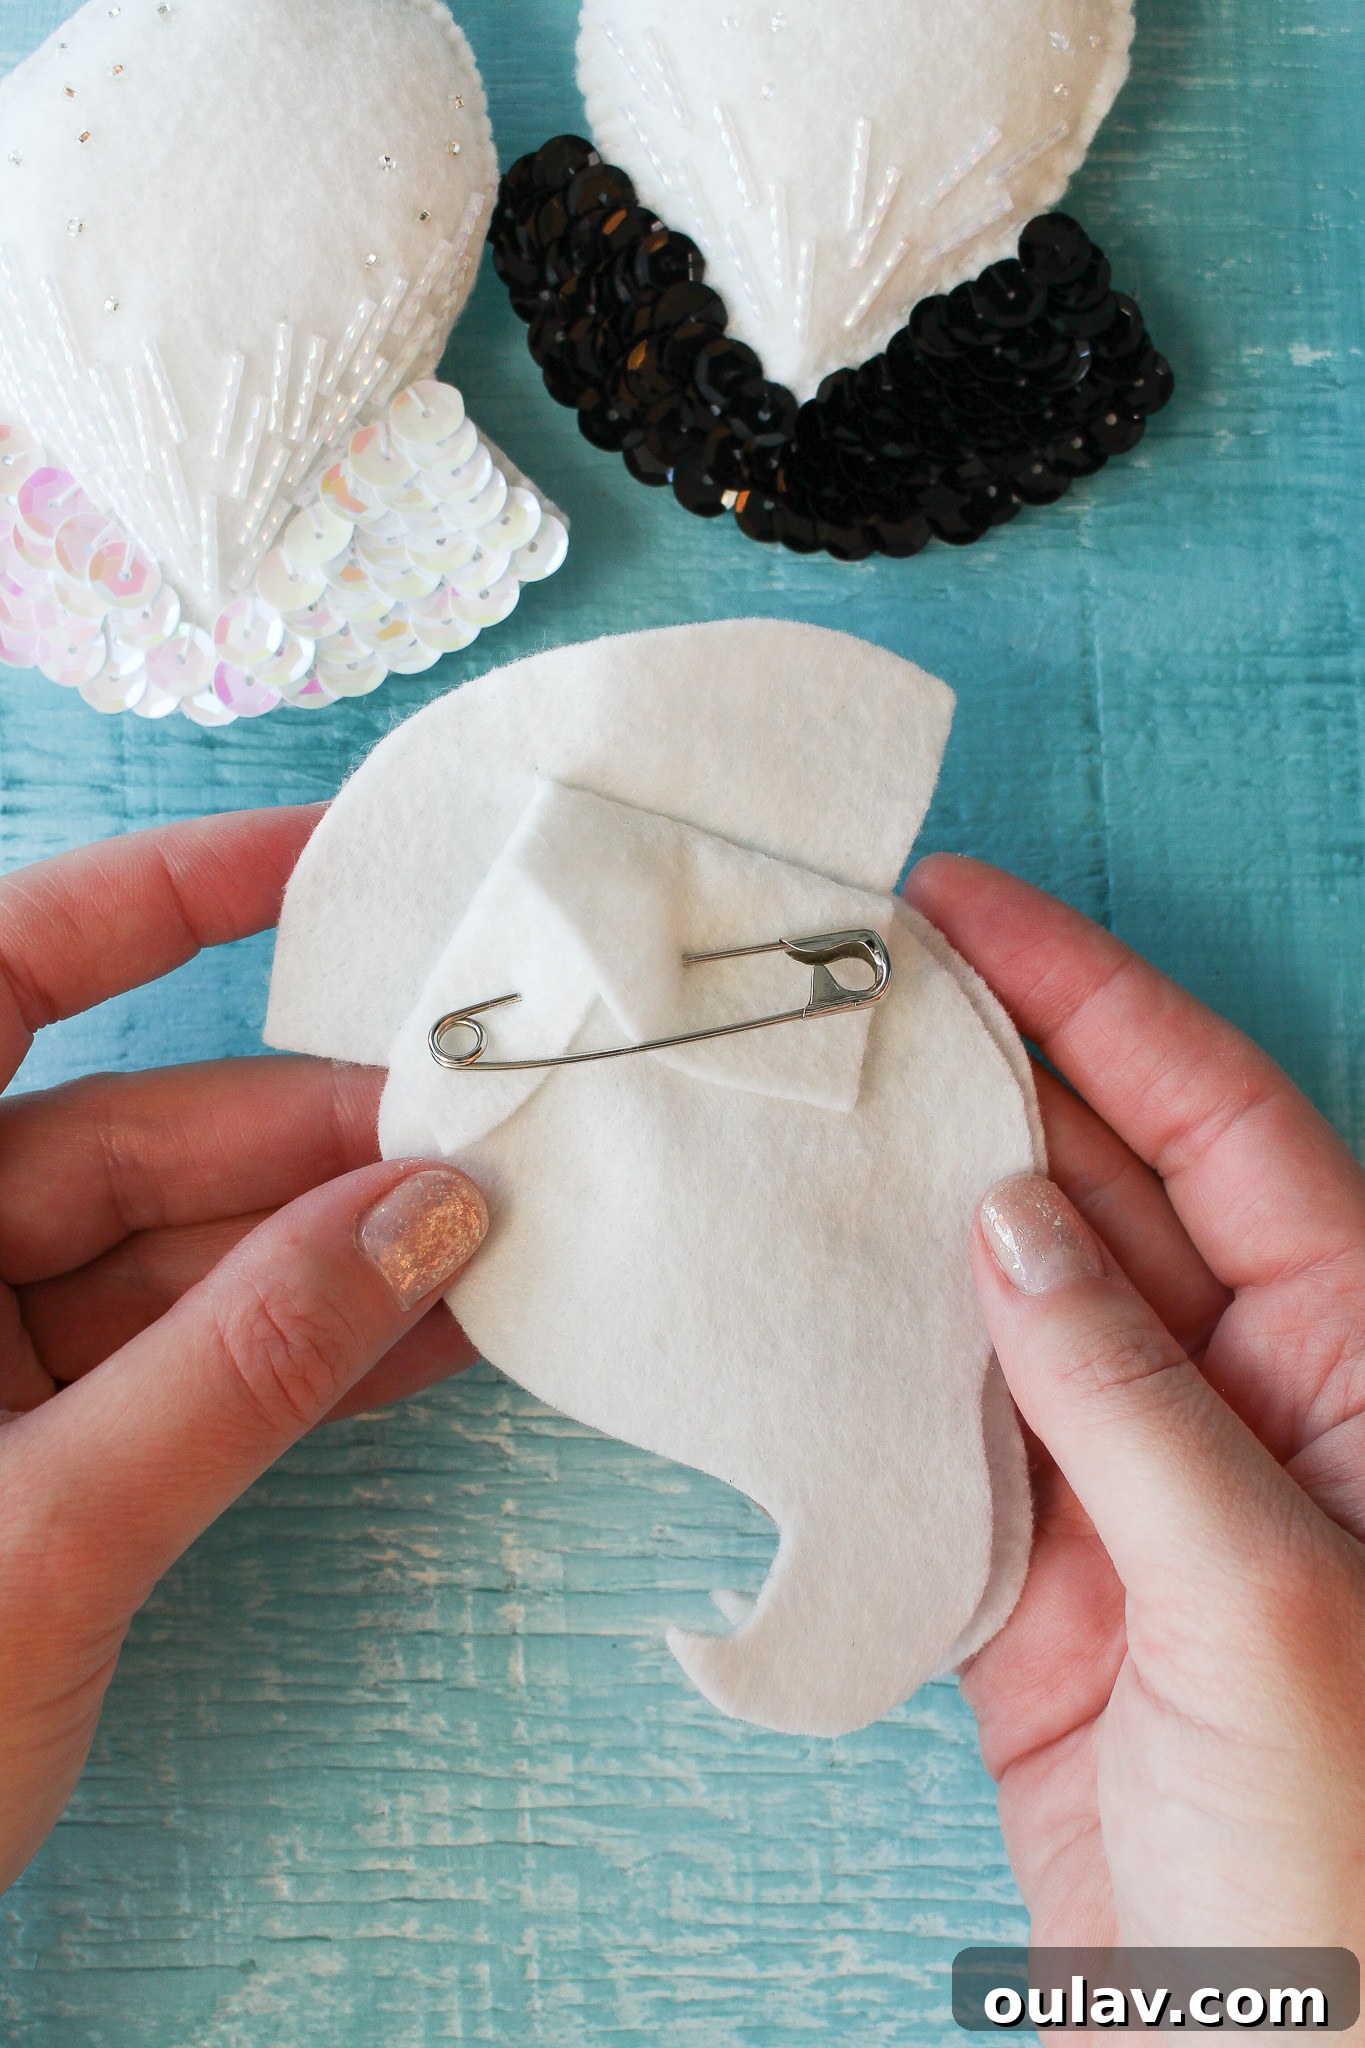
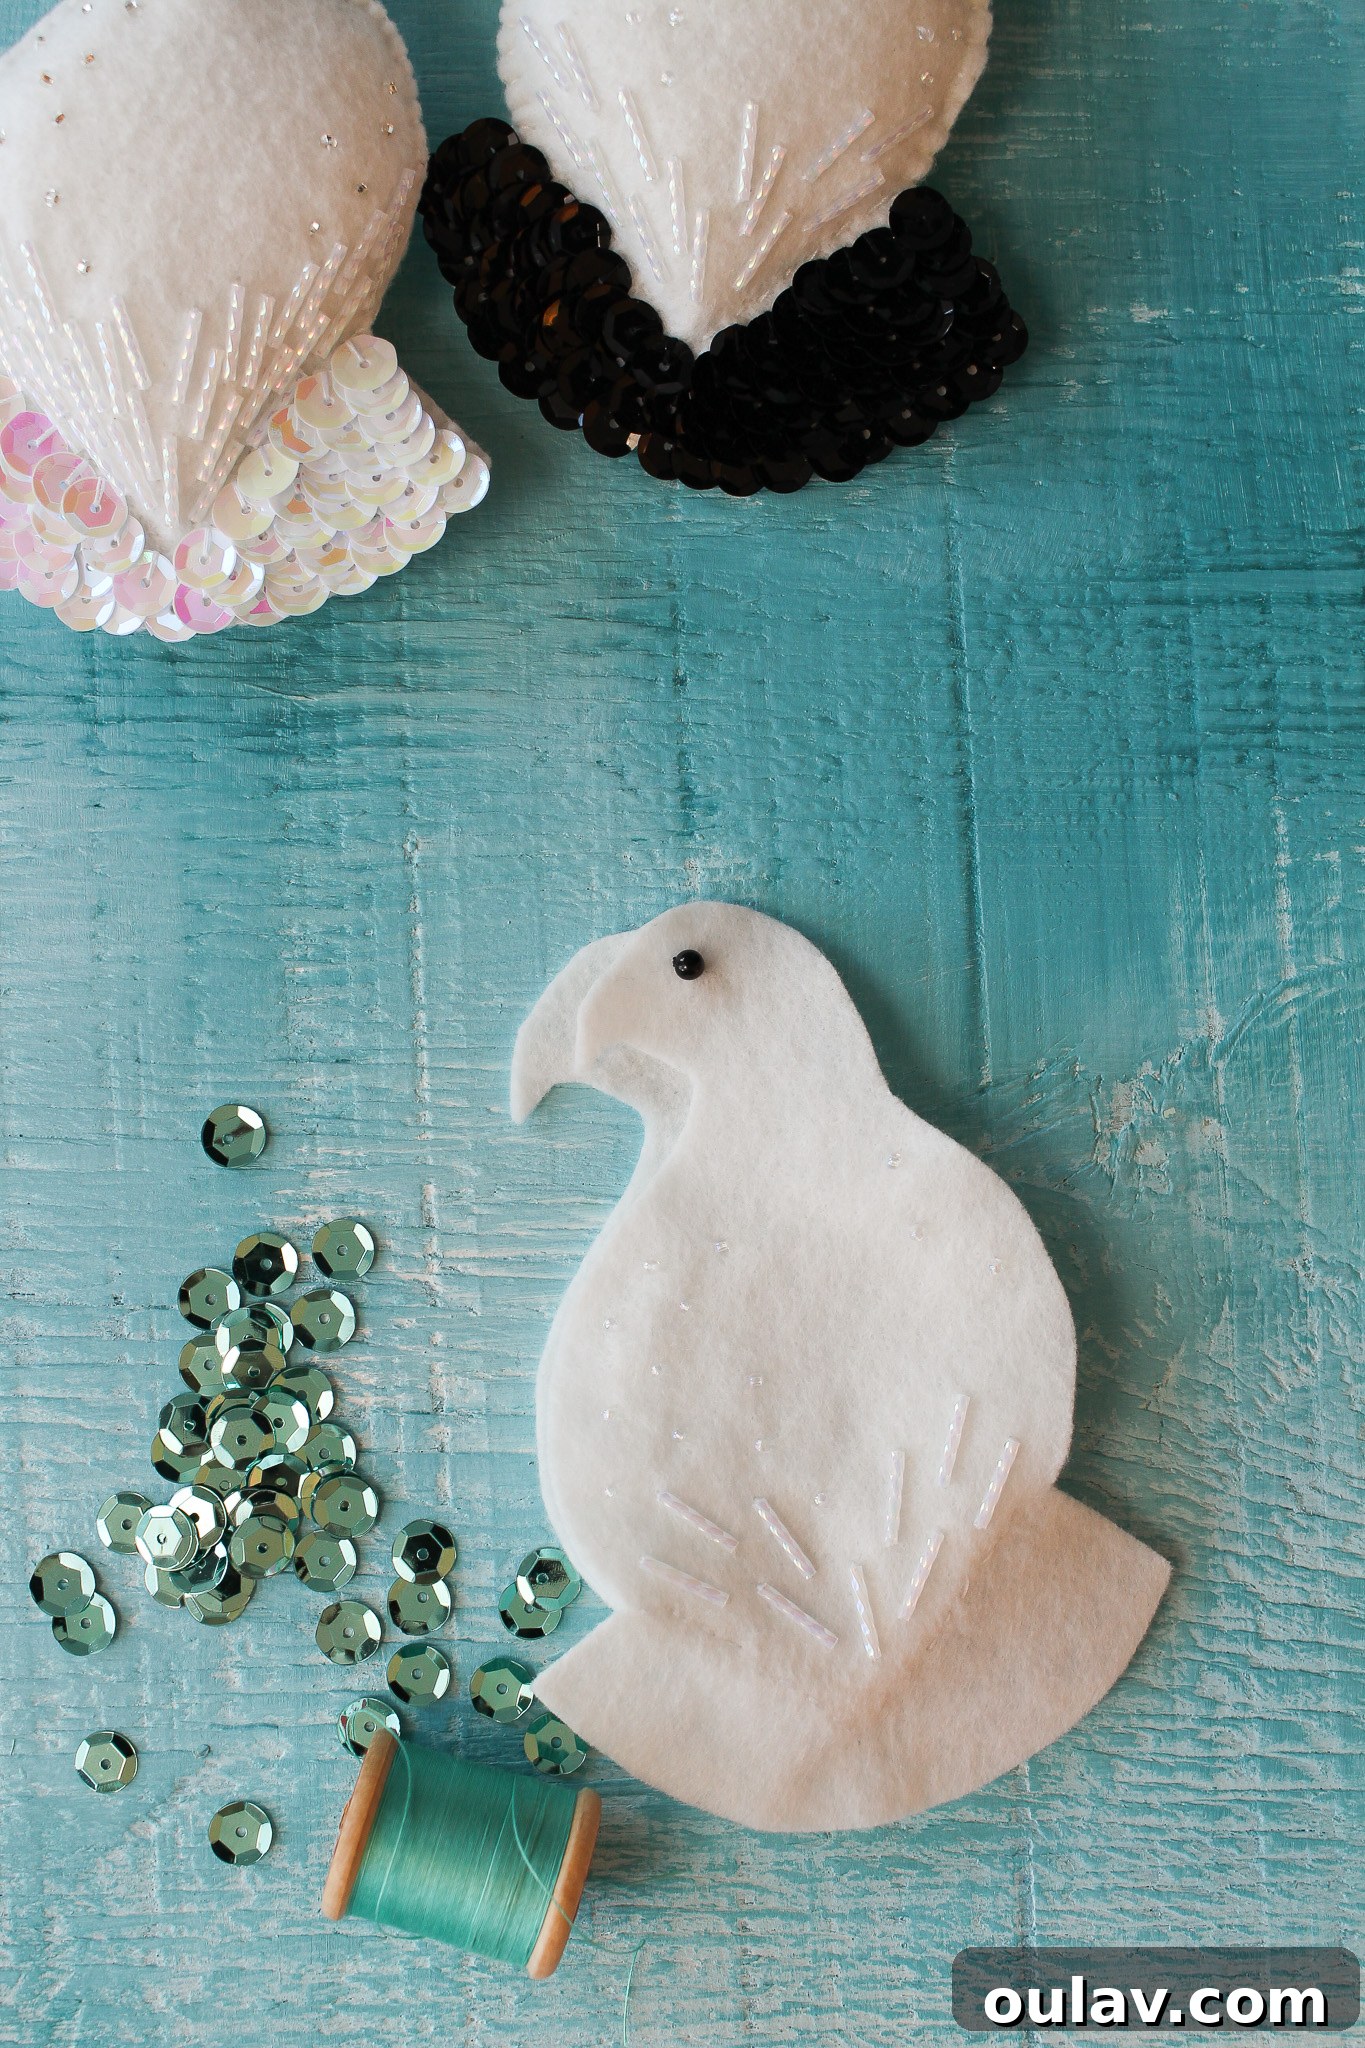
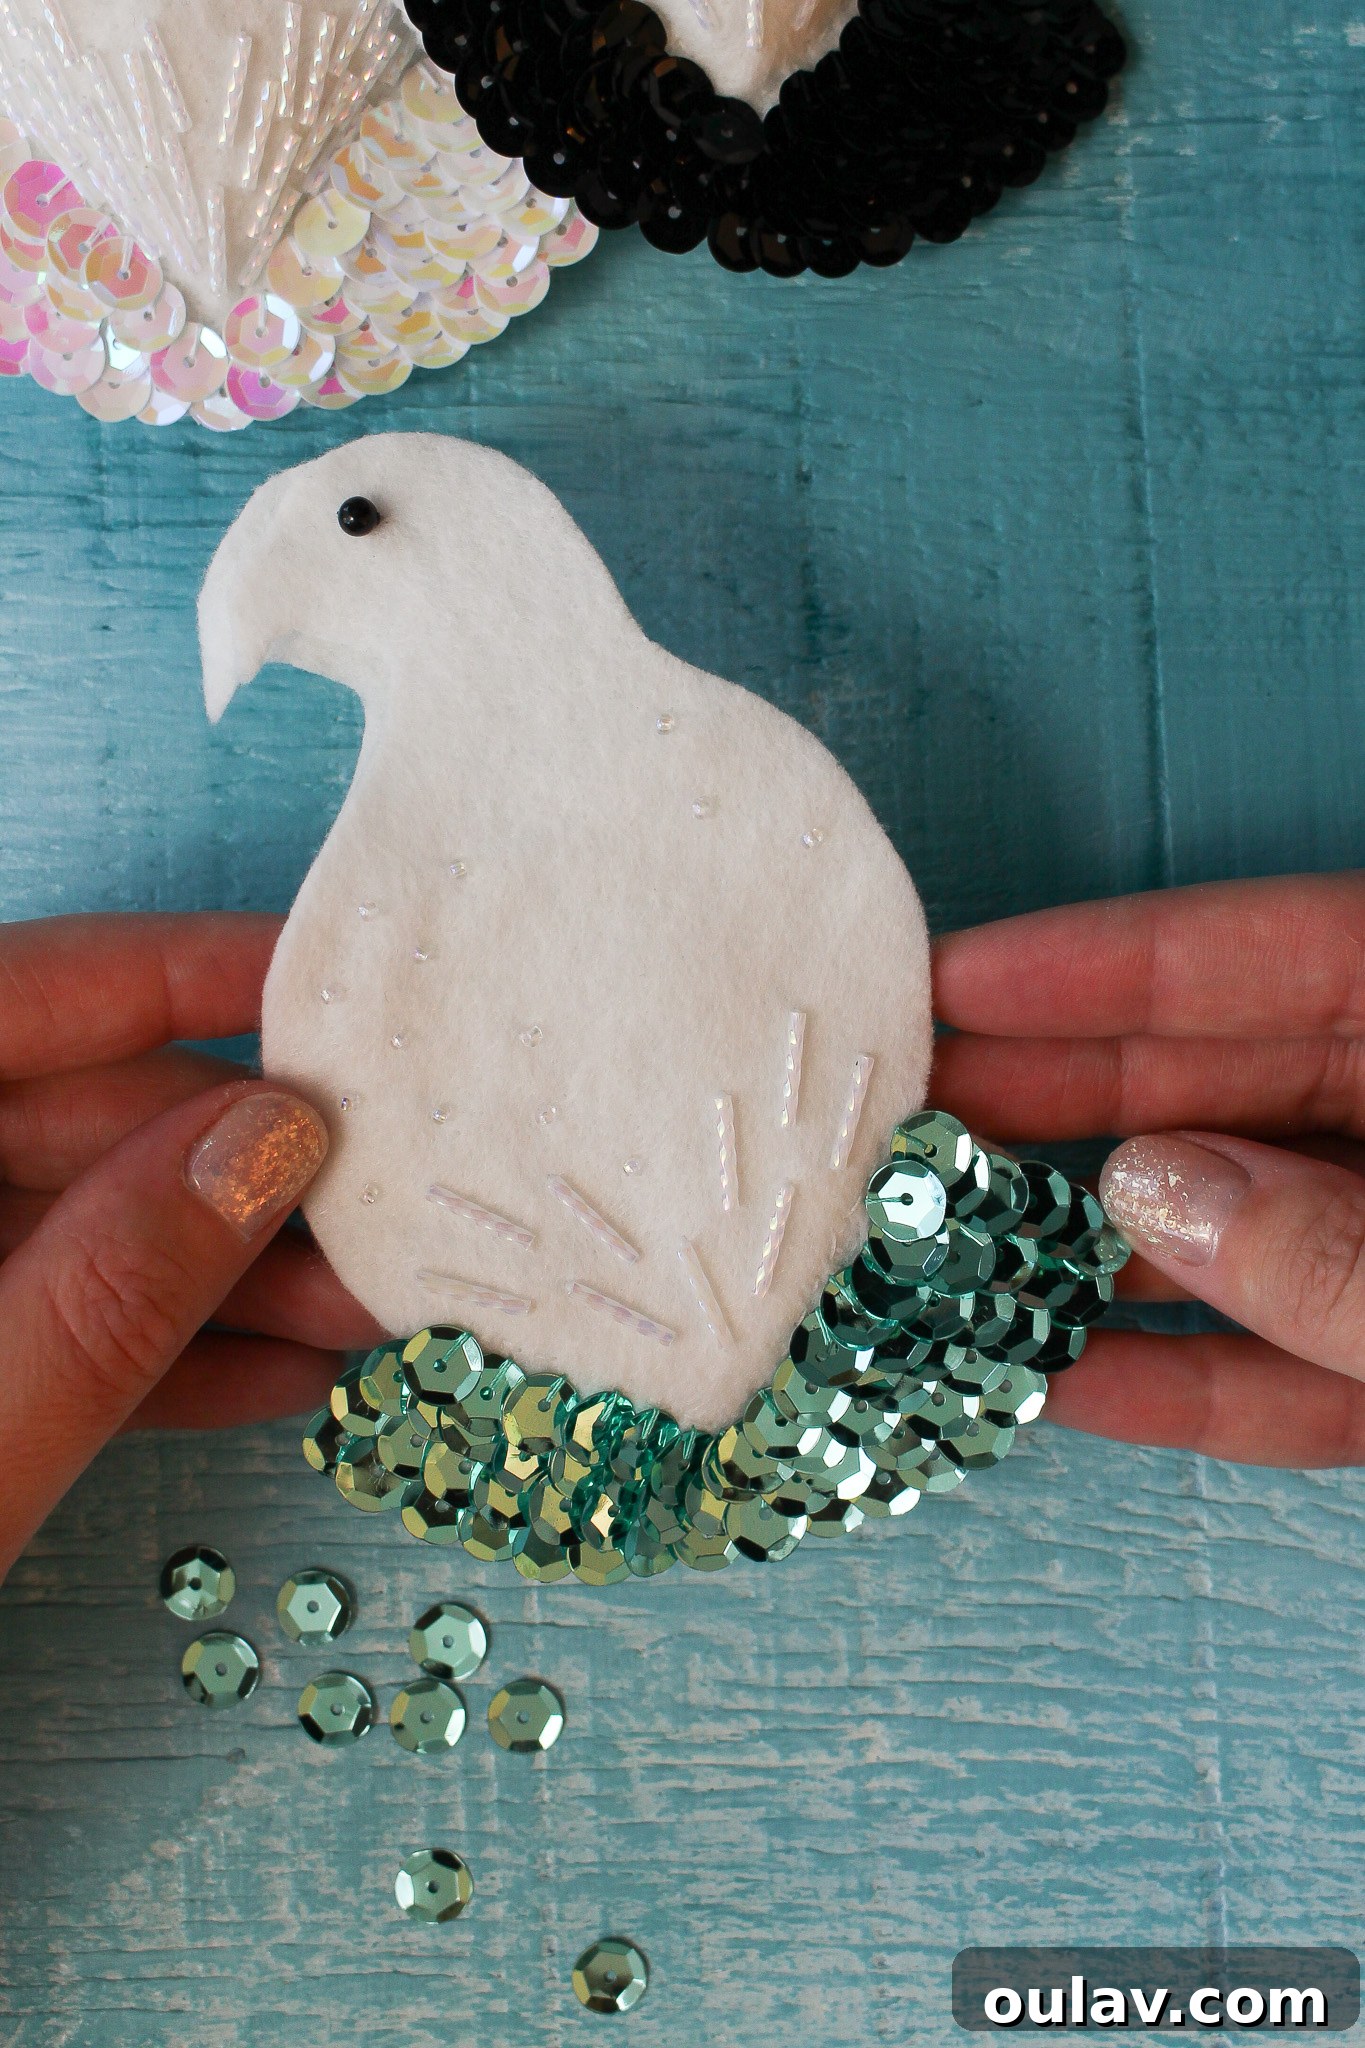
To stitch on the sequins, I attach them individually. Position a single sequin precisely where you want it. Bring your threaded needle up through the center hole of the sequin. Then, lay the thread across one side of the sequin, gently pressing it down, and push the needle back down through the felt at the outer edge of the sequin. For a continuous, seamless look, I recommend overlapping the sequins slightly as you stitch them on. This technique cleverly conceals the threads, creating a beautiful, dense covering that truly resembles delicate feathers.
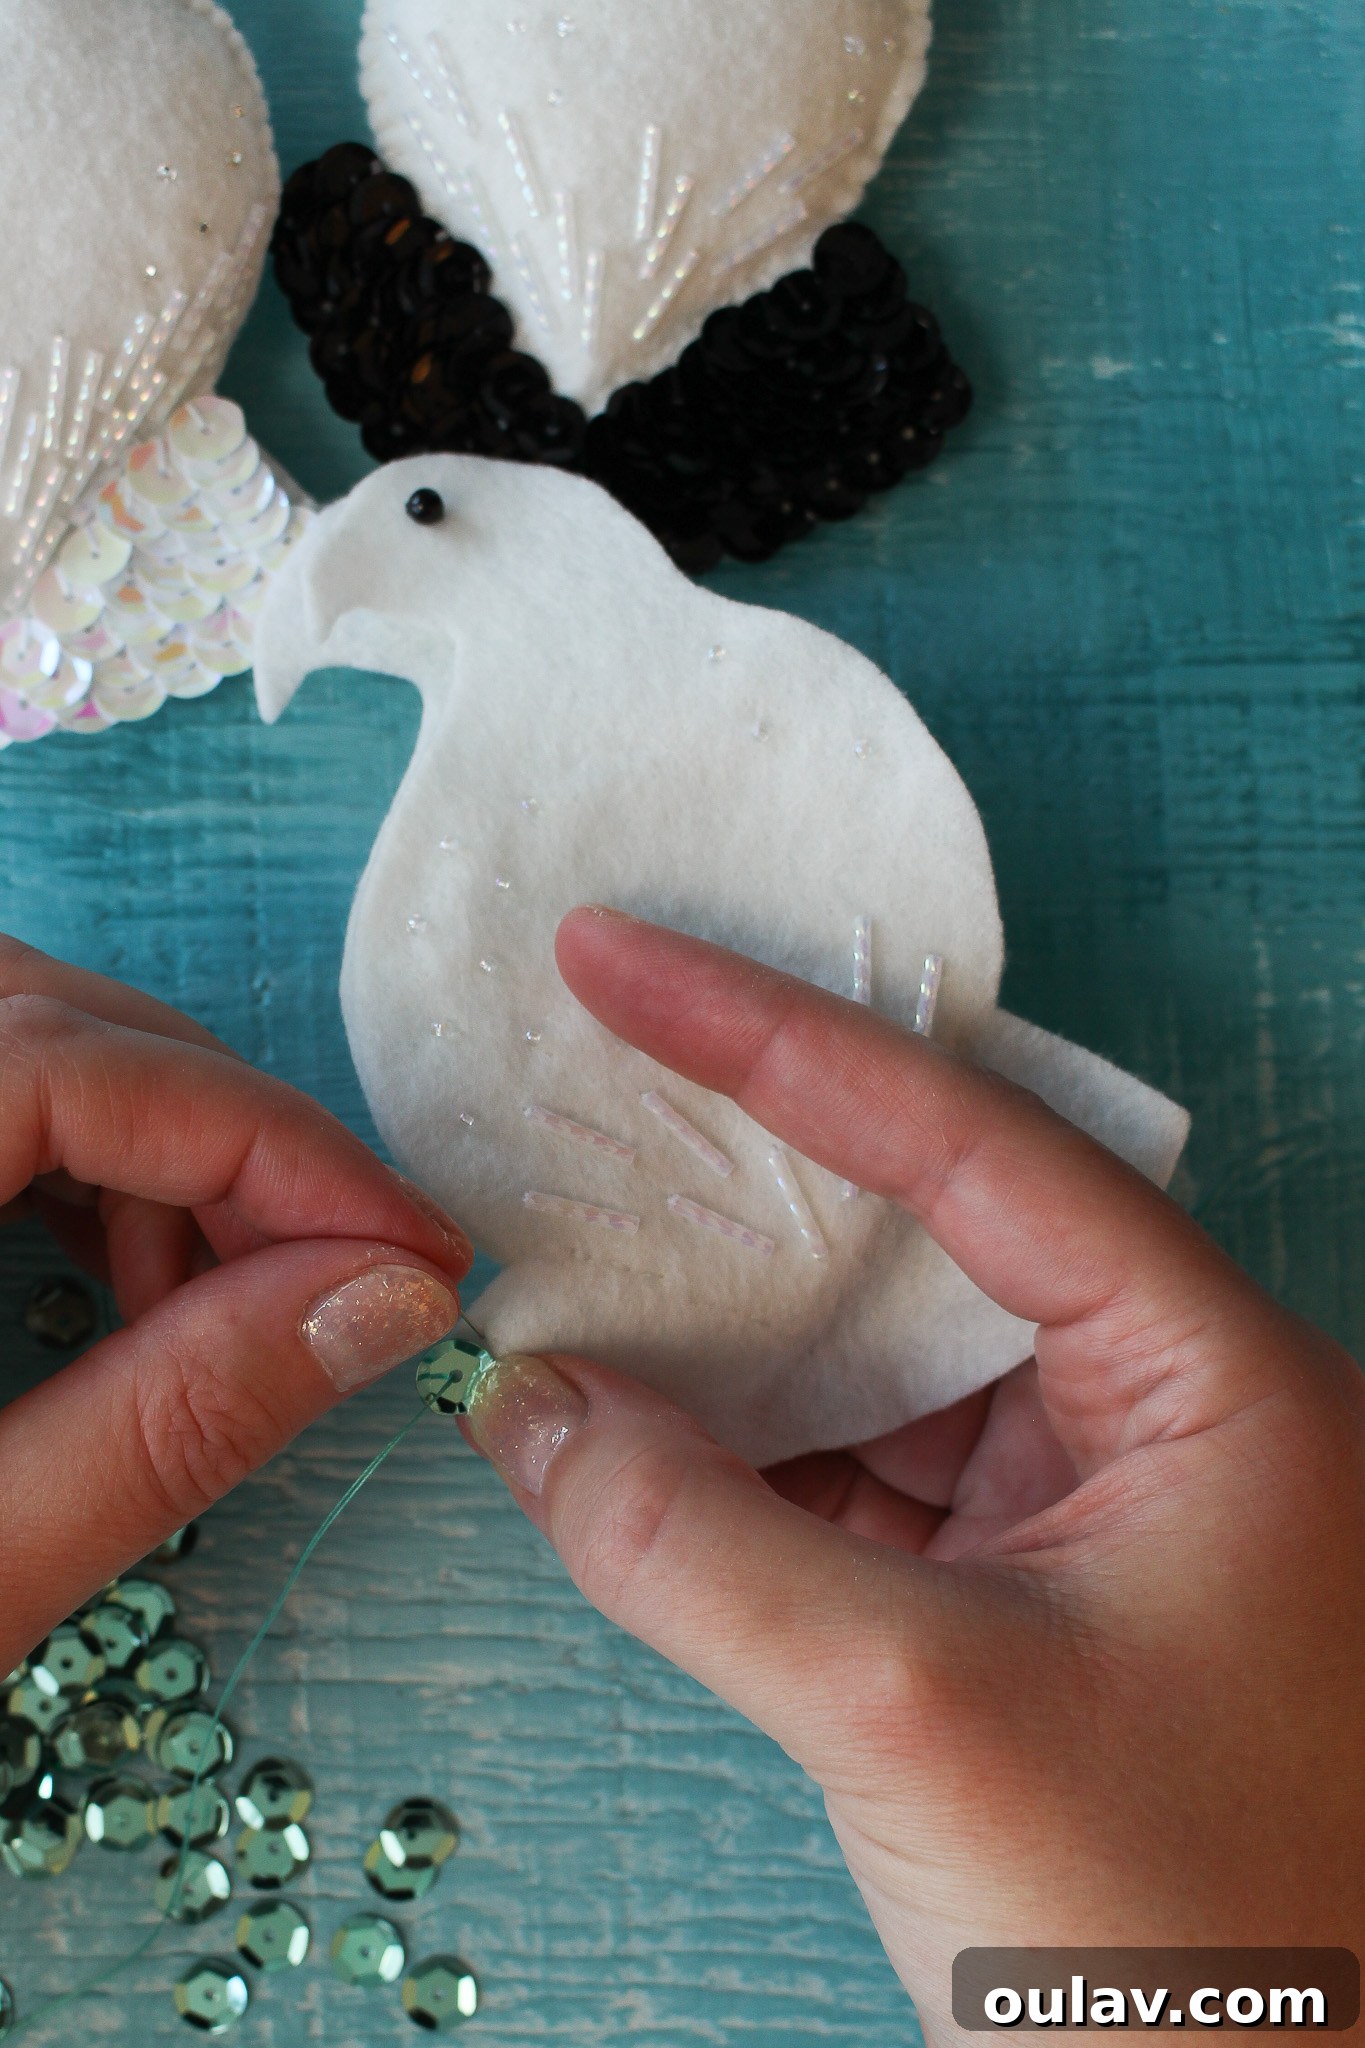
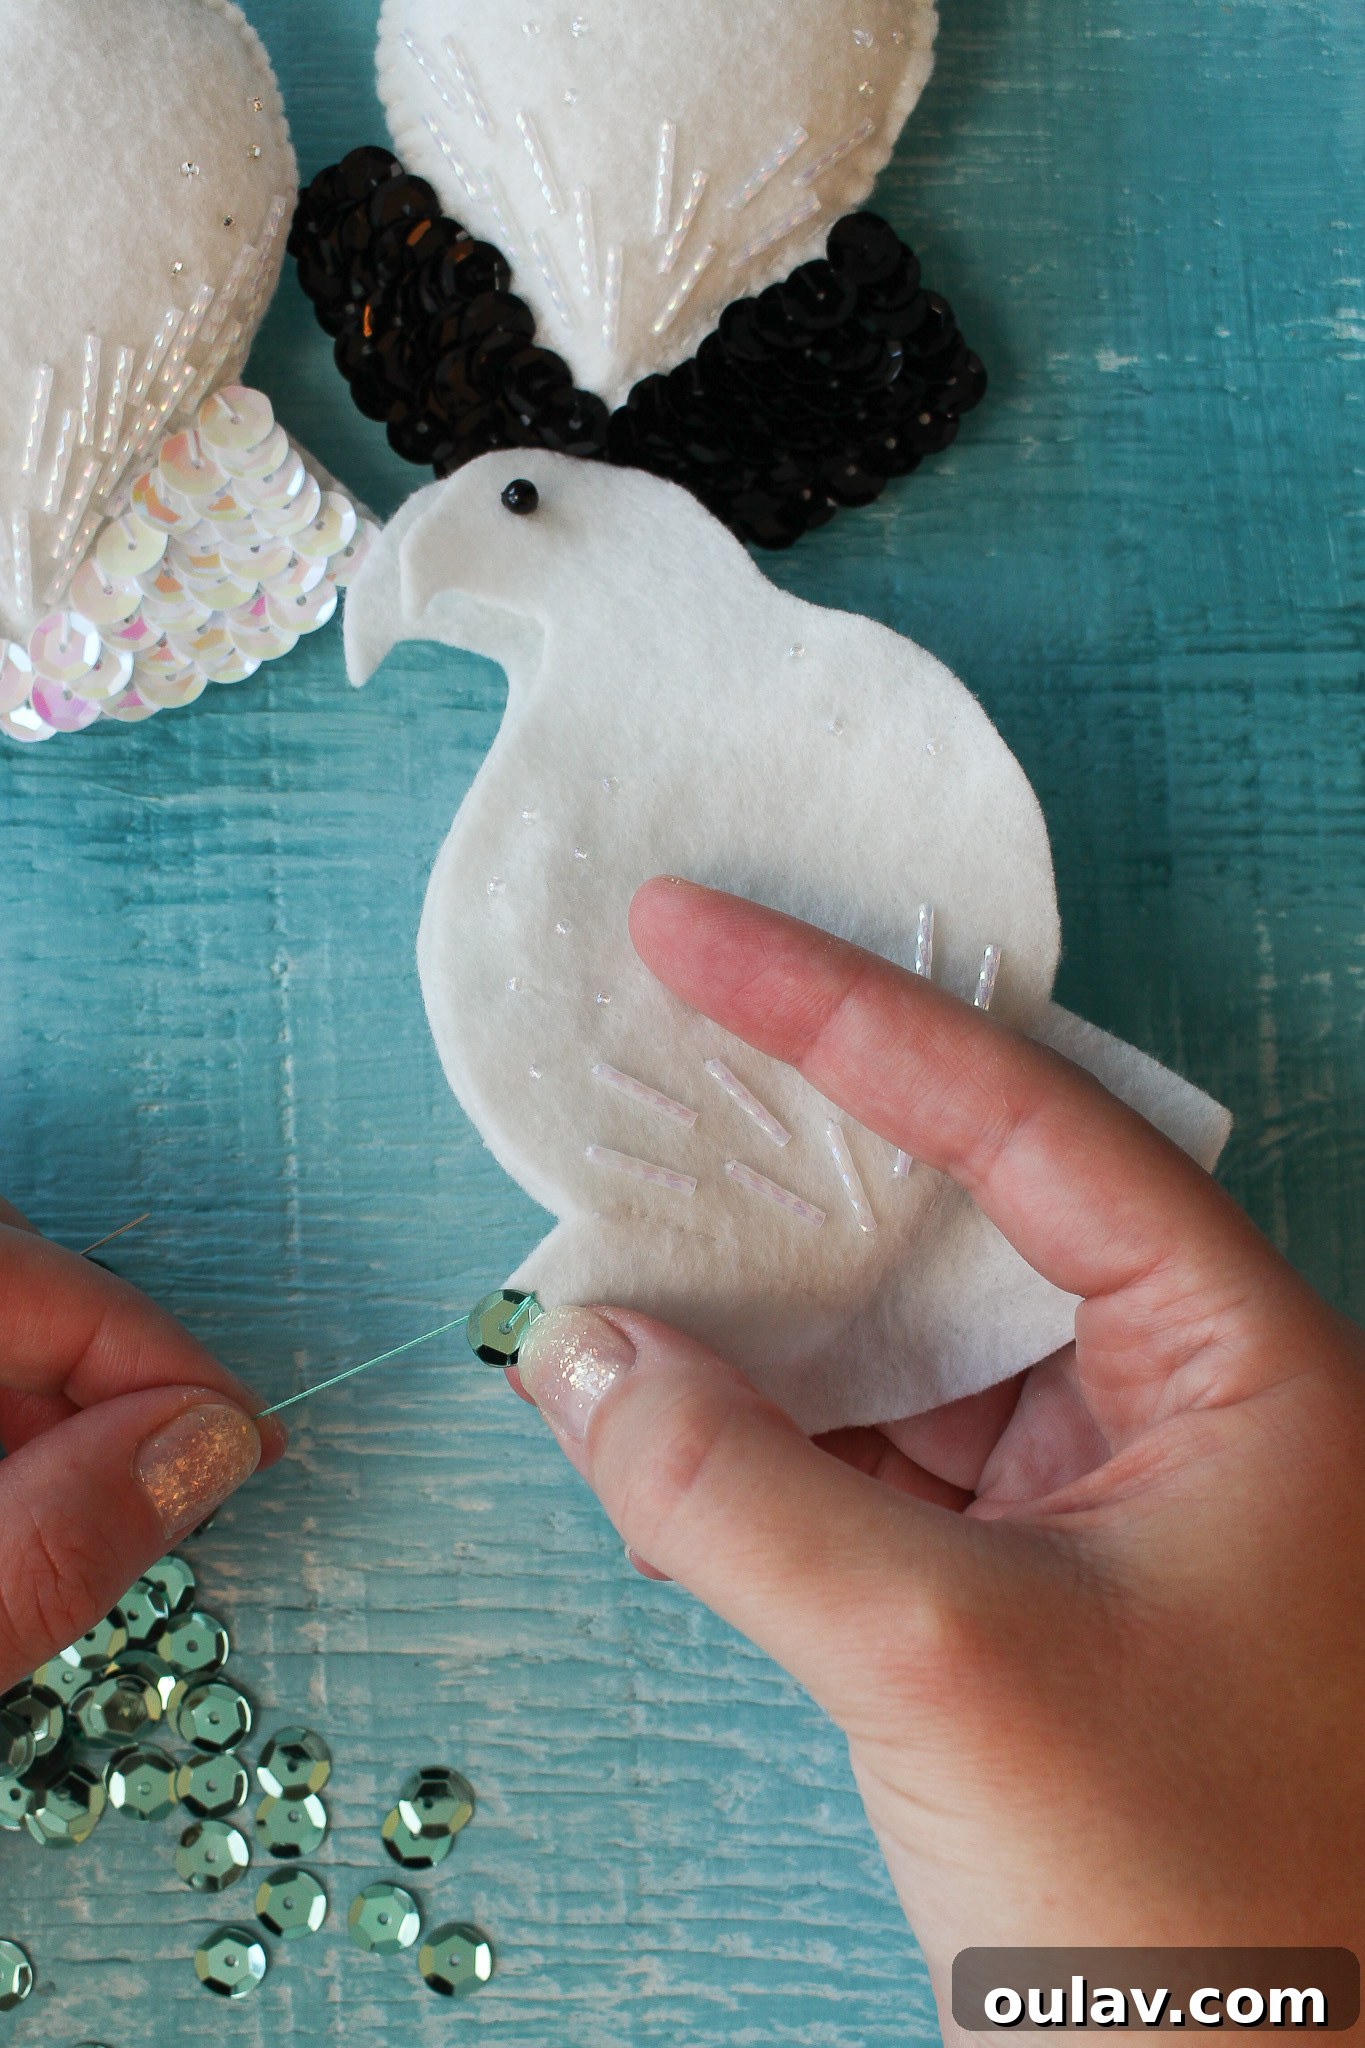
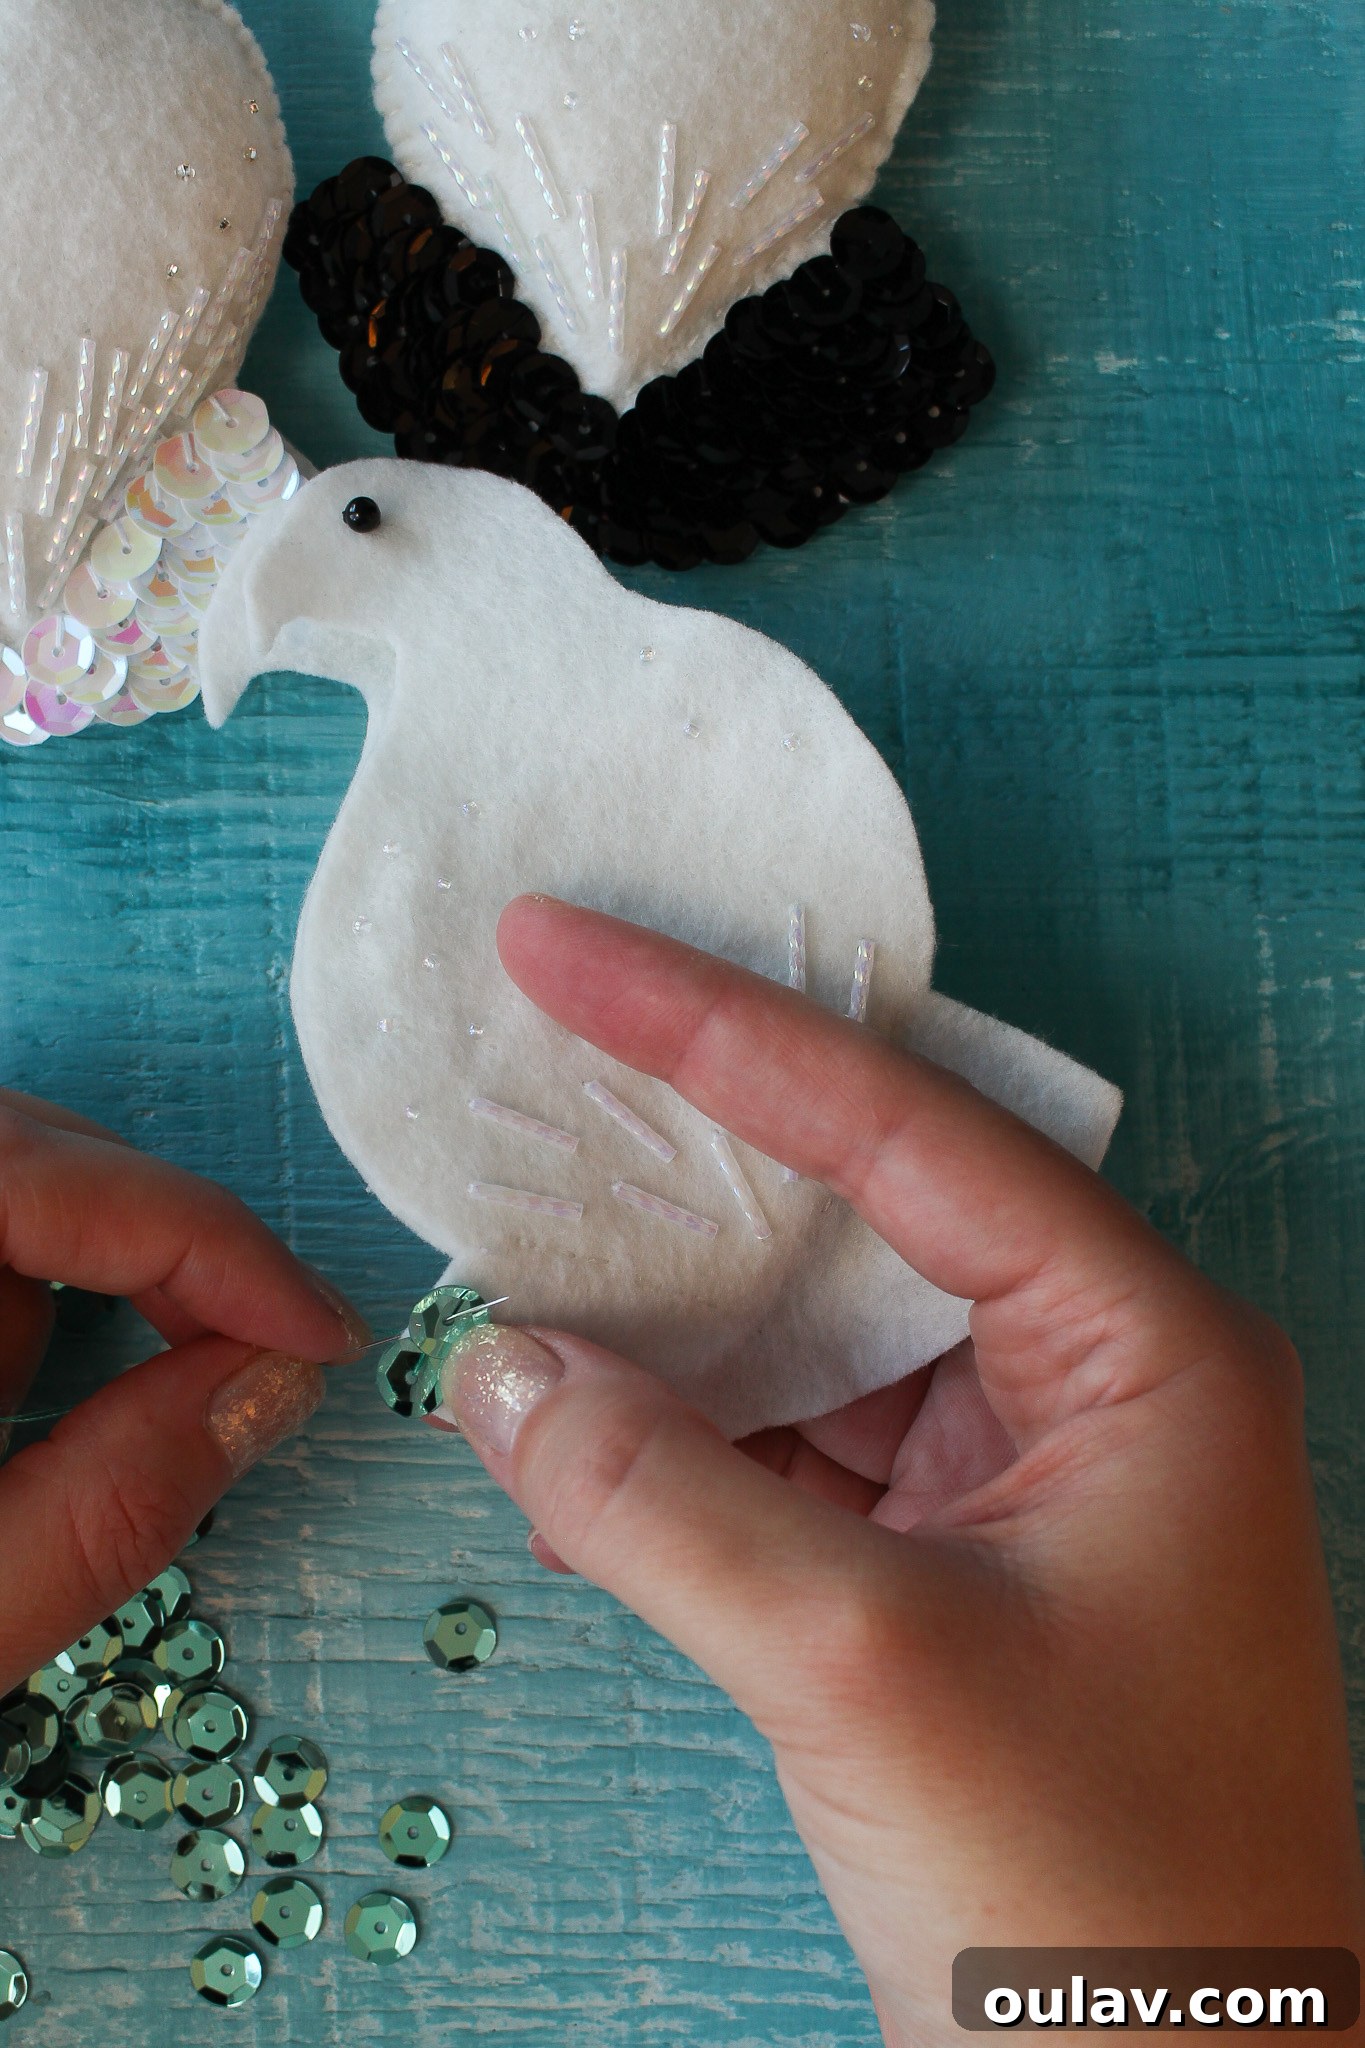
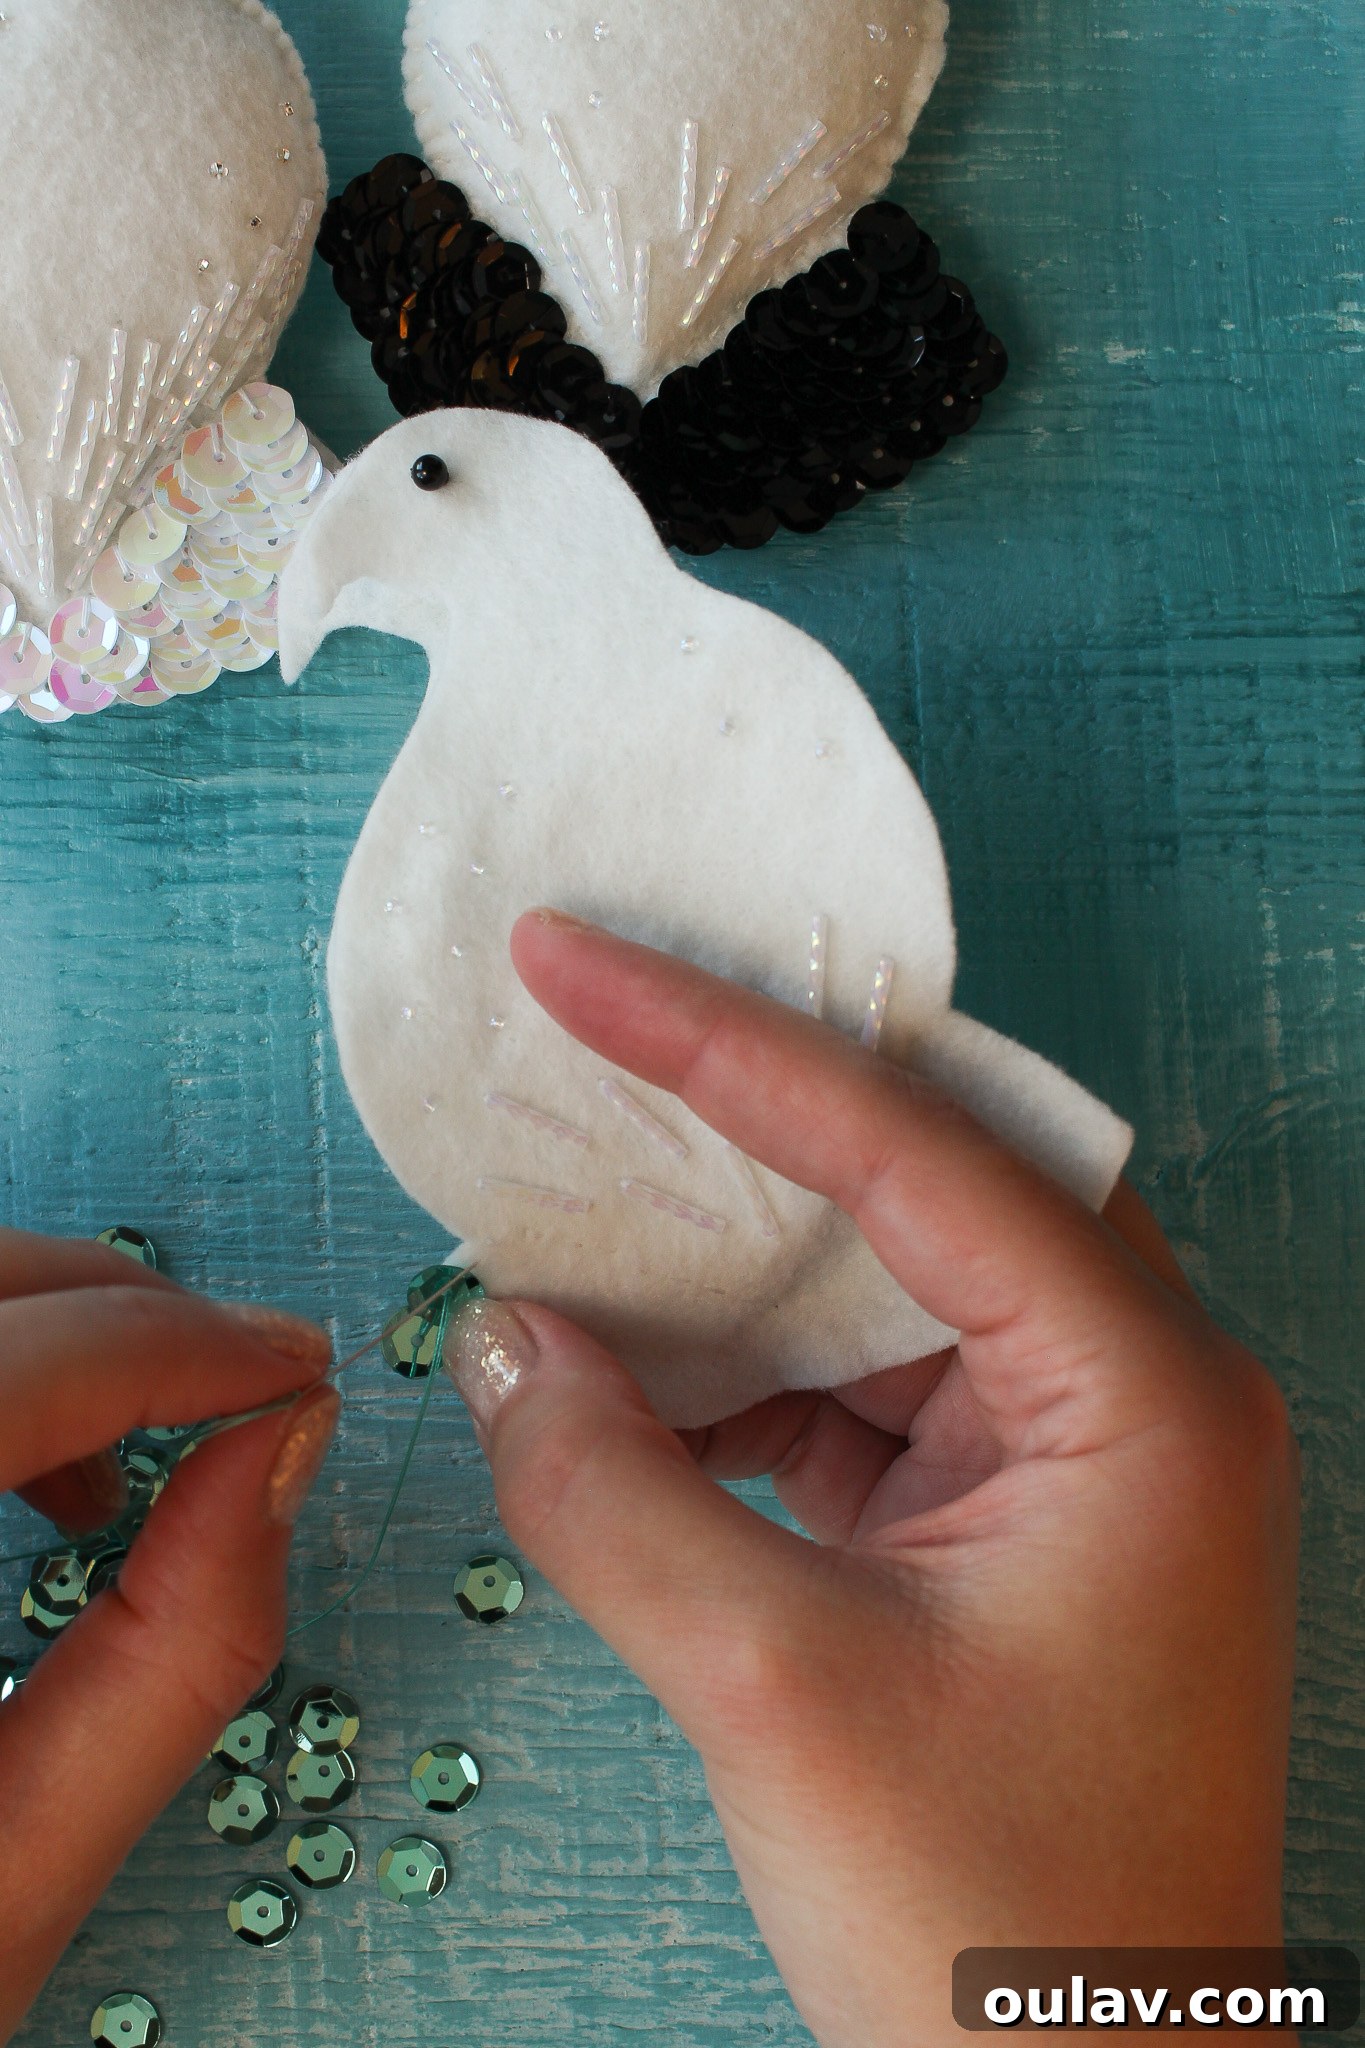
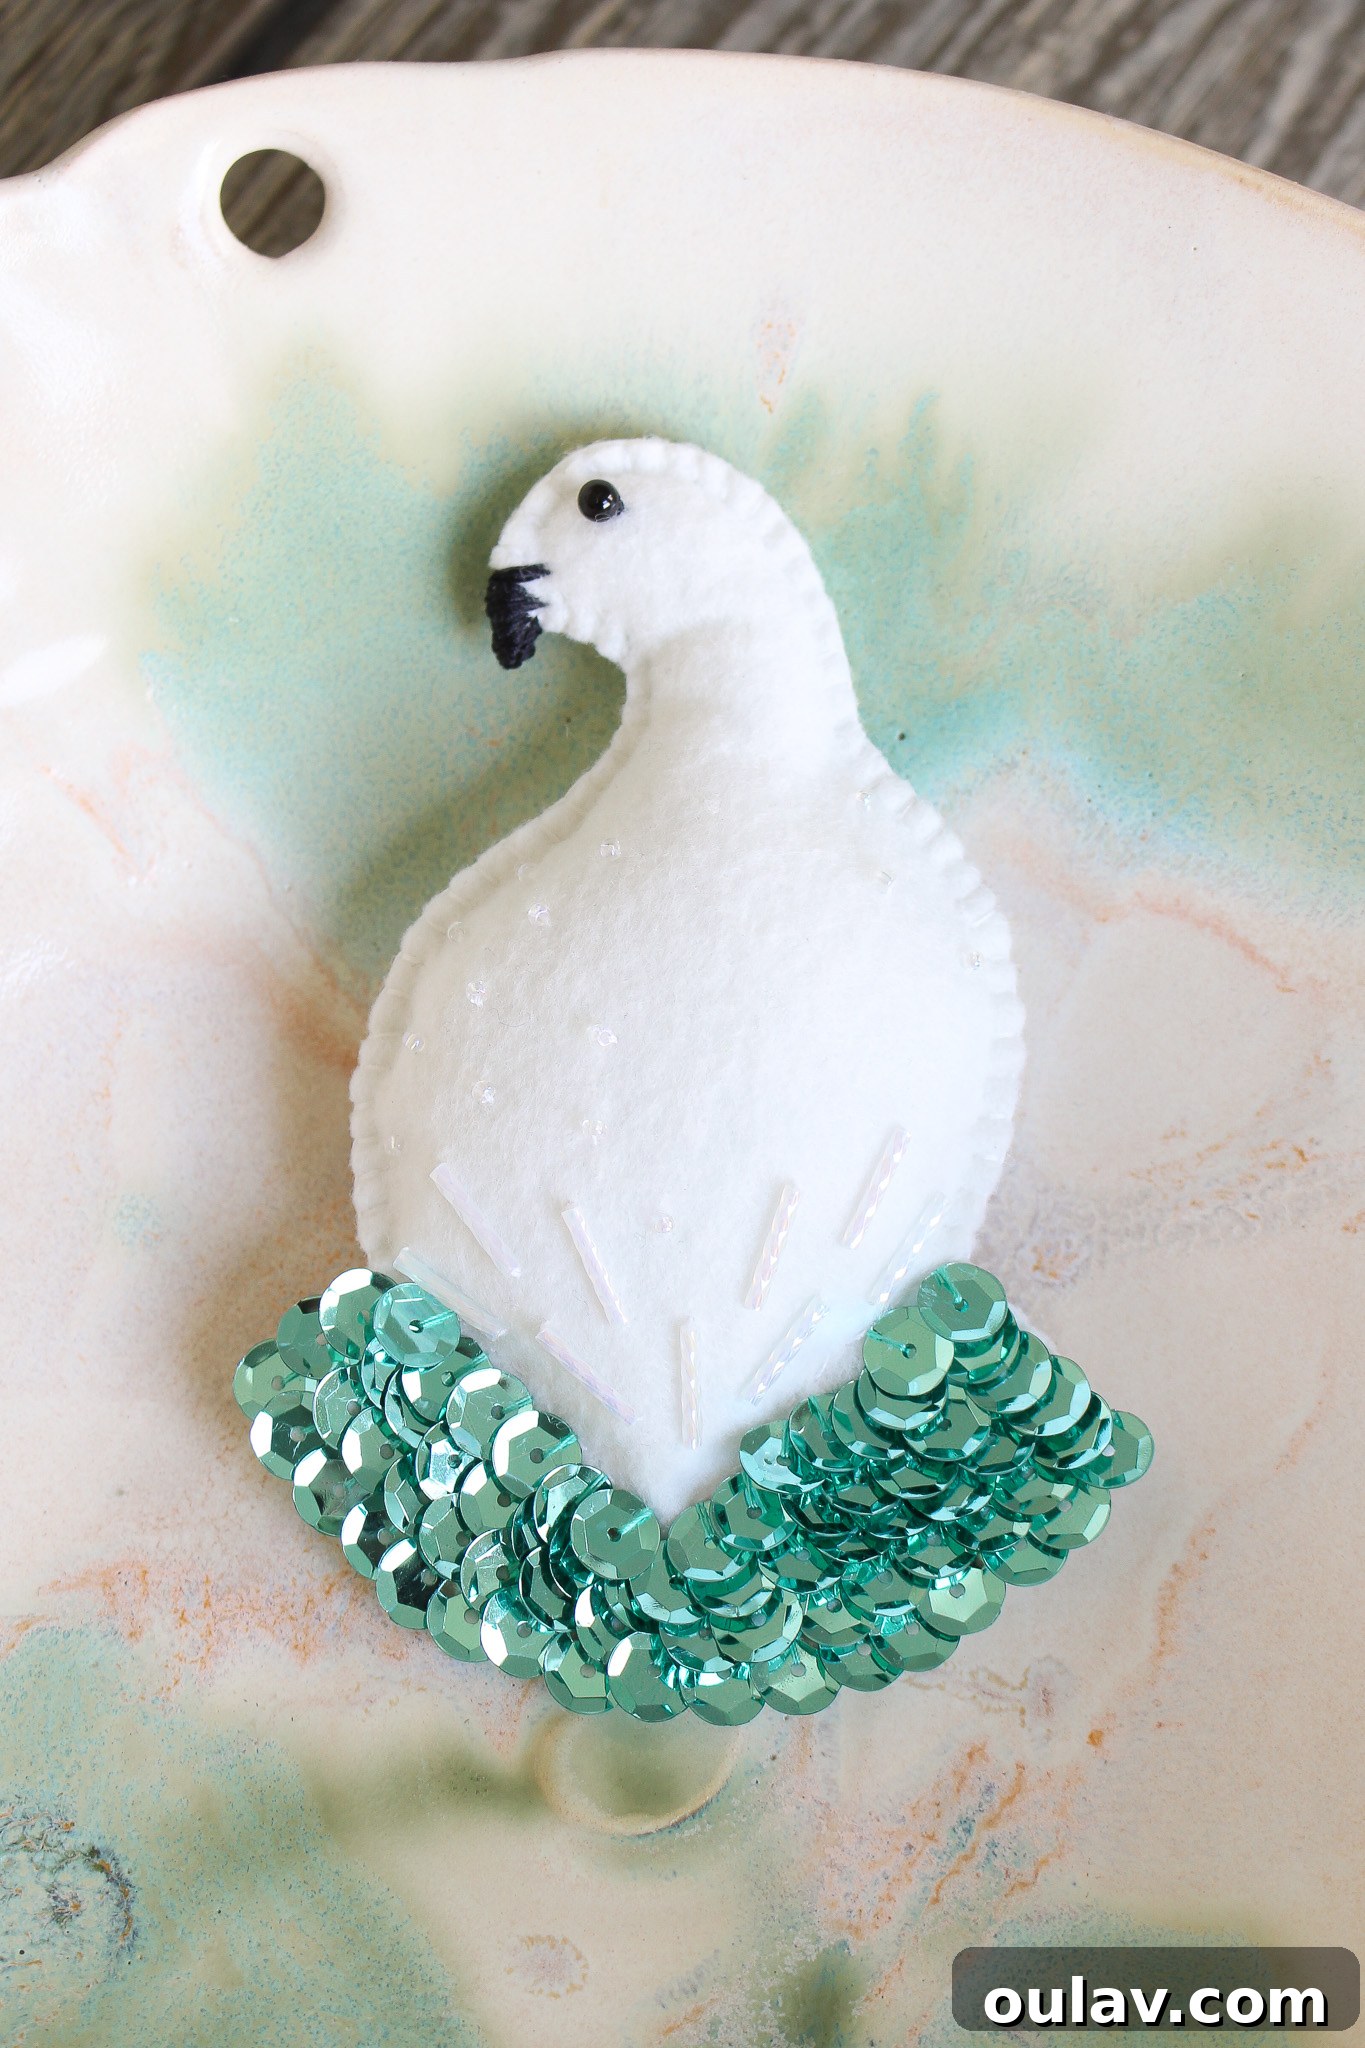
The number and arrangement of sequins are entirely up to your artistic vision. You can add just a few for a subtle gleam or cover a large area in dense rows for a truly show-stopping, feathery appearance. Feel free to mix and match with other beads for even more diverse textures and visual interest. For my Ptarmigan, I stitched on multiple rows of sequins to achieve a wonderfully rich and feathery look.
Sewing the Felt Ornament Together: The Blanket Stitch
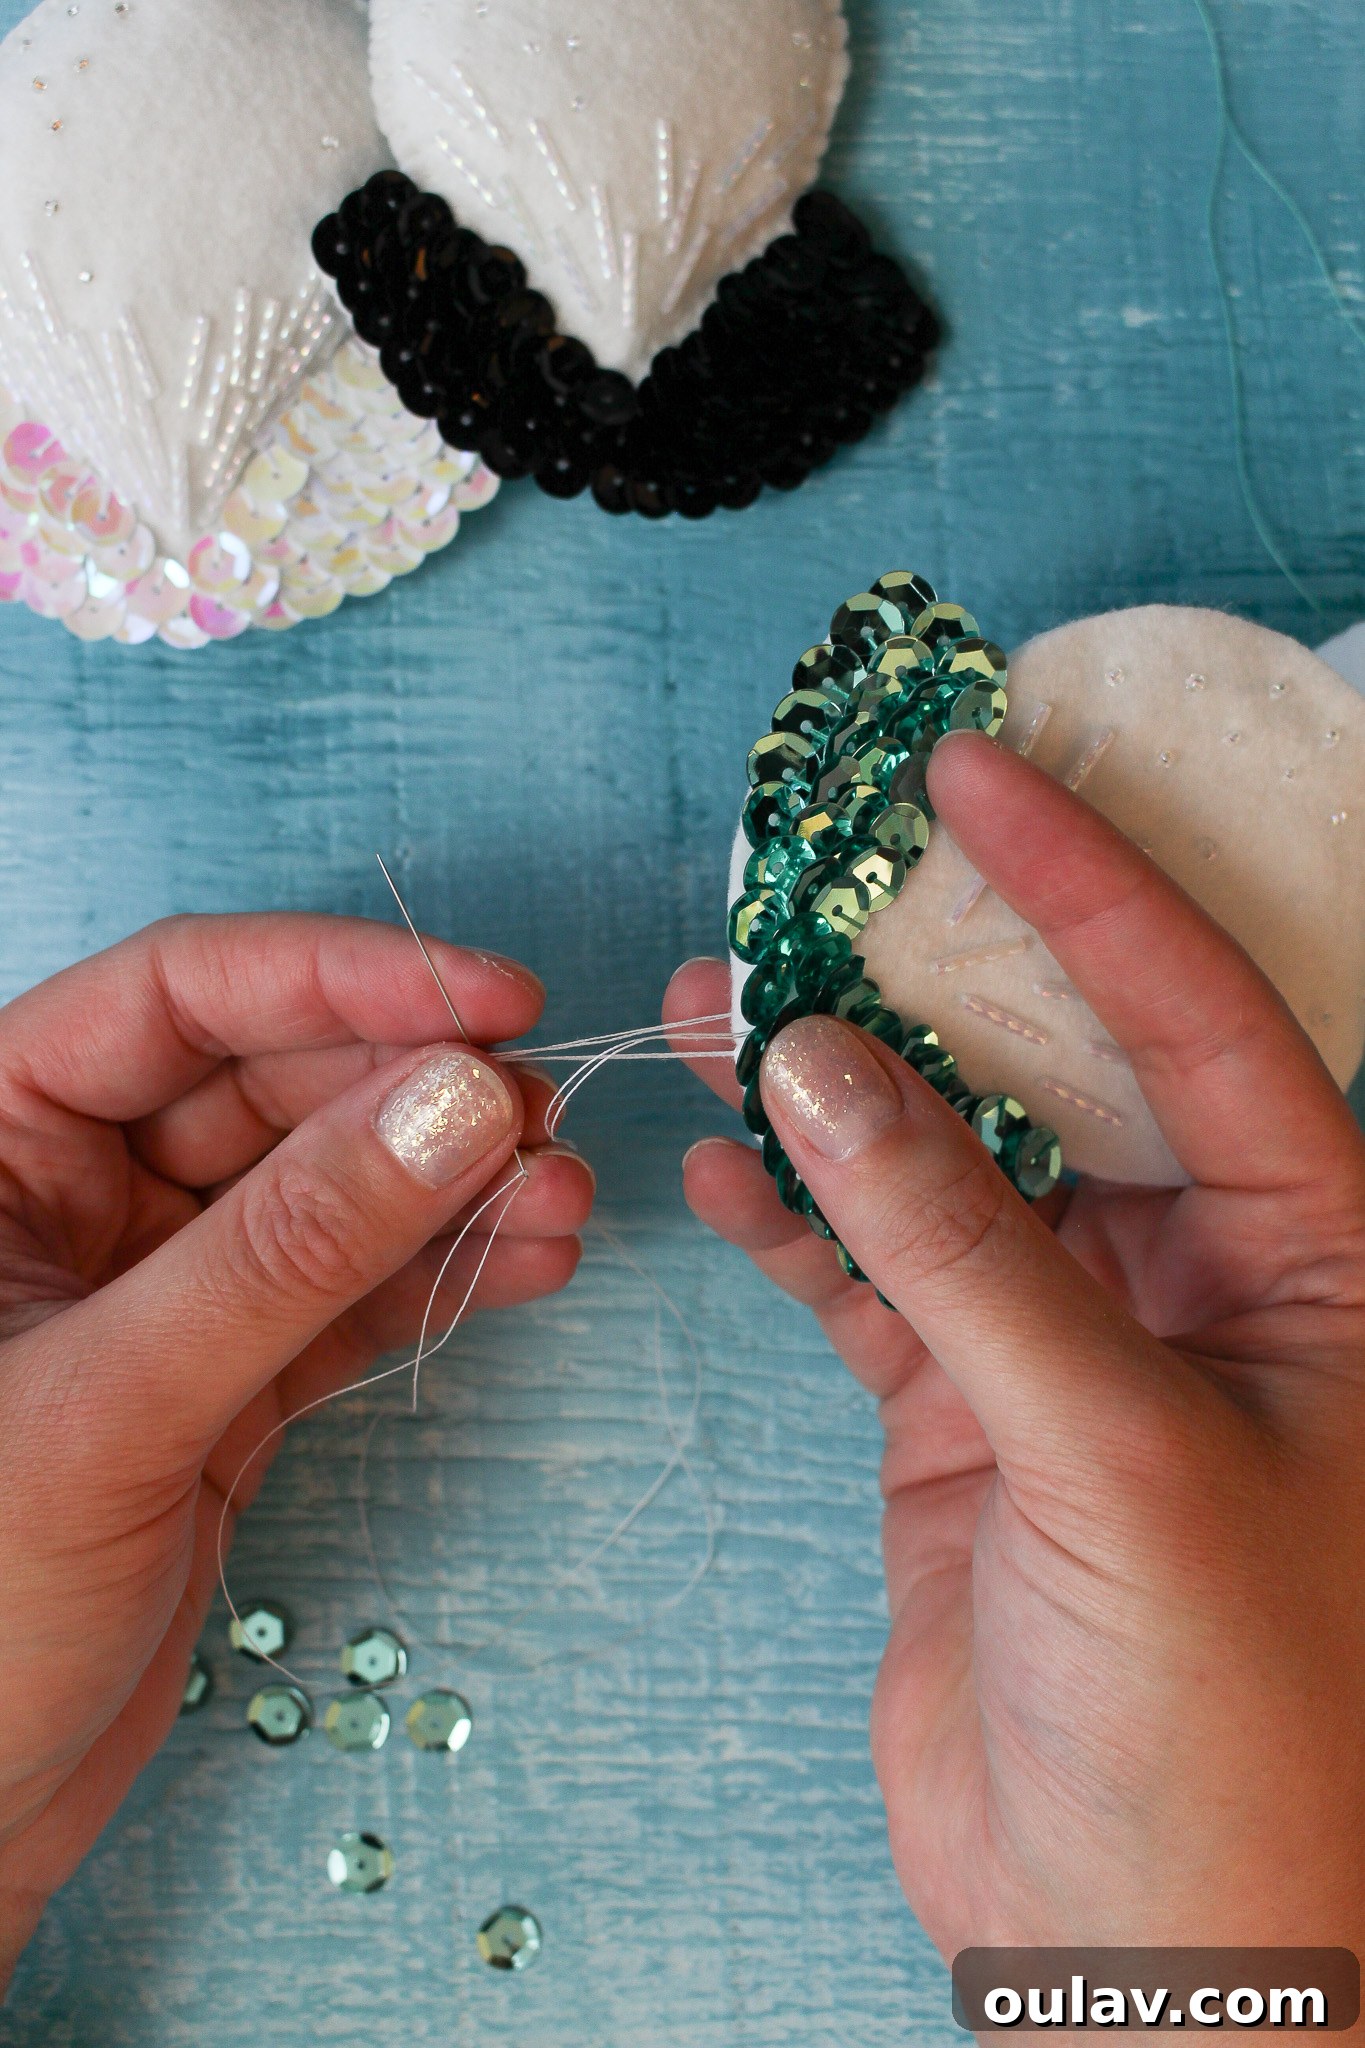
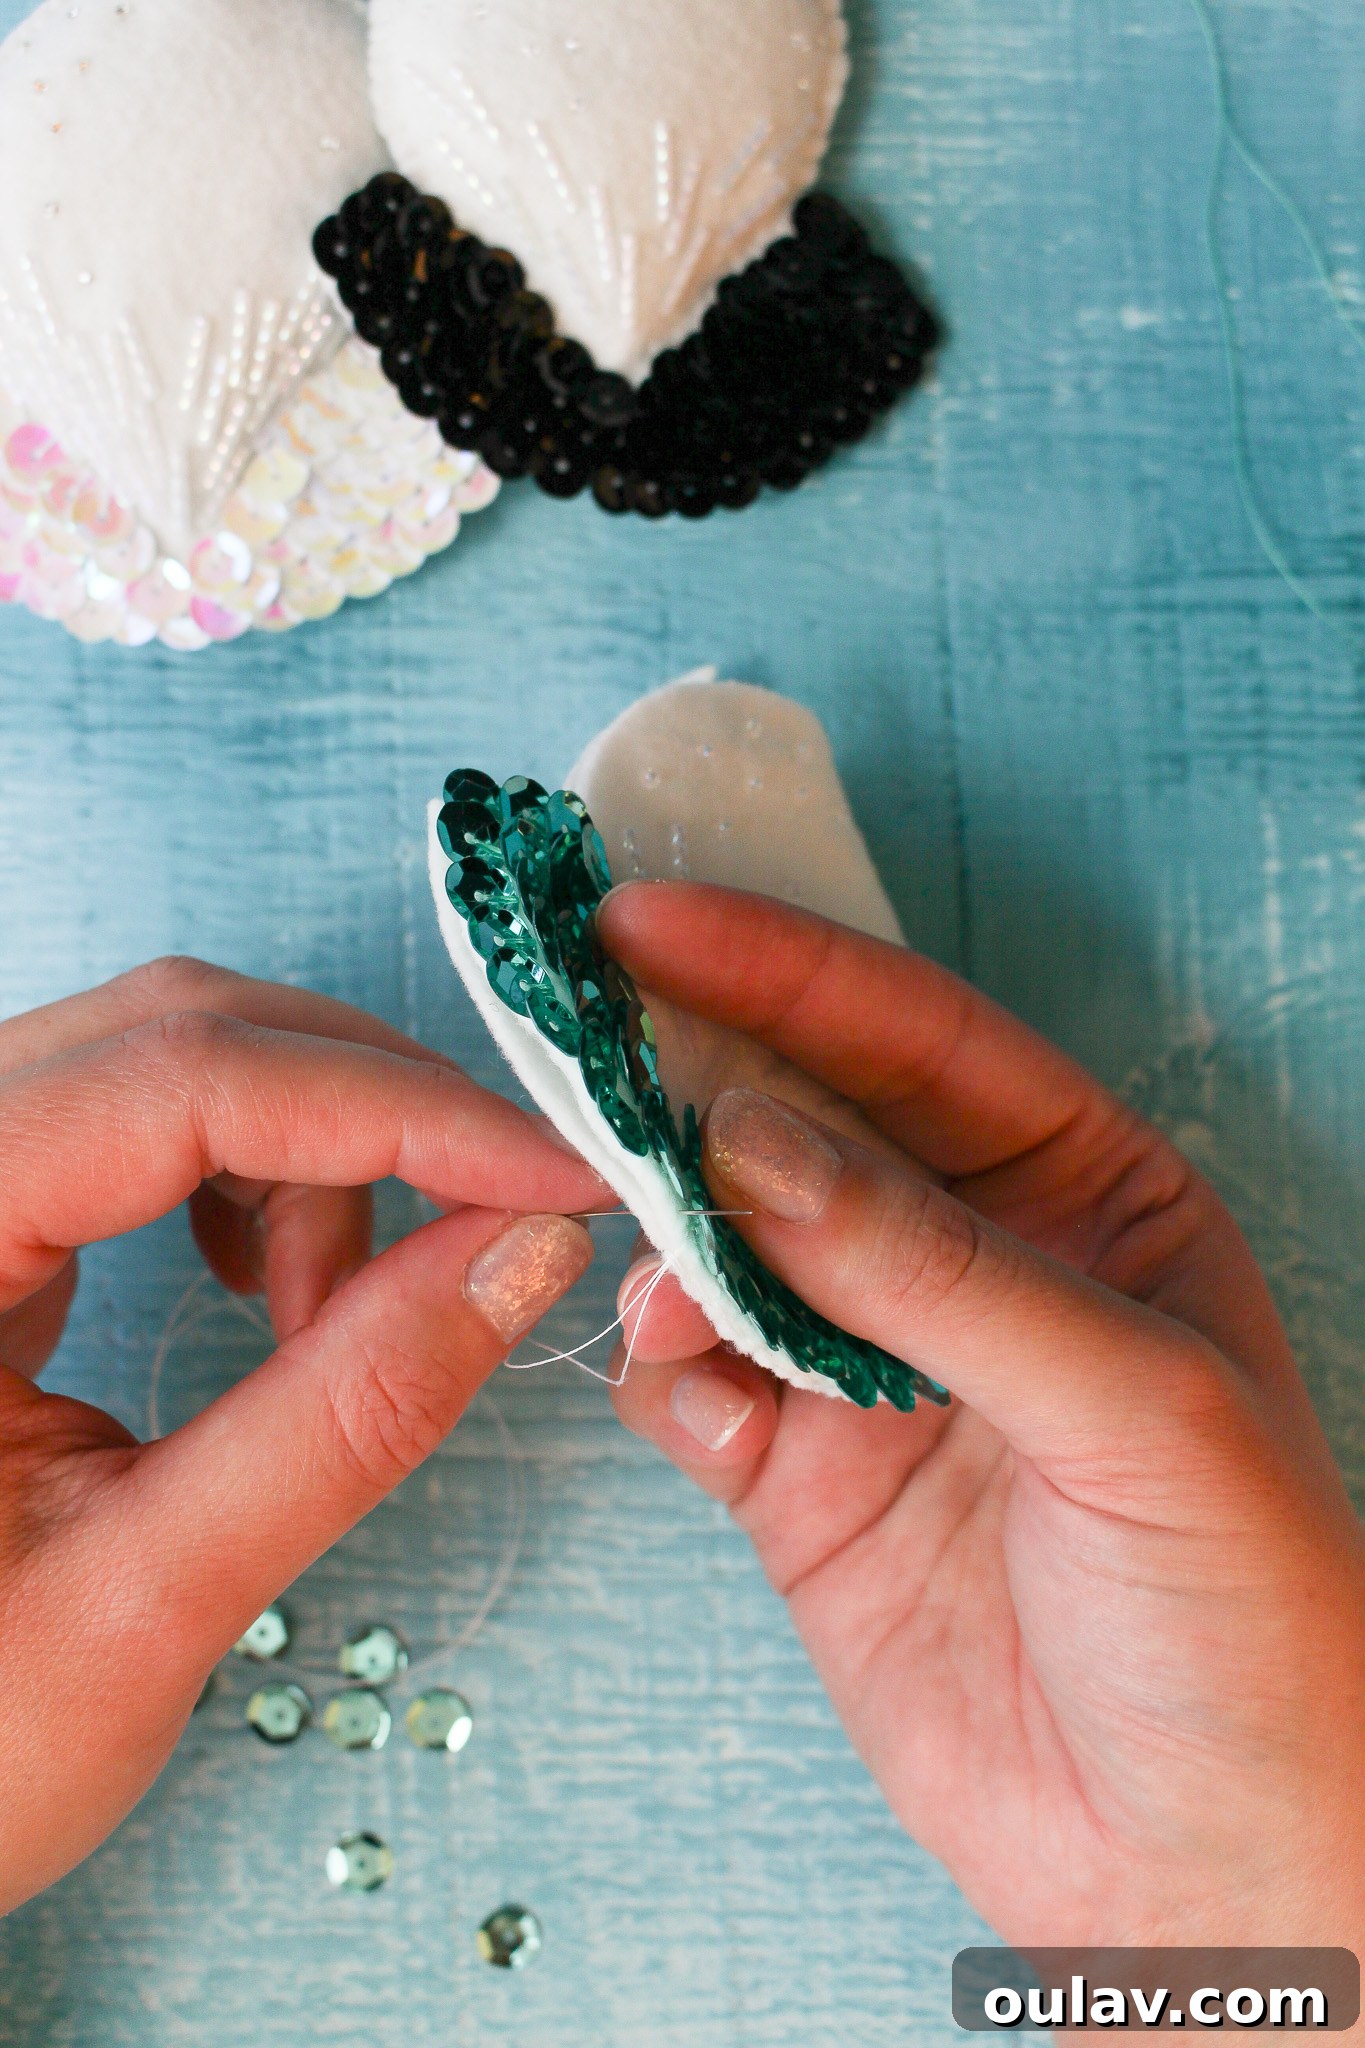
Now, it’s time to bring the two halves of your bird together. I find it easiest to start stitching the ornament closed where the tail gracefully meets the body, specifically on the right side of the bird. Work your way down along the tail and then up towards the beak using a blanket stitch. This stitch not only creates a strong, durable seam but also adds a beautiful decorative edge that is characteristic of felt crafts. When stitching around the sequin embellishments, proceed slowly and carefully, ensuring your needle consistently goes *under* the sequins and not *through* them, to avoid damage to both the sequins and your thread. If you’re new to the blanket stitch or hand sewing in general, fear not! My detailed video tutorial below will guide you through every nuance of this essential technique.
Mastering the Blanket Stitch: A Comprehensive Video Guide
The blanket stitch is a cornerstone of felt crafting, offering both durability and a charming aesthetic finish. If you’re unfamiliar with this stitch or simply want to perfect your technique, this video provides a clear, step-by-step demonstration. Watching the movements of the needle and thread will help you confidently execute this essential stitch for your felt ornaments.
Stuffing Your Felt Ornament: Achieving the Perfect Plumpness
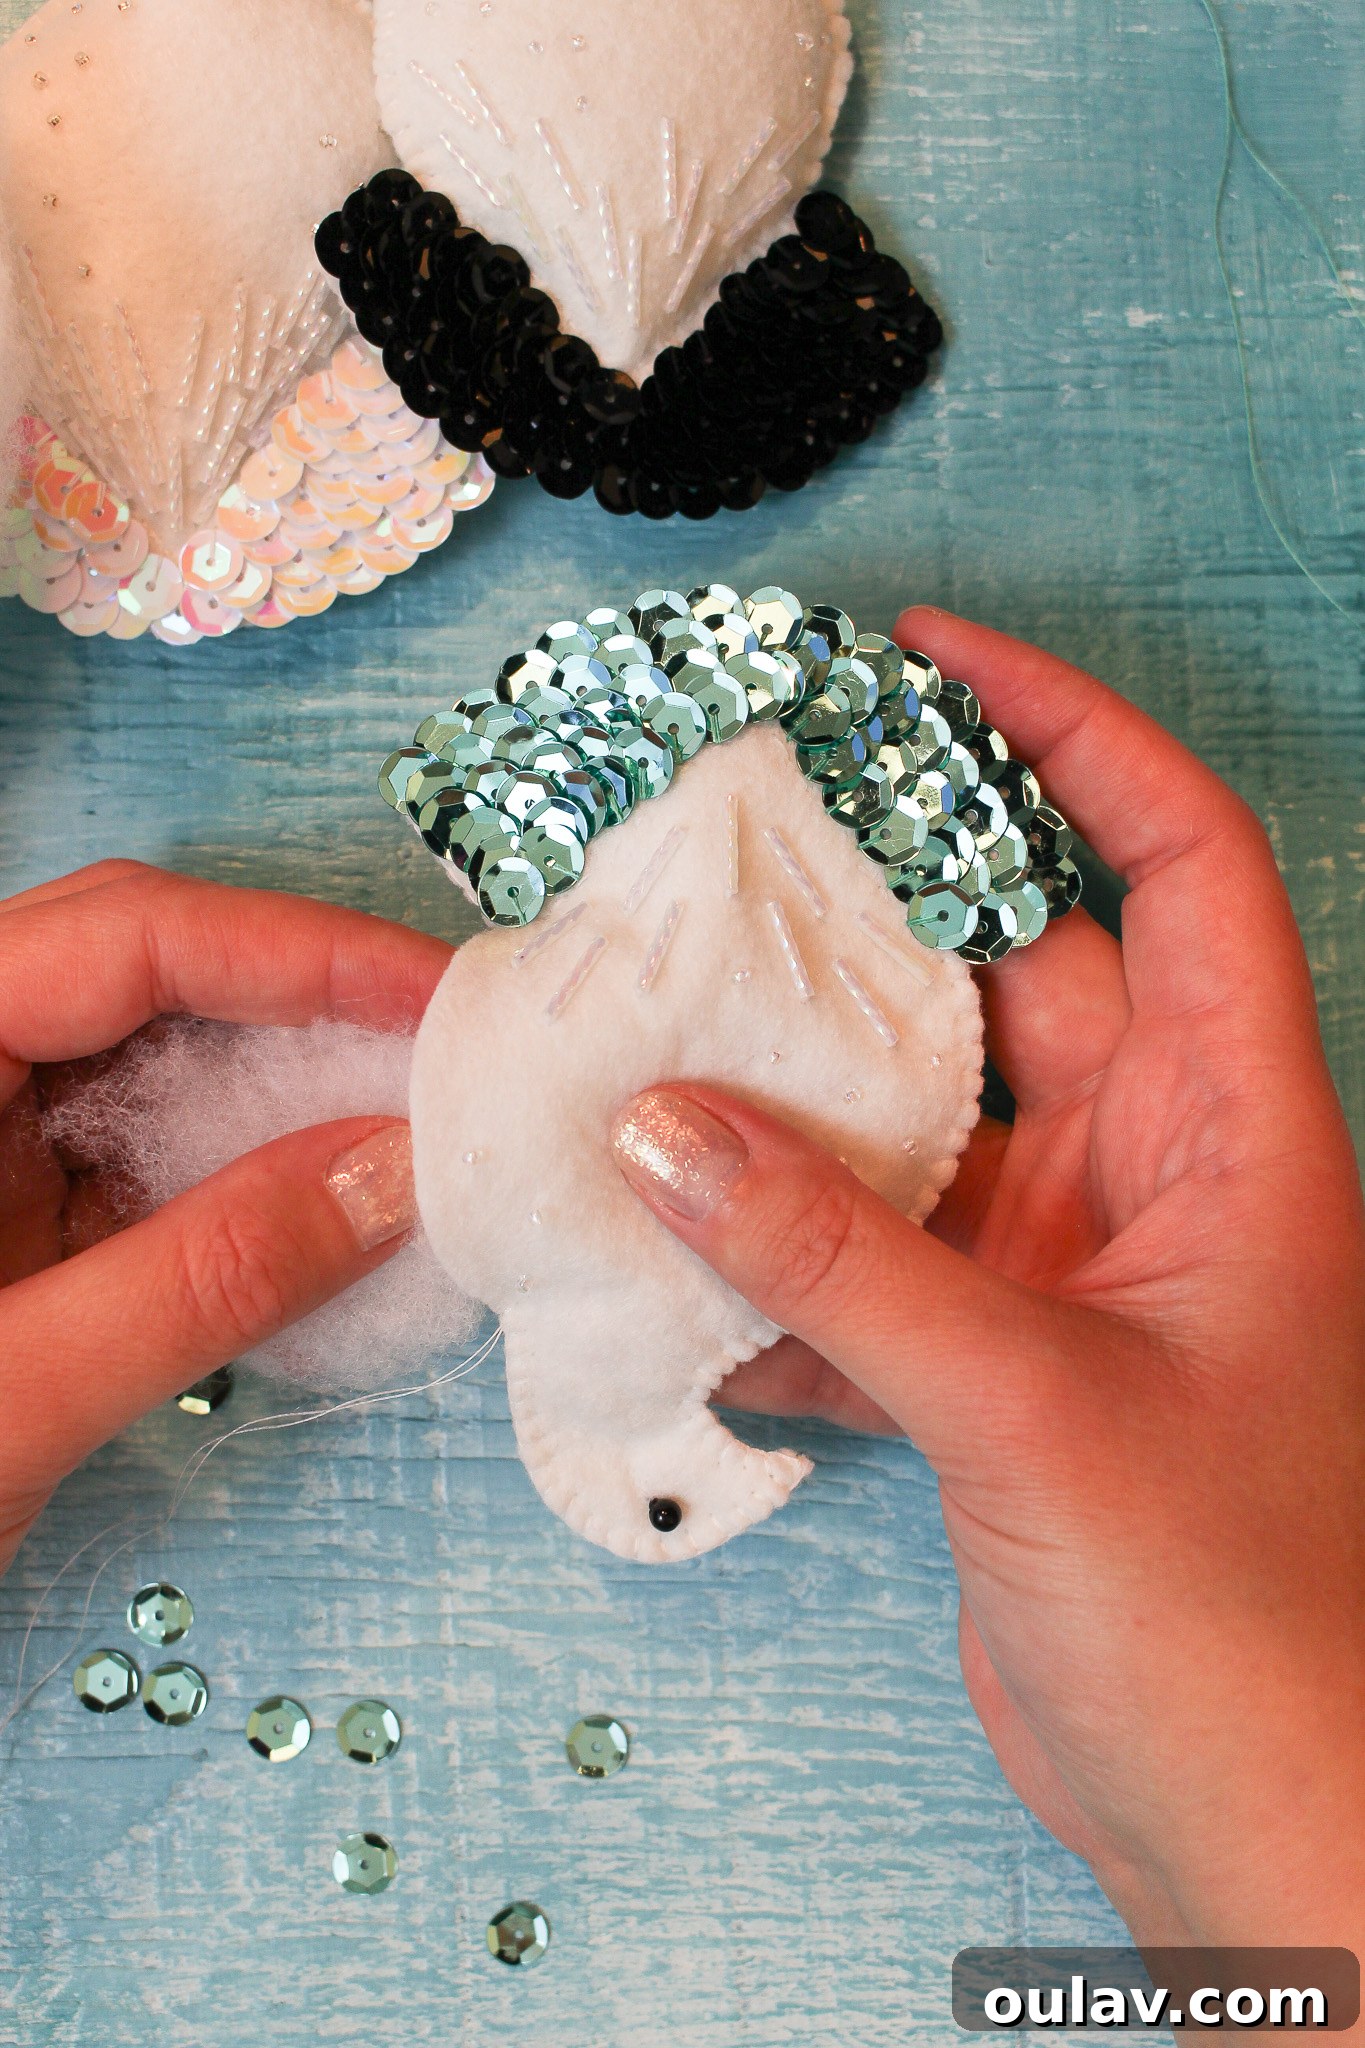
Once you’ve sewn a significant portion of the ornament and have reached the head section of the bird, it’s the ideal time to pause your sewing and begin stuffing! I’ve found that this specialized stuffing tool is incredibly helpful for accurately guiding batting into the smallest nooks and crannies, ensuring a smooth, even fullness. However, if you don’t have one, don’t worry – a chopstick, a knitting needle, or even the capped end of a pen will serve as excellent alternatives. Methodically work small, manageable sections of poly-fil or wool batting into the bird, ensuring it achieves a beautifully plump and well-defined shape. The trick is to stuff it firmly but not so tightly that it distorts the felt. Once a section is stuffed, continue sewing a little more, then pause to stuff again. This “sew a little, stuff a little” rhythm ensures an evenly stuffed ornament from beak to tail, resulting in a charming, three-dimensional finish.
Stitching on the Beak: The Finishing Touch
As one of the final, defining steps, you’ll use black thread (or embroidery floss for a bolder look) to stitch the Ptarmigan’s distinctive beak. Start by bringing your needle up from the back of the ornament, approximately a few millimeters from the edge of where the beak will be. Then, guide your thread over and towards the left edge of the beak area. Wrap the thread around, bringing it back up again to create a loop. Repeat this wrapping motion multiple times, layering the black thread densely. This technique effectively builds up a solid, opaque black beak that truly stands out and gives your bird character. Once satisfied with the beak’s shape and solidity, securely knot the black thread at the back of the ornament, carefully bury the remaining end within the felt, and trim any excess thread.
Clever Ways to Hang Your Handmade Felt Ornaments
When it comes to displaying your beautiful felt ornaments, the method of hanging can greatly impact their overall presentation. While ribbon loops are a classic choice, I personally prefer a more discreet approach: using green thread. By stringing a loop of (preferably green) thread across the back of the ornament with a needle and securing it with a knot, the hanger virtually disappears amidst the evergreen branches of a Christmas tree. This subtle technique ensures that your meticulously crafted ornament, with all its intricate details and sparkling embellishments, remains the undisputed star of your festive display, rather than drawing attention to the hanging mechanism.
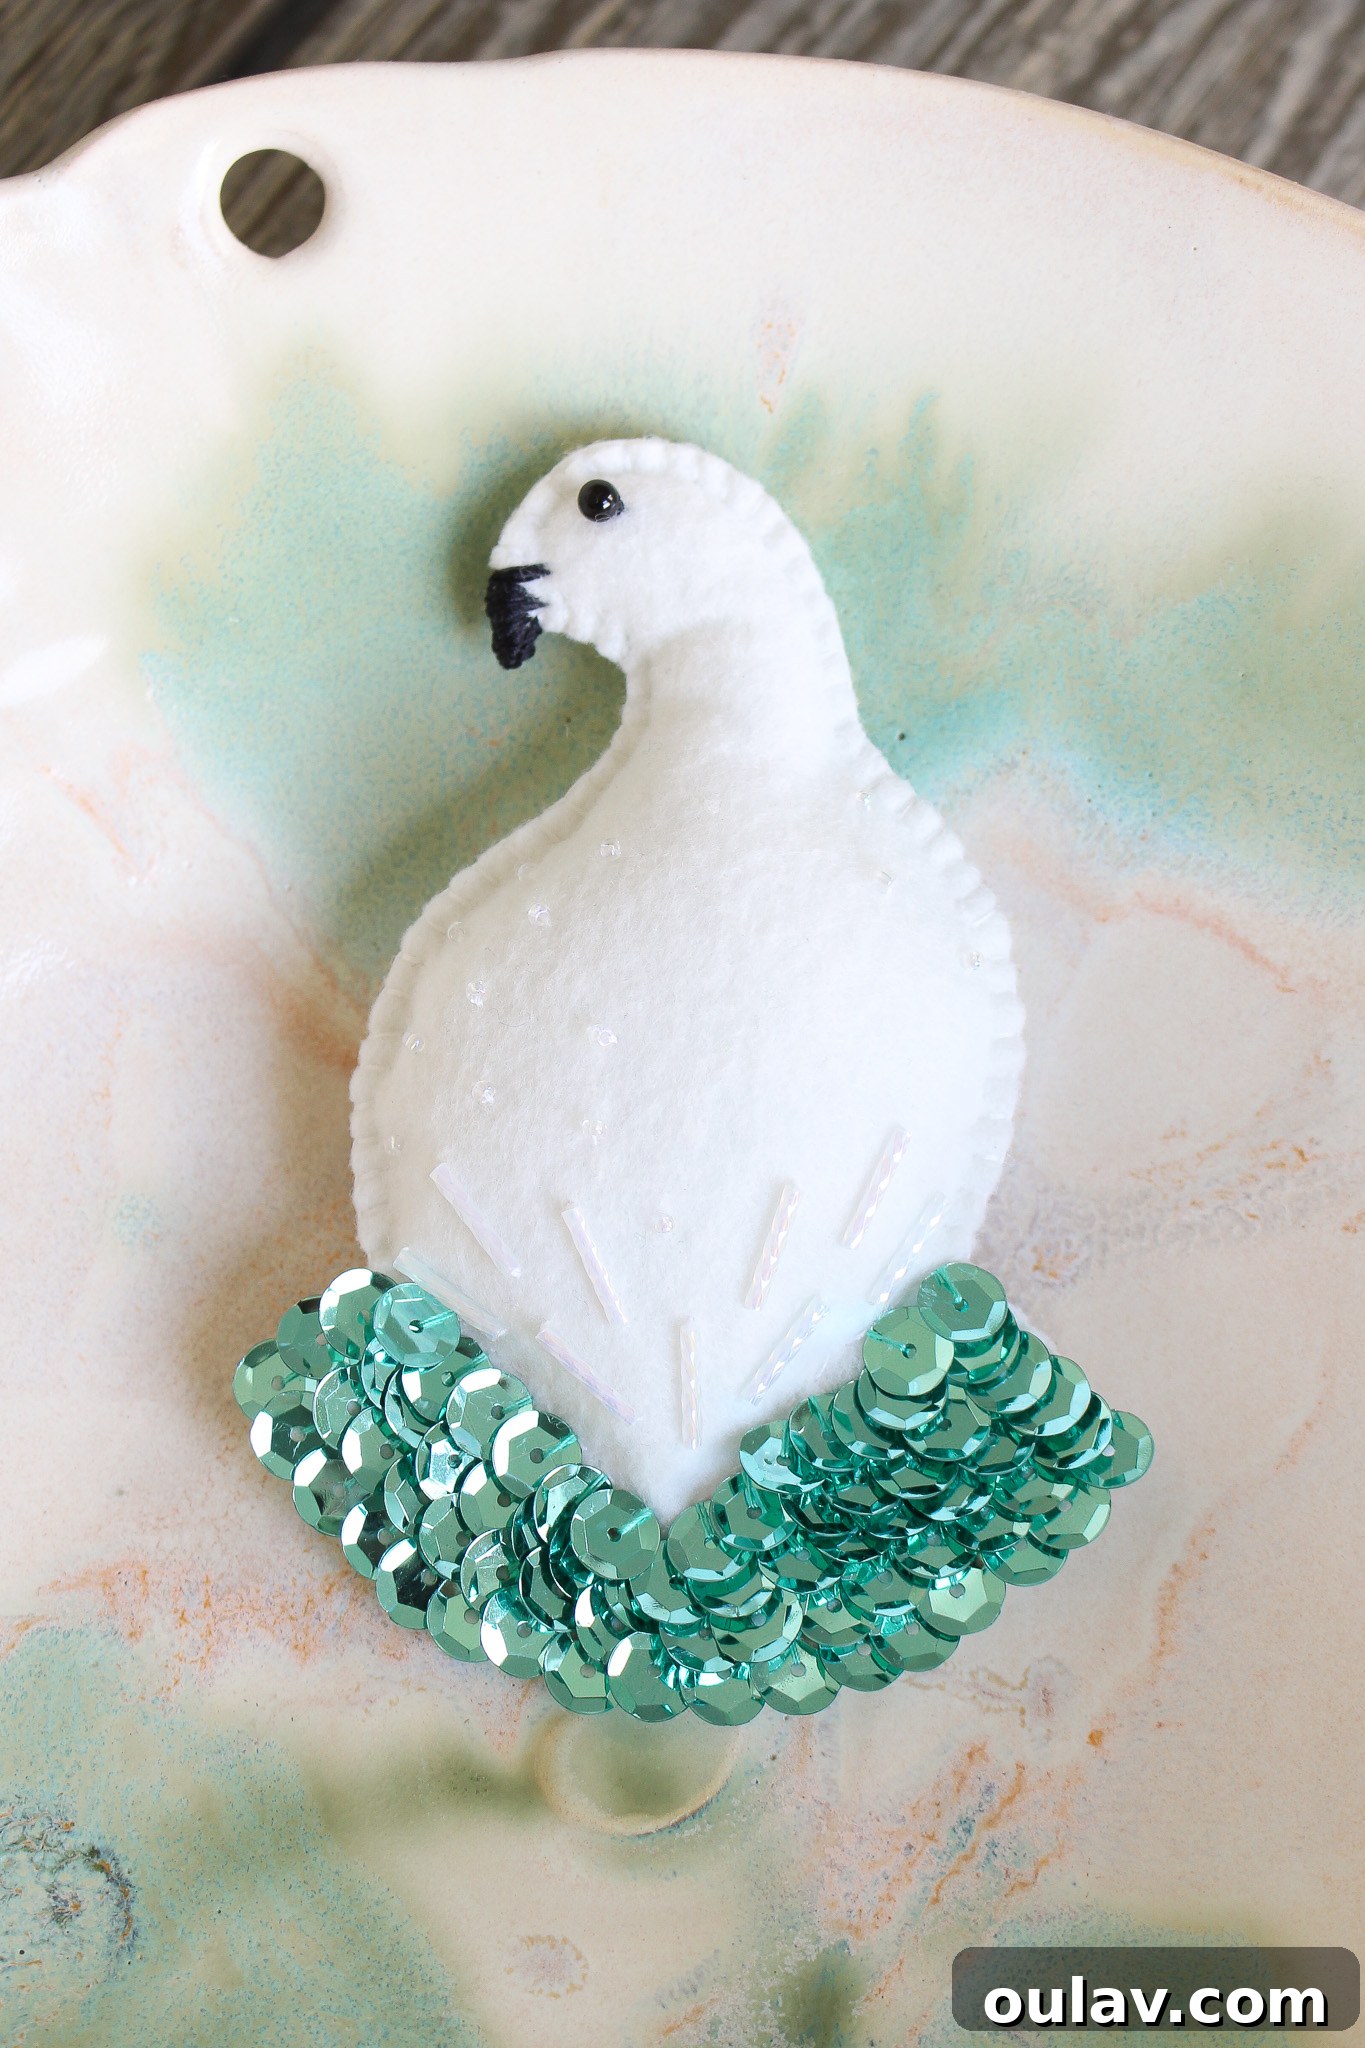
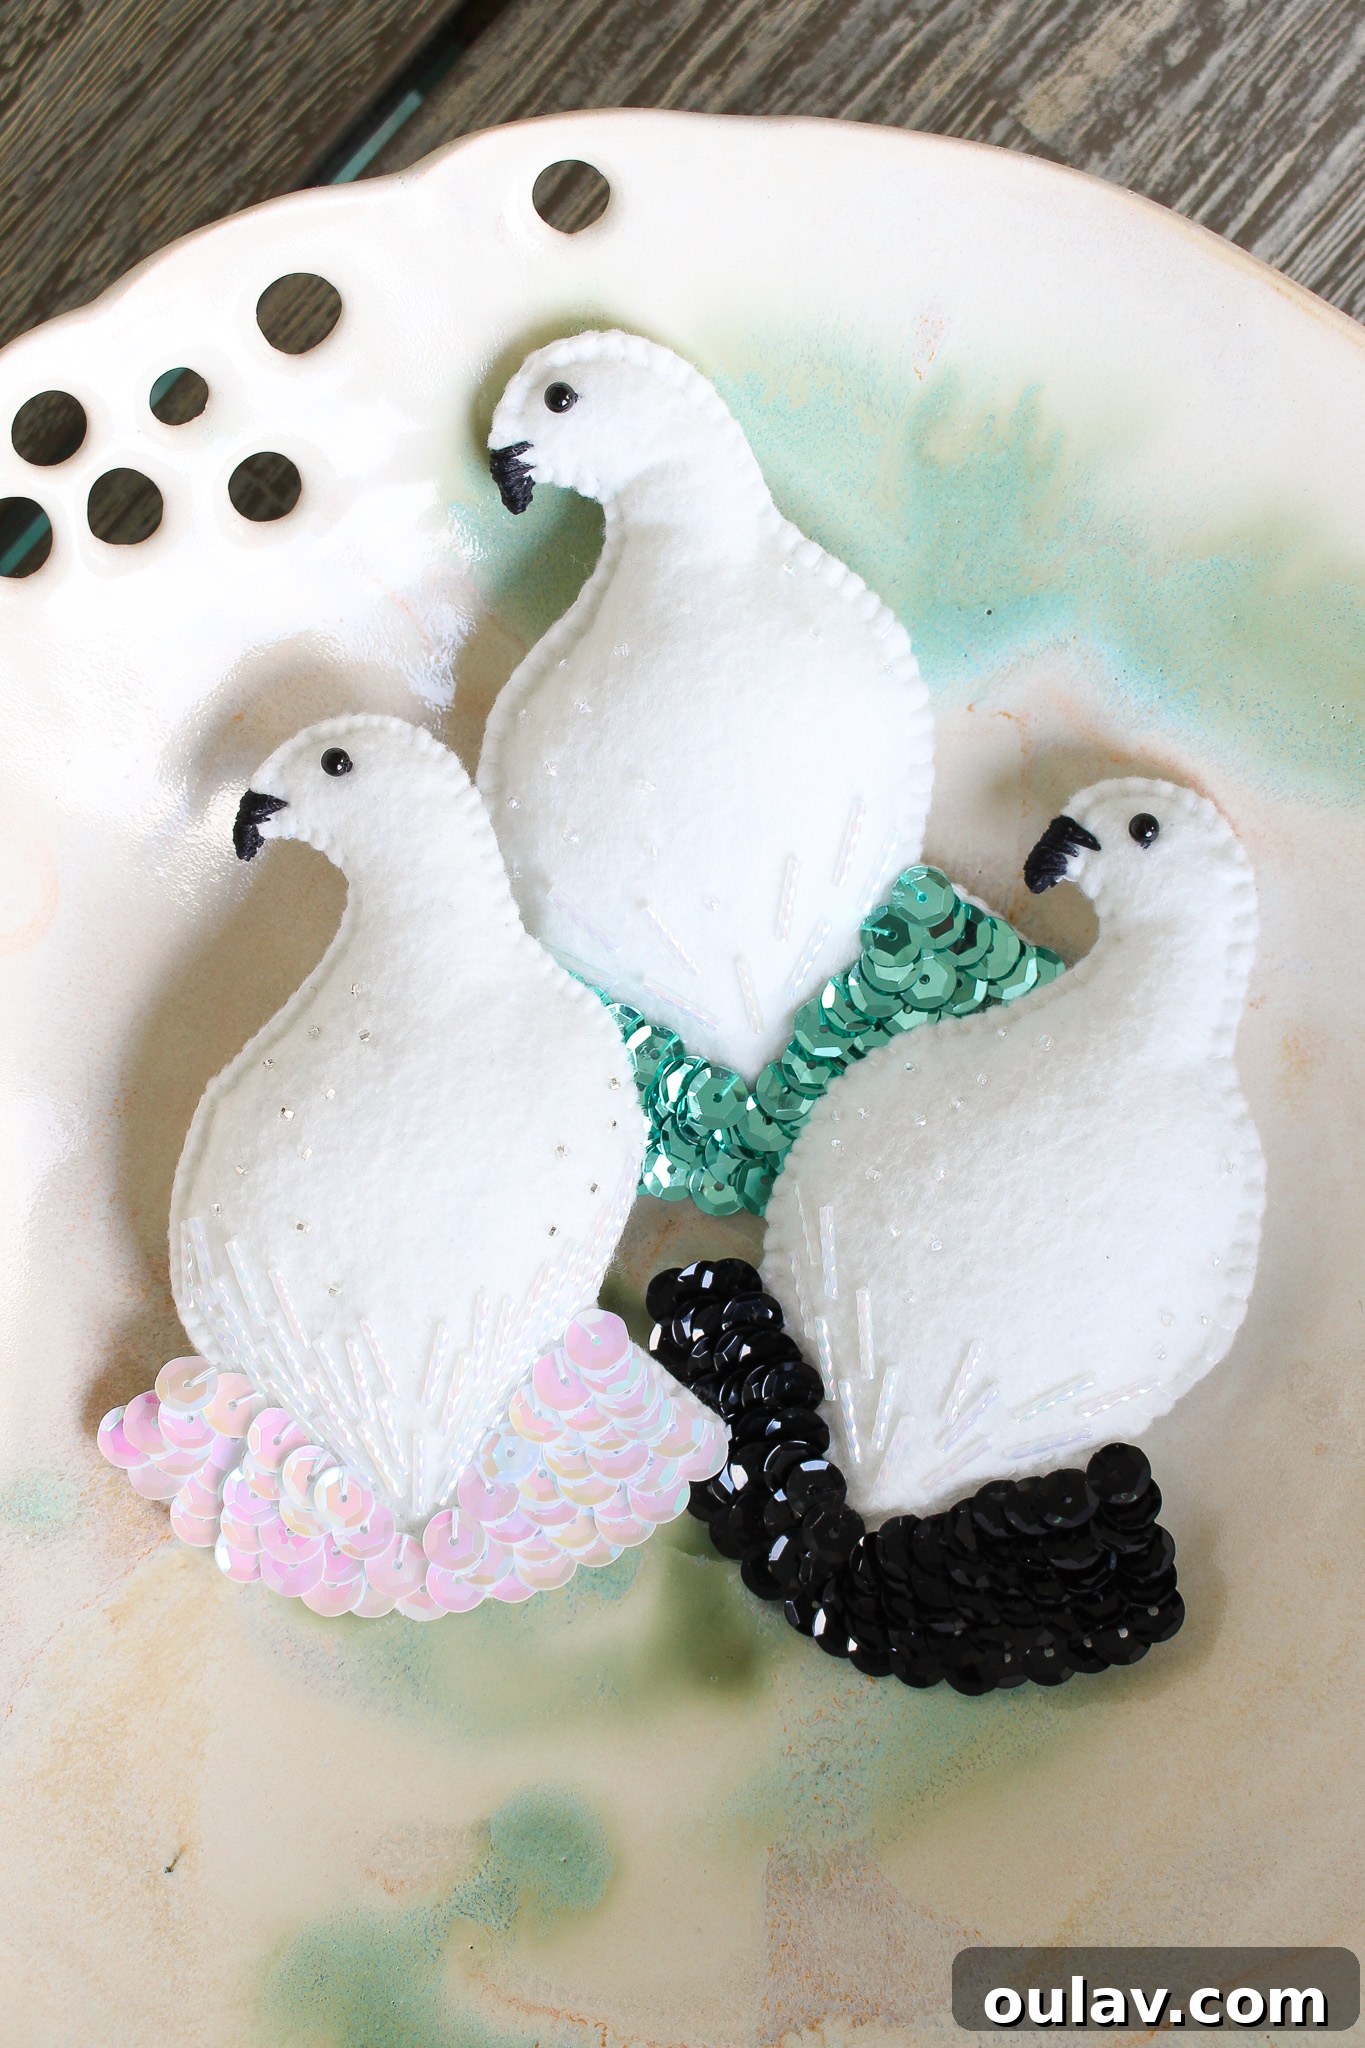
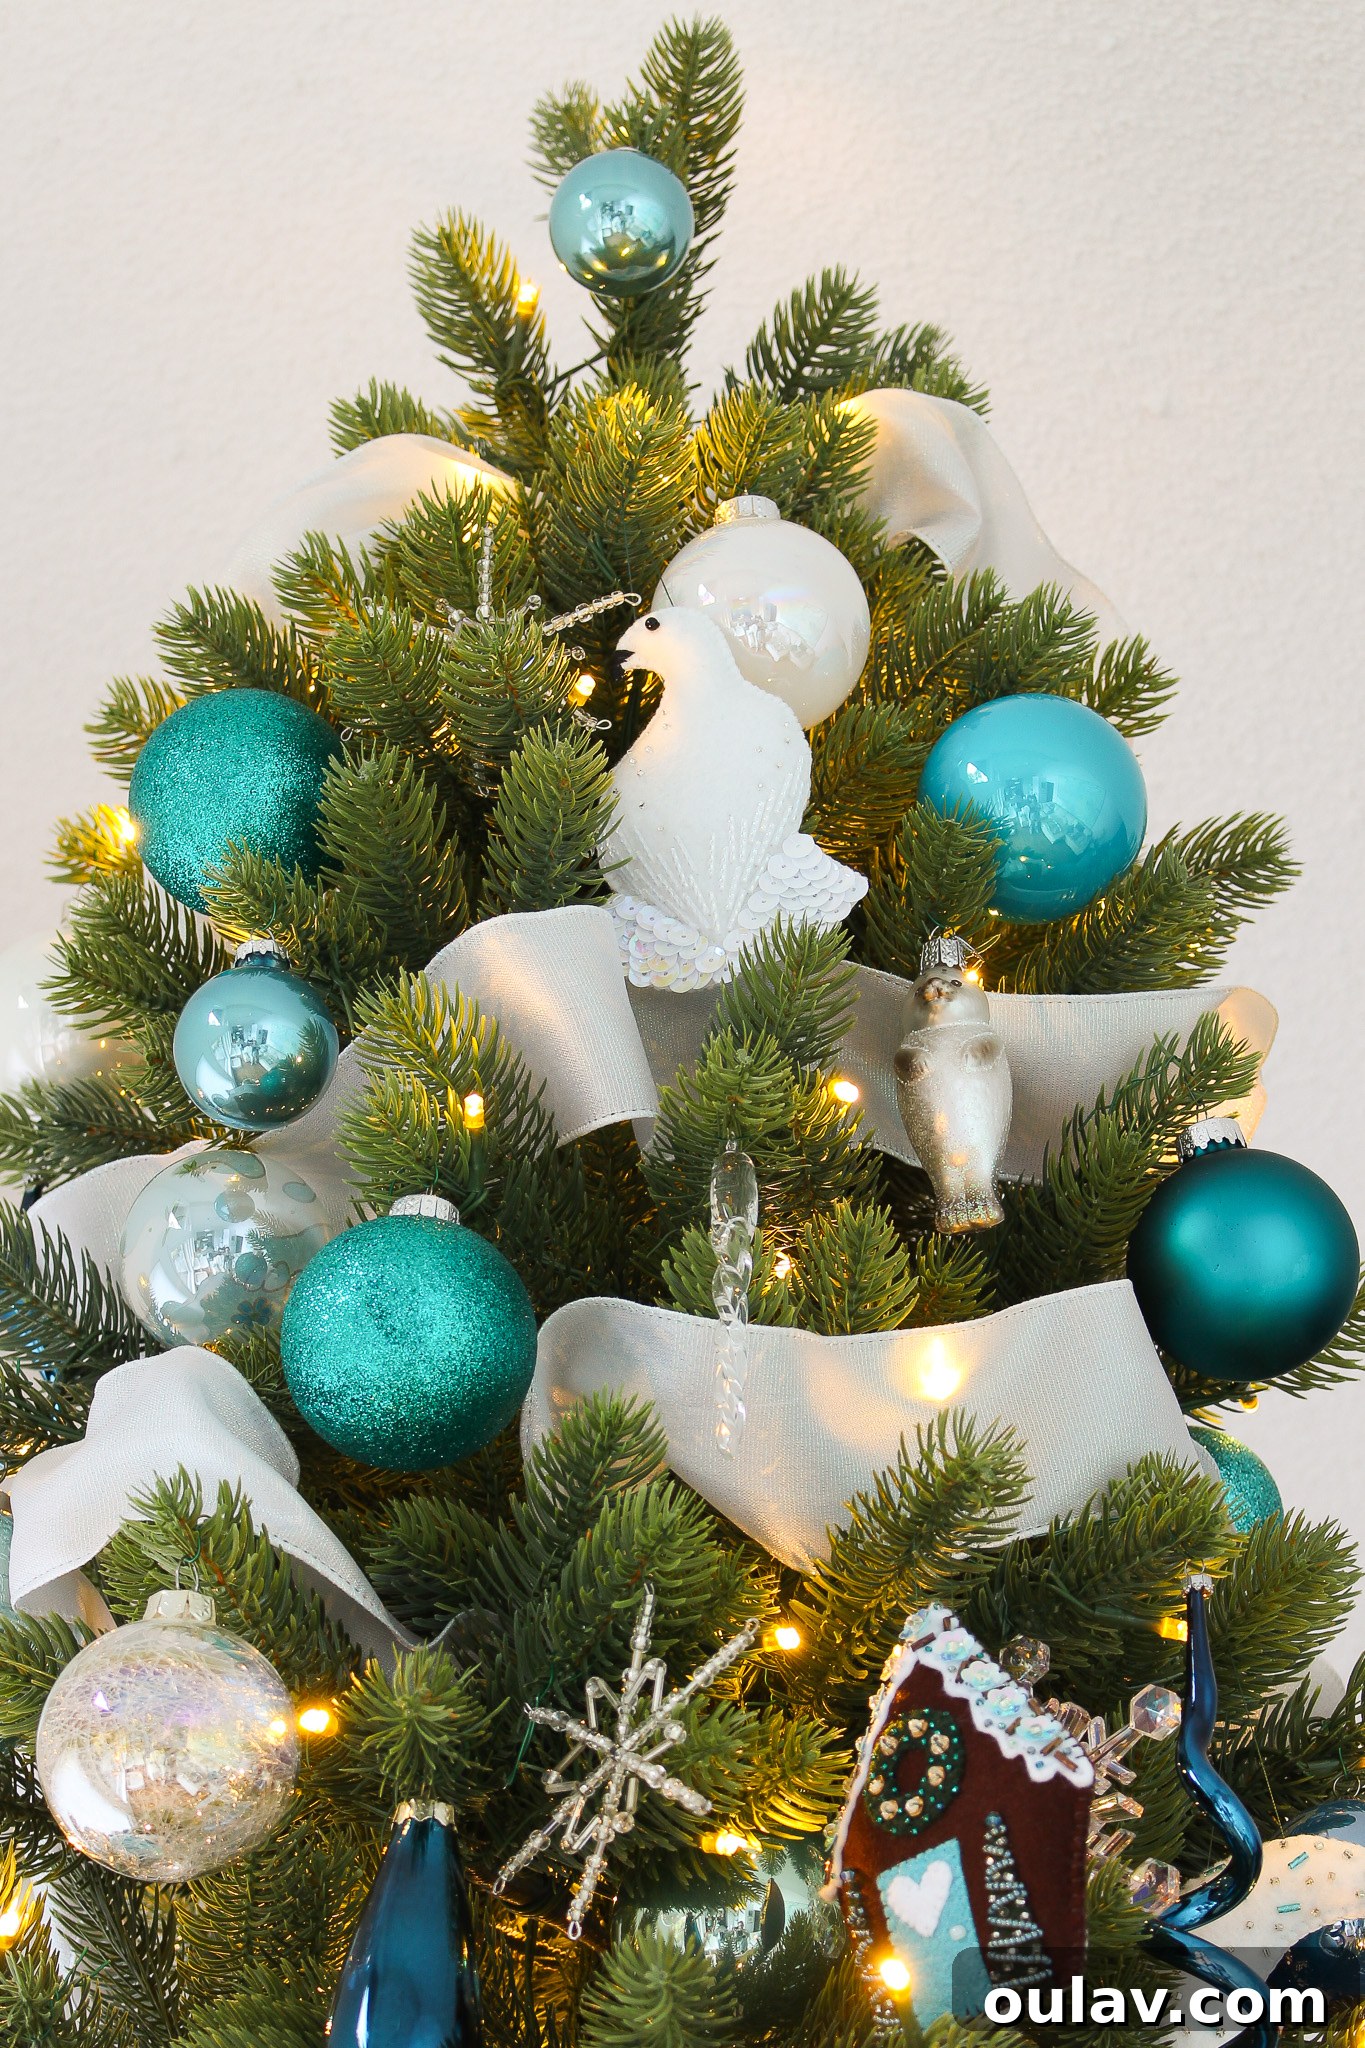
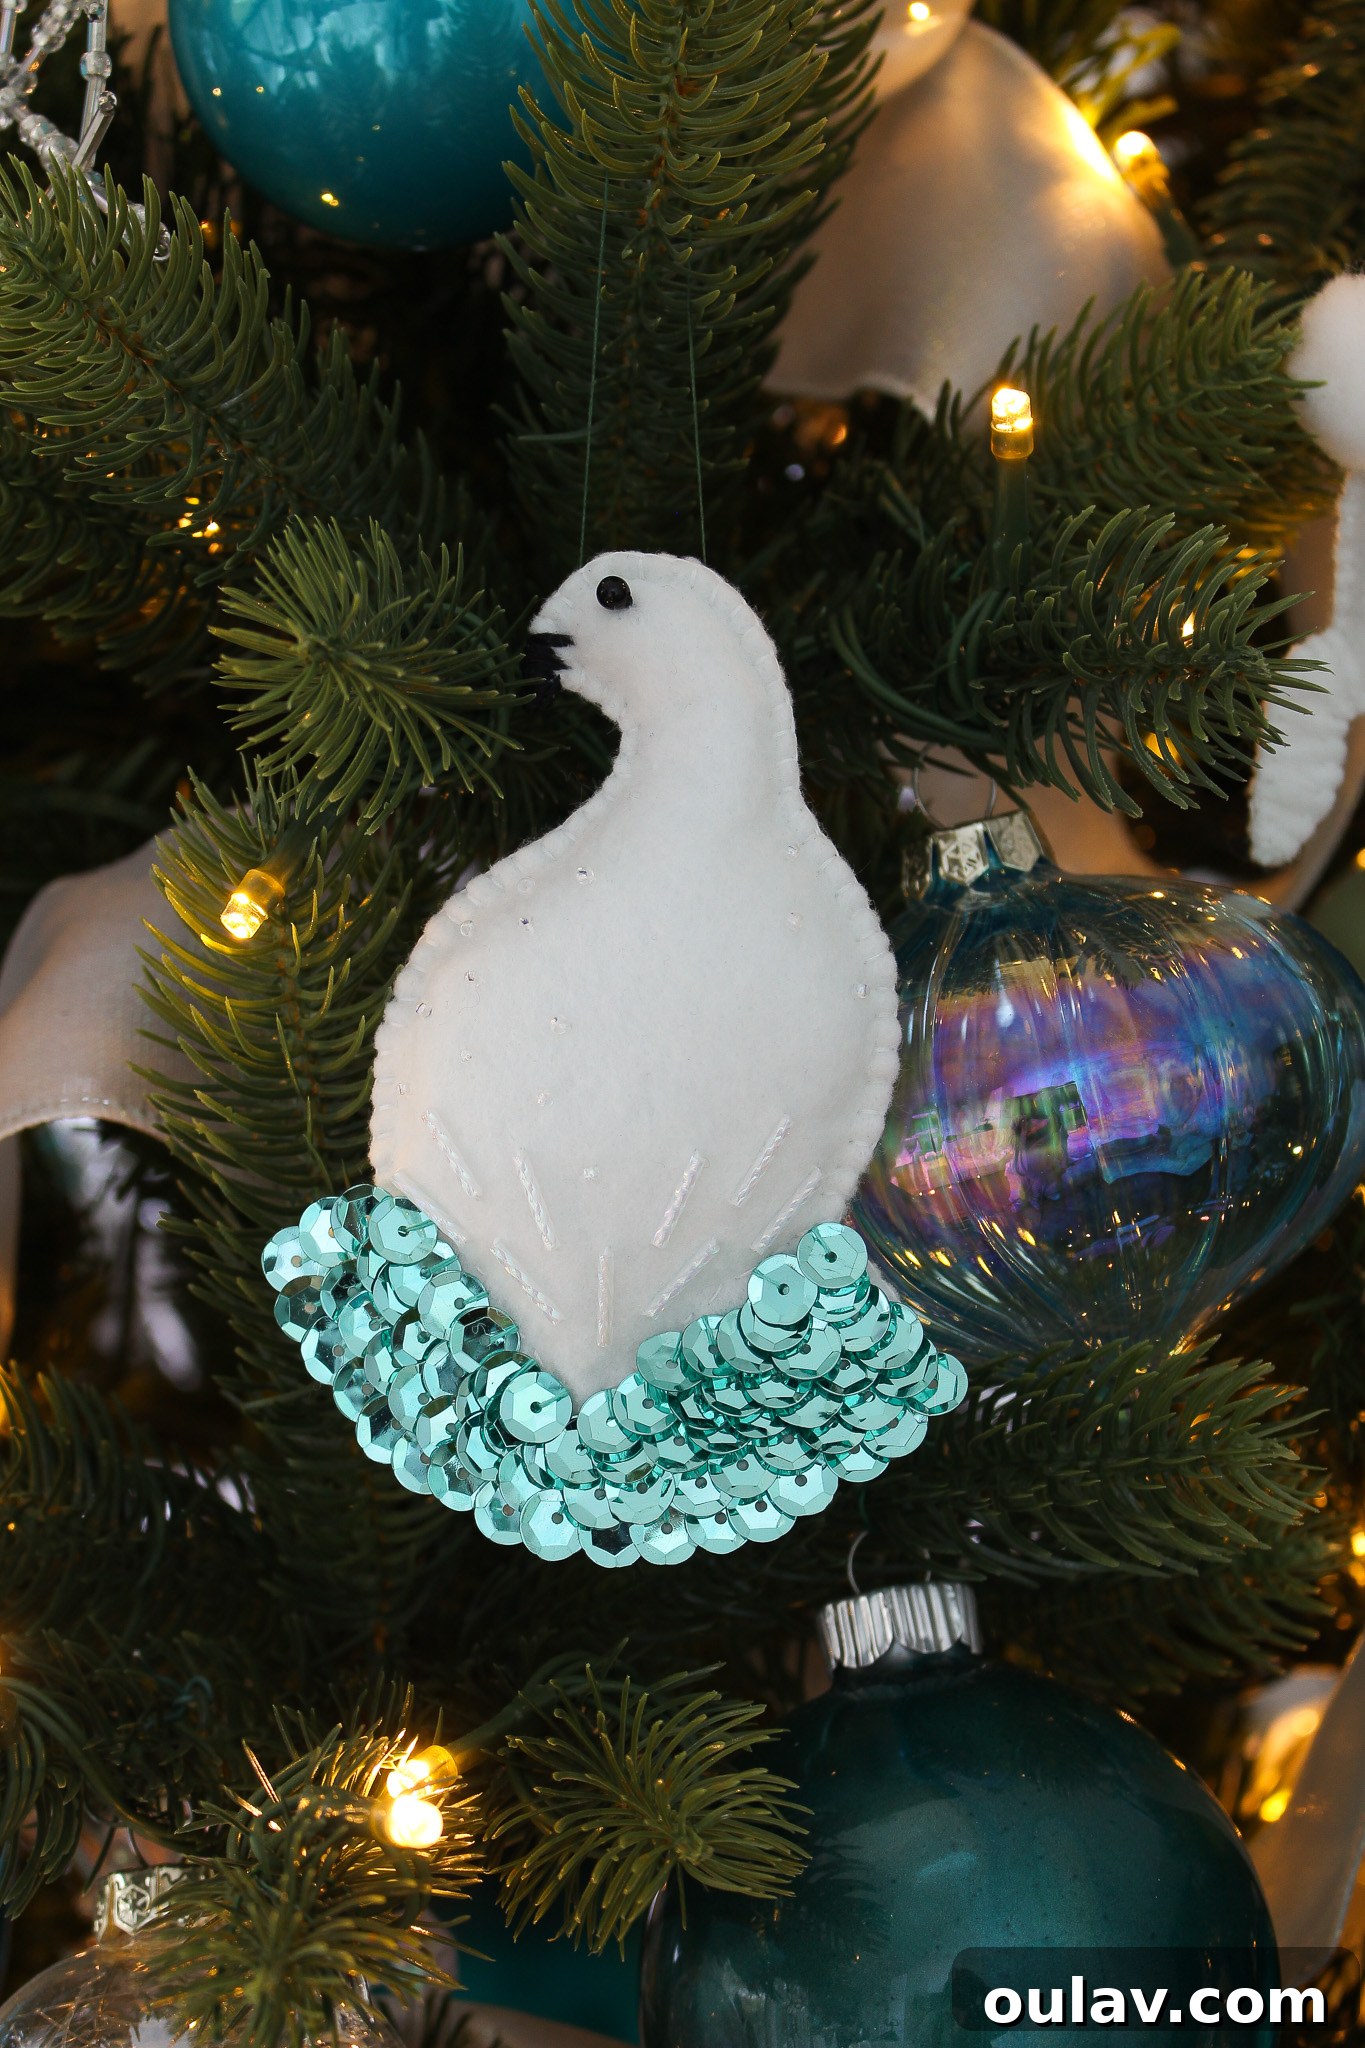
And there you have it – your very own DIY felt bird ornament, a beautiful Ptarmigan ready to adorn your home! This project truly allows for incredible creativity and personalization. While the black sequins offer the most “ptarmigan-like” authenticity, don’t hesitate to experiment. As you’ve seen, adding turquoise sequins, for instance, instantly introduces a whimsical and fun twist. This versatile DIY felt bird ornament pattern encourages you to explore different felt colors, bead combinations, and sequin arrangements, making each creation uniquely yours. Whether nestled on a Christmas tree or displayed year-round, your handmade felt bird will be a testament to your crafting skill and personal style.
Expand Your Crafting Horizon: More DIY Felt Ornament Tutorials & Patterns
If you’ve enjoyed crafting this charming Ptarmigan, you’ll be thrilled to discover our extensive collection of other felt ornament patterns and accompanying tutorials. Handmade felt ornaments are not just for the holidays; they make thoughtful gifts, delightful home decor, and wonderful keepsakes year-round. Explore all of my DIY felt ornament patterns here, and dive into these other blog posts for even more creative inspiration and step-by-step guidance:
- DIY Felt Seal Ornament Tutorial (with pattern): Create an adorable aquatic friend for your collection.
- DIY Felt Fox Ornament Tutorial (with pattern): Craft a cunning fox, perfect for nature lovers.
- DIY Felt Polar Bear Ornament Tutorial (with pattern): A majestic addition, bringing Arctic charm to your decor.
- DIY Felt Bunny Ornament Tutorial (with pattern): A sweet and whimsical bunny that’s sure to bring a smile.
- DIY Felt Gingerbread House Ornament Tutorial (with pattern): A festive and classic holiday craft.
- DIY Beaded Felt Moon Ornament Tutorial: A celestial design, adding a touch of magic.
- DIY Beaded Felt Heart Ornament Tutorial: A timeless symbol of love, perfect for any occasion.
- DIY Felt Cookies Ornaments Tutorial (with pattern): Sweet and calorie-free treats for your tree!