
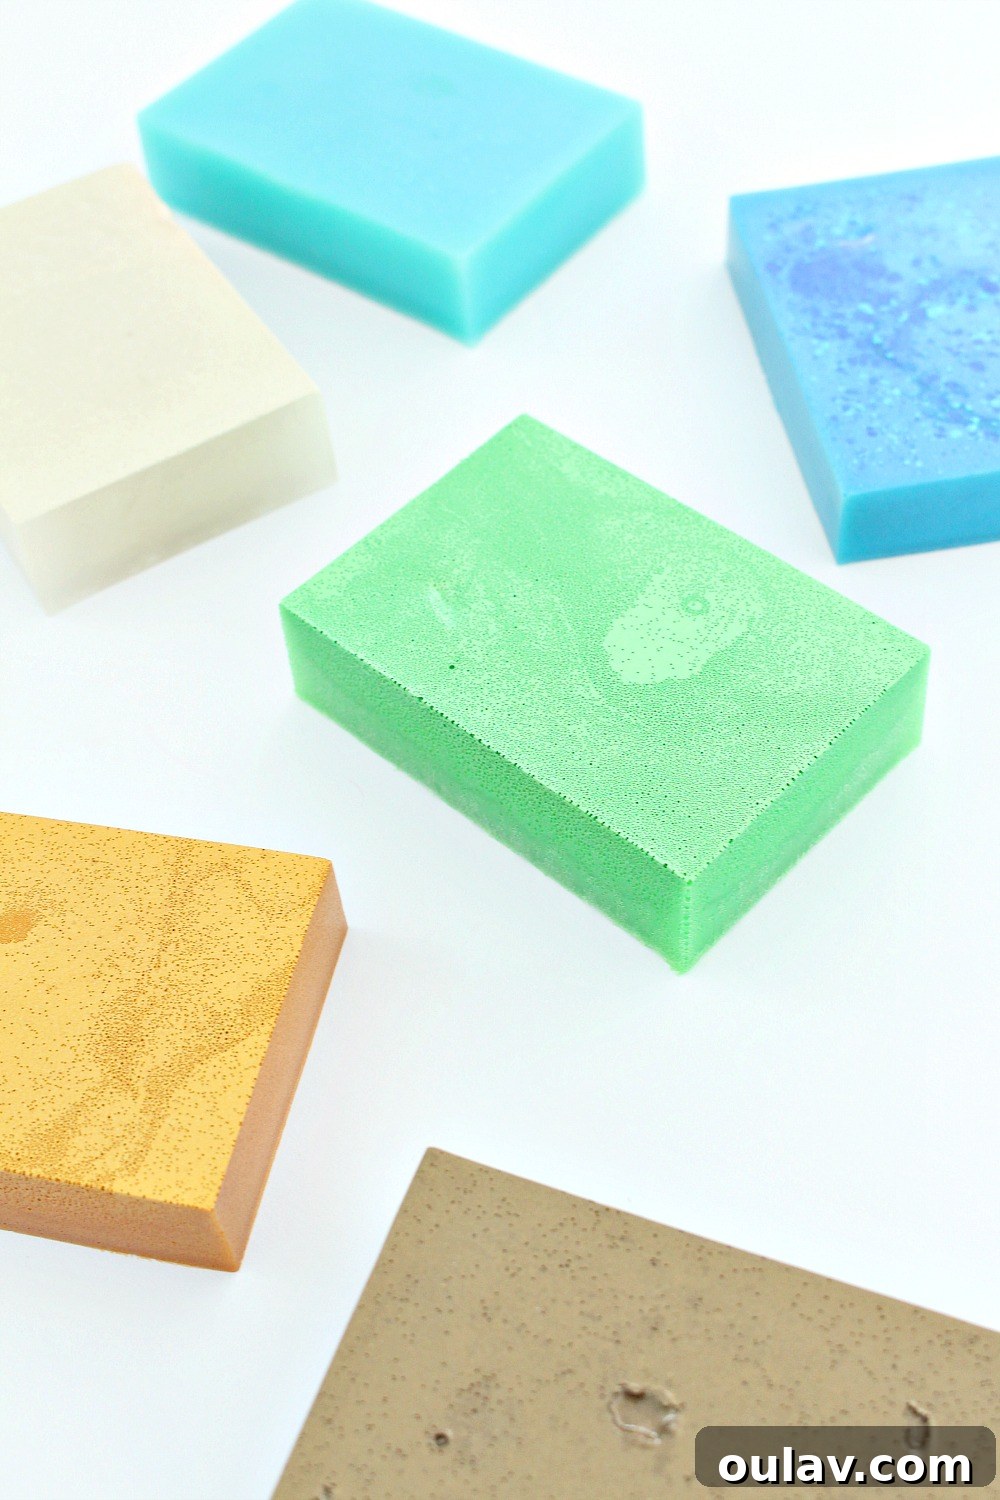
Get ready to unleash your inner artisan with today’s delightful DIY gemstone soap tutorial! These homemade soap rocks are not only stunningly beautiful and incredibly easy to craft, but they also serve a practical purpose. Imagine creating luxurious, personalized soaps that you can proudly use, display, or gift to loved ones – a true craft that brings joy without adding clutter!
Discovering the Allure of Gemstone Soap: From Admirer to Artisan
As an avid rock lover and collector, I’ve always been captivated by the natural beauty of gems and minerals. So, you can only imagine my delight when I first encountered “soap rocks” – incredibly realistic, gem-shaped soaps – at an artisanal boutique in Duluth, MN. Each bar was a tiny work of art, a perfect blend of nature’s beauty and human craftsmanship. Regularly priced at around $11, they felt like a luxurious indulgence.
My excitement soared when I discovered them on clearance one day, marked down to $6 a bar! It was still a splurge, but the discount was too good to resist. I practically ran to the cash register with an armful, securing a few as gifts and depleting the store’s stock of their stunning “turquoise” soap rocks. These treasured bars have graced my bathrooms over the years, appearing in various spaces and always sparking joy. You might have spotted them in this bathroom and that bathroom – and no, it wasn’t the same bar moving from room to room! Each was a unique piece, meticulously saved for special moments.
When I finally got down to my very last original soap rock, the urge to replenish my supply was strong. However, I hesitated at the full price. It was around this time that I started noticing a surge in gemstone soap tutorials online. A lightbulb went off: why not create my own? While my DIY gemstone soaps may not perfectly replicate the intricate beauty of the originals, the satisfaction of making them myself, coupled with the significant cost savings (down to about $2 a bar, and even less with more batches!), made it an incredibly rewarding endeavor. Crafting these unique soap rocks quickly became a fun and easy project, inspiring me to explore endless possibilities!
Essential Supplies for Crafting Your Own Gemstone Soaps
Embarking on your DIY gemstone soap journey is simpler than you might think, especially with the melt and pour method. This technique uses a clear glycerine base, which is perfect for creating translucent, realistic soap gems. Here’s a comprehensive list of what you’ll need to gather:
- Clear Glycerine Soap Base: This is the foundation of your gemstone soaps, allowing for that beautiful translucency. Look for high-quality options like this or this.
- White Glycerine Soap Base: (Optional) A small amount of opaque white base, such as this, can be useful for creating marbling effects or distinct opaque layers, mimicking certain mineral inclusions.
- Cosmetic Grade Mica Dyes: These finely ground mineral pigments are key to achieving the vibrant colors and natural shimmer of real gemstones. Ensure they are cosmetic grade for skin safety.
- Silicone Bar Molds: These molds are excellent for creating the initial colored soap blocks that you’ll later chop into organic shapes. They are flexible and reusable.
- Large Loaf Silicone Mold: Essential for combining your chopped colored soap pieces into a larger block, which you’ll then slice and shape into individual gemstone bars.
- Essential Oils: To infuse your soaps with delightful, natural fragrances. Choose oils known for their skin benefits and pleasant aromas.
- Cutting Board: A sturdy surface for safely cutting your soap bases and shaping the hardened soap.
- Non-serrated Knife: A sharp, non-serrated knife is ideal for clean cuts and for shaping your soap rocks without tearing.
- Microwaveable Bowl: A Pyrex 4-cup measuring cup or similar glass bowl works perfectly for melting the soap base. Its spout makes pouring easy.
- Microwave: For quick and controlled melting of your glycerine soap base.
- Stir Sticks: Disposable craft sticks or silicone spatulas for mixing colors and fragrances.
Important Notes on Your Soap Making Supplies:
Essential Oils: When selecting essential oils, prioritize quality and purity. There’s a vast market of cheap, synthetic knock-offs online, so opt for a reputable brand to ensure safety and true aromatic benefits. Keep in mind that some oils, like vanilla, can cause yellowing in soap, which might alter your desired gemstone aesthetic. If you’re aiming for crystal-clear gems, consider citrus, mint, or floral scents instead.
Glycerine Soap Bases: For a substantial batch, I initially ordered 7 lbs of glycerine base, which was enough to fill two large silicone loaf molds. While the exact brand I used might no longer be available, the provided links offer excellent alternatives. If you’re only purchasing one type, always go for the clear glycerine base. Its transparency is fundamental for achieving that authentic gemstone sparkle and depth, allowing the mica colors to truly shine. The white base is wonderful for creating opaque inclusions or marbled effects, adding another dimension to your “stone.”
Cosmetic Grade Mica Dyes: Mica colorants are your secret weapon for infusing your soap rocks with the enchanting shimmer and varied sheen of real stones. They are crucial for creating a truly realistic appearance. When adding mica, remember that a little goes a long way. I found in my first batches that I sometimes added too much, resulting in overly rich colors. For a more authentic look, start with a tiny pinch, mix thoroughly, and gradually add more until you achieve your desired hue. For future batches, I plan to experiment with very faintly tinted clear glycerine areas to create a beautiful “quartz” or geode-inspired effect, allowing for more translucency. Always ensure your mica is cosmetic grade to be safe for skin contact. And here’s a fun tip: don’t let those unused eyeshadow palettes gather dust – many can be repurposed as soap colorants!
Observe the captivating shimmer on these handcrafted DIY gemstone soap bars – a testament to the magic of mica!
Mastering the Art: How to Make Soap Look Like Crystals
Transforming simple soap into sparkling crystals is an exciting and straightforward process with the melt and pour method. Follow these steps to create your own collection of beautiful soap rocks:
- Choose Your Inspiration: Begin by selecting a specific gemstone or mineral you wish to mimic. Consider its unique colors, veining, and natural inclusions.
- Gather Visual References: Head over to Pinterest (my dedicated rocks and minerals board is a great starting point!) or other image resources. Study closely the intricate patterns, color transitions, and textures of your chosen stone.
- Prepare Your Soap Base: Cut chunks of your clear glycerine soap base into smaller, manageable pieces. Place a small batch (about 1-2 cups) into a microwave-safe container.
- Melt the Glycerine: Microwave the soap for 30-60 seconds, or until it’s fully melted into a liquid. Be careful not to overheat.
- Transfer and Color: Pour the melted glycerine into a temporary container, such as a disposable paper cup. This prevents color transfer if you’re making many different hues. Add a tiny pinch of cosmetic-grade mica colorant and a few drops of your chosen essential oil. Mix thoroughly until the color is even and the scent is to your liking.
- Create Initial Colored Blocks: Pour this colored and scented soap into small individual soap molds or even random plastic containers. These will form the “chunks” of color within your final gemstone soap loaf.
- Repeat for Variety: Continue this process, melting small batches, adding different mica colors and essential oils, and pouring them into molds. Aim for a diverse range of colors present in your chosen gemstone.
- Allow to Cure: Let these individually colored soap bars cool and harden in their molds for 6-8 hours, or until completely firm.
- Chop into Organic Shapes: Once set, remove the small colored bars from their molds. Using a non-serrated knife, roughly chop them into irregular, organic-looking chunks. Think varying sizes and jagged edges, just like natural stone fragments.
- Assemble the Loaf: Arrange all your chopped soap pieces strategically within a large loaf-shaped silicone mold. Try to visualize the final gemstone structure, placing darker or lighter chunks where you want them to appear in the “veins” or layers.
- Prepare the “Matrix” Layer: Melt another batch of clear glycerine soap base. Add a very light tint of mica, perhaps a sheer white, clear, or a subtle shade that would form the “matrix” or veining of your chosen gemstone. Don’t forget a few drops of essential oil for fragrance.
- Pour the Final Layer: Carefully pour this freshly melted, lightly colored glycerine over and between all the chopped soap chunks in the loaf mold. Ensure all pieces are submerged and the liquid settles into every crevice. If you want distinct layers, let previous pours firm up slightly before adding more.
- Harden Overnight: Allow the entire soap loaf to harden and cool completely, preferably overnight. This ensures it’s firm enough for slicing and shaping.
- Slice and Shape: Once fully hardened, carefully remove the soap loaf from the silicone mold. Slice it into thick cross-sections, similar to slicing a loaf of bread.
- Facet and Refine: Using your knife, sculpt each slice into irregular, multifaceted gemstone shapes. Cut off edges and corners diagonally to create natural-looking facets. Save all the soap shavings – they can be remelted for future projects or added to another batch!
This detailed process outlines how to create stunning DIY gem soap bars using the melt and pour method. Continue reading for more intricate instructions, complete with visual aids, to help you perfect your technique.
Crafting Your DIY Gemstone Soap (Melt & Pour Method) – A Deeper Dive:
As mentioned, the first step is always inspiration. Choose a gemstone, analyze its characteristics, and envision the colors you’ll need to bring it to life. Once you have your palette, you’re ready to begin creating the foundational small soap bars.
Melting the Glycerine Base: Cut your glycerine soap base into smaller cubes or chunks. This helps it melt more evenly and quickly. Place about a cup or two at a time into your microwaveable bowl. Pop it into the microwave and heat in 30-second intervals, stirring after each, until it’s fully liquid. Be careful not to boil or scorch the soap, as this can affect its clarity and scent.
Adding Color and Fragrance: Once your glycerine is smoothly melted, it’s time for the creative part. Add a tiny pinch of mica powder. Stir thoroughly until the color is uniformly distributed and reaches your desired intensity. Remember, you can always add more, but you can’t easily remove it! Next, add your essential oils. Start with a few drops, stir, and smell. Adjust the quantity until the aroma is just right for you. If you’re creating multiple distinct colors, pouring the melted soap into separate disposable cups (paper or plastic) before adding dye and oil can prevent color contamination in your main measuring cup, making cleanup easier between batches.
Pouring and Cooling the First Layer: Carefully pour your colored and scented glycerine into your individual bar molds. These small bars will be the vibrant “fragments” within your larger gemstone. Allow them to cool and harden for 6-8 hours. During this time, you can start on your next color, repeating the melting, coloring, and pouring process. The goal is to create a beautiful array of colors that reflect the natural diversity of your chosen gem or mineral. This stage is incredibly relaxing – a perfect “crafternoon” activity.
While any random plastic container can work, using a dedicated silicone bar mold is highly recommended. The soap bars release so cleanly and easily, and the mold is versatile enough for making regular rectangular soaps later. Once the small colored bars are completely hardened, gently pop them out of their molds. At this stage, you could even cut these directly into gem shapes if you wanted simpler individual soaps.
Creating Organic Chunks: Now comes the fun part – chopping! Use your non-serrated knife (or even kitchen tools like a vegetable peeler) to cut the hardened colored bars into diverse, organic-looking shapes. Aim for a mix of larger chunks, smaller shards, and thin, vein-like pieces, all mirroring the natural fractures and formations of real stones. Gently rubbing the cut edges can soften sharp corners for a more weathered look. Remember to save all the soap shavings and cuttings; they are valuable resources that can be melted down and incorporated into future soap projects, minimizing waste.
Assembling Your Loaf: Carefully arrange your newly chopped, colorful soap pieces within the large loaf-shaped silicone mold. This is where your artistic vision comes into play. Think about the specific gem or mineral you’re trying to replicate. For one of my batches, I strategically placed a darker layer at the bottom, gradually adding lighter chunks and delicate “veins” as I built upwards, creating a beautiful layered effect reminiscent of natural rock formations.
The Final Pour: Melt a fresh batch of clear glycerine, adding a few drops of your chosen essential oil and a very small amount of mica for a sheer, light color. This “filler” soap will bind all your colorful chunks together and form the translucent matrix of your gemstone. Gently pour this melted glycerine into the loaf mold, ensuring it flows around and covers all the smaller pieces. The exact amount you’ll need will depend on how densely packed your chunks are. Start with a cup and add more as needed. If you desire distinct, separated layers within your final loaf, allow each pour to firm up slightly before adding the next. This creates a mesmerizing depth.
Overnight Hardening: Patiently allow the entire soap loaf to set and harden completely overnight. This crucial step ensures the soap is firm enough to be sliced and shaped without crumbling. Once fully set, you’ll have a solid block of stunning gemstone soap, eagerly awaiting its transformation into individual bars. My first attempt resulted in a beautifully layered look, while a subsequent batch yielded a slightly more uniform distribution of color, showcasing the endless possibilities of this craft.
For my initial creation, I gravitated towards a pronounced layered aesthetic (as seen below), whereas my second batch exhibited a more uniform distribution of hues (visible above). This experimentation is part of the fun!
My next creative venture will focus on limiting color variation, instead playing more with opacity to suspend small shards and pieces within what I hope will perfectly emulate clear quartz. This process is inherently enjoyable, and I assure you, you’ll be eager to continuously experiment, striving to create the most realistic gem soaps possible. Once your loaf has hardened, gently remove it from the mold and slice it as you would a loaf of bread. Then, using your knife, cut off the edges and corners, adding various facets to each slice. This creates that wonderfully random, organic feel that makes each soap rock unique. Don’t be afraid to cut some bars diagonally, others squarely – mix it up for an authentic, natural assortment!
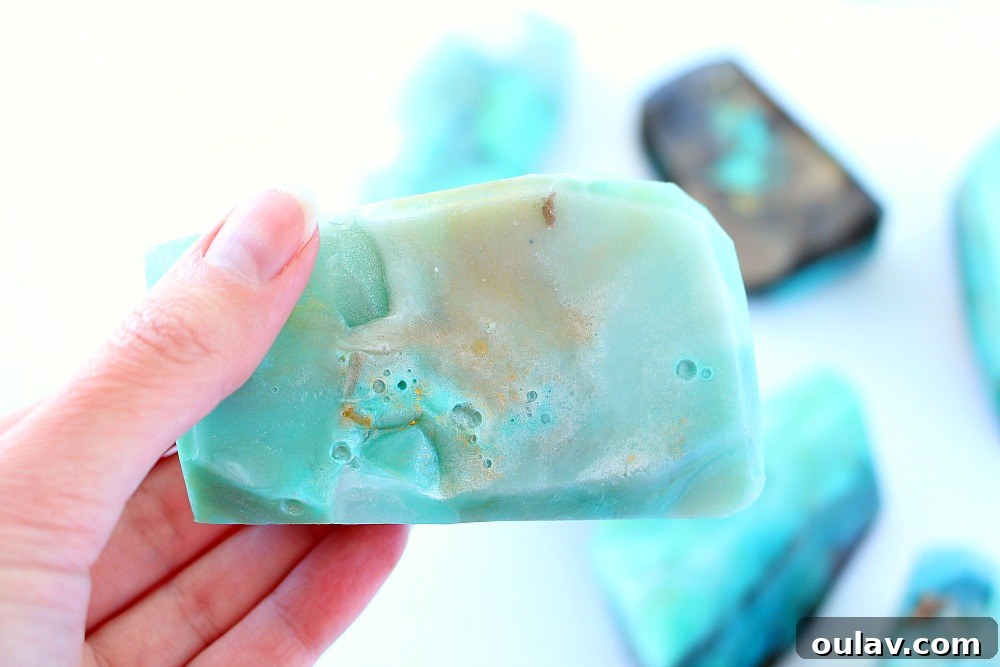
A Convenient Gemstone Soap Mold Option for Quick Creations:
One of the most satisfying aspects of soap making is its sustainable nature; you’ll always end up with little scraps and shavings that can be effortlessly melted down and reused in your next batch of rock soap. For those times you need a quick gift or simply want to use up leftovers, consider picking up a small, dedicated silicone mold, such as this convenient gem-shaped mold. With it, you can easily melt down any remaining soap scraps to create charming mini guest soaps. Alternatively, for the ultimate shortcut, you could technically bypass all the intricate steps above and simply pour some sheer colored glycerine soap base directly into these molds. This provides an instant and incredibly easy way to create beautiful gemstone-inspired soaps without the layering and shaping! It’s perfect for beginners or when you’re short on time but still want a touch of handmade magic.
Pro Tips and Smart Tricks for Making Your Best DIY Crystal Soap:
My DIY gemstone soaps bring such a cheerful and elegant statement to my bathroom counter, especially in my mid-century modern inspired space. I initially worried about the vibrant colors staining surfaces or my skin, especially when lathering up a bar in my brand new white tub. Thankfully, these fears were unfounded! The colors have proven to be completely safe and non-staining. Plus, with my notoriously sensitive skin – prone to redness, dryness, and frustrating oiliness – I’m thrilled to report that this soap has been incredibly gentle, causing no irritation or breakouts; it’s genuinely a lovely soap. Here are some invaluable tips and tricks to help you create your most beautiful and functional DIY soap rocks:
- Embrace Translucency: To truly capture the essence of a natural gem, ensure some areas of your soap remain translucent. This allows light to pass through, creating depth and that coveted realistic “gem” sparkle. Achieve this by using clear glycerine and being mindful not to over-saturate with mica.
- Maximize Mica’s Shimmer: The captivating shimmer of mica powders is most pronounced and effective when used in a clear glycerine base. The transparent nature of the base allows the reflective particles to shine brilliantly.
- Don’t Fear Experimentation: If a color doesn’t turn out as expected, don’t despair! Simply re-melt the soap bar. You can then add more dye to intensify the color, or more clear glycerine to lighten it. You can even introduce a completely new hue to transform it into something wonderful.
- Tackle Mica Bubbles: Occasionally, you might notice small mica bubbles in your melted soap. A quick spray with rubbing alcohol (isopropyl alcohol) directly onto the surface of the melted soap can help dissipate these bubbles. Alternatively, pre-mix your mica powder with a small amount of rubbing alcohol before adding it to the melted soap base for a smoother incorporation.
- Perfection is Overrated: Remember, crafting is about enjoyment and creativity, not flawless replication. Natural gemstones are perfectly imperfect, so embrace any irregularities in your soap rocks. Have fun with the process and let your unique artistic vision guide you.
- Effortless Cleanup: One of the best perks of melt and pour soap making is the easy cleanup! Since you’re working with soap, any residue on your tools like cutting boards, knives, and microwaveable bowls can simply be rinsed away or run through the dishwasher.
- Thoughtful Storage: Once your gemstone soaps are fully cured and shaped, store them in airtight containers or wrap them individually in plastic cling film to preserve their fragrance and prevent them from absorbing moisture from the air, which can cause “glycerine dew.”
- Gifting Presentation: For gifting, elevate your soap rocks with simple yet elegant packaging. Consider placing them in small organza bags, wrapping them with natural twine and a personalized tag, or arranging them in a rustic wooden box with crinkle paper.
Consider making a batch of these easy DIY gemstone soaps for thoughtful holiday gifts – you can even earn bonus points by crafting soaps inspired by birthstones! They’re a unique, handmade present that truly shows you care. (And if you find yourself in a rush, remember you can always find beautiful Soap Rocks on Amazon for stocking stuffers, saving your handmade creations for yourself later!).
P.S. Don’t Forget to Pin For Later!
P.S. For more creative inspiration, check out my stunning gold and crystal DIY soap rocks. Have you tried making your own DIY gemstone soap? I’d absolutely love to see your unique creations! Feel free to share a link in the comments section below or tag me on Instagram with your beautiful soap rocks!