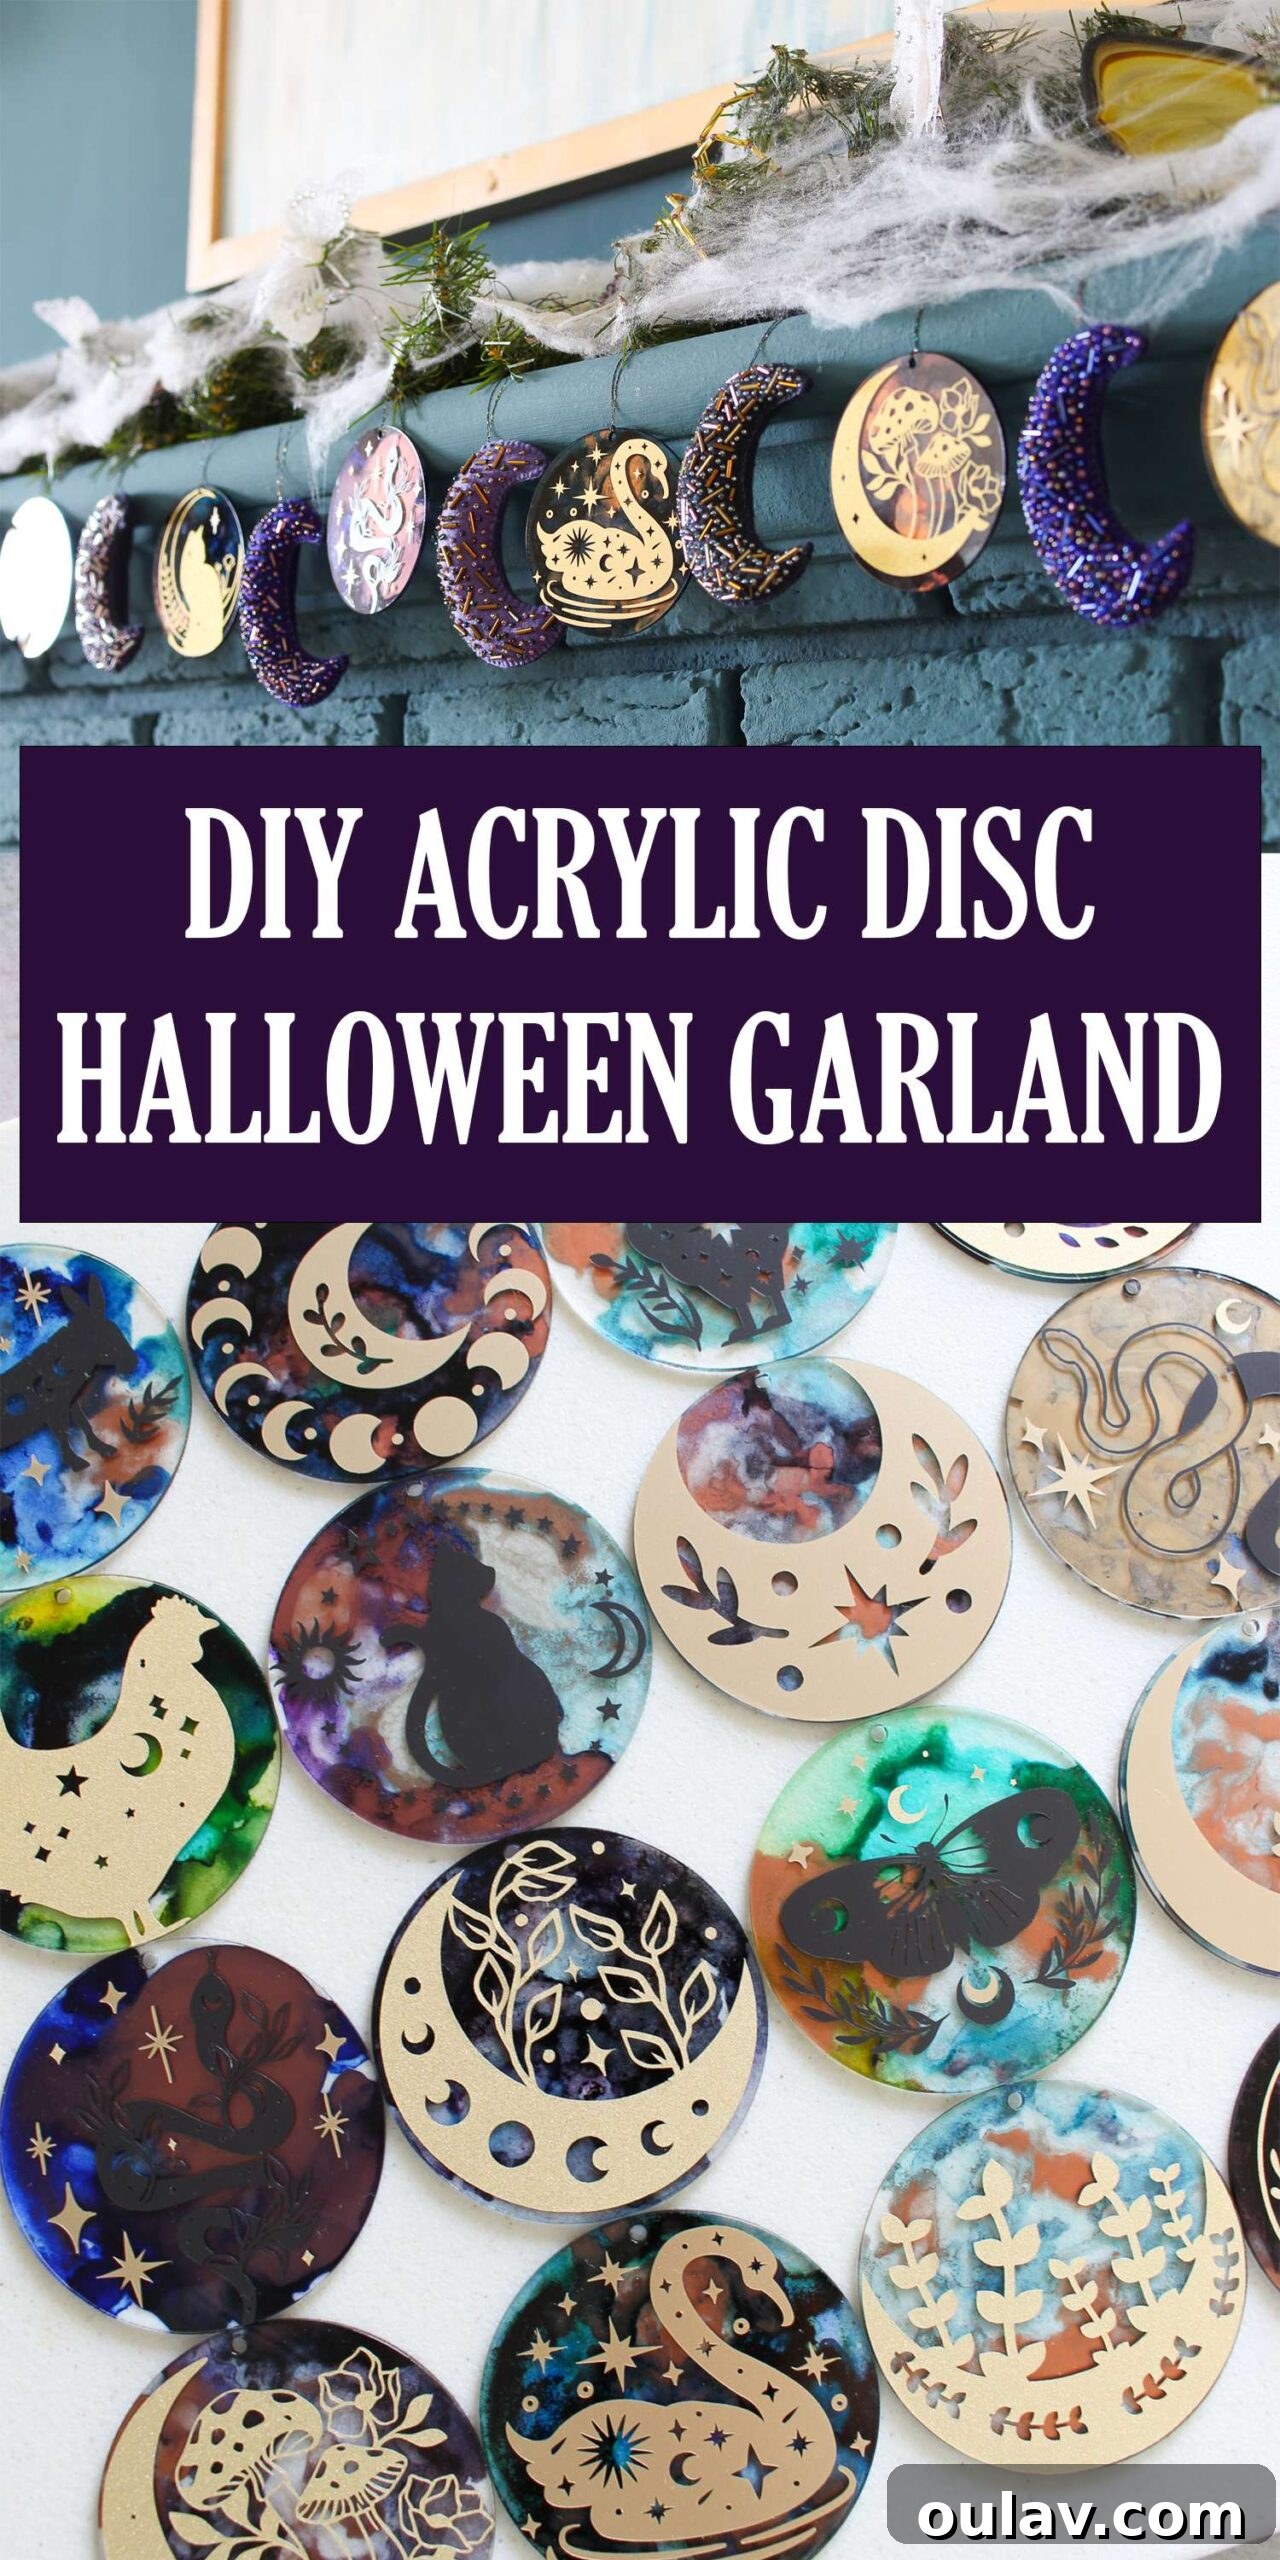
Get ready to be enchanted by a truly unique Halloween craft! This year, move beyond the ordinary and create a stunning DIY Cricut acrylic disc garland that boasts a magical, celestial vibe. What makes this project even more special is its story: it began last fall as a Christmas ornament idea and has beautifully transformed into elegant Halloween decor, proving that creativity knows no seasonal bounds. Follow along as we transform simple acrylic discs into mesmerizing pieces of art, perfect for adding an ethereal glow to your spooky season celebrations.
The journey of this garland is quite serendipitous. Initially, I envisioned these acrylic discs as exquisite Christmas ornaments, specifically designed to complement my Mom’s “Midsummer Night’s Dream” themed tree. Picture this: a collection of discs, painted with vibrant alcohol inks, ready to be adorned with whimsical, moonlit forest designs. However, as fate would have it, illness struck during the busy November/December crafting season, leaving many projects, including these ornaments, incomplete. Yet, as I revisited my crafting ideas, a delightful realization dawned upon me. The enchanting, mystical themes I had planned – swirling colors, celestial motifs, and nature-inspired imagery – perfectly aligned with the magical essence of Halloween. This unexpected pivot allowed me to breathe new life into an unfinished project, turning potential Christmas ornaments into a captivating DIY Halloween acrylic disc garland. The best part? Many of these discs can still be repurposed as ornaments for her Christmas tree later, making this a truly multi-seasonal and sustainable craft project!
Essential Supplies for Your Cricut Acrylic Halloween Garland:
To embark on this creative adventure and craft your own elegant DIY Cricut Halloween decor, gather the following high-quality materials. Investing in good supplies ensures a smoother process and a more professional, lasting finish for your celestial-themed garland:
- 3-inch Acrylic Discs: These are the foundation of your project. I specifically recommend this pack for consistent quality and clarity.
- Alcohol Inks: The magic behind the ethereal backgrounds. I’ve had fantastic results with this versatile set, and for an added touch of brilliance, metallic alcohol inks are a must.
- Alcohol Ink Blending Solution: (Optional) This helps the inks flow more smoothly and creates softer transitions, ideal for mystical designs.
- Paper Straws: (Optional) An excellent tool for manipulating ink and creating unique patterns.
- Rubbing Alcohol: Essential for cleaning discs and correcting any ink mistakes.
- Round Cotton Pads or Paper Towel: For cleaning and applying rubbing alcohol.
- Drop Cloth/Garbage Bag: Crucial for protecting your workspace from ink spills.
- Hair Dryer: (Optional) Speeds up the drying process of alcohol inks.
- Krylon Clear Glaze: To seal your alcohol ink designs, ensuring their longevity and preventing smudging.
- Cricut Cutting Machine: My Cricut Joy was perfect for this project due to its portability and precision for smaller cuts.
- Cricut Weeder Tool: Indispensable for removing excess vinyl with ease and accuracy.
- Cricut Scraper Tool: Ensures perfect adhesion of vinyl and transfer tape.
- Cricut Joy Permanent Vinyl: For your intricate designs. I achieved a magical aesthetic using Shimmer Gold, Matte Gold, and Matte Black.
- Cricut Joy Transfer Tape: For flawlessly transferring your vinyl designs onto the discs.
- Scissors: For cutting vinyl and transfer tape.
Key Considerations for Selecting Your Craft Supplies:
When choosing your supplies, especially alcohol inks and Cricut machines, a few thoughtful selections can significantly enhance your project. For alcohol inks, if you’re looking for a starter pack with a similar ethereal vibe, this trio of teal shades is fantastic. Alternatively, this larger pack featuring indigo, eggplant, lettuce, and mermaid tones offers a broader palette, all of which I utilized in my own designs. Don’t underestimate the power of metallics; a pack of metallic inks can elevate your project’s beauty threefold. A more budget-friendly option is this two-pack of copper and pearl, adding shimmer without breaking the bank.
If you don’t own a Cricut cutting machine, don’t despair! You can still achieve a magical look by purchasing ready-made holographic butterfly stickers or exploring your local dollar store for charming Halloween-themed stickers or adhesive gems and crystals. For those contemplating a Cricut purchase, I wholeheartedly recommend the Cricut Joy. Despite also owning a more advanced Cricut Maker 3, I frequently reach for my Joy due to its compact size and efficiency for smaller projects like this. It’s an excellent entry point into the world of Cricut crafts without the commitment of a more expensive machine.
Step-by-Step Guide: Mastering Alcohol Inks on Acrylic Discs:
Creating these captivating backgrounds with alcohol inks is a rewarding process that allows for incredible artistic expression. Follow these steps carefully to ensure a beautiful and lasting finish for your alcohol ink Halloween craft idea:
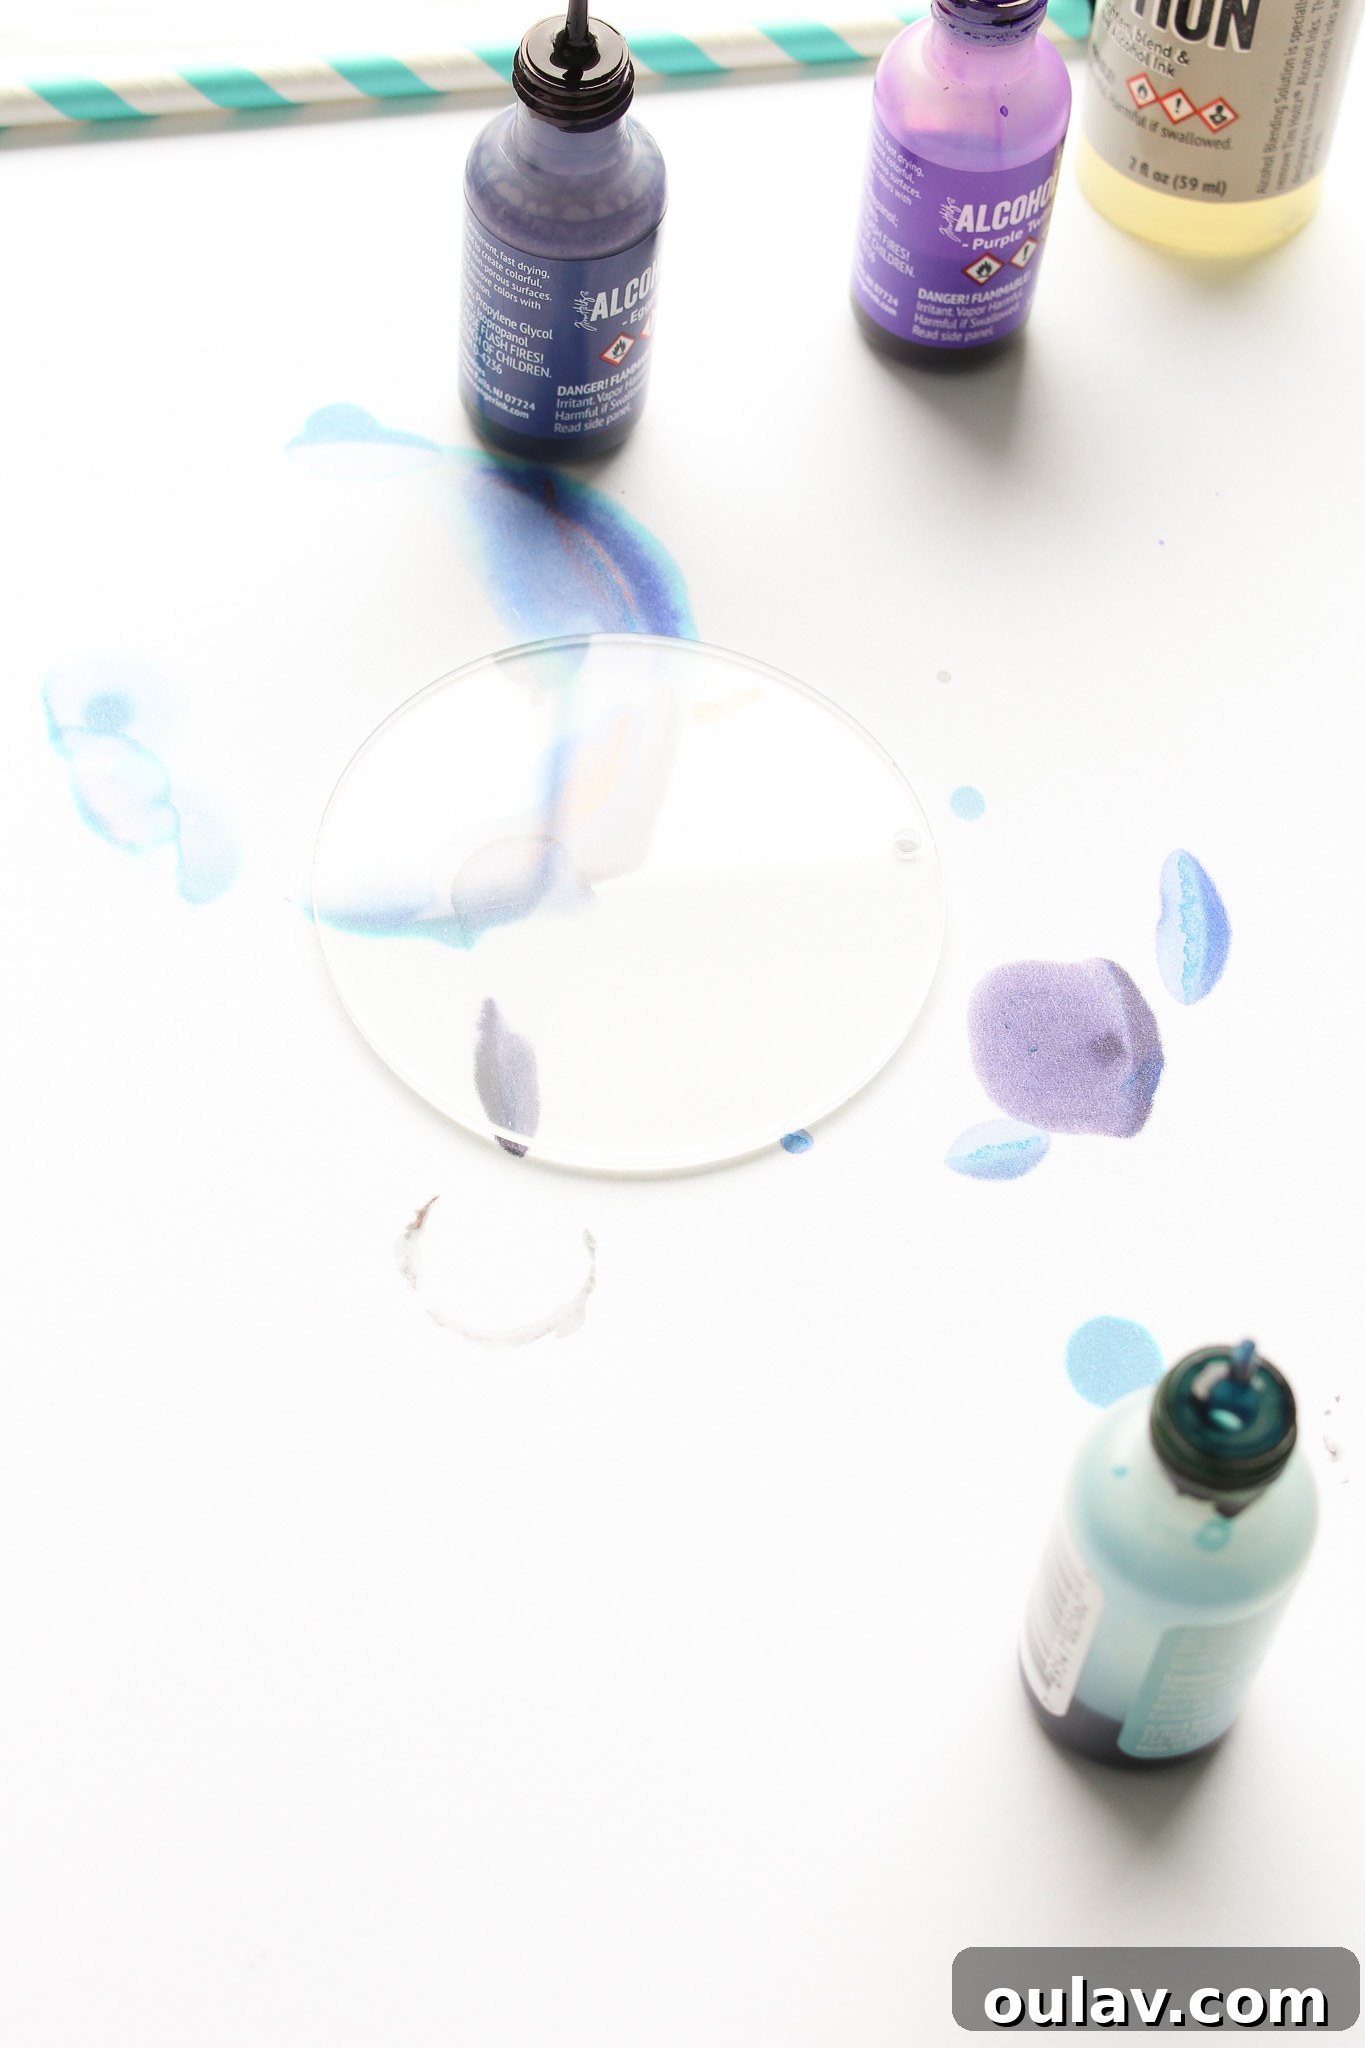
- Prepare Your Surface: Begin by carefully peeling off the protective film from one side of each acrylic disc. This is the side you’ll be painting. Leave the other side covered for now to protect it from scratches and smudges during the inking process.
- Clean Thoroughly: Dampen a cotton pad with rubbing alcohol and gently wipe the peeled surface of the disc. This removes any oils or dust, ensuring optimal ink adhesion and a pristine finish.
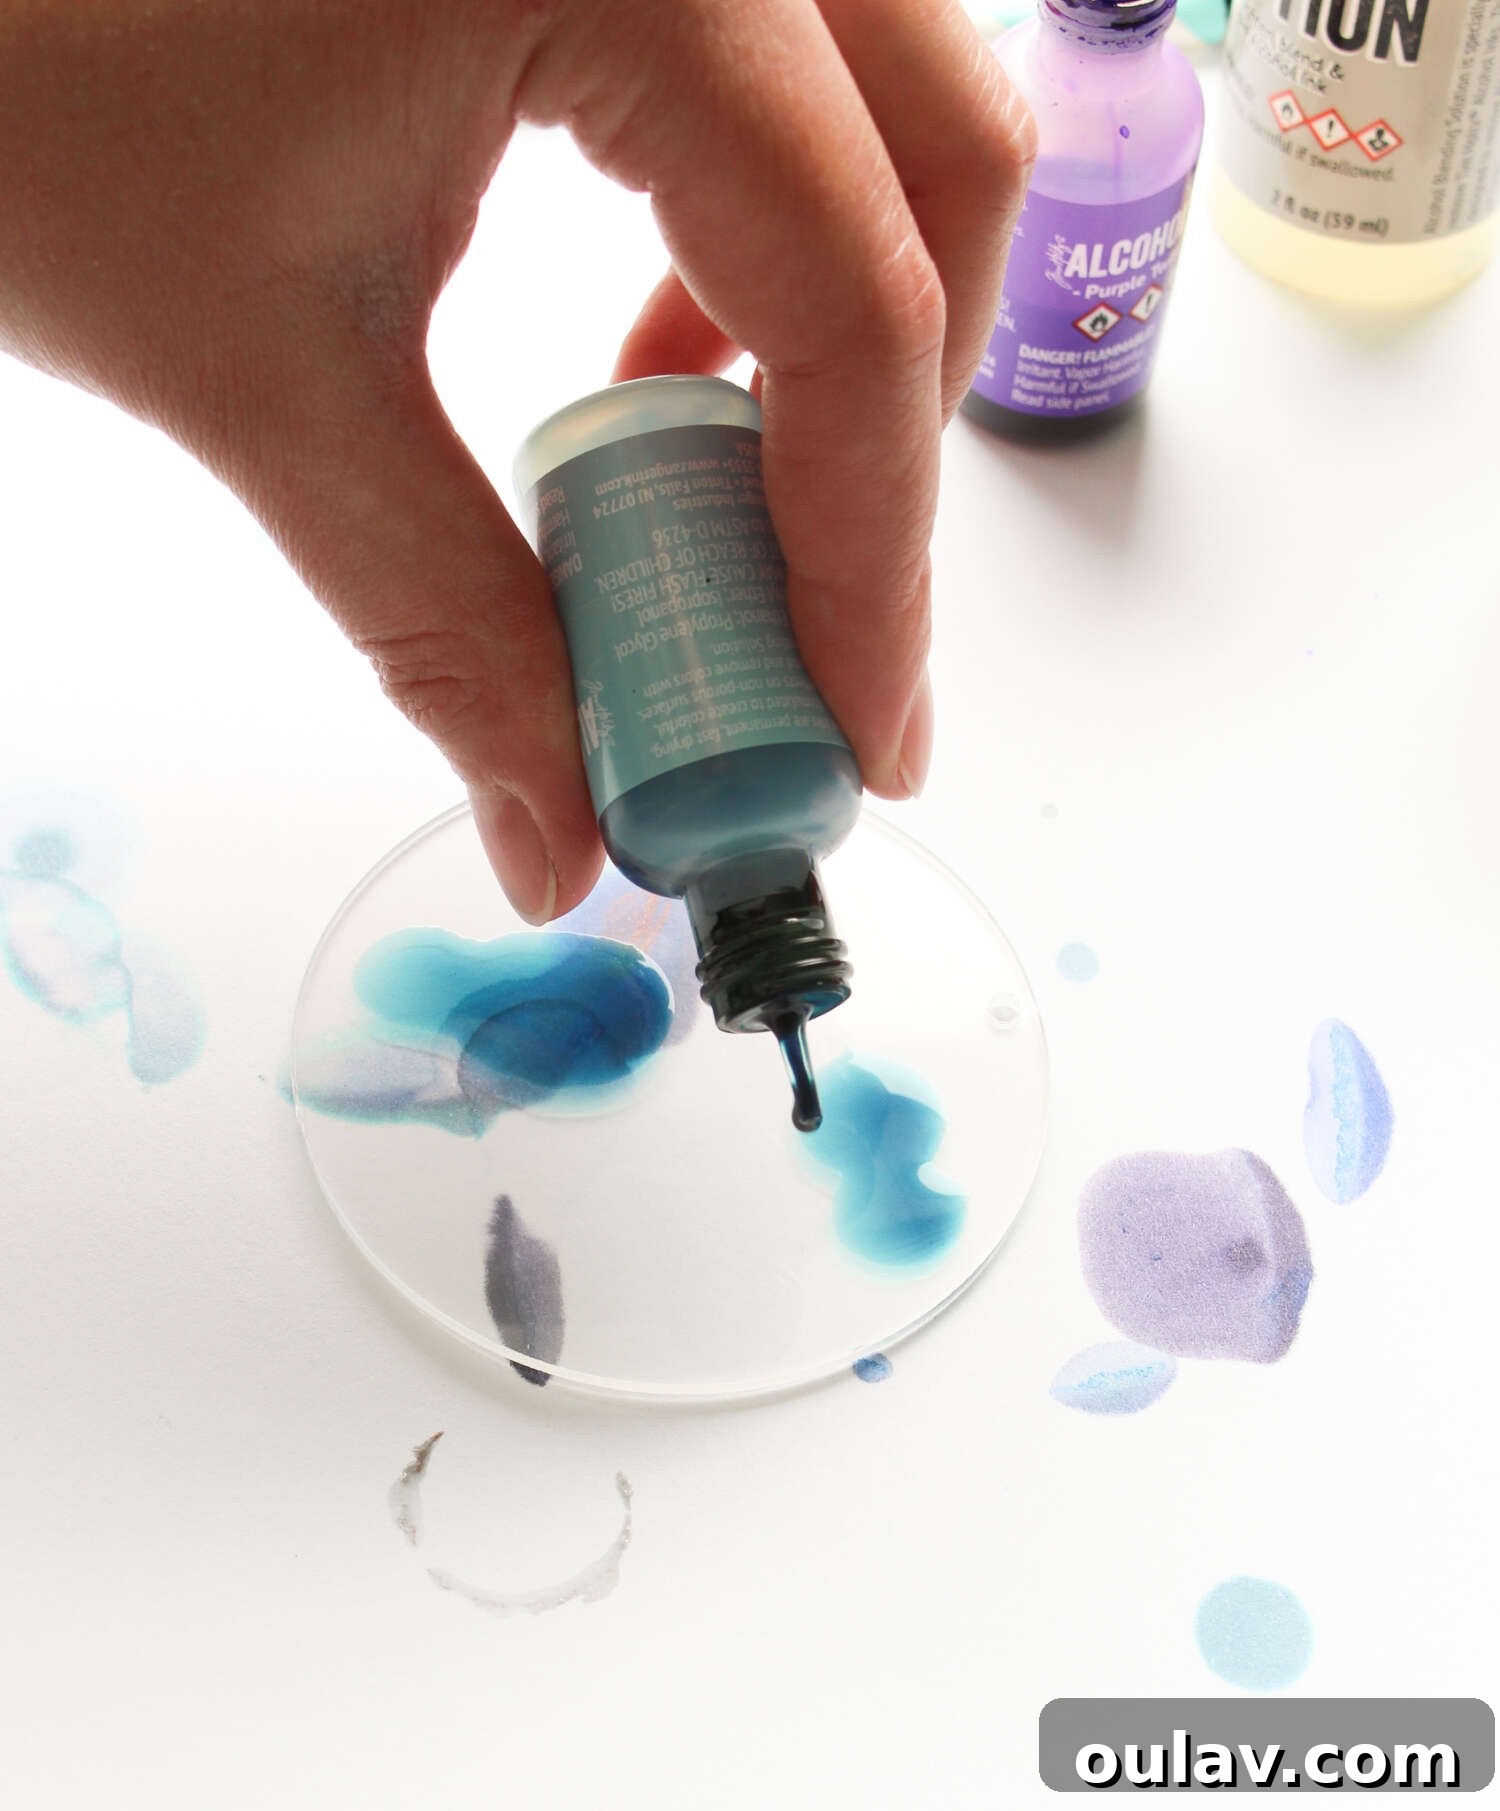
- Apply Blending Solution (Optional but Recommended): For smoother ink flow and more organic, watercolor-like effects, apply a few drops of alcohol ink blending solution to the disc. This acts as a medium for the inks to move freely.
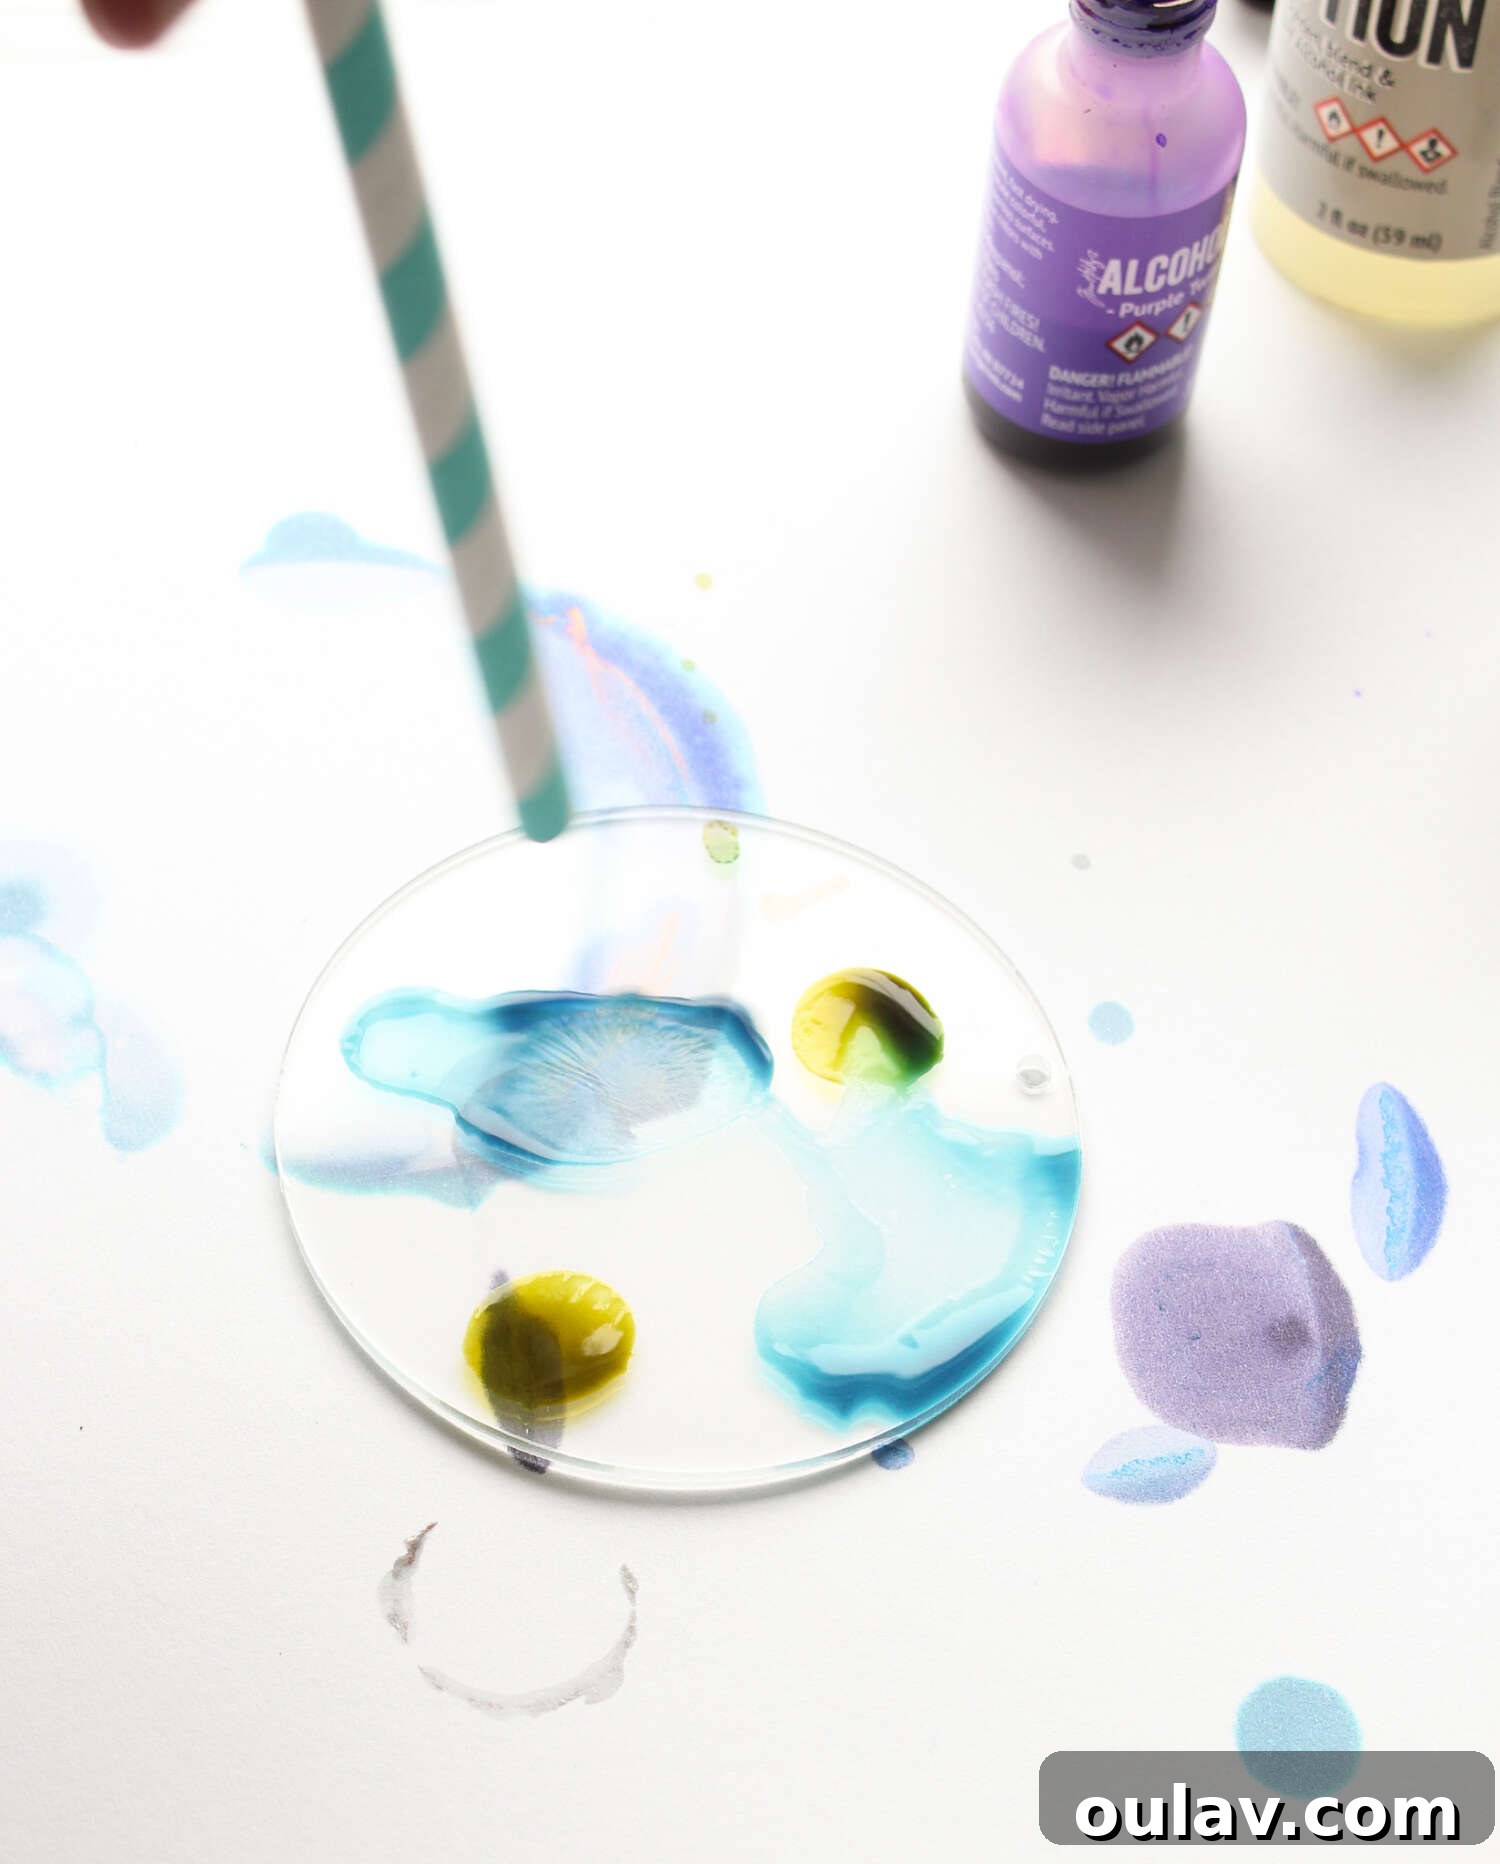
- Strategically Apply Alcohol Inks: Now for the fun part! Apply a few drops of your chosen alcohol inks. Remember, “less is more” initially. You can always add more ink, but it’s harder to remove excess without starting over. Experiment with different color combinations that evoke a magical Halloween or celestial theme.
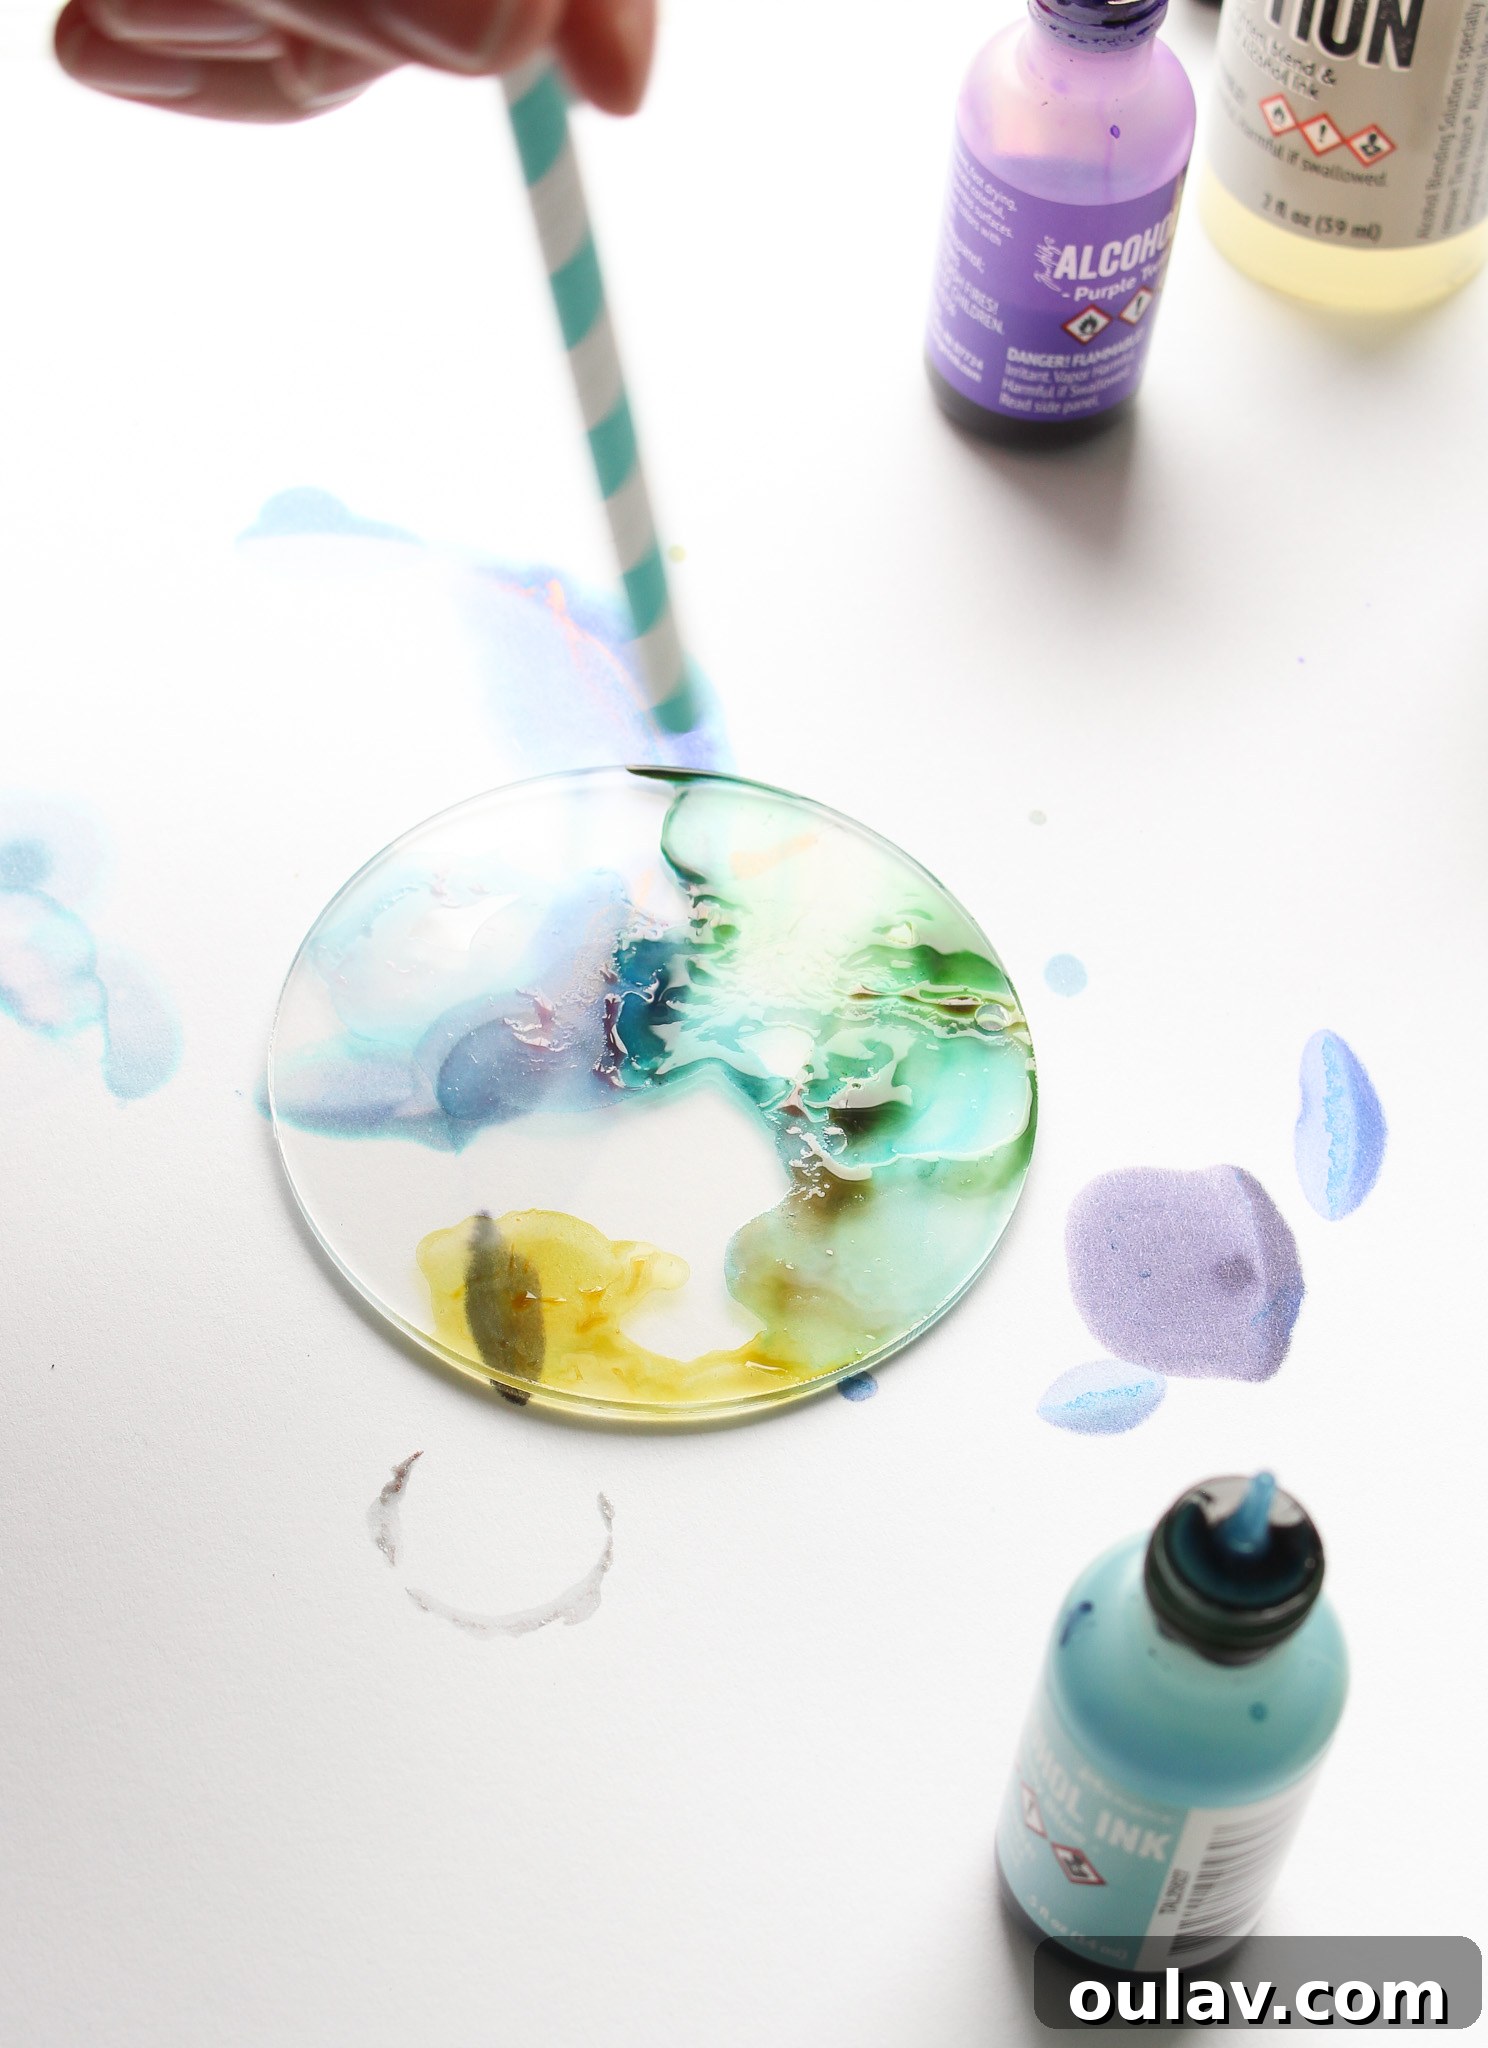
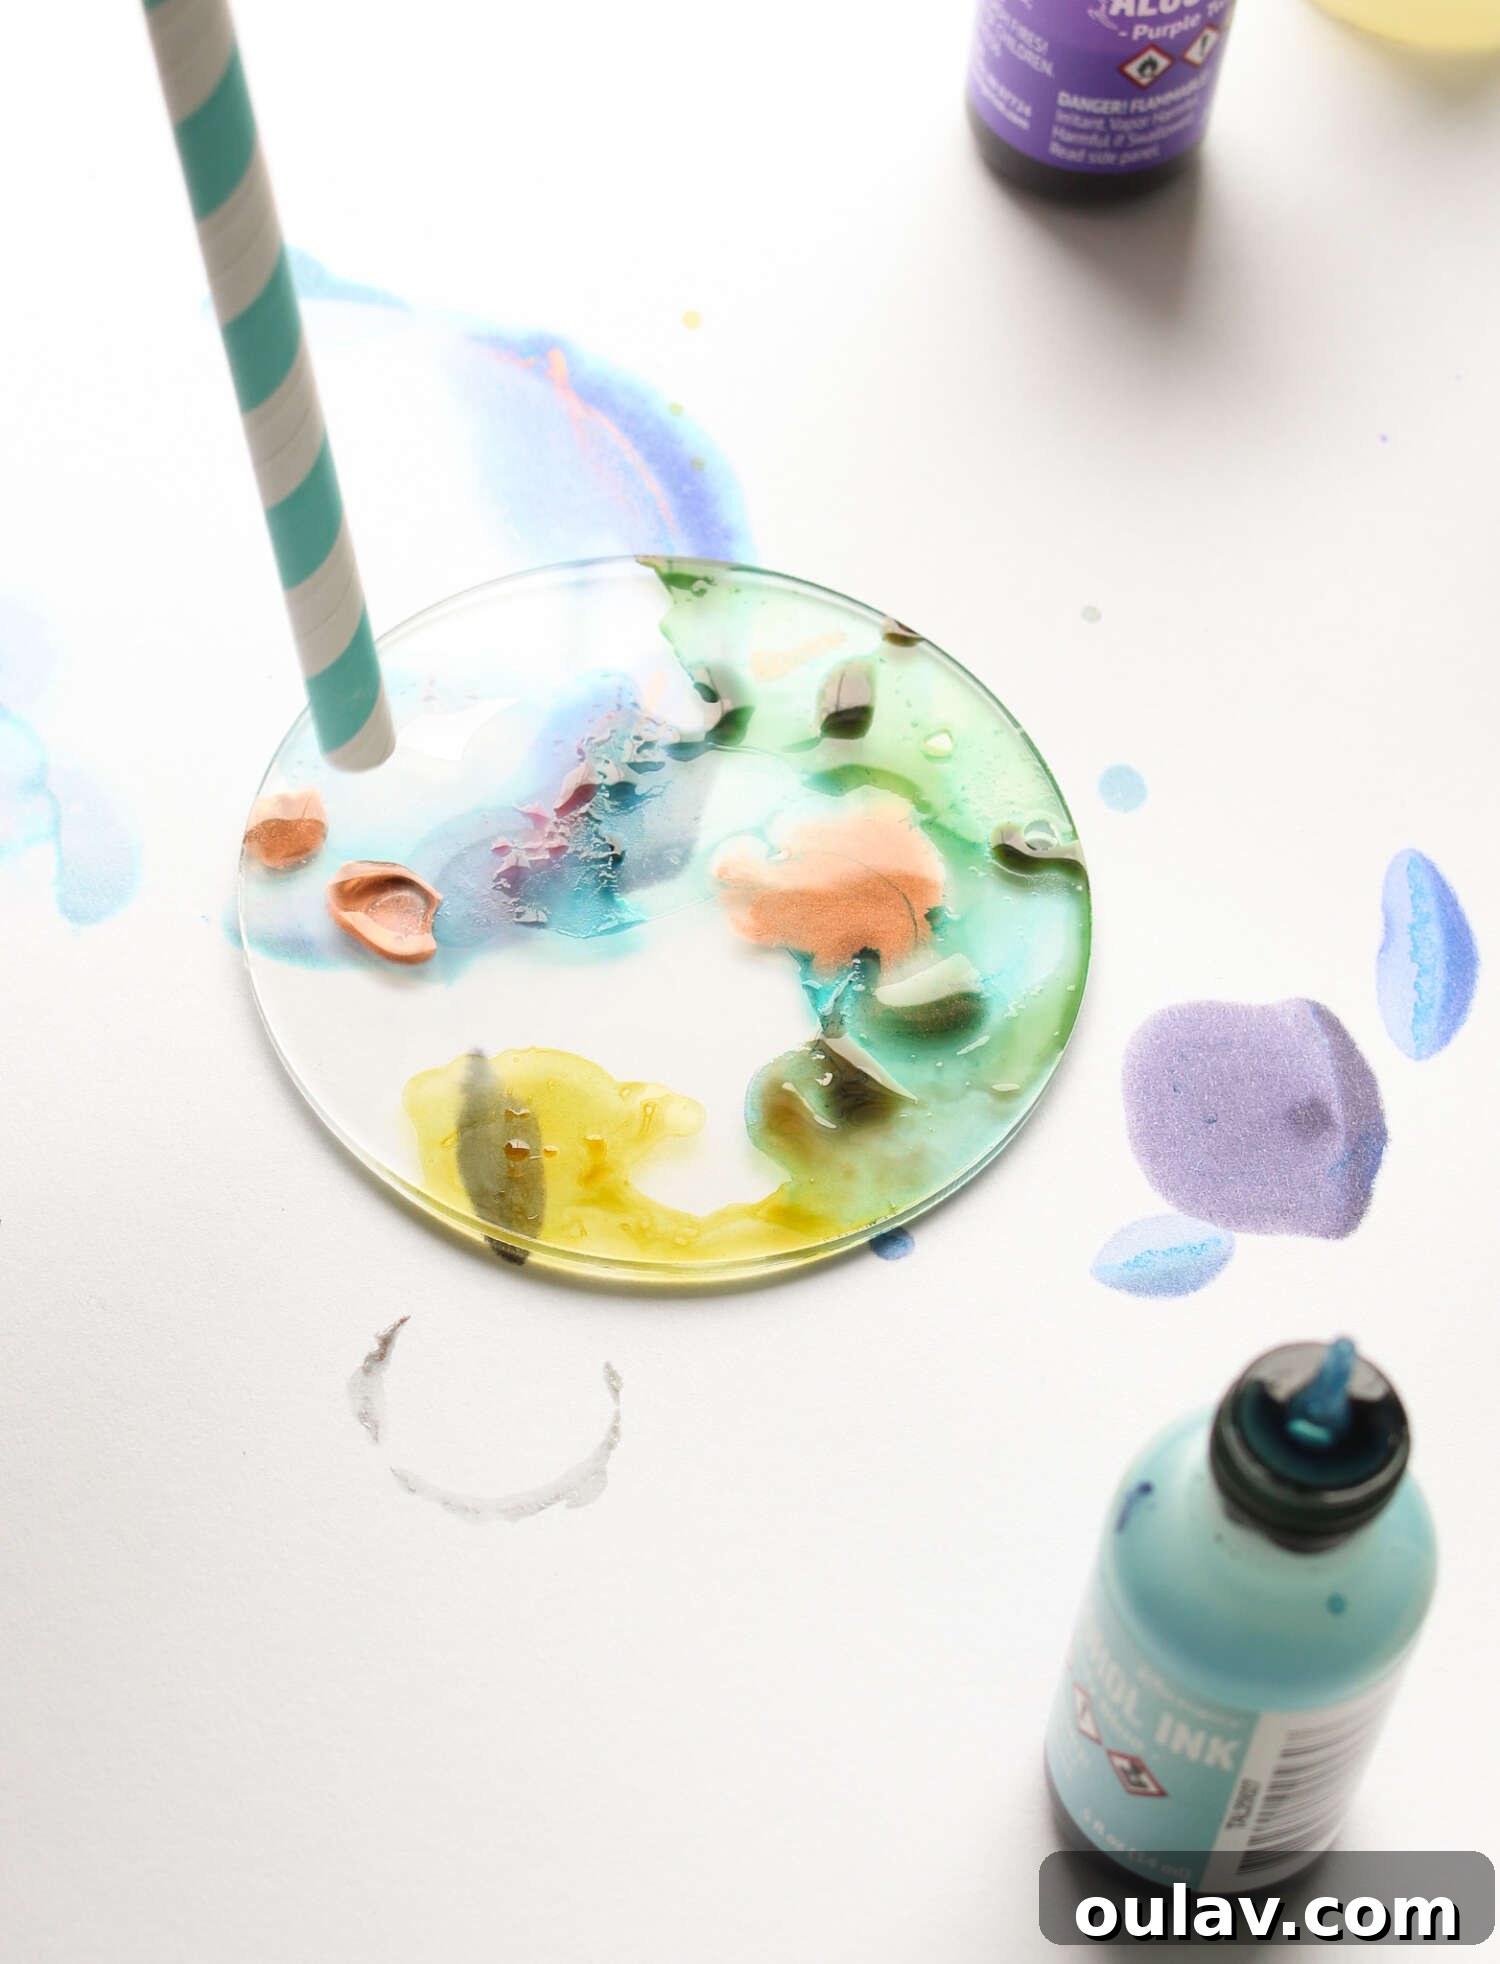
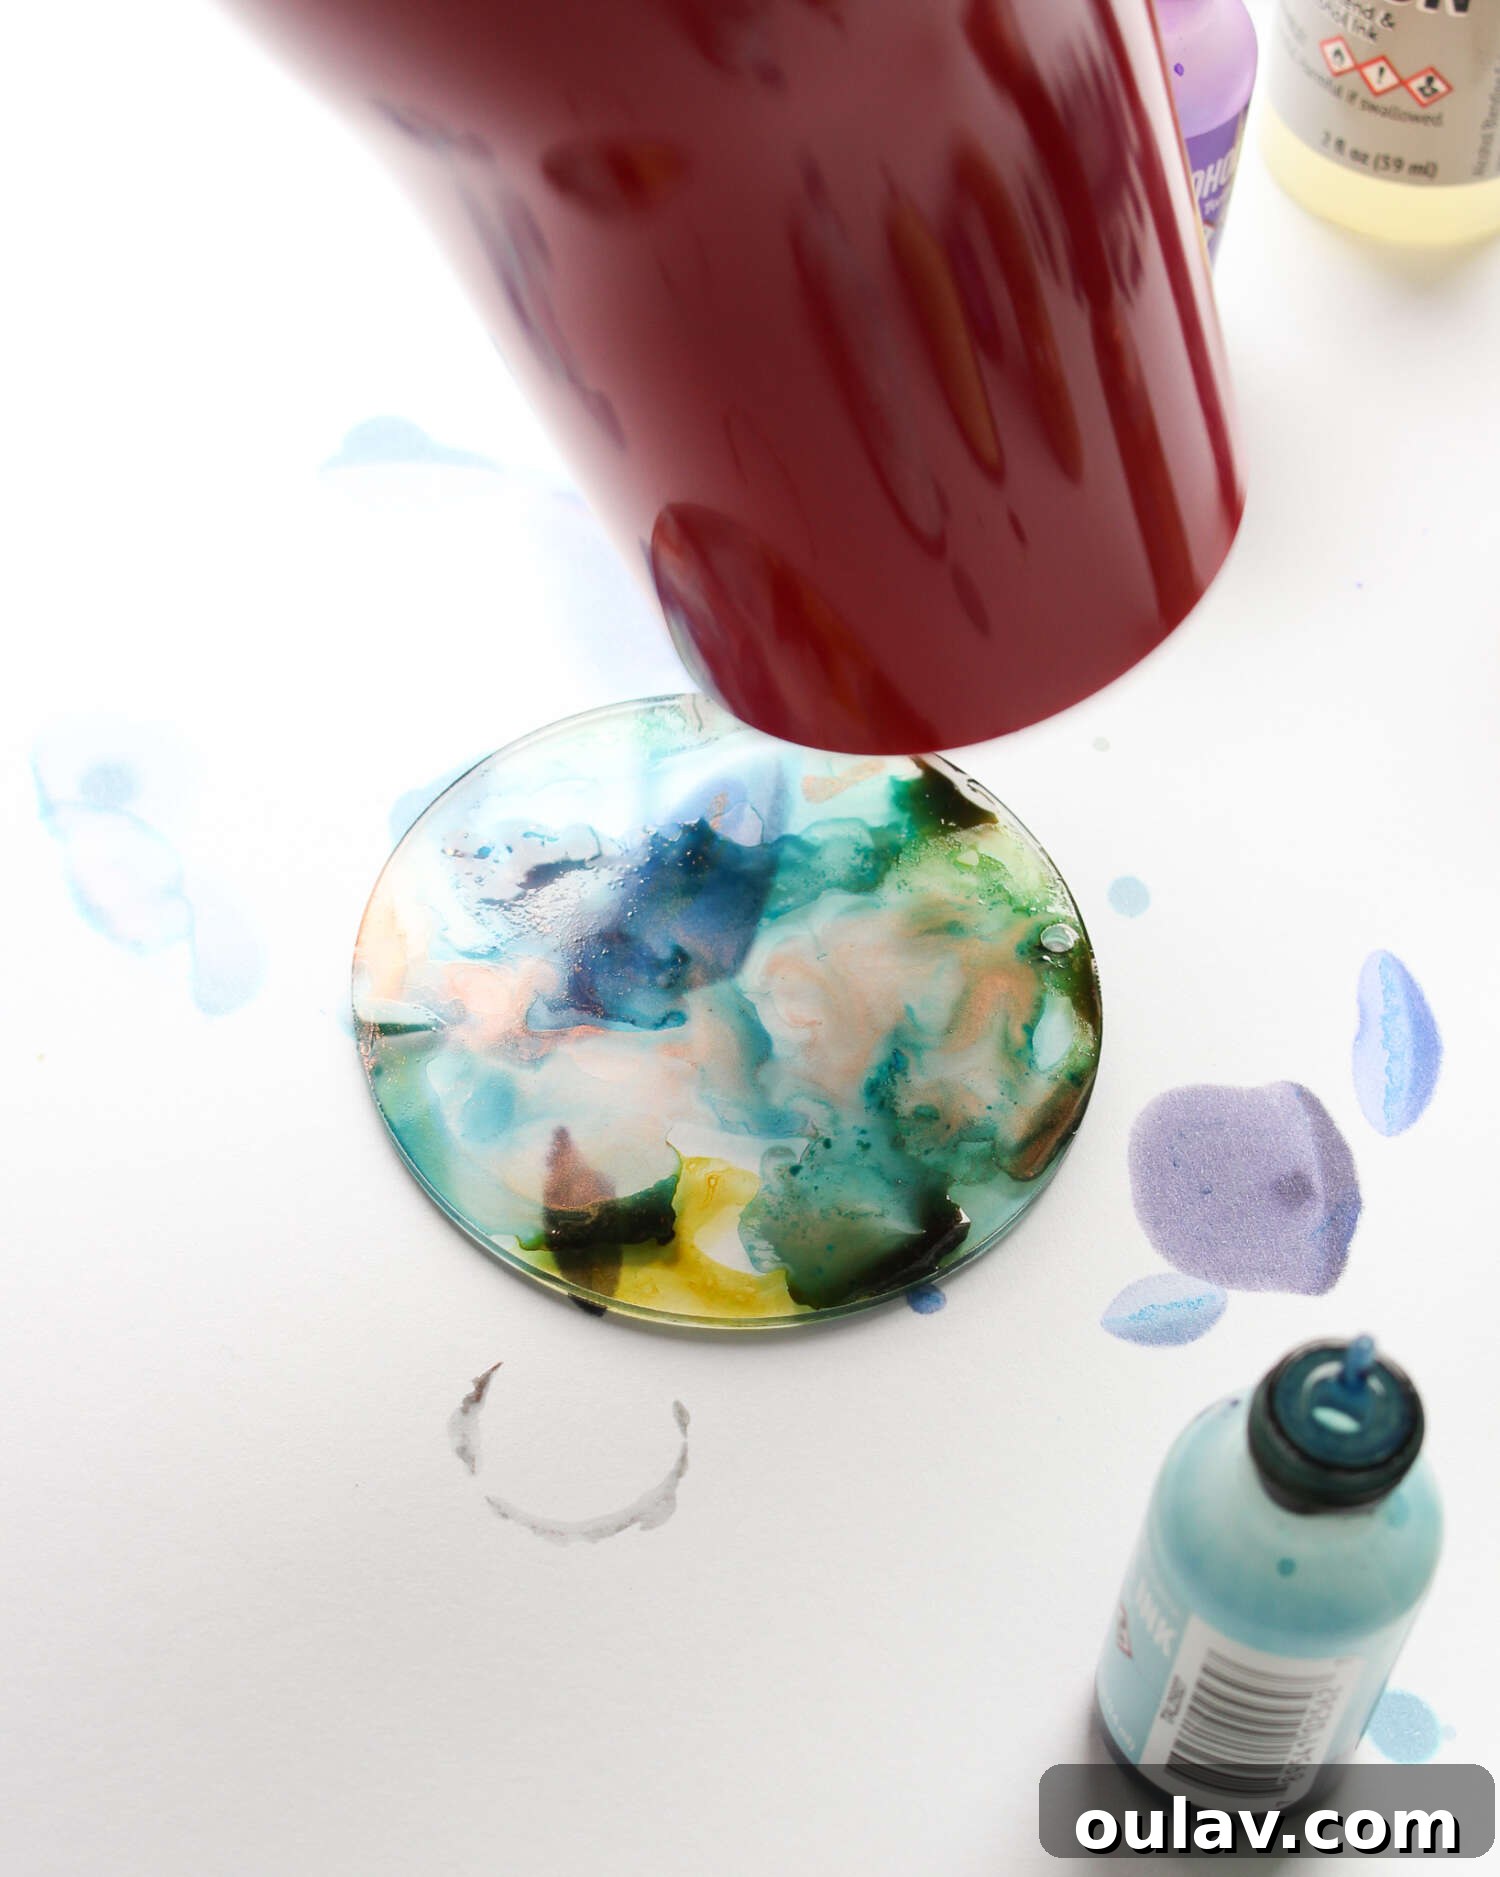
- Manipulate the Ink: Use a paper straw to gently blow on the ink, guiding it across the disc to create swirling, abstract patterns. Alternatively, a hair dryer on a low, cool setting can also be used to move the inks and blend colors. This step is where your unique design truly takes shape.
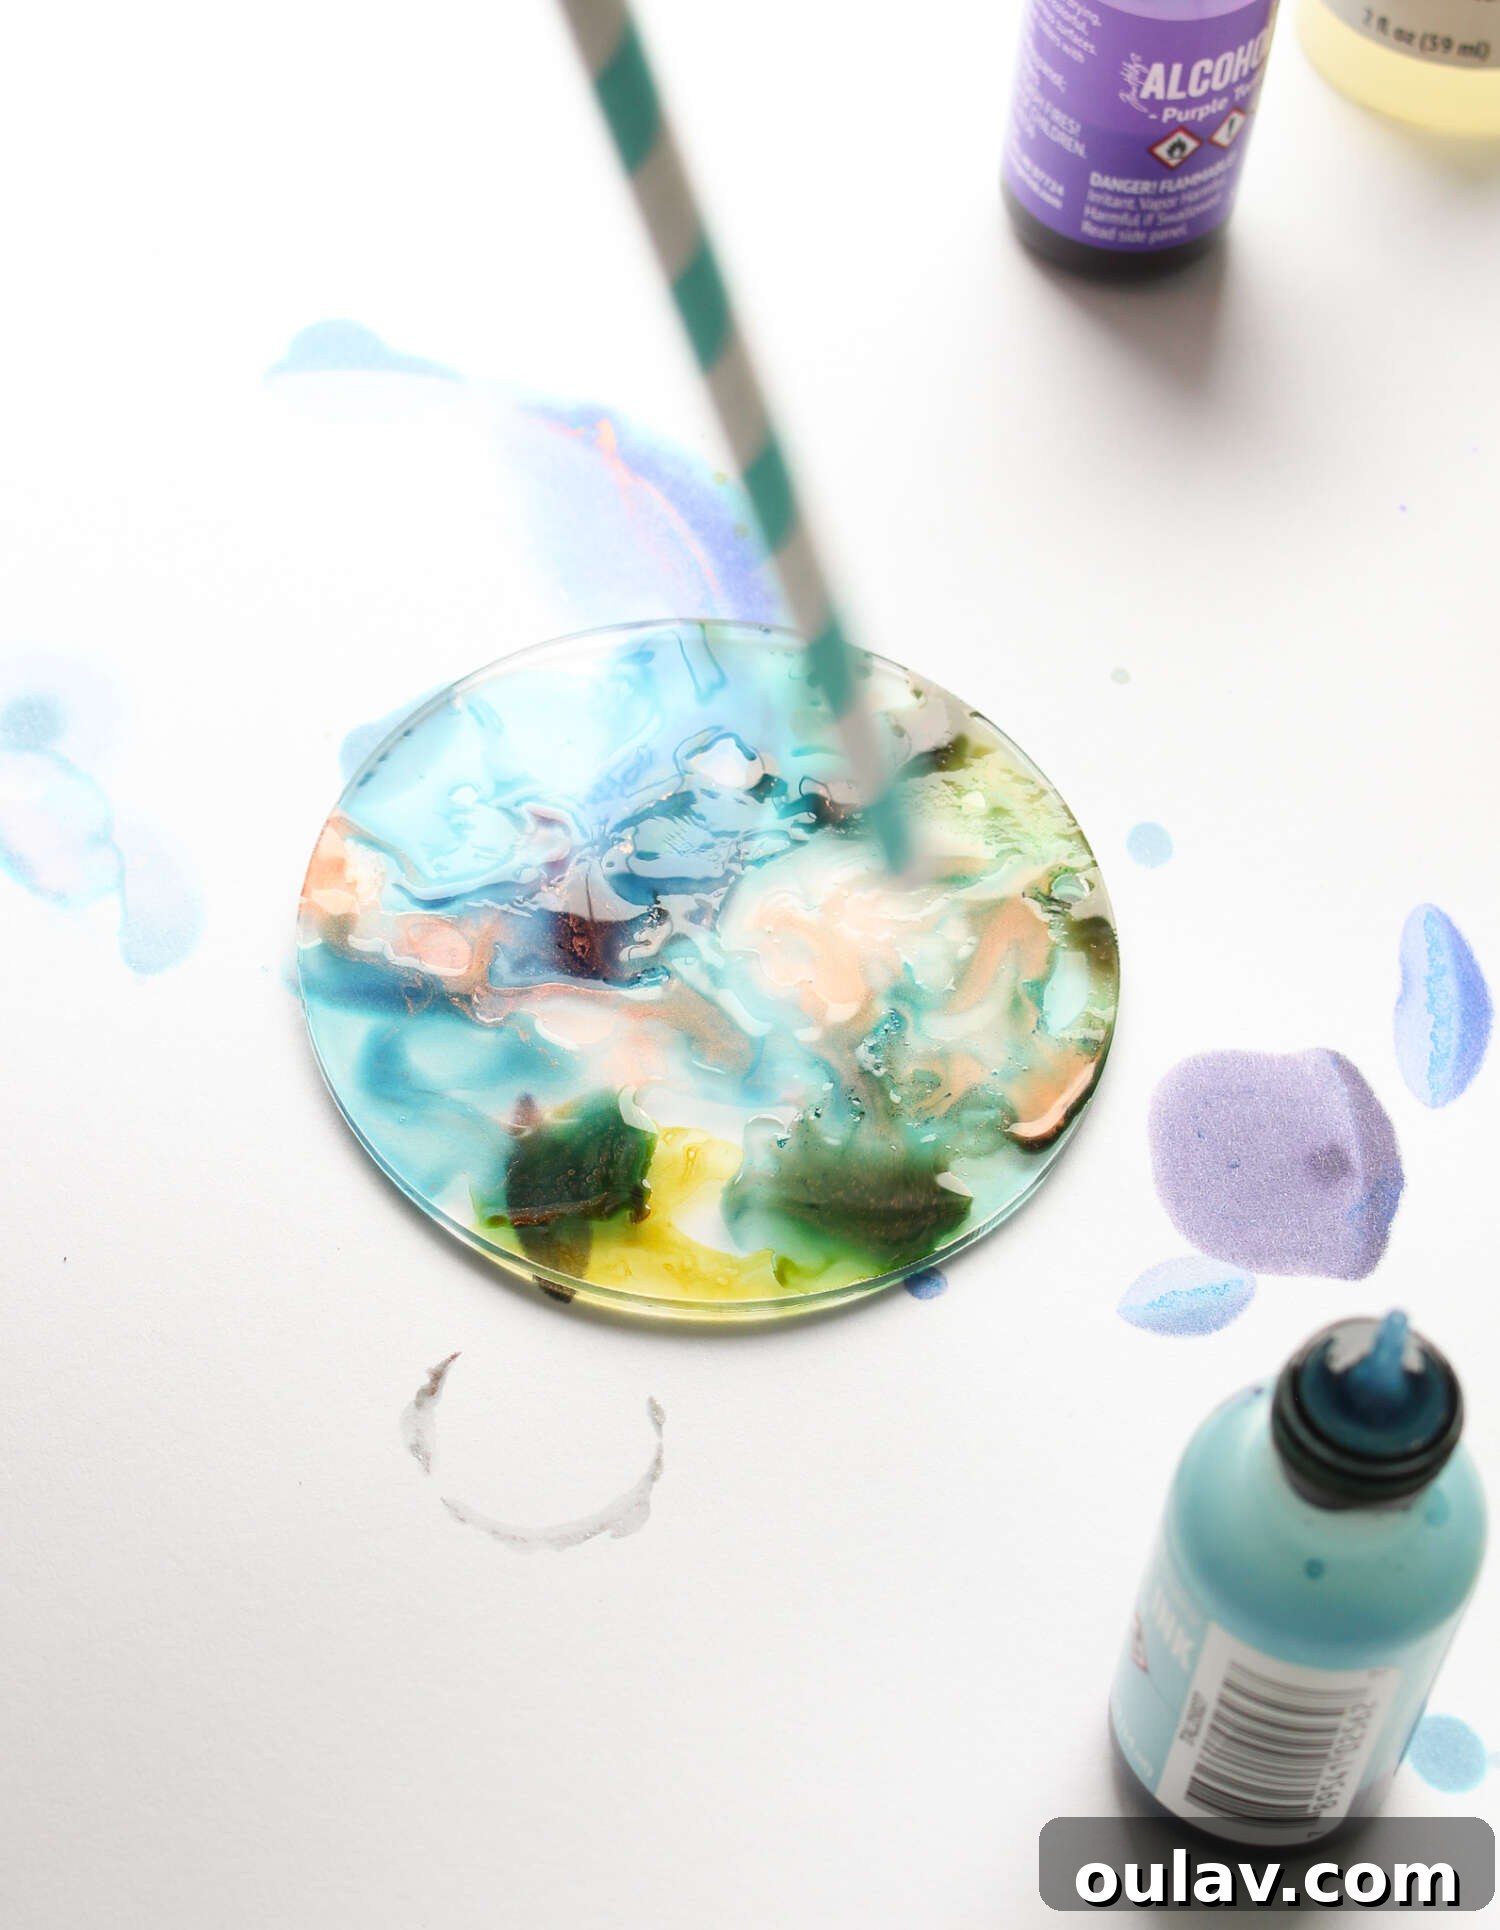
- Build Layers and Depth: Repeat steps 4 and 5, adding more ink or different colors until you achieve a design that you love. Don’t be afraid to layer colors to create depth and interesting visual textures.
- Correcting Mistakes: Don’t worry if a design doesn’t turn out as planned! Alcohol inks are quite forgiving. Simply use a rubbing alcohol-soaked cotton pad to wipe away the ink and start fresh.
- Ensure Complete Drying: Allow the alcohol ink to dry completely. This can take some time naturally, but a hair dryer on a cool setting can significantly speed up the process. Ensure the surface is no longer tacky before moving on.
- Seal for Protection: Once thoroughly dry, spray a light, even coat of Krylon Clear Glaze over the inked surface. This crucial step seals the ink, protects it from scratches, and prevents it from reactivating with moisture, ensuring your beautiful designs last.
- Final Drying: Set the sealed discs aside in a well-ventilated area to dry completely according to the glaze manufacturer’s instructions.
Behold Your Beautifully Inked Acrylic Discs:
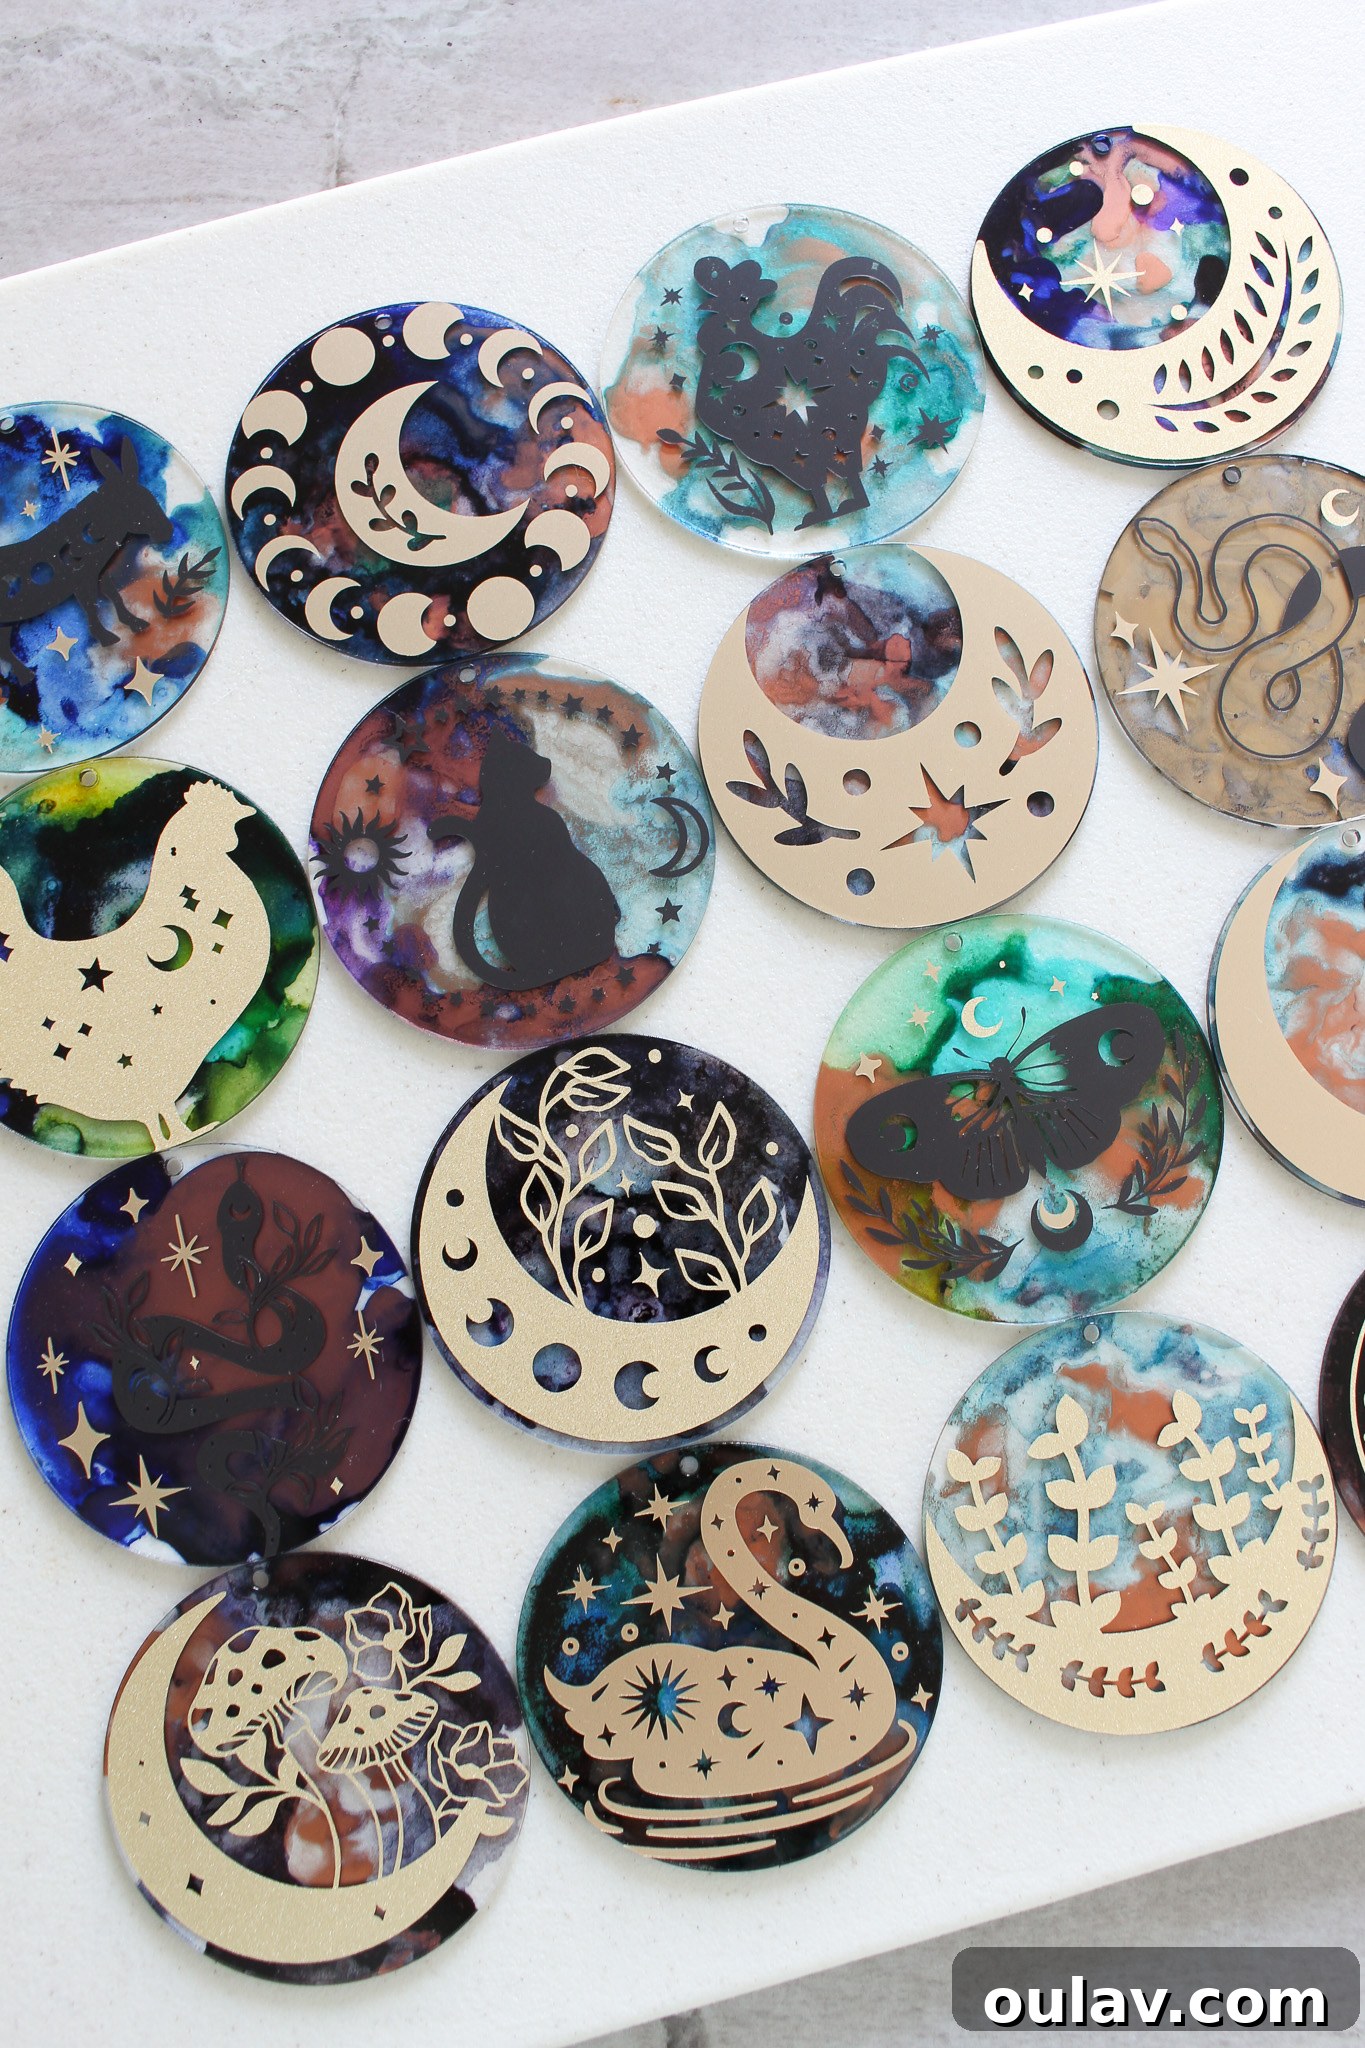
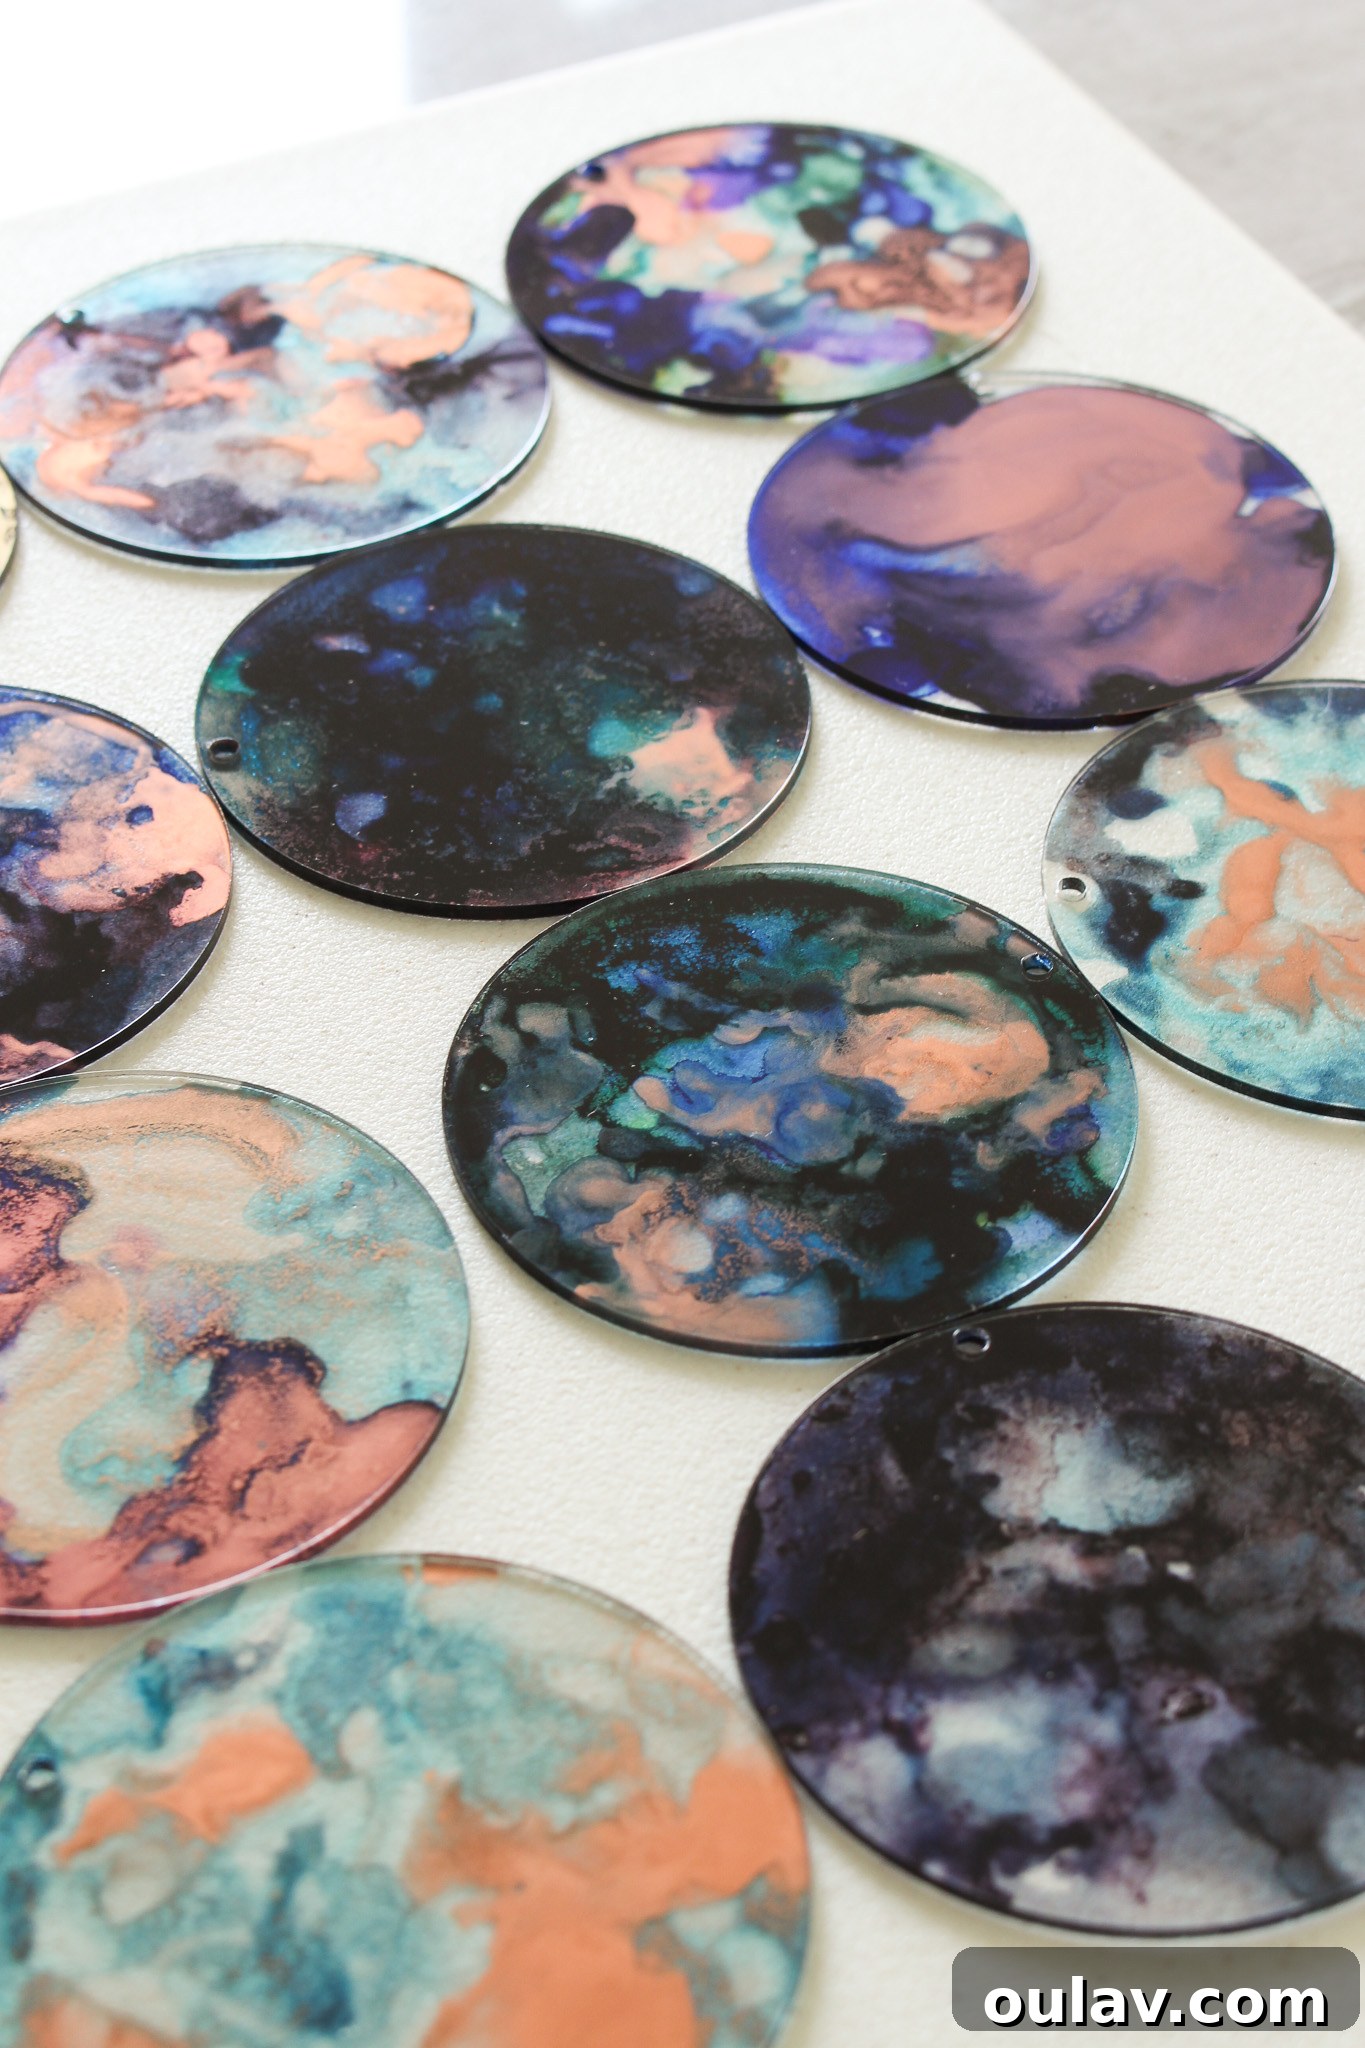
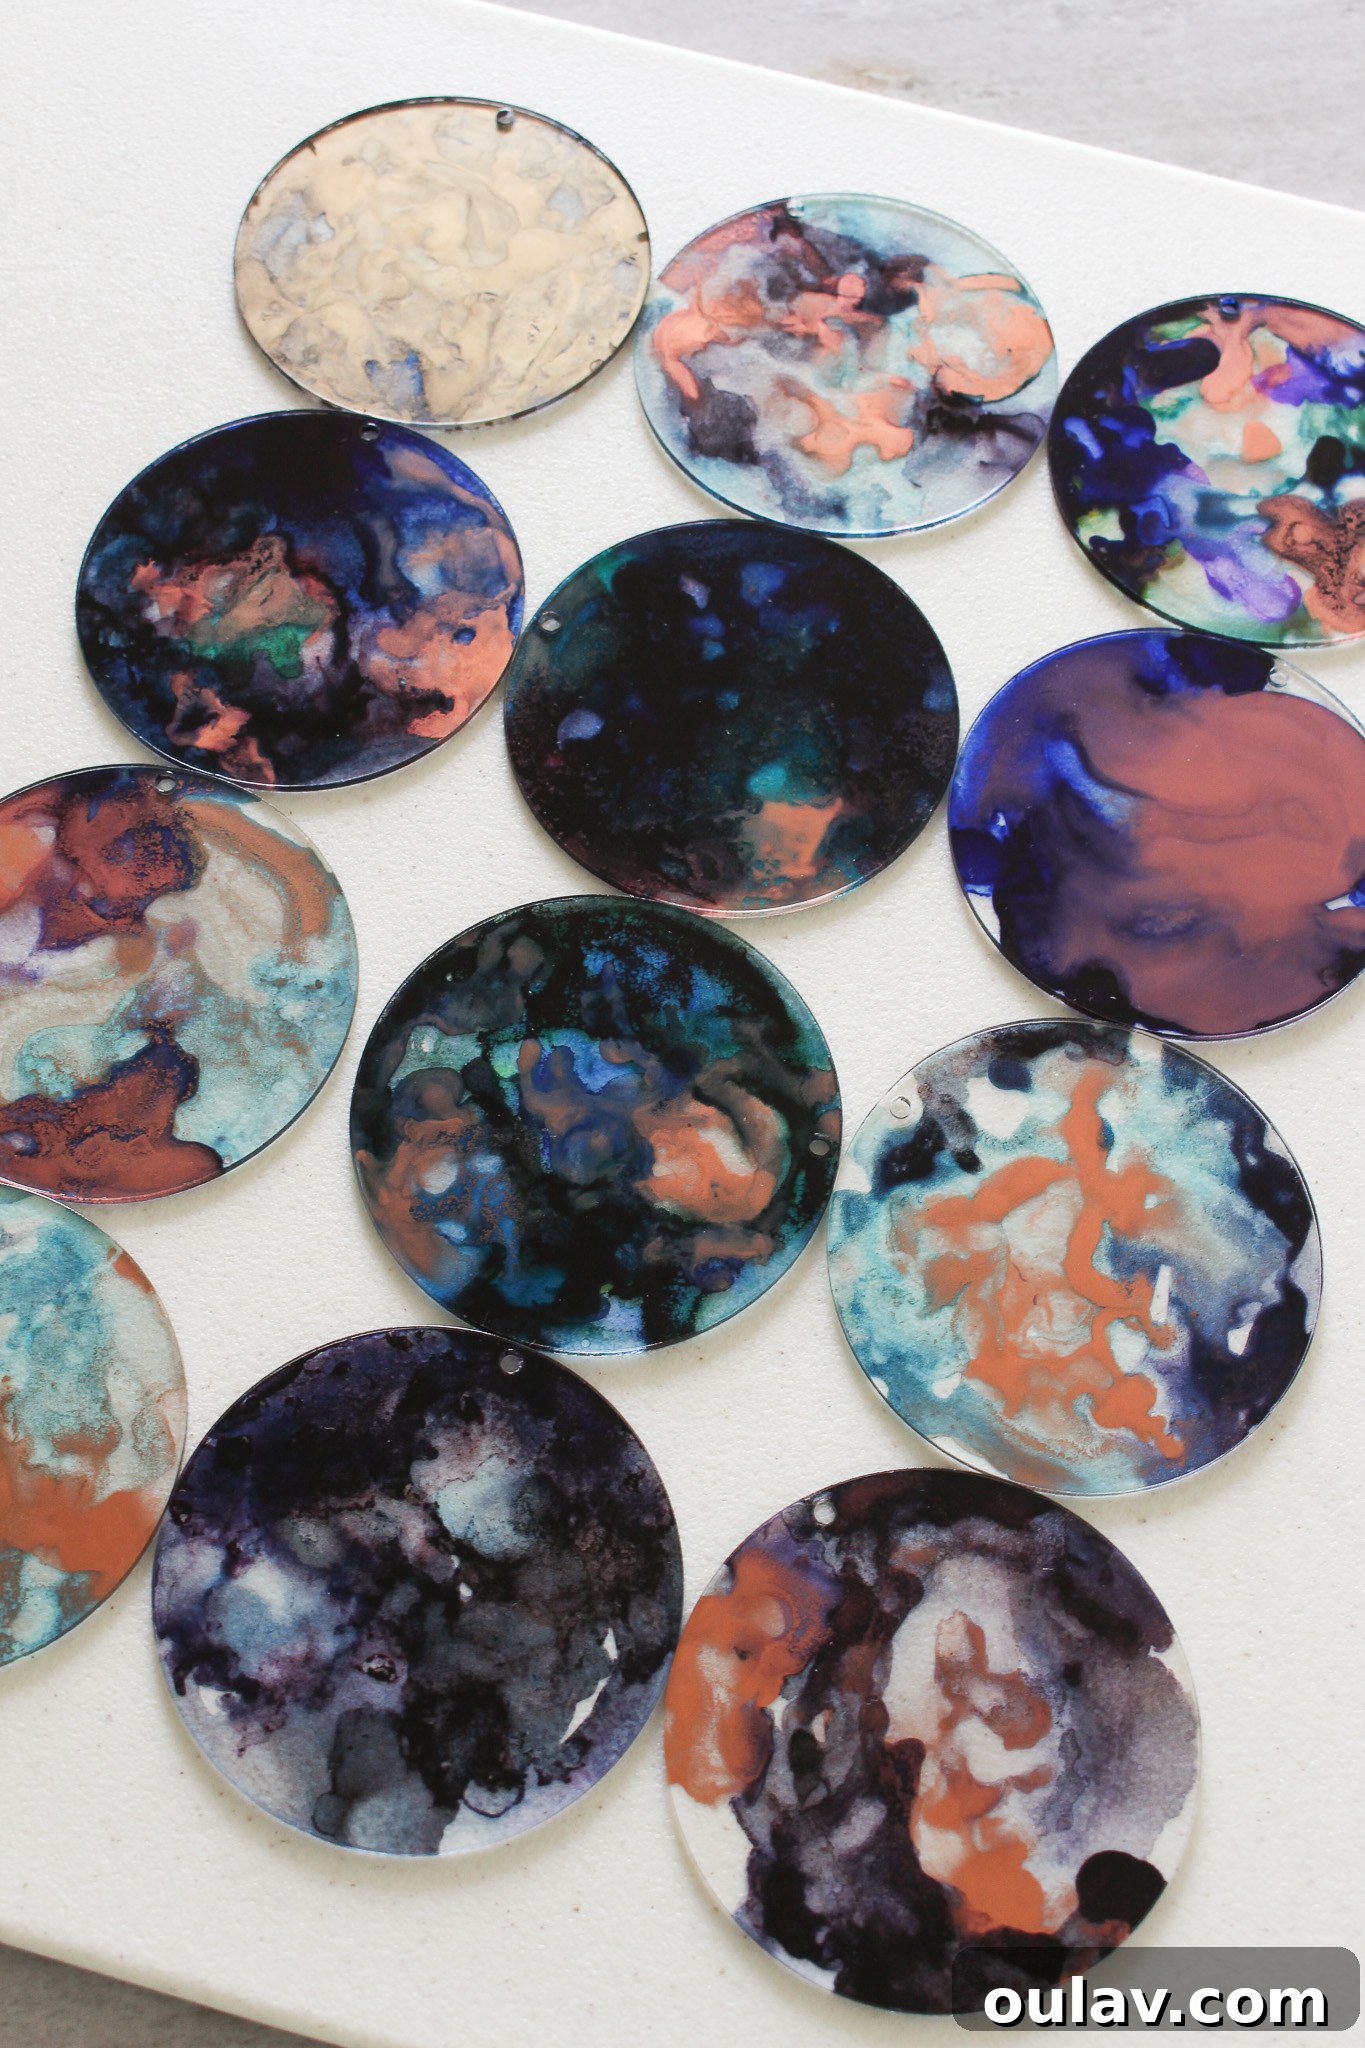
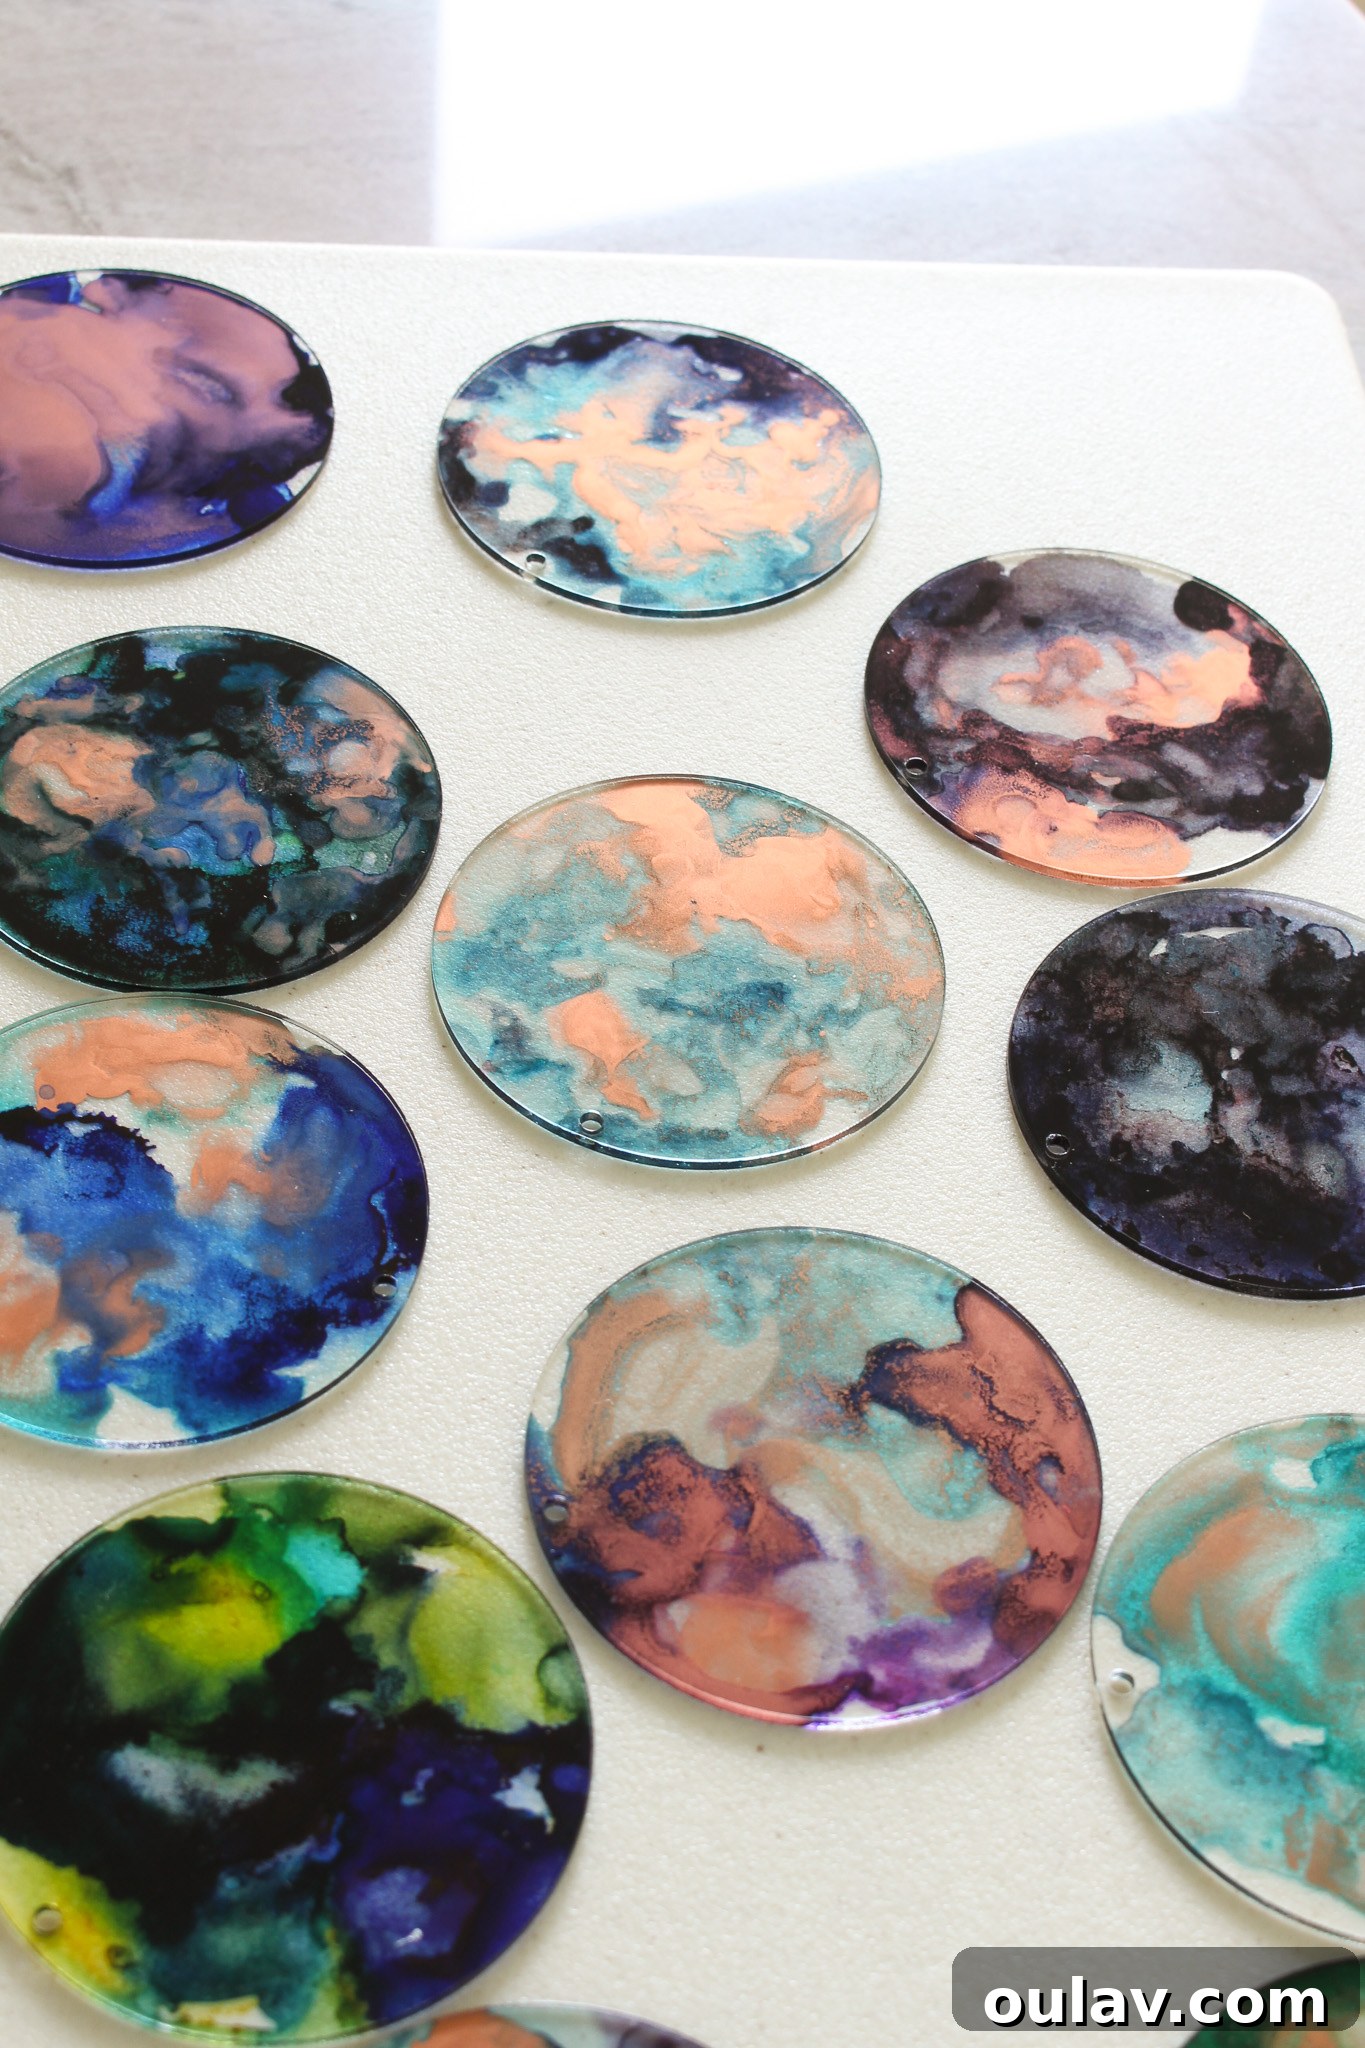
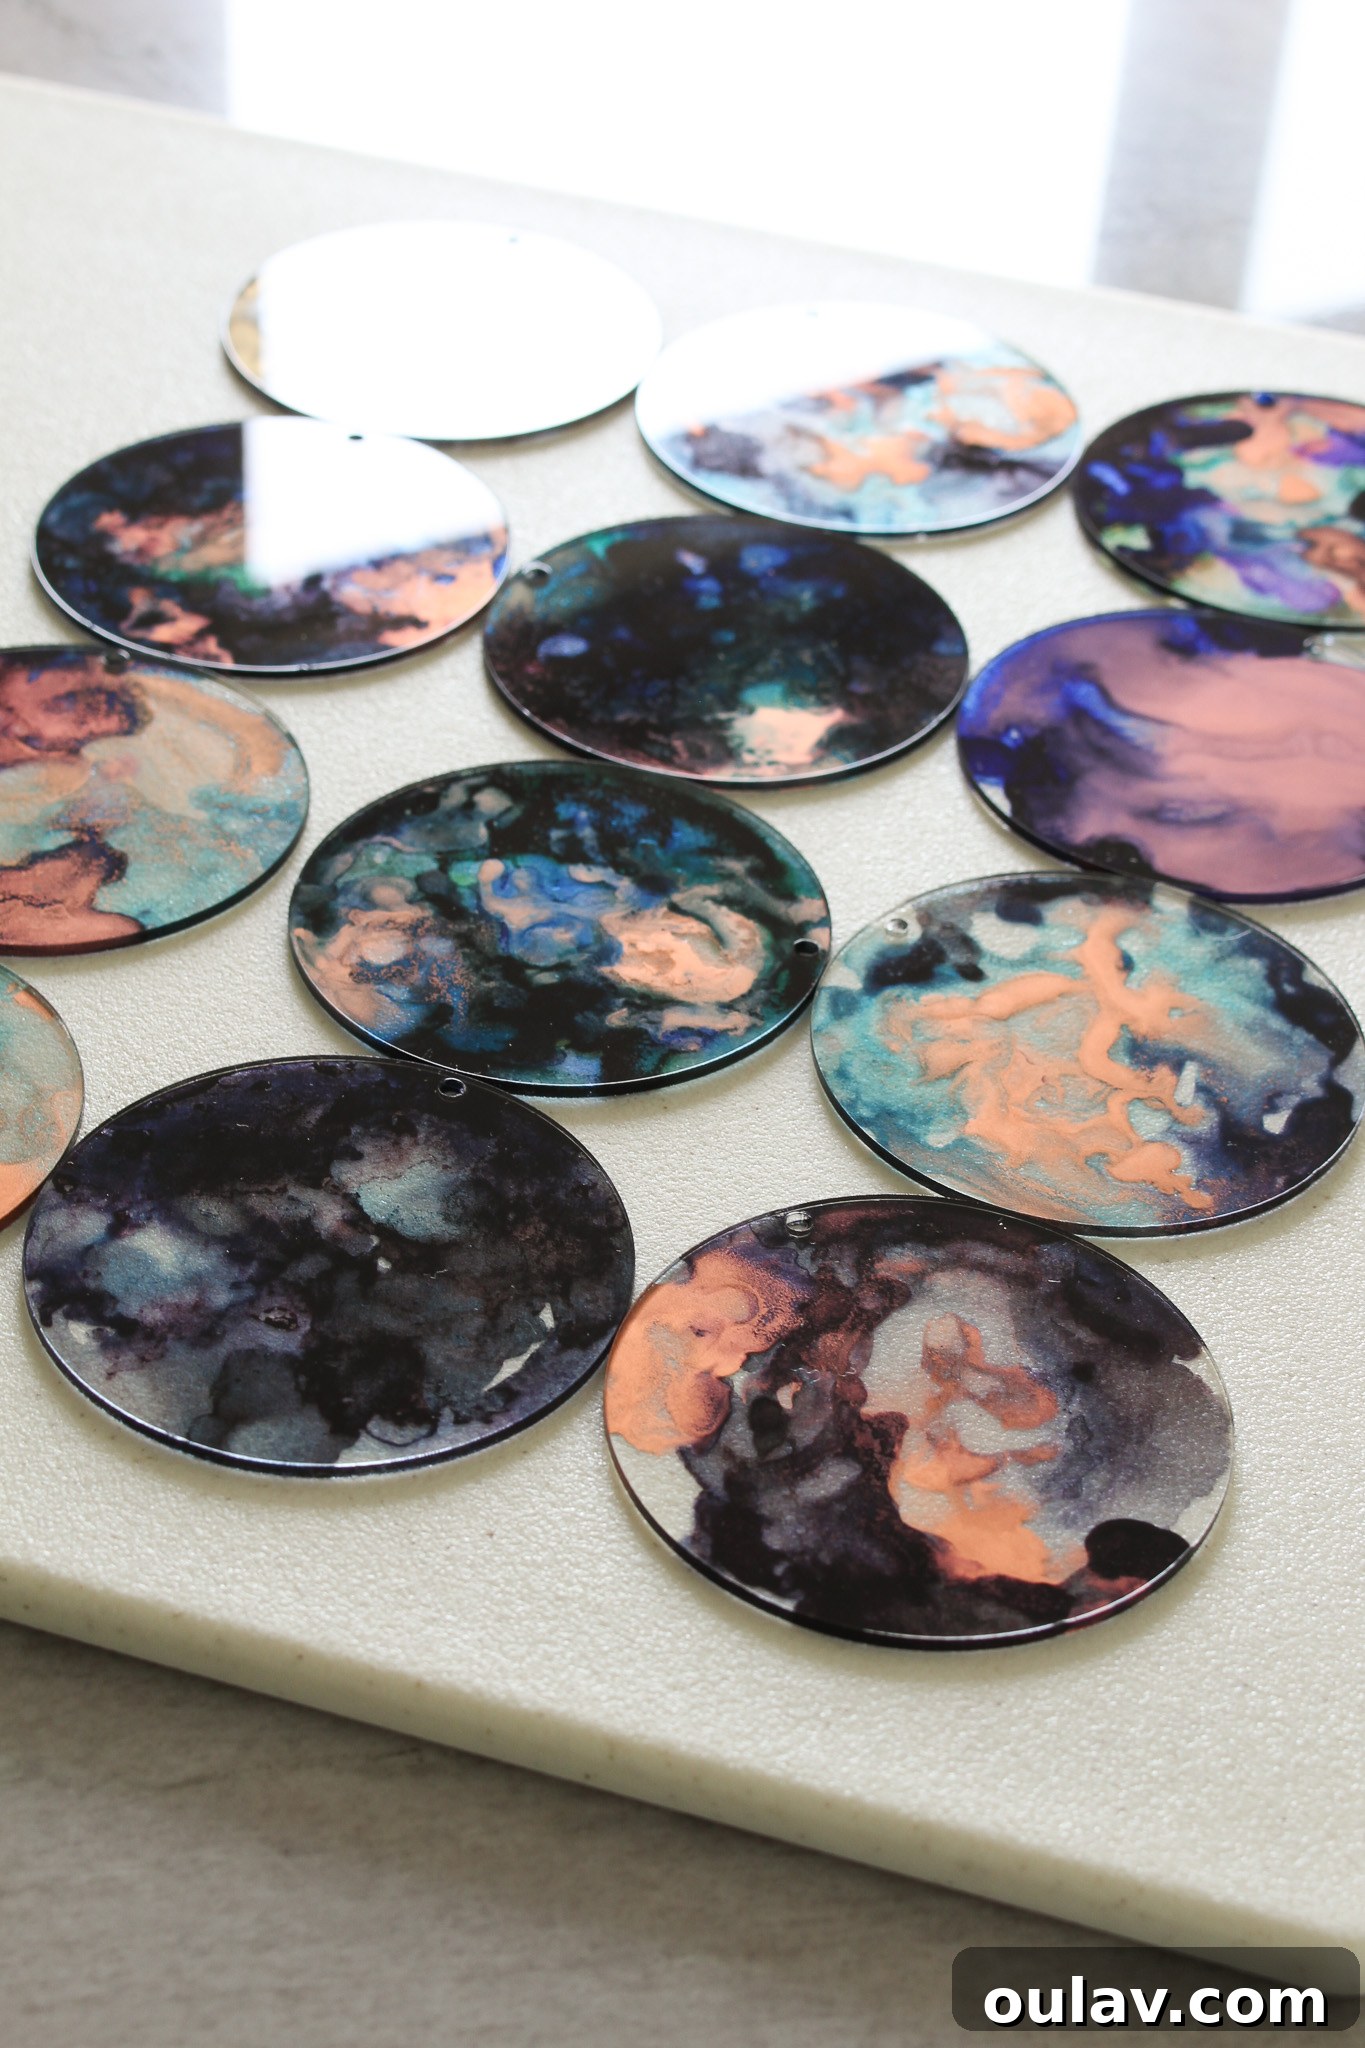
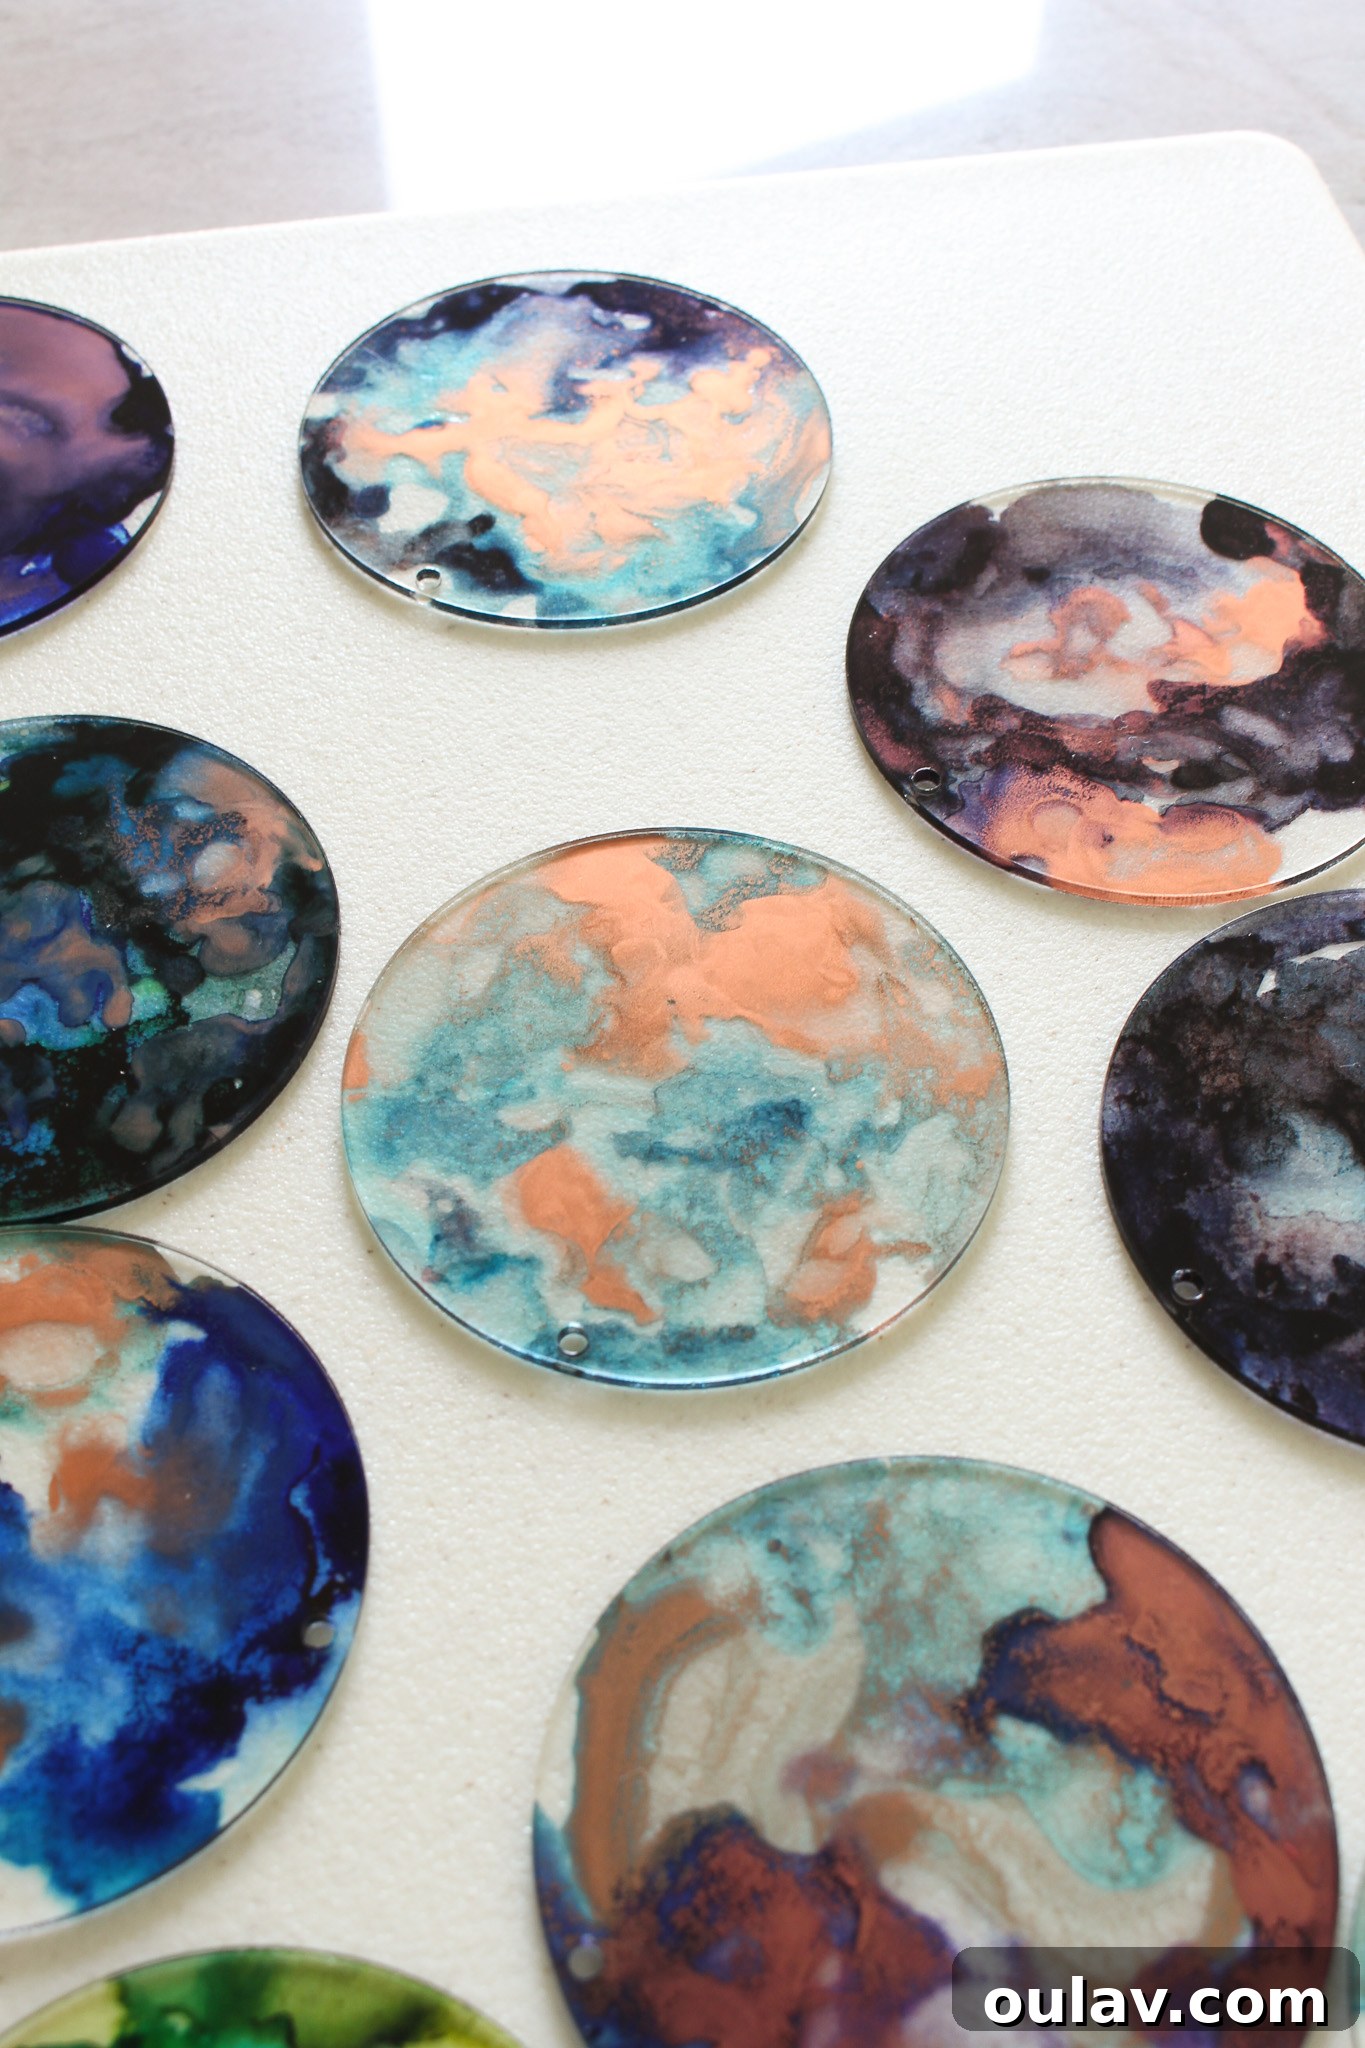
At this stage, your acrylic discs, adorned with swirling alcohol inks, are already truly captivating. The depth of color and the unique patterns created by the inks make each disc a miniature work of art on its own. They radiate a mystical glow, perfectly fitting for elegant Halloween garland. While these discs are gorgeous as they are and could certainly form the basis of a beautiful garland or set of ornaments, I wanted to elevate their charm even further by adding intricate Cricut vinyl designs. However, for a simpler yet equally stunning project, you could absolutely stop here and create a fantastic display. Just look at the vibrant, abstract beauty achieved with just alcohol inks!
Adding the Magic: Applying Cricut Vinyl Designs to Acrylic Discs:
Now that your alcohol-inked discs are dry and sealed, it’s time to add the intricate details that truly bring your Cricut Halloween crafts to life. Using your Cricut machine and permanent vinyl, you can personalize each disc with celestial, mystical, or classic Halloween motifs. This step allows for immense creativity and customization:
- Prepare the Discs: Carefully peel off the remaining protective backing from the unpainted side of your acrylic discs. This will be the surface for your vinyl designs.
- Clean the Surface: Using a cotton pad or paper towel dampened with rubbing alcohol, thoroughly clean the surface where the vinyl will be applied. A clean, lint-free surface ensures maximum adhesion.
- Design Selection in Cricut Design Space: Open Cricut Design Space. This powerful software offers a vast library of images. Search for themes like “magical,” “mystical,” “celestial,” “witch,” or “Halloween” to find designs that complement your alcohol ink backgrounds. Bookmark your favorites for easy access! You can access my exact designs here.
- Create Your Project: Start a new project in Design Space and import your chosen designs. Begin with one or two to get comfortable with sizing and placement.
- Size and Arrange: Precisely size your designs to fit gracefully on your 3-inch acrylic discs. Remember to leave the pre-drilled hole clear for hanging! Arrange them on your virtual mat, optimizing for vinyl usage.
- “Make It” and Cut: Click the “Make It” button in Design Space. Follow the prompts on your screen, selecting your vinyl type (e.g., permanent vinyl) and loading your mat into your Cricut Joy or other Cricut machine. Watch as your machine precisely cuts your chosen designs.
- Weeding Your Designs: Once cut, carefully remove the vinyl from the mat. Use scissors to cut around each individual design. Then, employing your Cricut weeder tool, meticulously pick out all the excess vinyl, leaving only your desired design on the backing paper. Take your time with this step, especially for intricate patterns.
- Apply Transfer Tape: Cut a piece of Cricut transfer tape slightly larger than your weeded vinyl design. Lay the transfer tape over the design, pressing it down firmly.
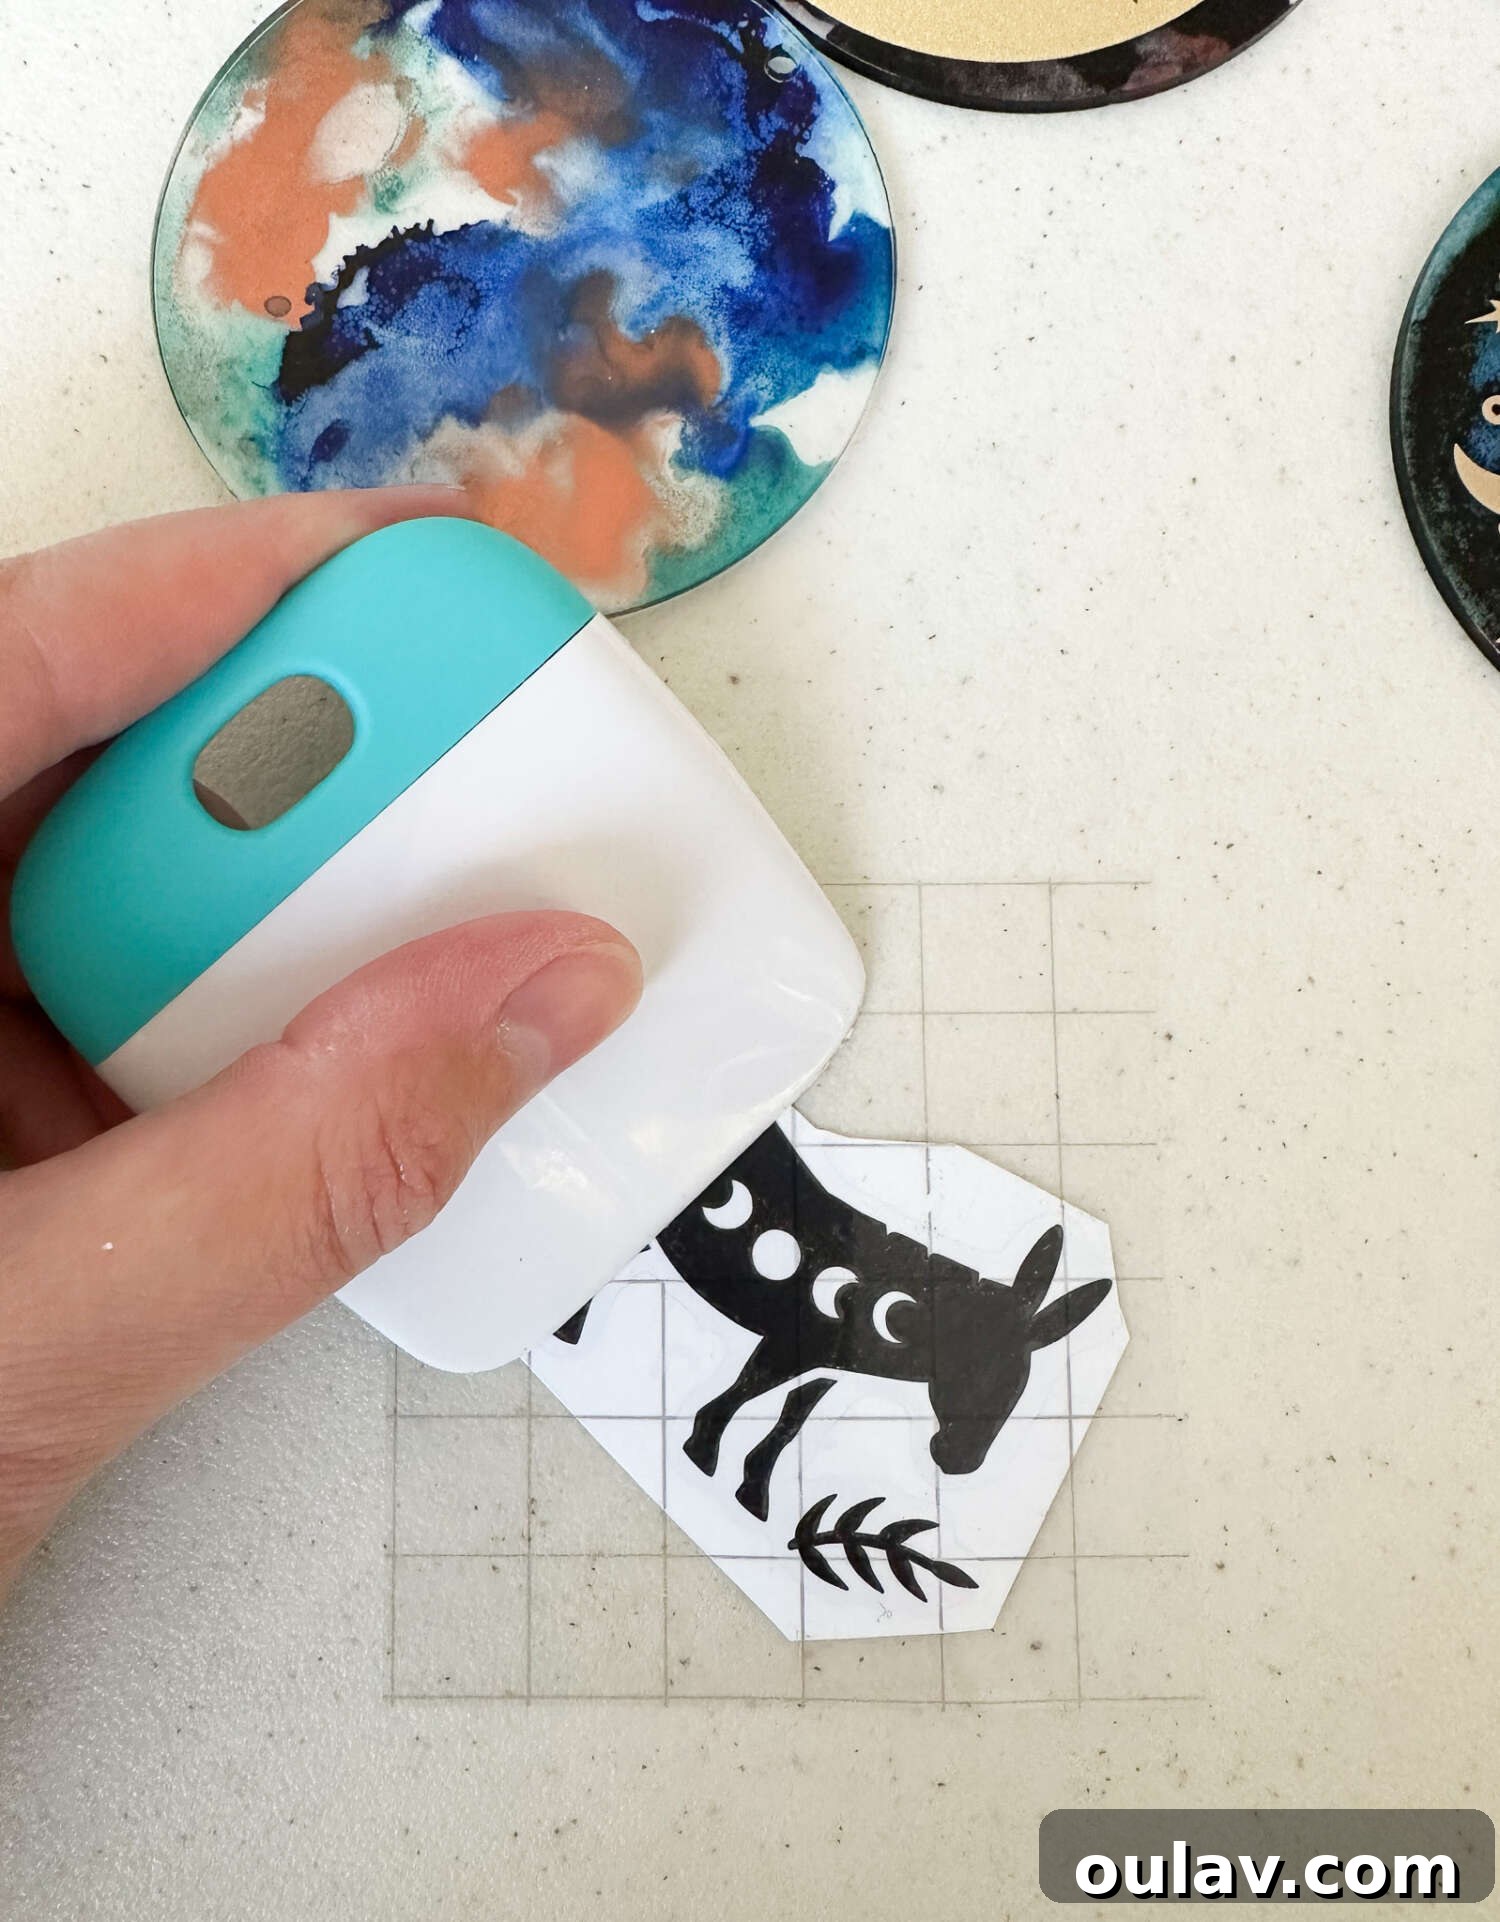
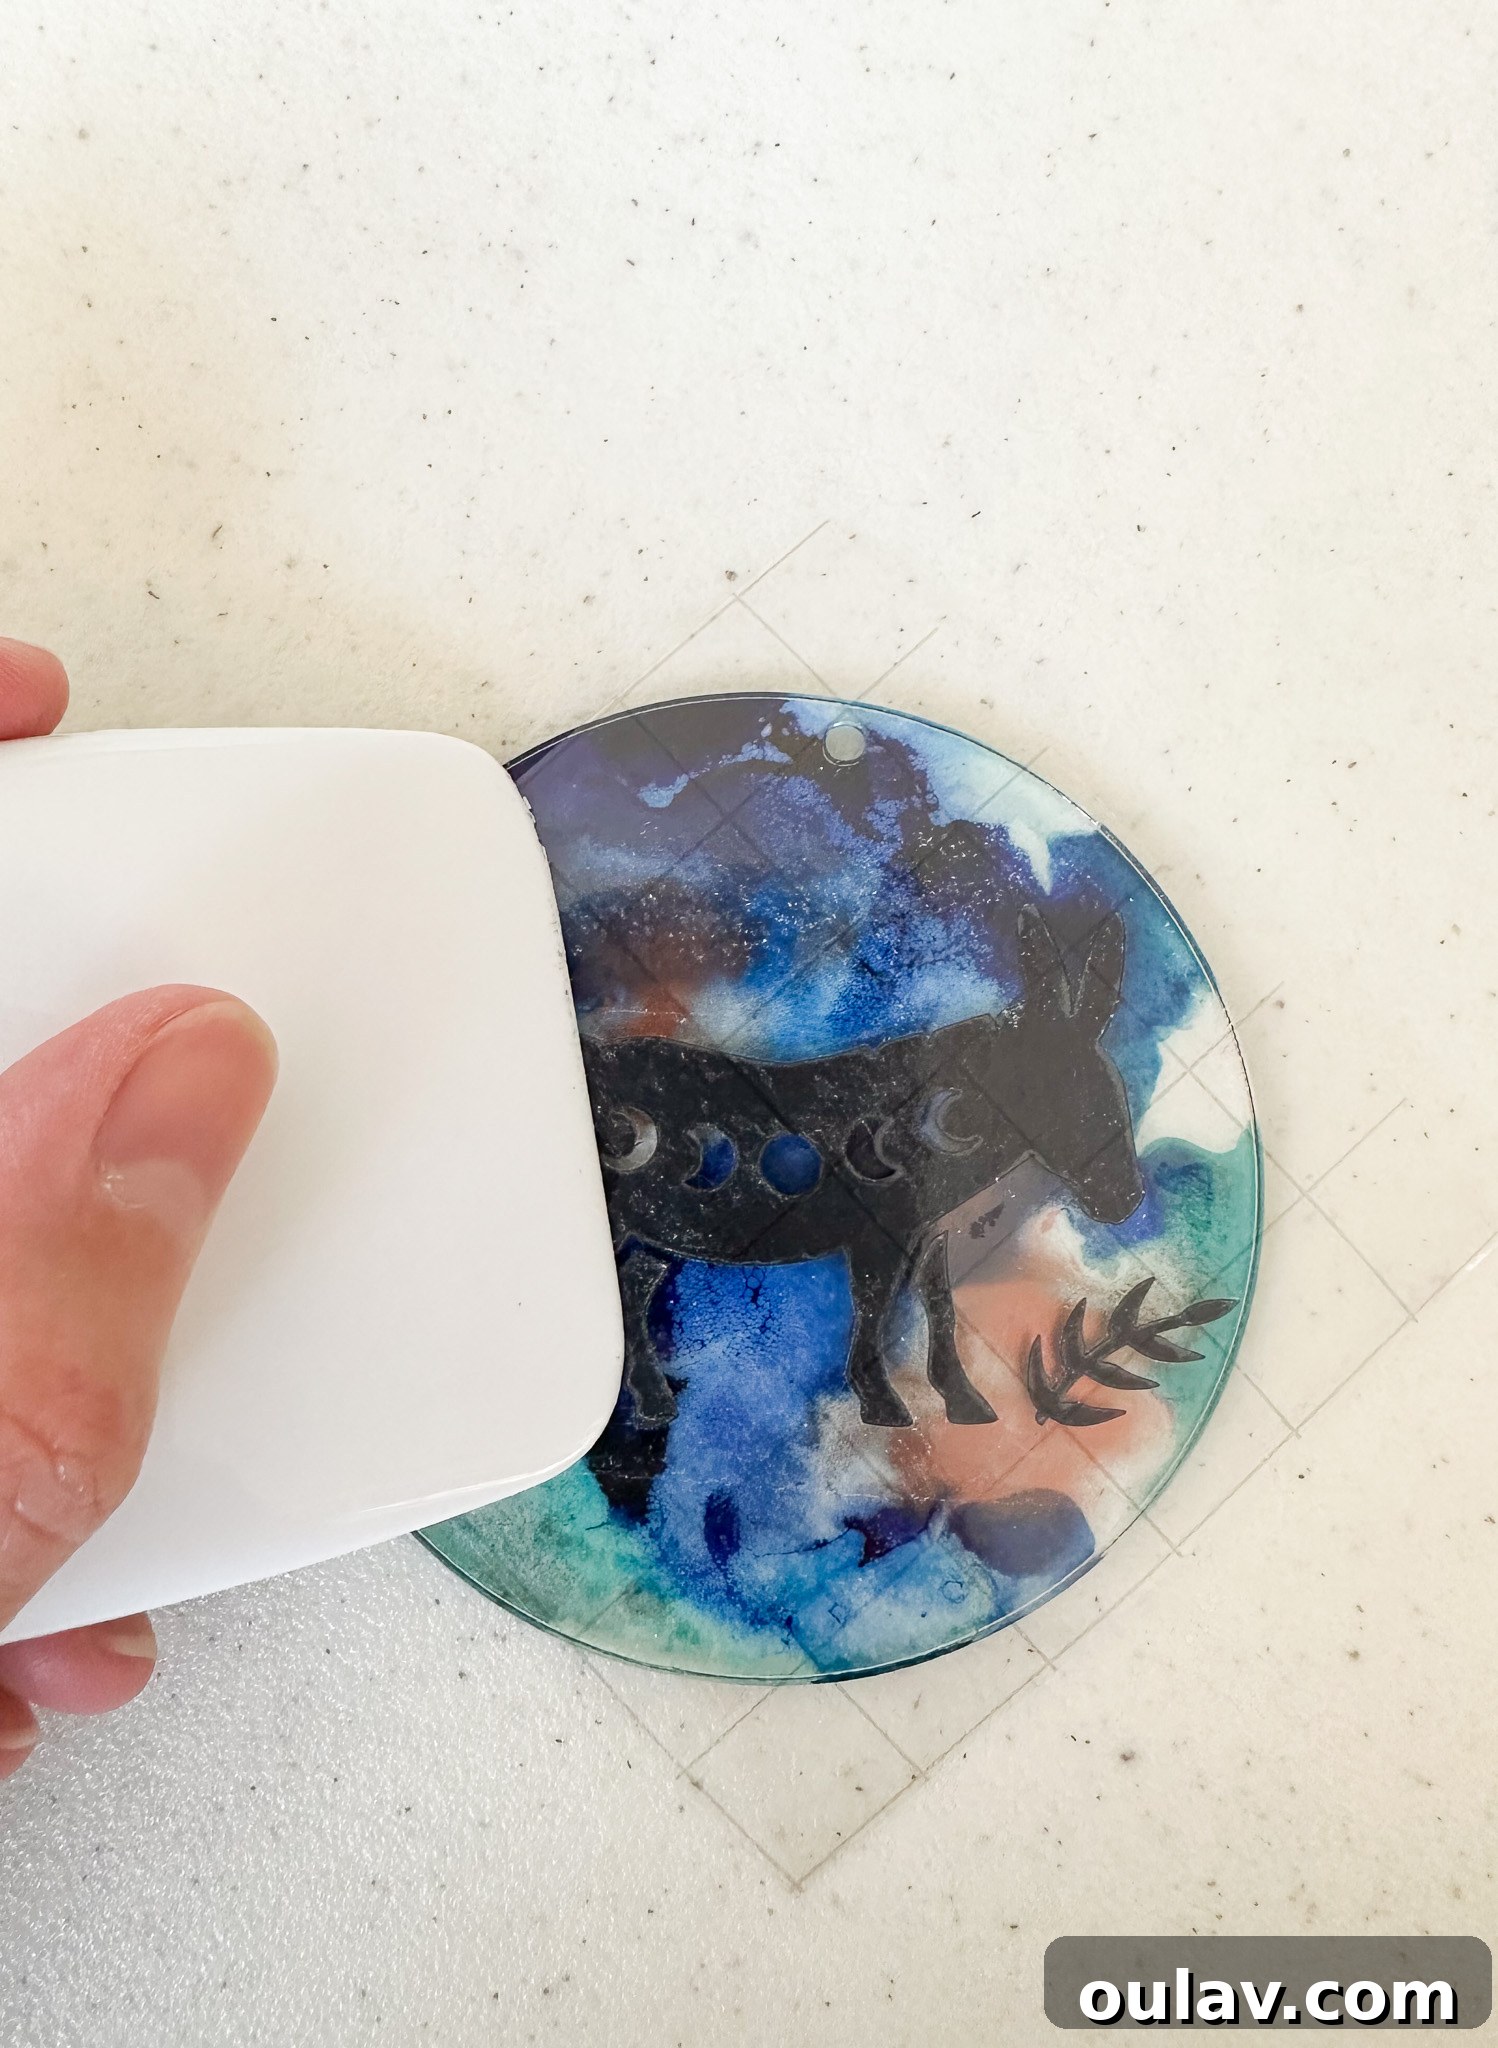
- Burnish the Design: Using the Cricut scraper tool, firmly rub over the transfer tape, ensuring the vinyl design adheres securely to the tape. This “burnishing” step is crucial for a clean transfer.
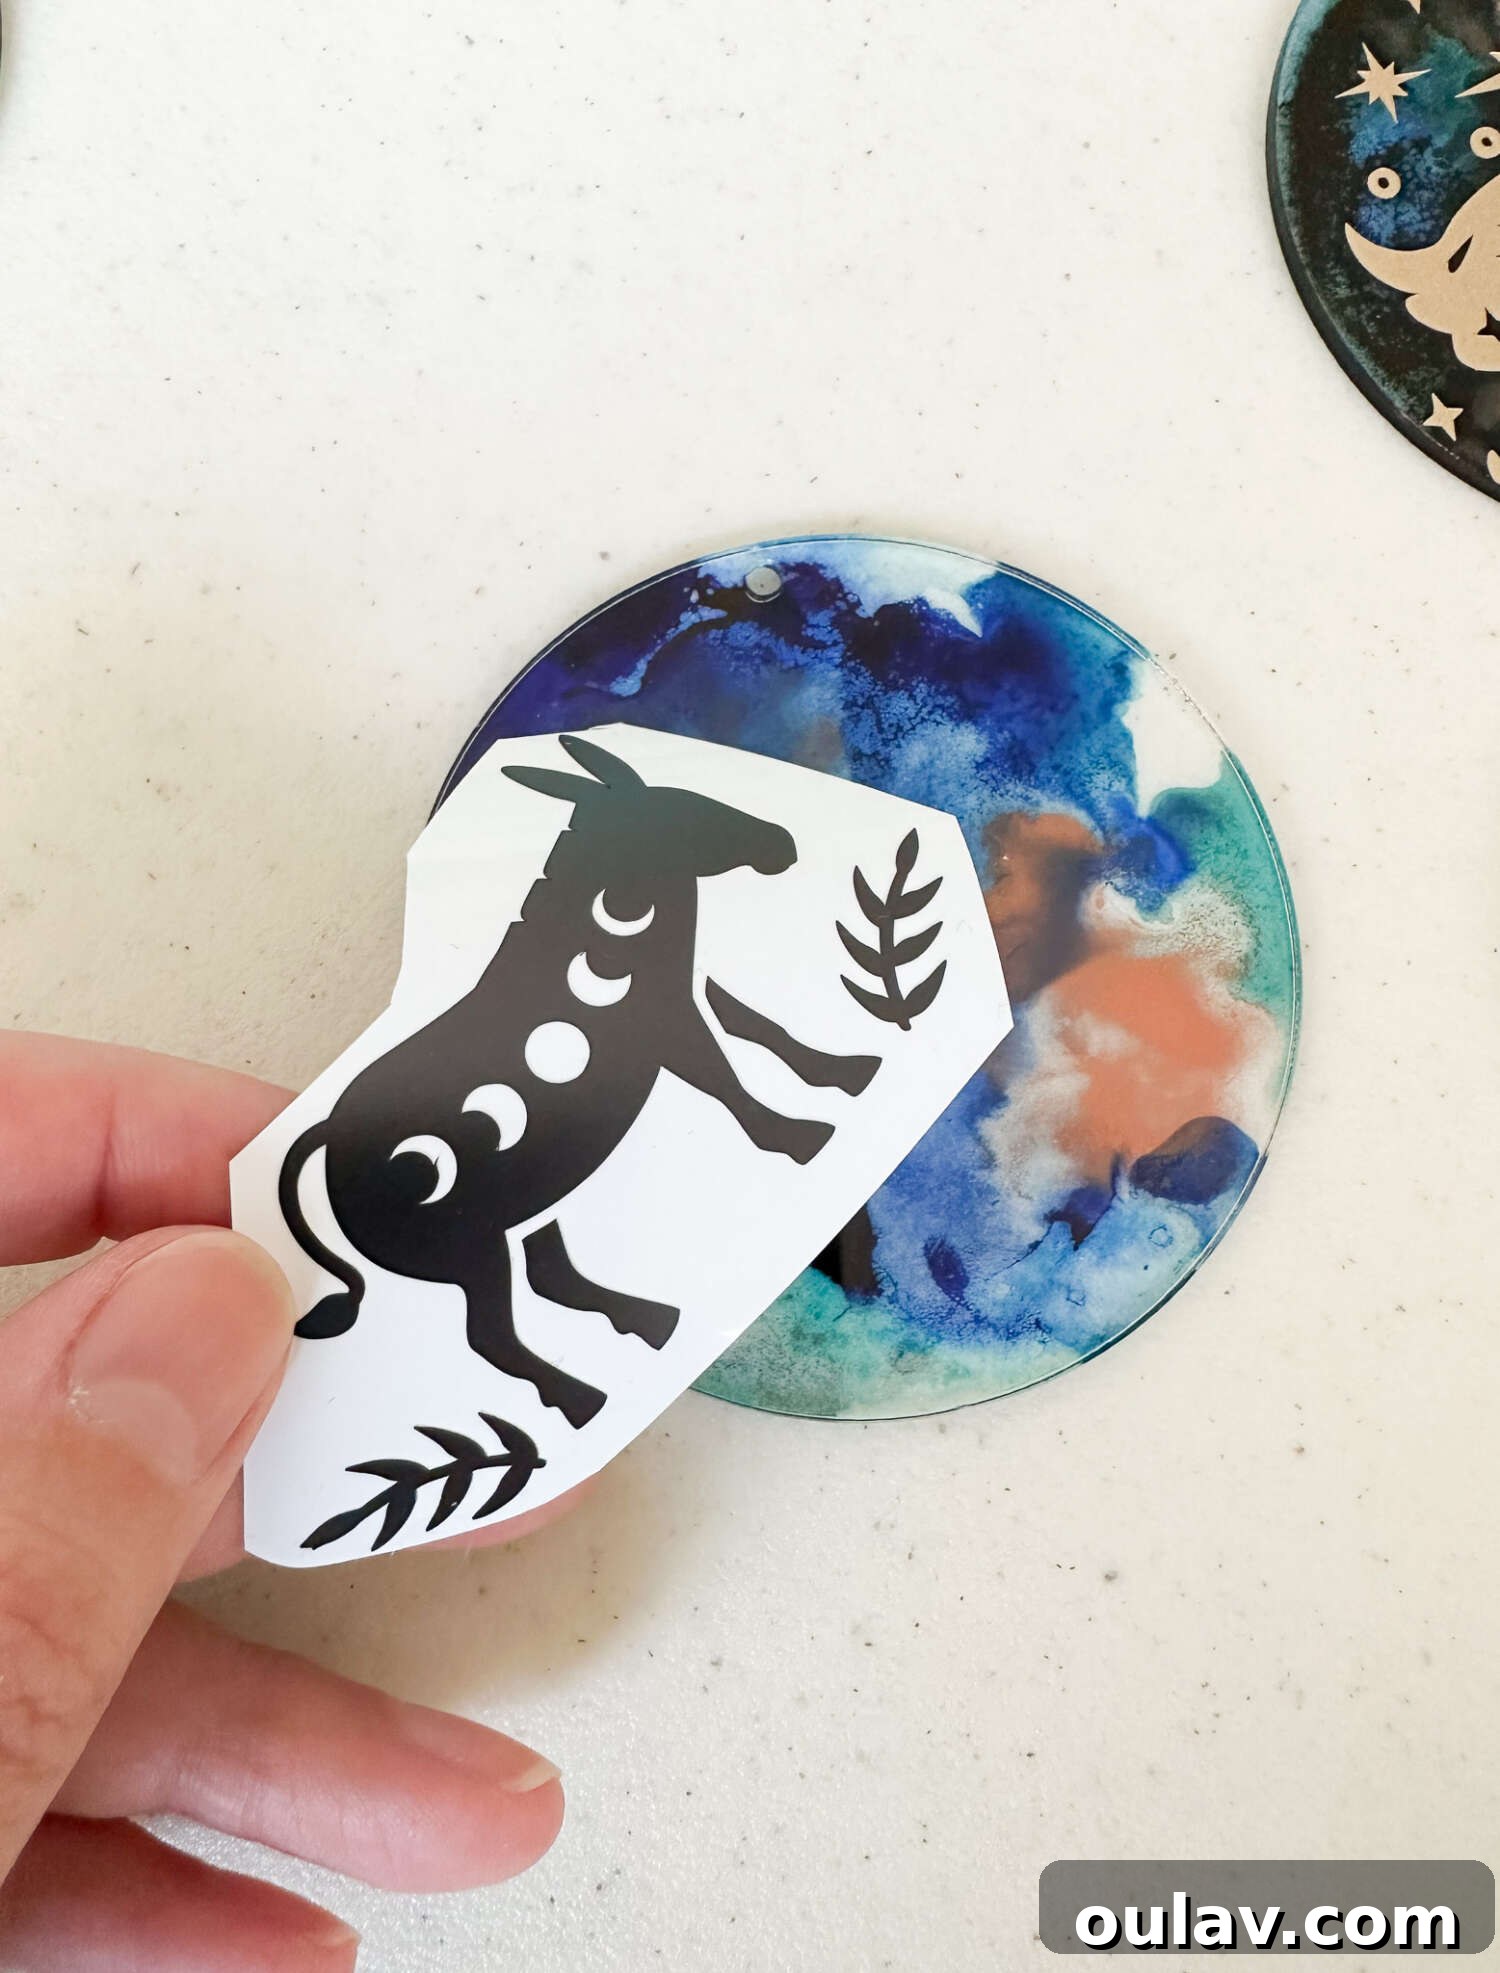
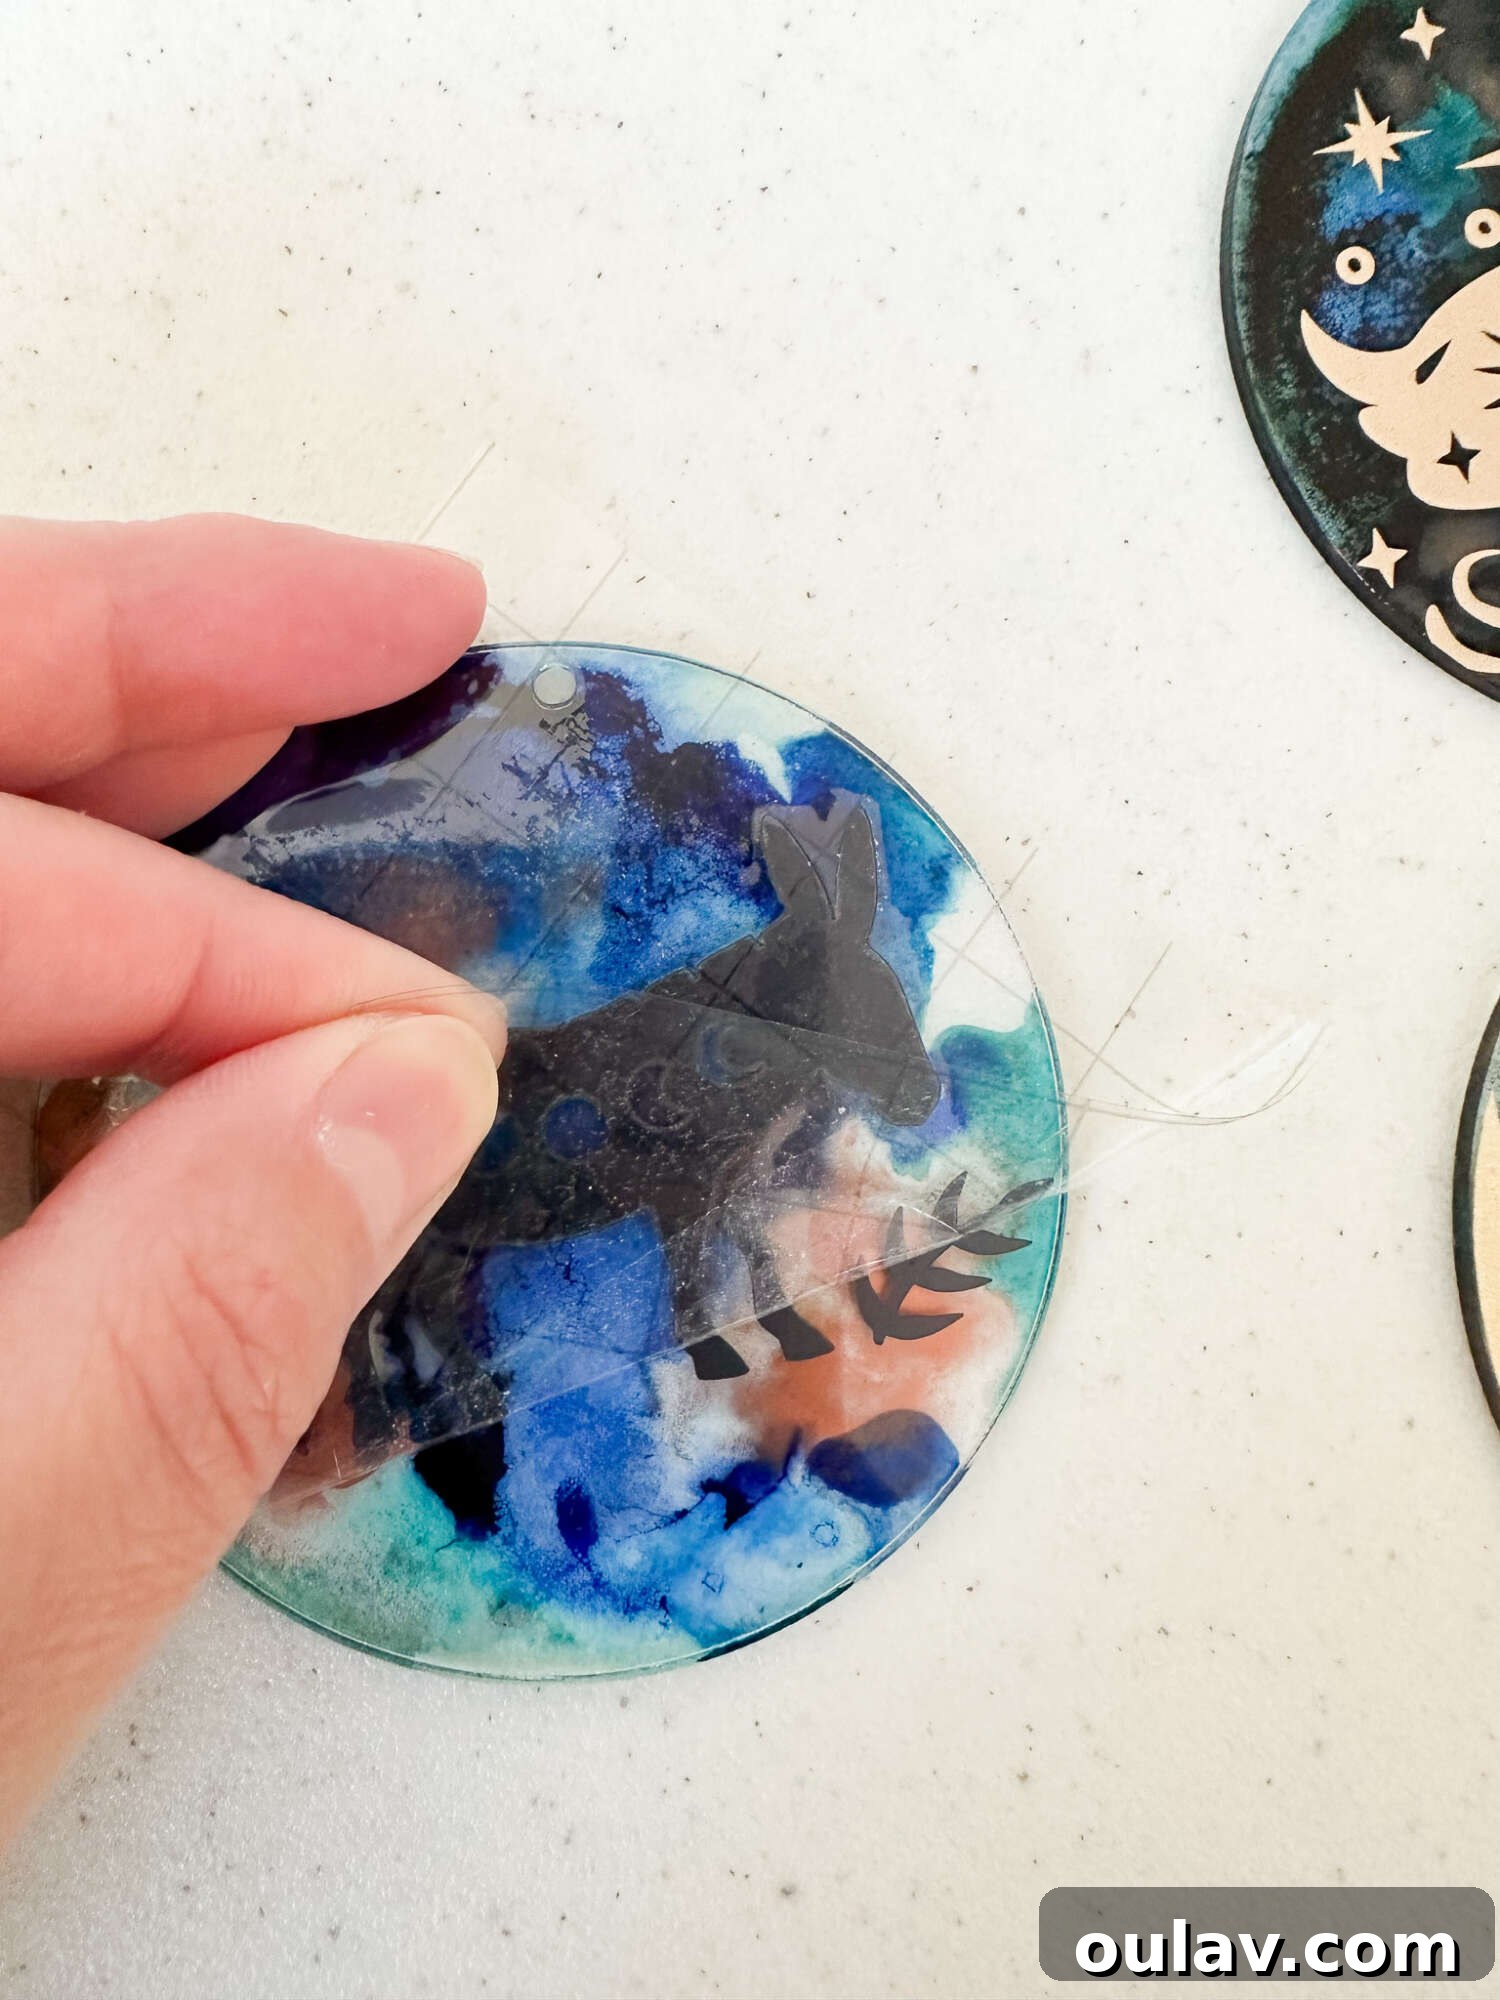
- Transfer to Disc: Carefully peel back the transfer tape. Your vinyl design should lift cleanly from its backing and stick to the transfer tape. Position the design precisely onto your acrylic disc.
- Secure the Design: Once positioned, use the scraper tool again to firmly press the design onto the acrylic disc, working from the center outwards to eliminate any air bubbles.
- Reveal Your Masterpiece: Slowly and carefully peel back the transfer tape, leaving your crisp vinyl design perfectly adhered to the acrylic disc.
- Enhance (Optional): For an even more layered and magical look, consider adding small individual stars, moons, or other embellishments around your main design.
*** Here is a direct link to all the specific designs I used for this project, saving you time in Design Space! There’s absolutely no need to create your own images; Cricut Design Space offers a treasure trove of hundreds of thousands of pre-made designs. To discover these enchanting patterns, I extensively searched terms like “magical,” “mystical,” and “celestial.” My goal was to find versatile designs that would seamlessly transition between Halloween and Christmas themes. For a purely Halloween touch, I also explored designs under “black cat.” If you’re seeking more traditional Halloween motifs, consider searching “witches,” “spooky,” and “Halloween” to unearth even more delightful options.
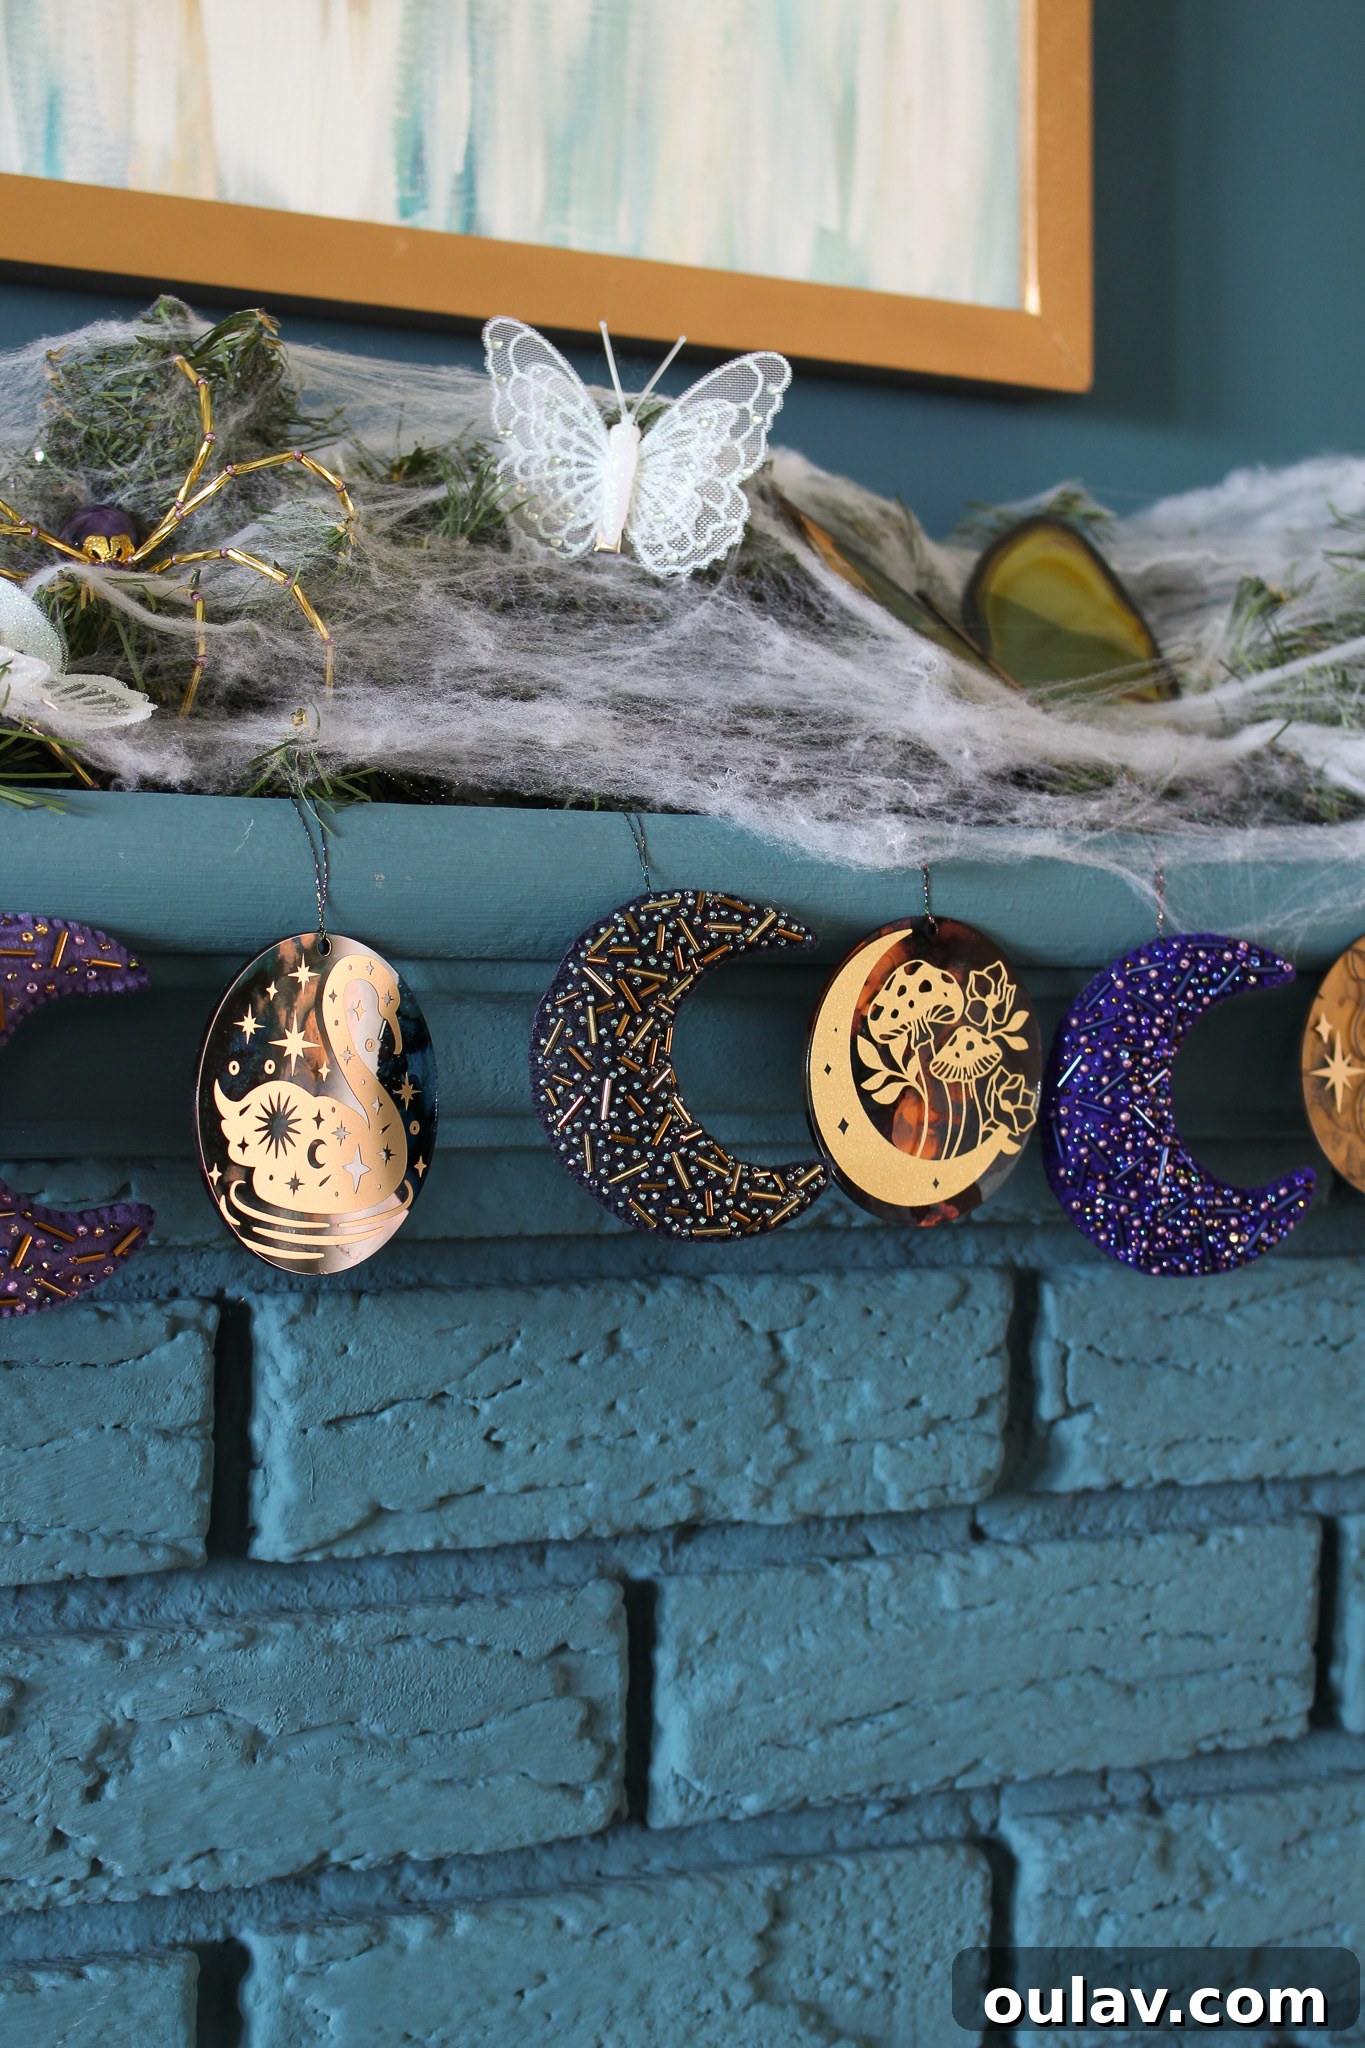
Your Finished DIY Cricut Acrylic Discs with Vinyl Designs: A Magical Revelation!
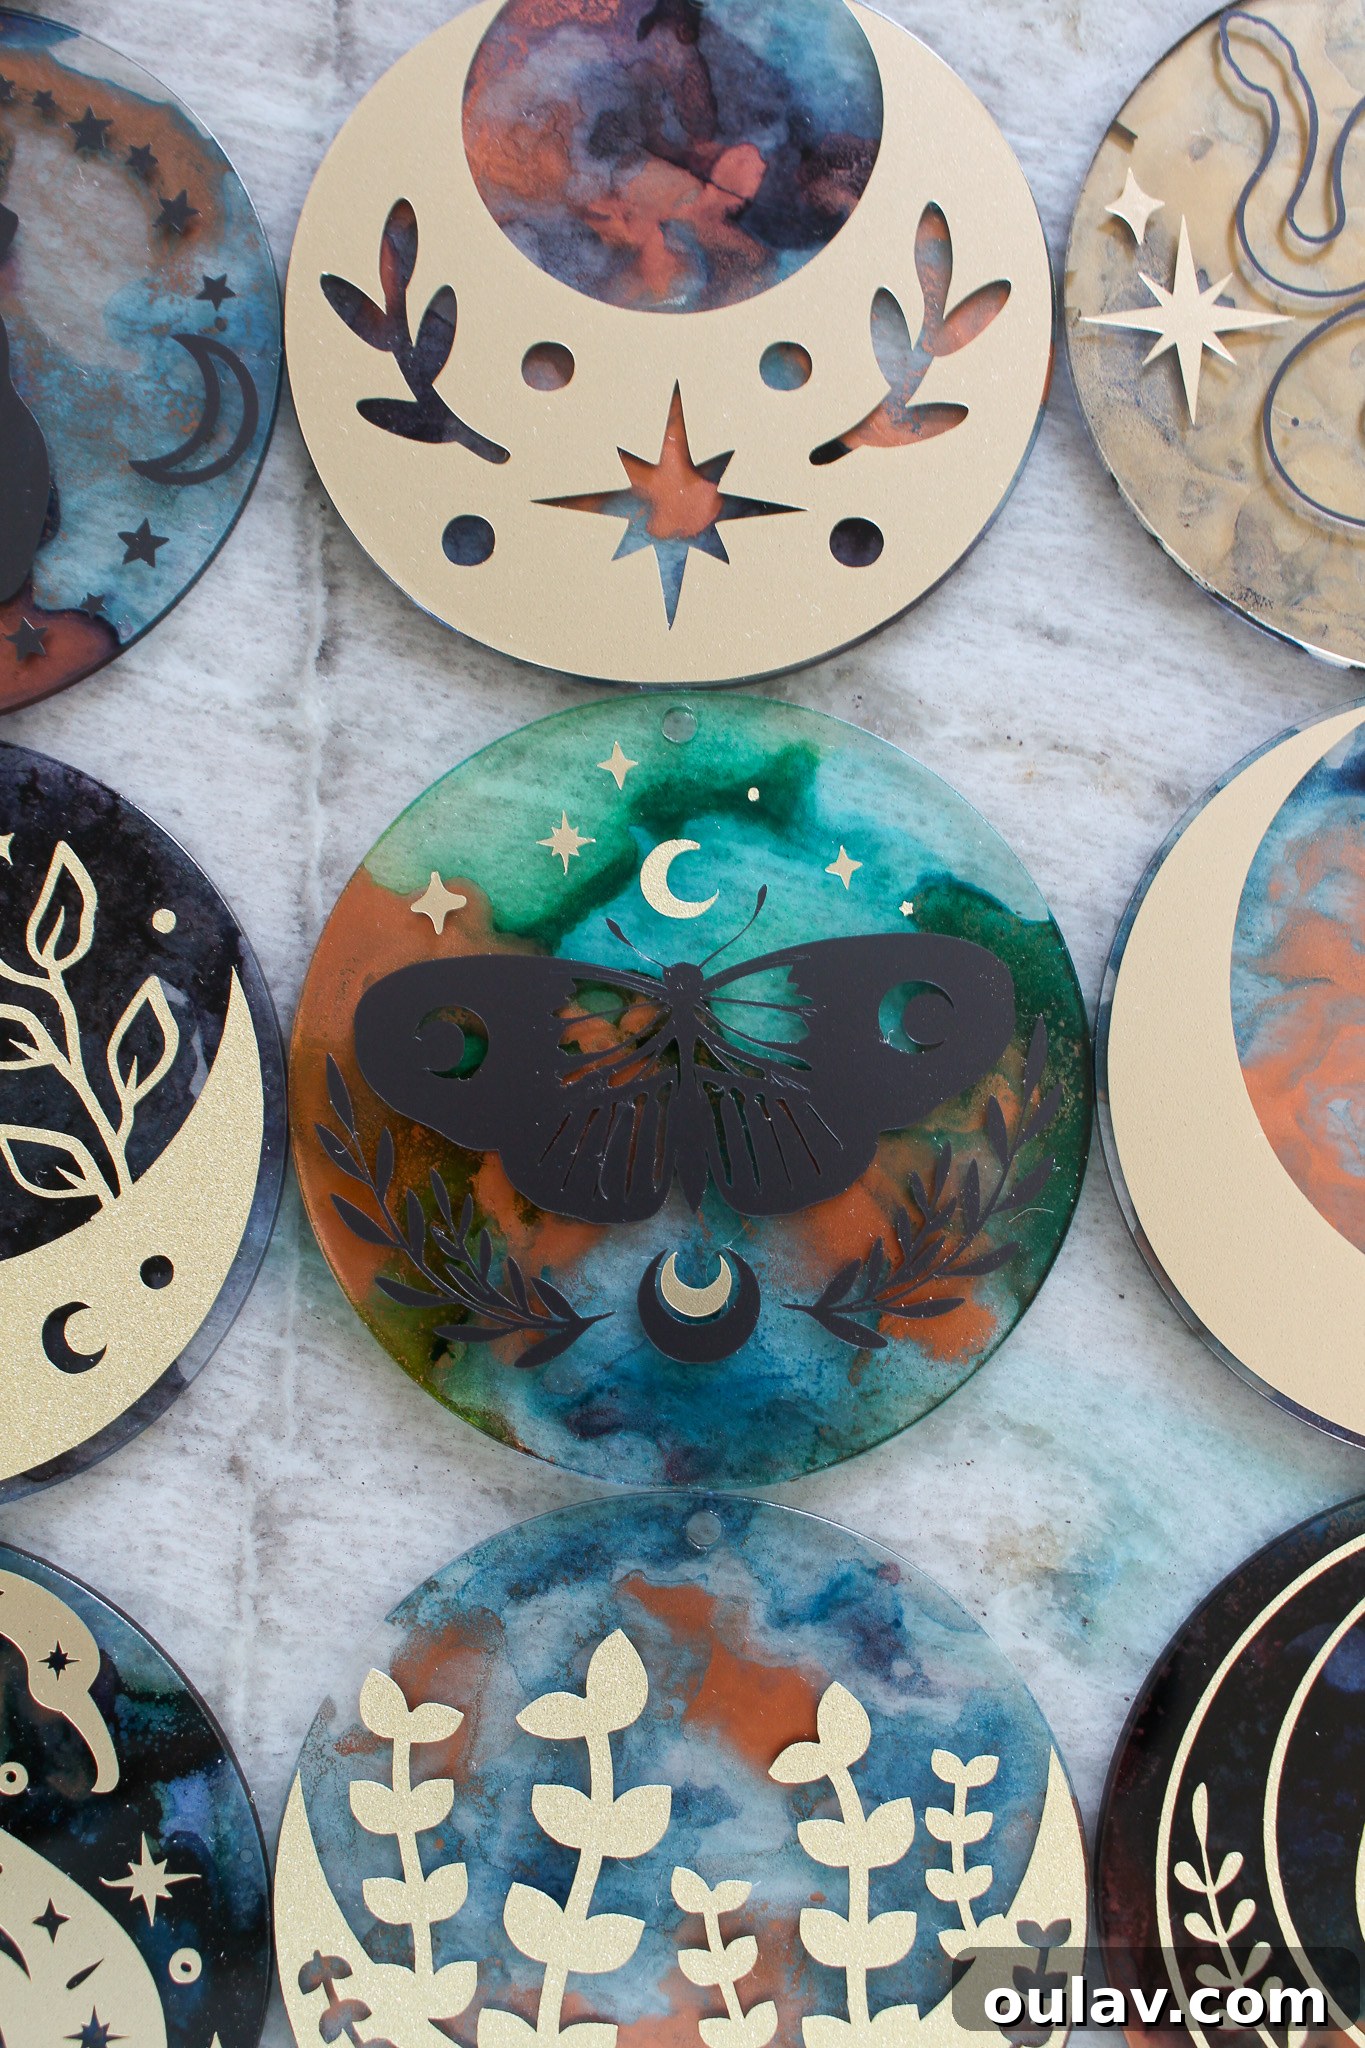
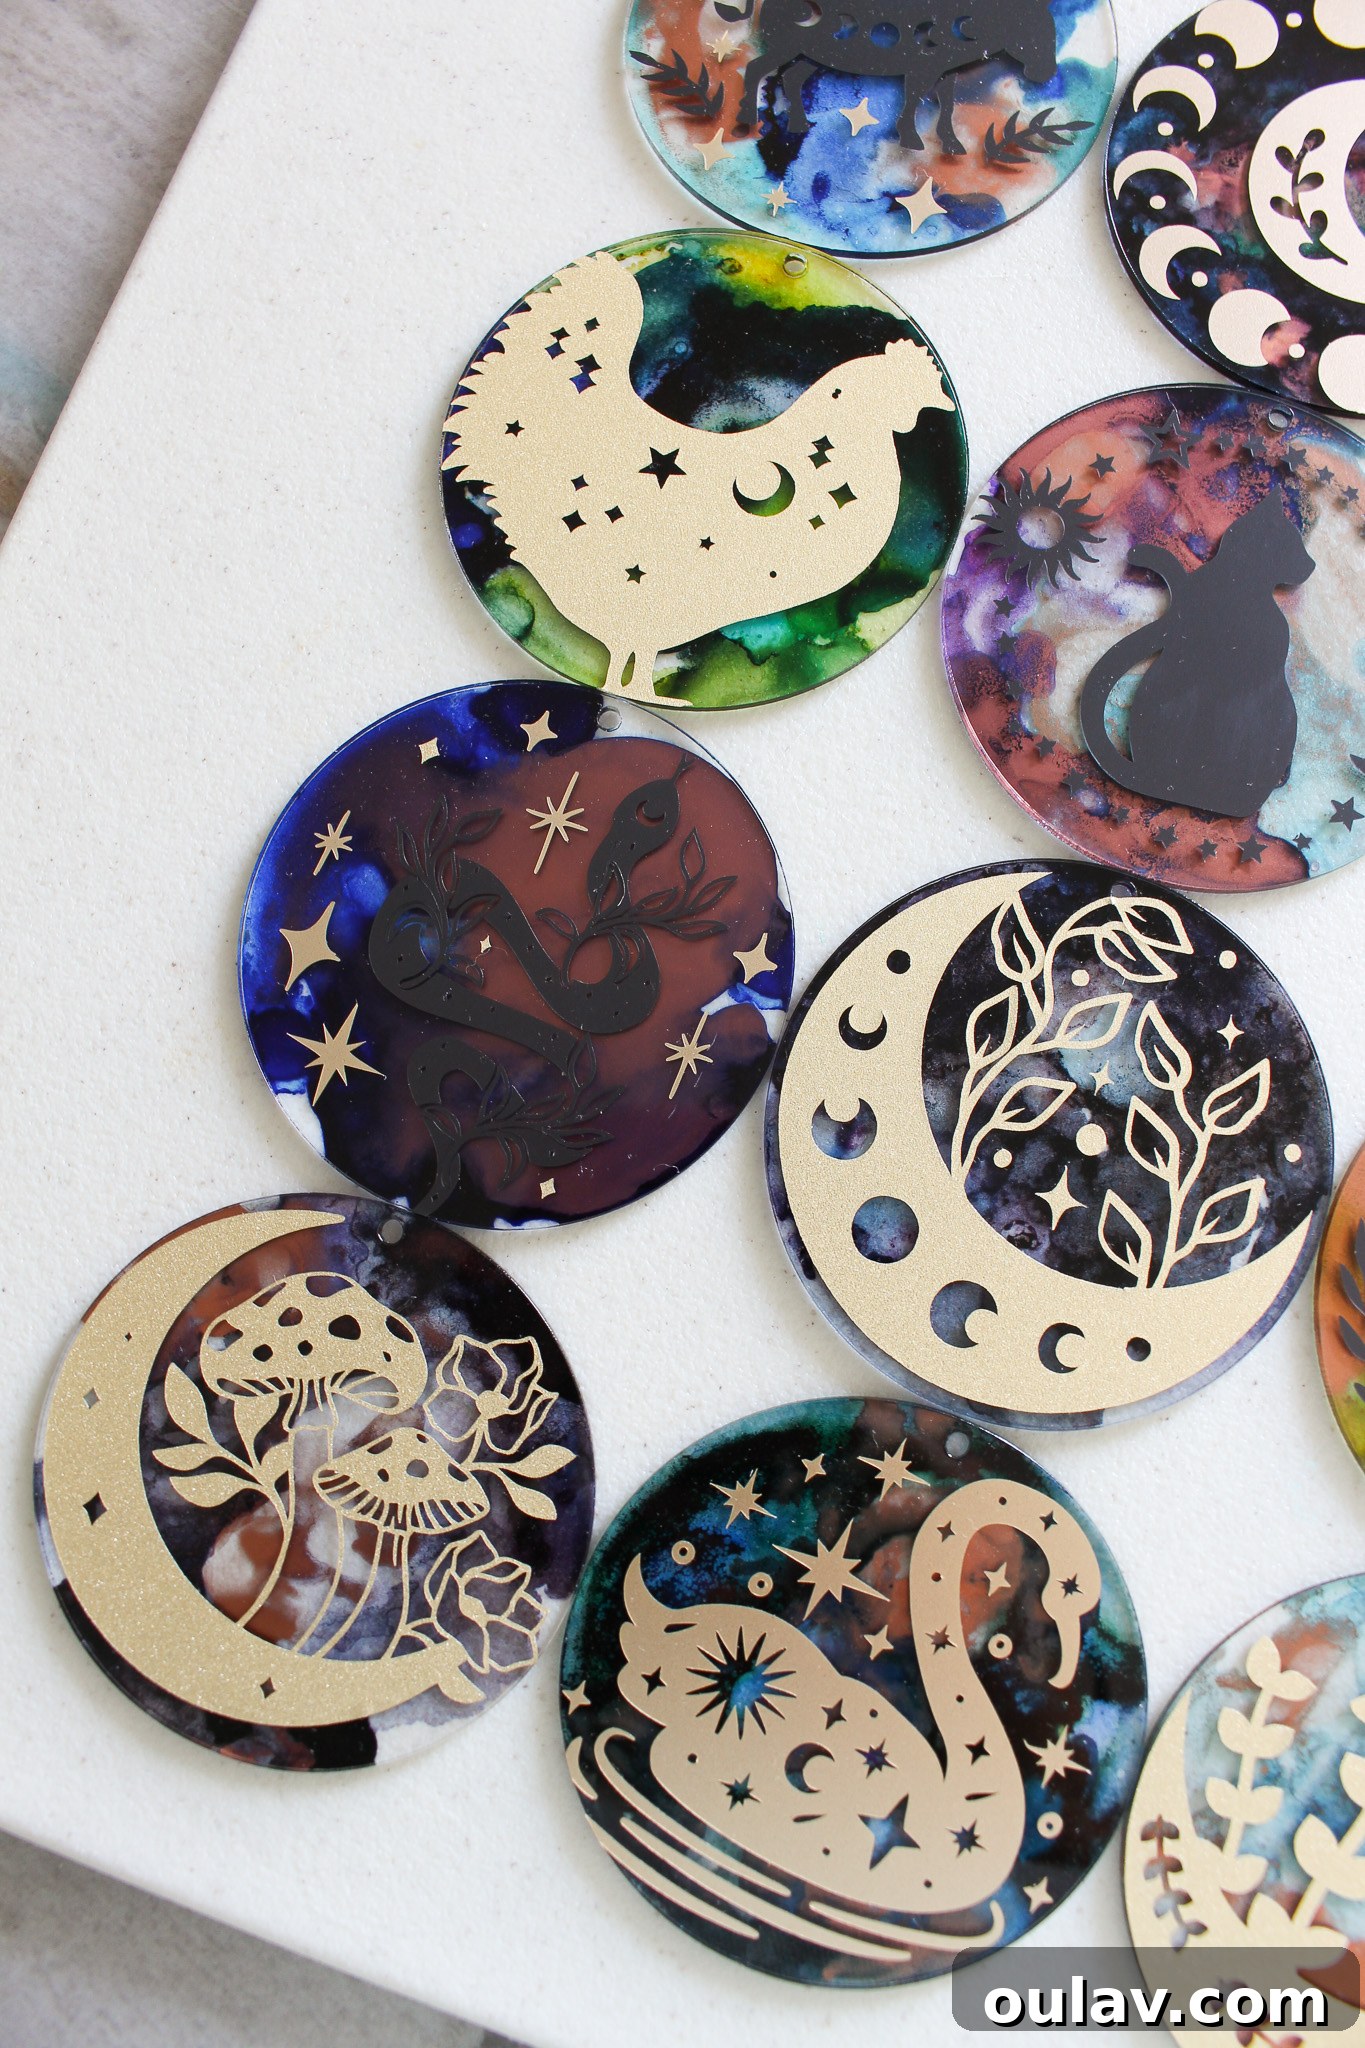
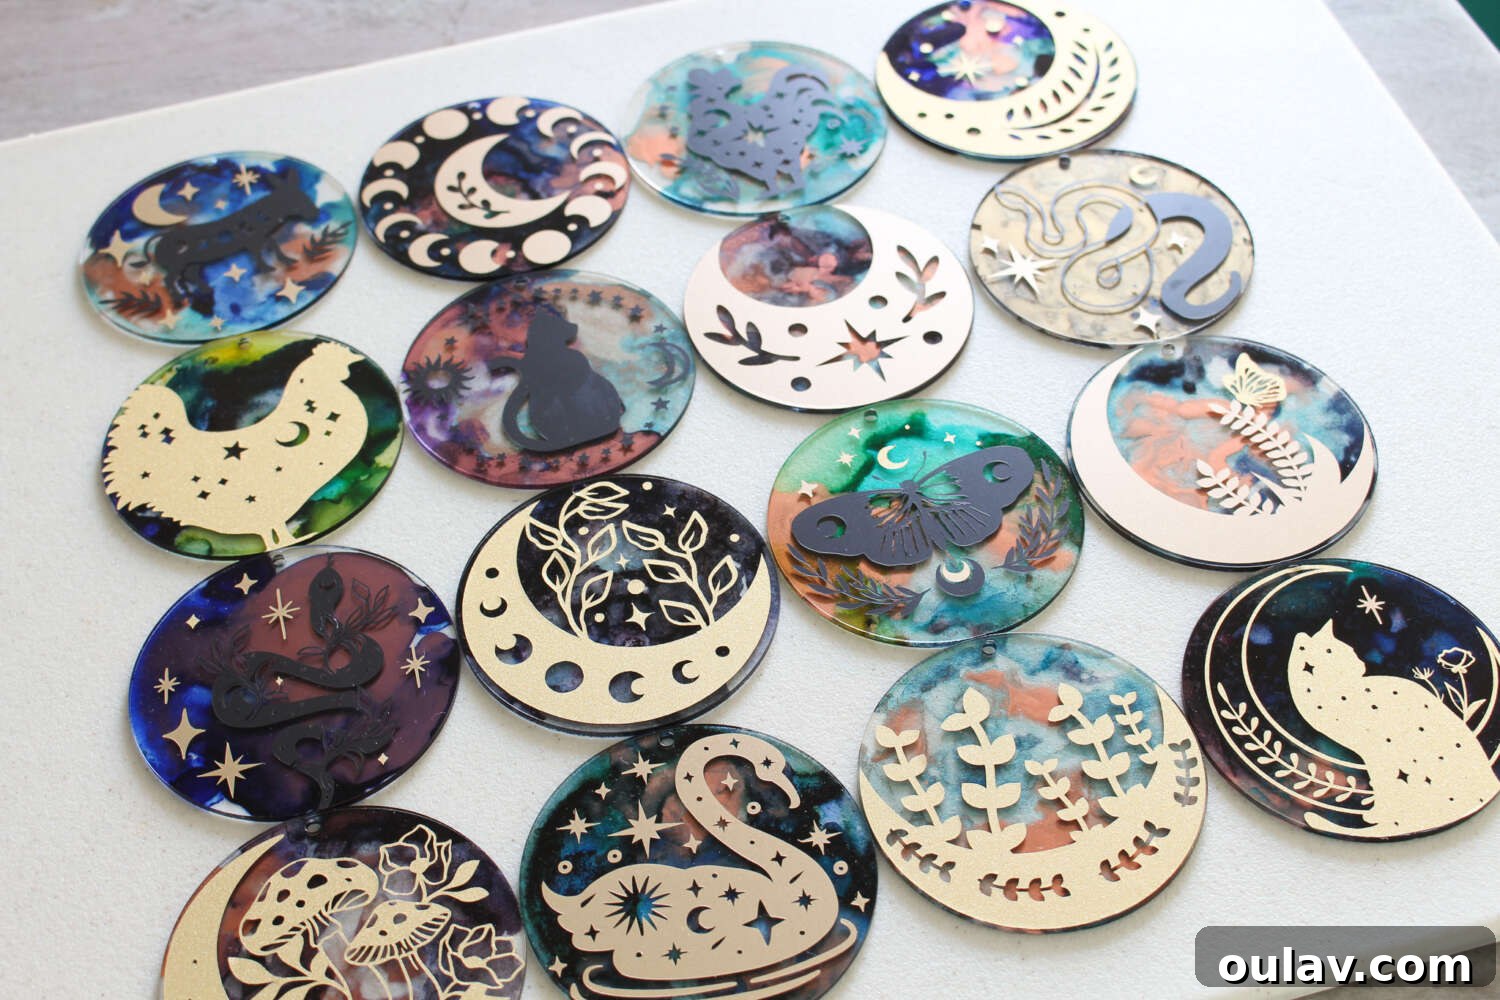
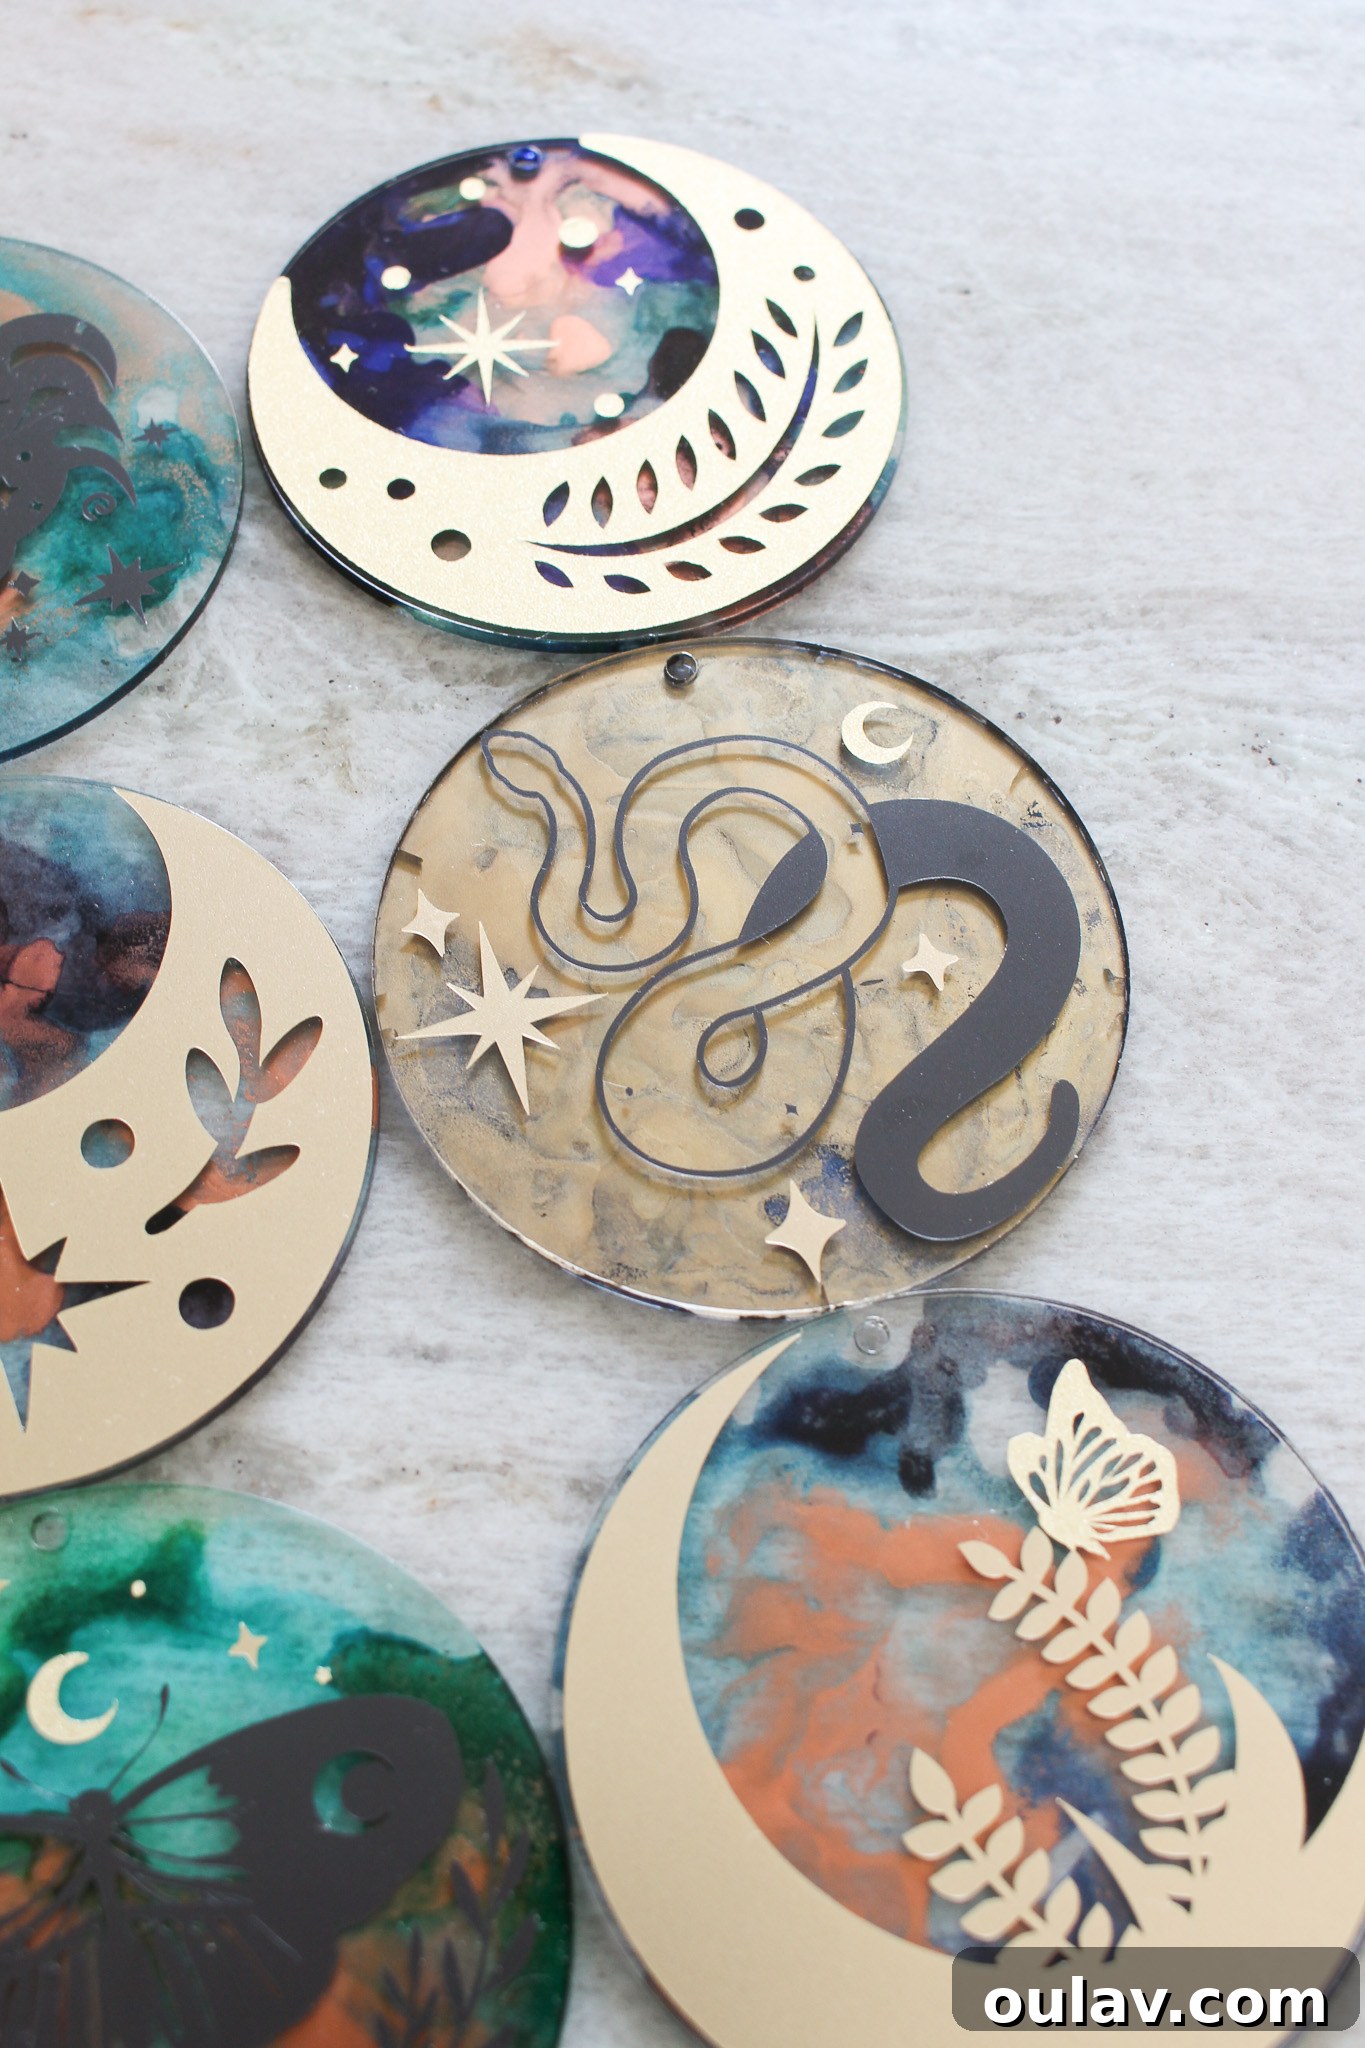
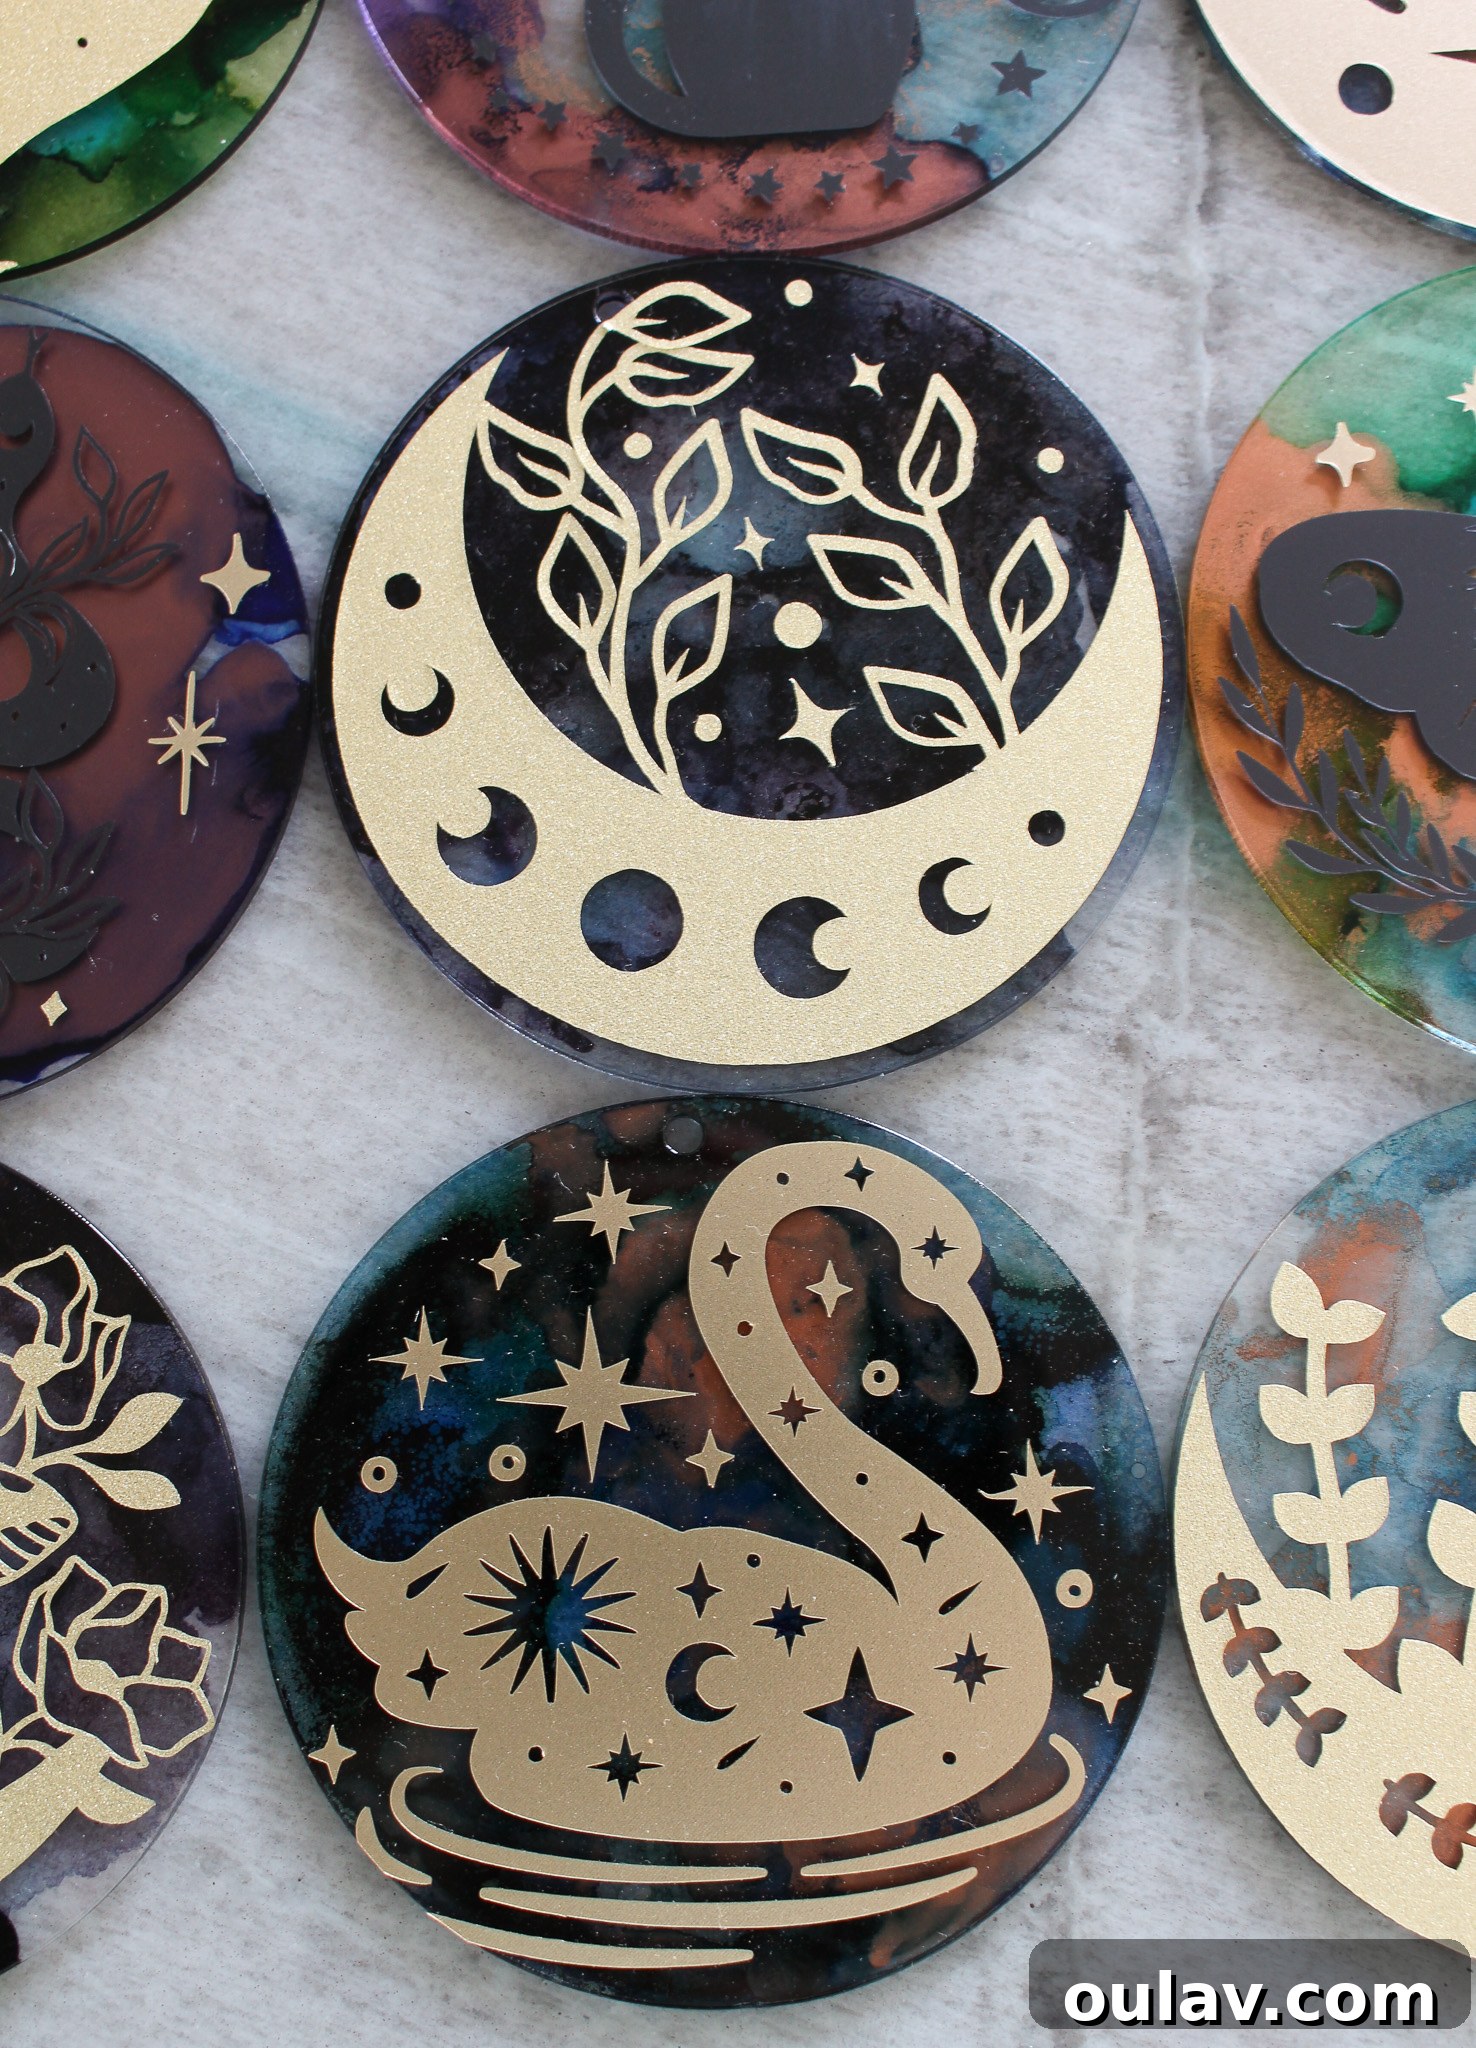
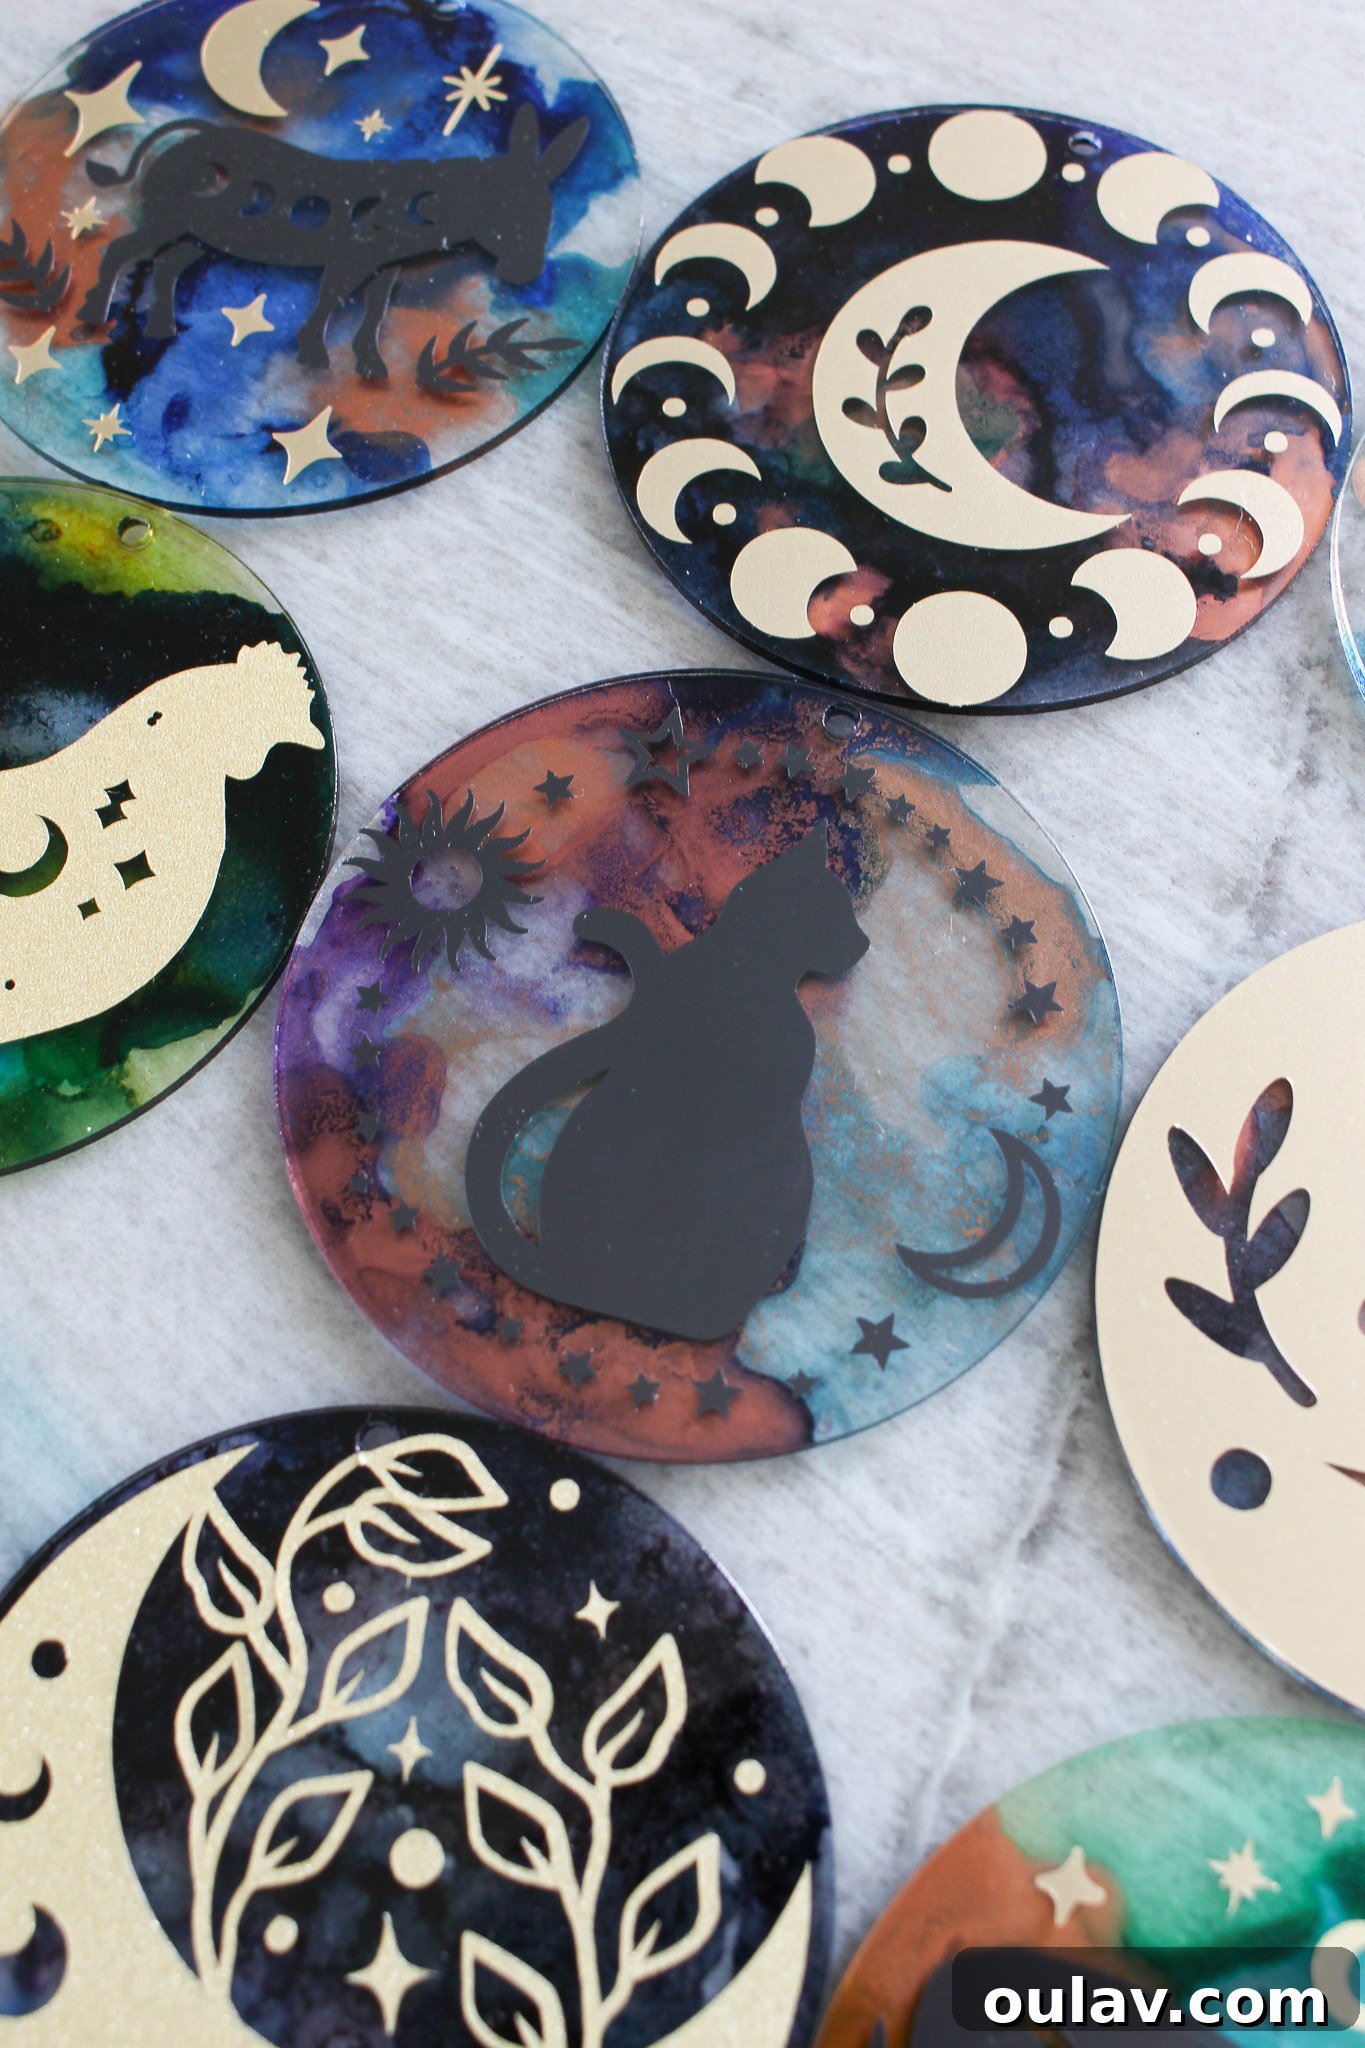
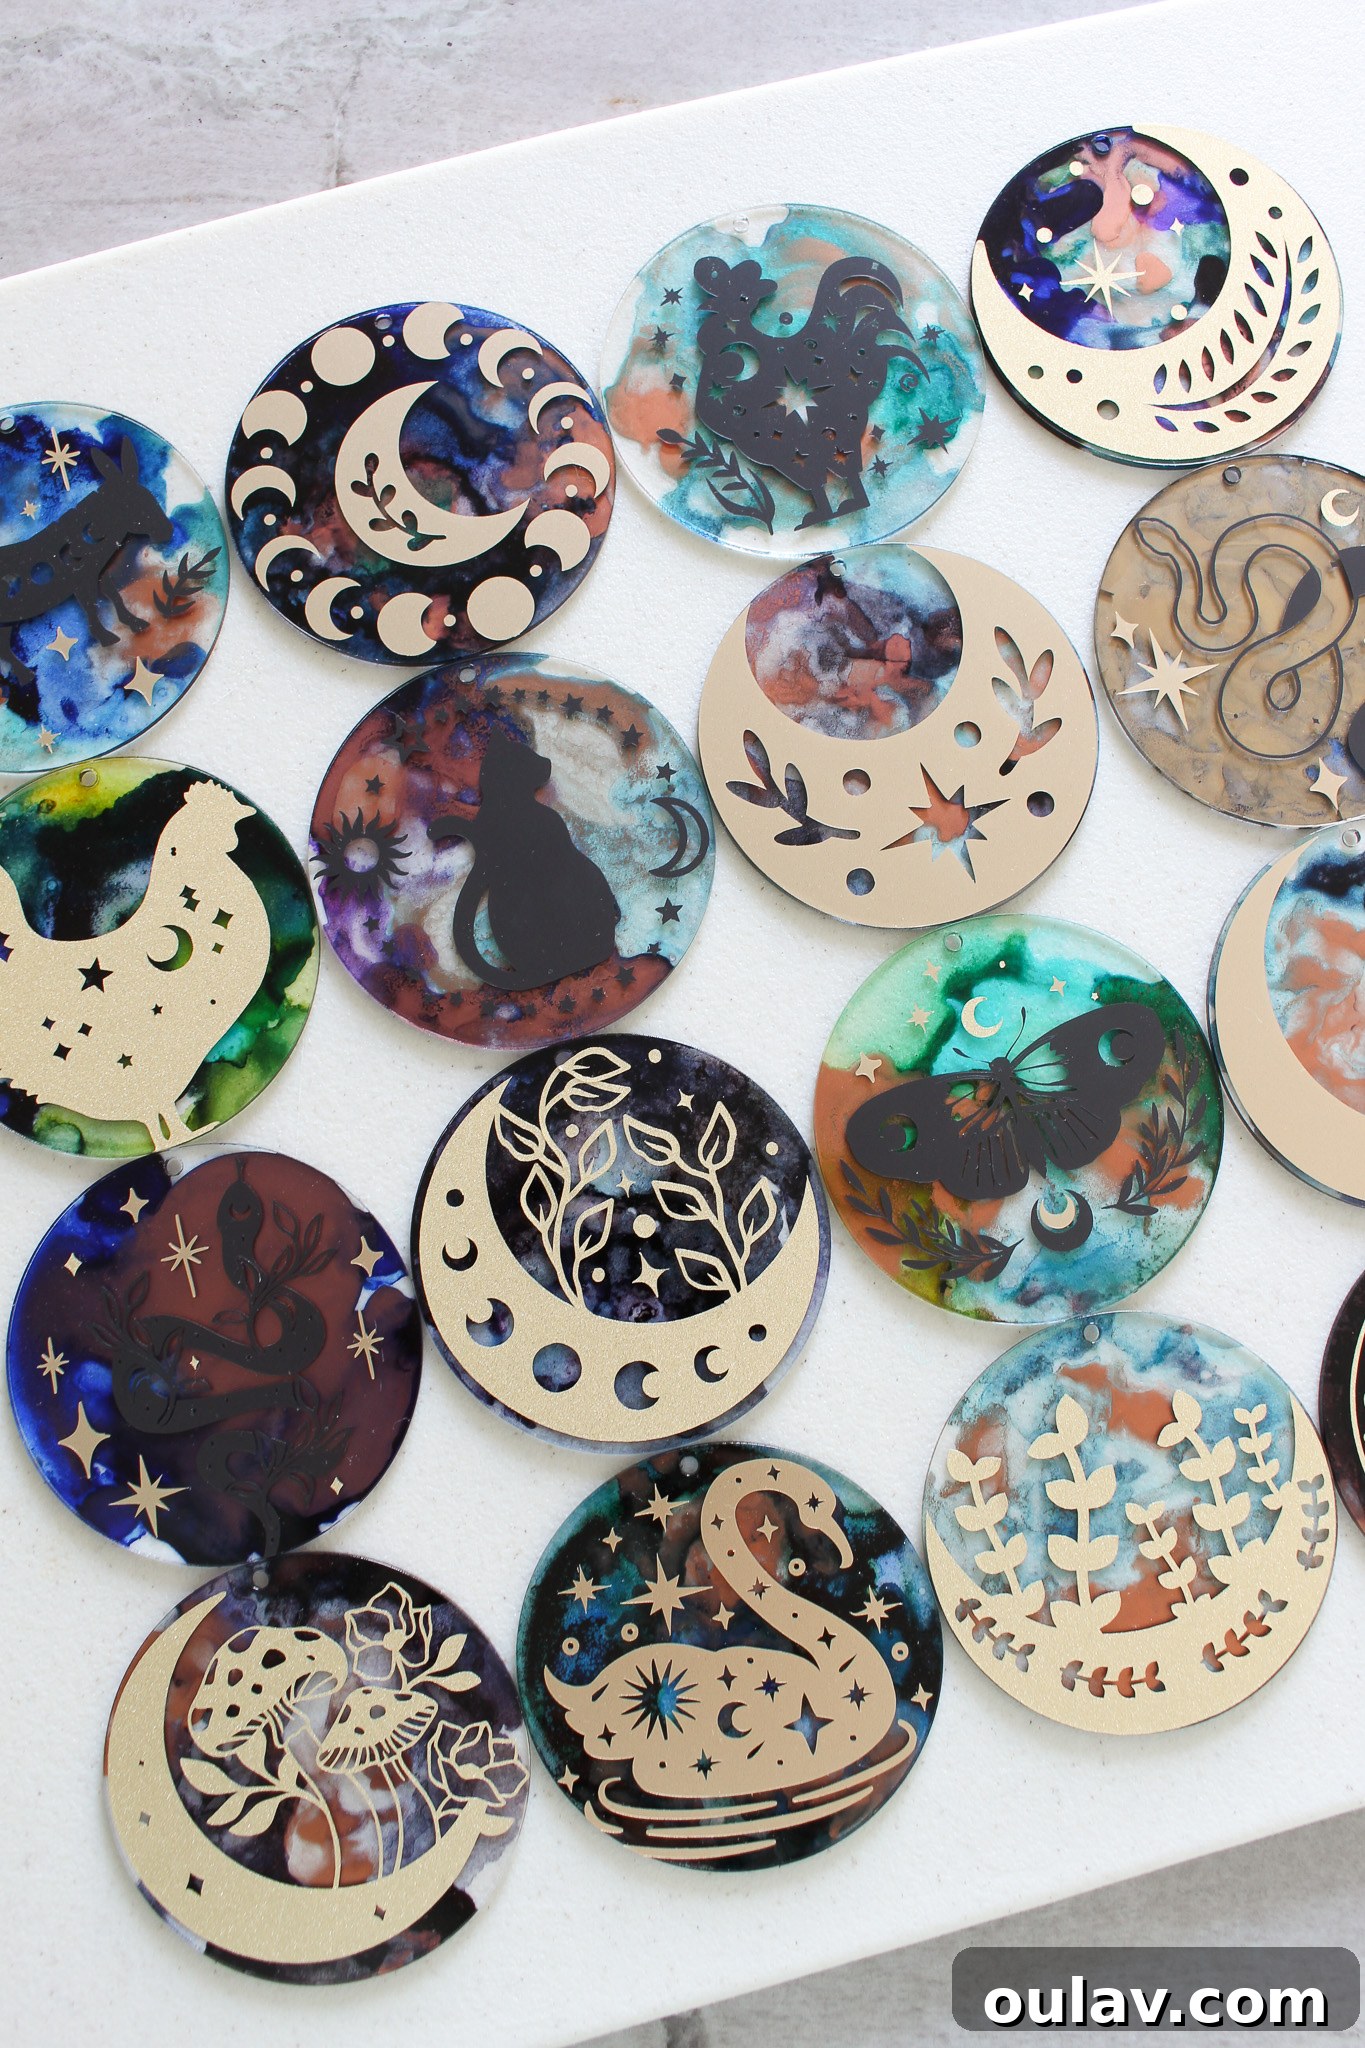
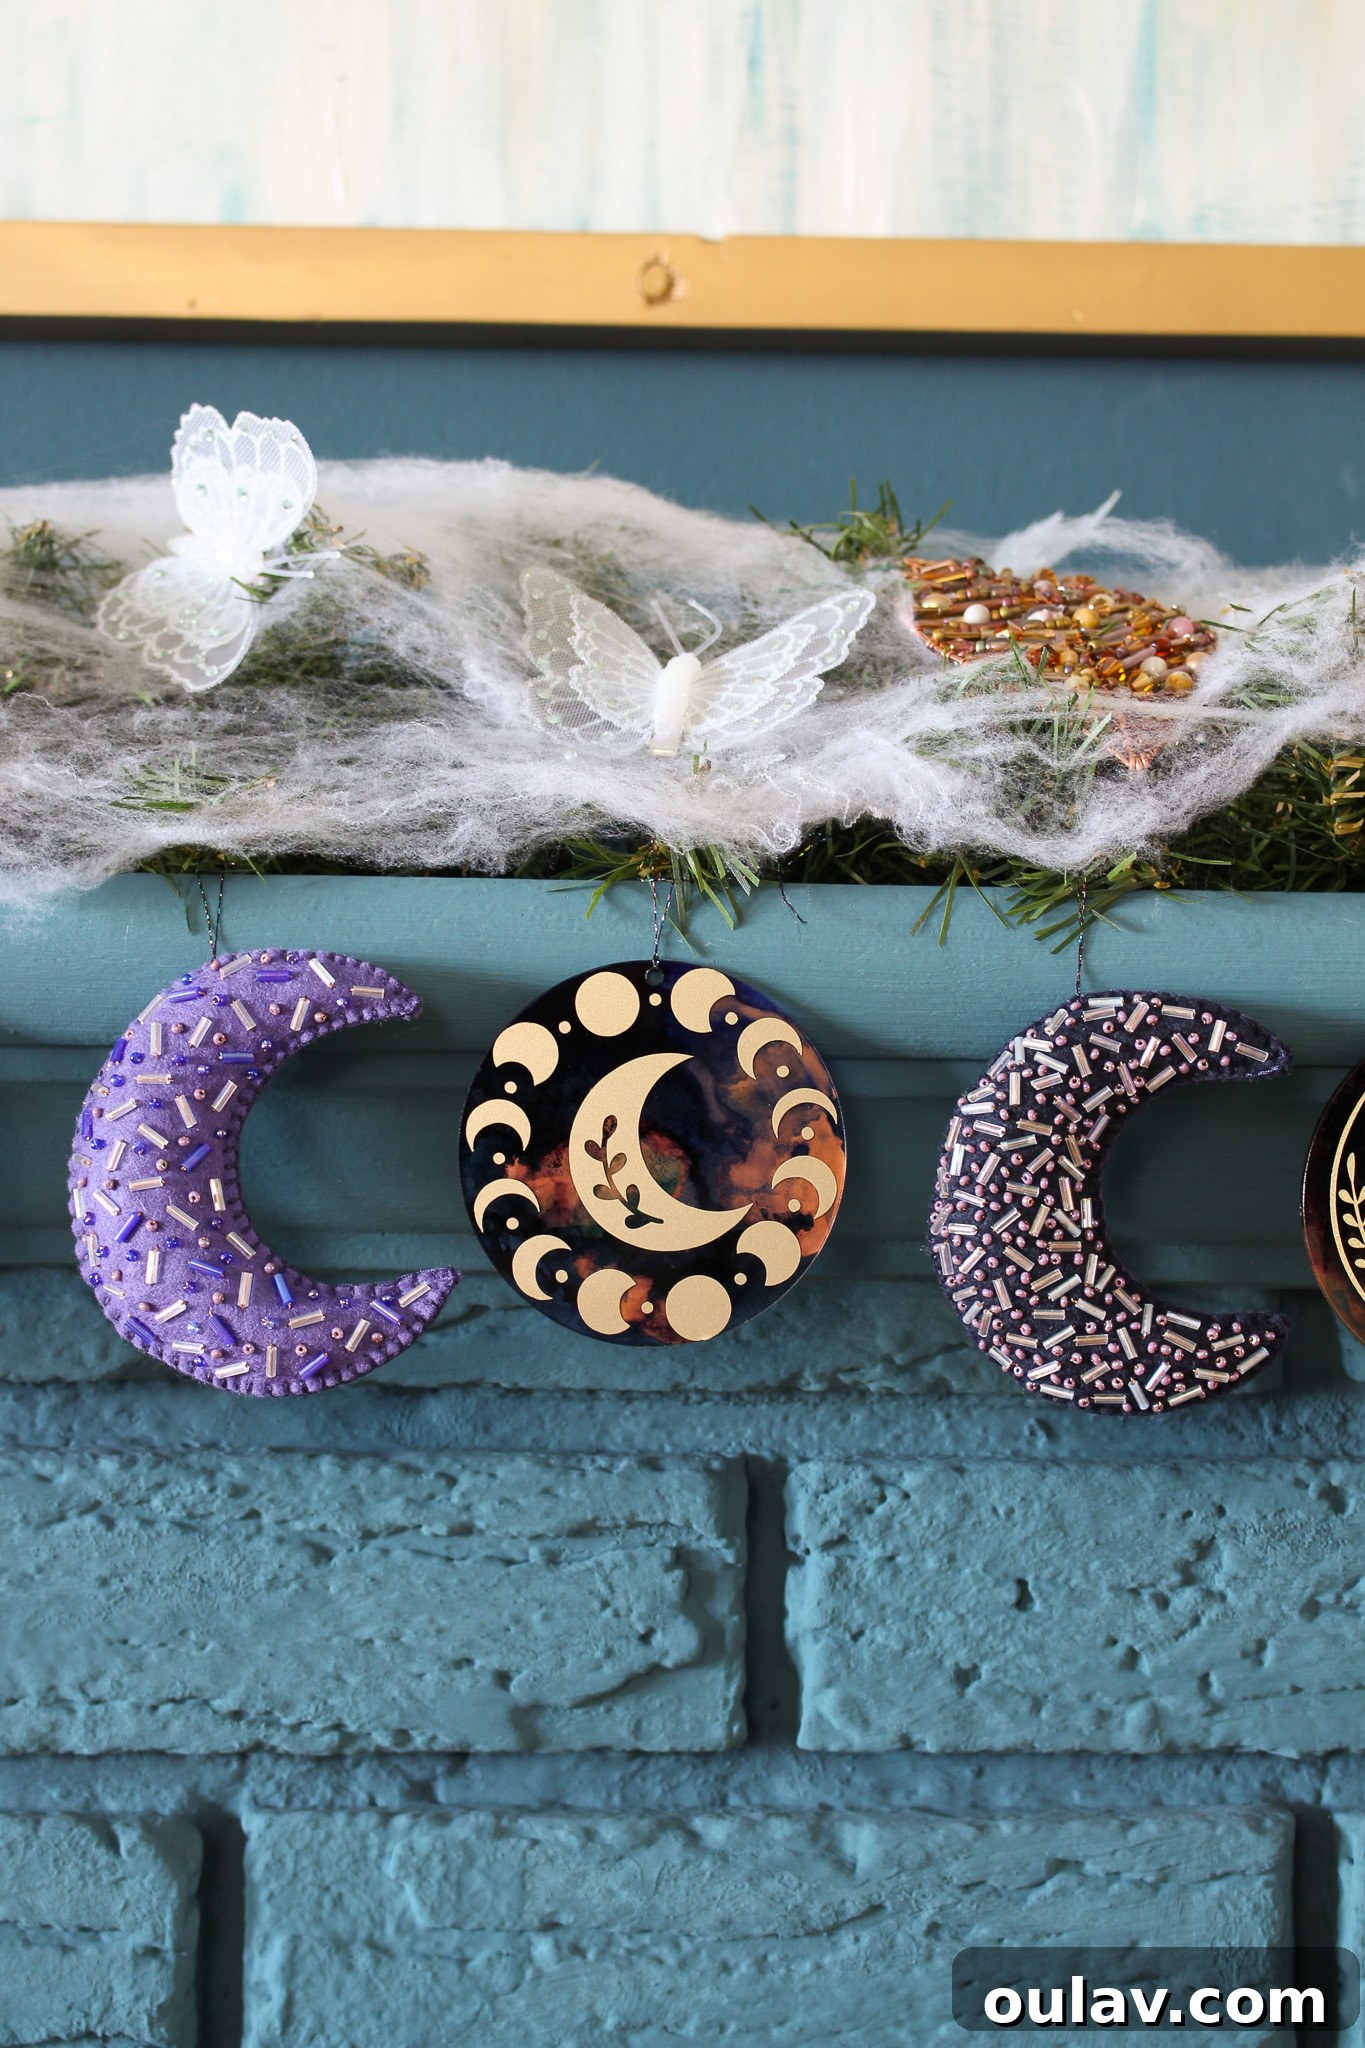
The moment has arrived to admire your finished acrylic discs! Each one is a unique fusion of vibrant alcohol ink backgrounds and intricate vinyl designs. I experimented with a combination of three different vinyls – Shimmer Gold, Matte Gold, and Matte Black – and the results are simply breathtaking. To say I’m obsessed would be an understatement! As someone who wasn’t traditionally a big fan of Halloween, this project has converted me. The interplay of the moody, swirling background colors from the alcohol inks, paired with the elegant, magical designs, creates an aesthetic that is both sophisticated and enchanting. The tiny moons and stars, in particular, add an irresistible charm. For the past two Halloweens, finding inspiration in the captivating atmosphere of Netflix’s The Chilling Adventures of Sabrina has proved incredibly effective in sparking my creativity for Halloween crafts. It seems my journey to becoming a DIY Halloween decor enthusiast is officially complete!
Assembling Your Enchanting DIY Cricut Acrylic Disc Garland for Halloween:
With your beautifully decorated acrylic discs ready, it’s time to assemble them into a captivating garland that will become the centerpiece of your Halloween decor. There are many ways to approach this, but I opted for a method that allowed me to integrate the discs seamlessly into a larger, more elaborate mantel display:
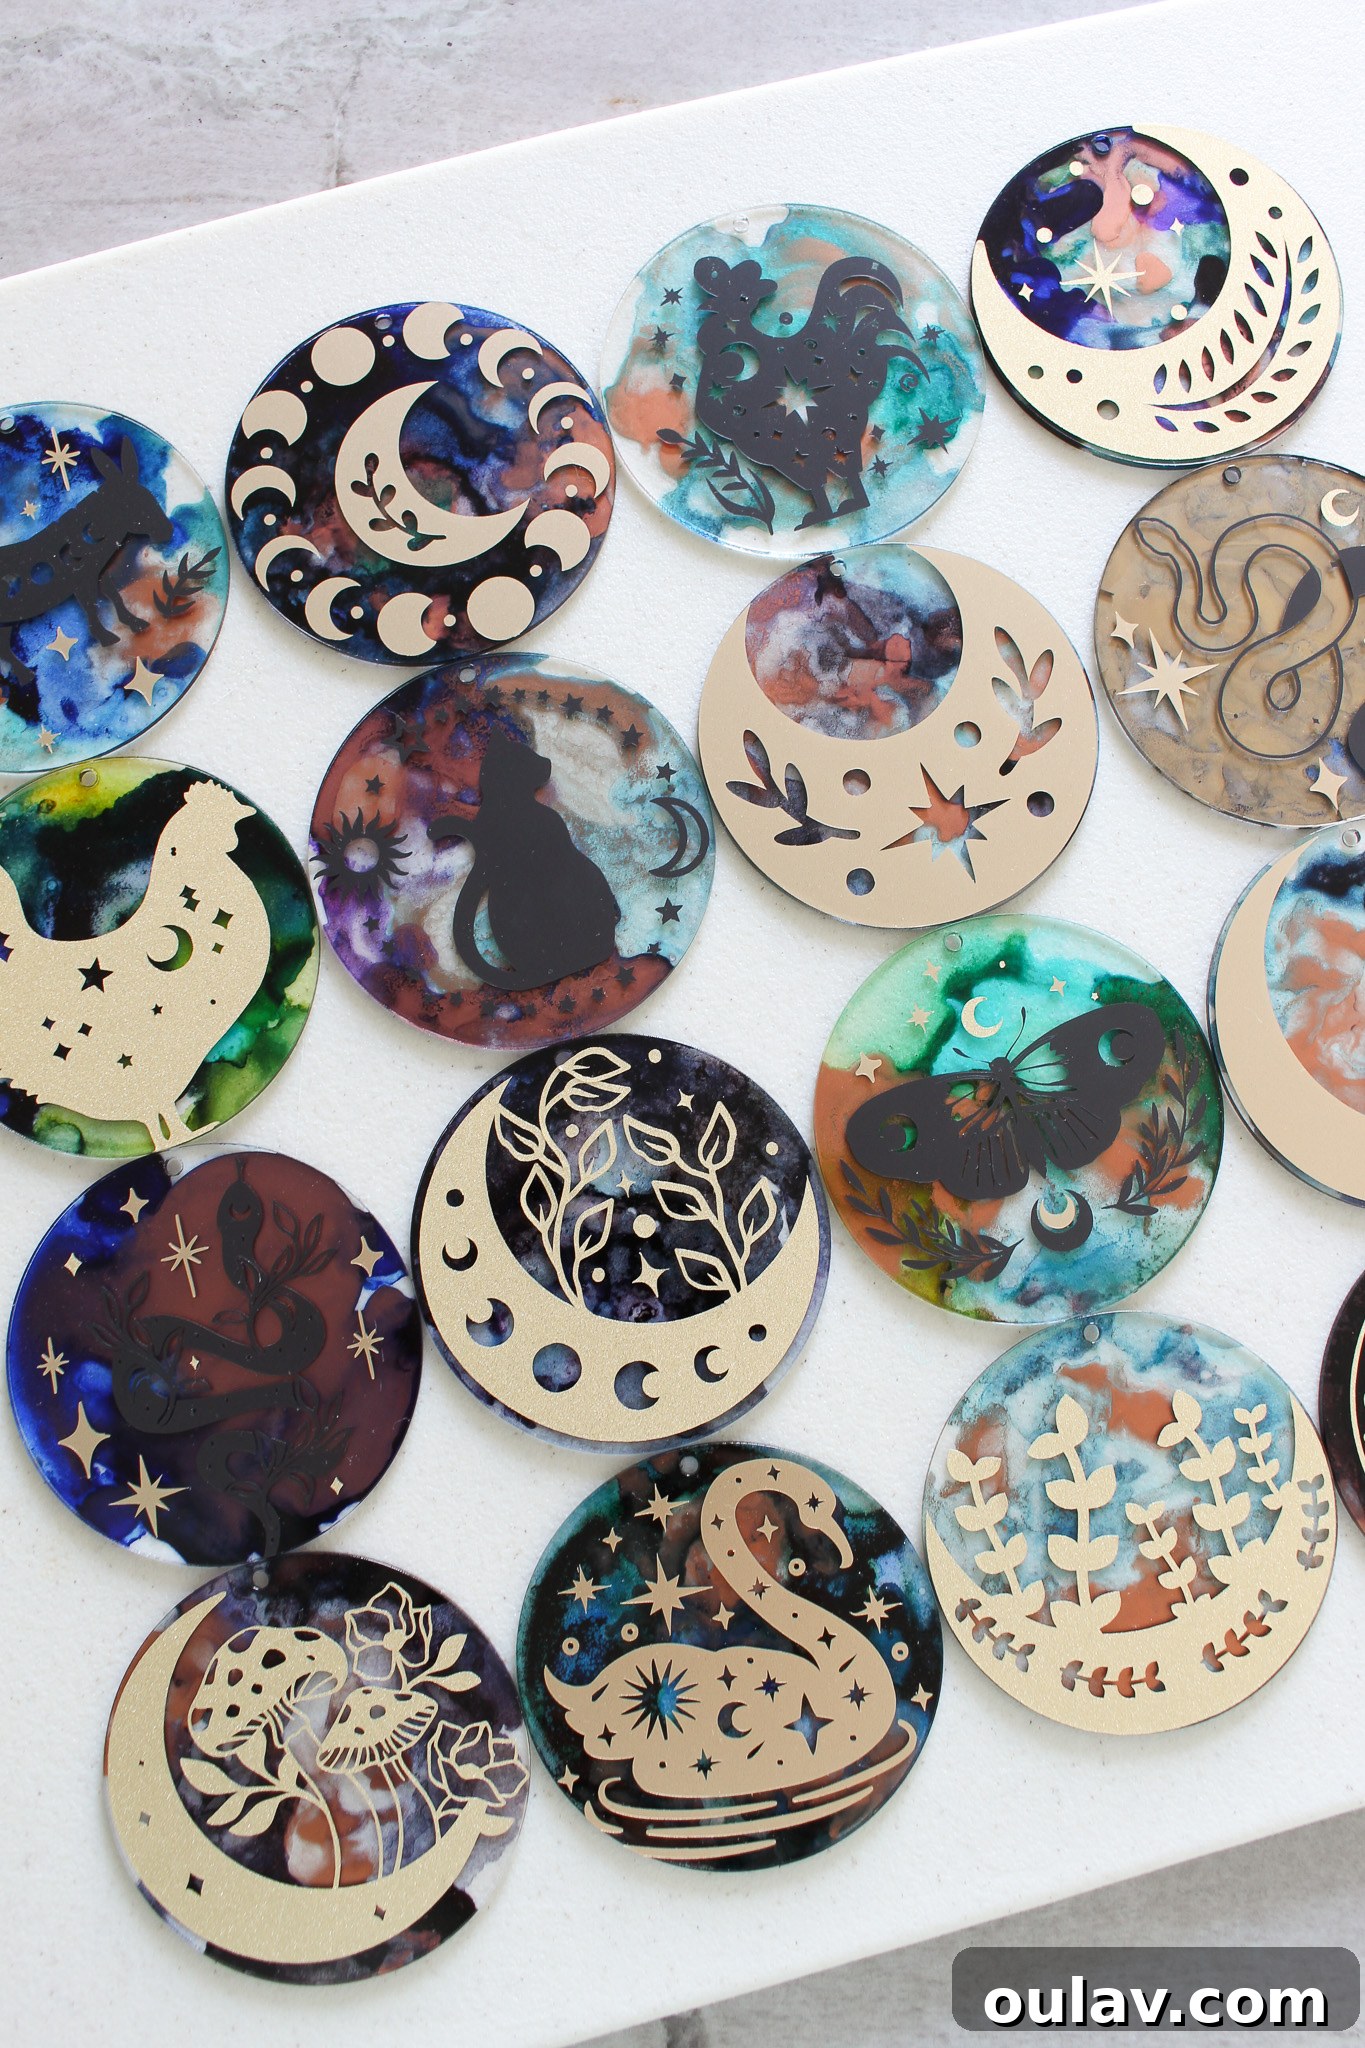
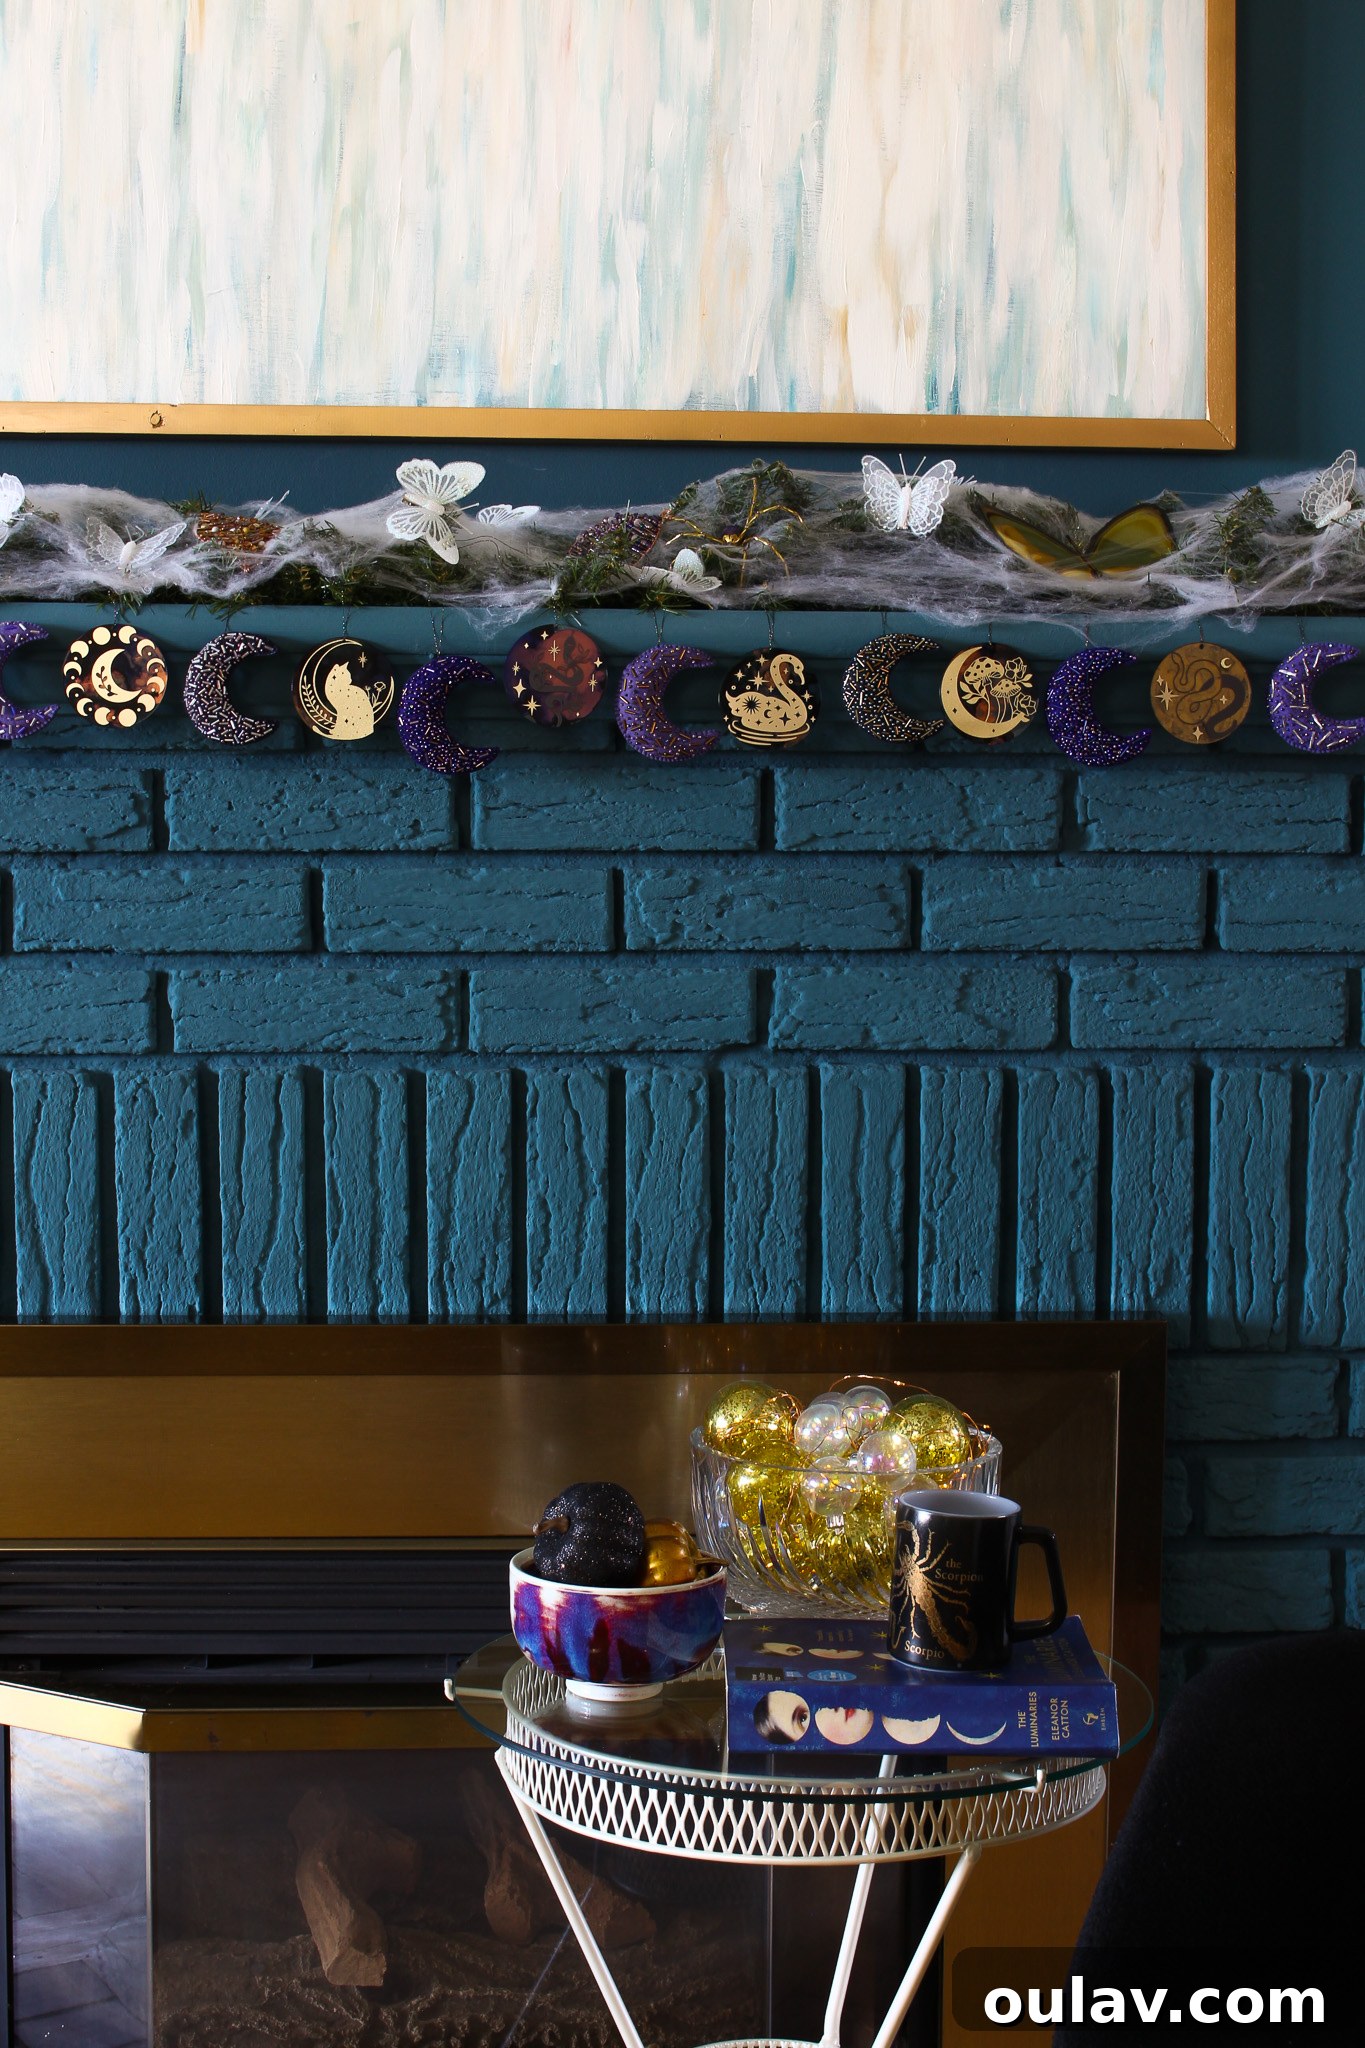
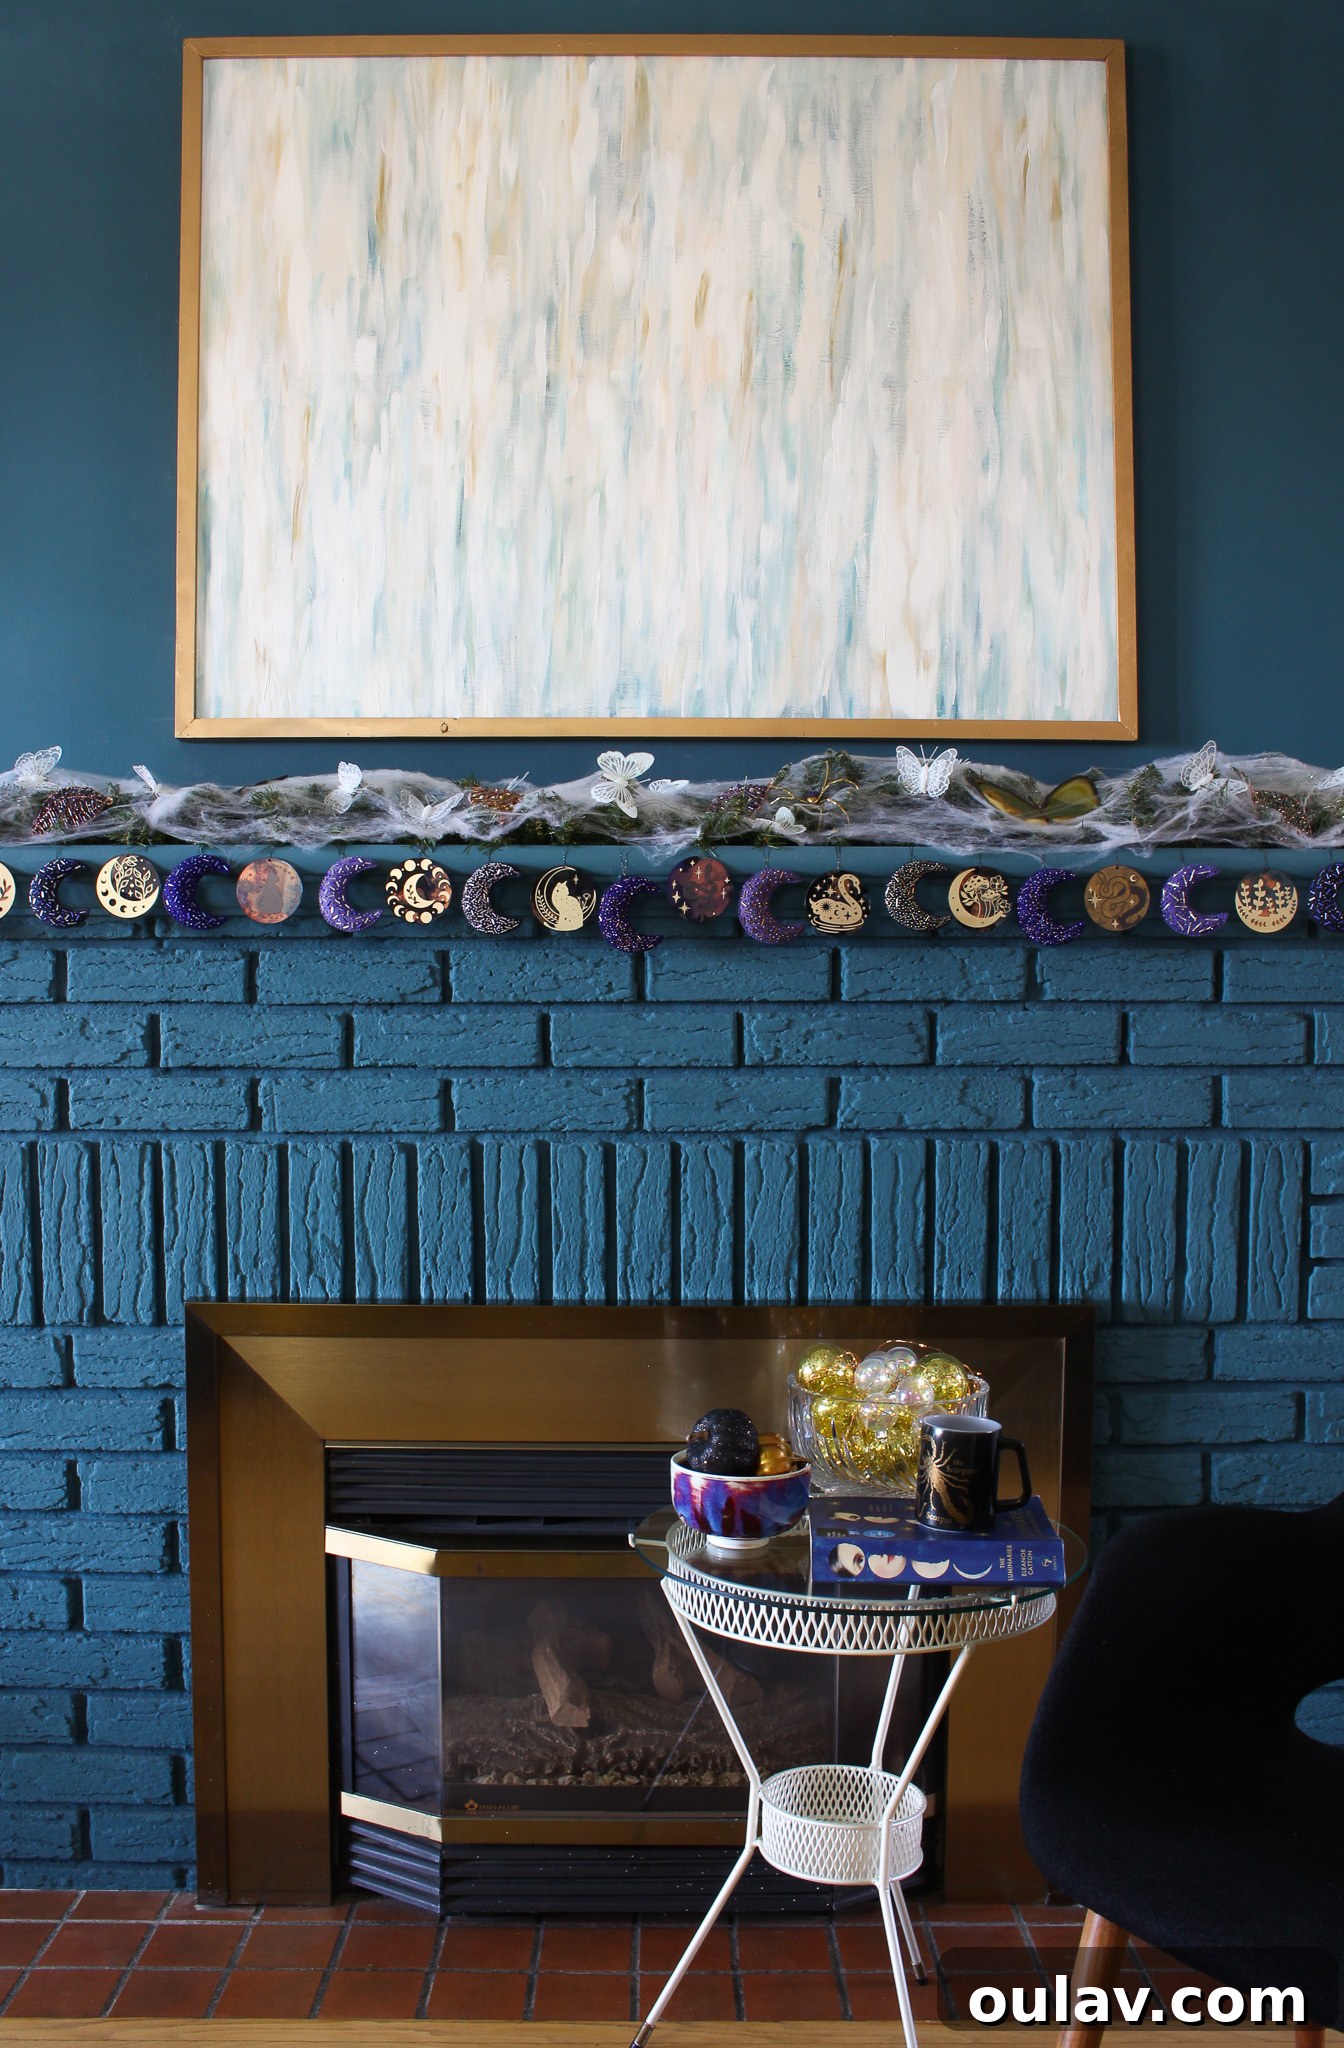
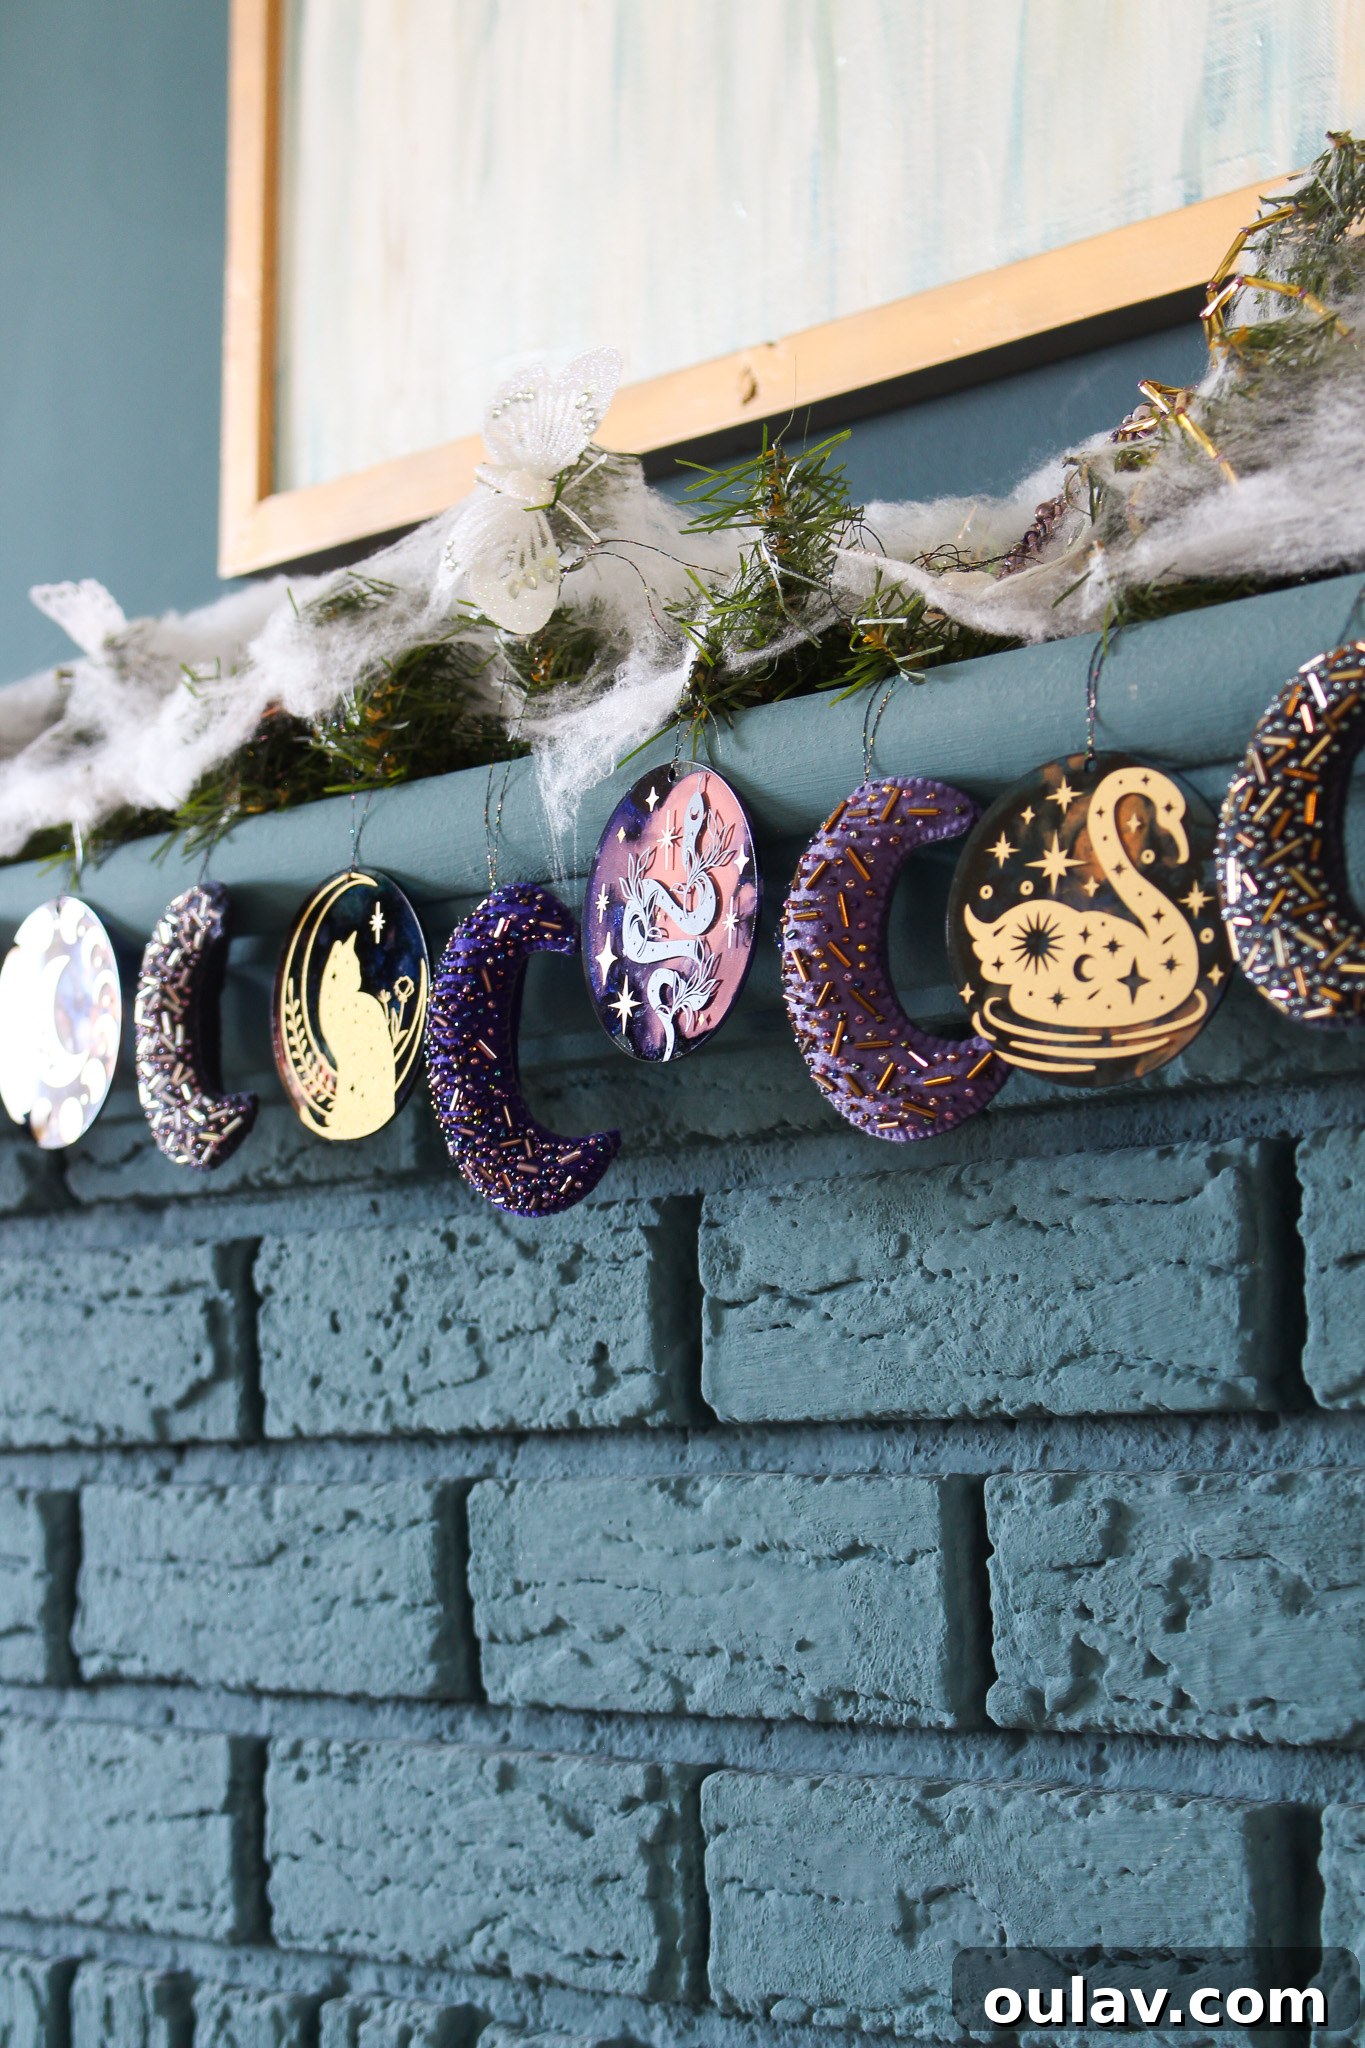
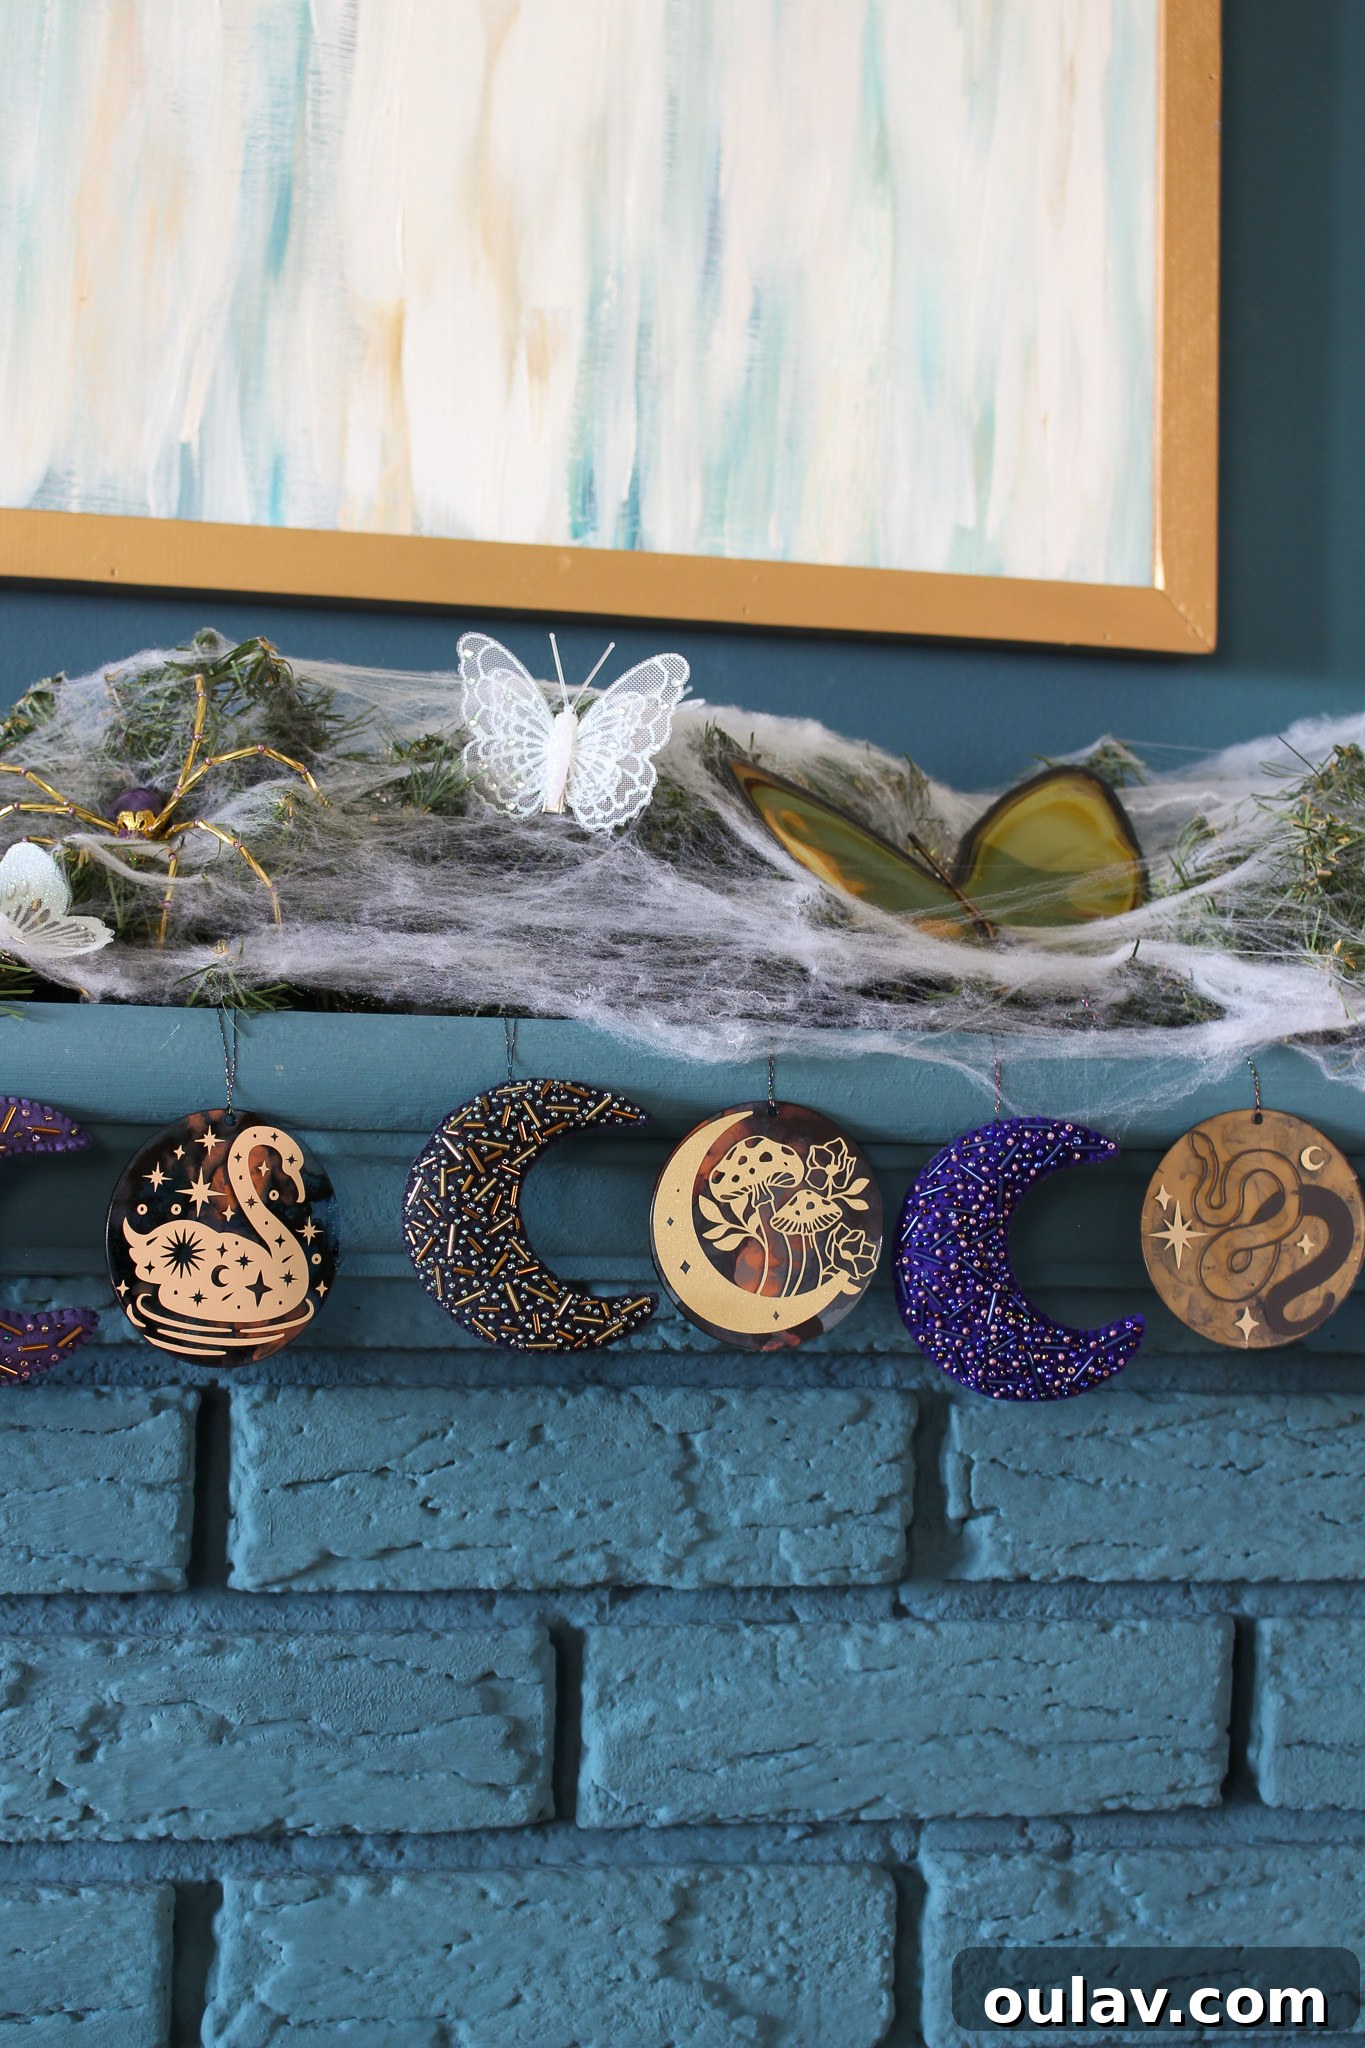
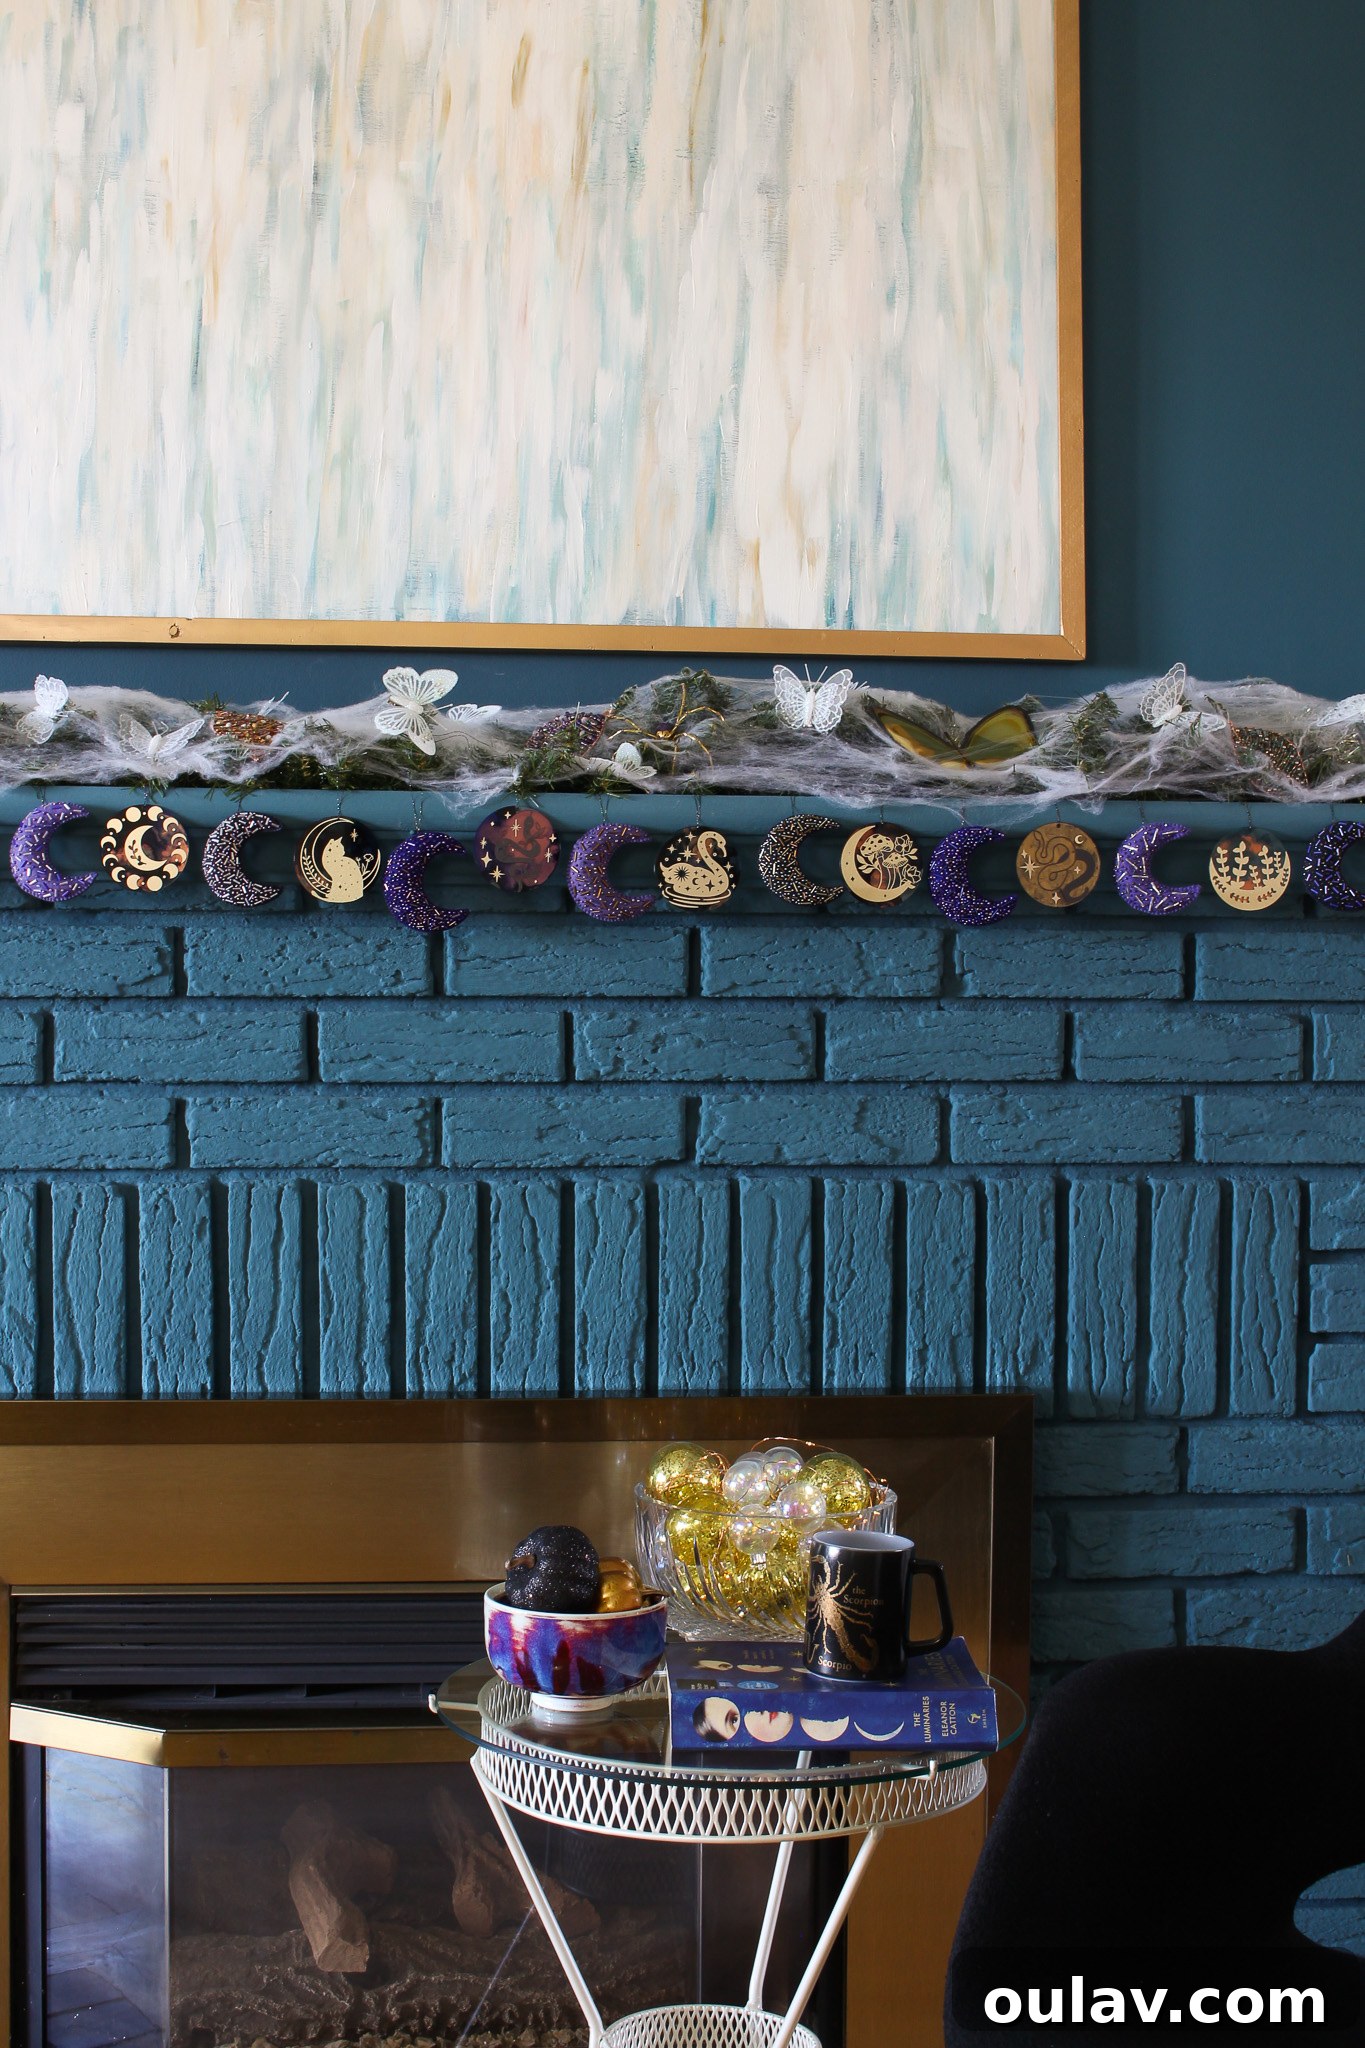
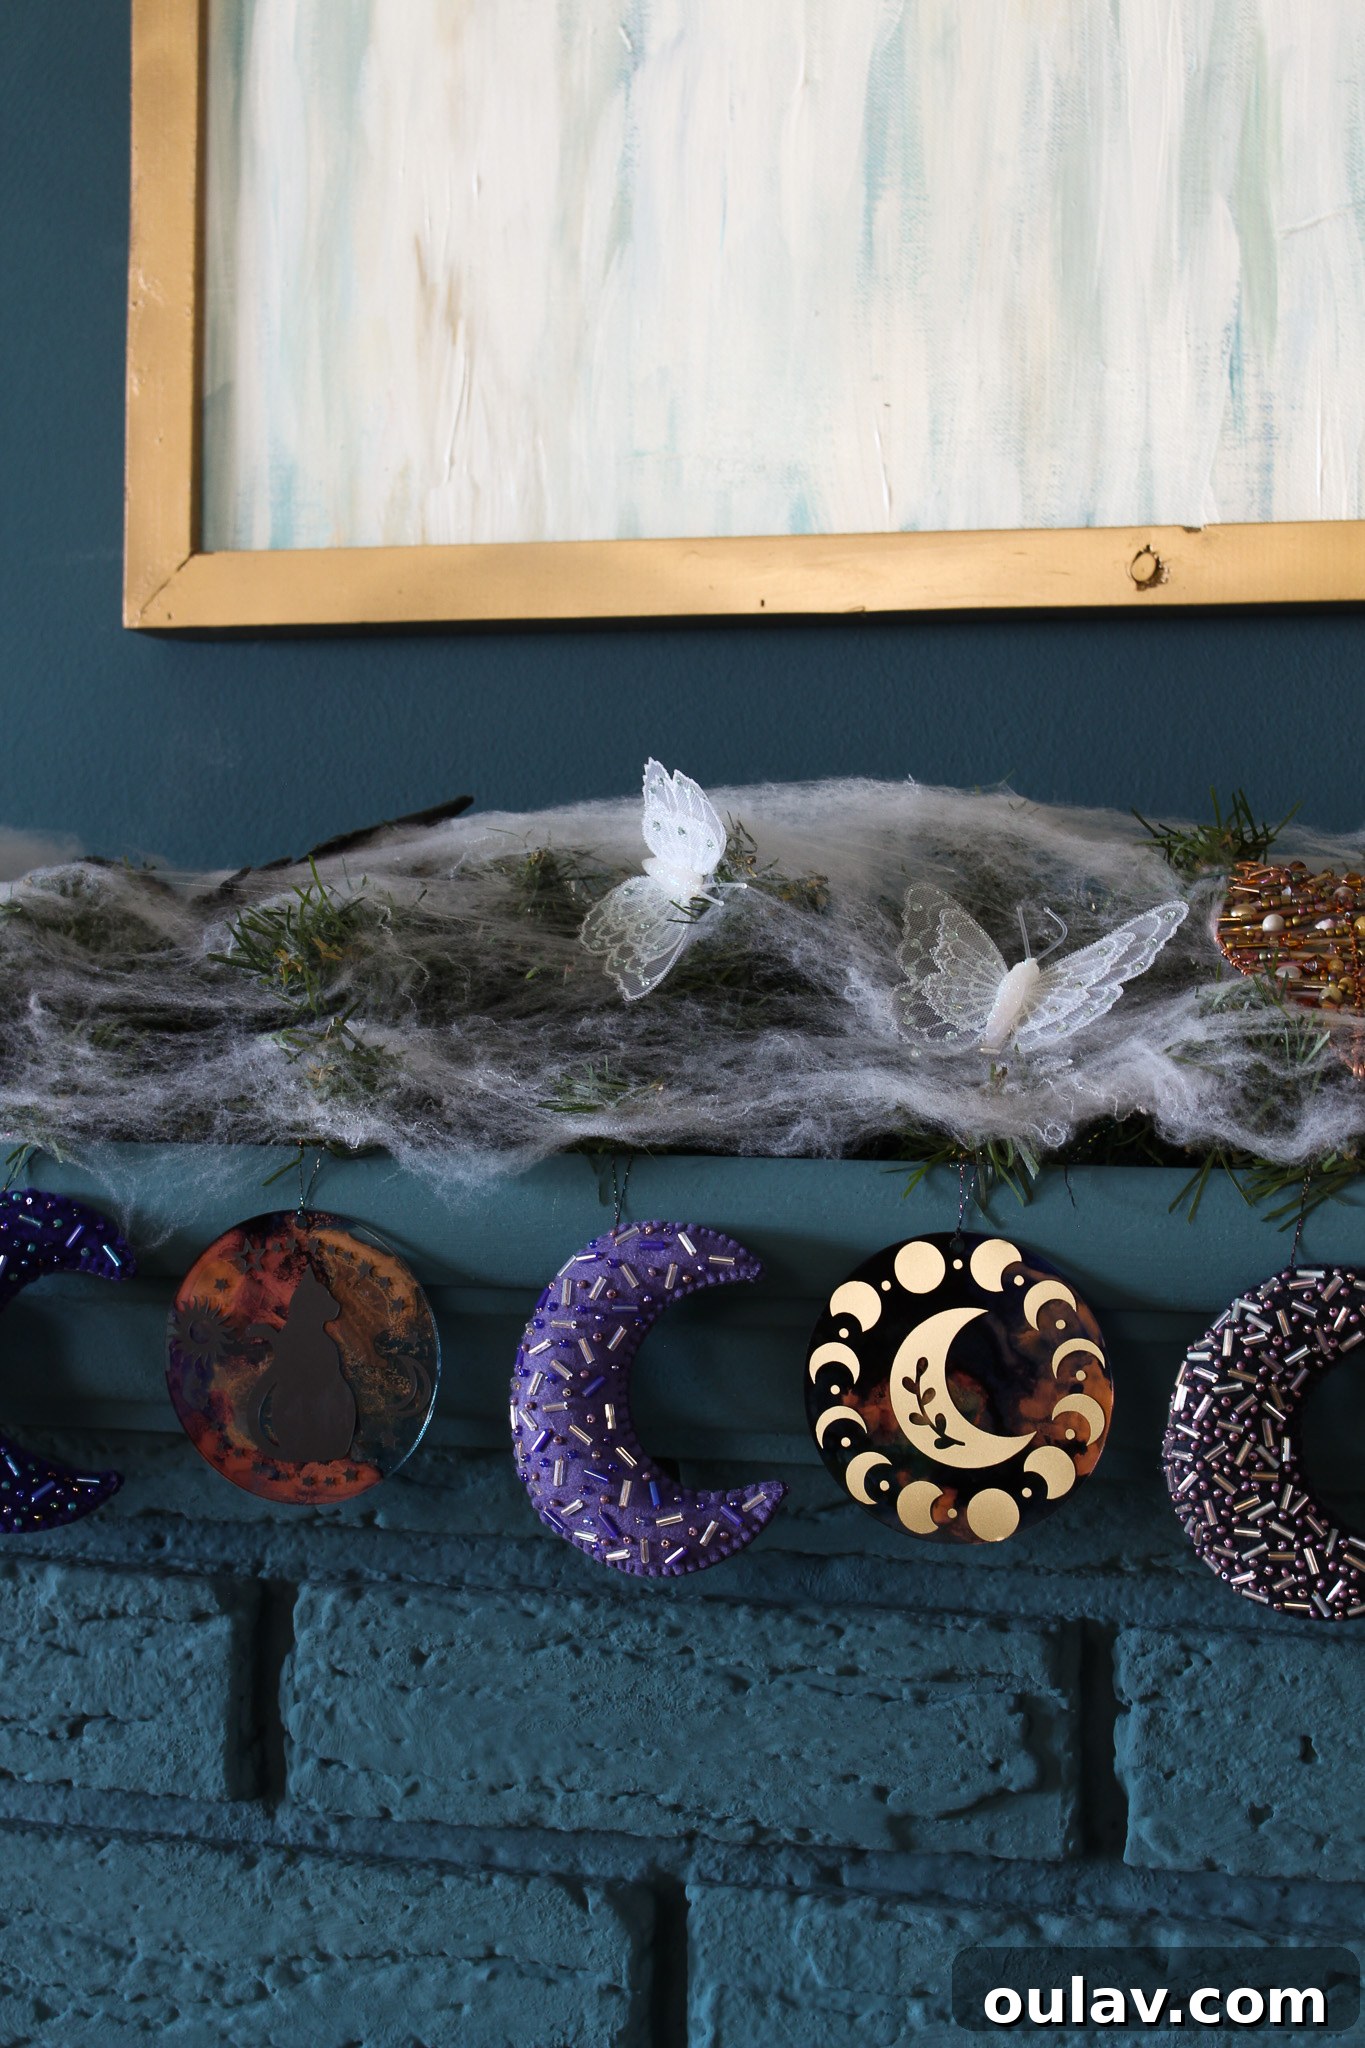
First, I started with a base of faux evergreen garland, which provided a natural, full foundation. To instantly transform it into a spooky Halloween spectacle, I draped layers of faux cobweb material over the evergreen, creating an eerie, ethereal atmosphere. Next, I used simple string to individually tie each acrylic disc to various branches of the garland, ensuring they hung at different heights for visual interest. This method also allowed me to alternate the acrylic discs with other handmade elements, like the striking purple and indigo DIY beaded felt moon ornaments I crafted for my Mom’s tree last year, maintaining a consistent magical theme.
While you could certainly string these discs together with thin ribbon or twine to create a more traditional garland, my chosen method offered more flexibility for display on my Mom’s mantel. It also provided the perfect opportunity to incorporate other beloved handmade items: my delicate DIY beaded wire leaf ornaments, elegant clip-on white butterflies (repurposed from her Christmas tree theme), a pair of larger, vintage metal butterflies we discovered thrifting, and of course, a quintessential DIY beaded spider for that classic Halloween touch. The layering of textures and elements creates a truly rich and immersive display.
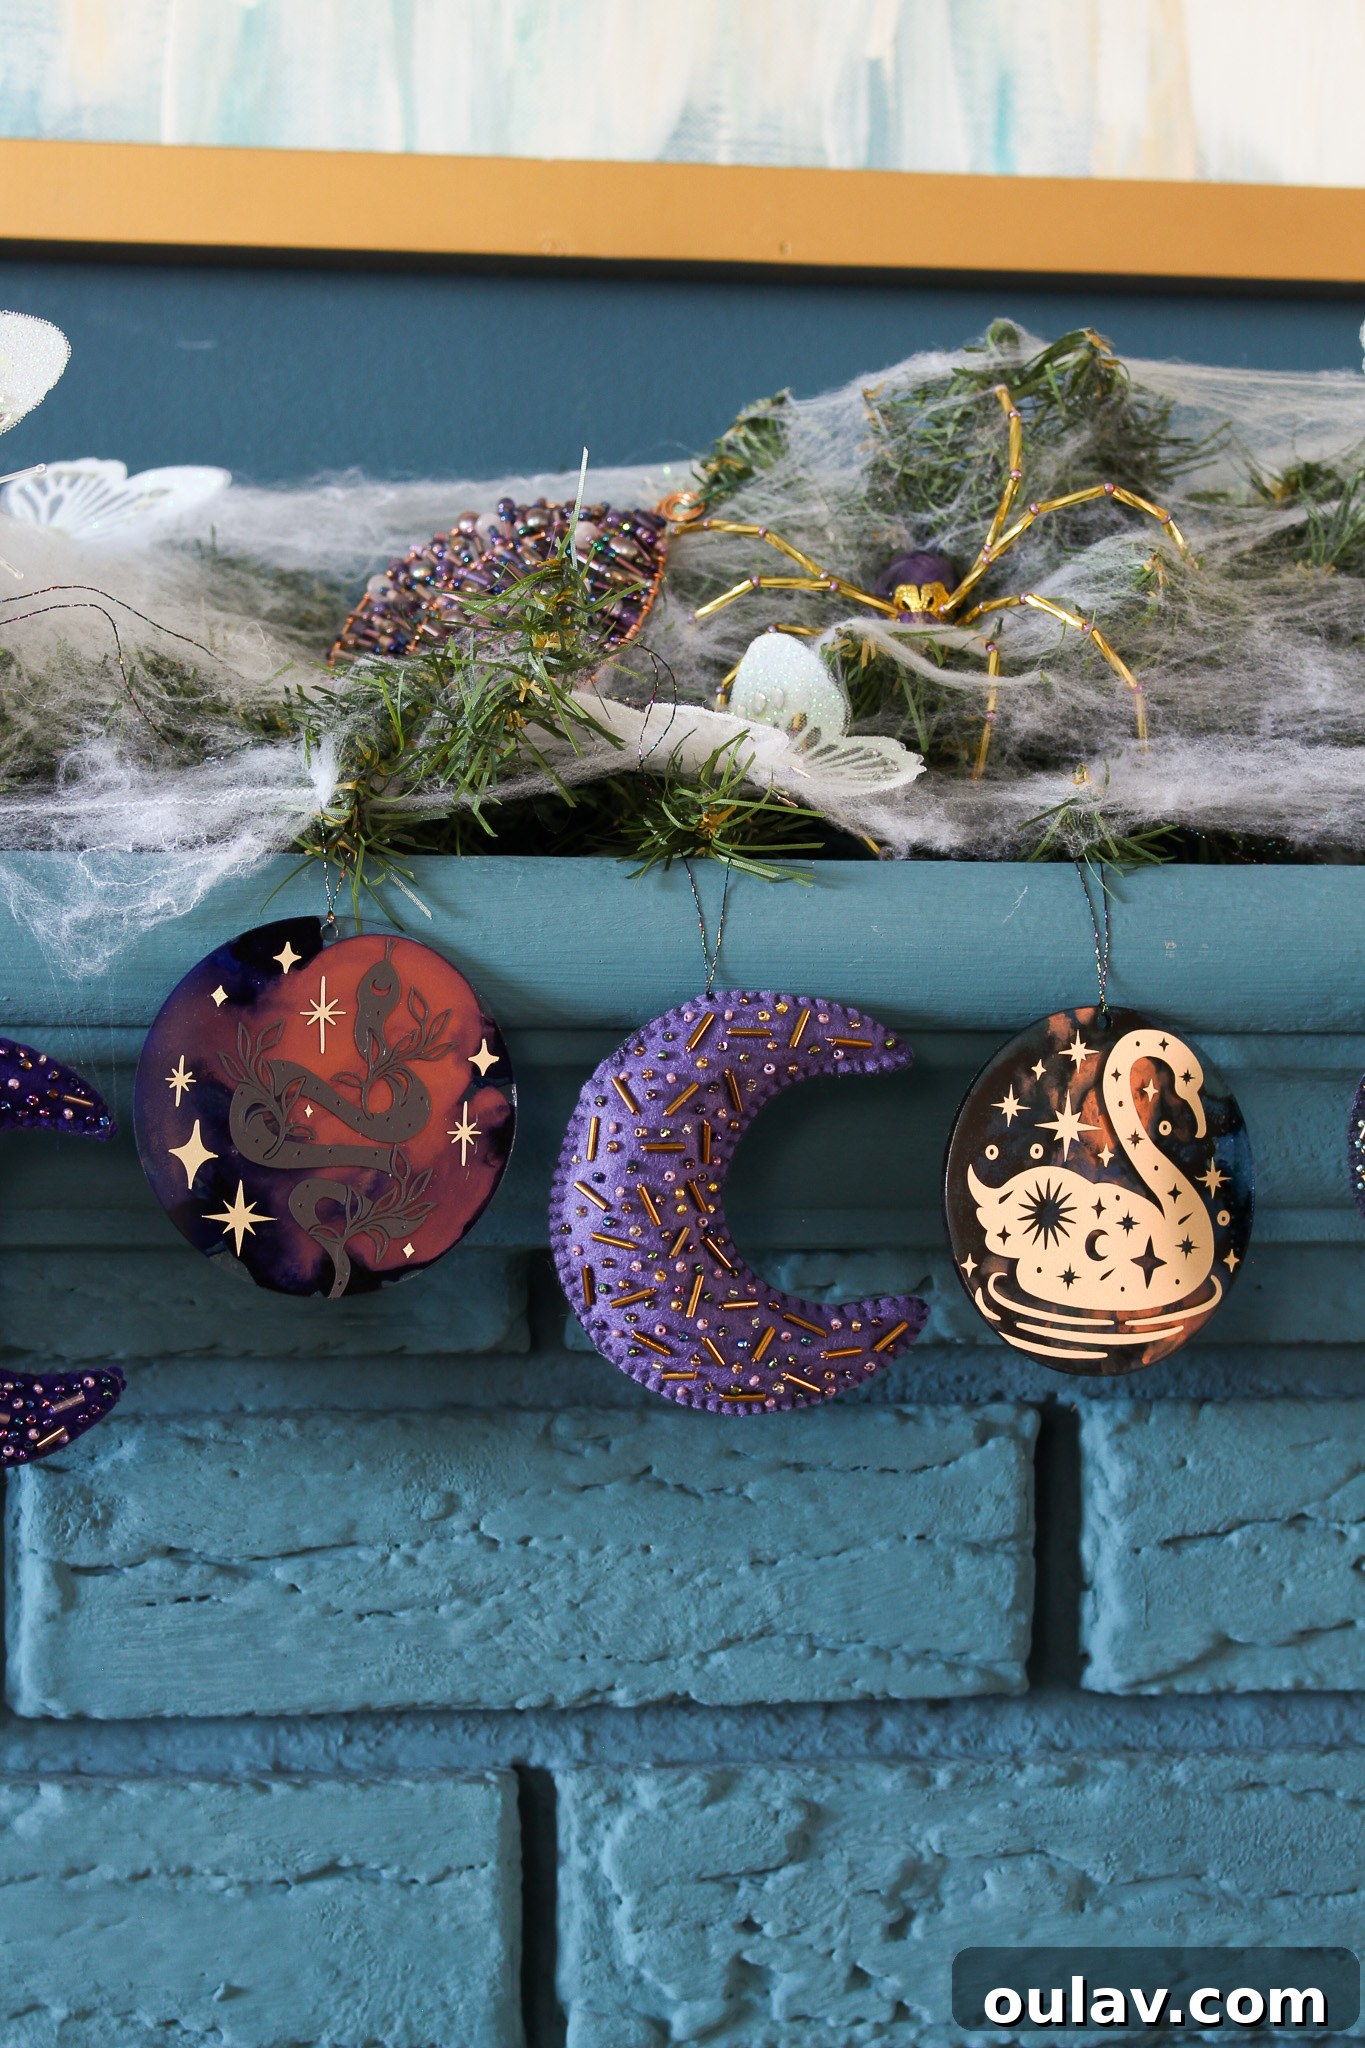
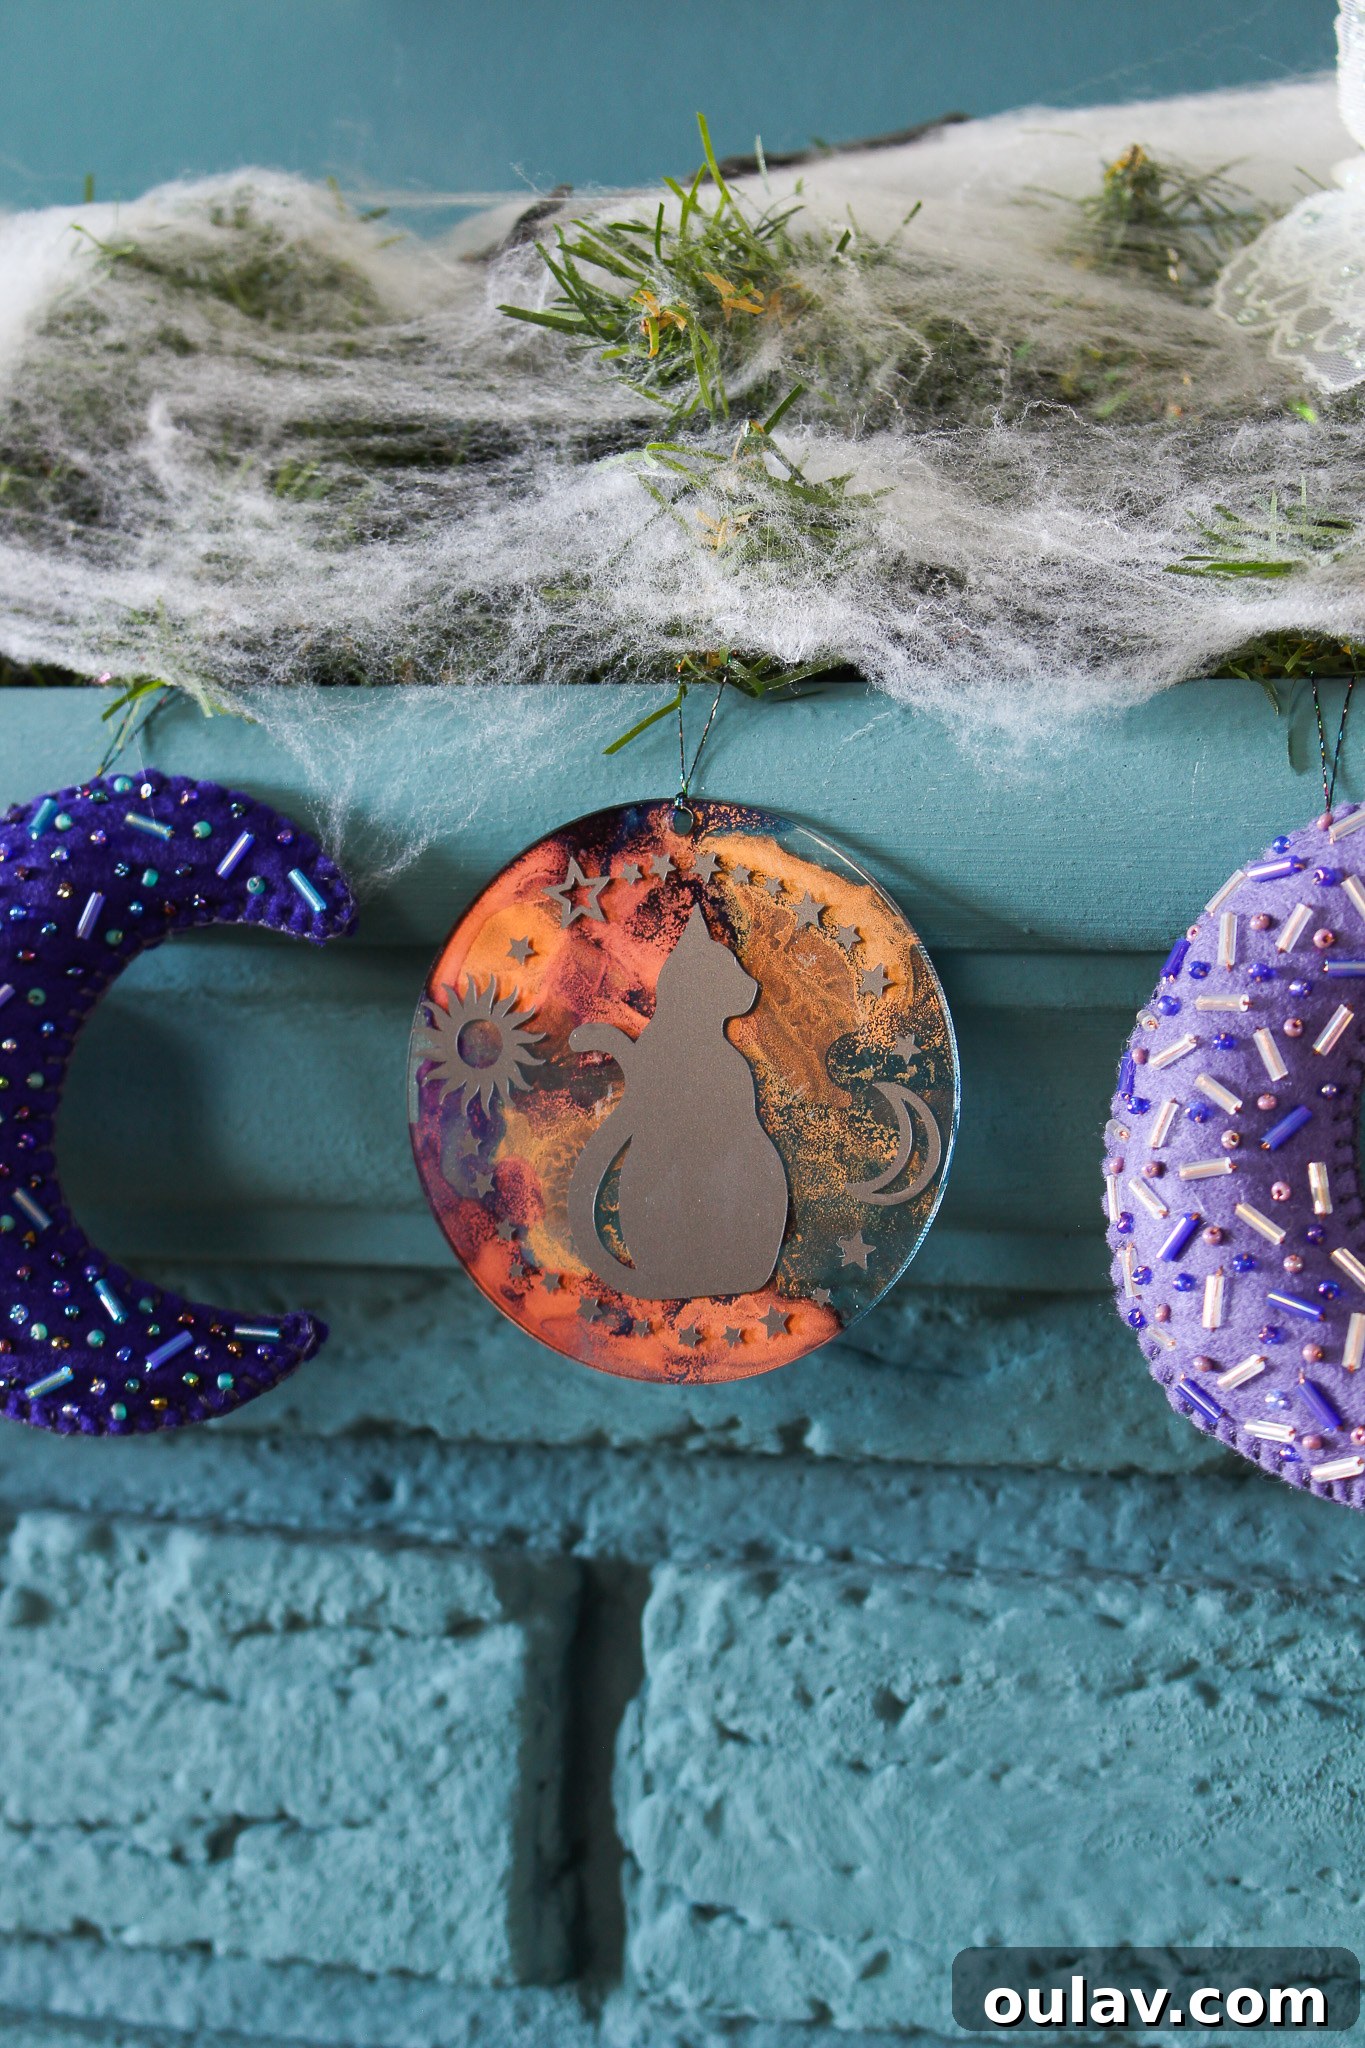
Here are some detailed close-ups of the finished DIY celestial-themed garland for Halloween. Notice how beautifully the metallic vinyls and metallic alcohol inks shimmer and catch the light, adding a captivating dimension to the display. The matte black vinyl, meanwhile, provides a striking contrast, offering an edgy elegance that perfectly complements the mystical theme.
To further enhance the moody and magical ambiance of the mantel, we styled a nearby vintage side table. It featured a shimmering vintage crystal bowl brimming with additional ornaments and battery-operated fairy lights, creating a soft, enchanting glow. Beside it sat a charming little purple pottery bowl I discovered at a landfill (now filled with a few miniature pumpkins for a seasonal touch) and a striking vintage Federal Glass astrology mug, tying into the celestial theme perfectly. This combination of handmade and vintage elements creates a rich, layered aesthetic that is both deeply personal and wonderfully unique.
I sincerely hope this comprehensive guide inspires you to create your very own DIY acrylic disc garland for Halloween! This project is a testament to how repurposed creativity can result in stunning, personalized decor that truly sets a magical scene. Happy Halloween crafting!
Cricut Halloween Garland Video Tutorial:
For those who prefer a visual guide, make sure to watch our detailed video tutorial on how to create this enchanting Cricut Halloween garland. It covers every step from alcohol ink application to vinyl detailing, bringing the entire process to life.
P.S. Don’t Forget to Pin this Magical Craft Idea for Later!