

Transforming your wardrobe doesn’t always require buying new clothes. Sometimes, all it takes is a fresh splash of color. Today, I’m thrilled to share my journey of giving an old dress a vibrant new life, and more importantly, showing you exactly how to dye clothes in the washing machine. This DIY fabric dyeing method is surprisingly simple, efficient, and yields impressive results, making it perfect for anyone looking to refresh their garments or tackle a creative project.
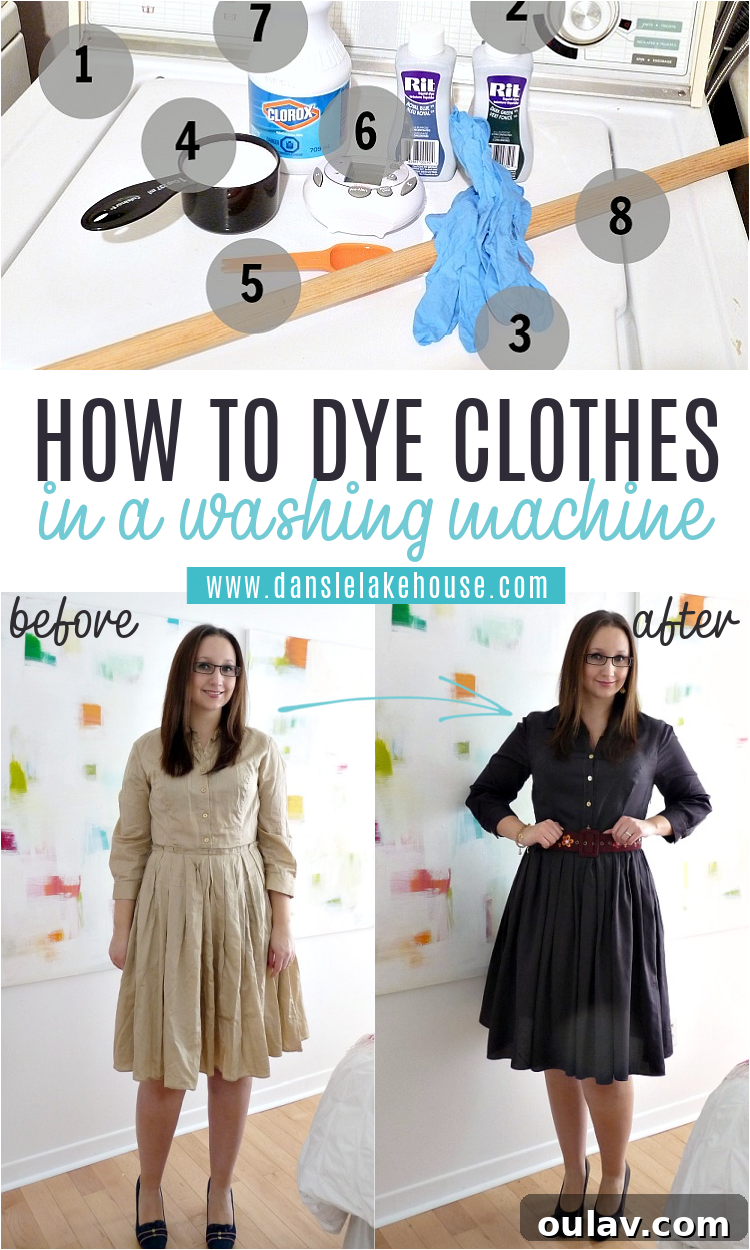
My quest began with a simple desire: finding comfortable, sleeved dresses that are both stylish and affordable. While sleeveless options are plentiful, finding an appealing long-sleeved dress often proves challenging. That’s why I initially settled on a 1950s-style cotton shirt dress. Its practical design and adorable pockets immediately caught my eye. However, despite its comfortable cut, the dress was undeniably a bit bland due to its original drab beige hue. This neutral shade did nothing to enhance my complexion, leading it to sit largely unworn in my closet after a single outing on my trip to Hungary.
Determined to make this dress a staple in my wardrobe, I decided it was time for a dramatic makeover. My vision was a sophisticated, deep teal green. I turned to Rit Dye’s comprehensive color formula guide, an invaluable resource for mixing custom shades. I was particularly drawn to the dark green mixed with navy or teal options (formulas 221 or 224 on their guide’s top row). My initial plan was to purchase dark green and navy dye. However, in a slight oversight, I accidentally grabbed dark green and royal blue instead of navy. The realization only hit me as I was pouring the dyes directly into the washing machine!
At that point, rather than starting over, I embraced the unexpected combination. I abandoned the precise formula and simply poured both bottles into the machine. I’d read that Rit dye can sometimes result in lighter colors than anticipated, so I reasoned that doubling the amount of dye wouldn’t harm the process. In fact, Rit’s instructions indicate that using no more than two bottles at a time is within the “safe zone,” reassuring me that my impromptu decision was sound. This initial foray into washing machine fabric dyeing proved that flexibility and a willingness to experiment are key to successful DIY projects.
Essential Supplies for Dyeing Clothes in a Washing Machine:
Before you embark on your own garment transformation journey, gathering the right tools is crucial. Here’s a detailed list of what you’ll need to successfully dye clothes in your washing machine:
- Washing Machine: Ideally, use a machine that isn’t brand new or pristine. While modern machines tolerate dyeing well, there’s always a slight risk of minor tinting to plastic components. An older, reliable workhorse is perfect for this task.
- Rit Dye: Choose your desired colors. For reference, I had originally intended to buy Navy Rit Dye and Dark Green Rit Dye. The quantity depends on the fabric weight and desired intensity; two bottles are often recommended for deeper shades.
- Rubber Gloves: Essential for protecting your hands from dye stains. You’ll thank yourself for this step!
- 1 Cup Salt: This is a crucial additive for natural fibers like cotton, rayon, ramie, or linen. Salt acts as a dye fixative, helping the fabric absorb the dye more intensely and produce a richer, more vibrant color.
- 1 Tablespoon Laundry Detergent: A small amount of detergent ensures the fabric is clean and prepped for dyeing, and also helps the dye disperse evenly. I typically opt for an earth-friendly variety, which I often find at Costco.
- Kitchen Timer: Precision is important for achieving consistent results. A timer helps you keep track of the dye bath duration. (I couldn’t resist linking to an adorable retro-looking one!)
- Bleach: Indispensable for cleaning your washing machine and any accidental splatters after the dyeing process is complete.
- Centipede Poking Stick: This might be a highly specialized item, and certainly not universally applicable! However, for those of us with basements prone to unexpected encounters, a long stick can be a surprisingly useful tool for managing any creepy crawlies that might appear during a lengthy DIY session. I encountered three during my dyeing extravaganza in the basement, so consider it a personal essential!
Step-by-Step Guide: How to Dye Clothes in the Washing Machine
Dyeing clothes in your washing machine is a convenient and effective method for achieving beautiful, even colors. Follow these steps carefully to ensure a successful outcome for your next DIY fabric dyeing project:
- Prepare Your Garment: Begin by washing your dress (or any item you’re dyeing) in warm water. This removes any sizing, dirt, or oils that could prevent the dye from adhering properly, ensuring an even color. Once washed, set it aside; it should be damp when added to the dye bath.
- Fill the Washing Machine: Fill your washing machine with enough hot water to allow the garment to move freely and fully immerse itself in the dye solution. Hot water is crucial as it helps the dye penetrate the fabric fibers more effectively, resulting in a more intense and lasting color.
- Add Detergent and Dye: As the machine is filling with water, add one tablespoon of laundry detergent and the two bottles of liquid dye (or powder dye dissolved according to manufacturer instructions). The detergent helps the dye disperse evenly throughout the water, preventing splotches.
- Mix the Dye Bath: Allow the machine to agitate for approximately one minute. This step thoroughly mixes the dye and detergent with the hot water, creating a uniform dye bath before you introduce your garment.
- Introduce the Garment: Carefully uncrease and add your damp dress to the dye solution. Close the washing machine lid immediately to prevent any splattering of the concentrated dye. Be aware that dye can splatter, so caution is advised.
- Add Salt for Intensity: At the five-minute mark of the agitation cycle, add one cup of salt. It’s best to dilute the salt in a small amount of warm water first to ensure it dissolves and disperses quickly. This slight delay in adding the salt allows the dye to begin absorbing into the fabric before the fixative action of the salt fully kicks in, optimizing color intensity, especially for cotton and other natural fibers.
- Monitor Dyeing Time: The ideal dyeing time is typically a minimum of 30 minutes for most fabrics to achieve a rich color. In my case, the dress was in the dye for a total of 25 minutes because the machine proceeded to rinse and spin before I could stop it in time. While 30 minutes is the recommended minimum for optimal saturation, you can adjust this based on your desired color depth.
- Rinse Until Clear: Once the dyeing cycle is complete, rinse the dress thoroughly. Start with warm water and gradually switch to cold water. Continue rinsing until the water running from the garment is completely clear, indicating that all excess dye has been removed.
- Final Wash: After rinsing, wash the dress again on a warm cycle with a small amount of detergent. This final wash helps set the dye and removes any residual dye particles, preventing color transfer to other clothes later. After this wash, rinse it one more time.
At this point, the dress looked promising: a deep dark green with only a hint of blue, which I was happy with. However, a minor setback emerged. From the one time I had worn this dress, my remarkably strong antiperspirant had chemically altered the fabric, leaving distinct lighter splotches under the arms. This is a common issue when dyeing clothes that have been exposed to certain chemicals, and it’s an important consideration for any dyeing project.
No need to panic! With a problem identified, I saw an opportunity for further experimentation. I headed out to purchase more dye. This time, my goal was to achieve a deeper, more uniform color. I specifically bought two bottles of navy dye. My reasoning was that a significantly darker color would be more effective at concealing the problematic lighter areas under the arms. Plus, the initial green was feeling a touch too “military” for my taste, so a shift towards navy felt like a more elegant solution.
I repeated the entire dyeing process, but with a slight modification to ensure maximum dye absorption. This time, I consciously stopped and reset the machine to the beginning of the agitation cycle, allowing the dress to remain in the dye bath for approximately 40 minutes. This extended duration helped the darker navy dye penetrate the fabric more thoroughly and allowed it to layer over the existing green and royal blue, creating a richer, more complex hue. After the extended dyeing, I carefully rinsed and washed the dress again, following the same steps as before.
The results were fantastic! The underarm region looked significantly better, with the lighter splotches much less noticeable. The final color turned out to be truly captivating – a deep, inky hue that possessed the richness of navy but with a distinct underlying warmth, thanks to the previous green and royal blue layers. It wasn’t quite navy, nor was it teal; it was a unique blend that felt incredibly sophisticated. (It’s worth noting that any light spots visible in the final photos are artifacts of the camera, not imperfections on the dress itself.) The ultimate color formula that emerged from this two-stage process was roughly 2 parts navy, 1 part dark green, and 1 part royal blue. This experience truly highlighted how the original color of the fabric significantly impacts the final outcome, making each DIY dye project a unique adventure.
I’m proudly calling this project a resounding success because the dress is no longer the drab, unworn item it once was. It’s now a distinct, stylish garment that I’m excited to wear. An added bonus? Despite being dyed in hot water twice, the dress didn’t shrink at all, which is often a concern with cotton fabrics. Here’s another look at the dress in its “before” state, for comparison:
One detail to note is that the original polyester stitching did not take the dye, remaining visible at the waistline. This is a common occurrence with mixed-material garments, as synthetic threads often react differently to dyes than natural fibers. However, I always found the dress’s original cut a little simple, so I decided to embrace this feature and enhance it. I paired the newly dyed dress with a beautiful hand-painted belt I purchased in Hungary last year, which perfectly distracts from the undyed stitches and adds a unique, personal touch to the outfit. While I may not be a professional fashion blogger, I certainly know my way around a creative transformation!
How to Clean a Washing Machine After Dyeing Clothes
After successfully dyeing your clothes, the next important step is to thoroughly clean your washing machine to prevent any dye transfer to subsequent laundry loads. It’s simpler than you might think:
- Immediate Wipe-Down: As soon as the dyeing process is complete, quickly wipe down any visible dye splatters on the machine’s interior, lid, or detergent dispenser with a soft cloth dampened with soapy water. This immediate action prevents dye from drying and becoming more difficult to remove.
- Add Bleach: Pour one cup of household bleach directly into the washing machine drum. Bleach is highly effective at neutralizing and removing dye residue.
- Run an Empty Hot Cycle: Close the lid and run the washing machine on the hottest possible setting, with a full water level, through a complete cycle. Do this with an empty machine. This hot water cycle, combined with the bleach, will thoroughly clean the drum and hoses, flushing out any remaining dye particles.
- First Dark Load: As an extra precaution, I always wash a load of dark-colored laundry immediately after cleaning the machine. This acts as a ‘test run’ to ensure no residual dye is present before washing lighter items.
Does Dye Stain a Washing Machine? Addressing Common Concerns
A common concern when contemplating washing machine fabric dyeing is whether the dye will permanently stain the machine itself. In my experience, my machine tolerated the entire dyeing process exceptionally well! While a few plastic areas were tinted ever so slightly, even after scrubbing, I anticipated this possibility. Our washing machine is quite old and has served us faithfully for years; it’s a true workhorse, so I wasn’t concerned about minor cosmetic changes to its appearance. Its primary function is utility, not aesthetics, making it ideal for such DIY projects.
For those hesitant about using their washing machine, you can also dye clothing in a basin or a large sink. However, this method requires constant, continuous stirring of the dye bath for the entire duration to ensure even dye distribution and prevent streaking. That sounded far too labor-intensive for me, especially considering that prolonged hanging around in my basement significantly increases my risk of encountering (and subsequently needing to relocate) more centipedes. The washing machine method, despite its minimal risks, offers unparalleled convenience and efficiency, making it my preferred choice for home fabric dyeing.
Top Tips for Successful Clothes Dyeing
To ensure your DIY clothes dyeing projects are always a success, keep these expert tips in mind:
- Read Instructions Meticulously: Always start by thoroughly reading the specific dye instructions. Different brands and dye types have varying requirements for water temperature, salt/vinegar use, and dyeing times.
- Double Up for Darker Shades: If you’re aiming for a dark or intense color, especially on larger items or when starting with a darker base fabric, consider using two bottles of liquid dye or double the amount of powder dye. This often helps achieve the desired depth of color.
- Embrace Flexibility: Approach dyeing with an open mind. The final color can be influenced by the fabric’s original shade, fiber content, and even water quality. Be prepared for slight variations and appreciate the unique, custom result. Don’t dye anything precious or irreplaceable if you’re not ready for potential surprises.
- Pre-Wash is Key: Always wash items thoroughly before dyeing. This removes any fabric finishes, sizing, or invisible stains that could resist the dye and lead to uneven coloring. If the material still feels stiff or has a ‘coating,’ wash it twice.
- Beware of Chemical Contact: Exercise caution when dyeing clothes that may have come into contact with chemicals like perfumes, antiperspirants, deodorants, or strong detergents. These substances can chemically alter fabric fibers, creating resist areas that will not absorb dye, as I experienced with my dress.
- Hot Water is Your Friend: Use the hottest water temperature recommended for your fabric type and dye. Hot water opens up the fabric fibers, allowing the dye to penetrate more deeply and set more effectively, resulting in vibrant, long-lasting colors.
- First Washes Are Critical: For the first few washings of a newly dyed item, wash it separately in cool water with a small amount of mild detergent that does not contain bleach. This helps remove any unbound dye and prevents color bleeding onto other garments.
- Wash with Similar Colors: After the initial washes, always wash dyed items with clothes of similar colors to prevent accidental transfer of any remaining loose dye.
- Expect Fading: Over time, all dyed items will experience some degree of fading, especially with repeated washing and exposure to sunlight. This is a natural characteristic of dyed fabrics.
- Thread and Hardware May Not Dye: Be aware that synthetic threads, zippers, buttons, and other non-fabric components often do not absorb dye in the same way as natural fibers. This can create a contrasting effect, as seen with my dress’s stitching.
P.S. Don’t Forget to Pin for Later!
More Inspiring DIY Dye Projects!
My passion for transforming textiles with dye extends far beyond dresses. If you’re looking for more creative ways to add color to your life, explore these additional DIY dye projects:
Dye Vintage Doilies a Bold New Color:
Since successfully dyeing my beige dress, I’ve also had great fun dyeing some vintage doilies, complete with matching napkins. This project is a fantastic way to update classic decor pieces. I love using these vibrant, newly colored doilies to create unique seasonal table runners, as the fresh hues perfectly complement and modernize their charming vintage appeal.
Give Your Jeans a Deeper Indigo Shade:
Another go-to project for me is routinely dyeing light wash jeans that I’ve snagged for a bargain. Transforming them into a rich, darker indigo shade is an excellent way to save money on clothes while keeping them looking stylish and fresh. This particular post offers TONS of additional tips and answers frequently asked questions about dyeing jeans, including advice on wear and preventing color transfer, making it a must-read for denim lovers.
Create a Watery Vibe with Dip Dyed Fabrics:
If you’re drawn to subtle, artistic color transitions, my tutorial with tips for dip dyeing is perfect for you. There’s one simple, yet essential, trick you need to know to achieve that beautiful, soft gradient effect. I absolutely adore the serene, watery vibe that comes with this DIY dye project – just picture the bottom of a flowing skirt or a crisp tablecloth elegantly dip-dyed! The potential for unique and stunning decor with this easy idea is immense.
Explore the Magic of Ice Dyed Fabrics:
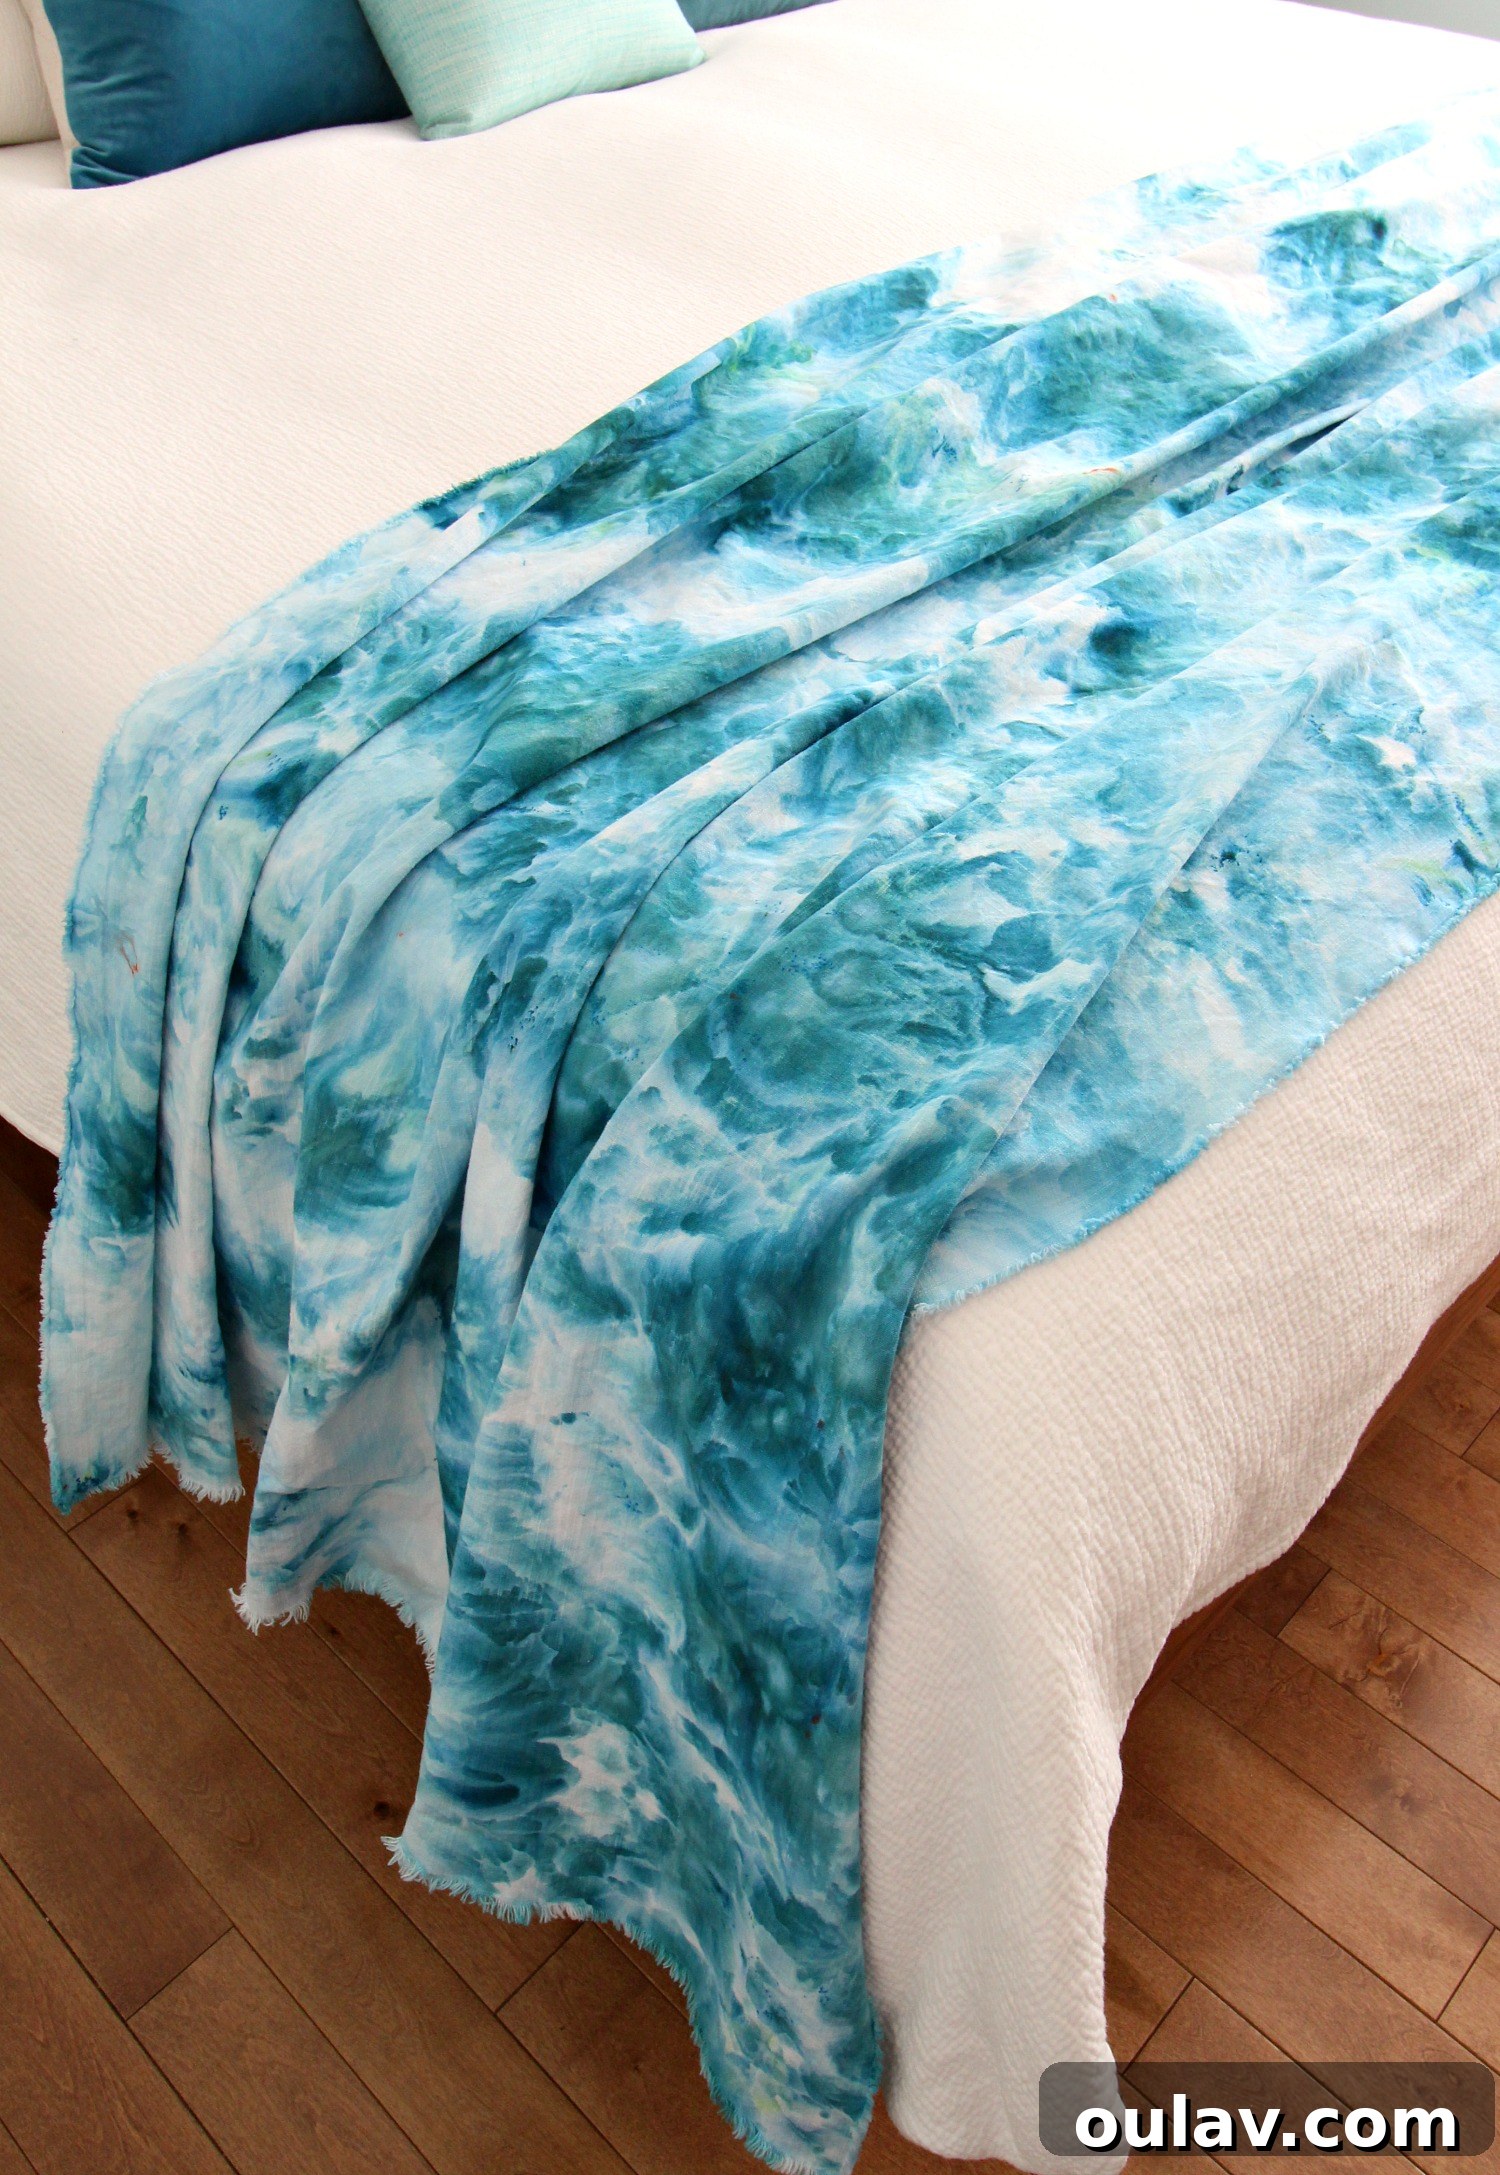
For something truly whimsical and unique, I highly recommend delving into all of my ice dyeing tutorials. Ice dyeing is an incredibly fun and straightforward technique that uses melting ice to create wonderfully organic, one-of-a-kind designs with minimal effort. The results are always a delightful surprise, yielding beautiful, unpredictable patterns that look incredibly artistic.
Custom Dyed Bottle Brush Trees:
And for a truly unique decorative touch, I’ve even dyed some bottle brush trees! This clever little project is an amazing way to create custom holiday decor or seasonal accents in virtually any color you desire. It allows you to perfectly match your festive displays to your personal style and existing home color scheme, adding a bespoke charm that store-bought items often lack.