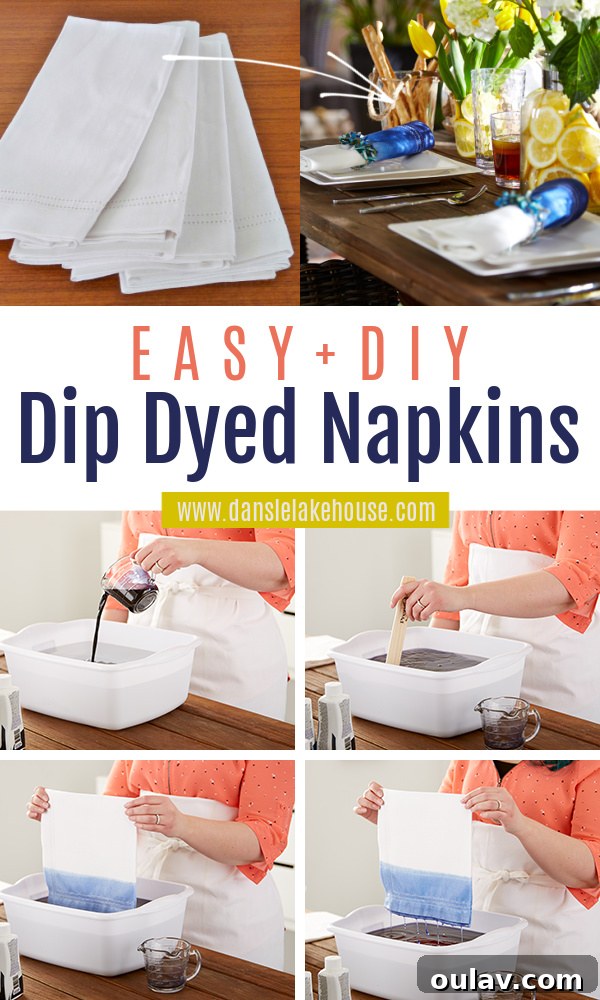
Transforming your home into a personal sanctuary often involves adding unique, handcrafted touches that tell a story. Just yesterday, I unveiled the serene backyard oasis I meticulously crafted, drawing profound inspiration from the breathtaking hues of my Greek honeymoon. Today, I’m thrilled to share a simple yet impactful DIY project that brings those Mediterranean vibes directly to your table: gorgeous dip-dyed napkins. This comprehensive guide will walk you through the entire process of fabric dip dyeing, equipping you with essential tips, clever tricks, and practical troubleshooting advice to ensure stunning results every time. Get ready to infuse your dining experience with custom color and artisanal charm!
Choosing the Perfect Fabric for Dip Dyeing: The Foundation of Flawless Color
The success of your dip-dyeing project hinges significantly on selecting the right fabric. While the technique itself is surprisingly straightforward, finding the ideal material can sometimes be the trickiest part. For optimal dye absorption and vibrant, lasting color, you’ll want to prioritize natural fibers. High-quality white linen or cotton napkins are your best bet. These materials readily soak up dye, allowing for beautiful, even saturation and the subtle gradients characteristic of dip dyeing.
One crucial detail to watch out for is fabric treatments. Many commercially available white napkins are marketed as “stain-resistant” or “water-repellent.” While these features might seem convenient for everyday use, they are the arch-nemesis of fabric dyes. A stain-resistant finish will, by its very nature, resist the dye, leading to patchy, uneven, or completely failed results. Avoid them at all costs!
My own quest for suitable napkins involved a determined hunt across various stores. If you find yourself in a similar predicament, unable to source untreated cotton or linen napkins, don’t despair! You can easily create your own inexpensive ones using a simple cloth napkin tutorial. This option provides complete control over the fabric type, ensuring it’s dye-ready. Ultimately, I triumphed in my mission, securing a batch of plain, untreated cotton-linen blend napkins that were perfect for this project. Remember, the natural fibers are key to achieving that professional, custom look.
Essential Lessons Learned: What NOT to Do When Dip Dyeing!
Every DIY journey comes with its share of trial and error, and my initial foray into dip dyeing was no exception. In an attempt to streamline the process, I once tried a shortcut that I now emphatically advise against! My idea was to dye six napkins simultaneously by creating a large dye bath in a plastic tub, hanging each napkin on a pant hanger, and then suspending all hangers from a long rod. With my mom’s help, we dipped them all at once, hoping for a uniform outcome.
The reality, however, was far from uniform. This method led to several undesirable outcomes: dye rubbed off from one napkin onto others, creating unintentional splotches and uneven coloring. There was also unfortunate splattering, which made for a messy and less-than-perfect finish. What I had hoped would be an efficient shortcut turned into a valuable lesson in patience and precision.
Therefore, based on my experience, I strongly recommend working with one napkin at a time. While it might seem slower, the individual attention each napkin receives ensures greater control over the dye application, resulting in cleaner lines, more consistent color, and a truly professional finish. The good news is that dip dyeing a single napkin really doesn’t take long, and the superior results are well worth the individual effort. Learn from my mistake and embrace the singular focus for optimal success!
To master the right way to achieve beautiful dip-dyed results, continue reading the detailed tutorial below, which includes all the essential steps and expert tips you need.
Gather Your Supplies: Everything You Need for DIY Dip-Dyed Napkins
Before you dive into the dyeing process, it’s crucial to have all your materials ready and organized. Preparation is key to a smooth and successful DIY project. Here’s a comprehensive list of the supplies you’ll need for creating your stunning dip-dyed napkins:
- Rit Dye: I recommend purchasing two bottles for richer, more varied tones. For this project, I chose Royal Blue and Navy to create a beautiful, oceanic gradient. Feel free to experiment with colors that match your personal style or home decor.
- Large Plastic Tub: This will serve as your dye bath. Choose a tub large enough to fully submerge the desired portion of your napkin without touching the bottom or sides, and one you don’t mind potentially staining.
- Hot Water: The hotter the water, the better the dye will dissolve and penetrate the fabric. I found that a mixture of boiling water from a kettle combined with super hot tap water works perfectly to achieve the ideal temperature.
- Stir Stick: A long stick or old spoon is essential for thoroughly mixing the dye bath, ensuring an even distribution of color.
- 1 Cup of Salt: Salt acts as a dye fixative, helping the dye to bind more effectively with natural fibers like cotton and linen. This leads to more vibrant, longer-lasting colors.
- Rubber Gloves: Protect your hands from staining. Dye can be difficult to remove from skin, so gloves are a must-have.
- Apron: Wear an apron or old clothes you don’t mind getting stained. Dye splatters can happen, and it’s better to be safe than sorry.
- White Linen or Cotton Napkins: As discussed, untreated natural fibers are crucial. Look for plain white napkins without any stain-resistant coatings. This set and this one are good examples of suitable options.
- Drop Cloths or Old Newspaper: For covering your work surface to protect it from any spills or splatters.
Step-by-Step Tutorial: How to Master DIY Dip-Dyed Napkins
Now that you have all your supplies, let’s embark on the exciting journey of transforming plain napkins into vibrant works of art. Follow these detailed steps for a successful dip-dyeing experience:
- Prepare Your Napkins: Begin by washing all your napkins thoroughly. This step is crucial as it removes any sizing, finishes, or dirt that might prevent the dye from adhering evenly. Once washed, do NOT dry them. The fabric needs to be still-wet when it enters the dye bath to ensure optimal absorption and prevent harsh lines.
- Set Up Your Workspace: Lay down drop cloths, old towels, or several layers of newspaper to completely cover your work surface. Dye can stain, so proper protection is vital. Put on your rubber gloves and apron to protect your hands and clothing from accidental splashes.
- Create the Initial Dye Bath: Following the manufacturer’s instructions on your Rit Dye bottles, prepare the dye bath in your large plastic tub. For the first phase, we’ll only be using the Royal Blue dye. Pour the hot water into the tub, then add the recommended amount of Royal Blue Rit Dye.
- Enhance Dye Absorption with Salt: Add one cup of salt to the dye bath. Stir the mixture thoroughly with your stir stick until the dye is completely dissolved and the salt is fully integrated. Salt acts as a mordant, helping the dye molecules bond more effectively with the natural fibers of your napkins, resulting in richer, more vibrant, and longer-lasting colors.
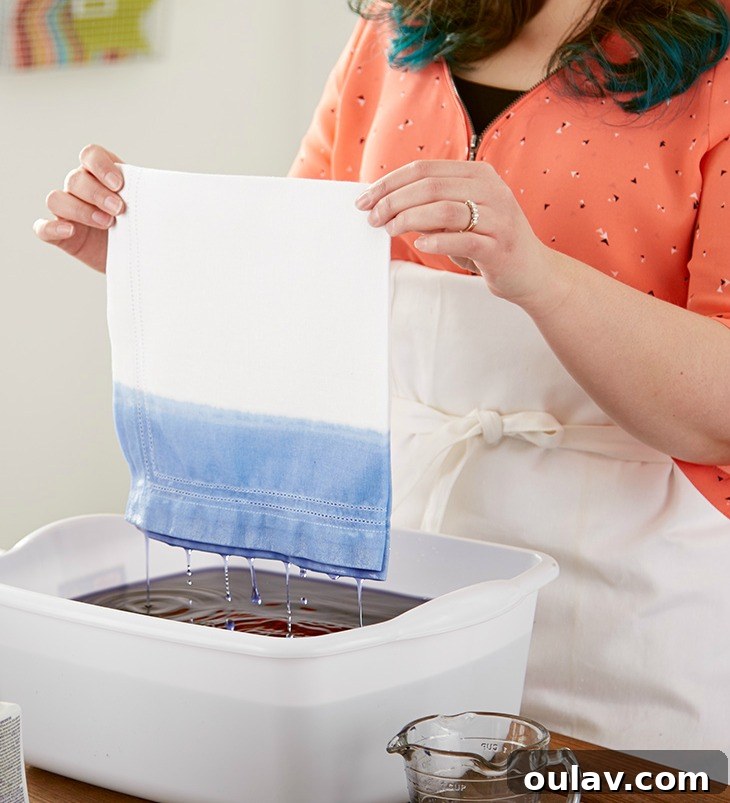
- First Dip – Establishing the Base Color: Take one still-wet napkin. Carefully dip it into the dye bath to the highest point you wish the dye to reach. This will be the lightest part of your gradient.
- Lift and Redip for Evenness: Gently lift the napkin out of the dye bath, allowing excess dye to drip off. Immediately dip it back in to the same initial high point. This double-dip helps ensure even saturation for the top section.
- Develop the First Level of Color: Keep the napkin moving fluidly in and out of the dye bath. Continuously lifting and lowering the fabric into this top section helps the dye penetrate evenly and avoids harsh lines. Continue this gentle motion until the first, highest “level” of dye reaches your desired shade. Remember, the color will appear darker when wet and will lighten slightly after rinsing and washing.
- Begin the Ombre Effect – Second Level: Now, you’ll start creating your gradient. Continue dipping and moving the napkin, but this time, don’t dip it quite as deep into the dye bath. Immerse it slightly less than the first level, concentrating the dye on the lower portion. This creates a gradual transition.
- Timing Each Level: For each “level” or section of your gradient, aim for approximately 3-5 minutes of dipping and agitation. The longer the fabric is submerged, the darker and more saturated the color will become. Keep in mind the color will fade slightly during the initial rinse and wash, so aim for a shade that’s a bit darker than your final desired outcome.
- Gradual Progression: Continue repeating this process, gradually raising the height of the napkin with each subsequent dip. This means that the lowest sections of the napkin will spend the most time in the dye, becoming the darkest, while the highest sections will have minimal dye exposure, remaining the lightest. This continuous, controlled movement is crucial for a smooth ombre effect.
- Introducing the Deeper Hue (Navy): When you have only the very bottom portion of the napkin left to dye (the part you want to be the darkest), carefully add the Navy Rit Dye to your existing Royal Blue dye bath. Stir it well to create a deeper, richer color.
- Final Dark Dip: Hold the very bottom edge of the napkin in this newly darkened dye bath for 3-5 minutes. This will create the deepest, most concentrated color at the bottom, completing your stunning gradient.
- Rinsing the Napkins: Once you’re satisfied with the color, carefully remove the napkin from the dye bath. Rinse it under cold running water. It’s important to direct the water flow away from the white, undyed portion of the napkin to prevent any accidental tinting. Continue rinsing until the water runs clear.
- Final Laundering: Launder the napkins as usual, but it’s highly recommended to wash them separately from other items for their first wash to avoid any potential dye transfer. Be aware that even after rinsing, the dye may impart a very pale blue tint to the white areas during this initial wash.
Achieving the Perfect Ombre Effect: Tips for Seamless Gradients
The beauty of dip dyeing often lies in its ability to create a soft, continuous color gradient, also known as an ombre effect. Instead of distinct, harsh lines of color, you want a smooth transition from one shade to the next. The secret to achieving this lies in constant, deliberate movement.
To produce a truly subtle gradient, continually move the napkin up and down within the dye bath. This constant motion, as opposed to simply holding the fabric stationary in one spot for an extended period, helps the dye absorb more gently and gradually. Think of it as painting with water – the more you blend, the softer the transition. This movement also serves another crucial purpose: it prevents the Rit dye from becoming splotchy. Rit dyes, and many fabric dyes, perform best and absorb most evenly when agitated during the dyeing process.
Continuously moving the fabric up and down at varying depths creates a much softer and more natural-looking color blend than merely holding the napkin at different fixed heights. If, however, you prefer more defined, harder lines (like the stunning, graphic look of Anu’s gorgeous dip-dyed curtains, for instance), you can indeed opt for a simpler “dip and hold” method for each section. But for that coveted, seamless ombre, remember: constant, gentle motion is your best friend.
Caring for Your Hand-Dyed Treasures
Once your beautiful dip-dyed napkins are complete, proper care will ensure their vibrant colors last. For the first few washes after dyeing, it’s best to wash them separately in cold water. This helps to set the dye further and prevents any residual dye from bleeding onto other laundry items. After these initial washes, you can generally wash them with similar colors, still preferring cold water cycles to preserve the dye’s intensity. Avoid using harsh detergents or bleach, as these can strip the color and damage the fabric. Line drying or tumble drying on a low setting will also help maintain their integrity and color vibrancy over time.
Beyond Napkins: Unleash Your Dip-Dyeing Creativity!
While napkins are a fantastic starting point for dip dyeing, the technique’s versatility extends far beyond your dining table. Once you’ve mastered the basics, consider applying this artistic method to other fabric items around your home. Imagine custom dip-dyed curtains, adding a unique gradient to your windows, or creating one-of-a-kind tea towels that elevate your kitchen decor. T-shirts, tote bags, pillowcases, or even plain canvas shoes can all be transformed with a splash of color and an ombre effect. Experiment with different color combinations, from subtle pastels to bold, contrasting hues, to reflect your personal style in every corner of your home. The possibilities are truly endless!
And speaking of adding charm to your table, I also have a delightful tutorial for crafting beachy DIY beaded napkin rings that perfectly complement these dip-dyed beauties!
Don’t Forget to Pin for Later!
Loved this tutorial? Make sure to save it for future reference or to inspire your next DIY project! Pin this image to your favorite home decor or craft board on Pinterest so you can easily find it whenever inspiration strikes. Happy crafting!