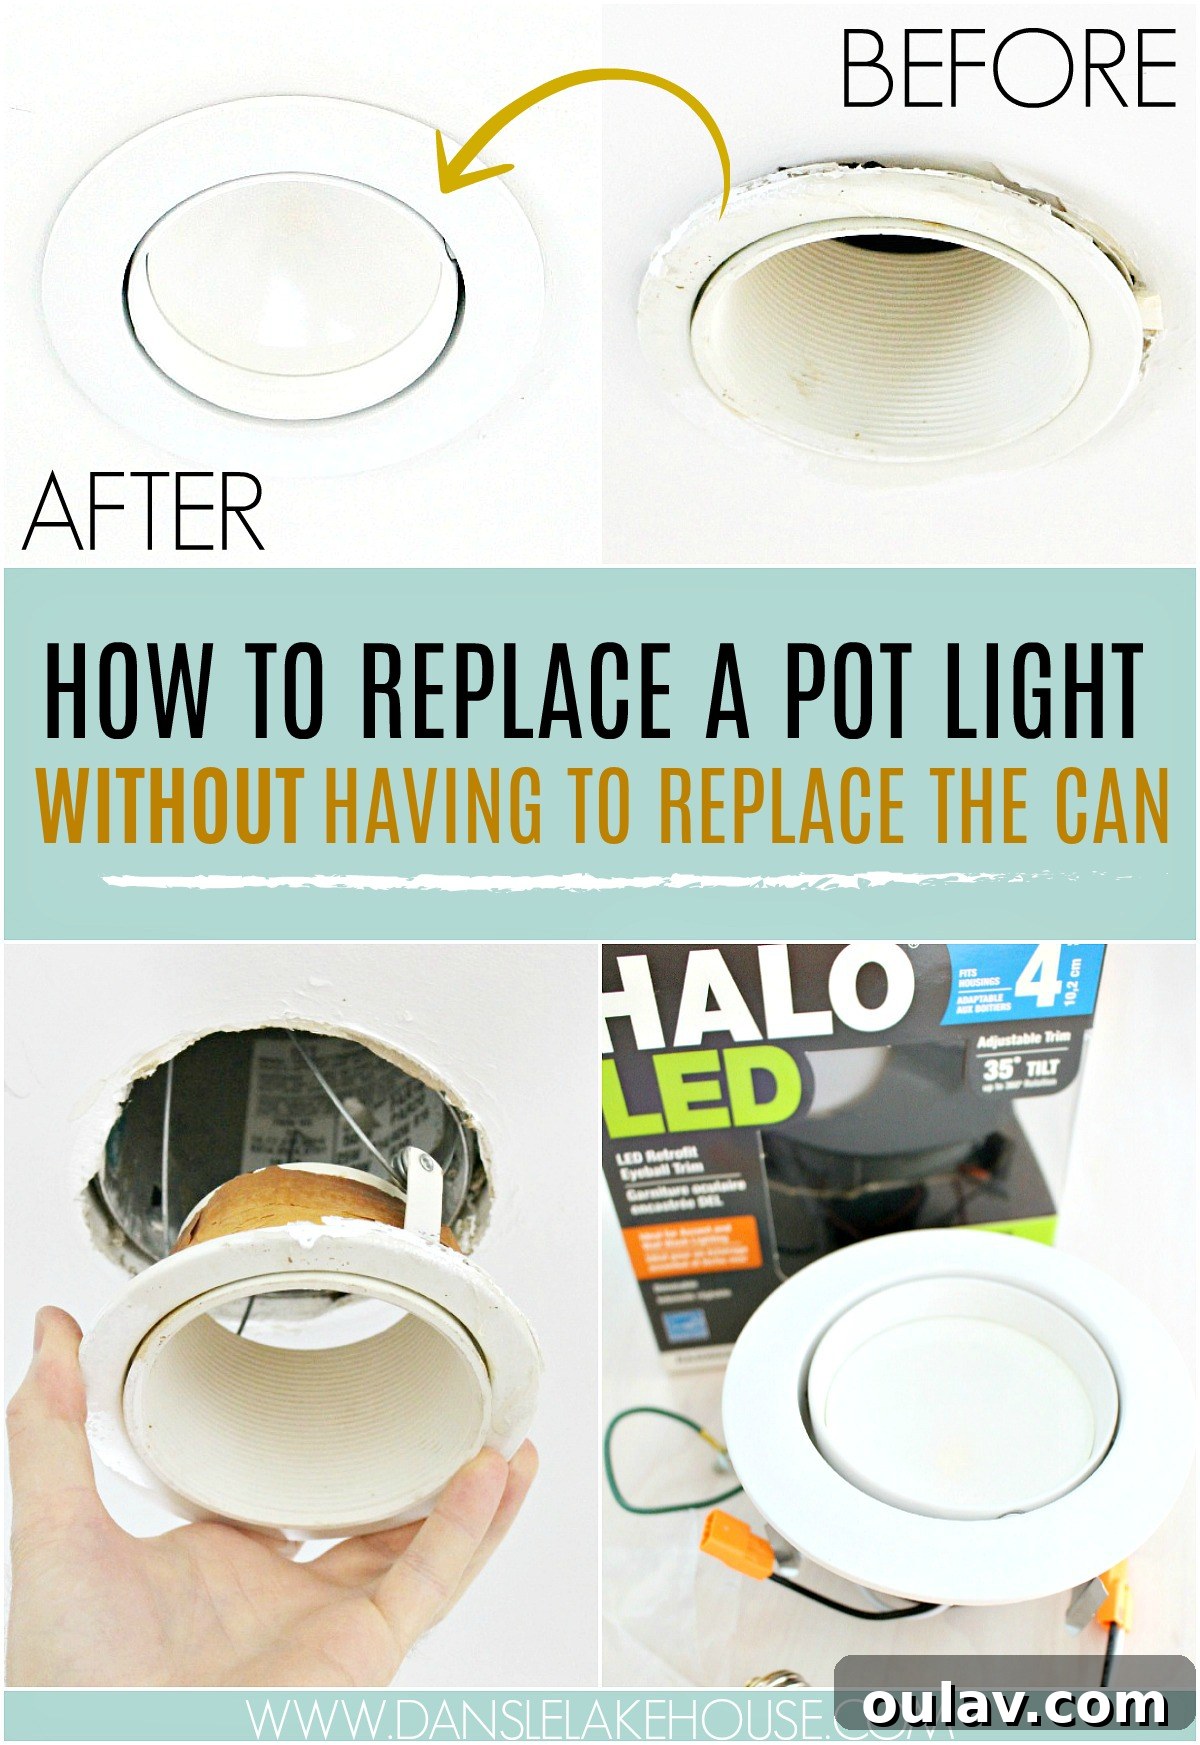
Transforming your home can often feel like a daunting task, especially when it comes to electrical upgrades. Many homeowners shy away from updating recessed lighting, commonly known as pot lights, fearing complex installations, attic adventures, and potential damage to their ceilings. But what if there was a simple, elegant, and budget-friendly way to refresh your lighting without replacing the entire fixture? We recently discovered an ingenious method to update pot lights without removing the existing can, and it’s a game-changer for any DIY enthusiast looking for a quick and impactful home improvement.
Out with the Old: The Problem with Dated Recessed Lighting
Our kitchen, a space we cherish and use daily, was plagued by two terribly outdated pot lights positioned directly over the counter. These fixtures were not just old; they were an eyesore. In past home tours, specifically our lakehouse tour and the “before” photos of our aqua makeover, you might catch a glimpse of them. However, they were meticulously cropped out of every “after” shot – a testament to how much we disliked their appearance.
While they functioned reliably, providing light where it was needed, their aesthetic impact was purely negative. They were discolored, showing years of wear and tear, and one of them had even been generously coated in silicone by a previous owner who seemed to have an affinity for the sealant. This made them look even more unsightly and contributed significantly to a dated feel in an otherwise refreshed kitchen. We had tolerated them for far too long, and honestly, looking back, I’m still a bit embarrassed we lived with them in such a state for so many years!
The Quest for an Easy Pot Light Upgrade: Discovering the Retrofit Solution
For quite some time, the idea of replacing these fixtures had lingered in the back of our minds. However, the thought of climbing into the cramped, dusty attic to remove the entire light cans was enough to deter us from starting the project. We simply didn’t know how to update pot lights without replacing the can – or even if such a convenient option existed. The prospect of damaging the ceiling during removal and then patching it up later seemed like too much hassle for what we hoped would be a simple lighting refresh.
The turning point arrived when one of the old bulbs finally burned out. We headed to The Home Depot, initially just for a replacement bulb. These traditional bulbs, at around $10 each, sparked a conversation: “Handy Hubby,” as I affectionately call him, and I decided it was finally time to tackle the lights properly. I wanted both lights to match, not just in style but also in the quality of illumination, so purchasing two fresh bulbs for our old fixtures felt like a temporary and unsatisfying solution.
As we browsed the lighting section, contemplating our options, a helpful salesperson approached us. We explained our dilemma and our reluctance to undertake a full can replacement. To our surprise and immense relief, he strongly advised against it, echoing our concerns about potential ceiling damage. Instead, he introduced us to the marvel of LED bulb and trim retrofit kits. While these kits might be a slightly higher initial investment than purchasing new traditional cans, the ease of installation and the technological upgrade they offer make them an incredibly worthwhile choice. This discovery was a true “aha!” moment – the perfect solution we hadn’t known existed.
Why Choose LED Retrofit Kits for Your Recessed Lighting?
Before diving into the installation, let’s understand why LED retrofit kits are an exceptional choice for updating your recessed lighting:
Energy Efficiency and Longevity
- Lower Wattage: Our old halogen bulbs consumed 50 watts each. The new LED retrofit kits draw only 10 watts, leading to significant energy savings on your electricity bill.
- Extended Lifespan: LED bulbs are renowned for their incredible durability. These kits are rated for up to 50,000 hours of operation, meaning you won’t need to replace bulbs for decades! This drastically reduces maintenance and the hassle of frequent bulb changes.
- Reduced Heat Output: LEDs generate much less heat than traditional incandescent or halogen bulbs, which can contribute to a cooler home and potentially lower air conditioning costs.
Improved Light Quality and Versatility
- Brighter Illumination: Despite lower wattage, LEDs often provide superior brightness. Our new lights are significantly brighter than the old halogens, making the kitchen feel more vibrant and functional, especially during shorter daylight hours.
- Color Temperature Options: While our chosen kits offer a very white light, many retrofit kits come in various color temperatures (warm white, cool white, daylight) to match your personal preference and home aesthetic. This allows for greater customization.
- Instant On: Unlike some older fluorescent bulbs, LEDs offer instant-on illumination without any flickering or warm-up time.
Ease of Installation and Aesthetic Appeal
- DIY-Friendly: As you’ll see in our step-by-step guide, these kits are designed for straightforward installation, often requiring just basic tools. This eliminates the need for professional electricians for many homeowners.
- Sleek, Modern Look: Retrofit kits replace the often bulky and discolored old trim with a clean, flush-mount design that seamlessly blends with the ceiling, instantly upgrading the room’s appearance.
- Cost-Effective Long-Term: While the initial cost might be slightly higher than a basic bulb, the long-term savings from energy efficiency and extended lifespan quickly make LED retrofit kits a more economical choice.
Step-by-Step Guide: How to Update Pot Lights Without Replacing the Can
Ready to upgrade your lighting? Here’s a detailed breakdown of how we transformed our kitchen pot lights with two Halo LED 4″ retrofit kits from The Home Depot. Each kit was approximately $50, offering an affordable and effective solution. (For those looking online, this Amazon option is quite similar.)
Step 1: Safety First – Turn Off the Power!
As with any electrical project, the absolute first and most crucial step is to ensure your safety. Locate the circuit breaker box for your home and switch off the power to the specific circuit that controls the pot lights you’ll be working on. It’s always a good idea to double-check with a non-contact voltage tester to confirm the power is off before touching any wires.
Step 2: Remove the Old Pot Light Trim
Once the power is confirmed off, it’s time to remove the old, dated trim. This process is usually quite straightforward. Gently pull down on the trim piece. You’ll likely feel resistance from a couple of metal retaining wires or springs inside the can. Carefully squeeze these wires together to release them from their clips inside the can. The trim should then detach easily, revealing the bulb and the interior of the can.
The arrow in the image below highlights these retaining wires, demonstrating what to look for:
Step 3: Prepare the Existing Can
After removing the trim and the old bulb, you’ll be left with just the existing can in your ceiling. In our case, the can itself was perfectly functional and not particularly old, just aesthetically lacking. Take a moment to inspect the can. Ensure it’s clean and free of debris. If there’s any loose insulation or dust, gently clean it out.
Step 4: Install the New LED Retrofit Kit
Now for the exciting part – installing the new, modern LED light and trim! Each retrofit kit comes with its own set of detailed instructions, and it’s always best to follow them precisely. However, the general steps are as follows:
1. **Install the Light Socket Adapter:** The kit typically includes an adapter that screws into the existing light bulb socket (the E26 medium base socket). Screw this adapter in securely, just like you would a regular light bulb.
2. **Connect the LED Module:** The new LED light assembly will have a plug that connects directly into the socket adapter you just installed. Simply plug it in firmly.
3. **Ground the Fixture:** This is a critical safety step. Using a screwdriver and one of the self-tapping screws provided in the kit, attach the ground wire (usually green or bare copper) from the new LED unit to an existing, unpainted metal hole or screw in the pot light can. This ensures proper grounding and reduces the risk of electrical shock.
Step 5: The “Can Shift” Installation Hack (If Needed)
While the installation is generally straightforward, we did encounter one minor stumbling block. When we tried to push the new trim tightly against the ceiling for a perfectly flush fit, the entire can shifted upwards, preventing a snug installation. This can happen with older, less securely mounted cans.
This is where “Genius Hubby” (my Handy Hubby) came to the rescue with a clever hack! He figured out that by threading a thin, sturdy wire through the small gap between the gimbal (the adjustable part of the light) and the trim, looping it around a fixed point inside the can, and then back through the trim, he could create leverage. By pulling down on this wire, he could hold the can securely in place while simultaneously pushing the new trim piece up tightly against the ceiling. It worked perfectly!
Once the trim was firmly in position, he simply pulled the wire back through and removed it. You might not encounter this issue, but it’s a valuable trick to have in your DIY arsenal, just in case your can decides to play hide-and-seek.
Step 6: Restore Power and Enjoy!
With the new LED retrofit kit securely installed and flush against the ceiling, all that’s left is to return to your circuit breaker panel and switch the power back on. Flip the light switch, and marvel at your newly updated, brighter, and more energy-efficient recessed lighting!
The Stunning Results: A Kitchen Transformed
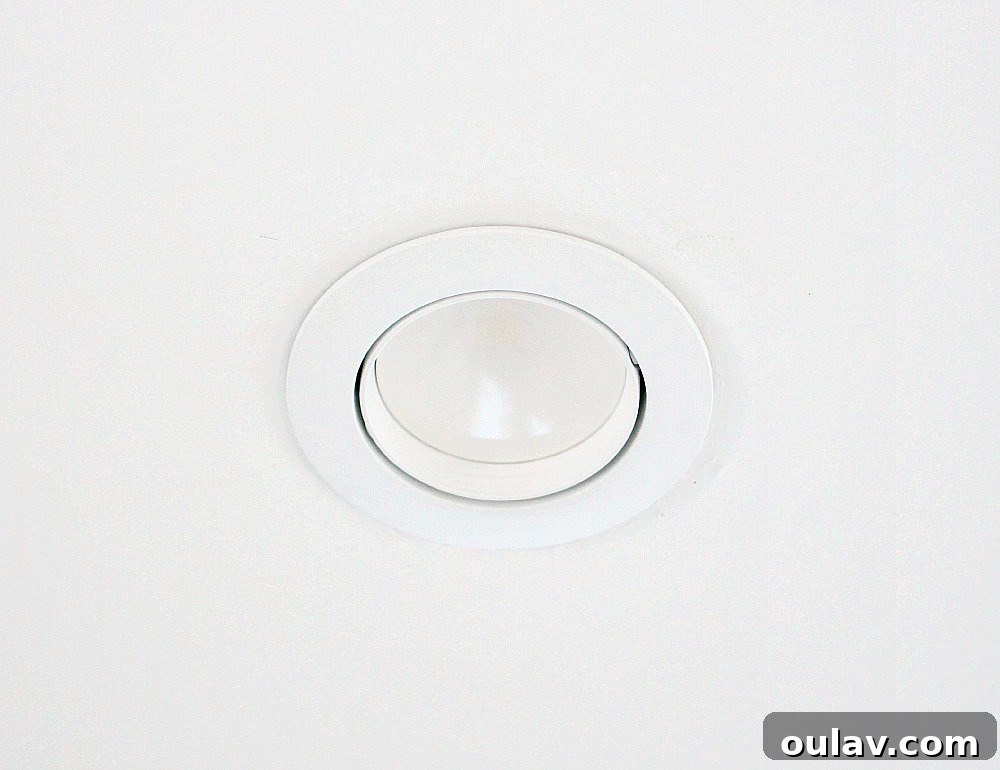
The difference these simple LED retrofit kits made to our kitchen is truly remarkable. The bulbs, rated for 50,000 hours and drawing only 10 watts, deliver an incredible amount of light – far brighter than our old 50-watt halogens. As the days grow shorter, having such bright and efficient kitchen lighting has been a huge blessing, making tasks easier and the space feel more inviting.
While I do have a nostalgic fondness for the slightly warmer, dimmer glow of halogen bulbs (and an irrational attachment to incandescent lighting), the crisp, clean white light from these LEDs is undeniably superior for a working kitchen. It’s a vast improvement over the harshness of fluorescent lights, even if my heart still yearns a little for the incandescent era.
Beyond the functionality, the aesthetic transformation is undeniable. The sleek, modern trim of the new LED lights instantly revitalized the area. You can truly appreciate the dramatic improvement with this before-and-after comparison:
With both pot lights updated, our kitchen now feels brand new. It’s often these small, worn-out details – the discolored trim, the inefficient bulbs – that can make an entire space feel dated and neglected. Addressing them can have an enormous impact on the overall ambiance and perceived freshness of your home.
Looking Ahead: More Pot Light Possibilities
Having experienced such an easy and rewarding upgrade, we’re now looking at other areas of our home with fresh eyes. Specifically, the “eyeball” pot lights above our fireplace are next on the list. We’re considering using this very same style of LED retrofit kit to modernize those fixtures as well, bringing a cohesive and updated lighting scheme throughout our living spaces.
This simple DIY project proves that updating your home’s lighting doesn’t have to involve complex electrical work or costly renovations. With LED retrofit kits, you can easily and efficiently upgrade your pot lights without the hassle of replacing the entire can. It’s an awesome, budget-friendly renovation idea that delivers stunning results and enhanced energy efficiency. Give it a try – you’ll be amazed at the difference!