
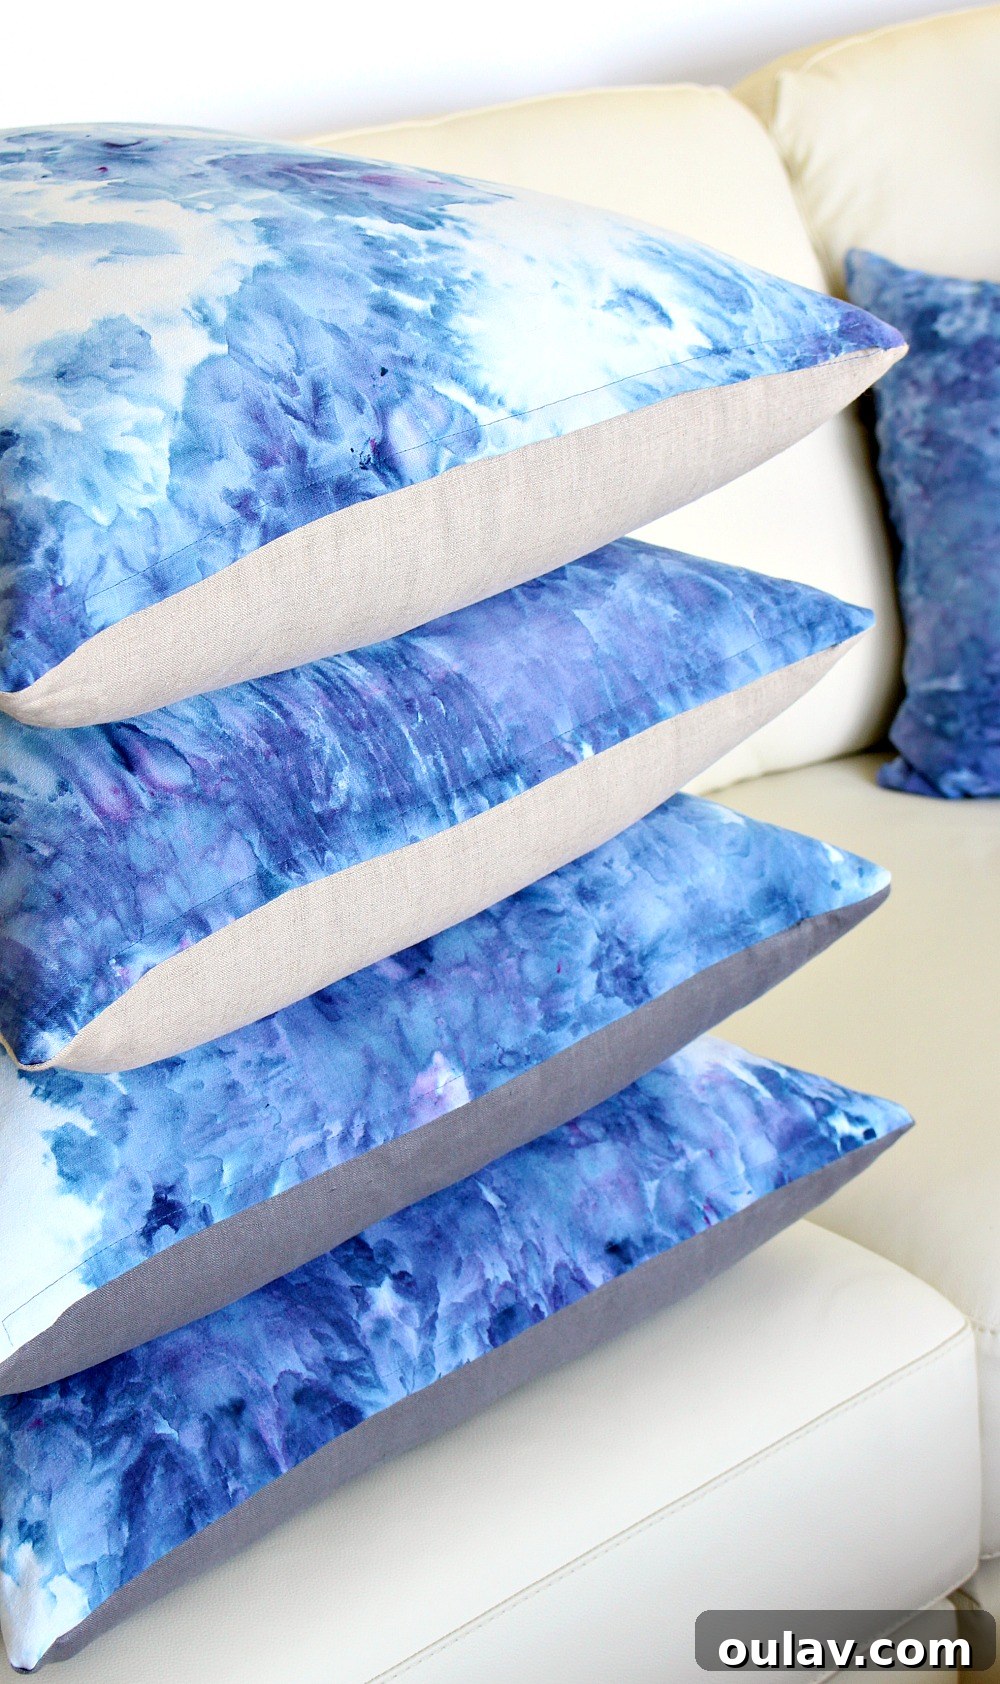
How to Sew a Flapped Zipper Pillow: Your Guide to Professional-Looking DIY Covers
Creating custom throw pillows with a removable cover is a rewarding DIY project that adds a personalized touch to any home decor. While there are many ways to finish a pillow, mastering the flapped zipper method ensures a polished, durable, and functional result. This tutorial will guide you through every step of sewing a throw pillow with a hidden flapped zipper, perfect for those who appreciate both aesthetics and practicality in their crafting projects.
We’ve all been there: debating the details of a DIY project. When I embarked on sewing my DIY ice dye pillows for the boat, a friendly disagreement arose with my mom. My initial vision was a bold, exposed gold zipper—a look I felt was undeniably “nautical.” However, traditional wisdom, championed by my mom, leaned towards the subtle elegance of a flapped zipper. The practical considerations quickly became apparent when a truly smooth, high-quality exposed gold zipper proved surprisingly expensive (around $21, yikes!). Our budget-friendly alternative from Fabricland, unfortunately, had rougher teeth that posed a risk to the boat’s new upholstery. This practical concern solidified the choice for a flapped zipper, proving that sometimes, the classic approach is best. It offers superior protection, a clean finish, and the quiet sophistication many homeowners desire.
Why Choose a Flapped (Hidden) Zipper for Your DIY Pillow?
A flapped zipper, also known as a hidden zipper, offers numerous advantages over an exposed zipper or other closure methods:
- Aesthetic Appeal: It provides a clean, seamless look, integrating the closure almost invisibly into the pillow design. This professional finish elevates your DIY projects.
- Upholstery Protection: As we discovered, rough zipper teeth can damage delicate fabrics and furniture. A flapped zipper conceals the teeth, preventing snags, scratches, and wear on sofas, chairs, or boat upholstery.
- Durability: Hidden zippers are less prone to accidental snagging or breaking since they are protected by a fabric flap. This extends the life of both your zipper and your pillow cover.
- Comfort: Without exposed zipper teeth, your pillow is softer and more comfortable to lean on, ideal for lounging.
- Ease of Removal & Washing: Like any zippered pillow cover, the flapped design allows for easy removal and washing, making maintenance a breeze and keeping your pillows fresh.


Tools and Materials You’ll Need for Your DIY Pillow Project
Before you begin, gather all your supplies. Having everything organized will make the sewing process much smoother:
- Fabric: Two squares of your chosen fabric for the pillow front and back. Consider the texture and durability suitable for a throw pillow. For example, we made pillows in various sizes: 16″x16″, 18″x18″, 20″x20″, and 22″x22″.
- Zipper: A standard zipper (not an invisible zipper) that is at least 2 inches shorter than the width of your pillow.
- Matching Thread: High-quality polyester thread that blends with your fabric.
- Sewing Machine: Equipped with a standard presser foot and a zipper foot.
- Fabric Scissors or Rotary Cutter: For precise fabric cutting.
- Measuring Tape or Ruler: For accurate measurements.
- Fabric Pins or Clips: To hold fabric layers in place.
- Iron and Ironing Board: For pressing seams, which is crucial for a professional finish.
- Seam Ripper: For any accidental stitches (every crafter’s best friend!).
Step-by-Step Tutorial: How to Sew a Throw Pillow with a Flapped Zipper
1. Prepare Your Fabric and Determine Pillow Size
First, decide on your desired pillow size. Remember that your finished pillow cover will be slightly smaller than your pillow insert to create a plump, full look. For any size, you’ll need to add a seam allowance—we recommend a standard 5/8″ (1.5 cm) salvage seam allowance on all sides. Cut two identical squares of your chosen fabric. If your fabric has a distinct front and back, or if it’s reversible (like ice-dyed fabric), decide which side will be the exterior. Place the two fabric squares together with their right sides facing inward. This ensures that your seams will be hidden when the pillow is turned right side out.
2. Mark Zipper Placement and Baste the Seam
Now, it’s time to mark where your zipper will go. We typically center the zipper along one edge of the pillow, leaving an inch (2.5 cm) or so on either side. Use fabric pins to clearly mark the beginning and end points of your zipper placement. With your zipper set aside, sew along the bottom edge of your pillow. Use a normal straight stitch for the fabric sections outside of your marked zipper placement. However, for the section where the zipper will be inserted, switch to a basting stitch—this is the longest stitch setting your sewing machine offers. This temporary stitch will hold the fabric together but can be easily opened later to reveal the zipper opening.


Once you’ve completed this seam, you can snip the basting stitches every inch or so. This makes it easier to open later, while still keeping the seam temporarily closed for the next steps. This technique is key to successfully concealing your zipper.

3. Attach the First Side of the Zipper
Lay your fabric flat with the right side up. Carefully fold the front piece of the pillow fabric onto itself, just below the seam you just sewed. This will expose the back piece of fabric and allow you to work on the zipper without the front piece getting in the way. With the front fabric pushed aside, take your open zipper. Pin one half of the zipper face down onto the back of the pillow fabric. Ensure the zipper teeth are positioned right up against the seam line you created. It should be touching the seam directly, ready to be sewn into place.


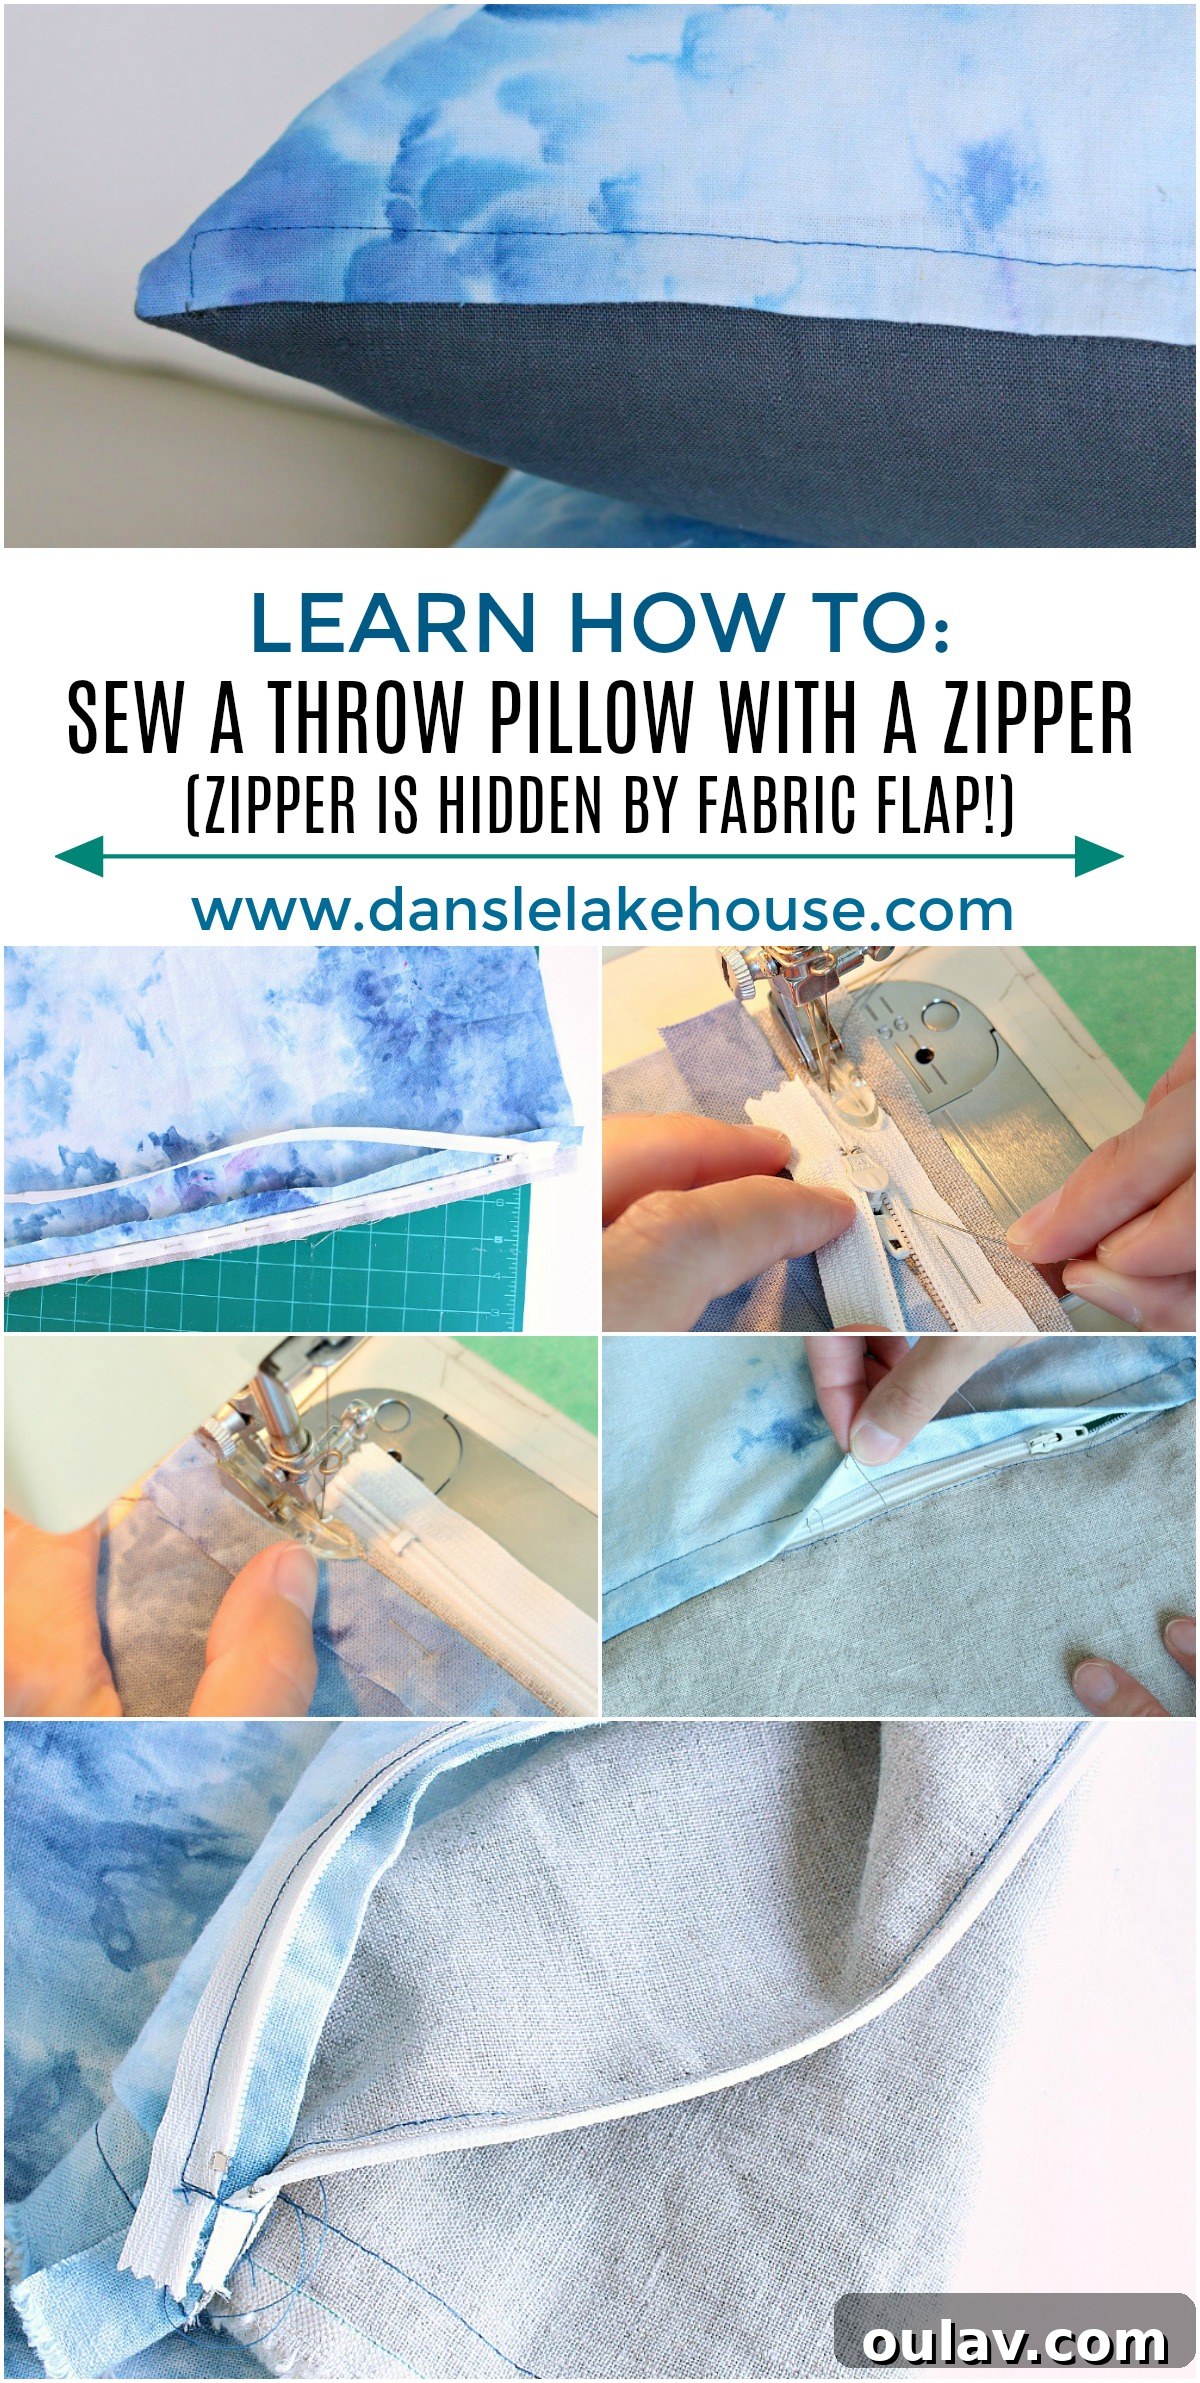
Switch your sewing machine to a zipper foot. Position your needle on the left side of the zipper foot. Begin sewing from the closed end of the zipper toward the open end. Many zippers have a slight change in texture or a guide line on their tape that can help you determine where to stitch—usually about halfway across the tape. Sew carefully and steadily to attach the zipper securely to this side of the fabric.


After this step, you will see one side of your zipper securely sewn onto the fabric. The fabric should now look like this:


4. Secure the Zipper Flap
With the first side of the zipper attached, fold the freshly sewn zipper underneath the pillow fabric and close the zipper. Now, you’ll work on creating the “flap” that hides the zipper. Pin the front of the pillow fabric out of the way, just enough to expose a tiny strip of the back fabric adjacent to the zipper. Move your zipper foot so the needle is now on the right side. Sew in the same direction as before—from the closed end of the zipper toward its opening. The primary purpose of this stitch is to anchor this exposed strip of back fabric. This helps the zipper sit perfectly flat and creates the hidden flap effect that makes this design so professional.


Upon completion, your work should resemble the following images, showing a neatly secured flap:


5. Sew the Second Side of the Zipper
Now, take the entire pillow cover, open it up, and place it face down, with the back of the zipper facing you. Keep your zipper foot configured as it was in the previous step (needle on the right side). You will now sew the side of the zipper that hasn’t been stitched yet. Start where you left off, sewing across the zipper tape just beyond the zipper stop. Pivot your fabric and continue sewing along the un-sewn edge to firmly attach the zipper to this side. When you approach about an inch from the other end of the zipper, pause.


Pro Tip for a Smooth Finish: Before reaching the very end of the zipper, anchor your needle in the fabric, lift the presser foot, and gently open the zipper a few inches, moving the zipper pull away from the edge into the already sewn area. This crucial step prevents the zipper pull from getting in the way of your sewing. With the zipper pull out of the way, you can easily finish sewing the remaining portion of the zipper tape to the fabric, ensuring a clean and continuous stitch line.


Once you’ve completed this, your pillow cover will have both sides of the zipper fully attached, forming the concealed flap. It should look like this:

6. Open the Basting Stitch and Finish the Pillow
Now for the satisfying part: carefully open up the basting stitches you sewed in the very first step. A seam ripper is perfect for this. Be gentle to avoid damaging your fabric or the permanent stitches. As you remove the basting, the fabric will separate, revealing your beautifully inserted hidden zipper.


Crucial Step: Keep the zipper OPEN! This is perhaps the most important detail when sewing a pillow with a flapped zipper. If you sew the remaining seams with the zipper closed, you won’t be able to turn the pillow right side out. With the zipper now open, flip your pillow cover so the right sides of the fabric are facing inward again. Pin along the remaining three raw edges. Sew these edges together using your standard 5/8″ (1.5 cm) seam allowance. Backstitch at the beginning and end of each seam for added durability.


Trim the corners diagonally to reduce bulk, then turn your pillow cover right side out through the open zipper. Use a point turner or your fingers to gently push out the corners for a crisp shape. Your beautiful, professional DIY flapped zipper pillow cover is complete!
The Beautiful Result: Your Finished Flapped Zipper Pillow
Once your pillow cover is finished and turned right side out, you’ll see the elegant, concealed beauty of the flapped zipper. It truly gives a store-bought quality to your homemade throw pillows, combining the best of aesthetics and practical design. My mom was certainly right: this flapped zipper not only looks incredibly polished but also provides peace of mind, knowing those zipper teeth won’t chafe against my brand-new boat upholstery!



Tips for Success and Troubleshooting Common Issues
- Pressing is Key: Iron your fabric before cutting and press your seams after each sewing step. This creates sharper edges and a more professional finished product.
- Zipper Length: Always choose a zipper that is slightly shorter than your pillow width (e.g., a 14-inch zipper for a 16-inch pillow). This allows for easier handling and creates cleaner side seams.
- Go Slow: Especially when working with zippers, take your time. A slow, steady pace leads to precise stitching and avoids mistakes. Don’t be afraid to use a seam ripper if needed!
- Practice Basting: If you’re new to basting stitches, practice on a scrap piece of fabric to get a feel for how easily it can be removed.
- Zipper Pull Obstruction: Remember the trick of moving the zipper pull out of the way before sewing over it. This prevents uneven stitching and frustration.
- Fabric Choice: For beginners, cotton or linen fabrics are easiest to work with. Avoid slippery silks or stretchy knits until you’re more confident.
Learning how to sew a pillow with a flapped zipper might seem daunting at first, but with a little practice, it’s actually not that difficult. Many experienced crafters find they can easily sew a pillow in an hour or less once they get the hang of it!
Expand Your Sewing Skills with More DIY Projects
If you enjoyed crafting this beautiful pillow, why not explore other sewing projects? For a closer look at how I created the unique ice-dyed fabric used in these pillows, be sure to check out my post on ice dyeing fabric. Or, if you’re looking for a smaller, quicker project to hone your skills, take a peek at my DIY ice dye napkins tutorial! We have a wide range of other sewing tutorials that can help you transform your home with handmade touches:
- How to Sew a Mitered Corner (perfect for polished DIY napkins and other linens):
- How to Sew a Fell Seam (ideal for creating a tablecloth from fabric that’s too narrow):
- How to Sew a Self-Lined Fabric Clothespin Bag:
- How to Sew a Pot Holder (plus the right heat shield material to use!):
- How to Sew Back Tab Curtains:
- How to Sew Gathered Curtains:


Check out all of our sewing tutorials here, and let us know if there are any other projects you’d like to see covered!
Conclusion
Sewing a throw pillow with a flapped zipper is a skill that will serve you well in many home decor projects. It provides a clean, professional finish, offers durability, and protects your furnishings—all while allowing for easy maintenance. This comprehensive tutorial has walked you through each step, from initial fabric preparation to the final stitches, ensuring you can create beautiful and functional pillow covers with confidence. Embrace the joy of DIY and transform your living spaces with handmade charm!