Embarking on a journey of creative exploration, I’ve been fascinated by the versatile world of string art. This captivating craft offers endless possibilities, from minimalist designs to intricate patterns, and my latest venture delves into the creation of an easy DIY macrame and driftwood wall hanging. This project isn’t just about crafting; it’s an experiment in blending natural elements with artistic expression, aiming to bring a touch of coastal serenity and handmade charm into our lakehouse.
My inspiration for this particular piece was sparked by a mesmerizing DIY string wall hanging I discovered on Instagram. Its elegant simplicity—just hand-dyed strings draped over a dowel—instantly captivated me. Eager to replicate and personalize this concept, I sourced spools of high-quality cotton string. However, as is often the case with creative endeavors, my plans began to evolve. I envisioned a more organic, beach-inspired aesthetic, leading me to a crucial deviation: replacing the standard dowel with a piece of beautifully weathered driftwood.
Living by the majestic Lake Superior, I’m fortunate to have an abundant supply of driftwood washing ashore. In the warmer months, we often boat to secluded beaches, where I indulge in my passion for collecting unique pieces. For years, I’ve been diligently saving these treasures for a grand sculpture, a project that, admittedly, remains a distant dream due to the sheer volume of wood required and my yet-to-be-developed sculpting skills! Consequently, my driftwood pile has grown impressively, seeing little action beyond an easy no-weave wall hanging I crafted a couple of years ago. This overflowing stash, however, proved to be the perfect catalyst for my latest string art experiment.
With the last vestiges of winter snow finally melting away, revealing my hidden trove of driftwood, a renewed sense of excitement for this DIY string and driftwood wall hanging project took hold. It felt like the ideal way to infuse our lakehouse with those much-desired summery, coastal vibes. I had a specific spot in mind: a blank wall between our kitchen and a prominent painting. Another painting would feel too competitive, but I believed string art, with its delicate texture and understated elegance, could add visual interest without overshadowing the existing artwork. Initially, I embarked on creating a massive, diagonally-hung version, but as it neared completion, a wave of uncertainty washed over me. Was it veering too much into “boho” territory? Perhaps too overtly beachy for the space? My ever-patient husband obligingly held it up for me to assess, as seen here:
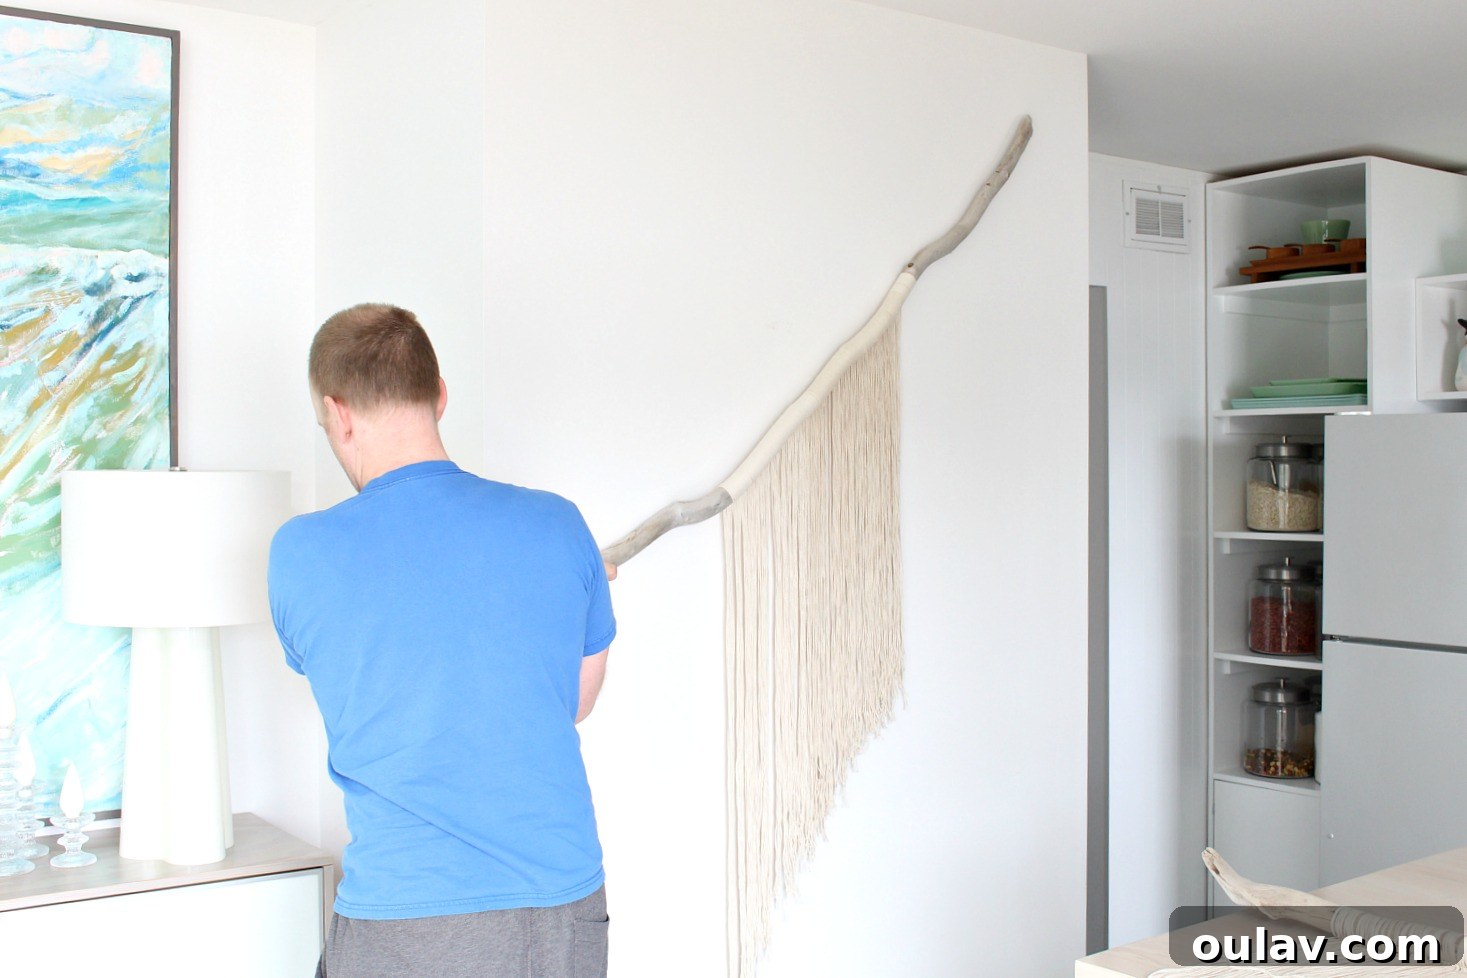
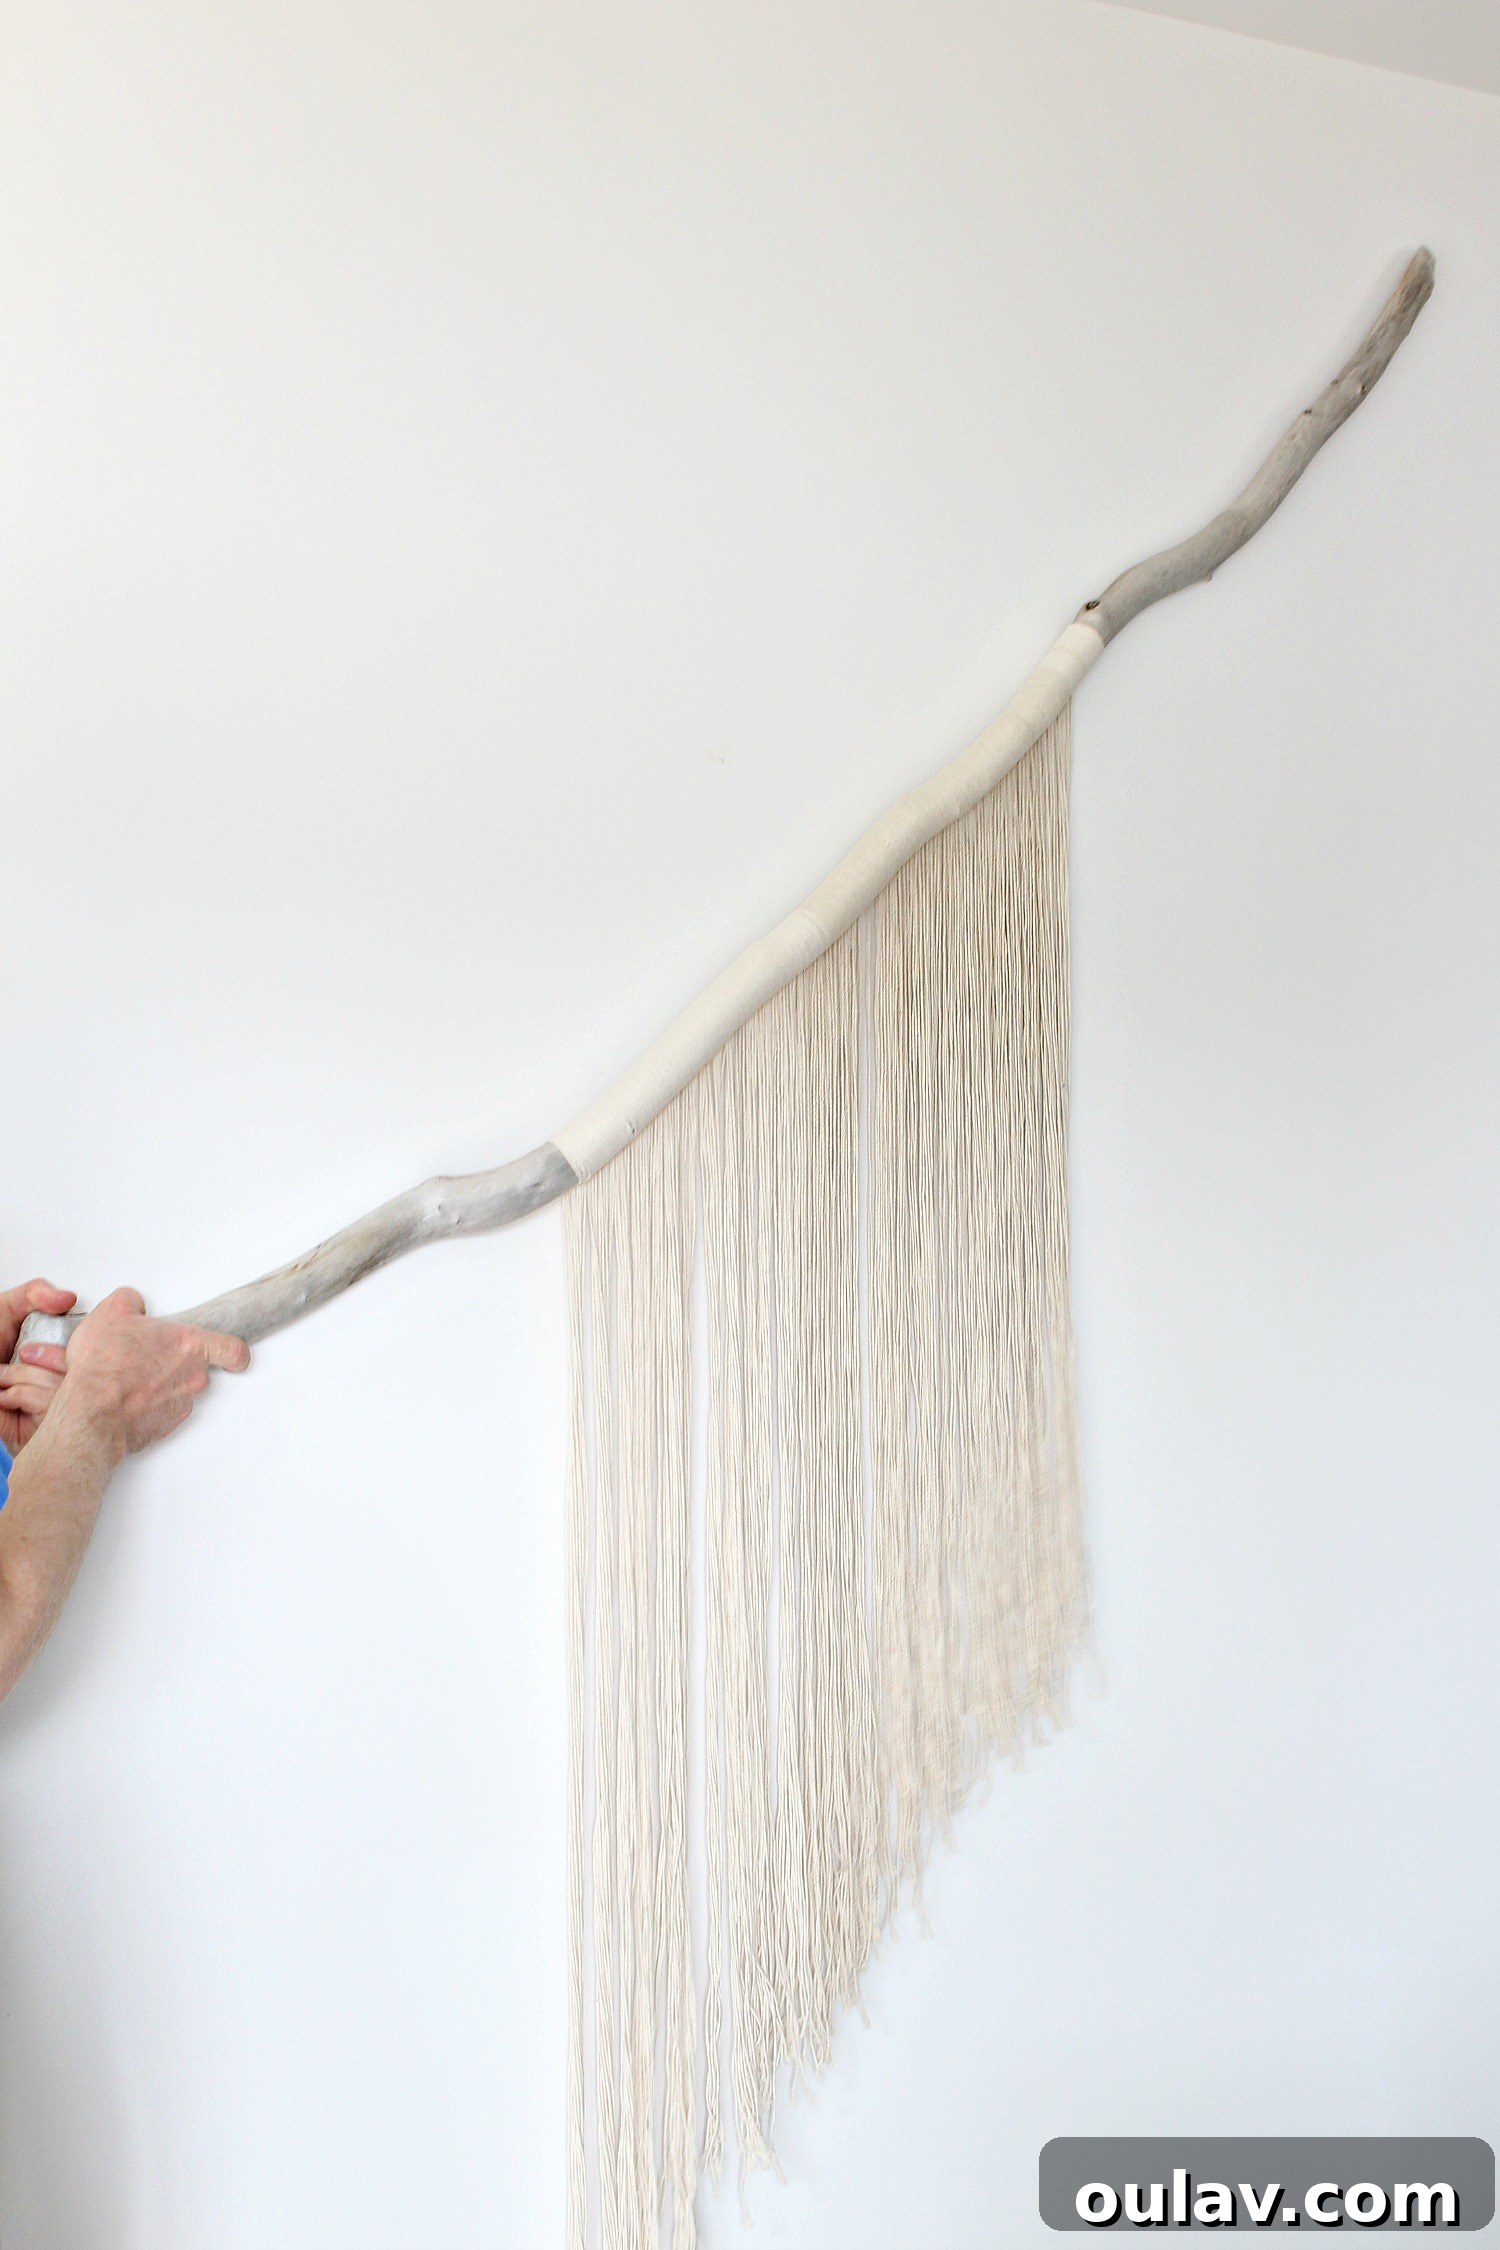
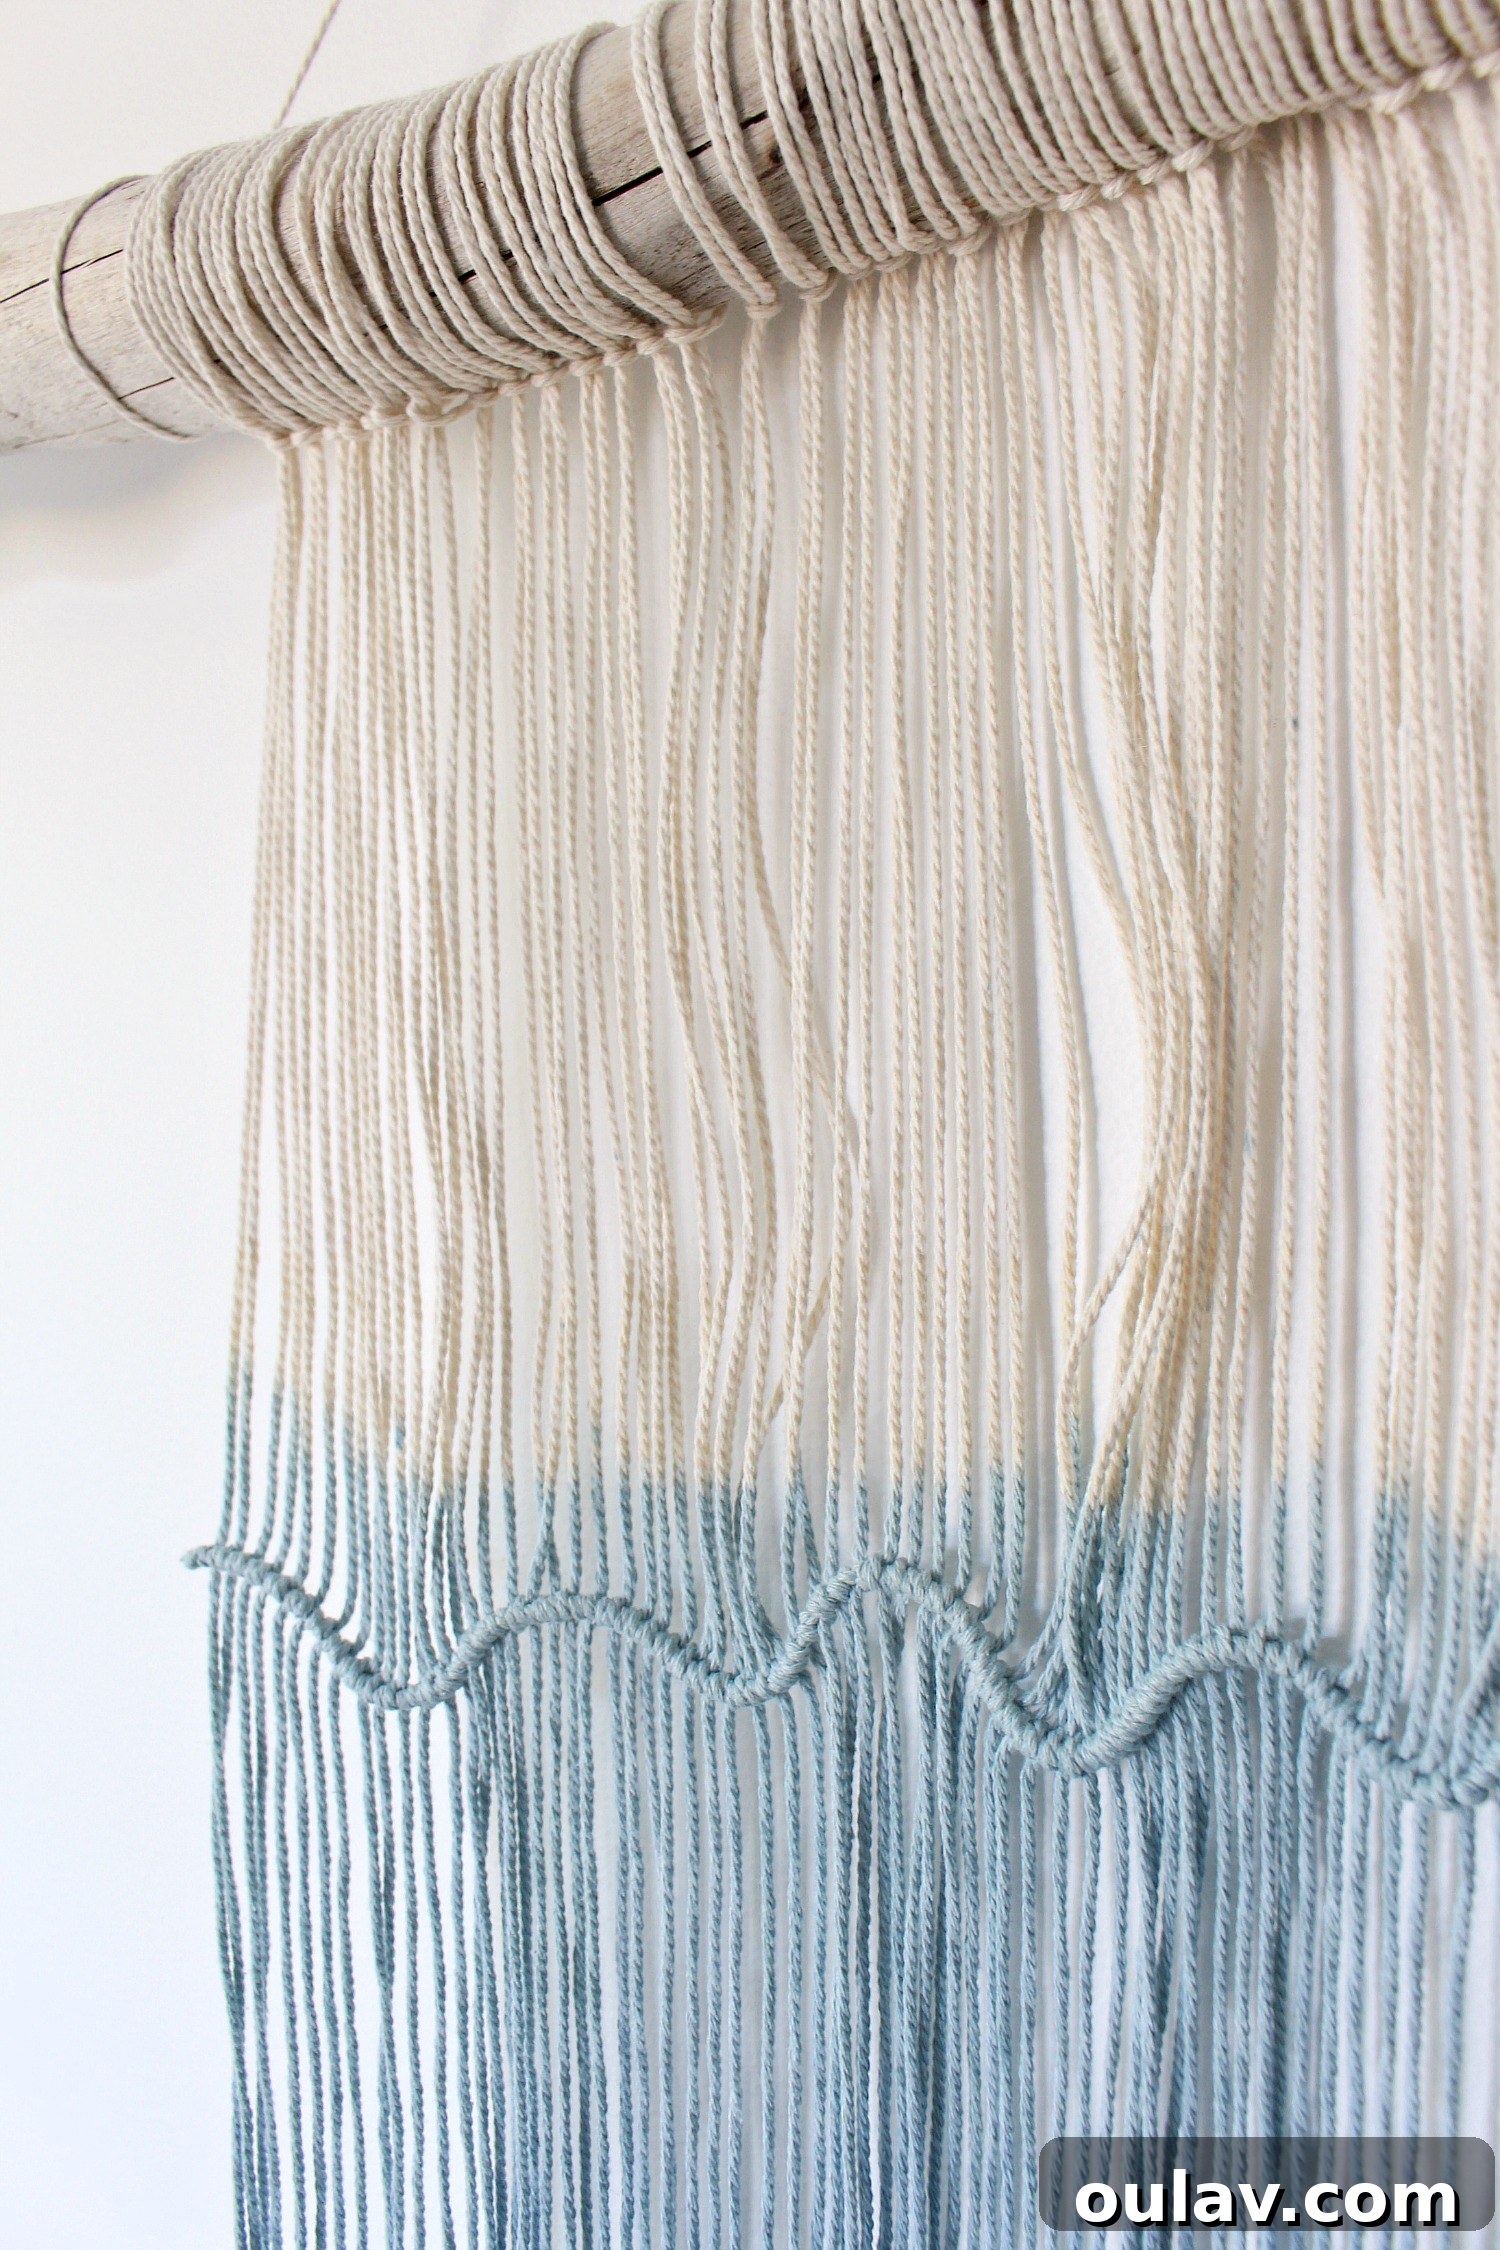
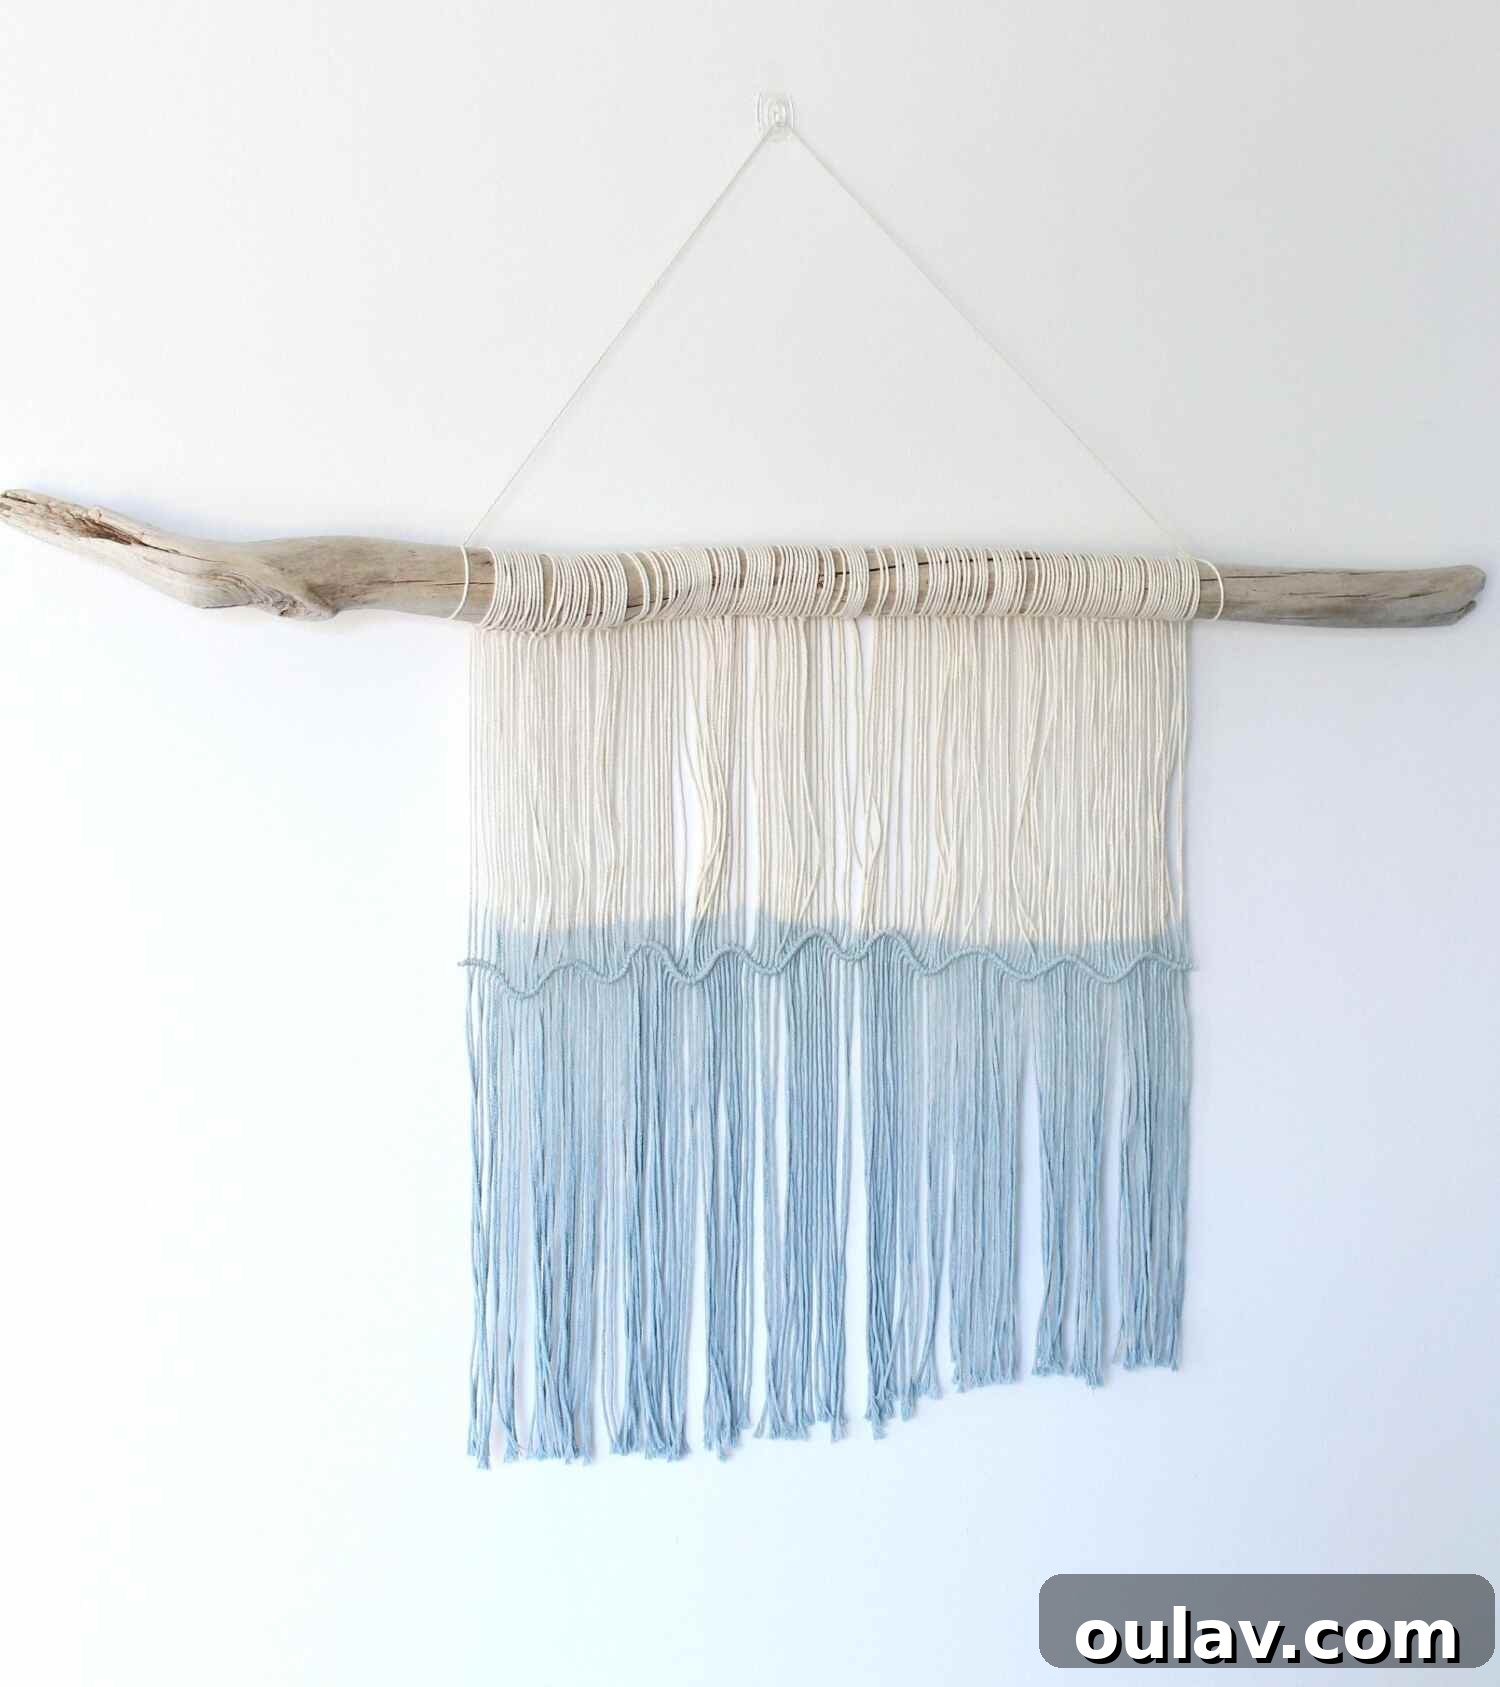
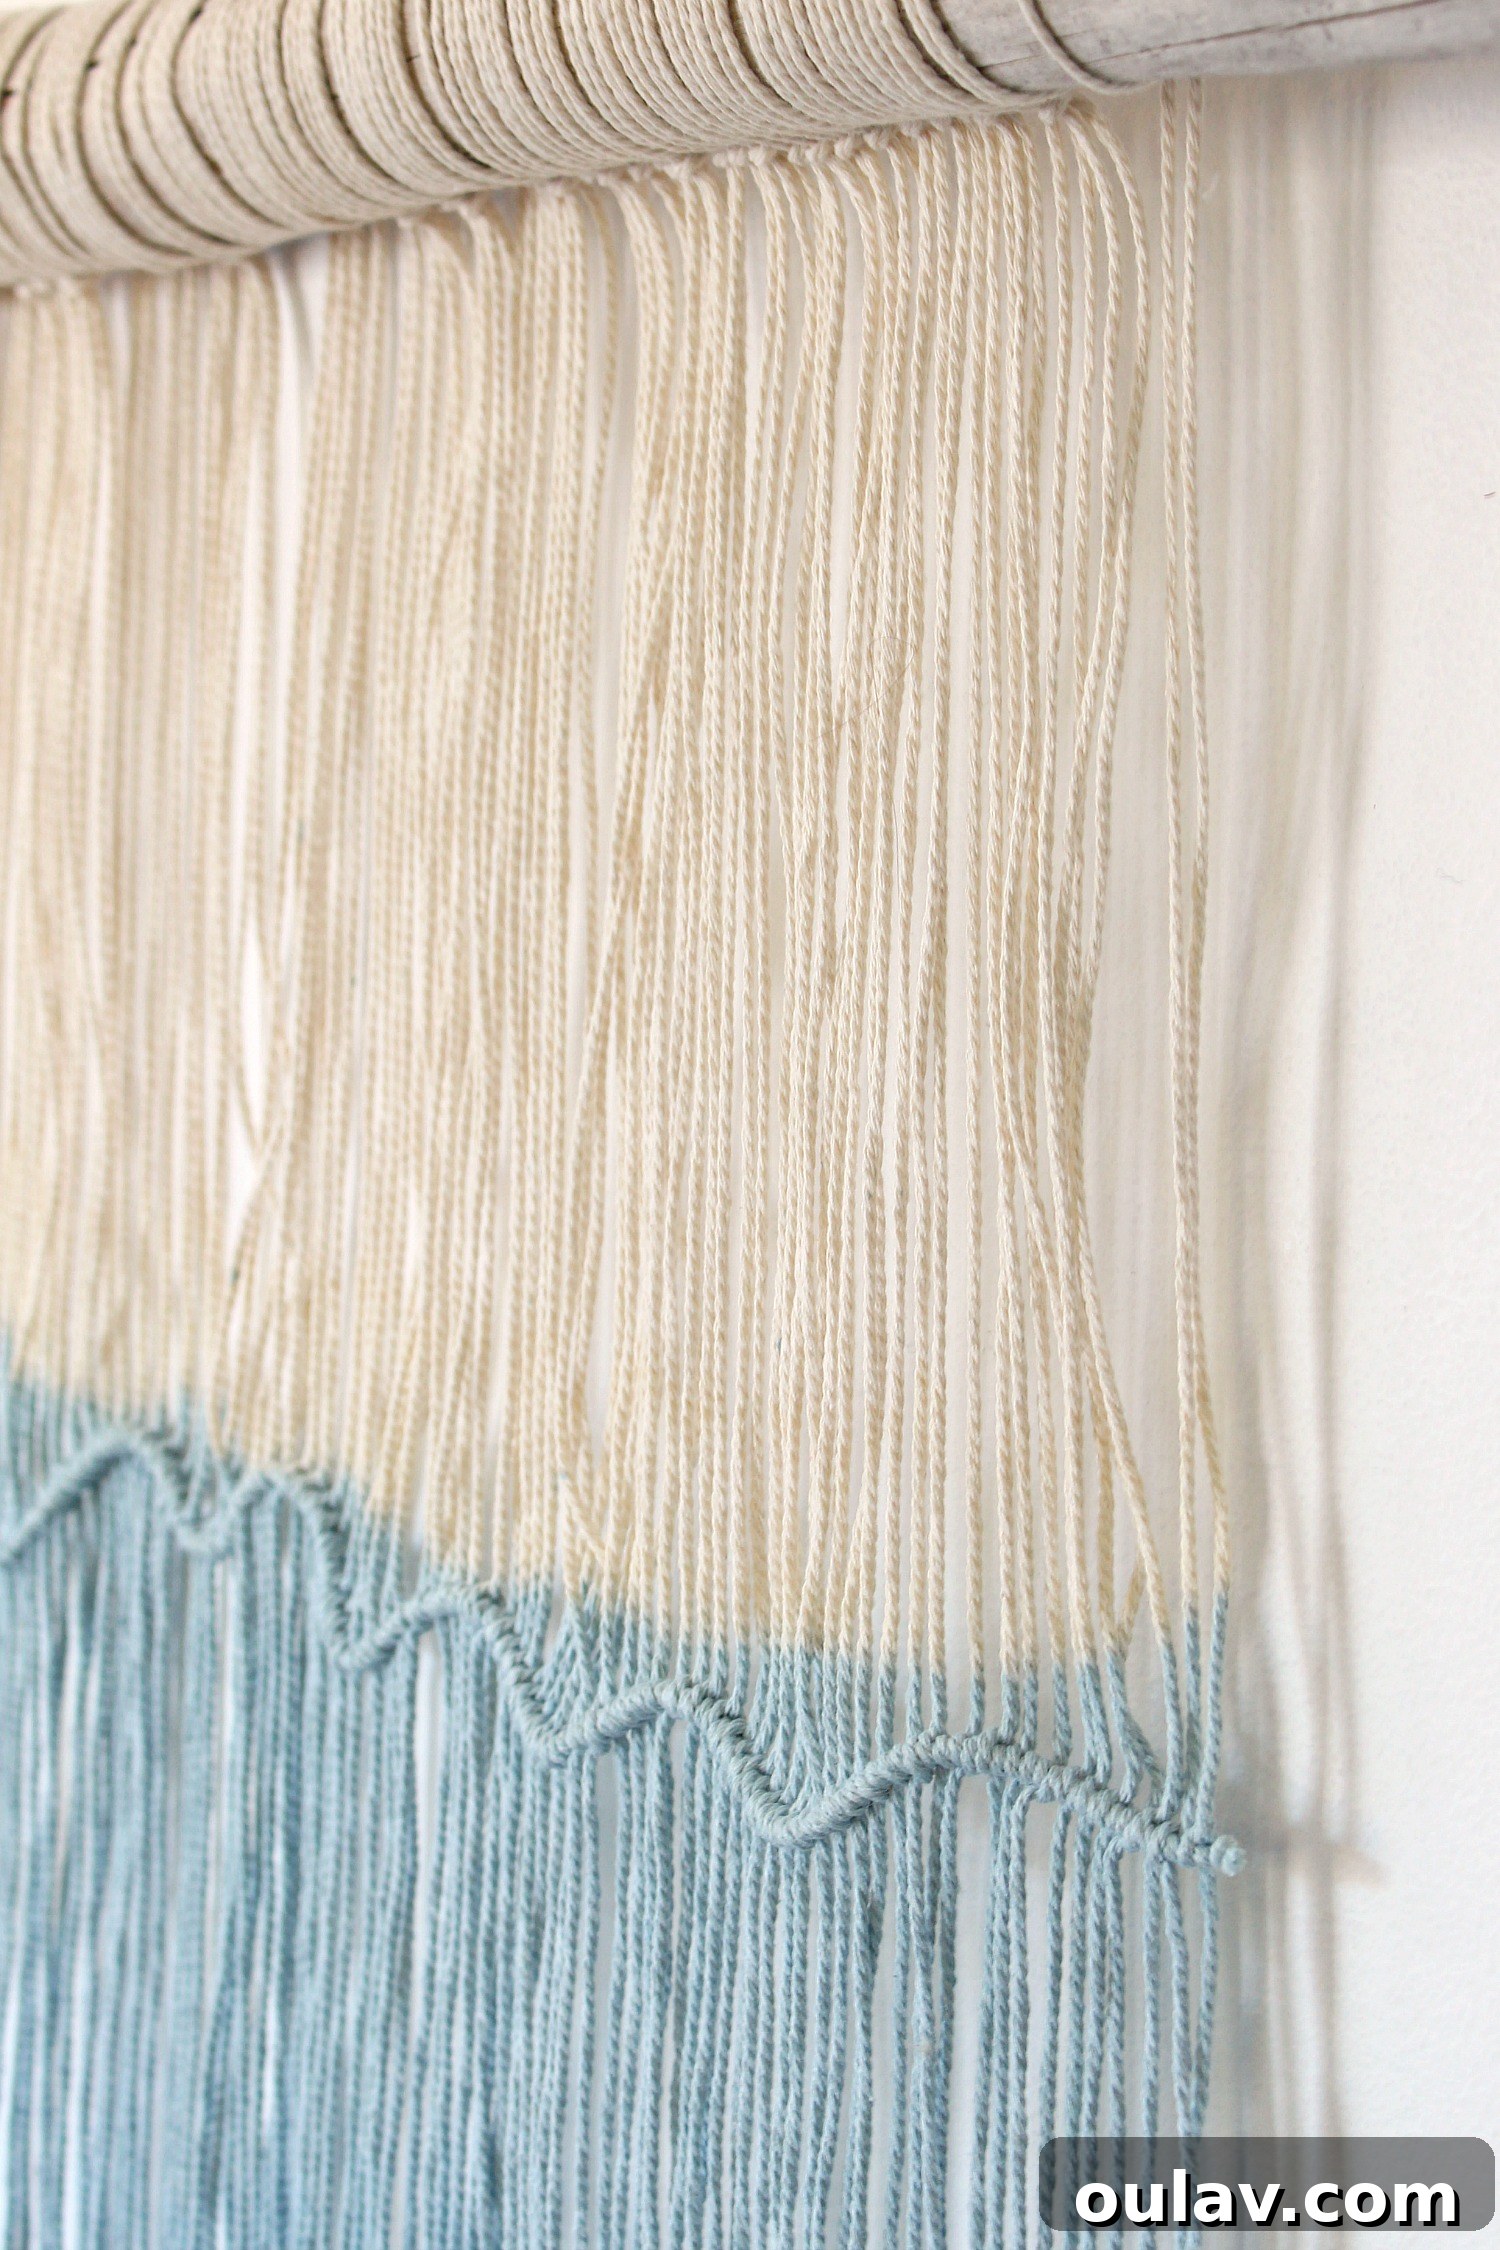
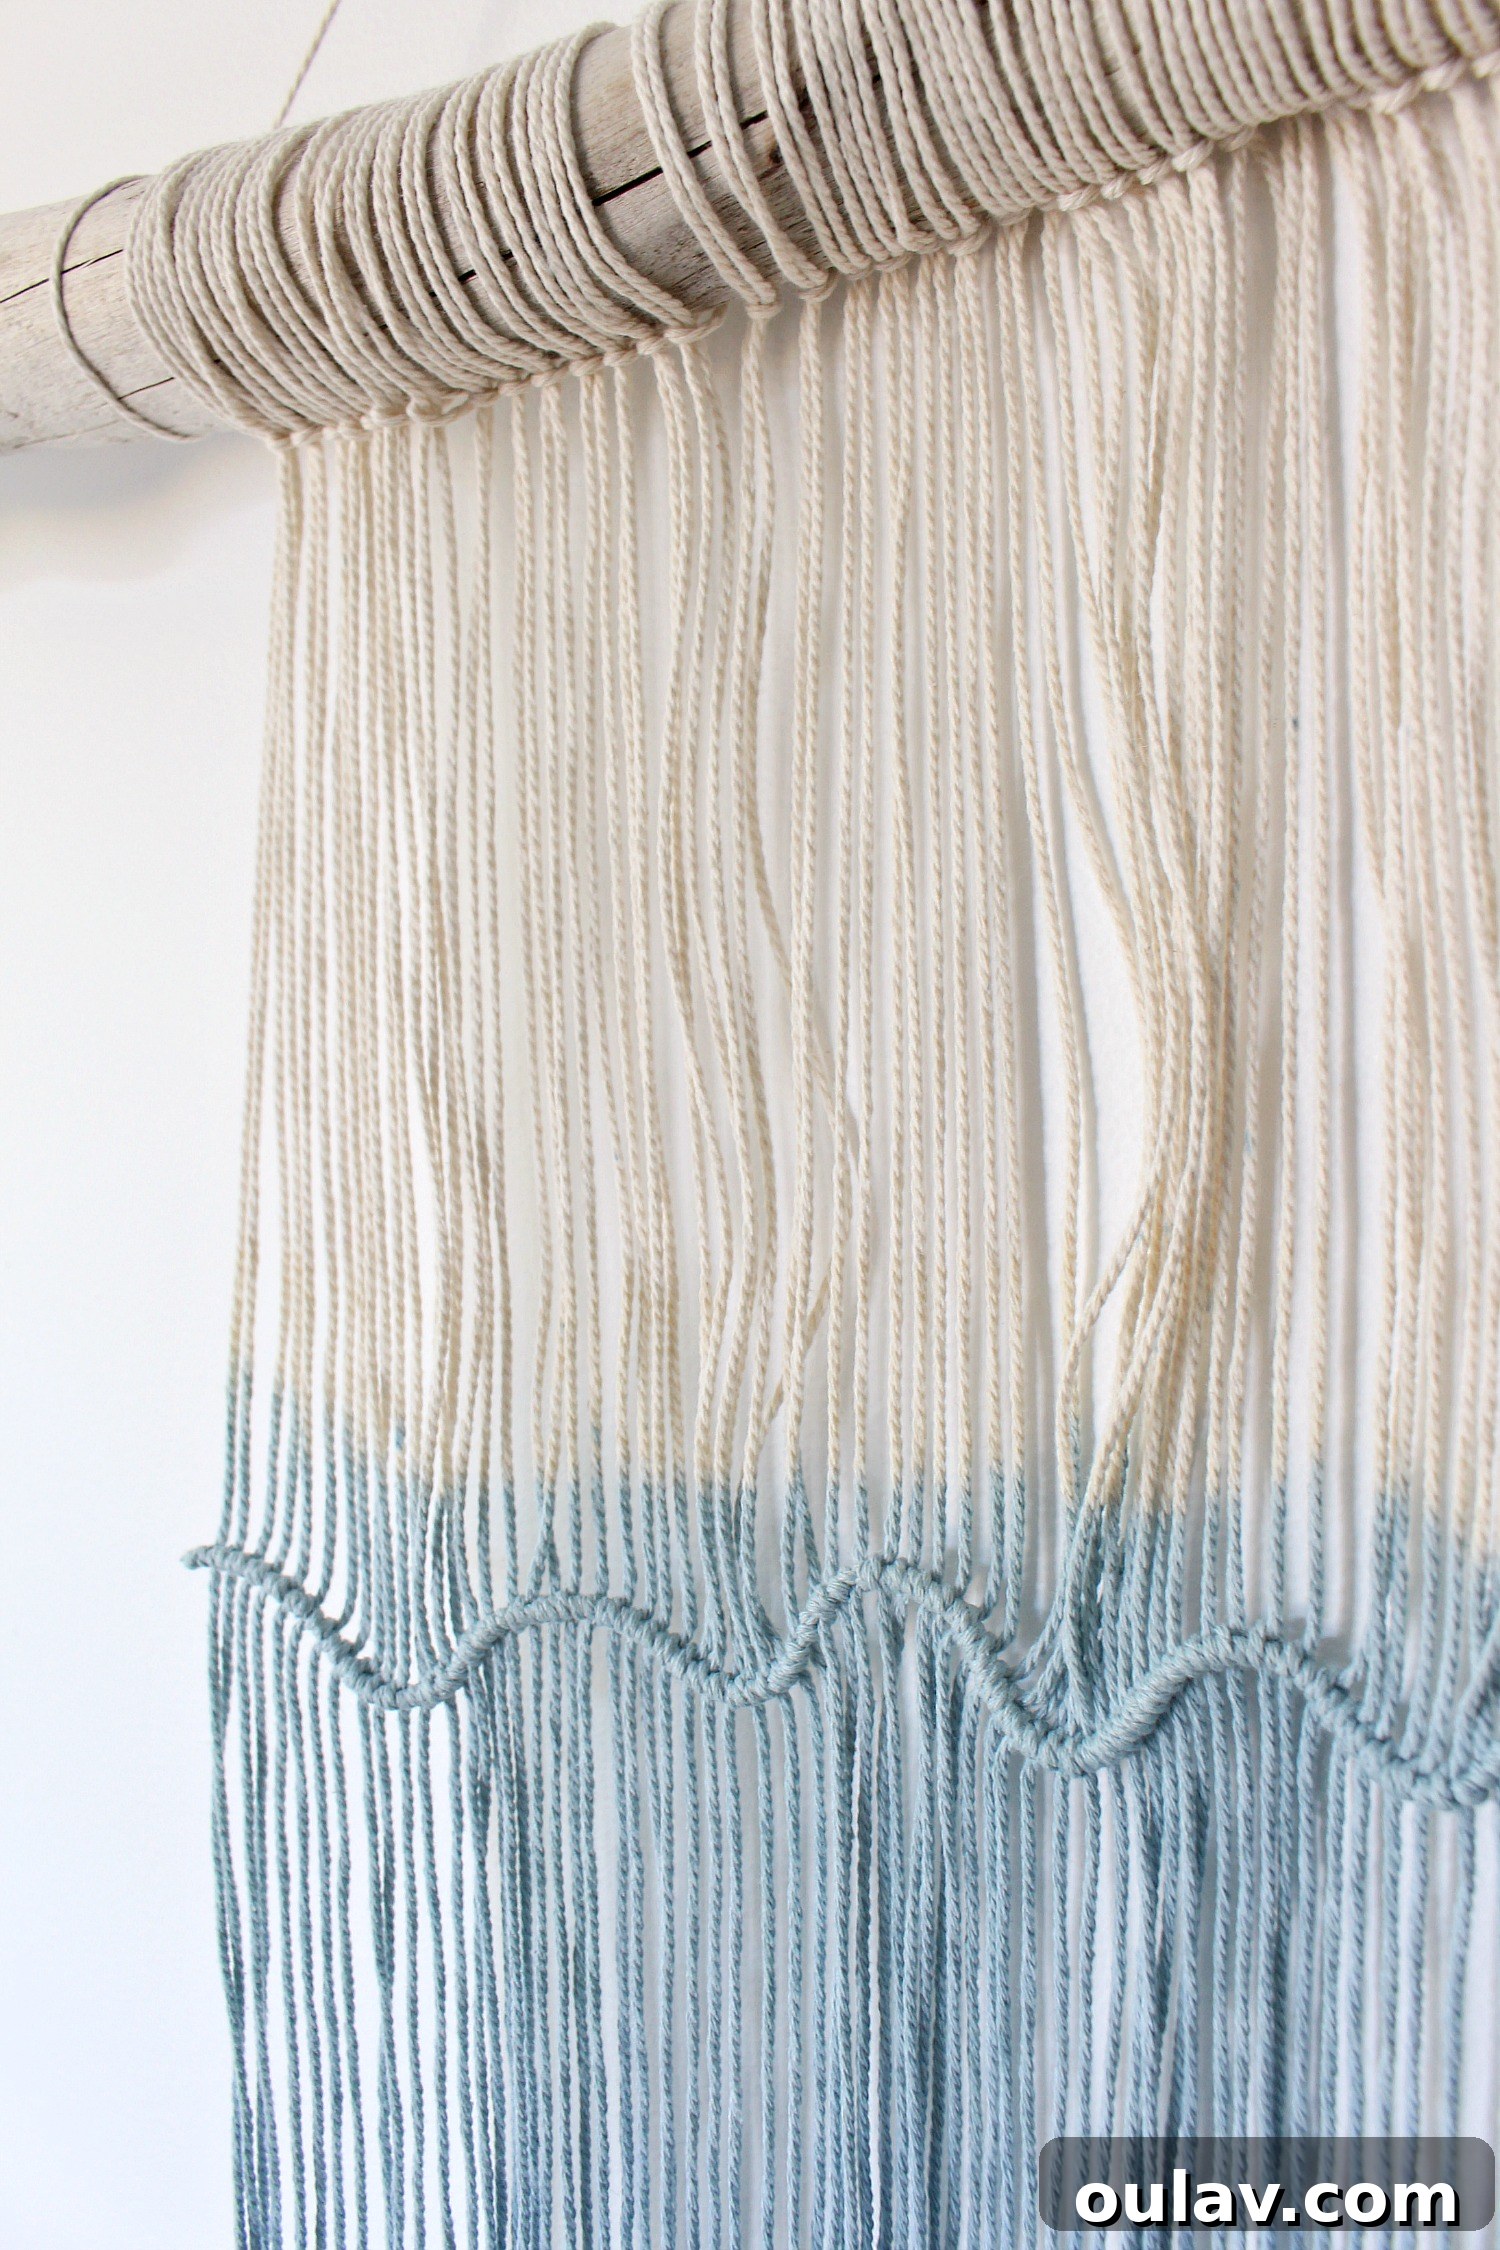
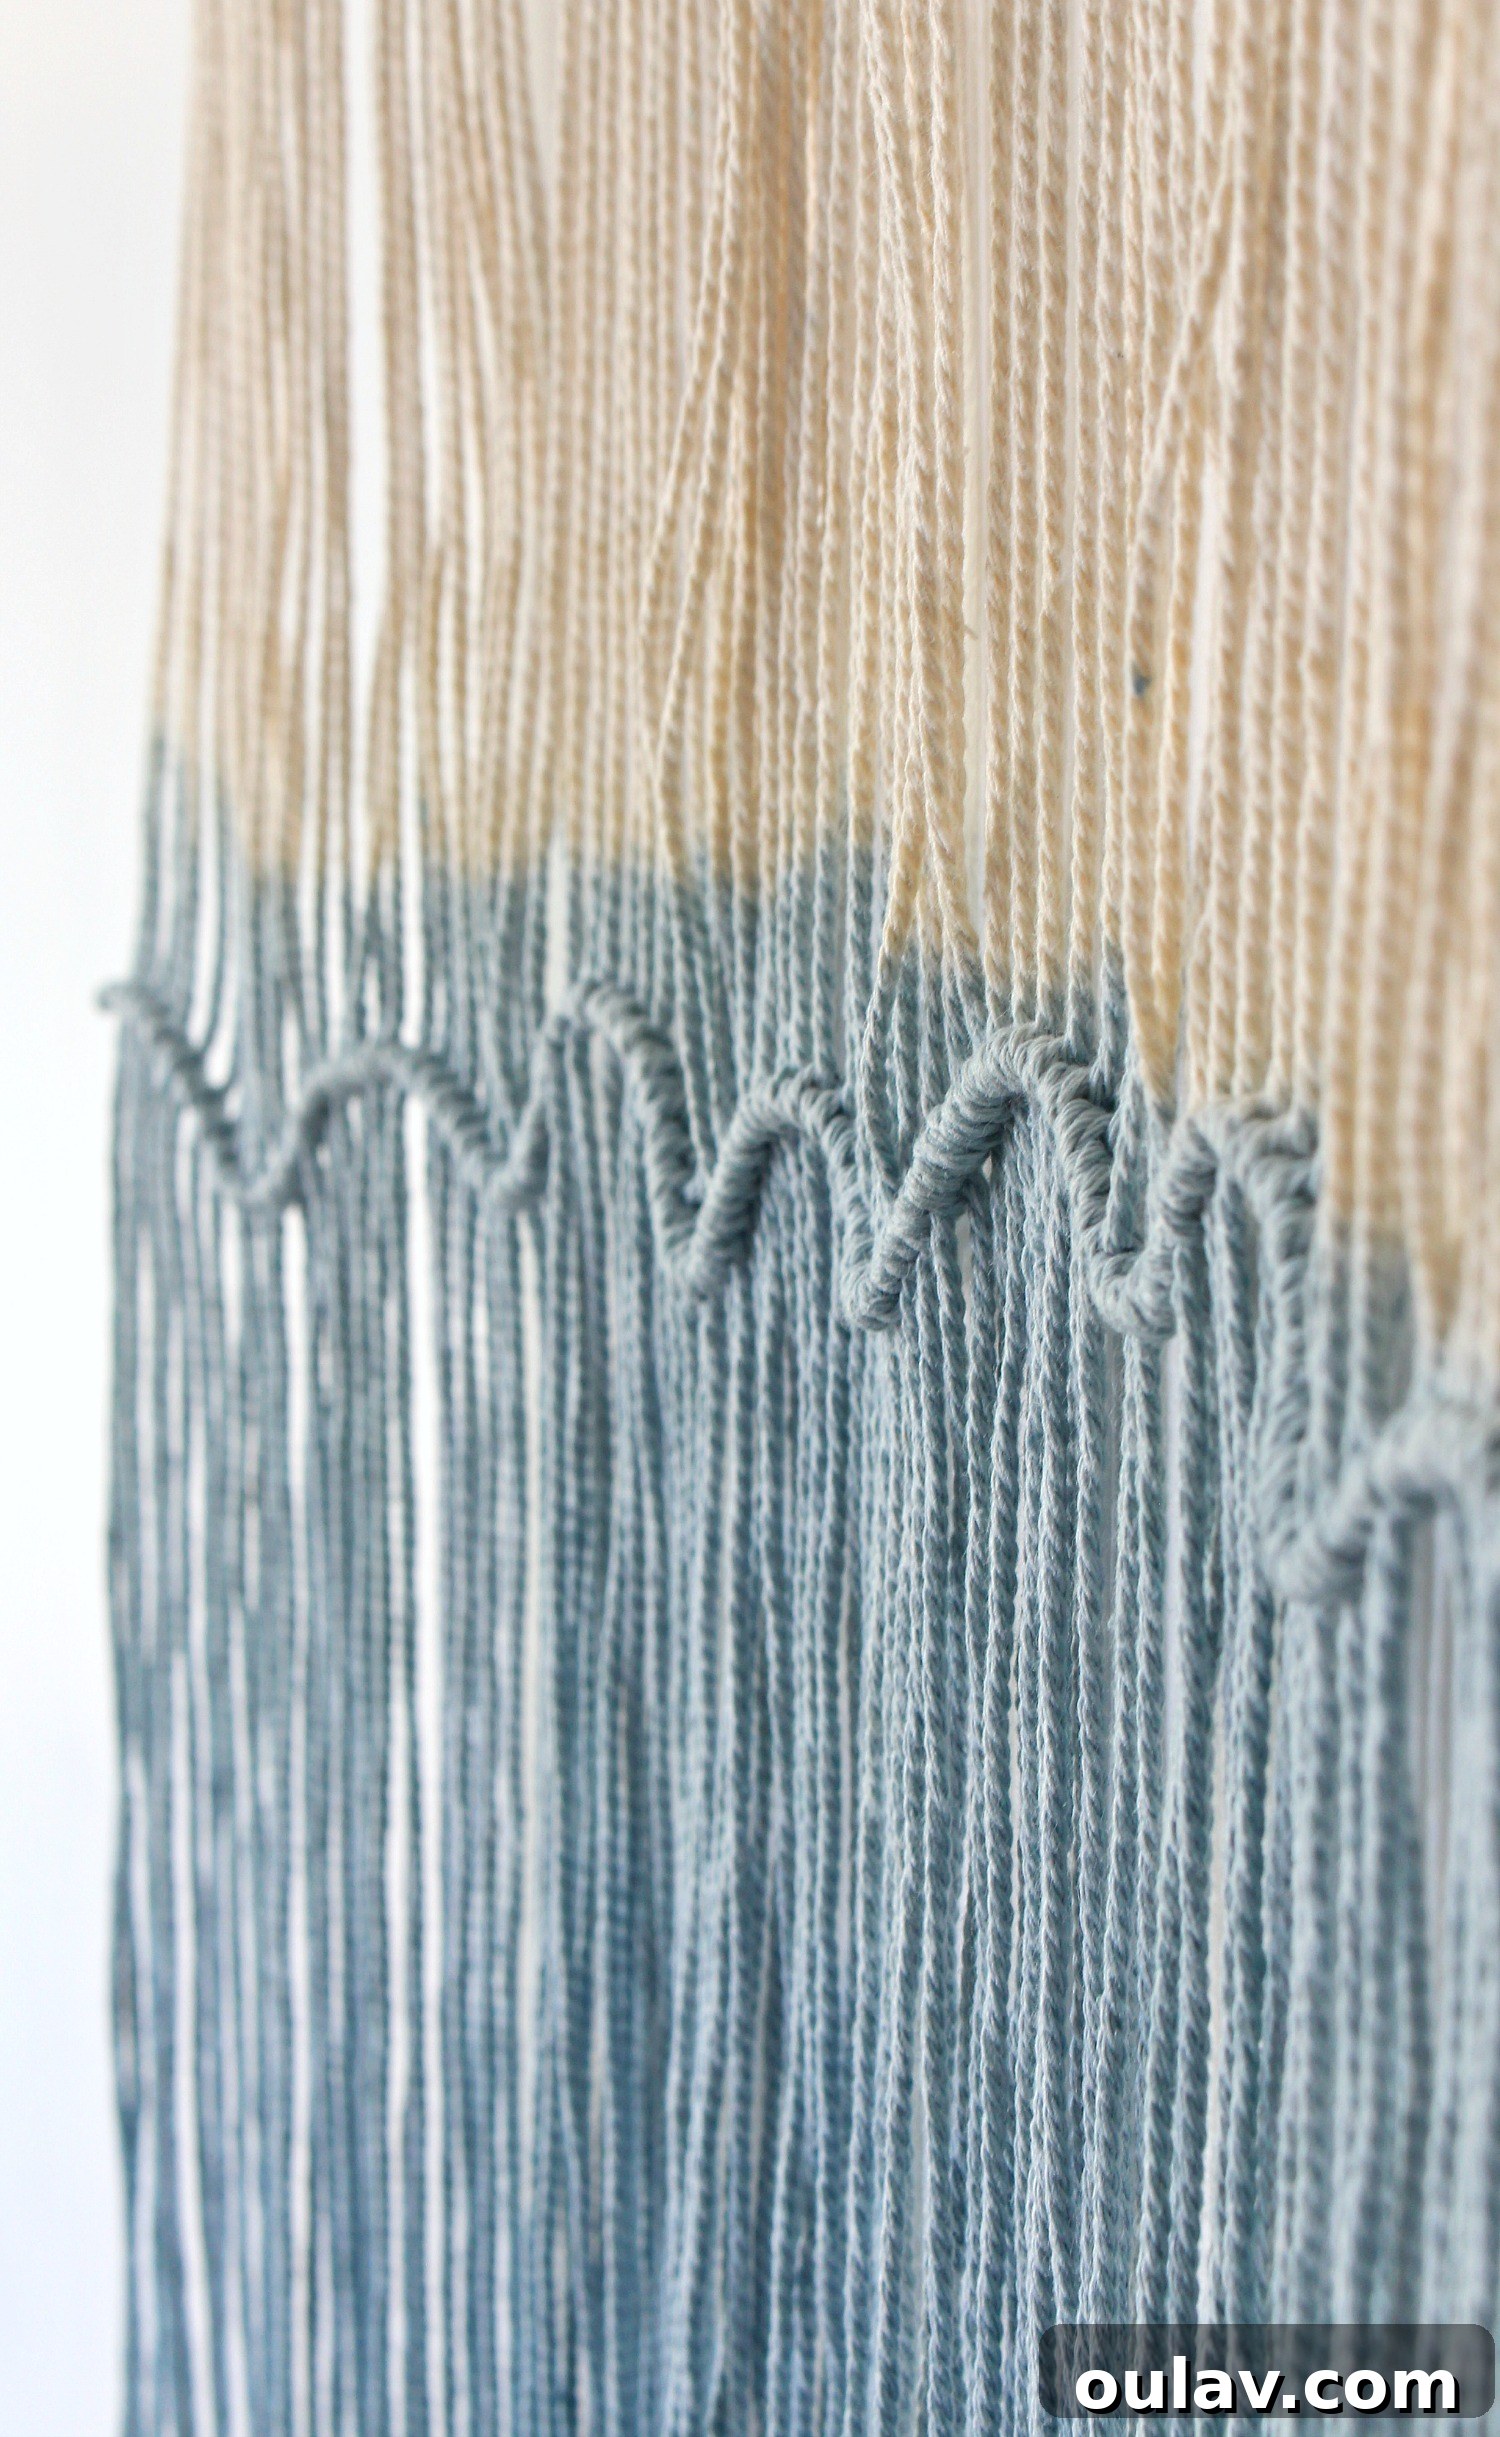
The gargantuan driftwood and string creation also didn’t quite hang with the grace I had envisioned. This prompted another trip to my beloved driftwood heap, where I selected a smaller piece for further experimentation, specifically focusing on different knotting techniques. I opted for a super simple, foundational macrame knot to fashion a subtle “wave” pattern throughout the suspended strings. This technique proved invaluable, helping the string lie more deliberately and reducing its tendency to twist. To maintain an air of effortless charm and beachy authenticity, I purposefully kept the knots loose and slightly imperfect. For an added touch of fun and visual interest, I then dip-dyed the ends. While I’m pleased with the outcome of this smaller iteration, I’m still pondering if it fully aligns with my personal aesthetic—the dip-dye and knots lean slightly more boho than I initially planned. This means continued experimentation and perhaps a re-evaluation of my original grand design. This particular piece is undeniably too small for its current placement, but seeing it in situ allows me to further contemplate its potential and future iterations.
The allure of creating a truly monumental art piece persists, yet I find myself at a crossroads: should I stick with the simplicity of plain, unknotted string, or should I hone my macrame prowess to construct a larger, more intricately knotted design? Currently, I’m leaning towards abandoning the driftwood for the massive project and reverting to the original dowel concept. However, I’d enhance it by building a sleek frame and staining it grey. This approach would still evoke a coastal feel, but with a more refined, less overtly organic touch. This iterative process, where an idea is born, reshaped, refined, and sometimes even completely reimagined, is truly what I cherish about creativity. It’s how an initial spark snowballs into something truly remarkable—or, on occasion, a valuable learning experience. I believe in sharing both the triumphs and the occasional missteps, as they all contribute to the artistic journey and offer insight into the ebb and flow of creative thought.
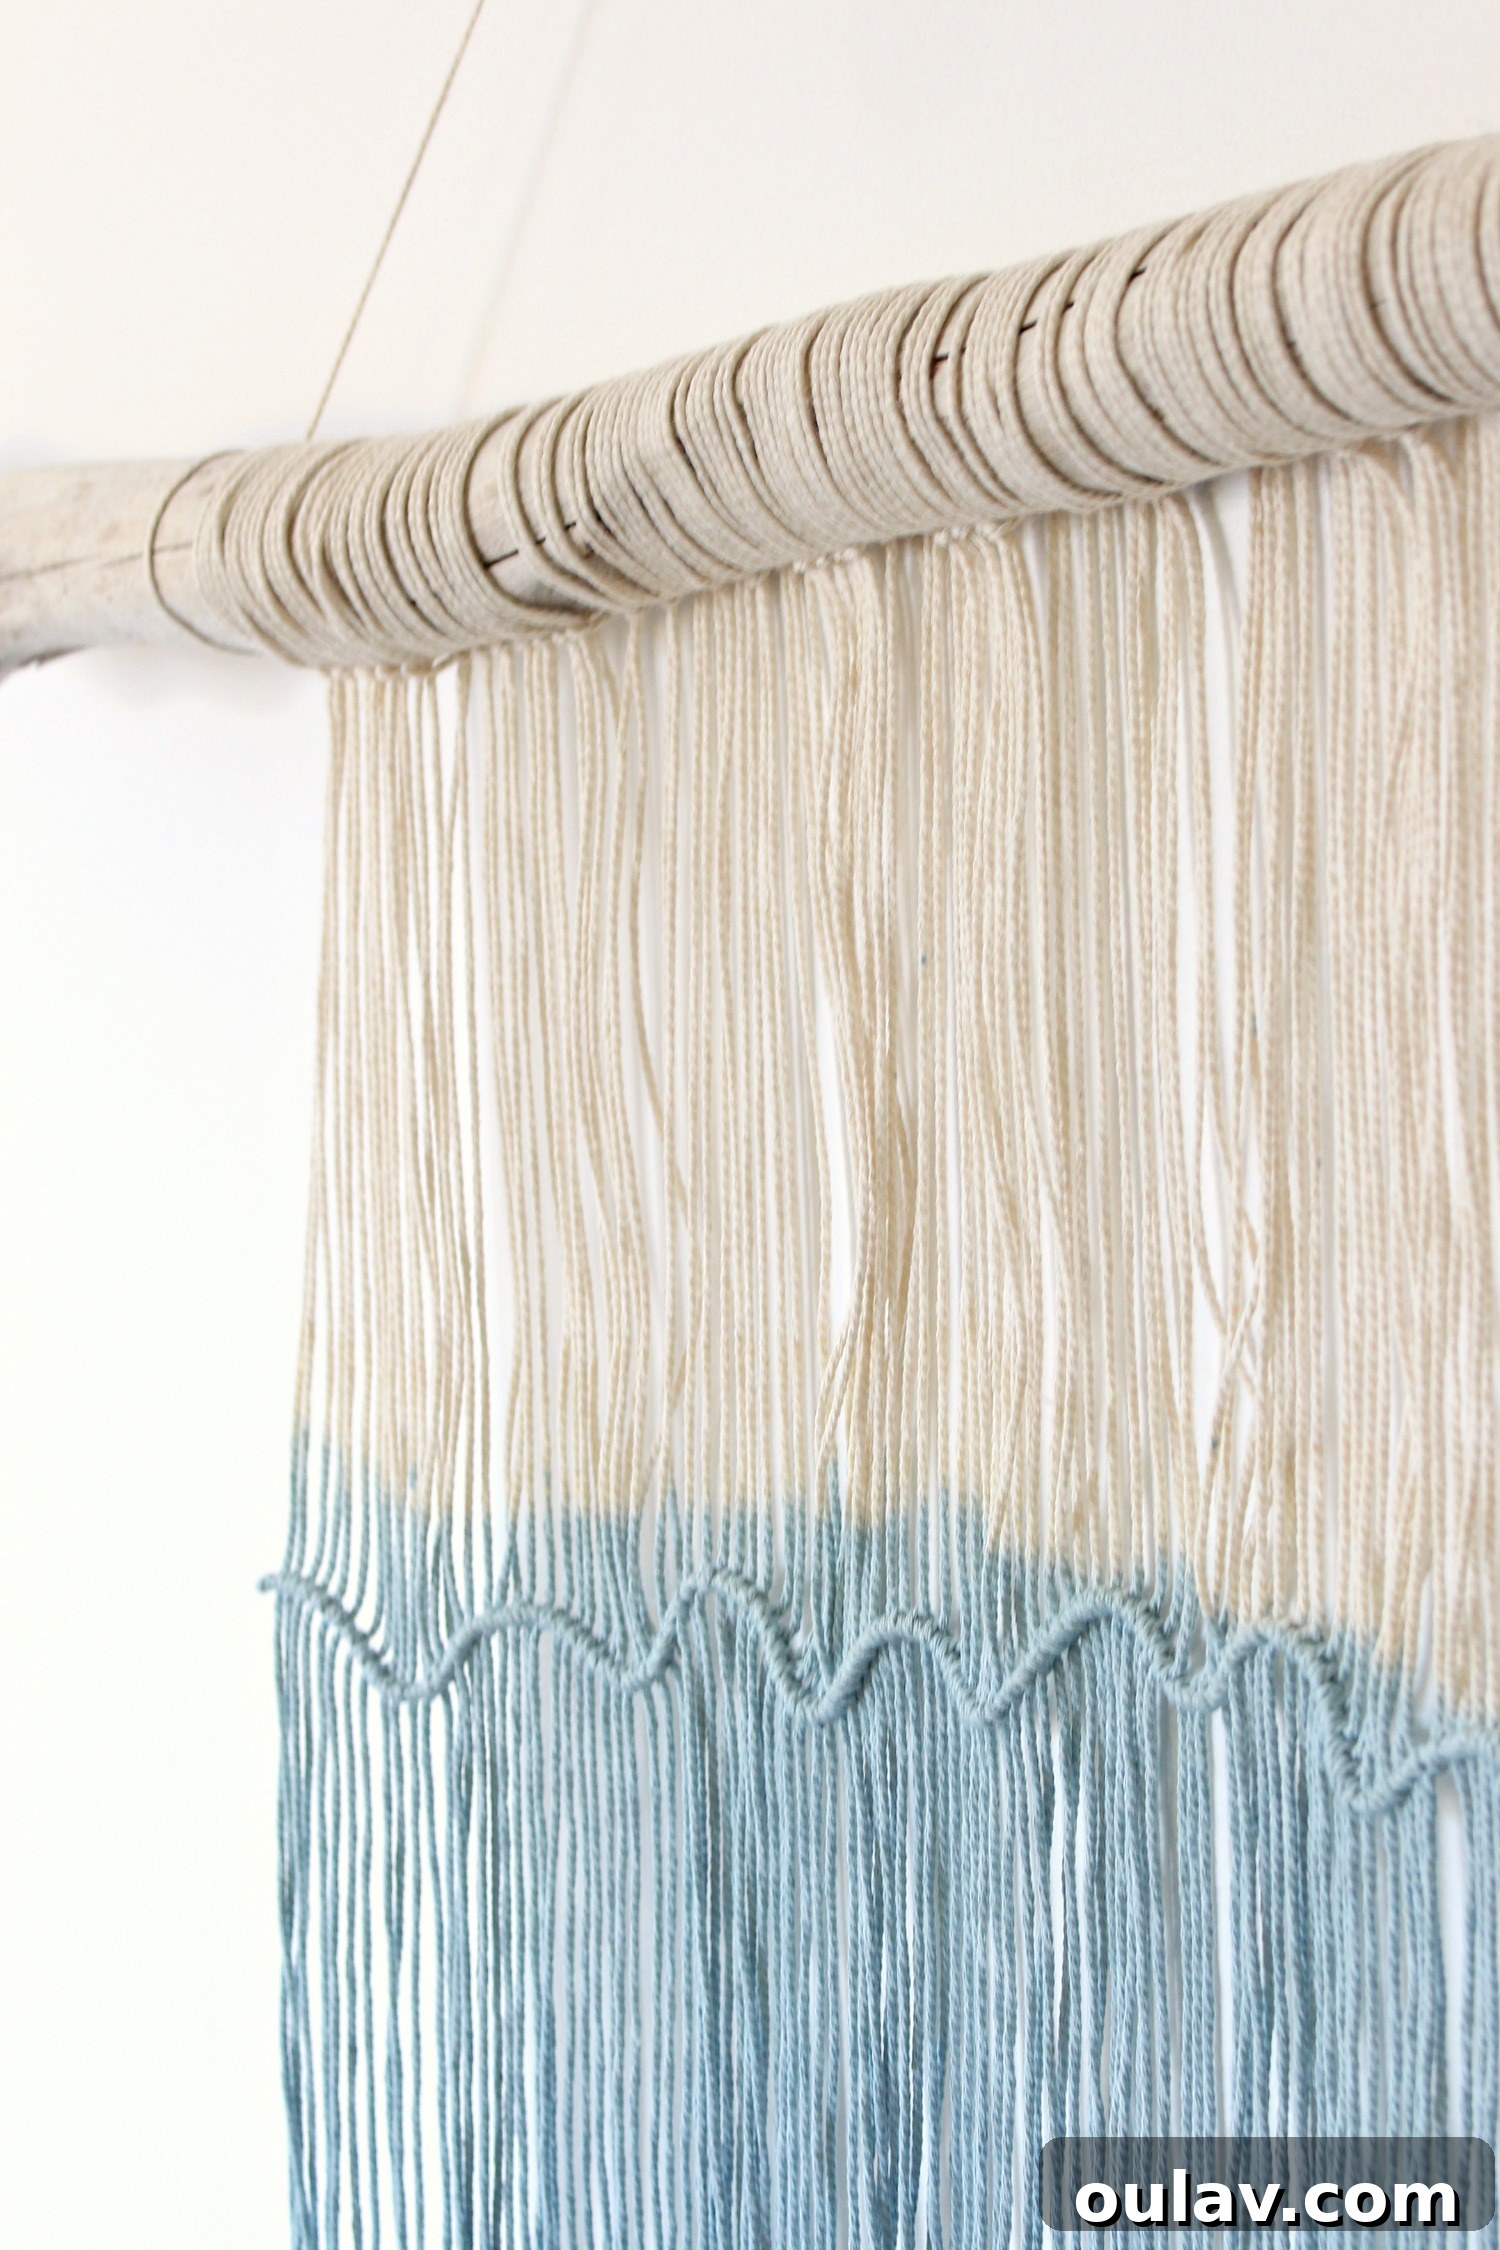
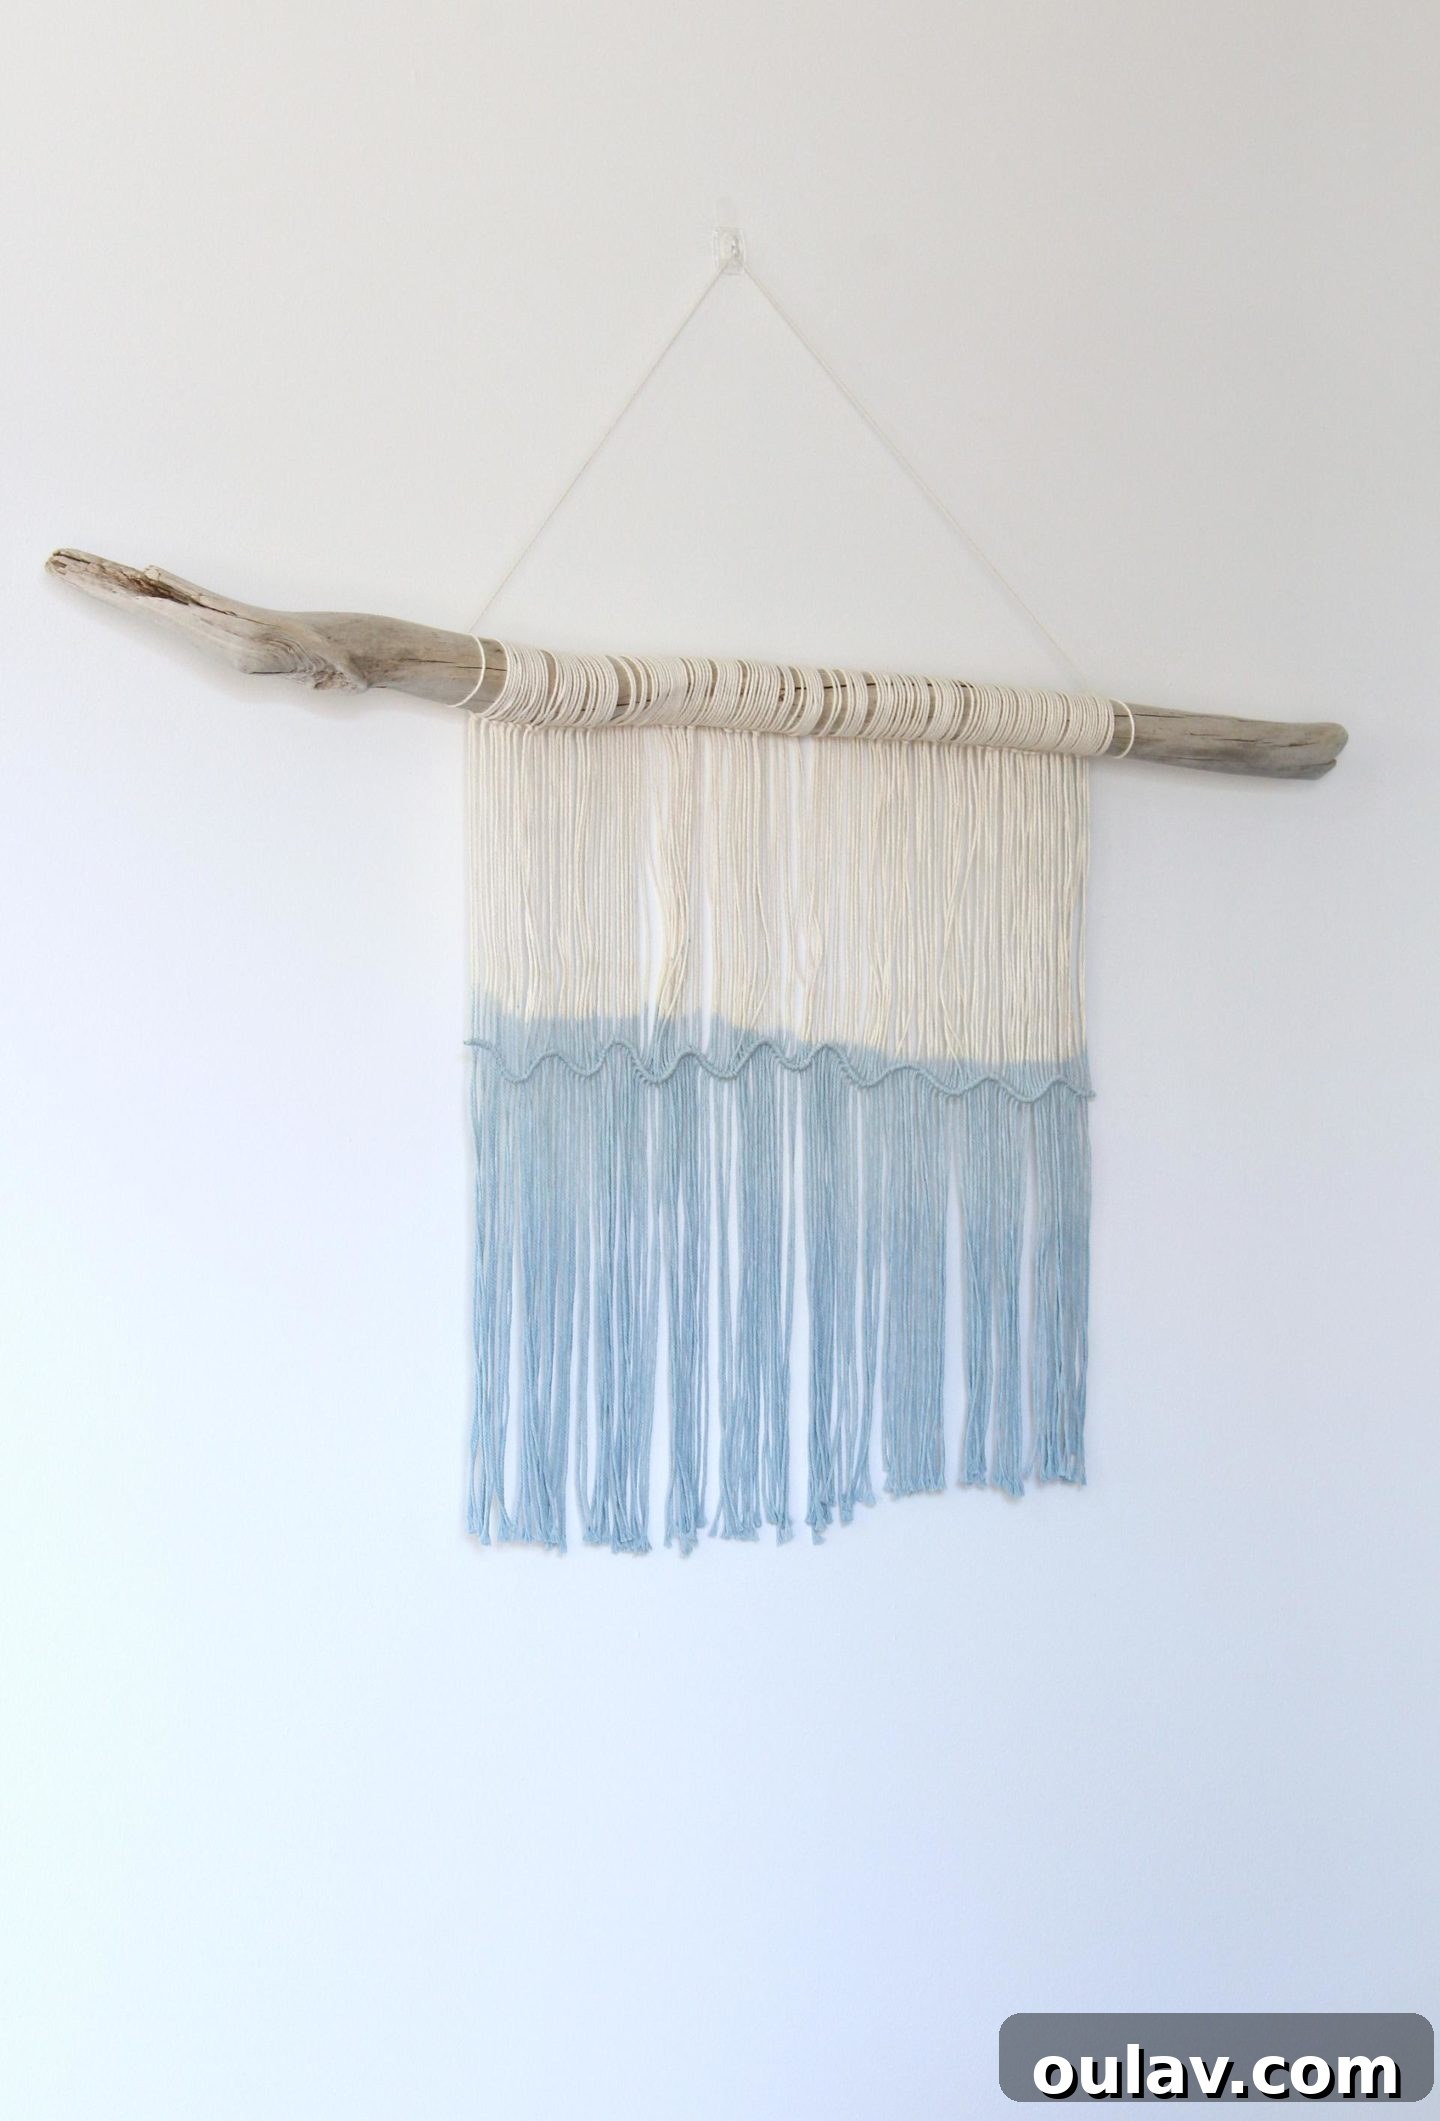
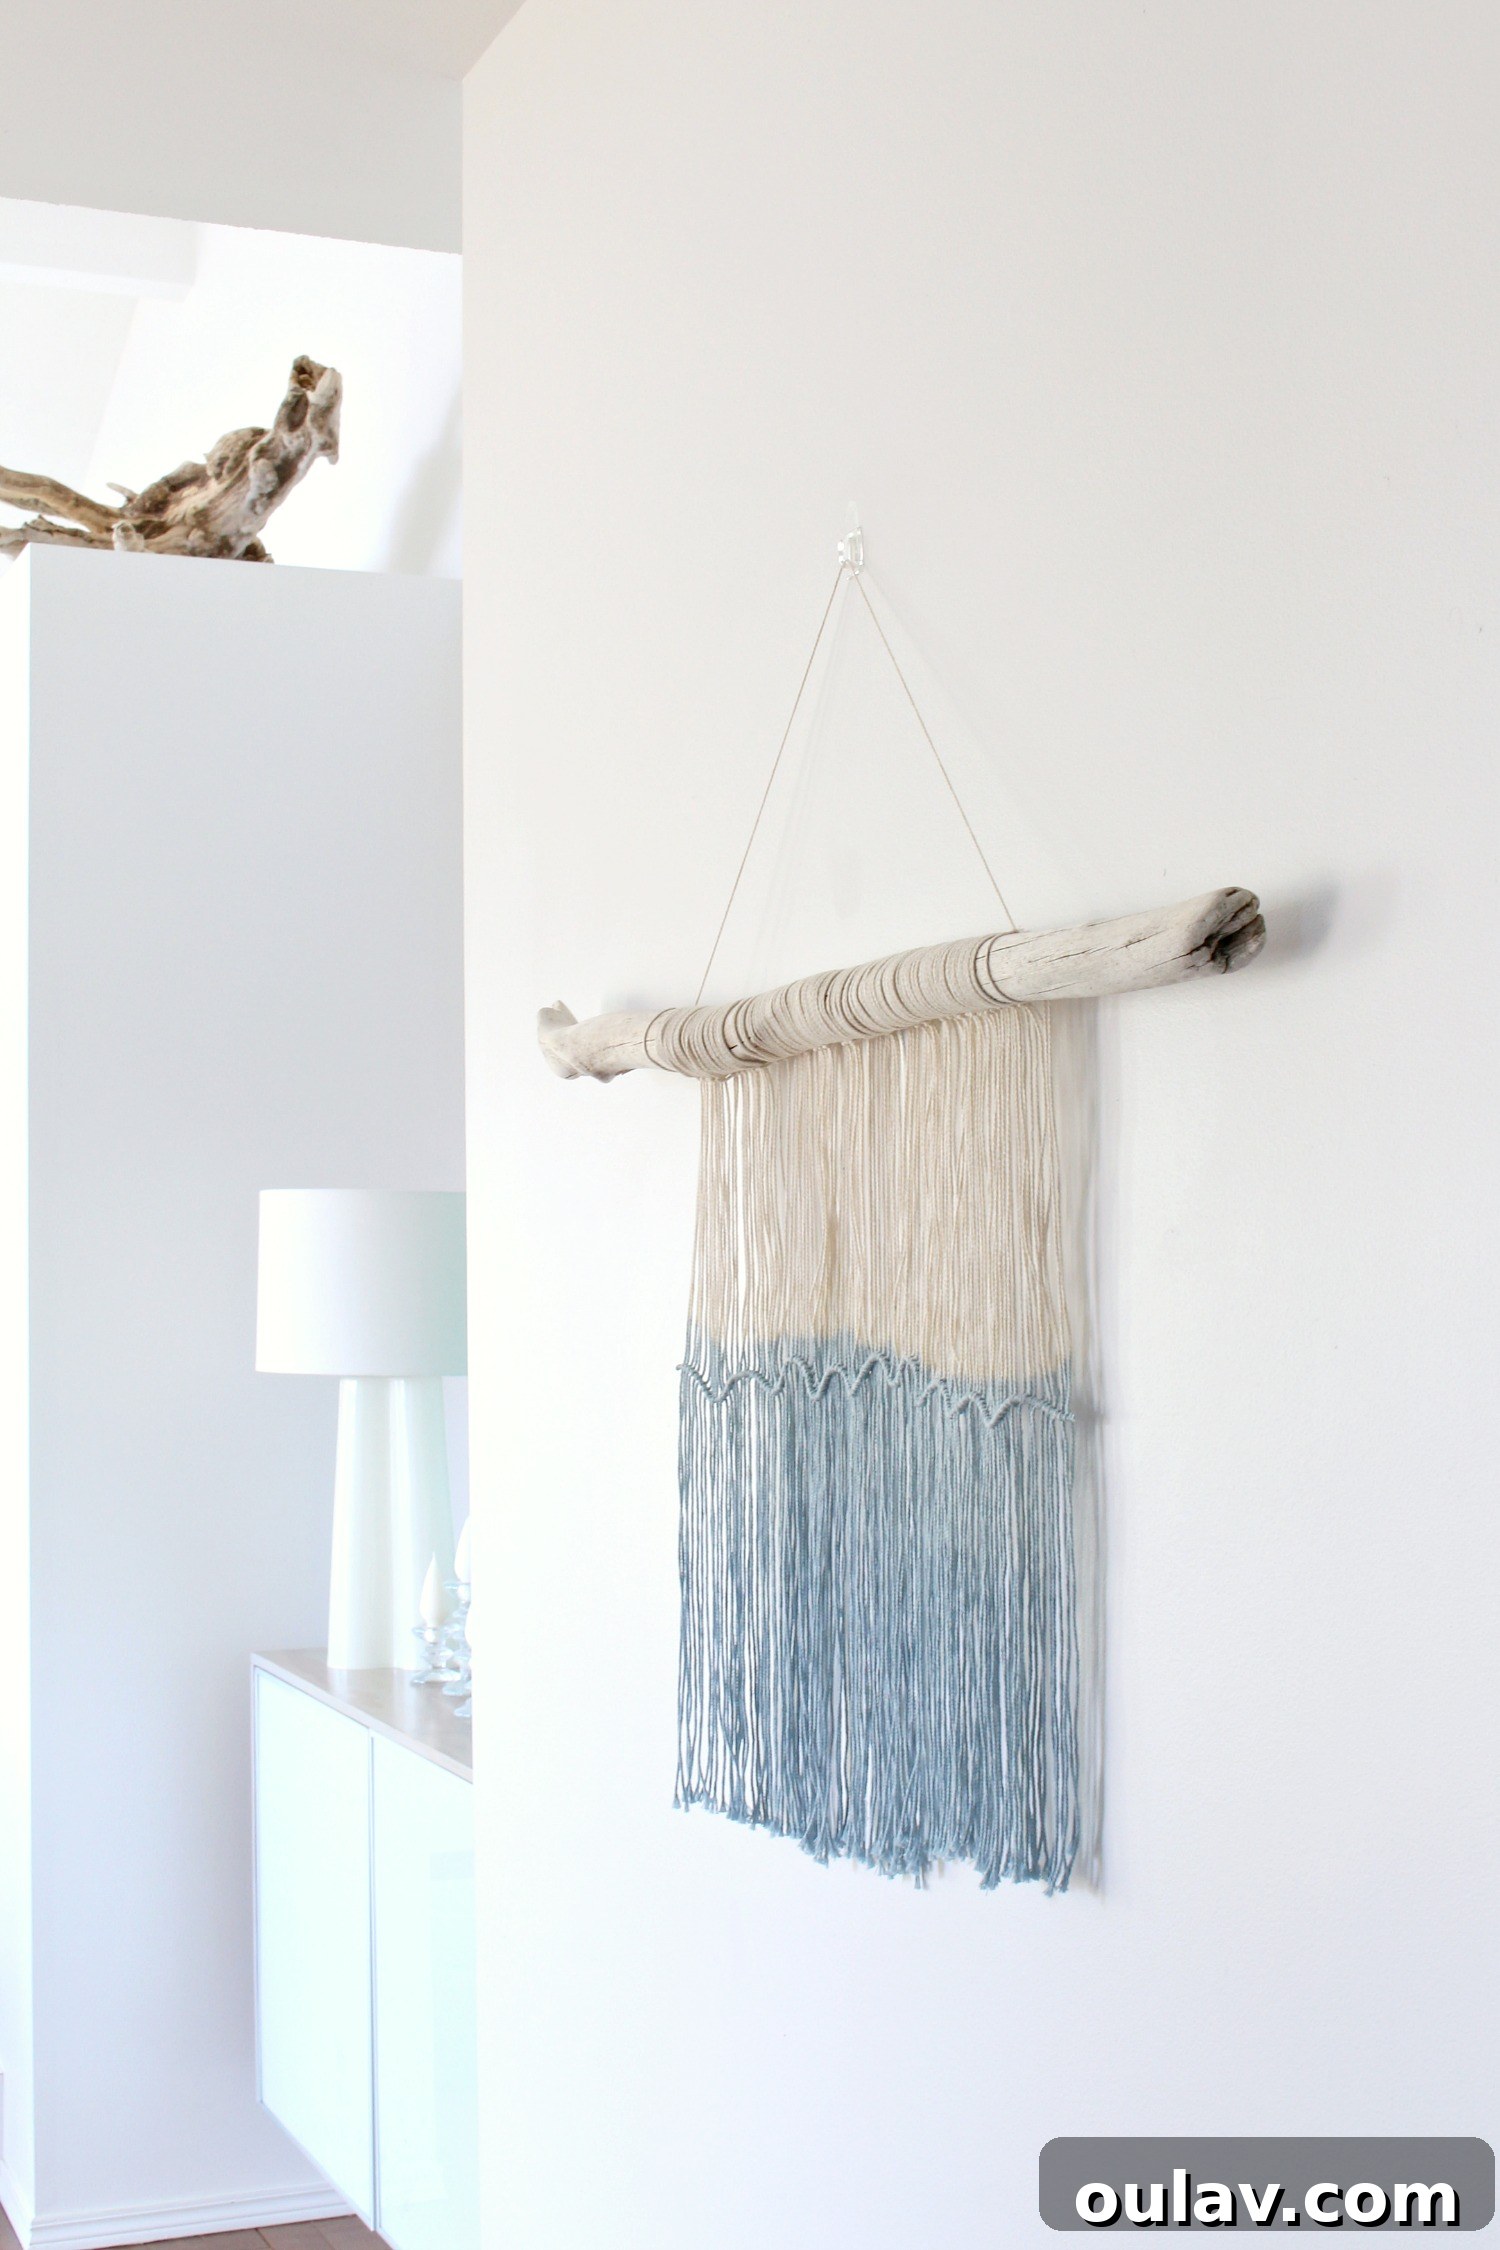
I felt compelled to share this particular easy DIY macrame and driftwood wall hanging version because the specific macrame knot I employed is incredibly straightforward. If you’ve been hesitant to try macrame, perhaps intimidated by the complex patterns or the many hours often required for larger projects, this simple design offers a perfect entry point. It’s a fantastic way to “dip your toe” into this rewarding craft without a huge commitment. With summer just around the corner, now is the quintessential time to venture out and scavenge for that ideal piece of driftwood (or a sturdy branch if driftwood isn’t accessible). Imagine spending a leisurely weekend afternoon on your deck or patio, enjoying the sunshine, meticulously knotting and dyeing your string to create your own unique coastal decor. This project not only yields beautiful wall art but also provides a wonderfully relaxing and mindful crafting experience.
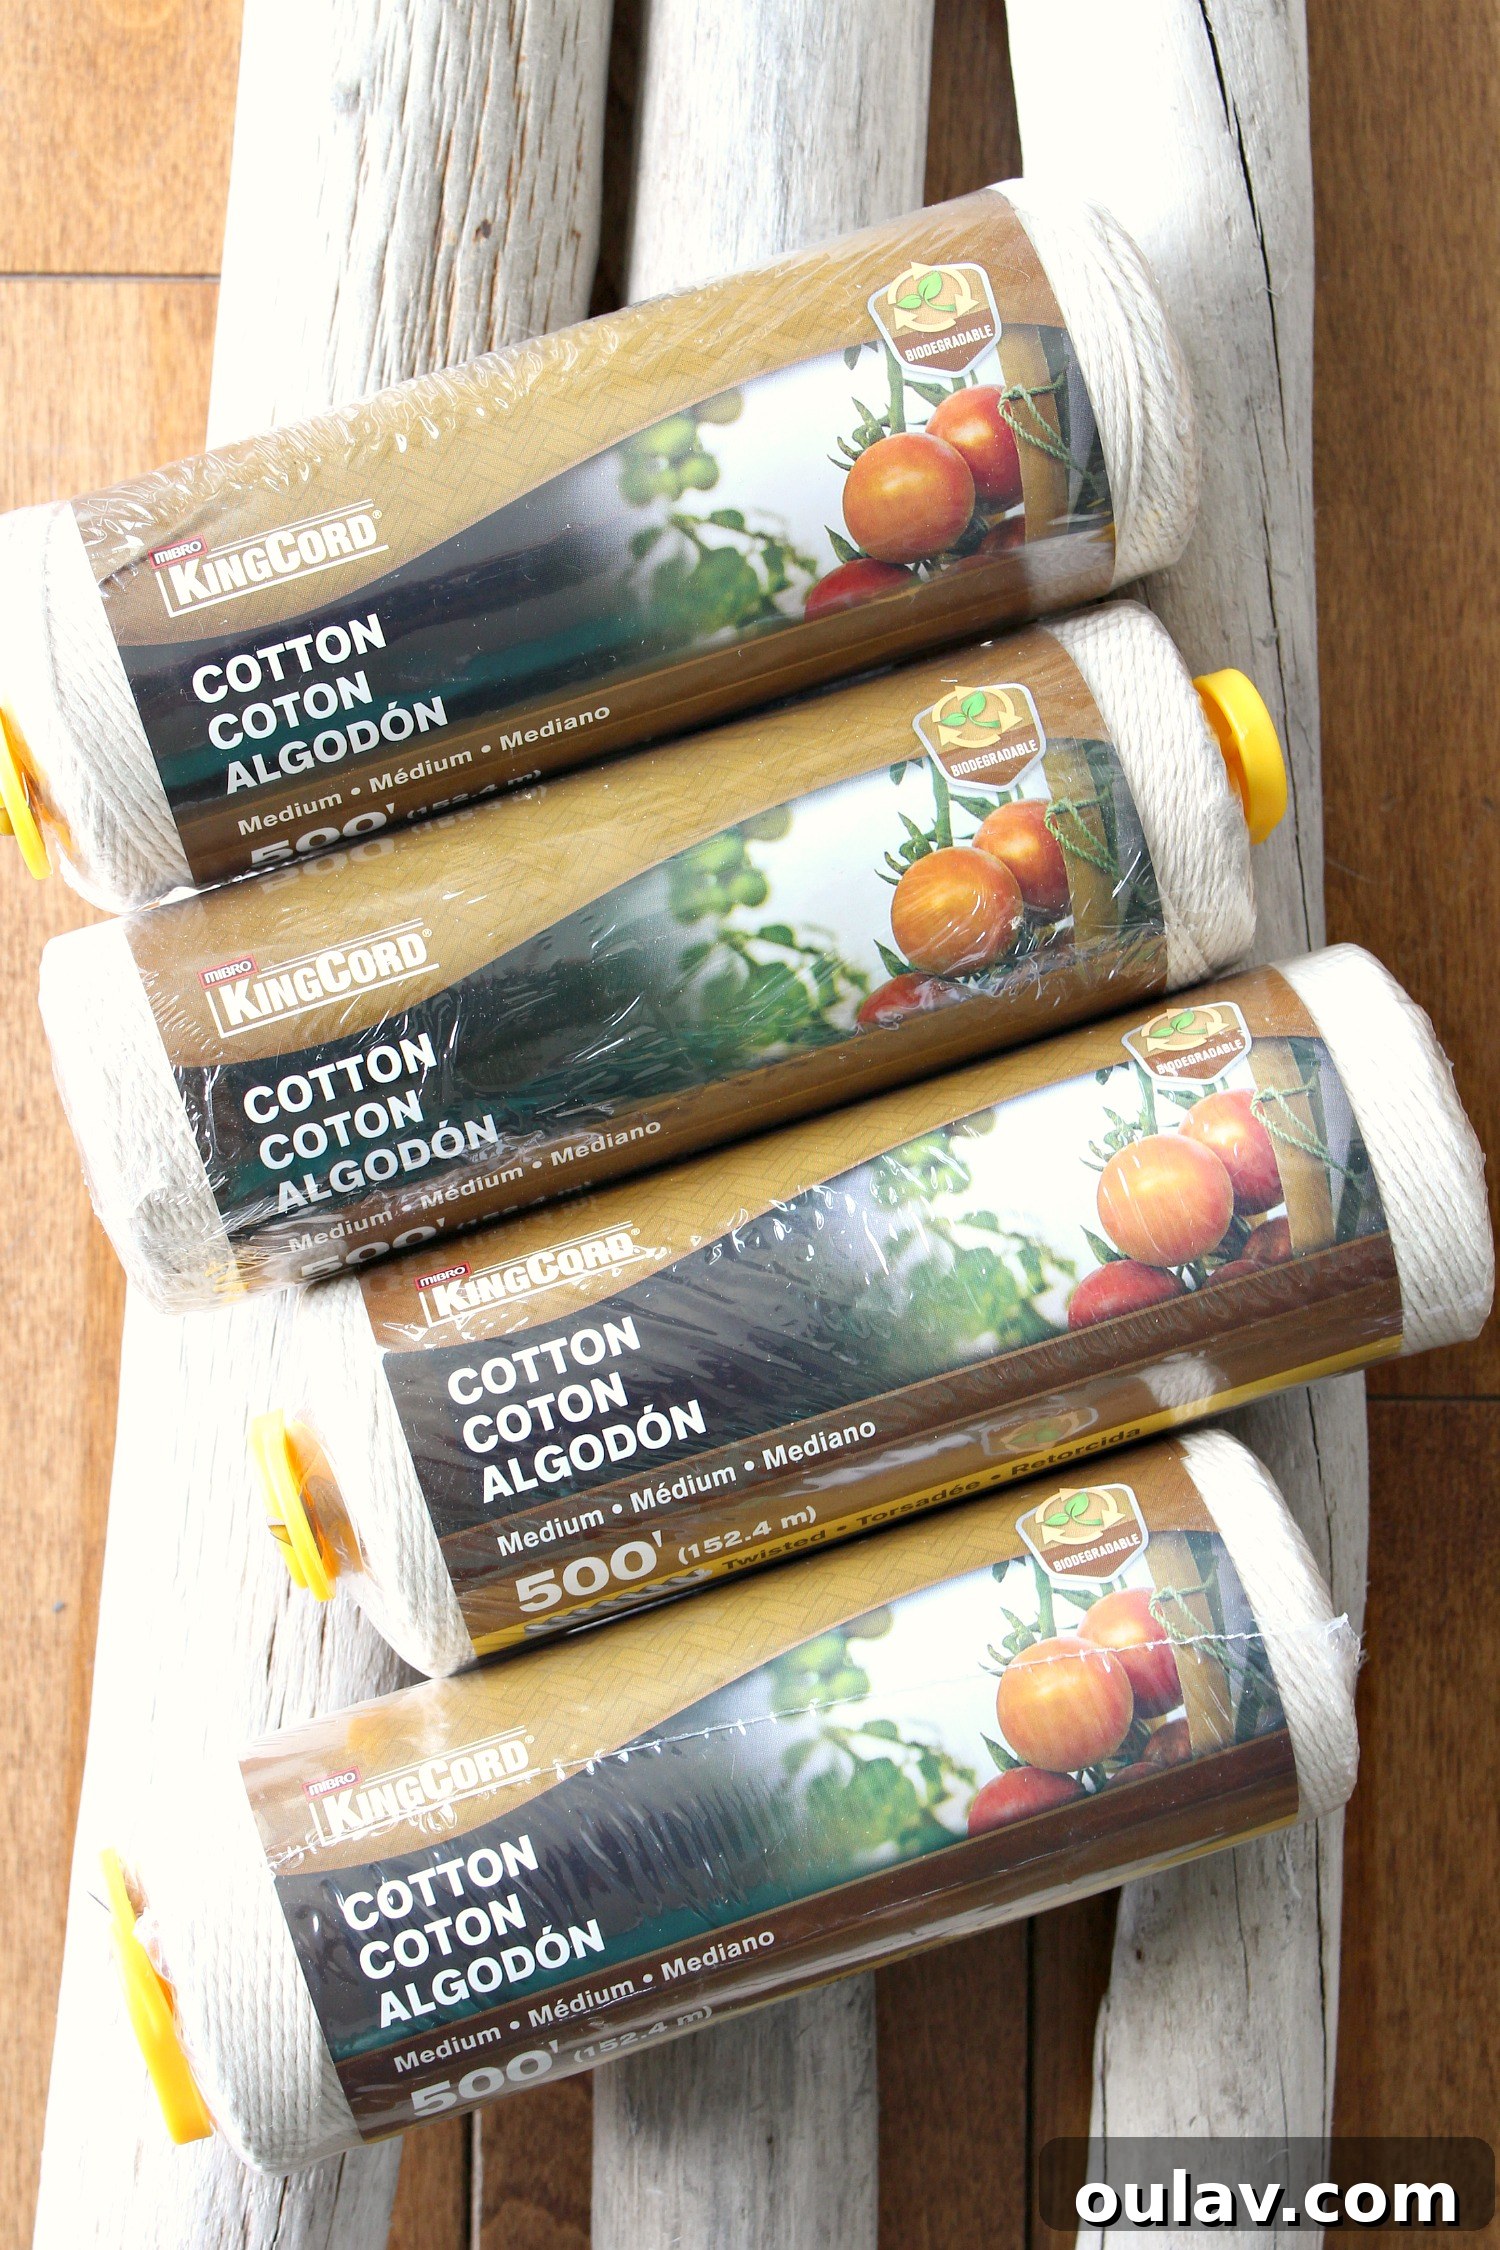
Essential Supplies for Your Coastal Macrame Wall Art:
Gathering the right materials is the first step to bringing your vision to life. This project requires only a few key items, making it accessible and budget-friendly:
- Cotton Cord/String: I specifically used KingCord medium-weight cotton cord for its excellent texture and knotting properties. For this small-to-medium project, I utilized less than 250 feet, so a standard spool should suffice for multiple attempts or a larger piece. Cotton is ideal as it takes dye beautifully and will not be subjected to washing.
- Driftwood, Branch, or Dowel: The focal point of your wall hanging. Select a piece that resonates with your desired aesthetic. Driftwood offers a natural, weathered look, while a smooth dowel can provide a cleaner, more modern foundation.
- Dye (Optional): Any type of fabric dye suitable for cotton will work. Since this piece won’t be washed, you don’t need to worry about colorfastness for repeated laundering. Choose a color that complements your home decor or adds a vibrant pop.
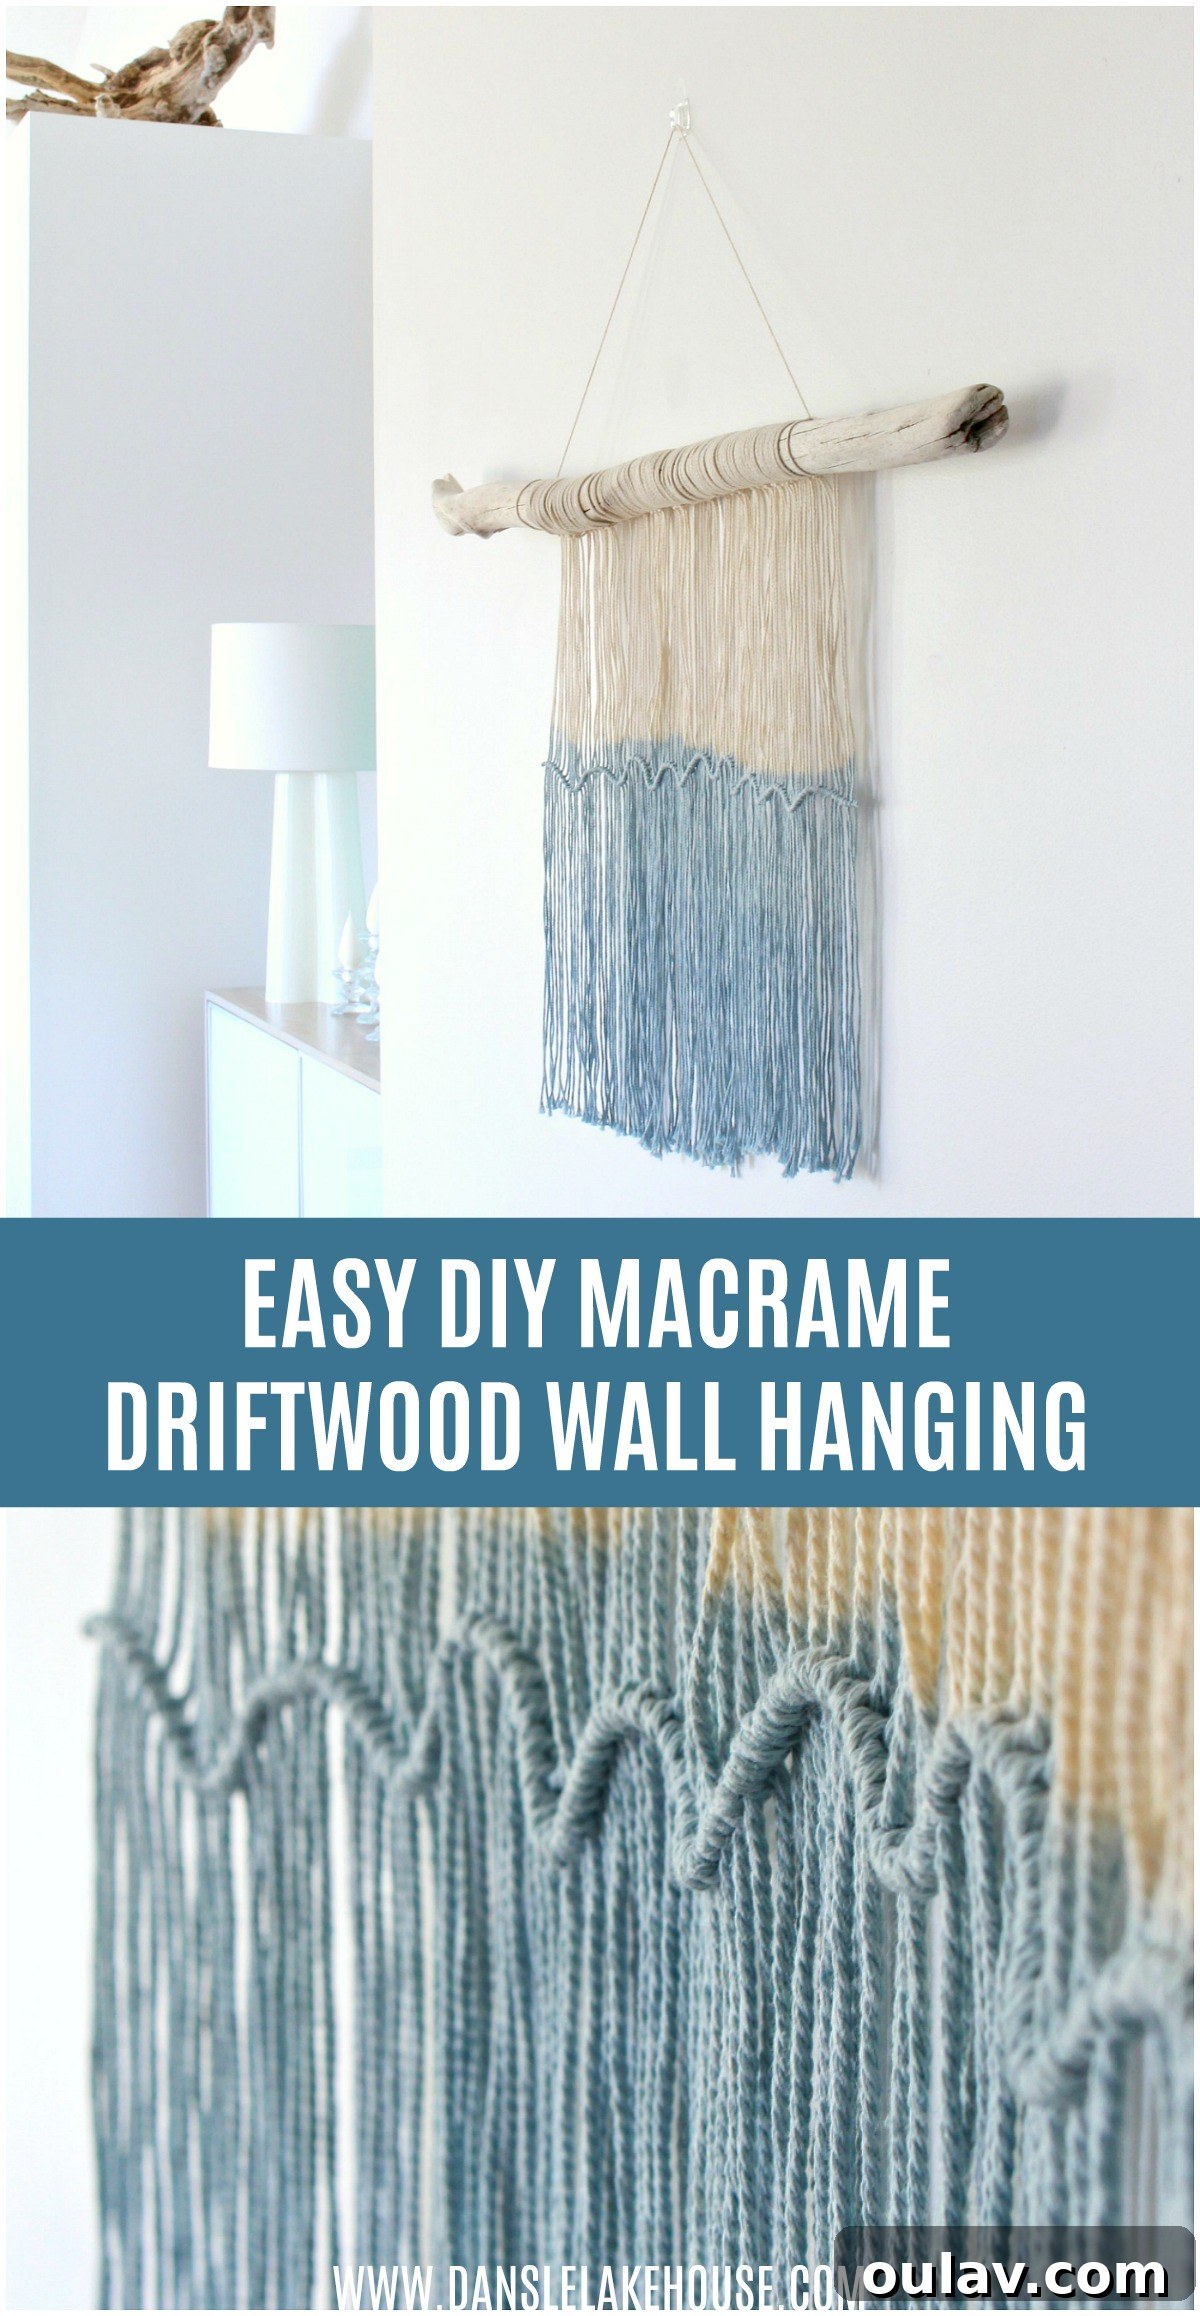
How to Craft Your Easy DIY Macrame and Driftwood Wall Hanging: A Step-by-Step Guide
1. Preparing Your String and Driftwood:
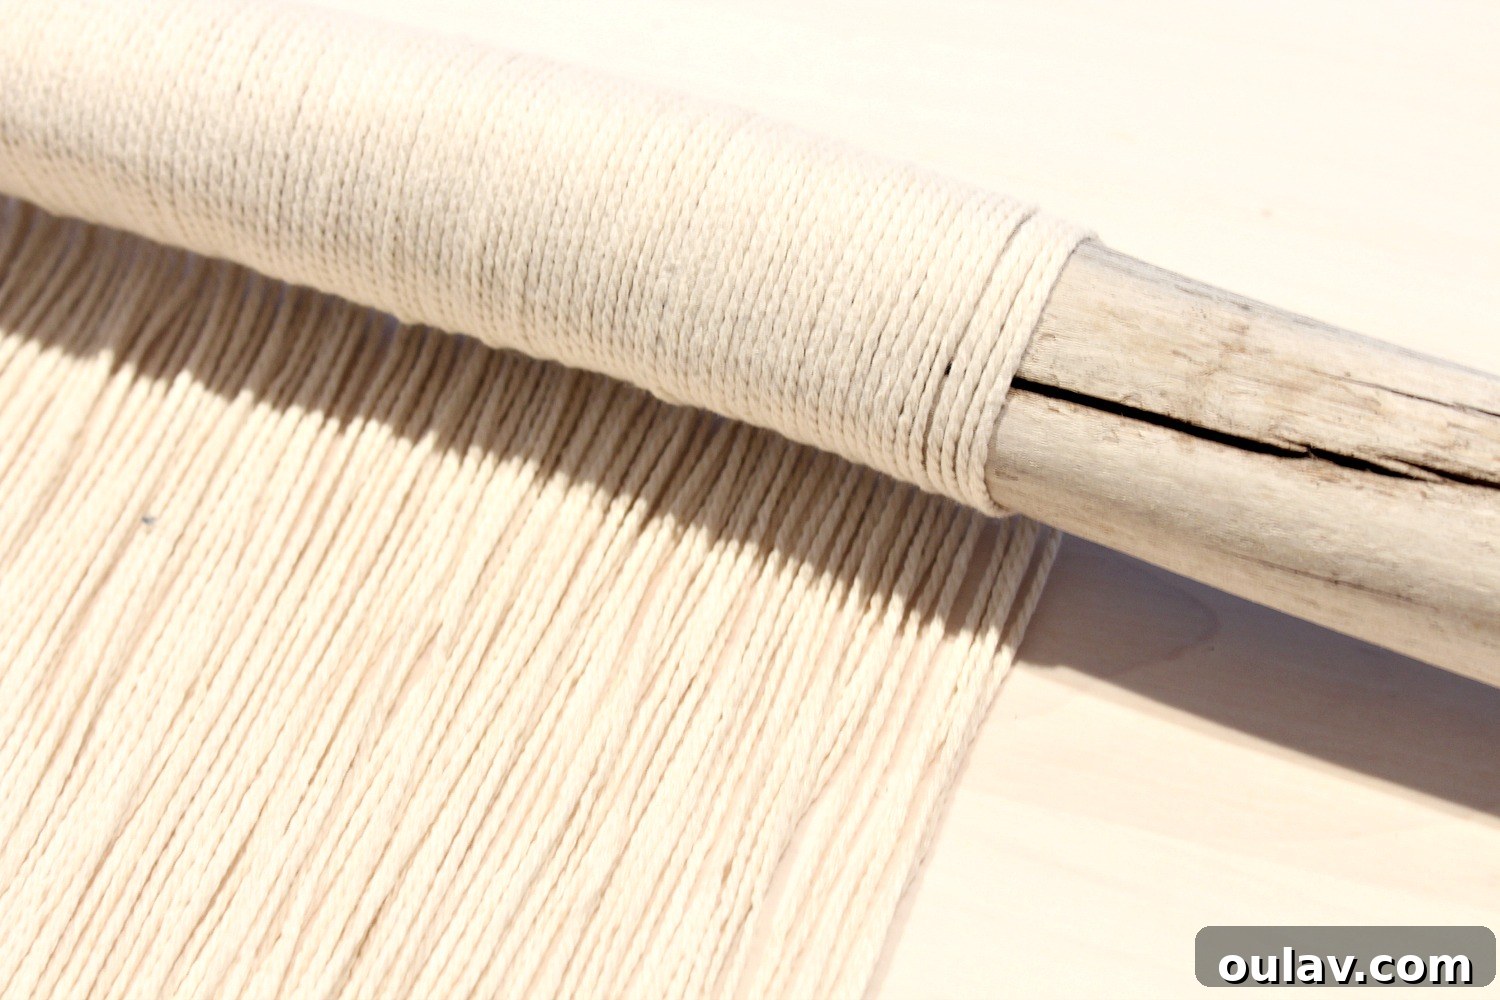
The first step is to prepare your string lengths. The ultimate hanging length is a personal preference, so feel free to experiment with a single strand first. As a general rule, you’ll want to cut your string a bit more than twice the desired finished length of your wall hanging. Once you have an ideal length, use it as a template to cut all your subsequent strings. Take each cut length of string and fold it precisely in half. Position the folded loop over your chosen driftwood or branch. Then, thread the two loose ends of the string through this loop and pull tightly, securing the string to your base. This is commonly known as a Lark’s Head knot.
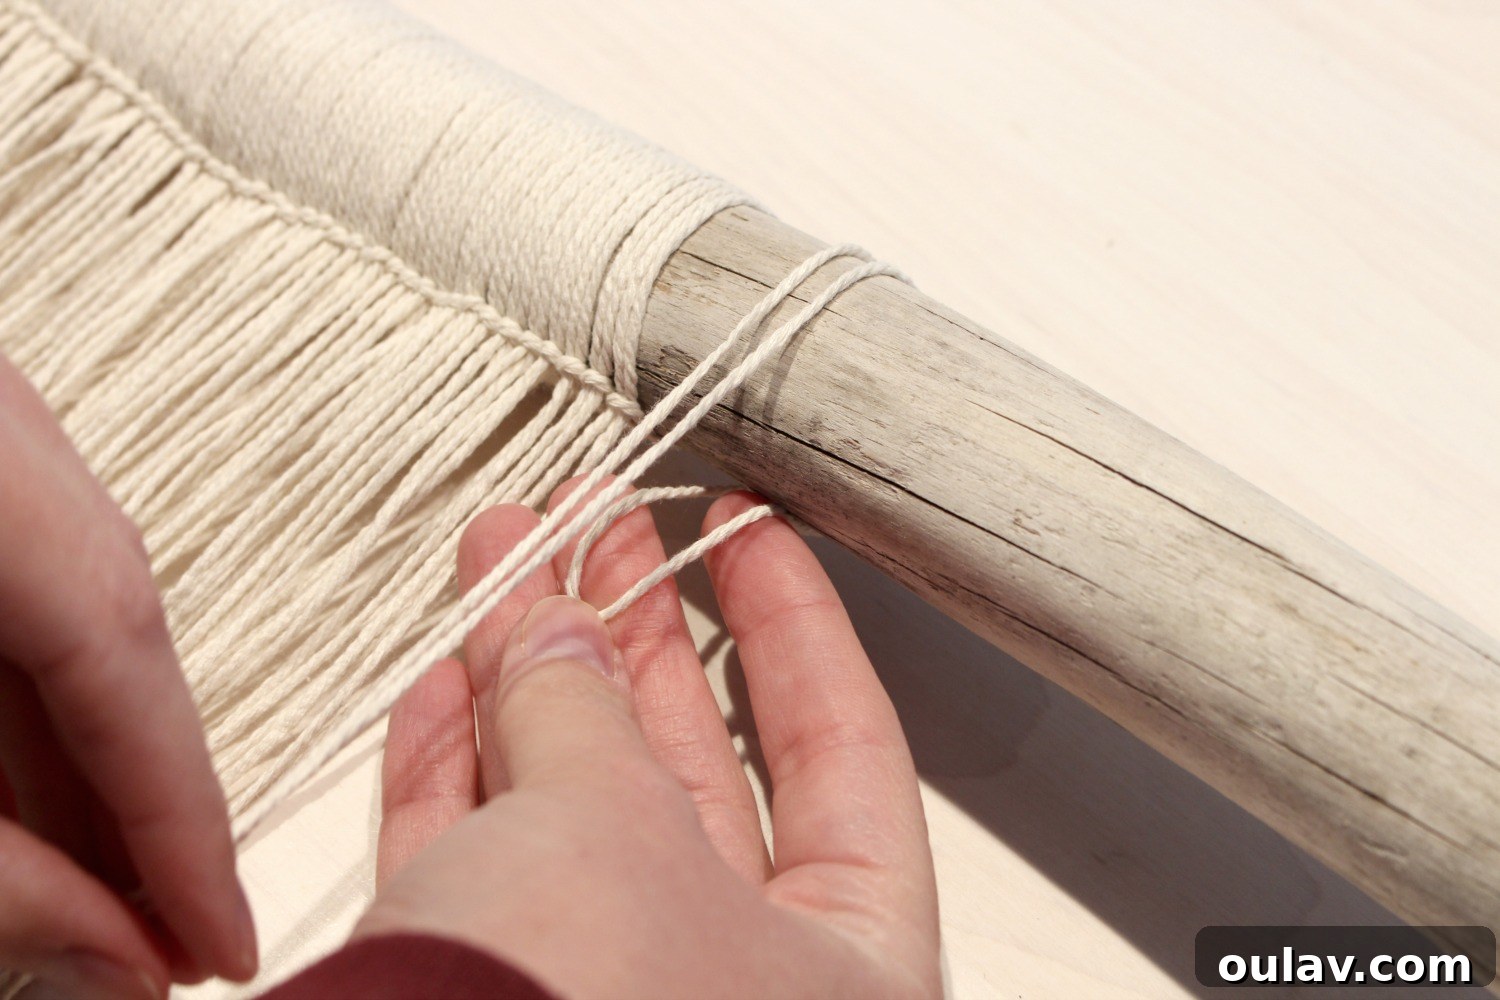
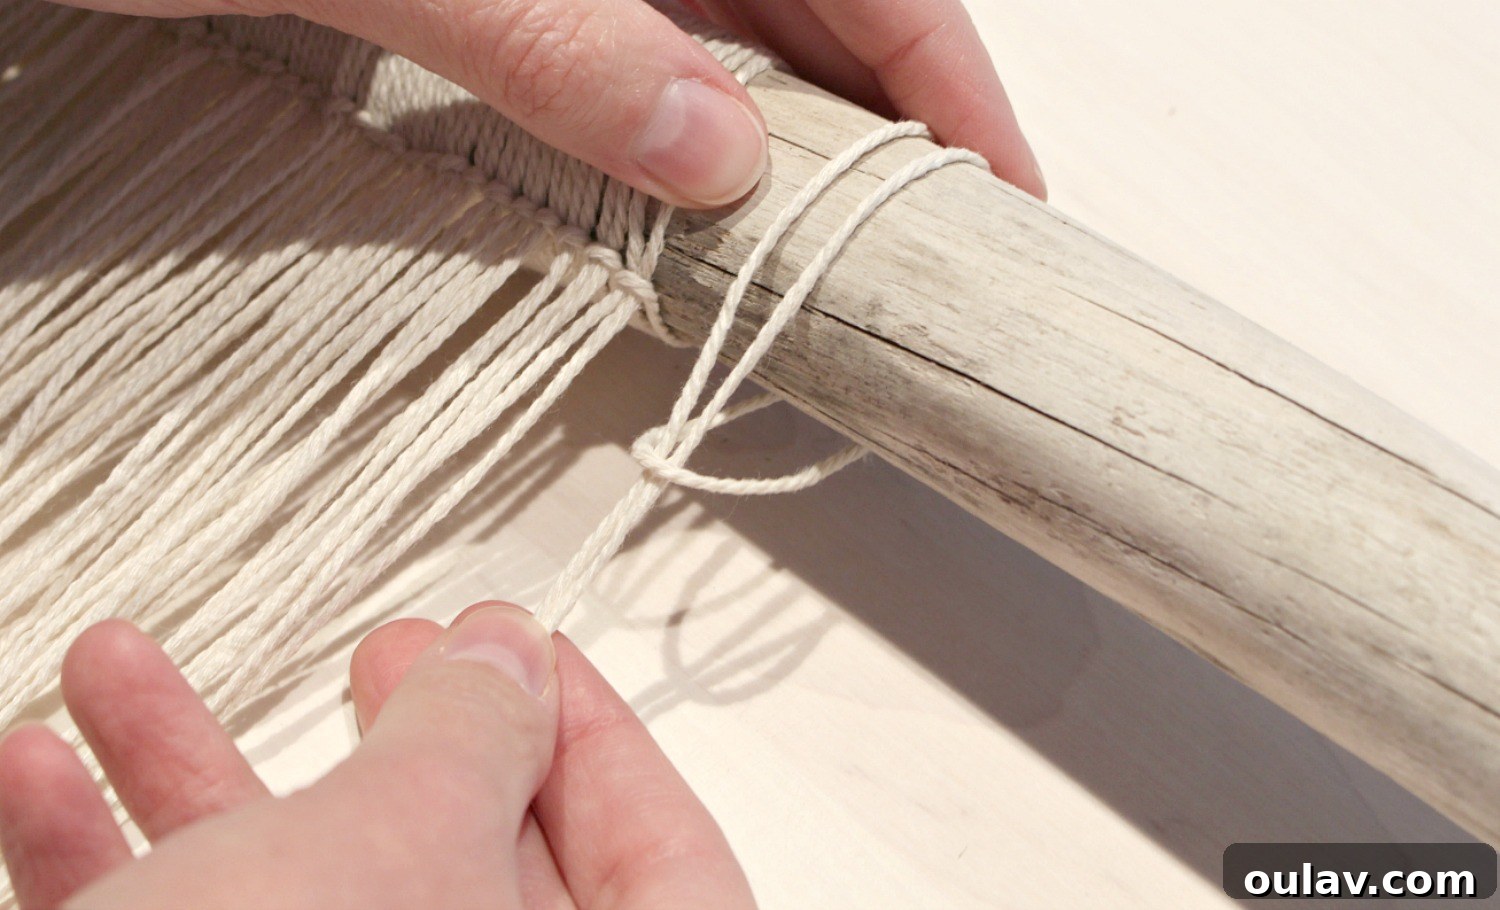
2. Arranging Your Strings:
Repeat the looping process until you’ve attached all your desired strings to the driftwood. Crucially, ensure you space your strings evenly along the driftwood *as you go*. Attempting to adjust the spacing once all strings are attached is significantly more challenging. Taking the time to achieve proper spacing at this initial stage will contribute greatly to the overall balanced and professional appearance of your finished piece.
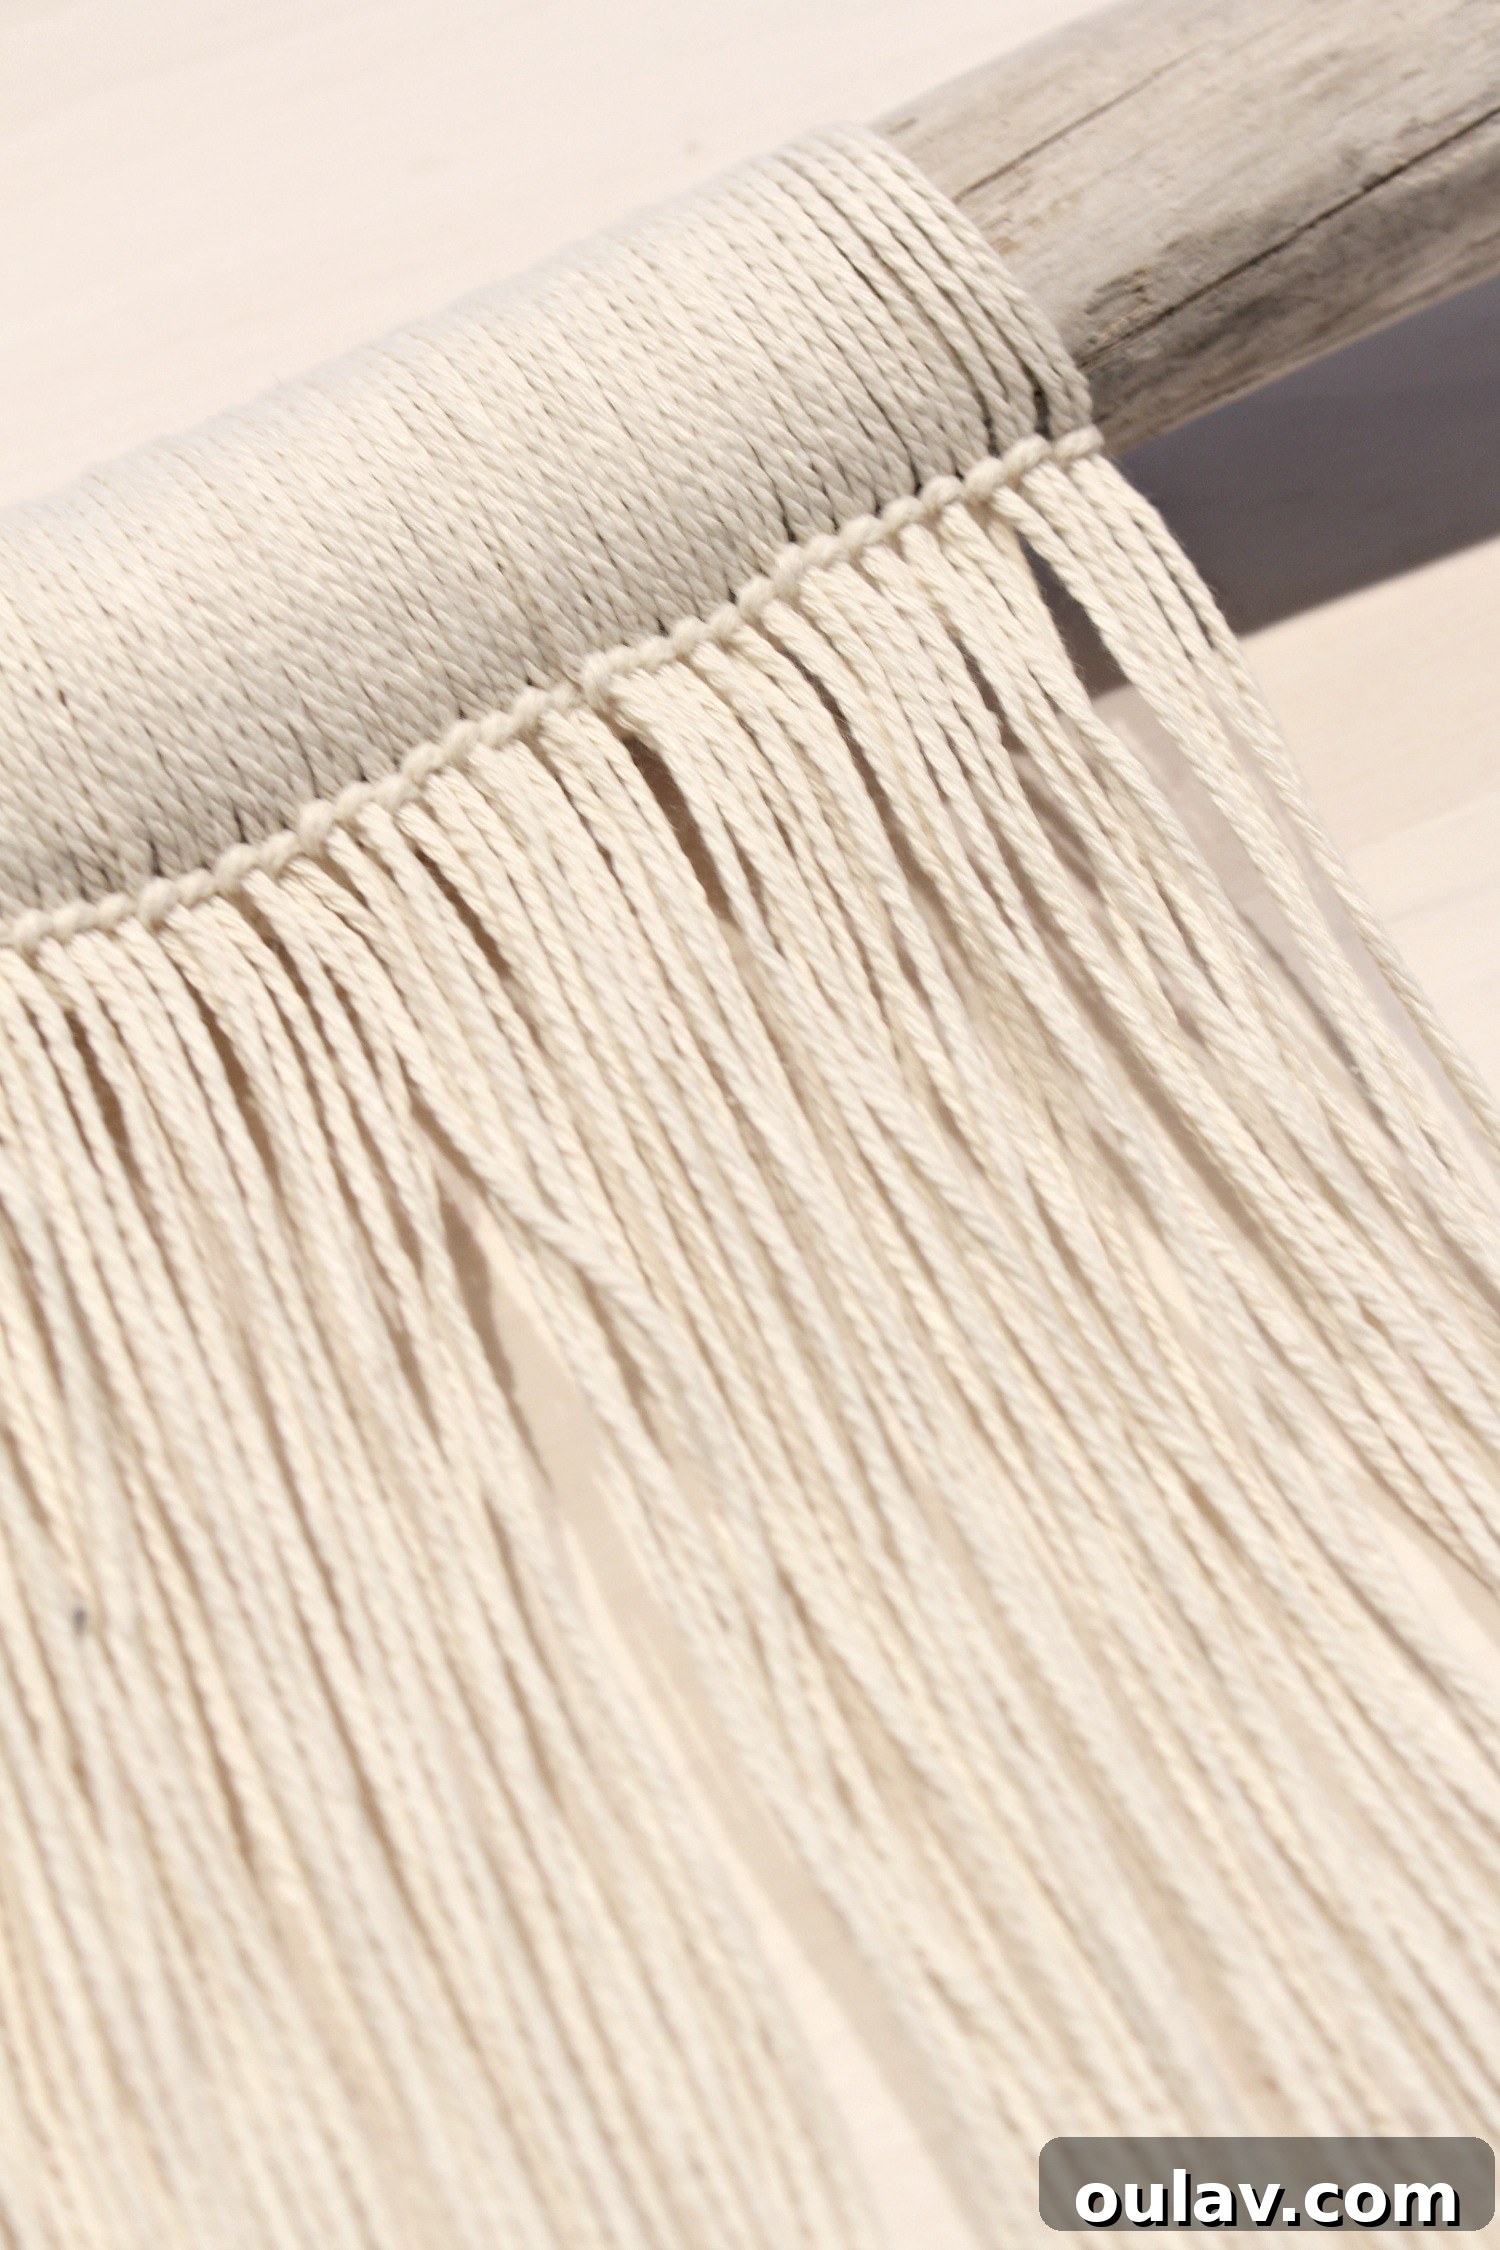
3. Introducing the Clove Hitch Knot (for the Wave Pattern):
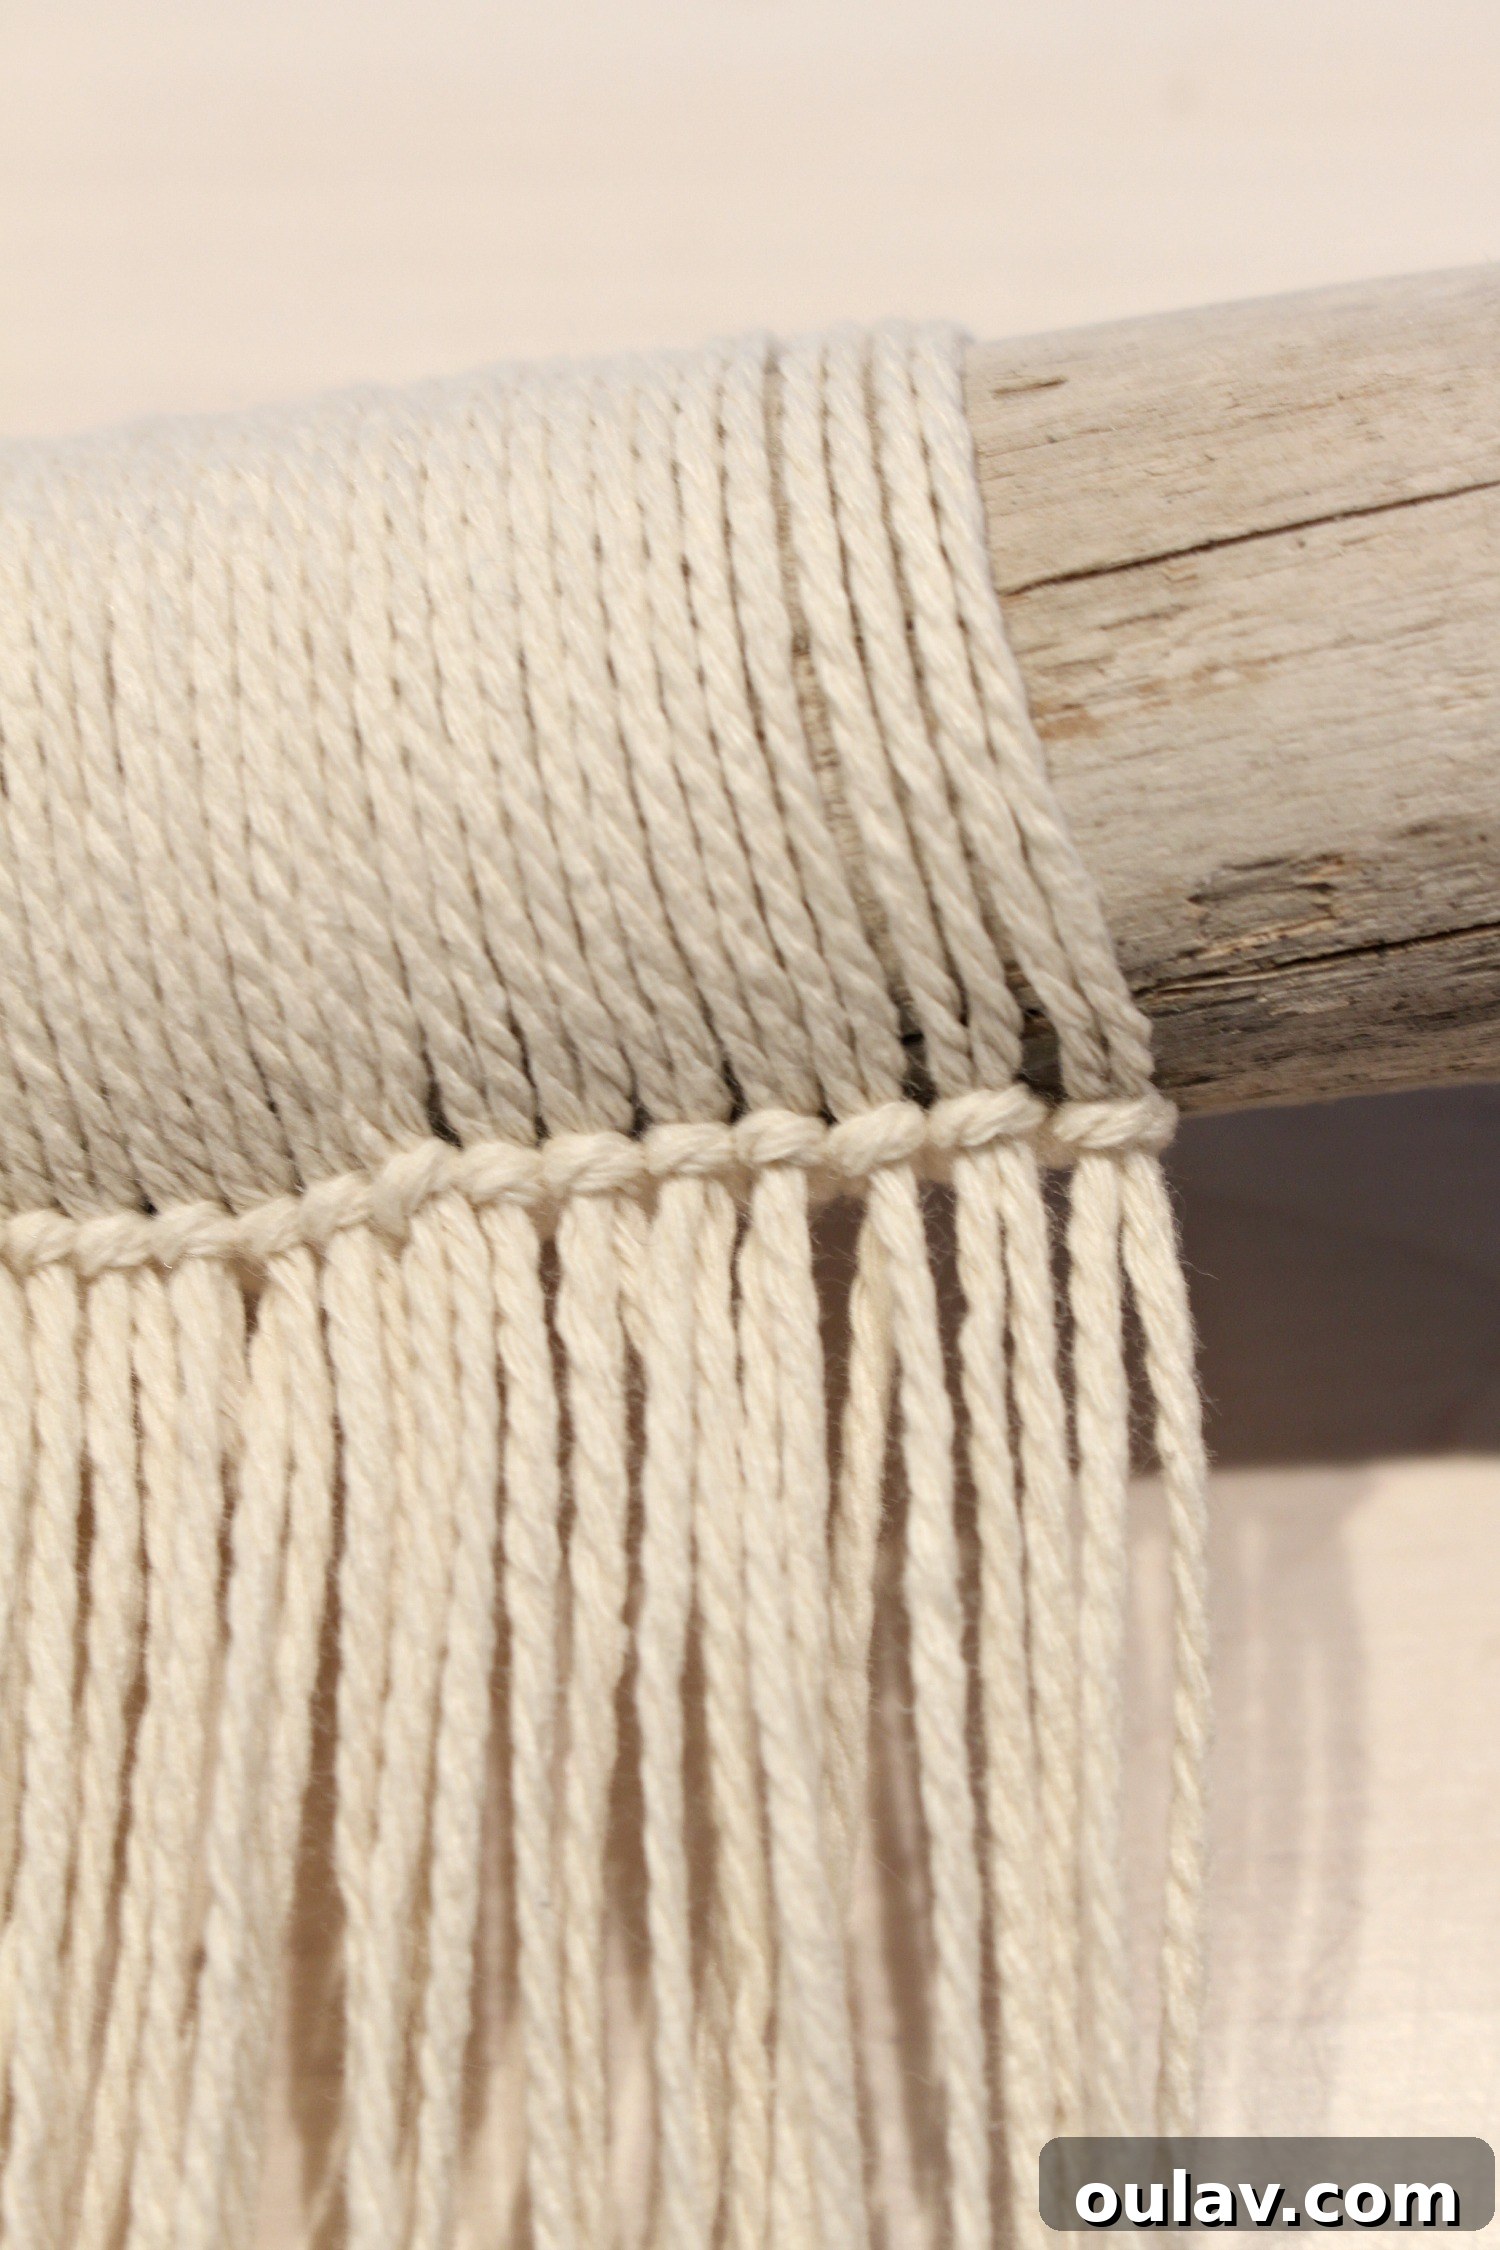
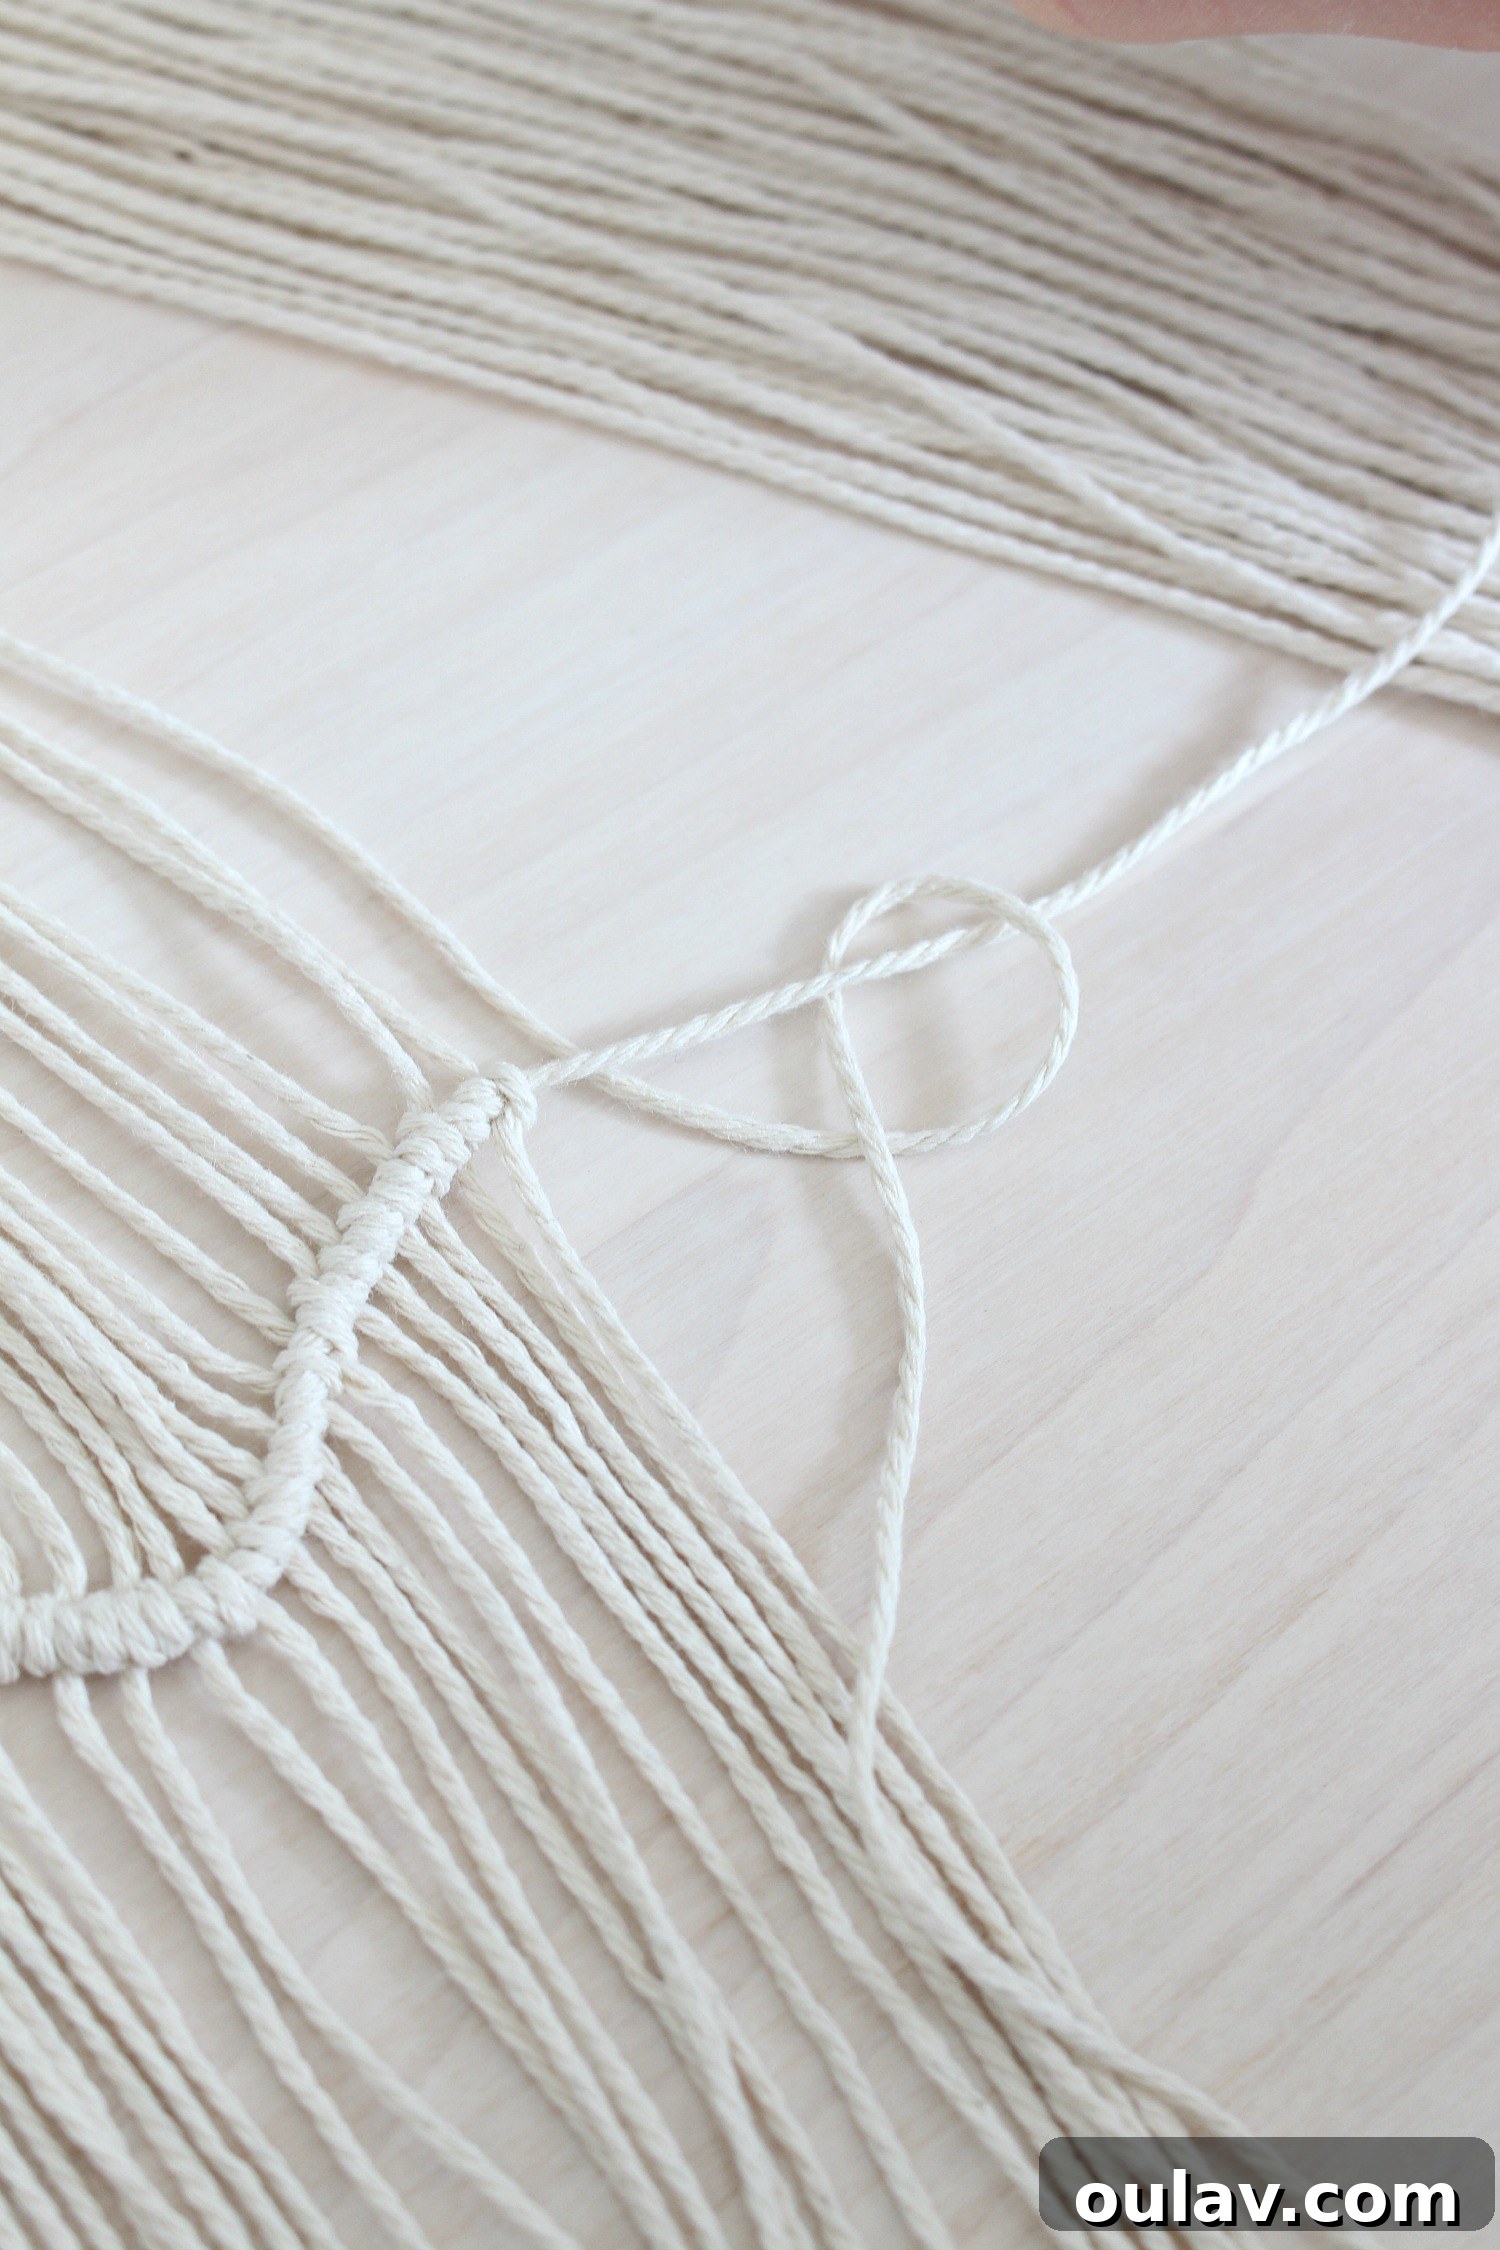
Once all your vertical strings are in place, cut an additional piece of string—this will be your horizontal working string—roughly twice the width of your entire wall hanging. The “wave” pattern is created using a simple yet effective macrame knot known as the clove hitch. This knot involves tying each individual vertical string around this single horizontal string, working your way across the piece. While it is simple, it is also time-consuming due to the repetitive nature of knotting each string. For visual tutorials, searching for “clove hitch macrame” online will yield many helpful videos. Here’s a detailed description of the process:
First, lay your horizontal string across the top of your suspended vertical strings. Take the end of the *first* vertical string (the one closest to you if you’re starting from left to right). Pull it up and over the horizontal piece, then guide it to the left side of the upper portion of that same vertical string, finally threading it back underneath the horizontal piece. This creates your first half of the knot.
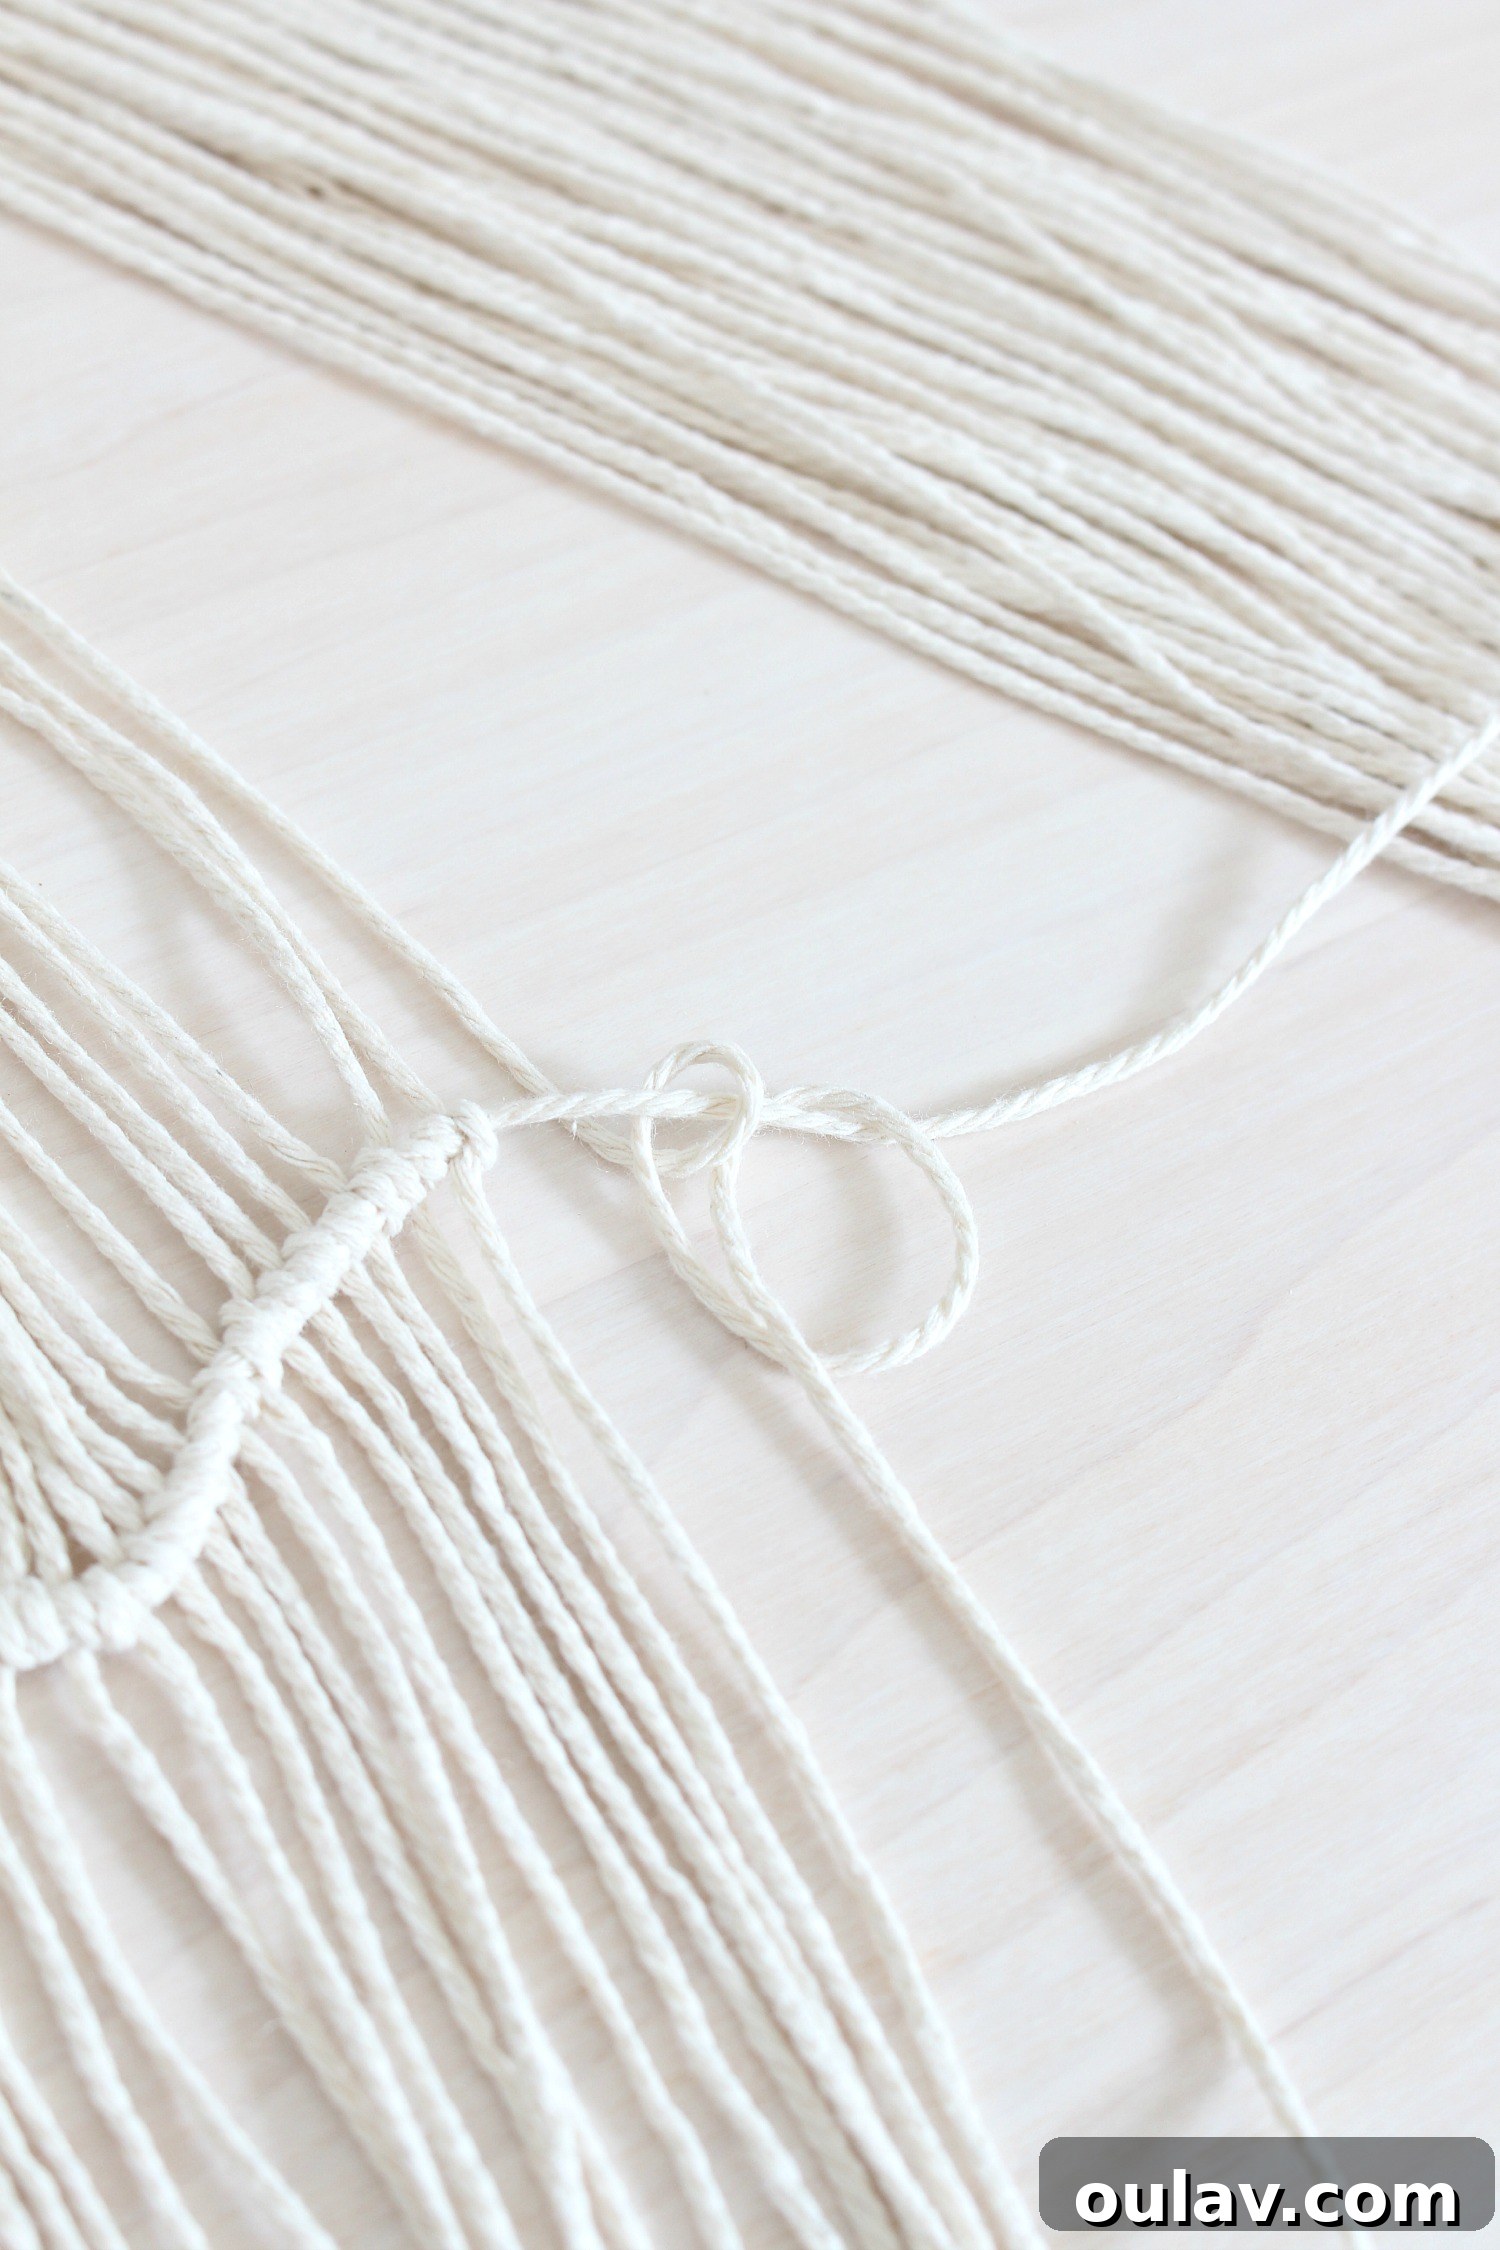
Next, take the same end of that vertical string and pull it up and over the horizontal piece again, but this time to the right of the loop you just formed. Thread the end of the string back down towards yourself, going under the horizontal piece, and immediately over the first loop you created with that vertical string. This completes the second half of the knot.
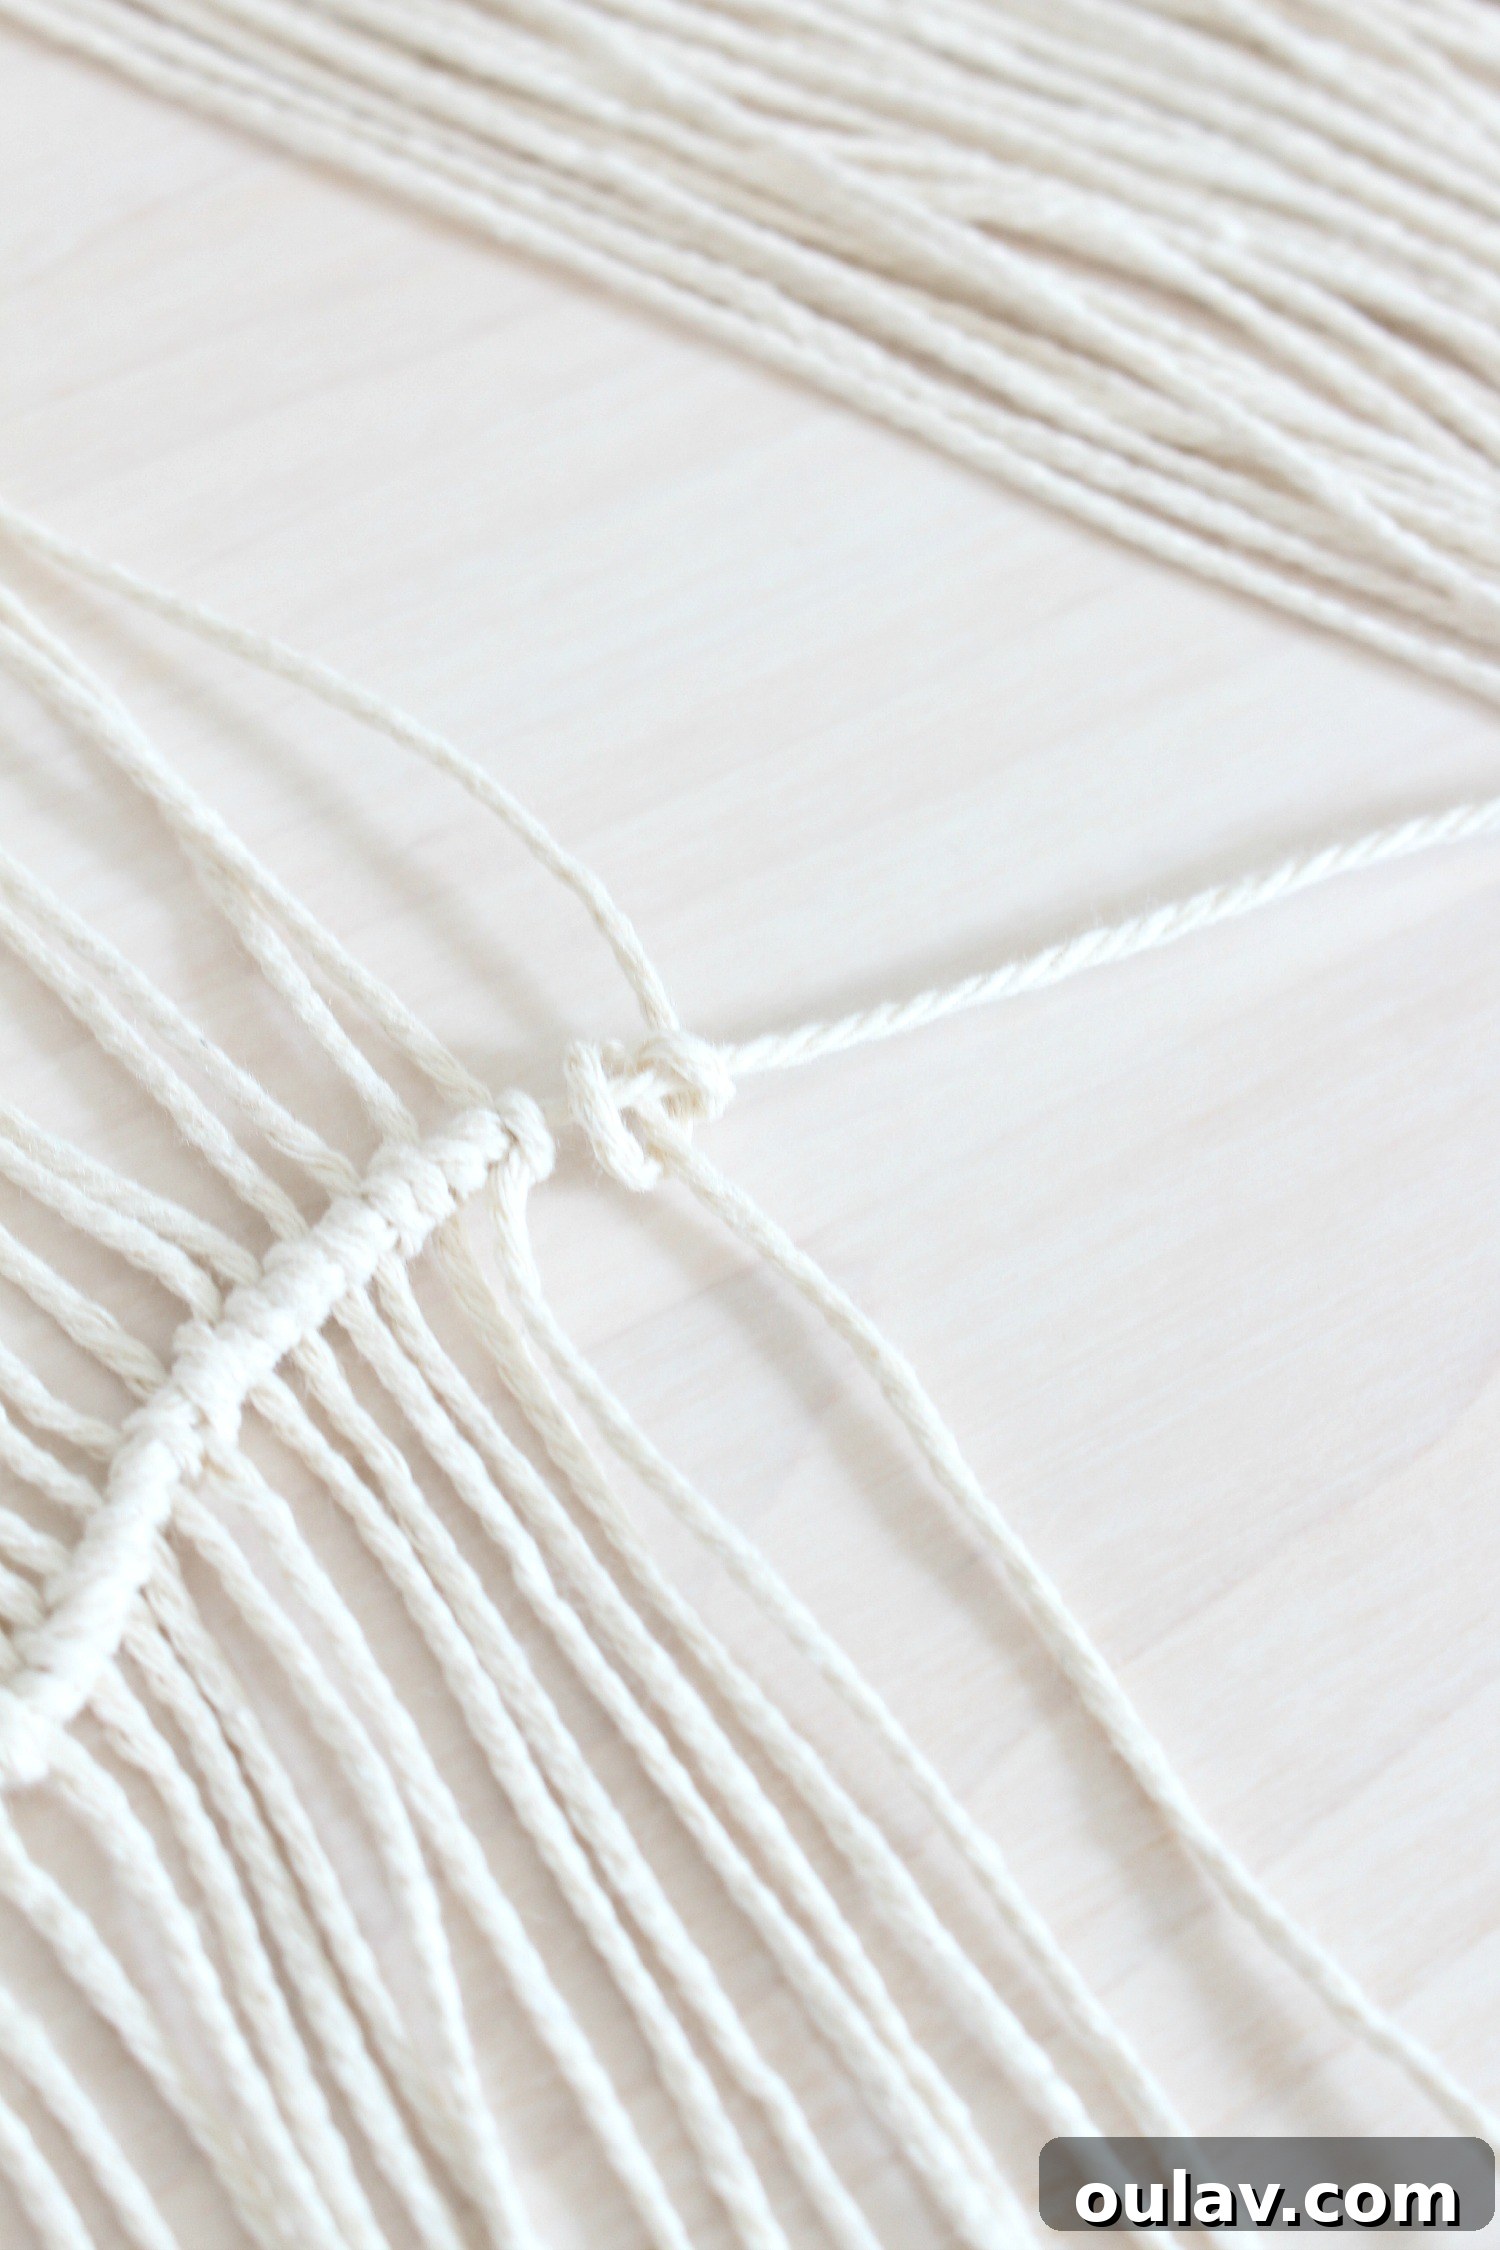
Now, carefully pull the knot tight, adjusting its position on the horizontal string to create the desired tension and shape. Repeat this process for every vertical string across your entire wall hanging.
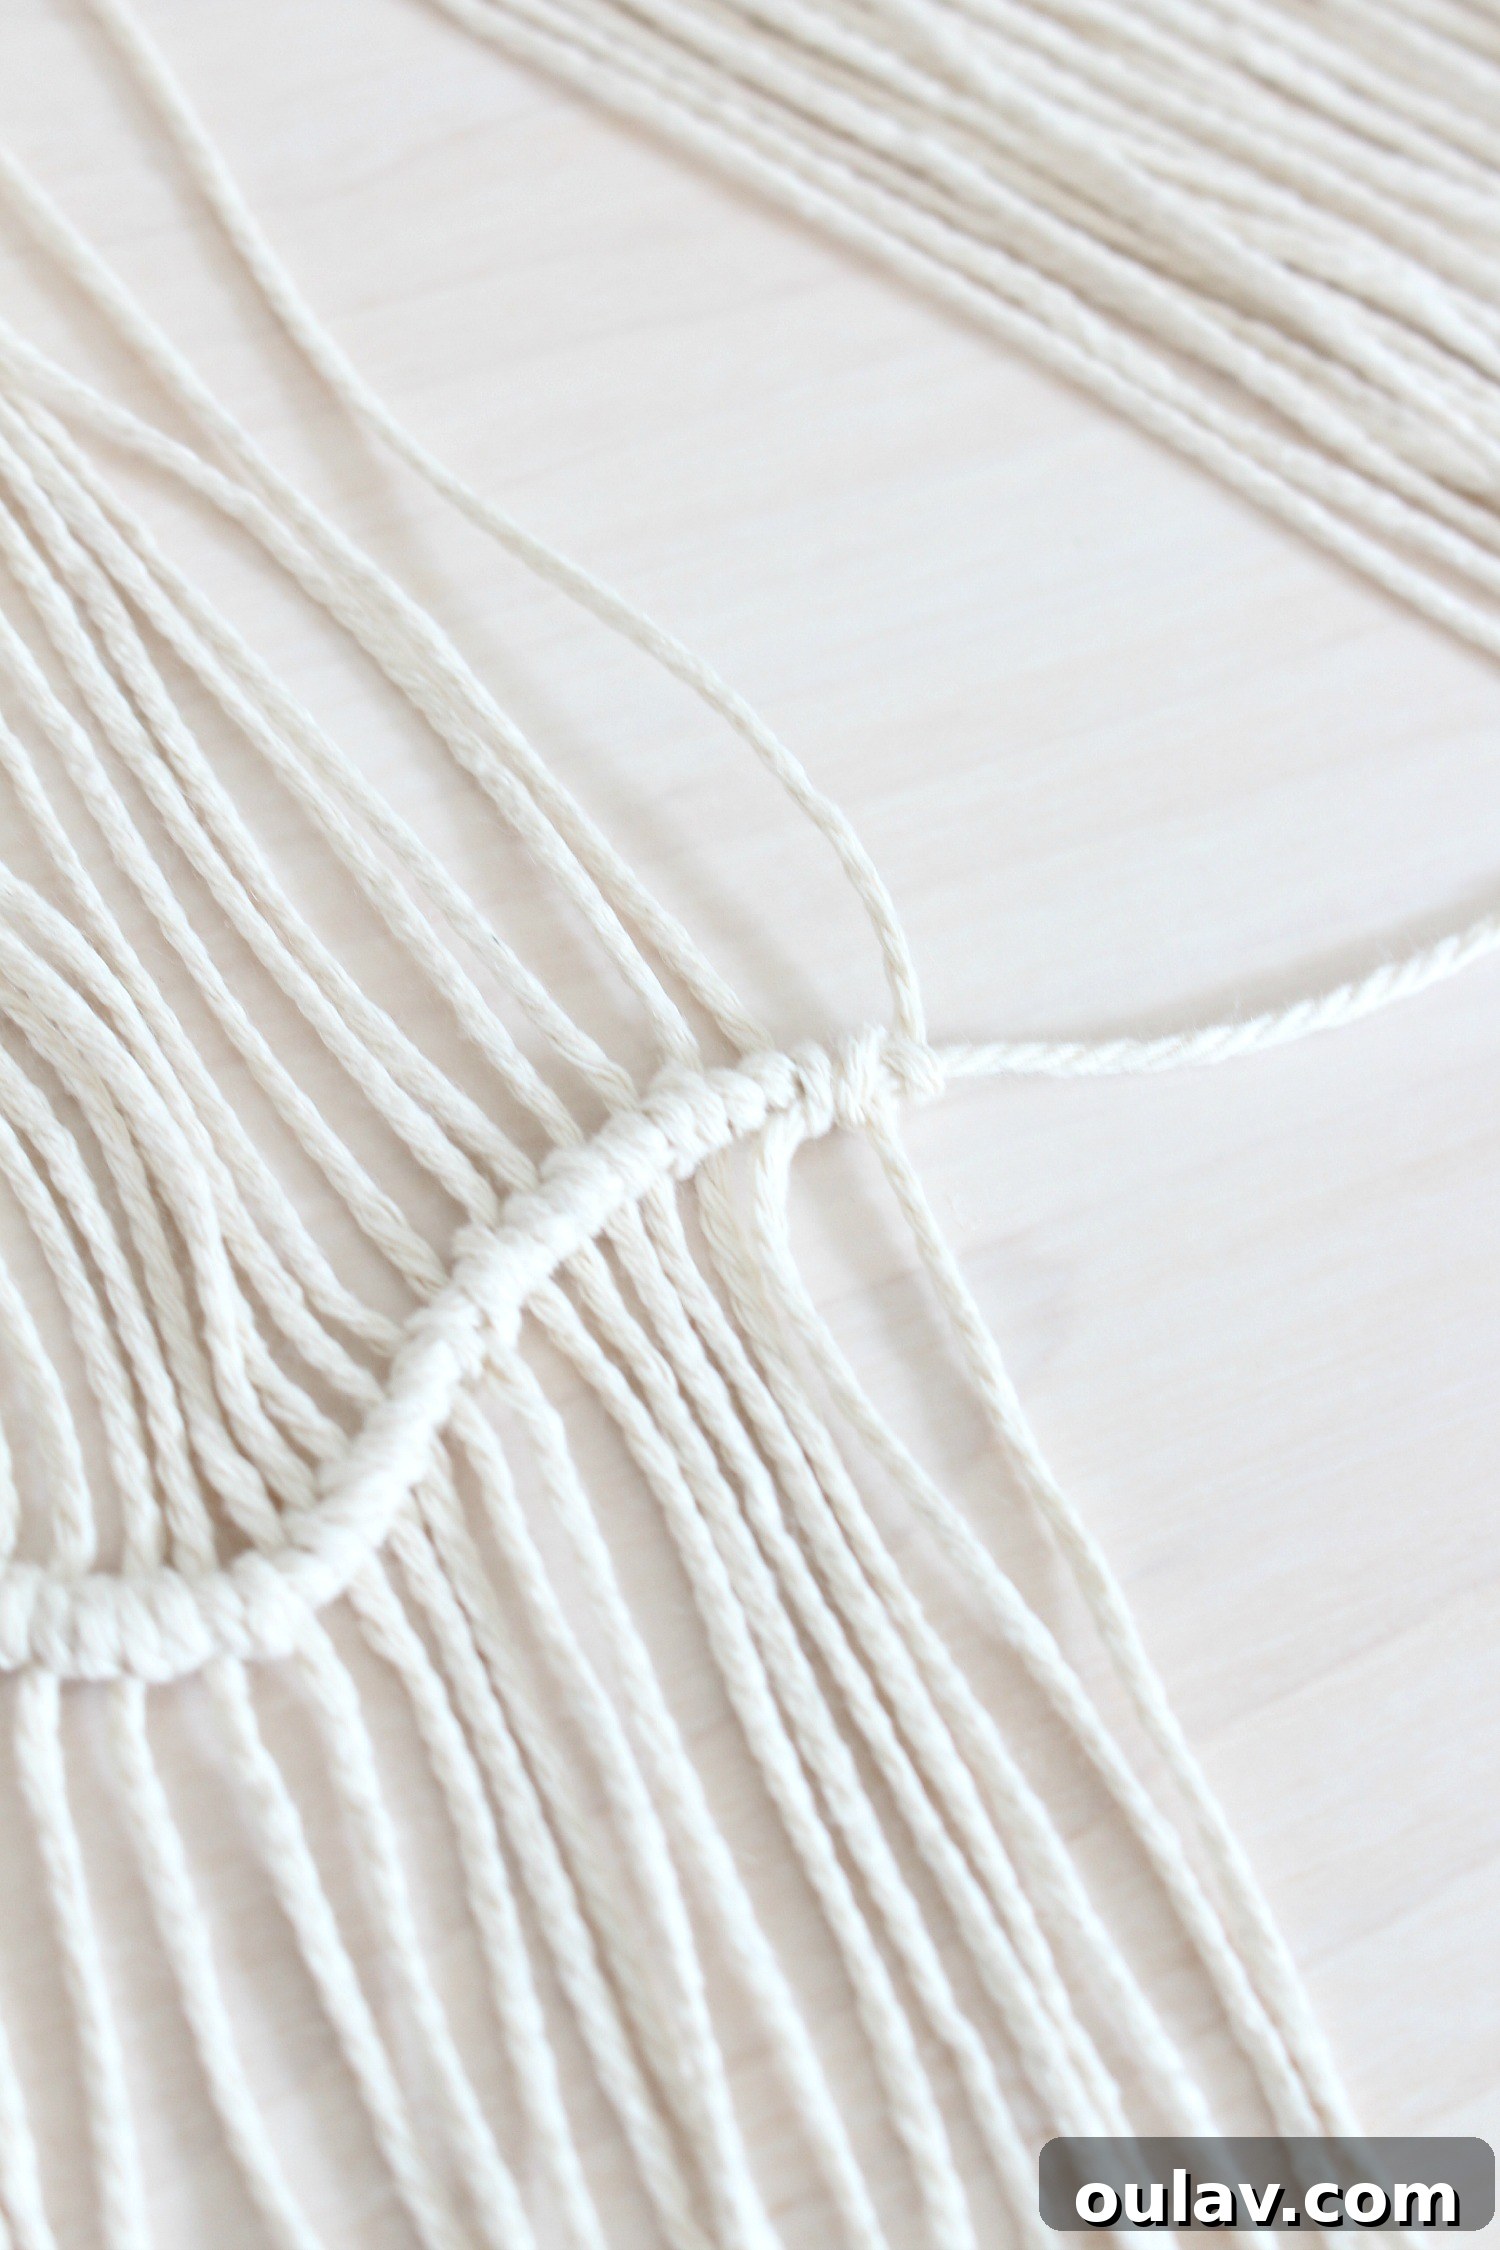
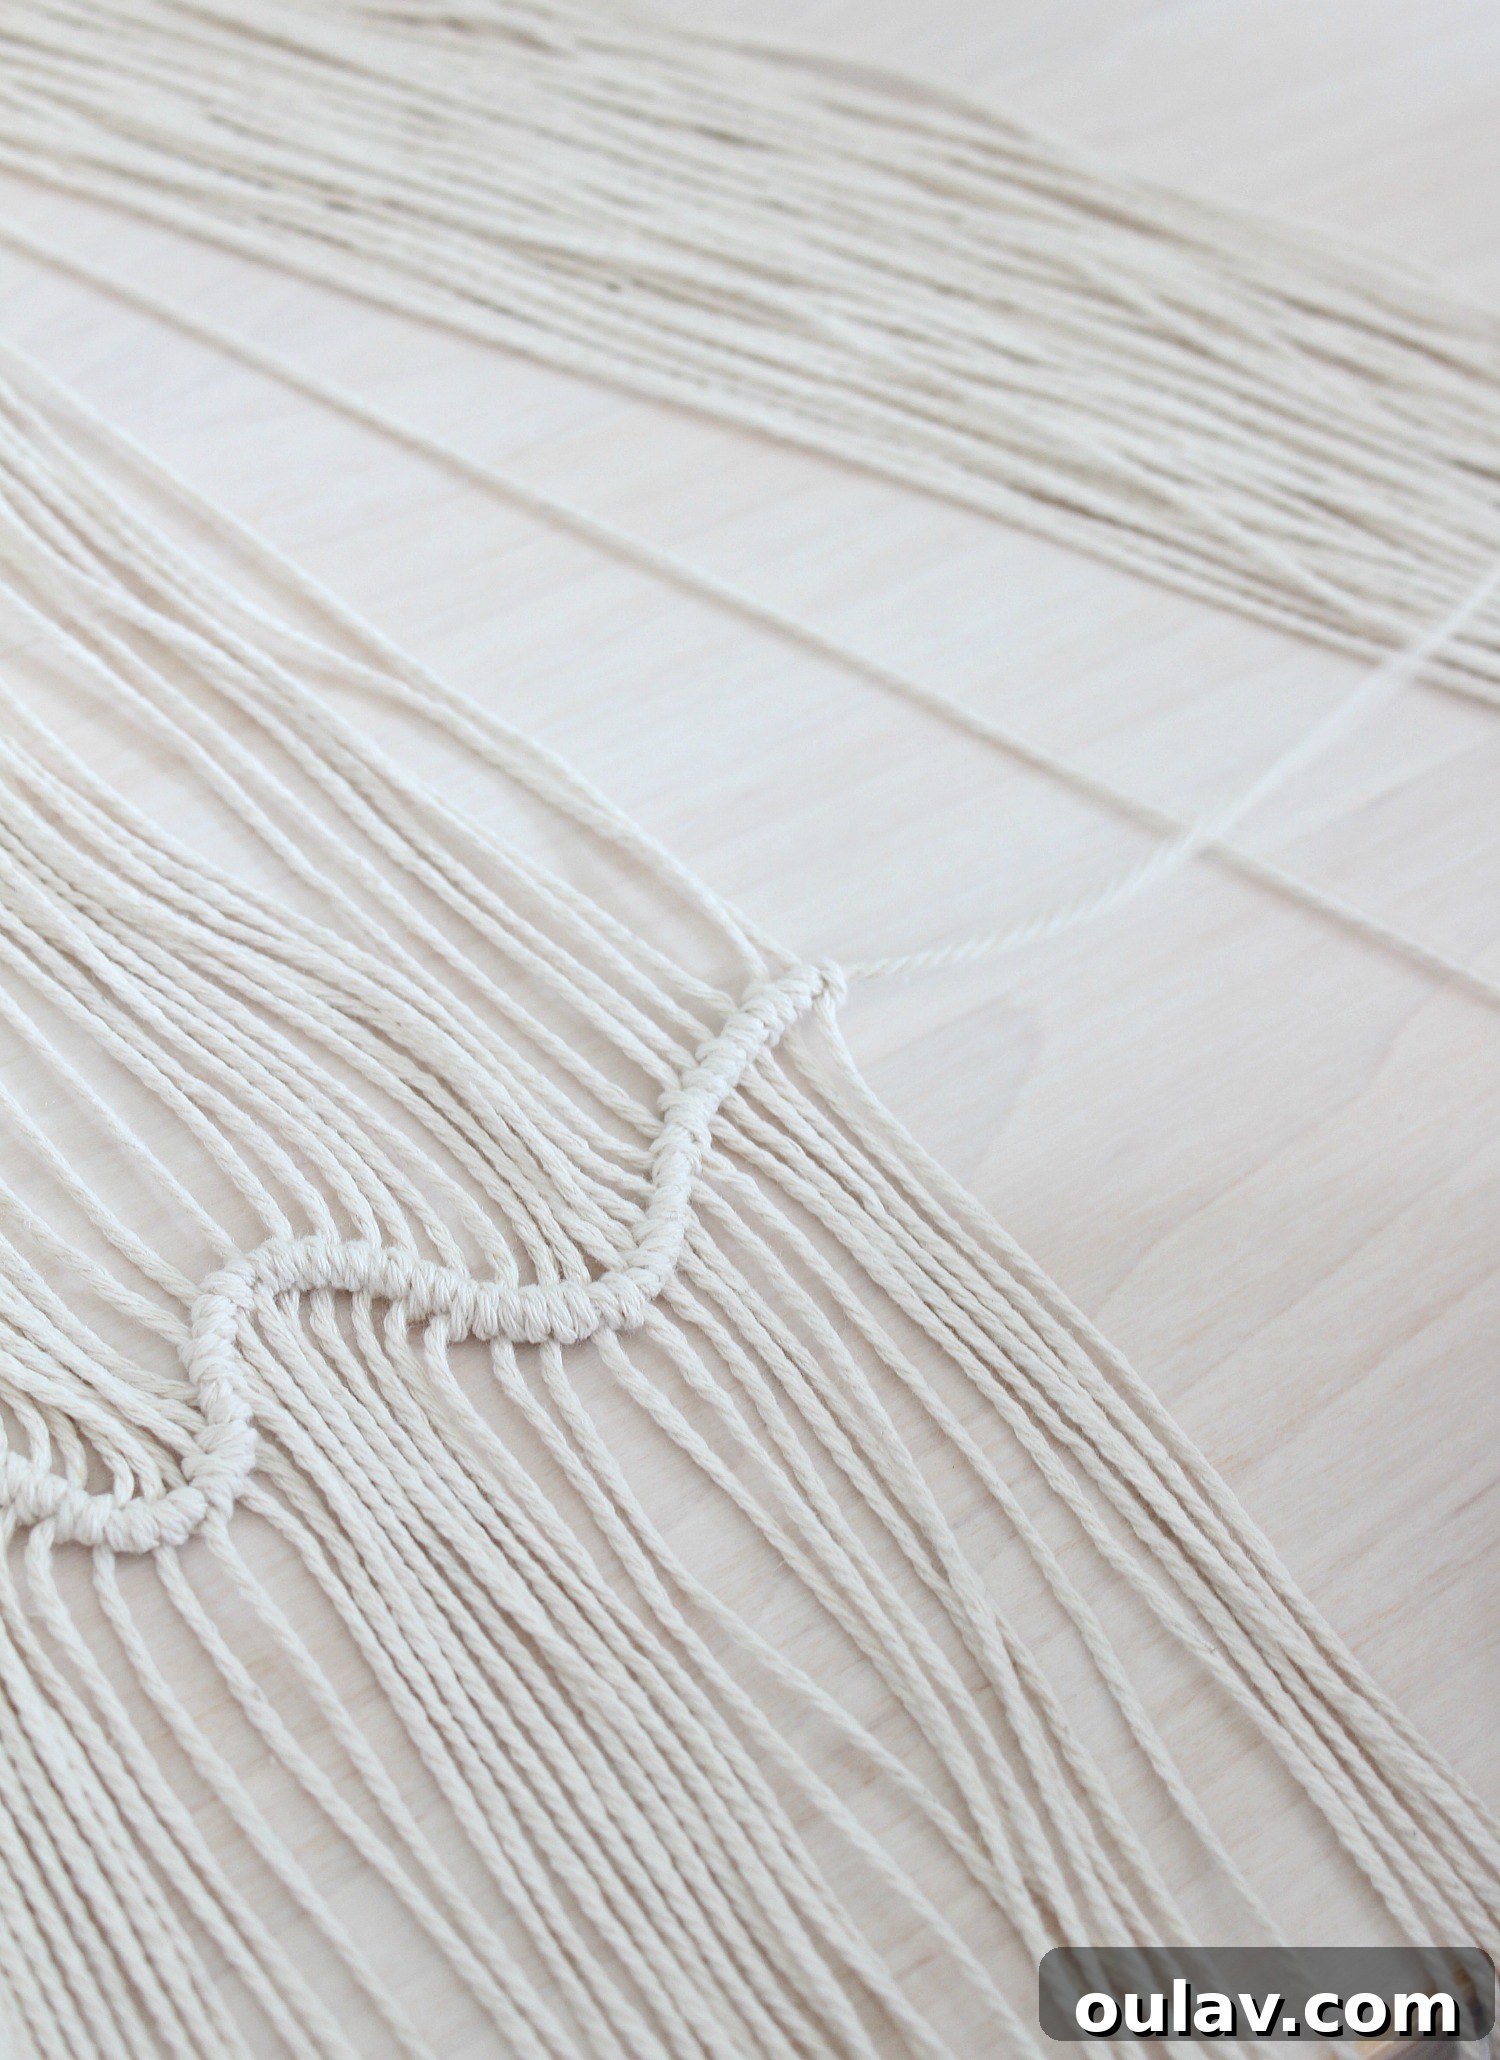
4. Creating the “Wave” Effect:
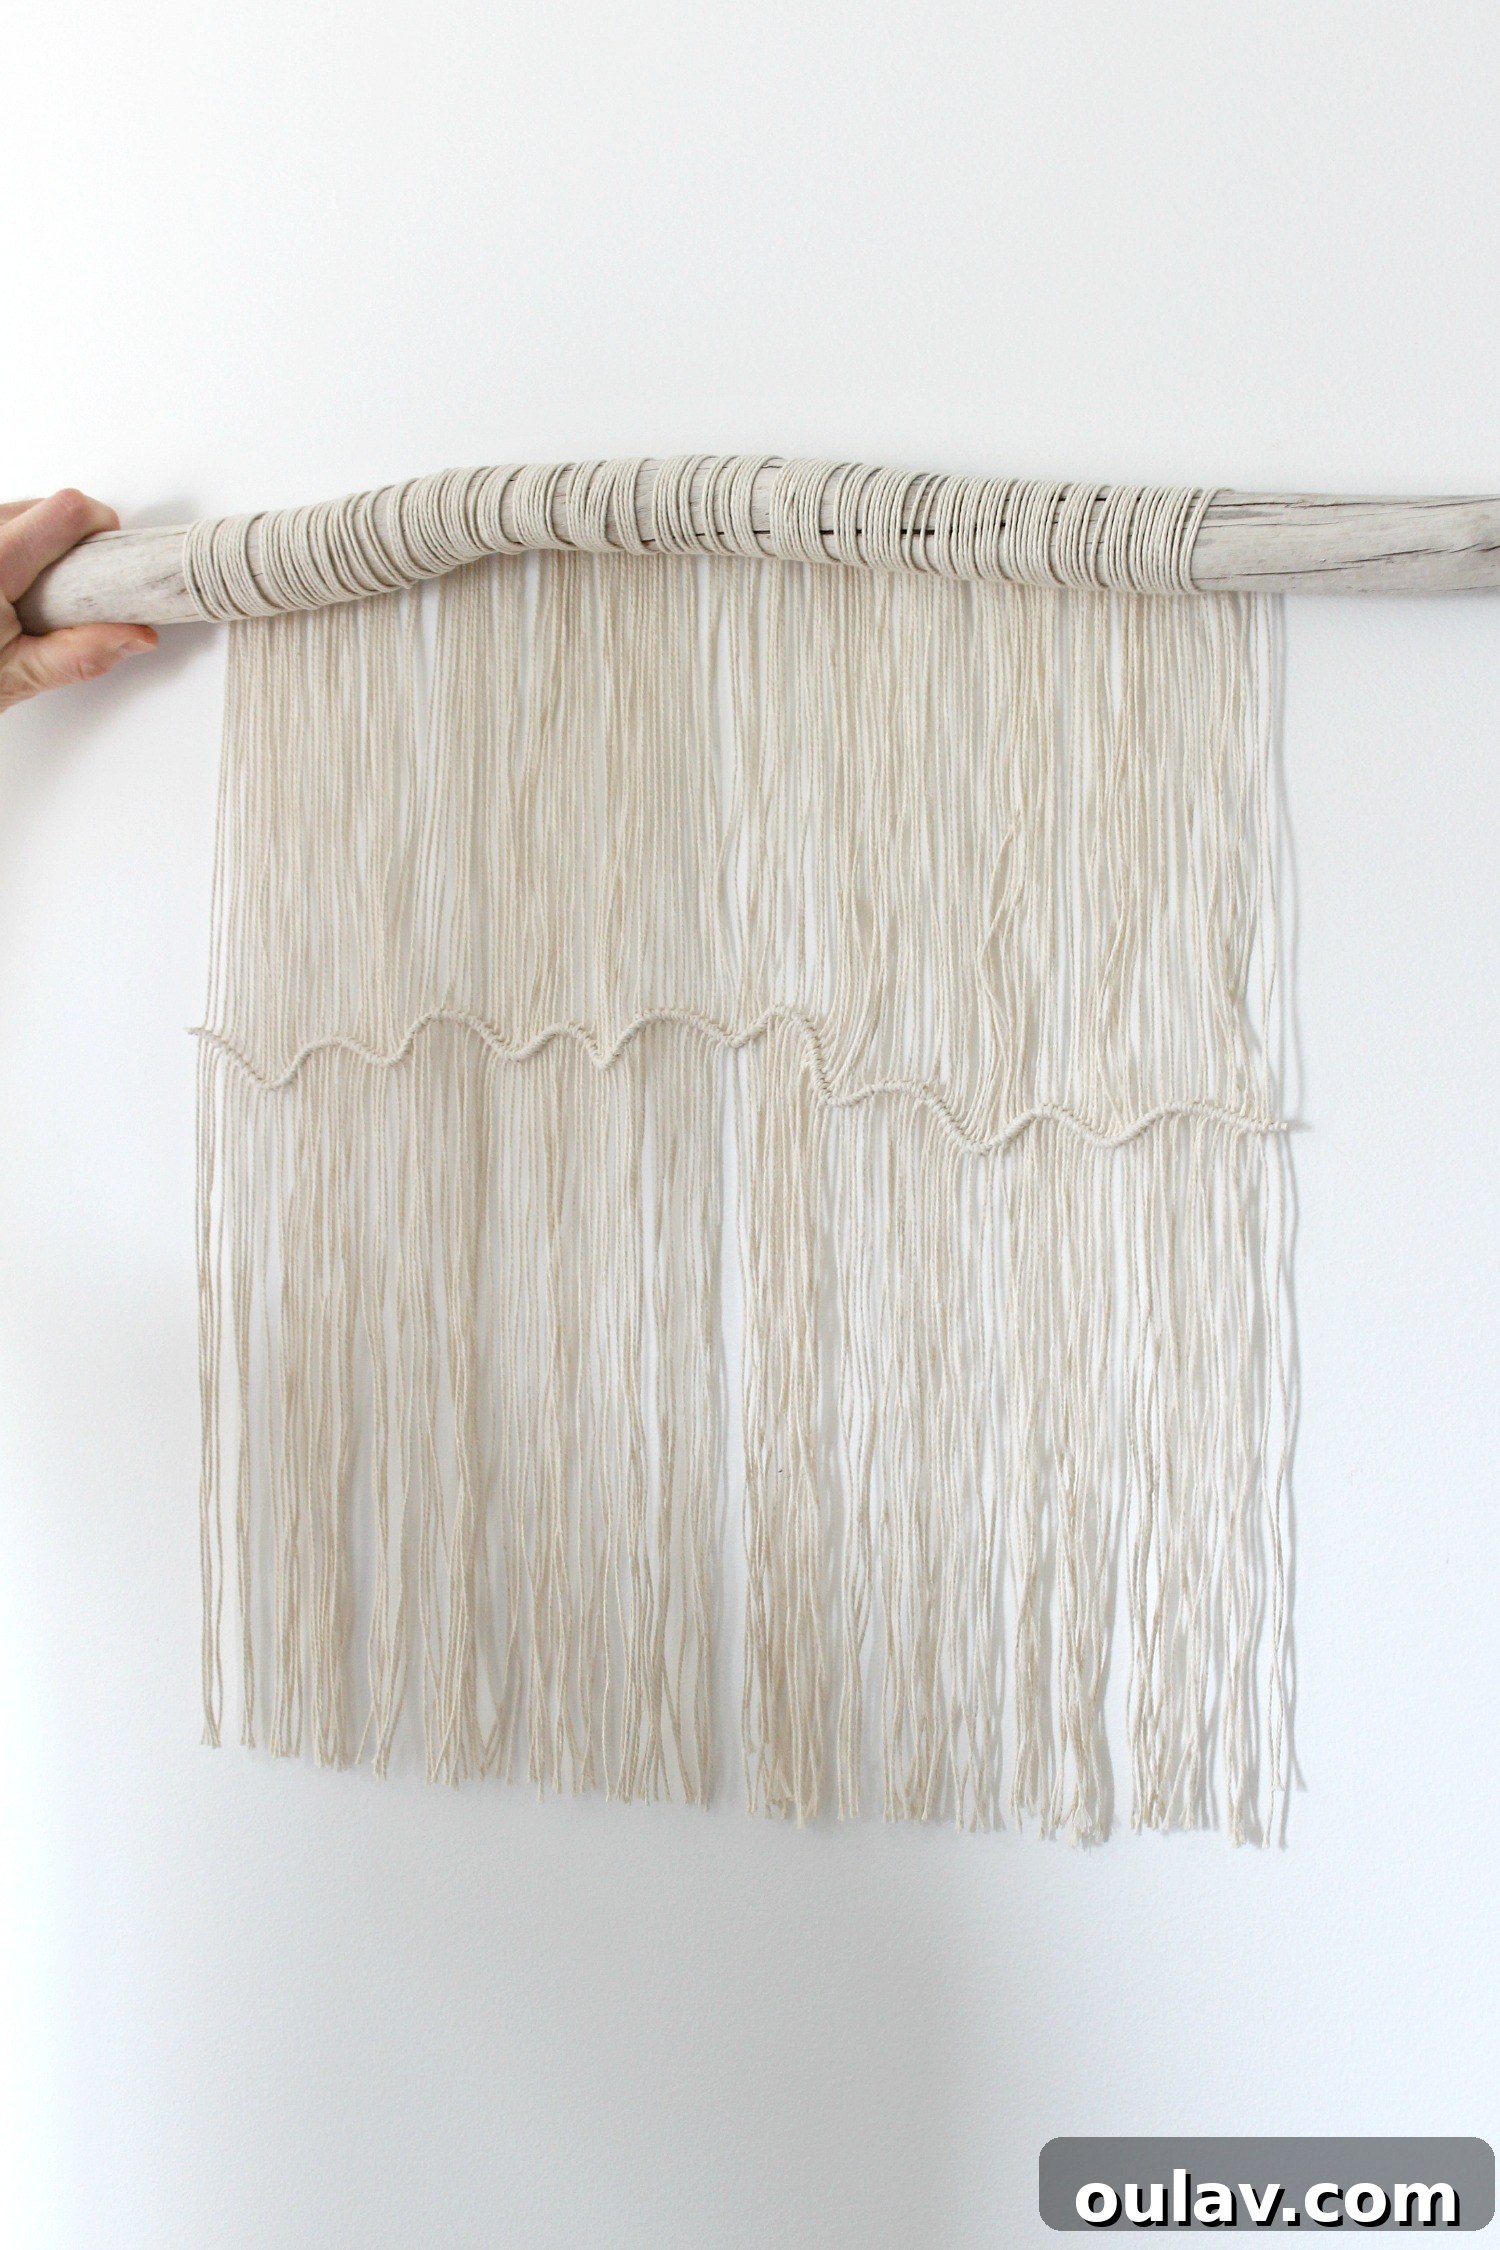
To achieve the undulating “wave” pattern, simply vary the vertical position of your horizontal working string for each subsequent row of knots. By shifting the horizontal string slightly up or down before tying the clove hitch knots, you create a beautiful, organic ripple effect across the entire piece. This subtle adjustment is key to the dynamic visual flow of the wall hanging, mimicking gentle ocean waves.
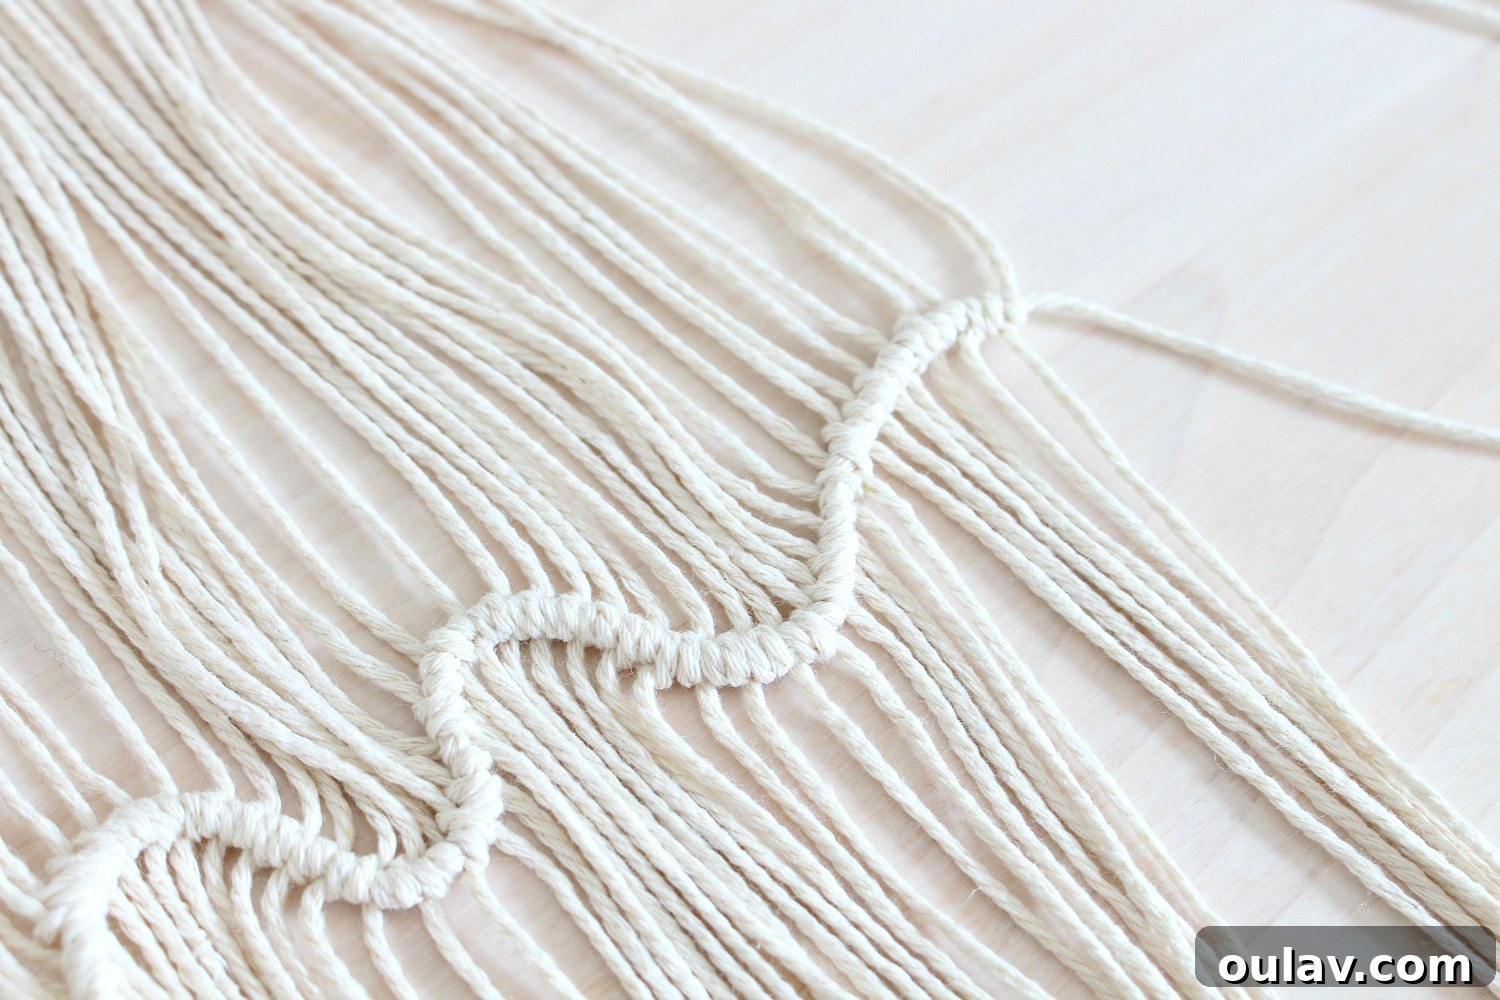
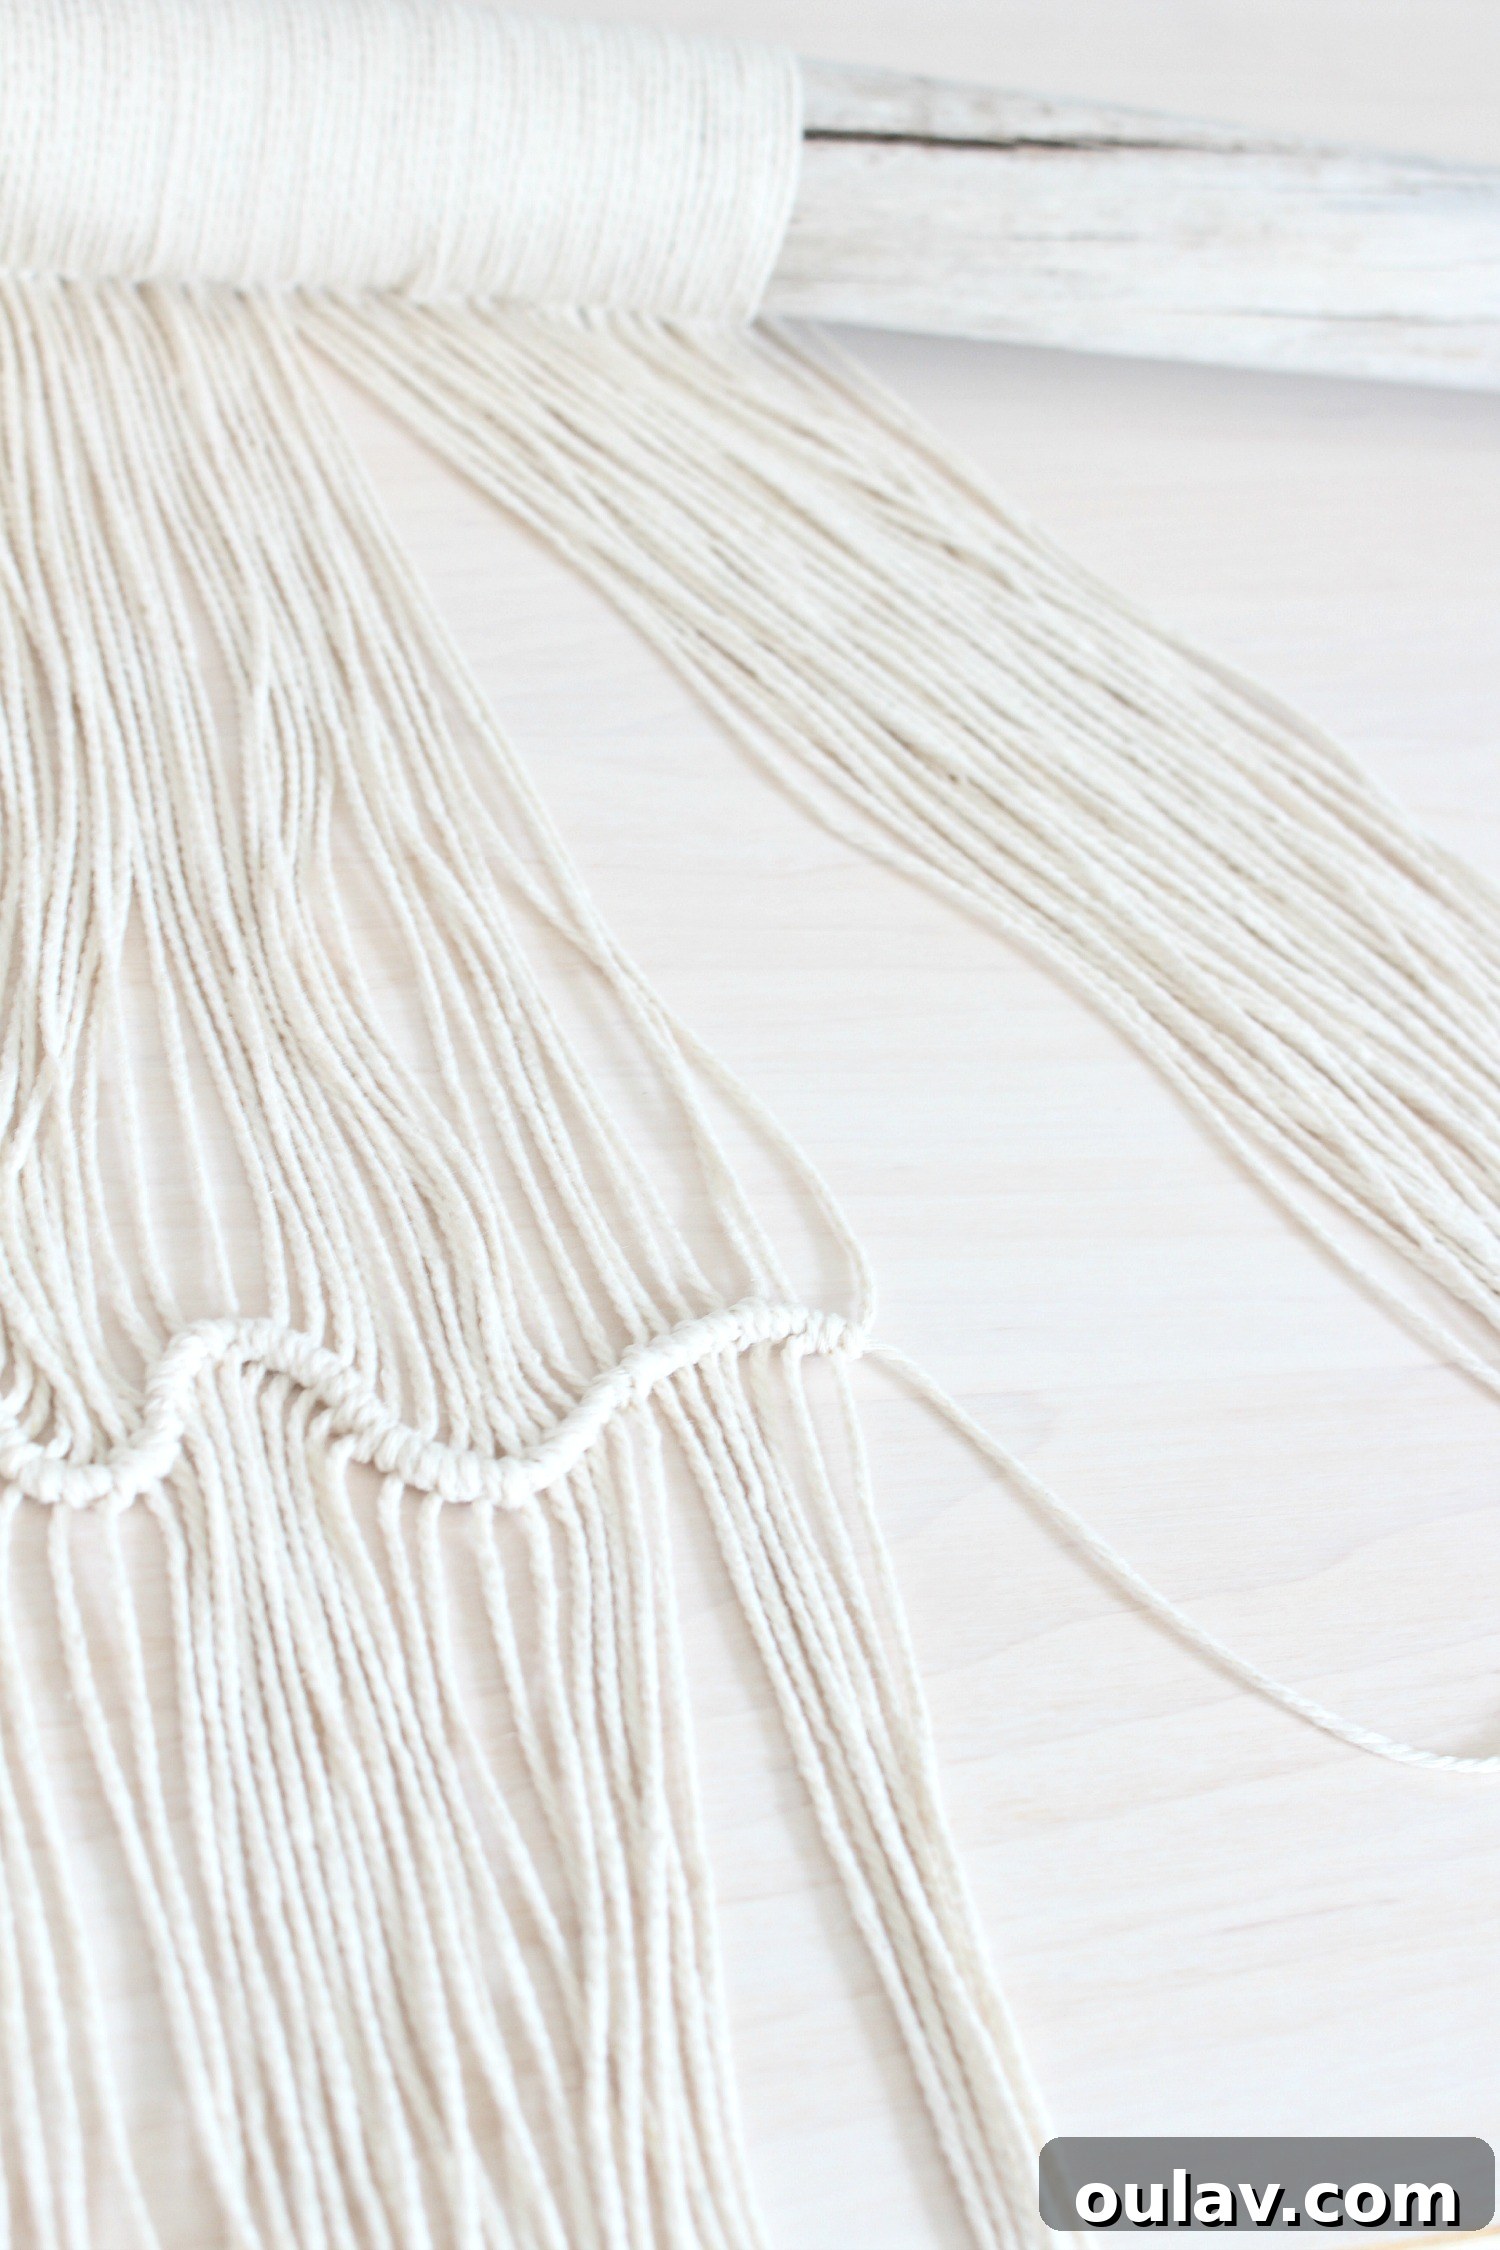
5. Finishing and Trimming:
Upon completing all your knots, you might notice your easy DIY macrame and driftwood wall hanging appears a little uneven or “wonky.” This is completely normal! Take some time to carefully adjust the spacing and tension of the strings and knots until you’re satisfied with the overall balance. To secure the horizontal working string, simply double knot its ends and trim any excess. A potentially better approach for a seamless look is to start with a much longer horizontal string, allowing its ends to hang freely and blend with the other vertical string pieces.
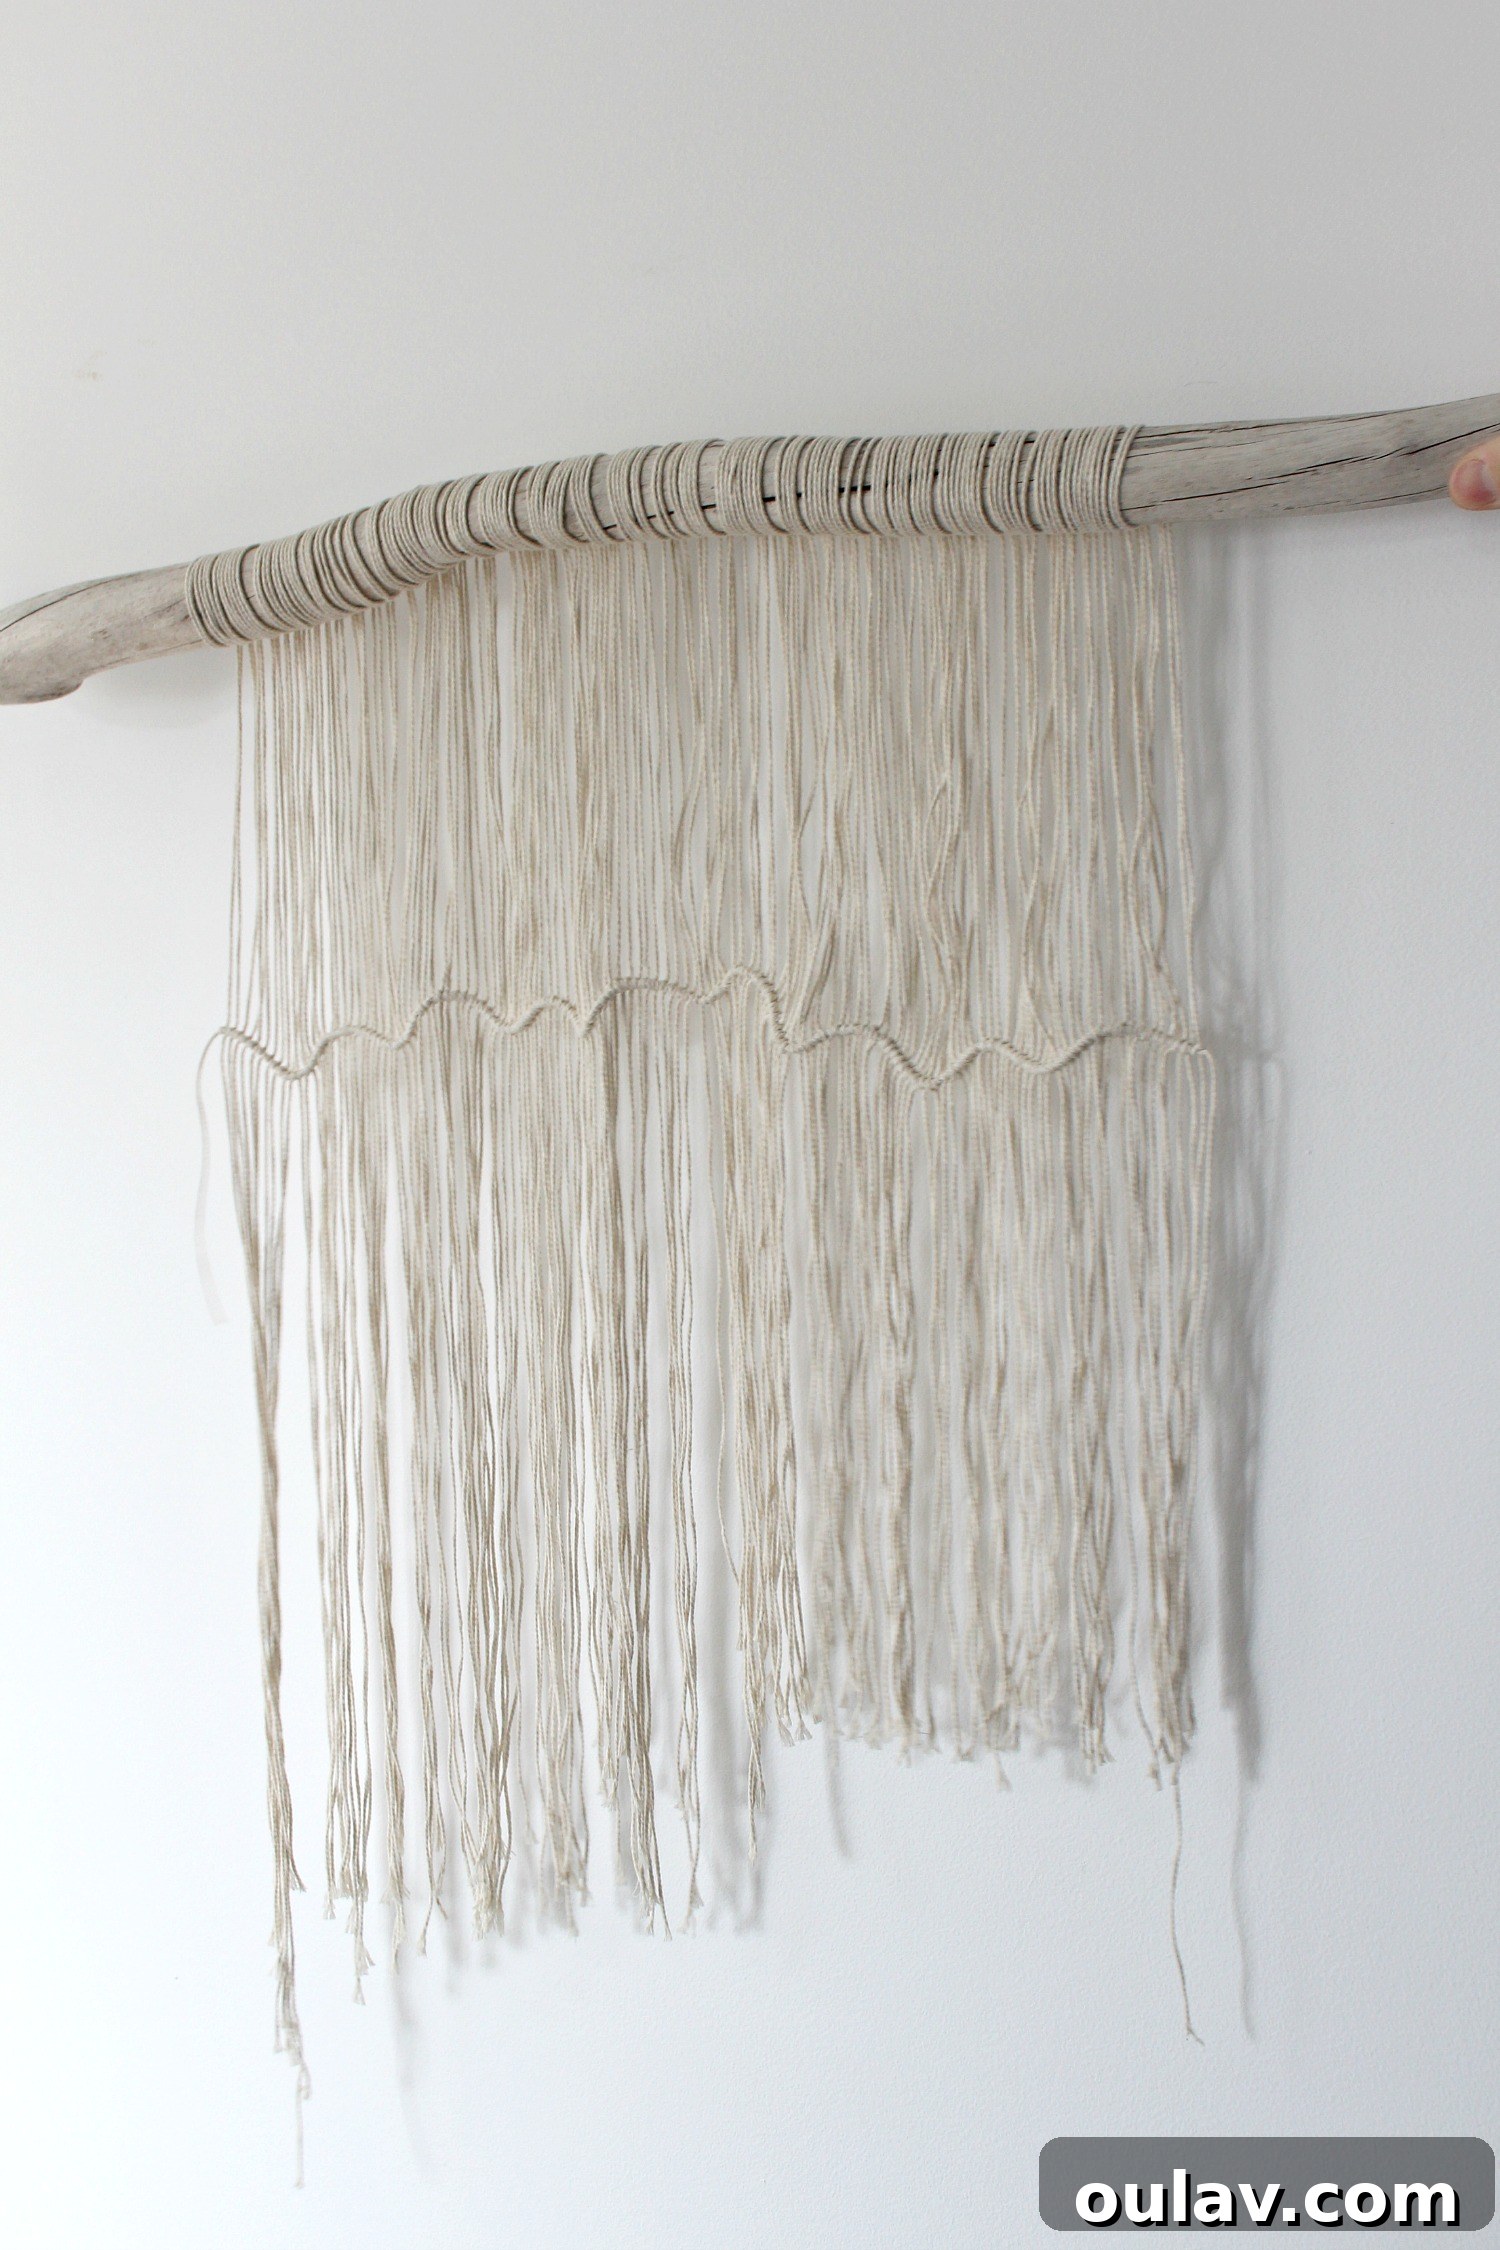
When it comes to trimming the bottom of your wall hanging, there’s a crucial tip to ensure an even finish: hang the piece in its intended final spot on the wall *before* you trim. I initially made the mistake of trimming it while my husband held it level, only to find it appeared uneven once hung. The way gravity affects the strings means that trimming it in its hanging position will result in the most aesthetically pleasing and symmetrical outcome. You’ll notice in my “after” photos that it wasn’t as perfectly even as when I first trimmed it, precisely because of how it was hanging.
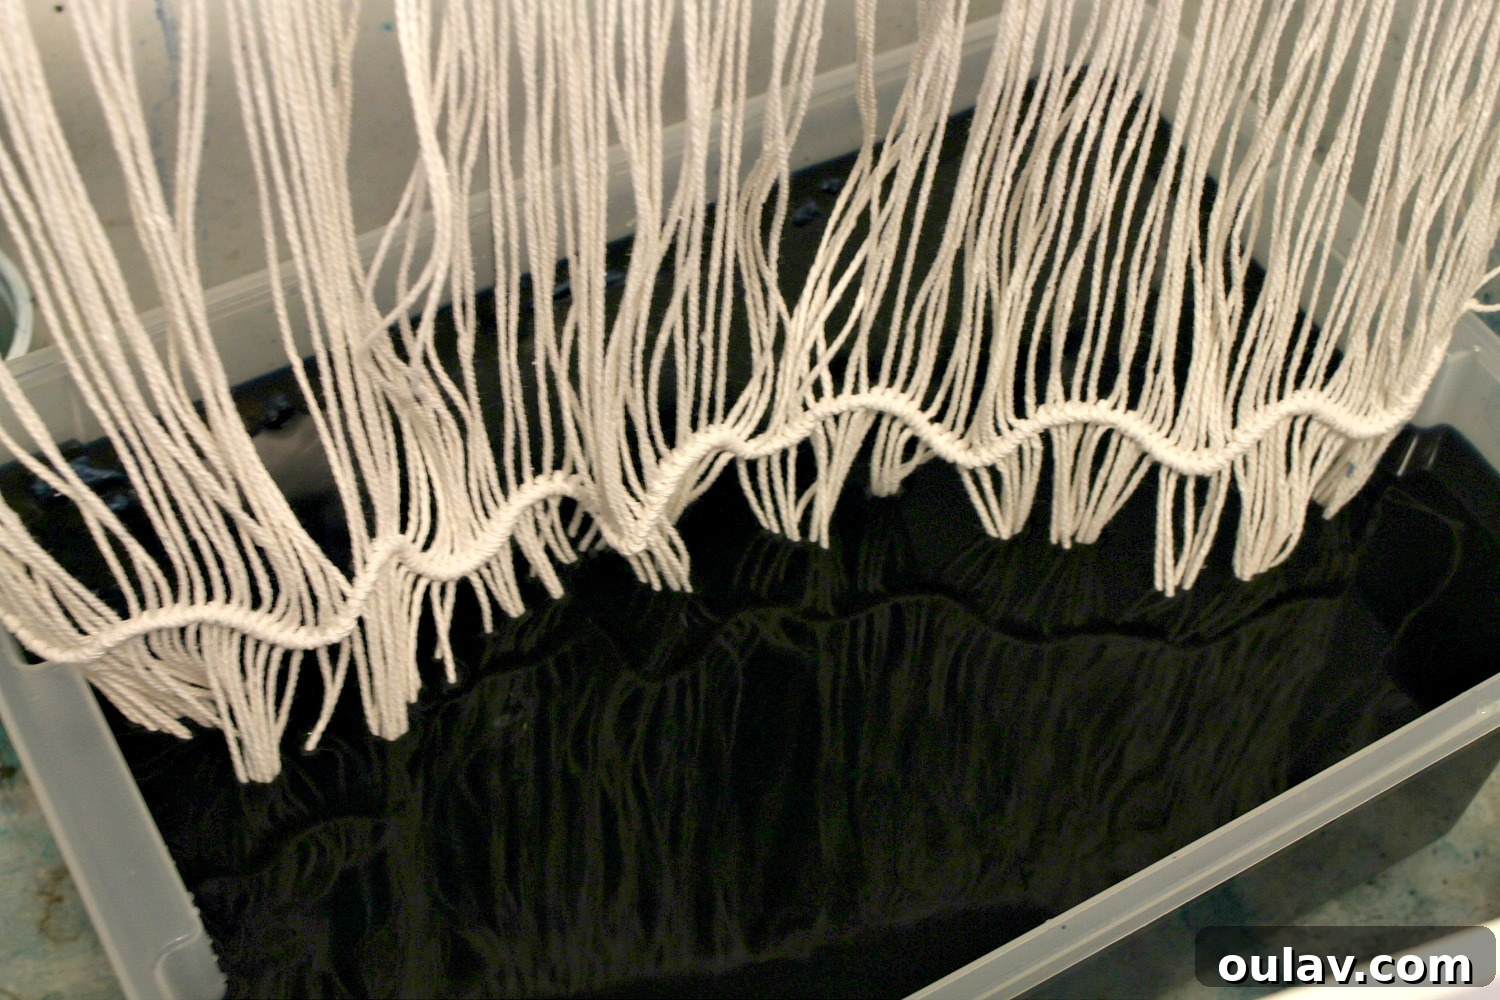
6. Optional Dip-Dyeing for a Coastal Touch:
Adding a dip-dyed effect is entirely optional, but it can significantly enhance the coastal charm of your wall hanging. I simply prepared a dye bath using some leftover dye, gently wet the bottom portions of the string, and dipped them for approximately 10 minutes. This short immersion time created a beautiful, light, and airy gradient, adding a subtle splash of color without overwhelming the natural beauty of the piece.
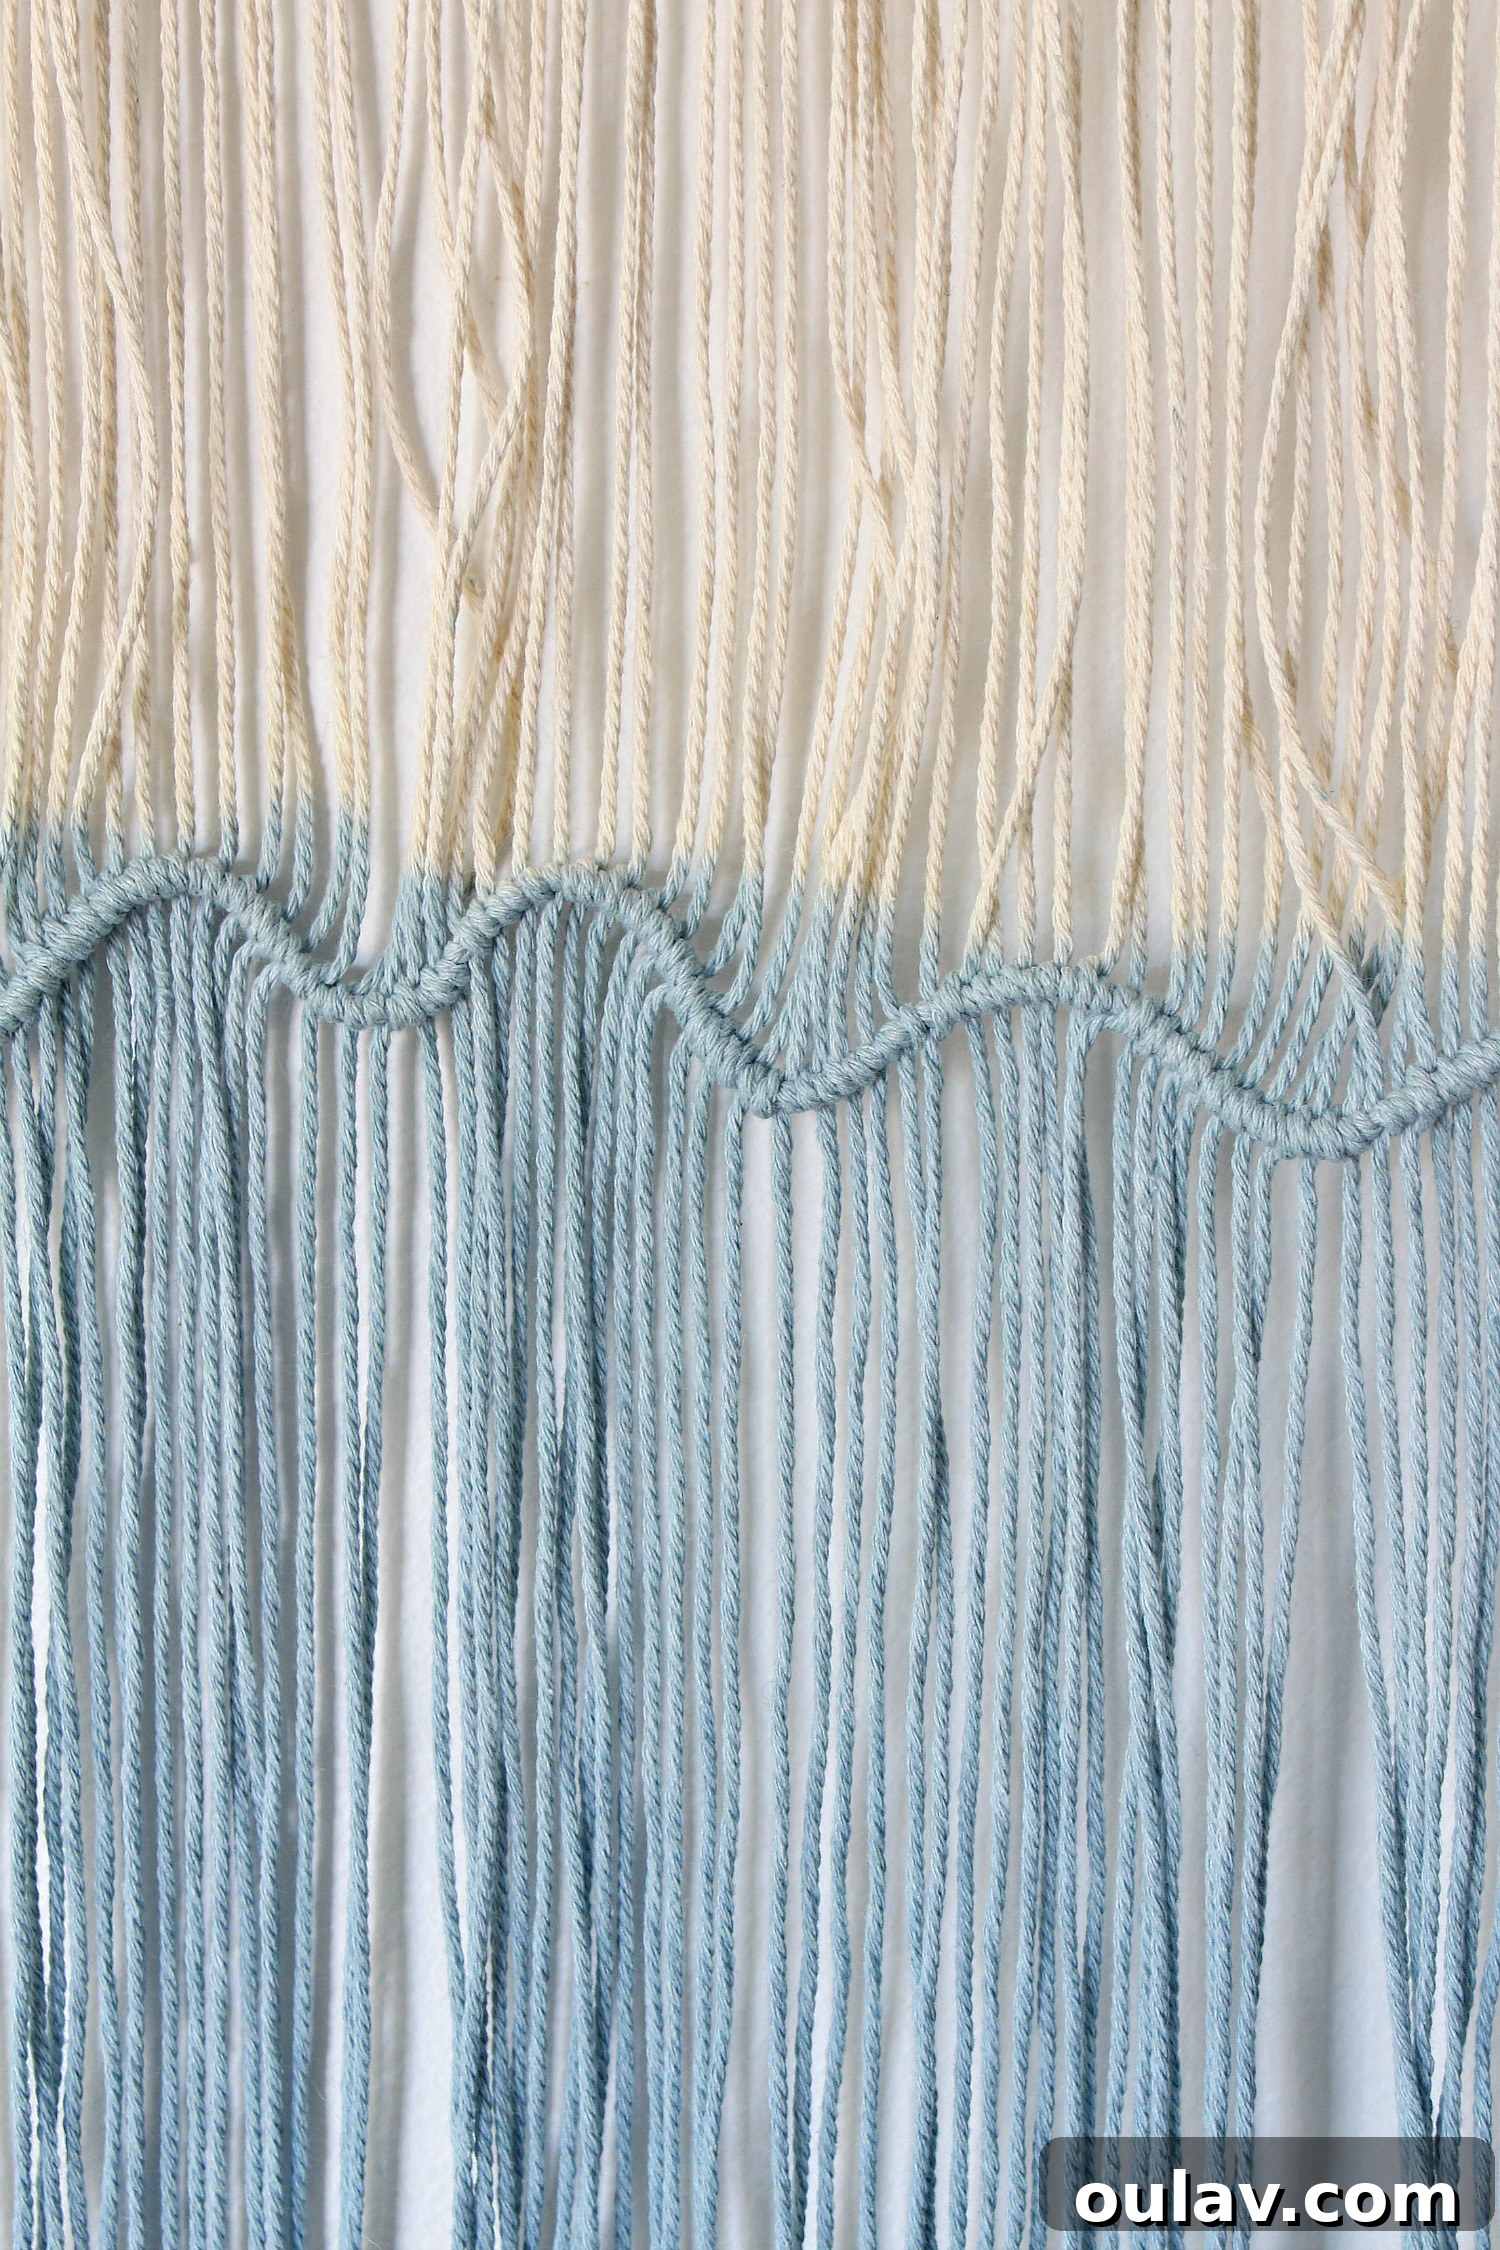
I do plan to go back and trim my piece again, applying the “hang it first” rule. However, a word of caution: trimming string art is a bit like cutting your own bangs – it’s easy to get carried away and quickly reach a point where it’s far too short (and still potentially lopsided!). Proceed with care and trim incrementally.
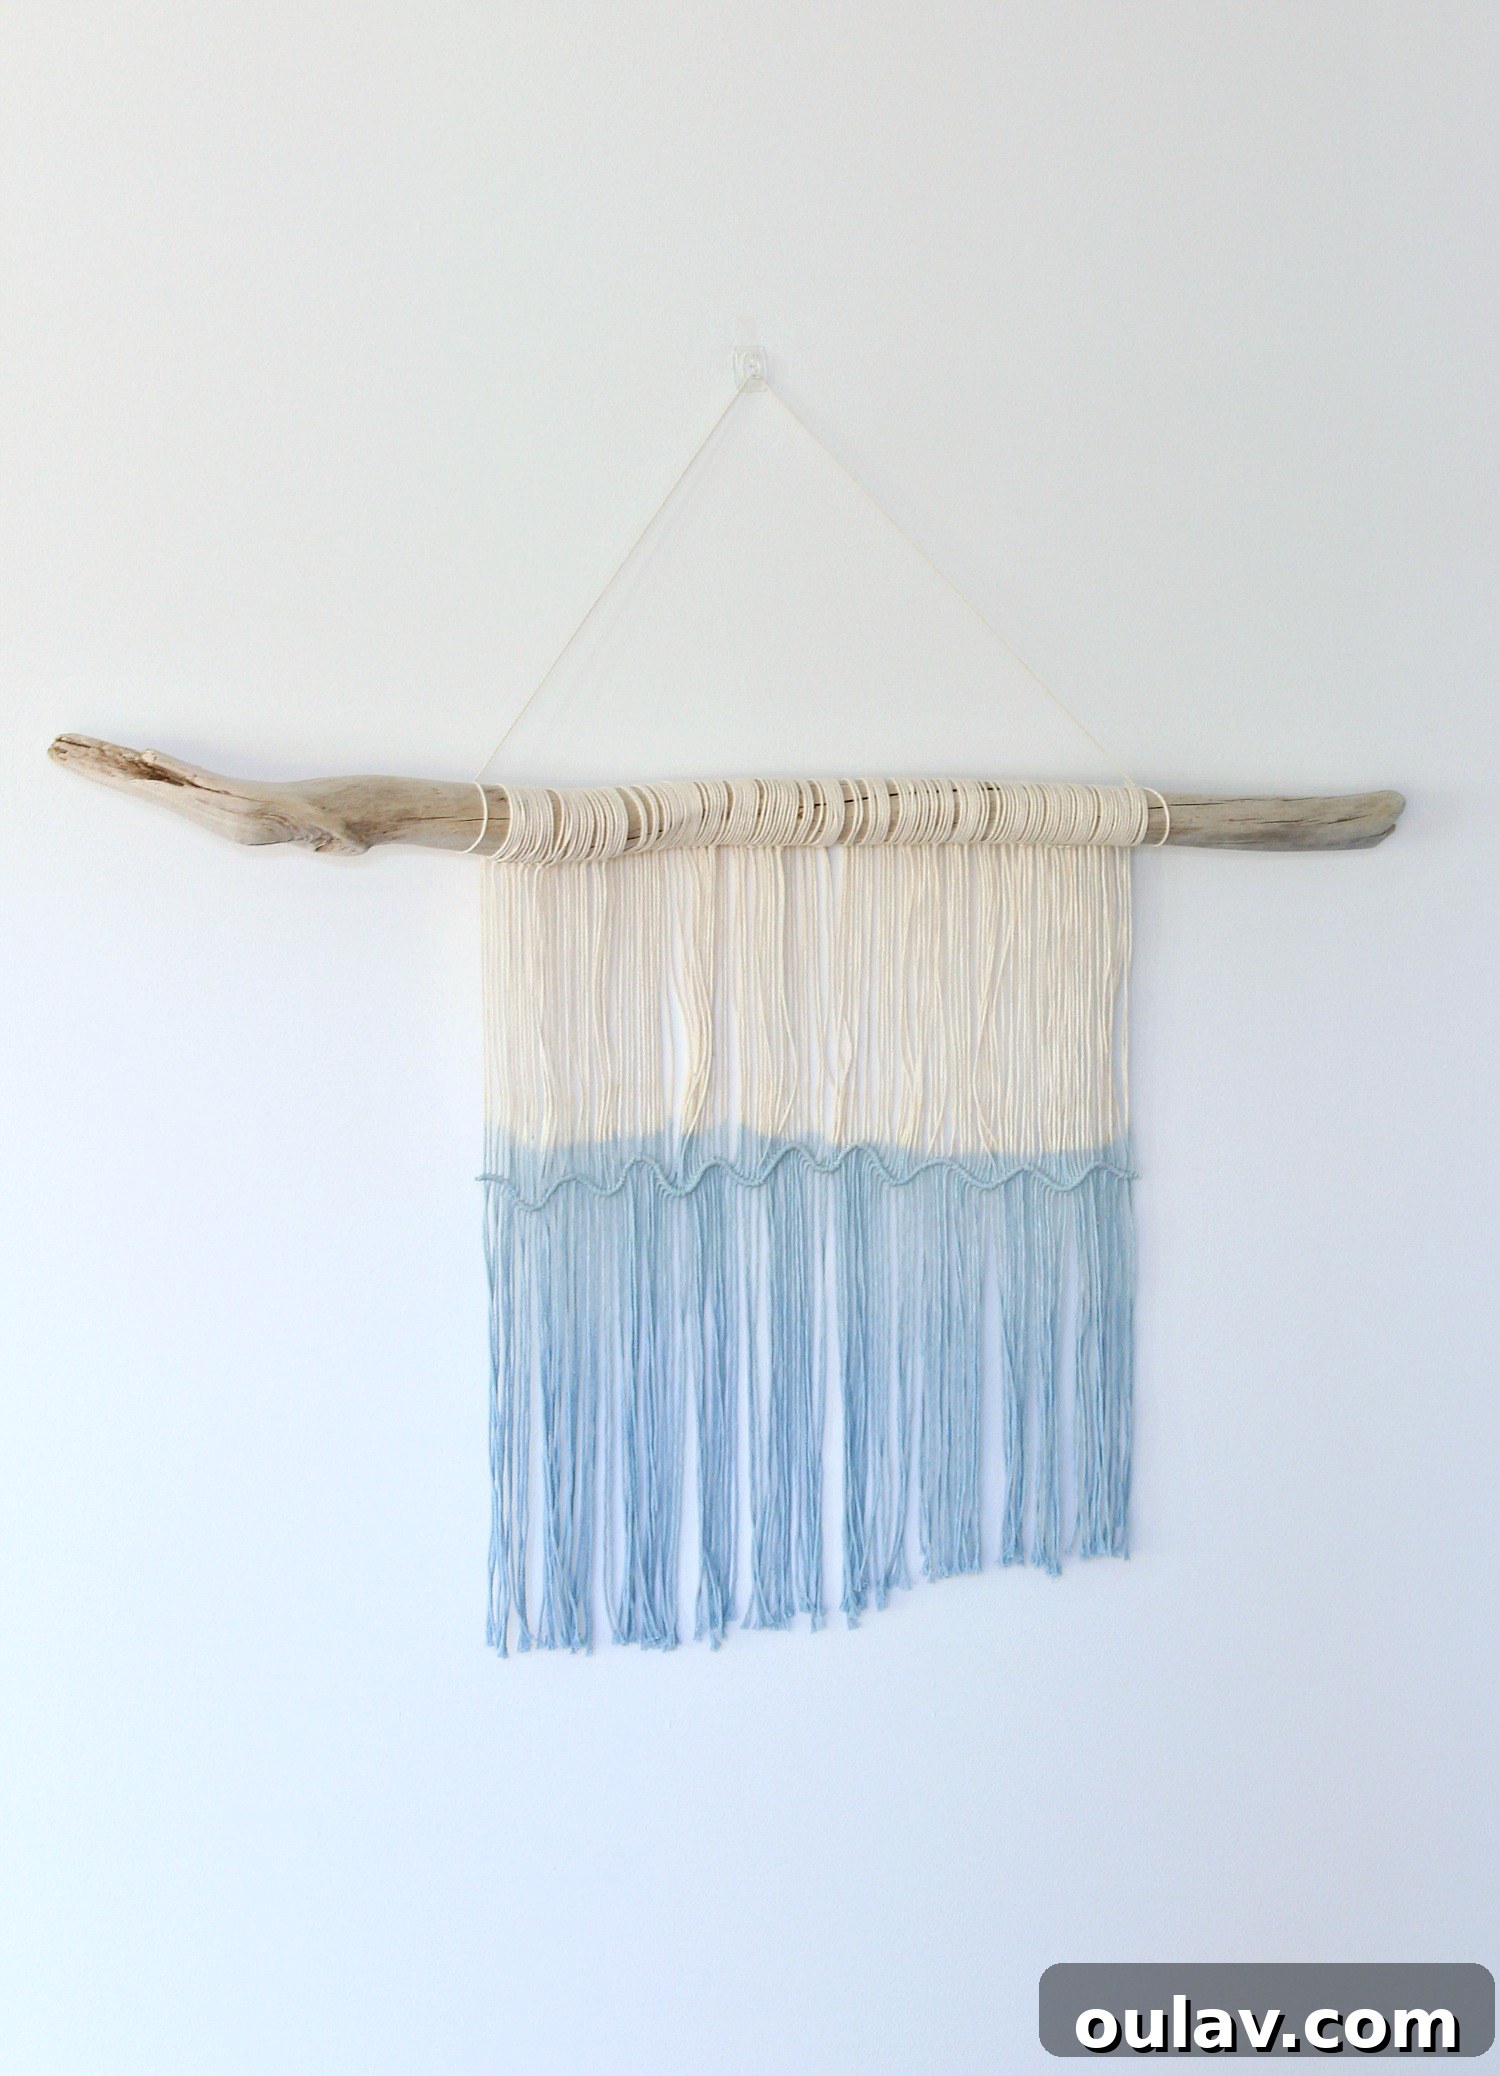
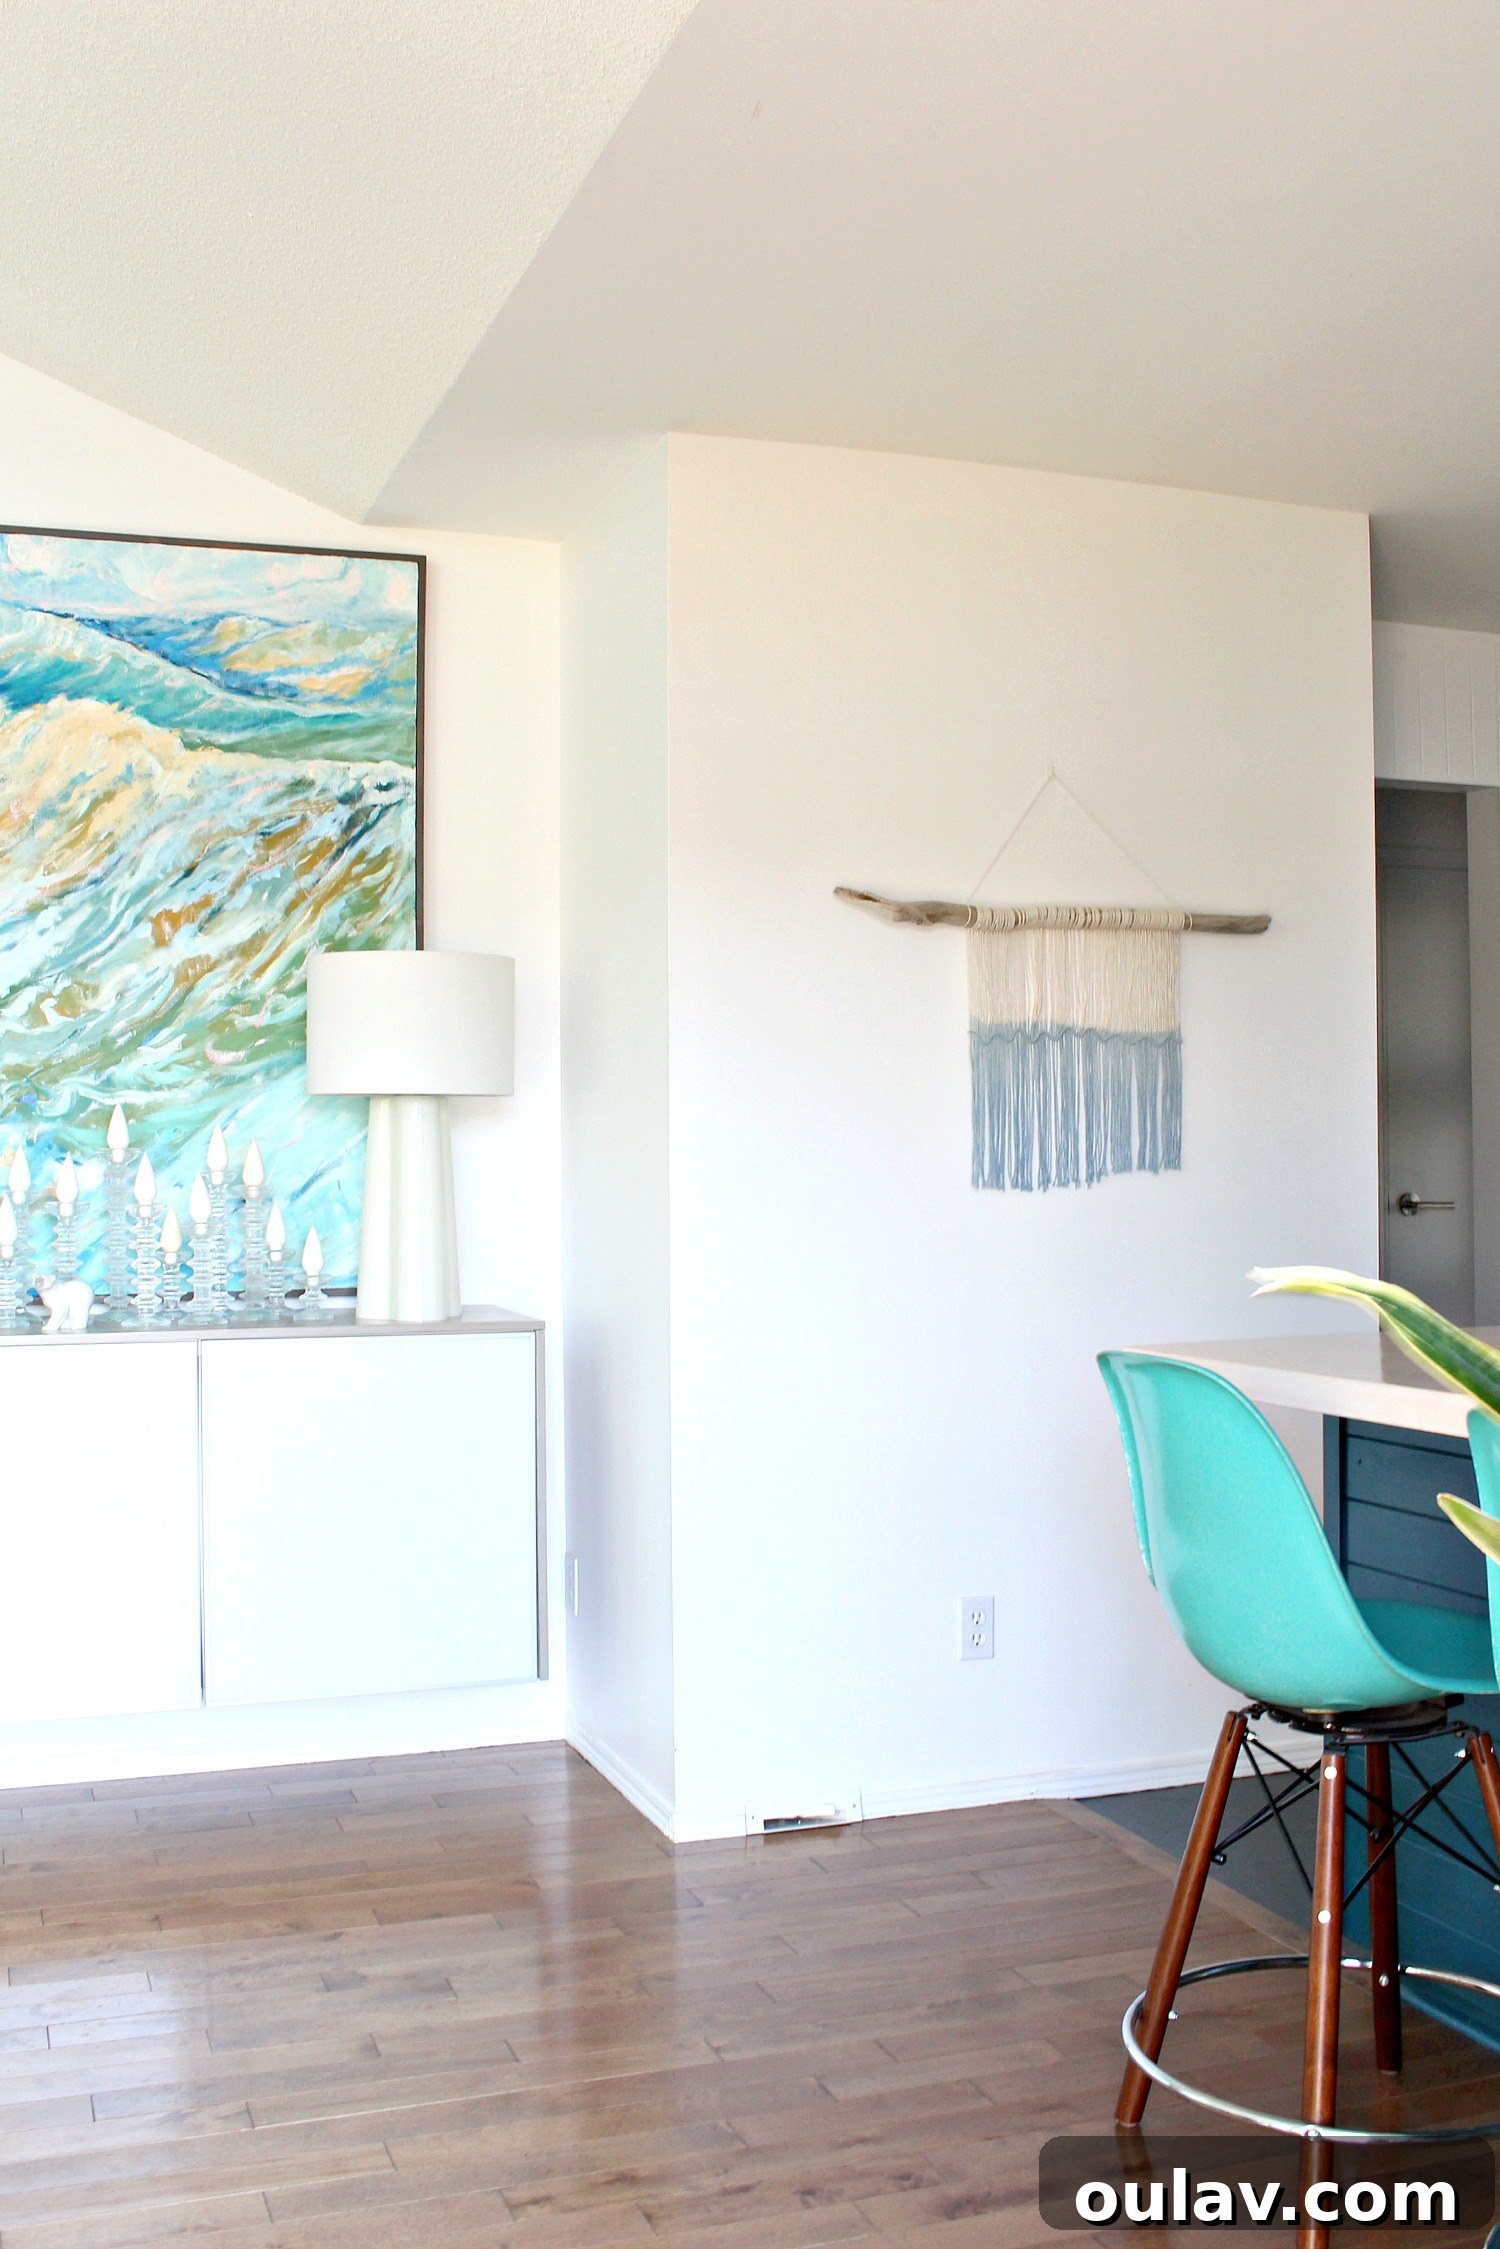
While I’m still contemplating my larger wall hanging aspirations (and I’d genuinely love to hear your thoughts and suggestions in the comments!), I sincerely hope you enjoyed this tutorial for an easy DIY macrame and driftwood wall hanging. This project showcases how a simple knot can create a beautifully intricate and flowing wave pattern, adding a unique, handcrafted touch to any space. It’s a testament to the joy of creative experimentation and the beauty of bringing natural elements into our homes through art.
Looking for more inspiration to spark your creativity this season? Today, I’m delighted to be joined by several talented blogging friends who are also sharing their fantastic Summer DIY and Craft ideas! Click on the links below to discover a wealth of engaging projects and tutorials to brighten your home and garden.
How to Seed a New Lawn from Scratch at The Happy Housie
DIY Palm Leaf Shadow Art Box (PB Knockoff) at Craftberry Bush
How to Make an Outdoor Pallet Tabletop at My Sweet Savannah
DIY Outdoor Planter with Candle at Clean & Scentsible
DIY Hanging Patio Garden at Tatertots and Jello
DIY Outdoor Candle Holders at The Handmade Home
DIY Painted Coasters at My 100 Year Old Home
Outdoor Tabletop Herb Garden at Inspiration for Moms
DIY Modern Sun Art at Cassie Bustamante
DIY Shell Candles at Finding Silver Pennies
DIY Beaded Garden Markers at Zevy Joy
Easy DIY Macrame and Driftwood Wall Hanging at Dans le Lakehouse
DIY Printed Fern Art at Satori Design for Living
DIY Criss Cross Outdoor Planters at She Gave it a Go
Coastal Coaster DIY at Rambling Renovators
Stamped Spoon Garden Markers at Life is a Party
Summer Porch Updates at Taryn Whiteaker Designs