
Transforming a dated fireplace can dramatically revitalize a living space, often without breaking the bank. Today, I’m thrilled to share a detailed guide on how to easily paint a stone fireplace, showcasing my own stunning charcoal grey fireplace makeover. While my ultimate dream involves a complete fireplace renovation—envisioning a sleek slate design with an integrated television mount, addressing the tiny firebox, wonky doors, and awkwardly placed vents—a budget-friendly solution was needed in the interim. For under $100, I successfully updated our fireplace by painting the existing gold doors and vents a sophisticated black using high-heat paint, and then transforming the pine wood and faux stone facade with a rich, modern charcoal grey. This simple yet impactful project not only modernized our fireplace but also became a central anchor in updating our entire living room, proving that a little paint can go a long way in home improvement.
This affordable fireplace makeover involved three primary steps, each contributing to the dramatic transformation:
- Persuading my husband to embrace a dark grey painted faux stone finish, which ultimately proved to be a design triumph.
- Applying Rustoleum high-heat enamel spray paint to refresh the metal fireplace doors and vents, changing them from a dated gold to a contemporary black.
- Painting the fireplace’s faux stone and pine wood surround with a carefully selected, deep charcoal grey.
You might recall my previous post detailing how I meticulously painted the fireplace doors and vents. Now, it’s time to reveal the full glory of the freshly painted fireplace. Was it a little bit of playful cruelty to make you wait for the complete reveal? Perhaps, but the anticipation only builds for the stunning before-and-after!
Essential Supplies for Your Fireplace Painting Project:
Gathering the right tools and materials is the first crucial step for any successful DIY project. For this fireplace transformation, here’s what you’ll need:
- Dustpan and broom: Essential for thorough pre-painting cleaning.
- 2″ angled paint brush with stiff bristles: Ideal for working paint into textured surfaces and sharp edges.
- Behr Premium Plus Primer & Paint in One (I personally used Behr Evening Hush in a Satin Finish): A high-quality paint-and-primer combination is key for adherence and durability on faux stone.
- Painter’s tape and drop cloths: Crucial for protecting surrounding walls, floors, and furniture from paint splatters.
- Small artist’s brush: Invaluable for precision work around intricate edges and trim.
Detailed Guide: How to Easily Paint a Stone Fireplace
Below, I’ll walk you through the step-by-step process I followed to paint this faux stone fireplace. While the metal doors and vents required a specialized heat-resistant spray paint, it’s important to note that for most fireplace brick or stone, unless it consistently gets hot to the touch (beyond warm), standard interior paint is perfectly adequate. This tutorial, originally published in 2013, stands the test of time; as of 2021, my fireplace continues to look stunning. In fact, it’s even evolved further since I managed to integrate a TV mount above it, a project you can explore further by clicking here. This proves the longevity and adaptability of a painted fireplace.
Prepping the Fireplace Stone for Paint: The Foundation for Flawless Finish
The “stone” on our fireplace isn’t genuine natural stone; it’s a composite material, essentially concrete mixed with various aggregates to mimic the appearance of real stone. My primary aesthetic concern was the unwelcome 80s pink undertones blended within its texture, which made it feel terribly dated. When researching how-to guides, I encountered conflicting advice regarding the best type of paint for concrete surfaces. To err on the side of caution, I initially sought masonry paint at Home Depot. However, I quickly discovered two major hurdles: a) the color palette for masonry paints was severely limited, and b) they were out of the dark bases I needed for my charcoal vision. Fortunately, a knowledgeable associate in the paint department confirmed my growing suspicion: a plain old paint-and-primer combination would work perfectly, negating the need for any special masonry-specific paint. I opted for Behr Premium Plus, a choice I highly recommend for its excellent coverage and durability.
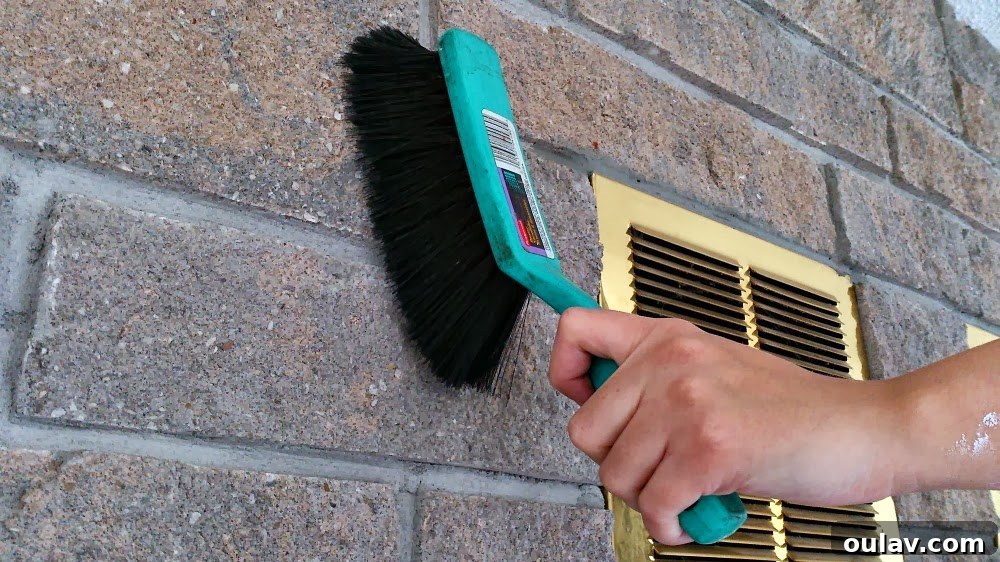
Before any painting could begin, meticulous cleaning of the stone surface was paramount. I had originally intended to use a shop vac for this task, but a rather memorable mishap altered my plans. My father had suggested cleaning out the interior of the firebox with the shop vac first, which seemed like a logical step. I quickly checked to ensure the vacuum’s exhaust wasn’t recirculating dust back into the room, and everything appeared to be in order. Engrossed in the satisfying work of cleaning the firebox, and perhaps patting myself on the back for the sparkling interior I was achieving, I failed to notice what was happening behind me until the smoke detector blared to life. Turning around, I was met with a dense cloud of ash debris so thick that it practically obscured the kitchen. I had, much to my dismay, successfully deposited the entire contents of the fireplace onto our freshly painted white walls. After what felt like a million Swiffer cloths and eventually another fresh coat of paint, it’s now a humorous anecdote. However, for cleaning the faux stone facade itself, I learned my lesson and opted for a much less perilous method: a simple, sturdy brush. This effectively removed all loose dust, soot, and any surface grime without risking another airborne ash distribution. This crucial cleaning step ensures optimal paint adhesion and a smooth, long-lasting finish.
Tips for Painting the Fireplace Stone: Achieving a Professional Finish
Once the surface was impeccably clean and free of dust and any loose concrete bits, it was time for the transformation to begin. I armed myself with a 2-inch angled brush, specifically chosen for its stiff bristles, which are excellent for textured surfaces. I approached the painting process in small, manageable sections, methodically working the paint into every seam and crevice of the faux stone. This involved not just brushing, but actually loading the brush with ample paint and then deliberately *squishing* it into every nook and cranny. This technique is vital for ensuring comprehensive coverage on such an uneven and porous surface, preventing any missed spots that would otherwise reveal the old, dated finish.
My approach was akin to a stippling motion you might use with a stencil; I actively *pushed* the paint into the stone rather than just lightly brushing over it. After saturating an area, I then gently swept the brush across the painted section. This secondary sweep served a dual purpose: it helped to even out the paint application and, crucially, to catch any potential drips or excess paint before they could dry in an unsightly manner. Although this rigorous technique meant my lovely paint brush was quite “trashed” by the end of the project, it allowed me to achieve superb coverage with just a single coat of paint for the majority of the fireplace. The only subsequent steps involved a few minor touch-ups here and there, adding paint to any minuscule spots I might have initially overlooked.
For the entire fireplace wall, which encompassed the faux stone facade, the surrounding pine wood trim, the mantles, and even a built-in firewood storage cubby to the right, I utilized nearly a full gallon of paint. This project was spread out over a few afternoons. I found myself taking breaks when fatigue set in, shifting focus to other tasks to maintain my energy and enthusiasm. However, with an extra set of hands, or if your fireplace is more modest in size than mine, this project could easily be completed within a single weekend, or even a concentrated afternoon.
One of the most challenging aspects was painting the edges where the faux stone met the adjacent walls, and also where it abutted the metal vents. These areas presented uneven edges that were remarkably close to the surrounding surfaces, making it impossible to effectively slide painter’s tape or even newspaper in for protection. To tackle this intricate task, a very small paintbrush, typically found in art supplies, proved to be incredibly useful. Its fine bristles and small size allowed for precise application, giving me the control needed to meticulously paint these delicate edges without getting paint on the clean walls or newly painted vents. This small detail made a significant difference in achieving a clean, professional finish.
Capturing the true essence of the fireplace in photographs can be quite challenging, as the charcoal grey hue subtly shifts and morphs into various shades depending on the ambient lighting throughout the day. Please bear with me and try to overlook the slightly disheveled state of the living room at the time of these photos – we are constantly progressing towards our ideal space, one project at a time!
Here Are Some Dramatic Before & After Transformations!
Picking the Perfect Paint Colour & Finish for the Fireplace: Evening Hush in Satin
When I first introduced the idea of painting our fireplace, a valid concern arose from some readers about the faux stone potentially appearing “flat” once painted. This feedback was incredibly valuable, and I took this warning to heart. My goal was to select a paint finish that would imbue the surface with a sense of “life” and dimension, rather than a dull, matte appearance. Consequently, I opted for a satin finish, and the results are absolutely perfect.
The beauty of the satin finish truly shines through as the natural light catches the various facets and textures of the faux stone. This interaction creates a subtle, almost ethereal glimmer that subtly shifts throughout the day, effectively preventing the “painted” look that often comes with a matte finish on textured surfaces. What I find most appealing is how dynamic the color appears; as the light changes, the grey seems to morph into slightly different shades, almost as if I had painstakingly applied several variations of the same hue. This unexpected depth adds a sophisticated character to the fireplace, making it a captivating focal point in the room.
Initially, I faced a considerable challenge in finding the precise deep, dark shade of grey I envisioned. My family and I spent a significant amount of time poring over countless paint swatches, comparing nuances and deliberating on the subtle differences between them. After much consideration and careful evaluation under various lighting conditions, I ultimately selected Evening Hush (770F-6) by Behr. Beluga was a very close second choice, offering a similar depth, but upon closer inspection, we felt it was just a touch too dark for the overall aesthetic we were aiming for. As an added bonus, and a testament to its universal appeal, this particular shade of charcoal grey received enthusiastic approval from my husband. The color was perfect – striking the ideal balance between sophistication and modern style, and contributing significantly to the updated feel of our living room.
| My Mom, diligently pondering some grey swatches during the selection process. |
We’ll be sharing more updates on our living room transformation very soon, as soon as the space begins to resemble a fully decorated and functional living area once again!
Painted Fireplace Update: A Glimpse into its Enduring Beauty
For those curious to see the “finished” space (because, let’s be honest, is a home ever truly “done”?), I invite you to explore it on The Lakehouse Tour. It provides a comprehensive look at how this painted fireplace integrates into the broader aesthetic of our home. Here’s a little sneak peek to pique your interest and show just how well this budget-friendly makeover has held up over the years: