
Stunning Chalk Paint Cabinet Makeover: Transform Your Furniture on a Budget
Are you ready to witness a truly remarkable transformation? Today, I’m thrilled to share an exciting project: a complete chalk paint cabinet makeover that breathed new life into an outdated piece and unified my entire craft and storage space. If you’ve ever considered upcycling furniture with chalk paint, this guide will walk you through the process, offering practical tips and revealing just how easy it can be, even for a first-timer.

The “Fish Room” Vision: Blending Functionality with Style
As you might have seen in my previous post about the Fish Room, this space has undergone a significant evolution. What began as a utility area has been reimagined as a highly functional craft and storage room. The cornerstone of this transformation was replacing the original, less-than-ideal cabinetry with a collection of second-hand furniture pieces. This decision dramatically increased our storage capacity, which was crucial after my Mom and I streamlined and pooled our extensive sewing supplies.
With my Mom downsizing to a cozier home and our joint sewing projects almost always taking place at my house, centralizing our supplies here made perfect sense. But the Fish Room isn’t just for fabric and thread; it’s also where I store paints, adhesives, and other temperature-sensitive “garage-y” items that can’t freeze. Therefore, maximizing every inch with drawers, cabinets, and shelves became a top priority. The goal was to create a space that was not only incredibly organized but also aesthetically pleasing—a far cry from a cluttered storage annex.

Unifying Mismatched Furniture: The Power of Paint
While the various second-hand pieces we acquired fit the space remarkably well, they were undeniably a bit of a hodgepodge. The existing Ikea furniture, with its crisp white melamine and faux wood foil finishes, offered a naturally bright and airy aesthetic, reminiscent of a coastal retreat. This established a foundation of lightness that I was keen to build upon. However, the newly acquired pine cabinet, though perfectly functional, introduced a rustic “country” vibe that clashed with the polished, intentional look I envisioned for the room. My aim was to prevent the Fish Room from looking like a “furniture graveyard” – a place where disparate pieces merely came to rest. I knew immediately that paint would be the ultimate unifier.
Having never ventured into the world of chalk paint before, this cabinet presented itself as the perfect inaugural project. Its promise of minimal prep and a beautiful matte finish seemed like the ideal solution for transforming the pine cabinet from country to chic and seamlessly integrating it with the rest of the room’s decor.

Before & After: A Glimpse of the Transformation
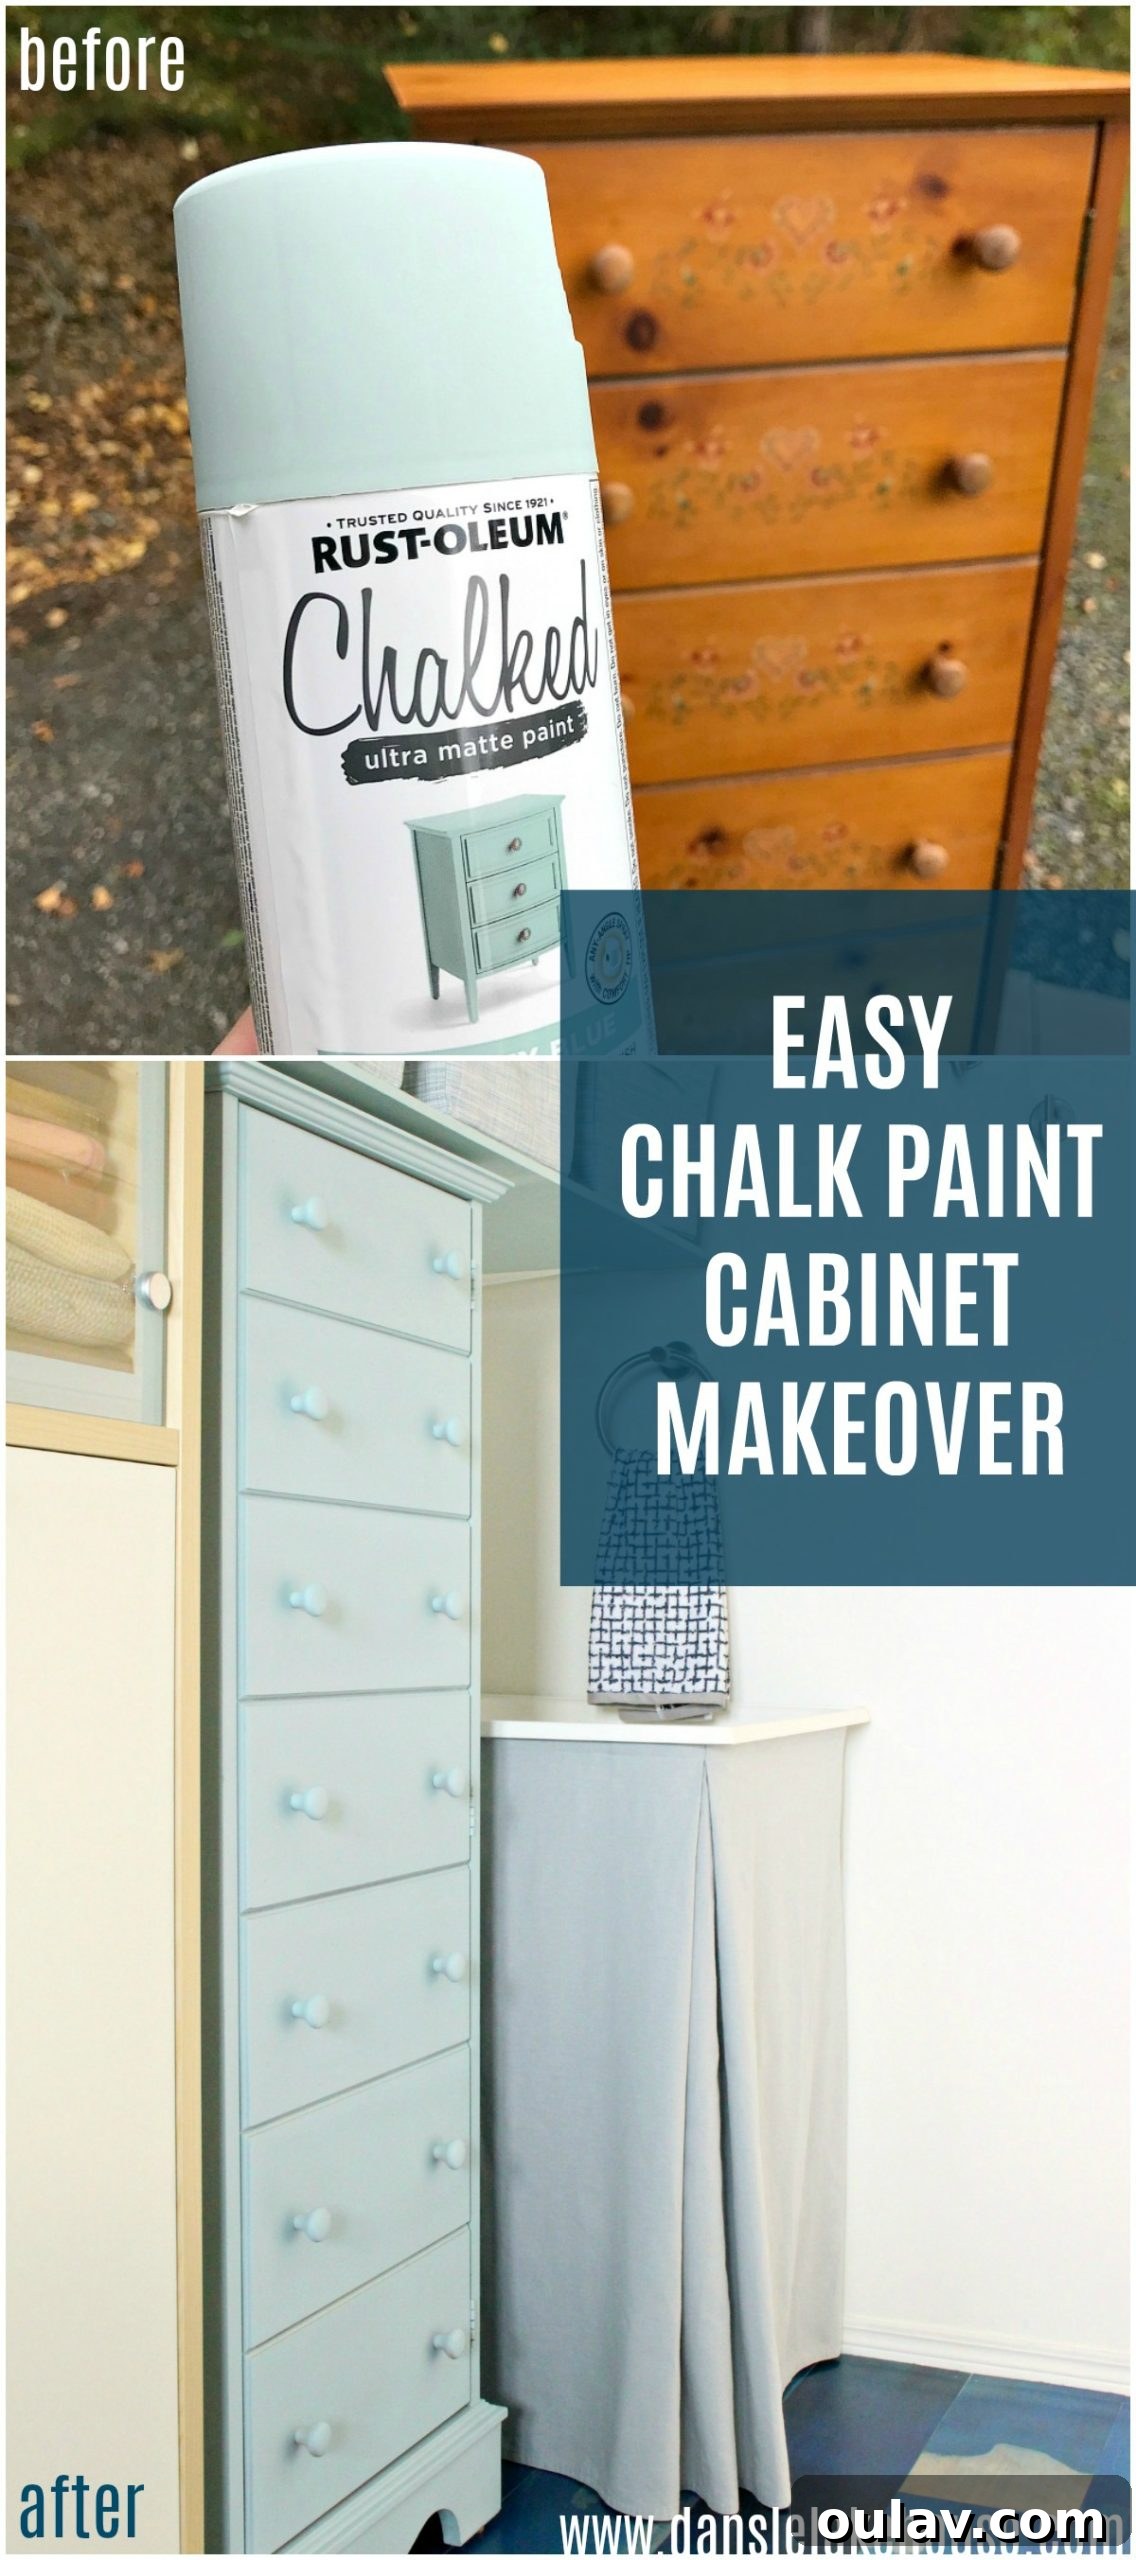
Before we dive into the details of the painting process, let’s take a moment to appreciate the “before” state of the pine cabinet. This visual comparison truly highlights the dramatic impact a simple coat of chalk paint can have.

For quite some time, my design preferences had leaned heavily towards natural wood tones, particularly the rich warmth of walnut. When wood grain felt overwhelming, I often opted for pale grey or cream stains to allow the natural beauty of the wood to show through. However, this particular pine cabinet, with its distinct style and somewhat dated appearance, clearly called for an opaque paint finish. The challenge was finding a color that would not only modernize the piece but also tie into the existing elements of the Fish Room.
Choosing the Right Hue: Rust-Oleum Serenity Blue Chalk Paint
My quest for the perfect shade led me to Rust-Oleum’s new chalk paint line, where I discovered the ideal pale blue/grey hue: “Serenity Blue.” This color was an absolute game-changer. It beautifully picks up on the subtle blue trim detailing on the glass doors of the Ikea cabinets, creating an immediate visual connection. This careful color coordination made my decorating choices feel incredibly intentional, rather than the “happy accidents” they often are in practice! It was truly exciting to find a product that could so perfectly bridge the gap between disparate furniture pieces.

The Magic of Chalk Paint: A Beginner’s Guide to Application
As a first-time user, experimenting with chalk paint was a genuine delight, and I was particularly impressed that Rust-Oleum offers its own line. This versatile paint is available as a convenient spray paint or in a traditional can. For the cabinet itself, I chose the spray paint option, primarily to achieve the smoothest possible finish and avoid any tell-tale brush strokes. The goal was a modern, factory-like appearance that would elevate the piece.
Preparation for Painting: A Quick & Easy Start
One of the widely celebrated benefits of chalk paint is its reputation for requiring minimal preparation – often no priming or heavy sanding is needed. While this is certainly true, I opted for a light sanding of the entire unit anyway. This step helps create a slightly textured surface for better adhesion, ensuring an even more durable and professional finish. After a quick wipe-down to remove any dust, the cabinet was ready for its transformation.
Spray Painting for a Flawless Finish
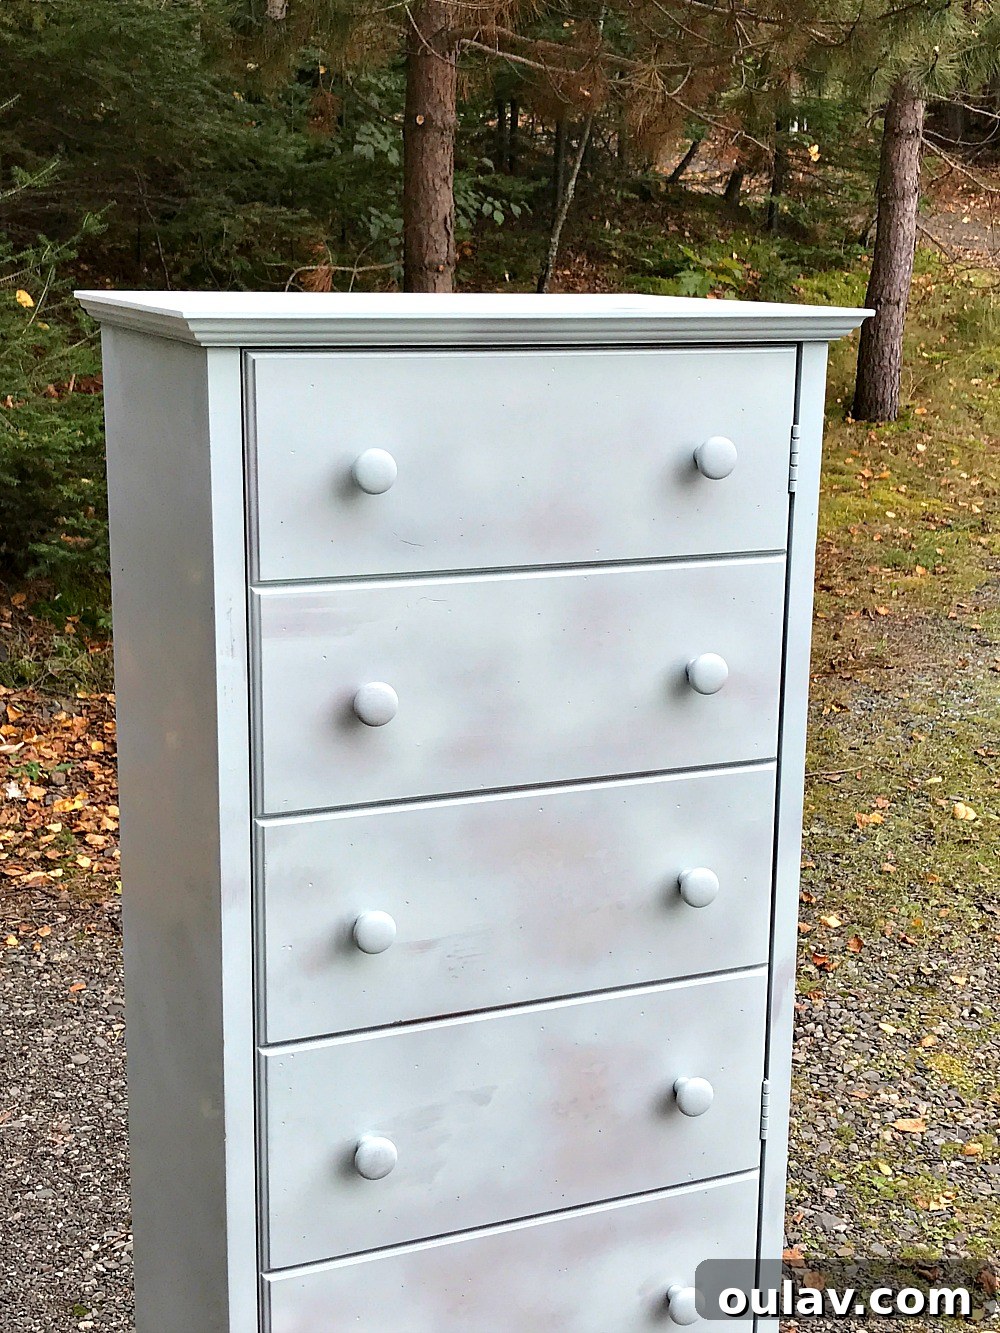
My decision to use spray chalk paint paid off immensely. I didn’t bother taping off any areas; instead, I simply sprayed the cabinet while it was closed, carefully preserving its beautiful cedar interior. This not only saved time but also ensured a continuous, seamless finish across all visible surfaces. Even the hinges and knobs received the same Serenity Blue treatment, applied simultaneously. This streamlined approach made the entire chalk paint cabinet makeover incredibly fast and surprisingly easy, minimizing tedious detail work.
Achieving a Professional Matte Look
Initially, the coverage appeared a bit splotchy, which can be disconcerting for a first-timer. However, after patiently applying three thin coats, the result was nothing short of seamless and wonderfully smooth. I absolutely adore the matte finish it achieved; it instantly modernized this somewhat dated piece, giving it a sophisticated, contemporary feel. The stenciled design on the front of the original cabinet was perfectly covered, yet the subtle irregularities and natural character of the wood (which, to be honest, almost looked faux) were beautifully preserved beneath the matte surface, adding depth and charm.

The Unbelievable Drying Time: A DIYer’s Dream
One of the most impressive and truly lovable qualities of this chalk paint is how incredibly quickly it dries! I vividly recall a day when I was home alone and decided to drag the cabinet outside to spray on the first coat. I finished and headed back into the Fish Room to work on another project, expecting to return to the cabinet much later. I had only been working for about 15 minutes when I heard a distinct rumble of thunder. My beautiful, sunny day with clear skies had dramatically morphed into an unexpected thunderstorm.
Panicked, I ran to the driveway, convinced that my fresh paint job was utterly ruined. To my astonishment and immense relief, the paint was dry enough for me to heave, shove, and drag this massively heavy chest back into the garage without a single smudge or issue. A few days later, once the skies cleared completely, I confidently applied the second and third coats. Any other paint would undoubtedly have been damaged by the sudden downpour – and certainly by my frantic manhandling – but this chalk paint was unscathed, proving its remarkable resilience. This quick-drying property alone makes the chalk paint cabinet makeover a joy and a true success for anyone on a tight schedule or facing unpredictable weather.


Enhancing Storage and Style: DIY Plywood Shelves
To further combat the “furniture graveyard” look and maximize the room’s utility, my husband and I embarked on another small DIY project: adding custom plywood shelves. These shelves were designed to perfectly line up with the existing shelves in the Ikea cabinets, creating a continuous and visually harmonious storage system. Naturally, they were also painted with the very same Serenity Blue chalk paint as the cabinet, reinforcing the cohesive color scheme throughout the room.
Brushing Chalk Paint: A Different Technique
For the plywood shelves, I decided to switch up my application method and brush on the paint. This technique demands a different kind of commitment: you have to work quickly and confidently, applying the paint with decisive strokes and avoiding over-brushing to prevent streaks or visible brush marks. Despite the need for precision, chalk paint goes on incredibly well with a brush, and a little truly goes a long way. I still have tons of paint left over – you might have even spotted this versatile color in my DIY mini potted plant ornaments project!
Selecting the Right Brackets: Lessons Learned
To support these new shelves, I rummaged through the garage and found some brackets, which I promptly spray painted white to match the existing decor. In hindsight, however, we probably should have invested in some tougher, more heavy-duty brackets, similar to the ones we used in the kitchen. While I always strive to work with what I have on hand to stay within budget, these lighter-duty brackets mean we can’t truly load down the shelves with extremely heavy items. This might, in fact, be a wise limitation for organization, preventing clutter! I’ll be keeping a close eye on how they hold up over time, but for now, they serve their purpose perfectly.
The Transformed Fish Room: A Budget-Friendly Success Story

I am incredibly proud of how this entire space came together, especially considering the modest budget we worked with. The cohesive look, from the chalk-painted cabinet and shelves to the existing Ikea pieces, creates a unified and welcoming atmosphere. And let’s not forget the striking foundation: the cool blue marbled floors we ingeniously crafted from plywood, which tie everything together beautifully.
While we anticipate a more extensive renovation of this space in the future, likely involving brand new, built-in cabinetry, for now, it was incredibly satisfying to repurpose these second-hand pieces. Giving this random grouping of furniture a new home and purpose, along with various bits and bobs from the garage, has made the Fish Room not only functional but also a true reflection of budget-friendly creativity. I absolutely love how my chalk paint cabinet makeover turned out, and I’m already excited to explore using chalk paint in many more future DIY projects.
Explore More DIY Inspirations
Ready to see the full picture? Come tour the finished Fish Room, now a fully transformed Craft Room, by clicking here. And for more creative ideas and step-by-step guides, be sure to explore my DIY & Craft Project Gallery and my DIY Renovating Gallery. Happy crafting!