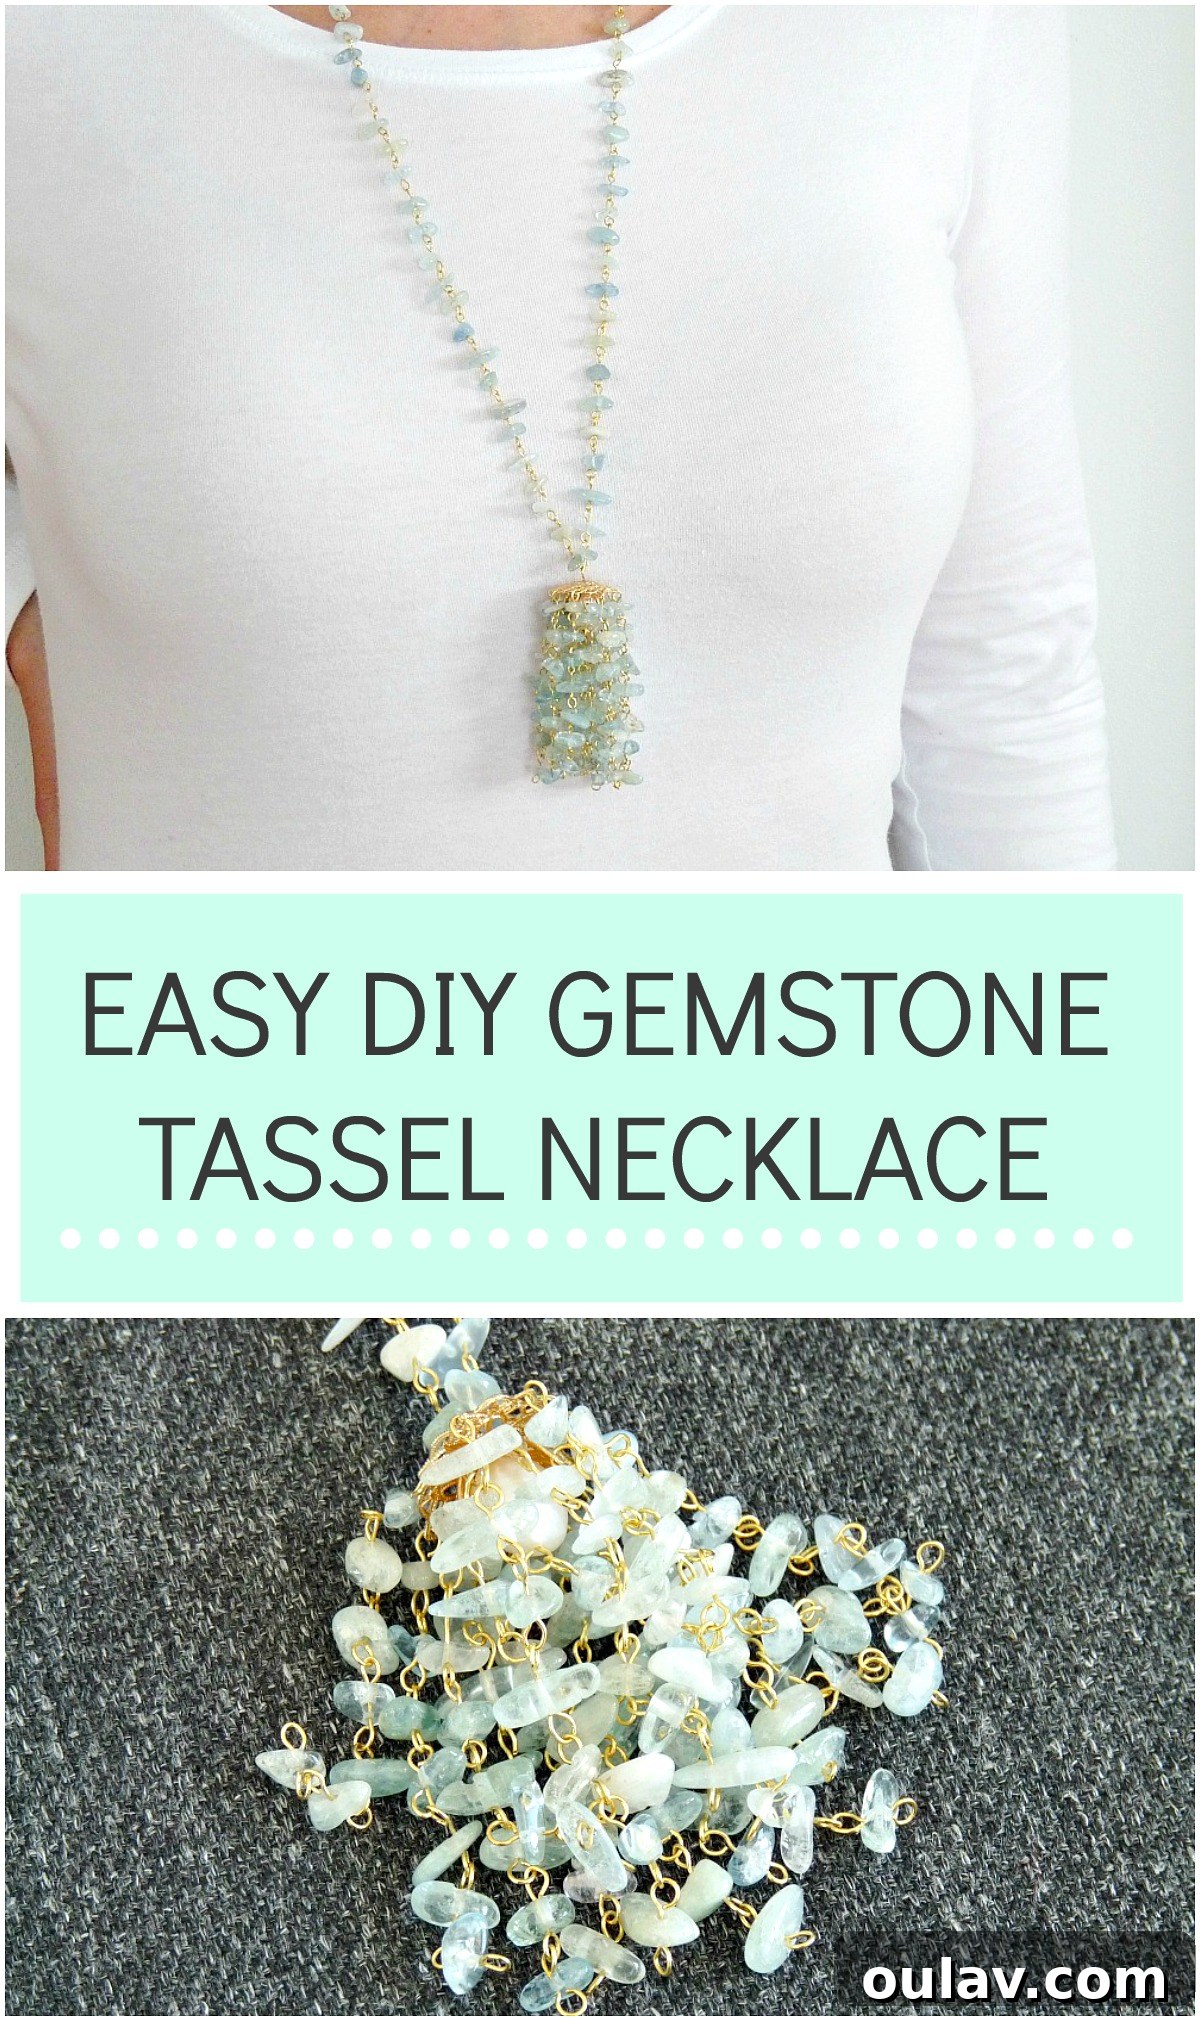
The allure of handmade jewelry often lies in its unique charm and the personal story it tells. There’s a particular joy in crafting something beautiful with your own hands, especially when it aligns with current fashion trends while also being mindful of your budget. This guide will walk you through creating your very own stunning **DIY gemstone tassel necklace**, a project that’s not only incredibly rewarding but also allows you to express your individual style. We’ll explore how to transform simple materials, perhaps even those hidden gems in your craft stash, into a captivating piece that will undoubtedly draw compliments.
The tassel trend has been a consistent favorite in fashion, adding a playful yet sophisticated touch to accessories. But why settle for off-the-shelf when you can elevate this trend with the sparkle and significance of gemstones? In my own crafting journey, I recently felt a strong desire to create some new jewelry. Committed to sticking to a budget and making the most of what I already owned, I challenged myself to avoid craft store temptations. To my delight, I unearthed some fantastic finds: beautiful aquamarine chips and elegant filigree bead caps salvaged from a pair of vintage chandelier earrings. With these, the vision for a unique **aquamarine tassel necklace** began to take shape.
The Joy of Crafting Your Own Gemstone Tassel Necklace
Creating your own jewelry, like this **gemstone tassel necklace**, is a deeply satisfying experience. It’s an opportunity to personalize your accessories, ensuring they perfectly match your aesthetic and wardrobe. Beyond the aesthetic appeal, DIY projects offer a wonderful escape, a mindful activity that allows you to focus your energy and creativity. This particular project is surprisingly straightforward, making it perfect for both seasoned crafters and those new to jewelry making. While I’ve shared the exact materials I used, the beauty of DIY lies in its flexibility. Feel free to substitute any type of beads, stones, or colors that resonate with you to make a truly unique **beaded tassel necklace**.
Why Choose Aquamarine for Your Tassel Necklace?
Aquamarine, with its delicate blue-green hues, evokes the serene beauty of the ocean. It’s often associated with tranquility, clarity, and harmony, making it a popular choice for jewelry. Its subtle sparkle and soothing color make it incredibly versatile, complementing a wide range of outfits from casual to elegant. When considering gemstones for your **DIY tassel necklace**, aquamarine offers a refreshing, sophisticated touch. However, don’t limit yourself! Amethyst, rose quartz, lapis lazuli, or even simple glass beads can create equally stunning results. The key is to choose materials that you love and that inspire your creativity.
Essential Supplies for Your DIY Gemstone Tassel Necklace
Before diving into the creation process, gathering your materials is the first crucial step. The beauty of this project is that many items can be found in existing craft stashes, proving that beautiful jewelry doesn’t always require a trip to the store. Here’s a detailed list of what you’ll need, along with some helpful considerations:
- Aquamarine Chips or Beads: While I used chips, which offer an organic, raw aesthetic, you can opt for faceted beads for more sparkle or smooth round beads for a classic look. Consider the size and shape – larger beads will create a bolder statement, while smaller ones offer a more delicate feel. For a truly dazzling finish, faceted aquamarine beads are an excellent choice.
- Gold Eye Pins: These are fundamental for connecting your beads into chains. Ensure you have a sufficient quantity, as you’ll be using many for both the main necklace chain and the tassel strands. Quality eye pins will prevent your necklace from breaking easily.
- Flat Filigree Bead Cap: This will serve as the top-most part of your tassel, providing multiple attachment points for the dangling gemstone chains. Look for one with an intricate design and enough openings or edges to securely hook your individual strands.
- Second, More Spherical Bead Cap: This cap will sit beneath the flatter one, contributing to the tiered structure of the tassel. It should be slightly smaller than your main flat bead cap to create a visually appealing layered effect.
- Pearl or Other Bead for the Tassel Core (Optional): A central pearl or decorative bead adds a touch of elegance and acts as a focal point within the tassel. If you prefer a simpler design or a full gemstone tassel, this step can be skipped, and you can create a central gemstone strand instead.
- Needle-Nosed Pliers: Essential for bending and closing loops on your eye pins. Opt for jewelry-specific pliers with smooth jaws to avoid marring your wire.
- Wire Cutters: For trimming excess wire from your eye pins. Many needle-nosed pliers have integrated wire cutters, offering a convenient two-in-one tool.
- Ruler or Measuring Tape: Useful for ensuring consistent chain lengths for your tassel and overall necklace length.
A note about the supplies: The exact number of beads and eye pins you’ll require will largely depend on the desired length of your necklace and the size and fullness of your tassel. For my project, I used approximately 200 eye pins and a similar number of stone chips. It’s always a good idea to purchase a little more than you anticipate needing, as some eye pins might get squashed or bent, and occasionally, stone chips may have unevenly drilled holes, making them unusable for a seamless chain. Investing in good quality findings will ensure the longevity and beauty of your handmade **aquamarine necklace**.
How to Craft Your DIY Gemstone Tassel Necklace: A Step-by-Step Guide
Now that you have all your materials, let’s begin the exciting process of assembling your unique **beaded tassel necklace**. Patience and attention to detail are your best friends here, especially when forming loops.
Step 1: Creating the Main Necklace Chain
This is where the bulk of your effort will go. The main chain is composed of numerous individual gemstone links connected together. Each link is made using an eye pin and a single gemstone bead.
- Thread a Bead: Take an eye pin and slide one aquamarine stone bead onto it. Push it down until it rests snugly against the existing loop of the eye pin.
- Trim the Wire: Using your wire cutters, trim the excess wire, leaving approximately 7-10mm (about 1/4 to 3/8 inch) of wire extending beyond the bead. This length is crucial for forming a neat and secure loop.
- Form a Loop: Grab the trimmed wire with your needle-nosed pliers and carefully bend it into a loop. You can find a clear tutorial on loop-making here, which demonstrates this essential jewelry-making technique. The goal is to create a perfectly round, closed loop.
- Connect the Links: Before gently closing the newly formed loop completely, slip the loop from the next eye pin (which will also have a bead threaded and a loop partially formed) onto it. Then, firmly but gently close the first loop with your pliers, ensuring it’s secure and there are no gaps. This creates a continuous chain of interconnected gemstone links.
- Repeat Extensively: Continue this process – threading a bead, trimming, forming a loop, and linking – a multitude of times. You’ll repeat this “a zillion times” until your chain is long enough to comfortably slip over your head. If you prefer a shorter necklace, you can stop at any point and attach a clasp (not included in the original supplies, but easily added).
Step 2: Constructing the Tassel Base
The tassel is the captivating centerpiece of your necklace, and building its base correctly is key to a beautiful, flowing design. This involves layering the bead caps and a central pearl or bead.
- Prepare the Core: Take a single eye pin. If you’re using a pearl or a decorative bead for the core, thread it onto this eye pin.
- Add the Bead Caps: Next, slide the smaller, more spherical bead cap onto the eye pin, followed by the larger, flatter filigree bead cap. The larger cap should sit on top, forming the structure to which the tassel strands will attach.
- Secure the Base: Just like with the main chain, trim the eye pin wire, leaving enough for a loop, and create a secure loop at the top. This top loop will be used to attach the entire tassel to your main necklace chain. This assembly forms the sturdy and decorative base from which your tassel will dangle. I was a bit eager and started attaching my tassel strands before taking a photo, but envision the same arrangement with a glass bead instead of a pearl, as shown in the image below, to illustrate the concept.
Step 3: Assembling the Dangling Tassel Chains
This is where your tassel truly comes to life. You’ll create a series of smaller gemstone chains and attach them to the bead caps, building a lush, flowing effect.
-
Create Mini Chains: Using the same technique as for the main necklace chain (eye pin, bead, trim, loop, link), create several shorter chains of aquamarine stones. The variation in length will give your tassel depth and movement. For example:
- Center Chain: If you used a pearl or bead as your tassel core, a single chain (e.g., with five stones) can dangle directly from its bottom loop.
- Inner Layer: For the smaller bead cap, create a series of chains (e.g., with six stones each). These will be hooked onto the edges or openings of the smaller bead cap.
- Outer Layer: For the largest, flat filigree bead cap, make chains with slightly more stones (e.g., seven stones each). These will be attached to the outermost points of the largest bead cap.
By varying the number of stones in each strand attached to different tiers of bead caps, you ensure that the overall length of the tassel strands remains similar, creating a harmonious and full appearance.
- Attach the Chains: As you complete each mini strand, simply hook its top loop onto an available edge or opening of the appropriate filigree bead cap and gently close the loop with your pliers. It’s crucial that your chosen bead caps have sufficient points or an open filigree design to allow for easy and secure attachment of these beaded chains.
- Secure the Ends: For the very ends of the individual tassel chains, you have a couple of options. While straight pins (also known as headpins, which have a flat head at one end) are ideal for creating a neat, loop-free finish at the bottom, I sometimes improvise. In my case, I simply used eye pins for the ends. It’s amusing how I’ll splurge on something like a pricey planter but then pinch pennies on basic craft supplies like straight pins! It’s all part of the unique journey of a DIY enthusiast.
Once all your gemstone strands are attached and secured, your beautiful **gemstone tassel** will be complete, ready to be joined with your main necklace chain.
When it’s completed, the gemstone tassel looks like this:
Step 4: Connecting the Tassel to the Necklace Chain
The final step is straightforward: simply connect the top loop of your completed gemstone tassel to the bottom center of your main necklace chain. Ensure this connection is secure to prevent your beautiful tassel from detaching.
Wearing and Sharing Your Handmade Creation
The best part about creating a **handmade gemstone necklace** is finally getting to wear it or gift it to someone special. My Mom was kind enough to snap a photo of me wearing my fancy new **DIY gemstone tassel necklace**, and I couldn’t have been prouder.
However, the necklace proved to be so appealing that before I knew it, she was wearing it herself! It seems I might have to embark on making a second one soon. This truly speaks to the universal appeal of beautiful, handcrafted jewelry.
I’m genuinely quite besotted with aquamarine – no surprise, given my long-standing penchant for mint and aqua hues in decor and fashion. And I’m so incredibly happy I finally found a perfect use for these beautiful beads! I must confess, I’ve been hoarding them since 2009 (I’m hanging my head in shame, but also beaming with pride for finally utilizing them). This project is a testament to the fact that sometimes, the best crafting supplies are those you already own, just waiting for the right inspiration to strike.
I encourage you to give this **DIY gemstone tassel necklace** a try. It’s a rewarding project that results in a stunning piece of jewelry you’ll cherish. Happy crafting!