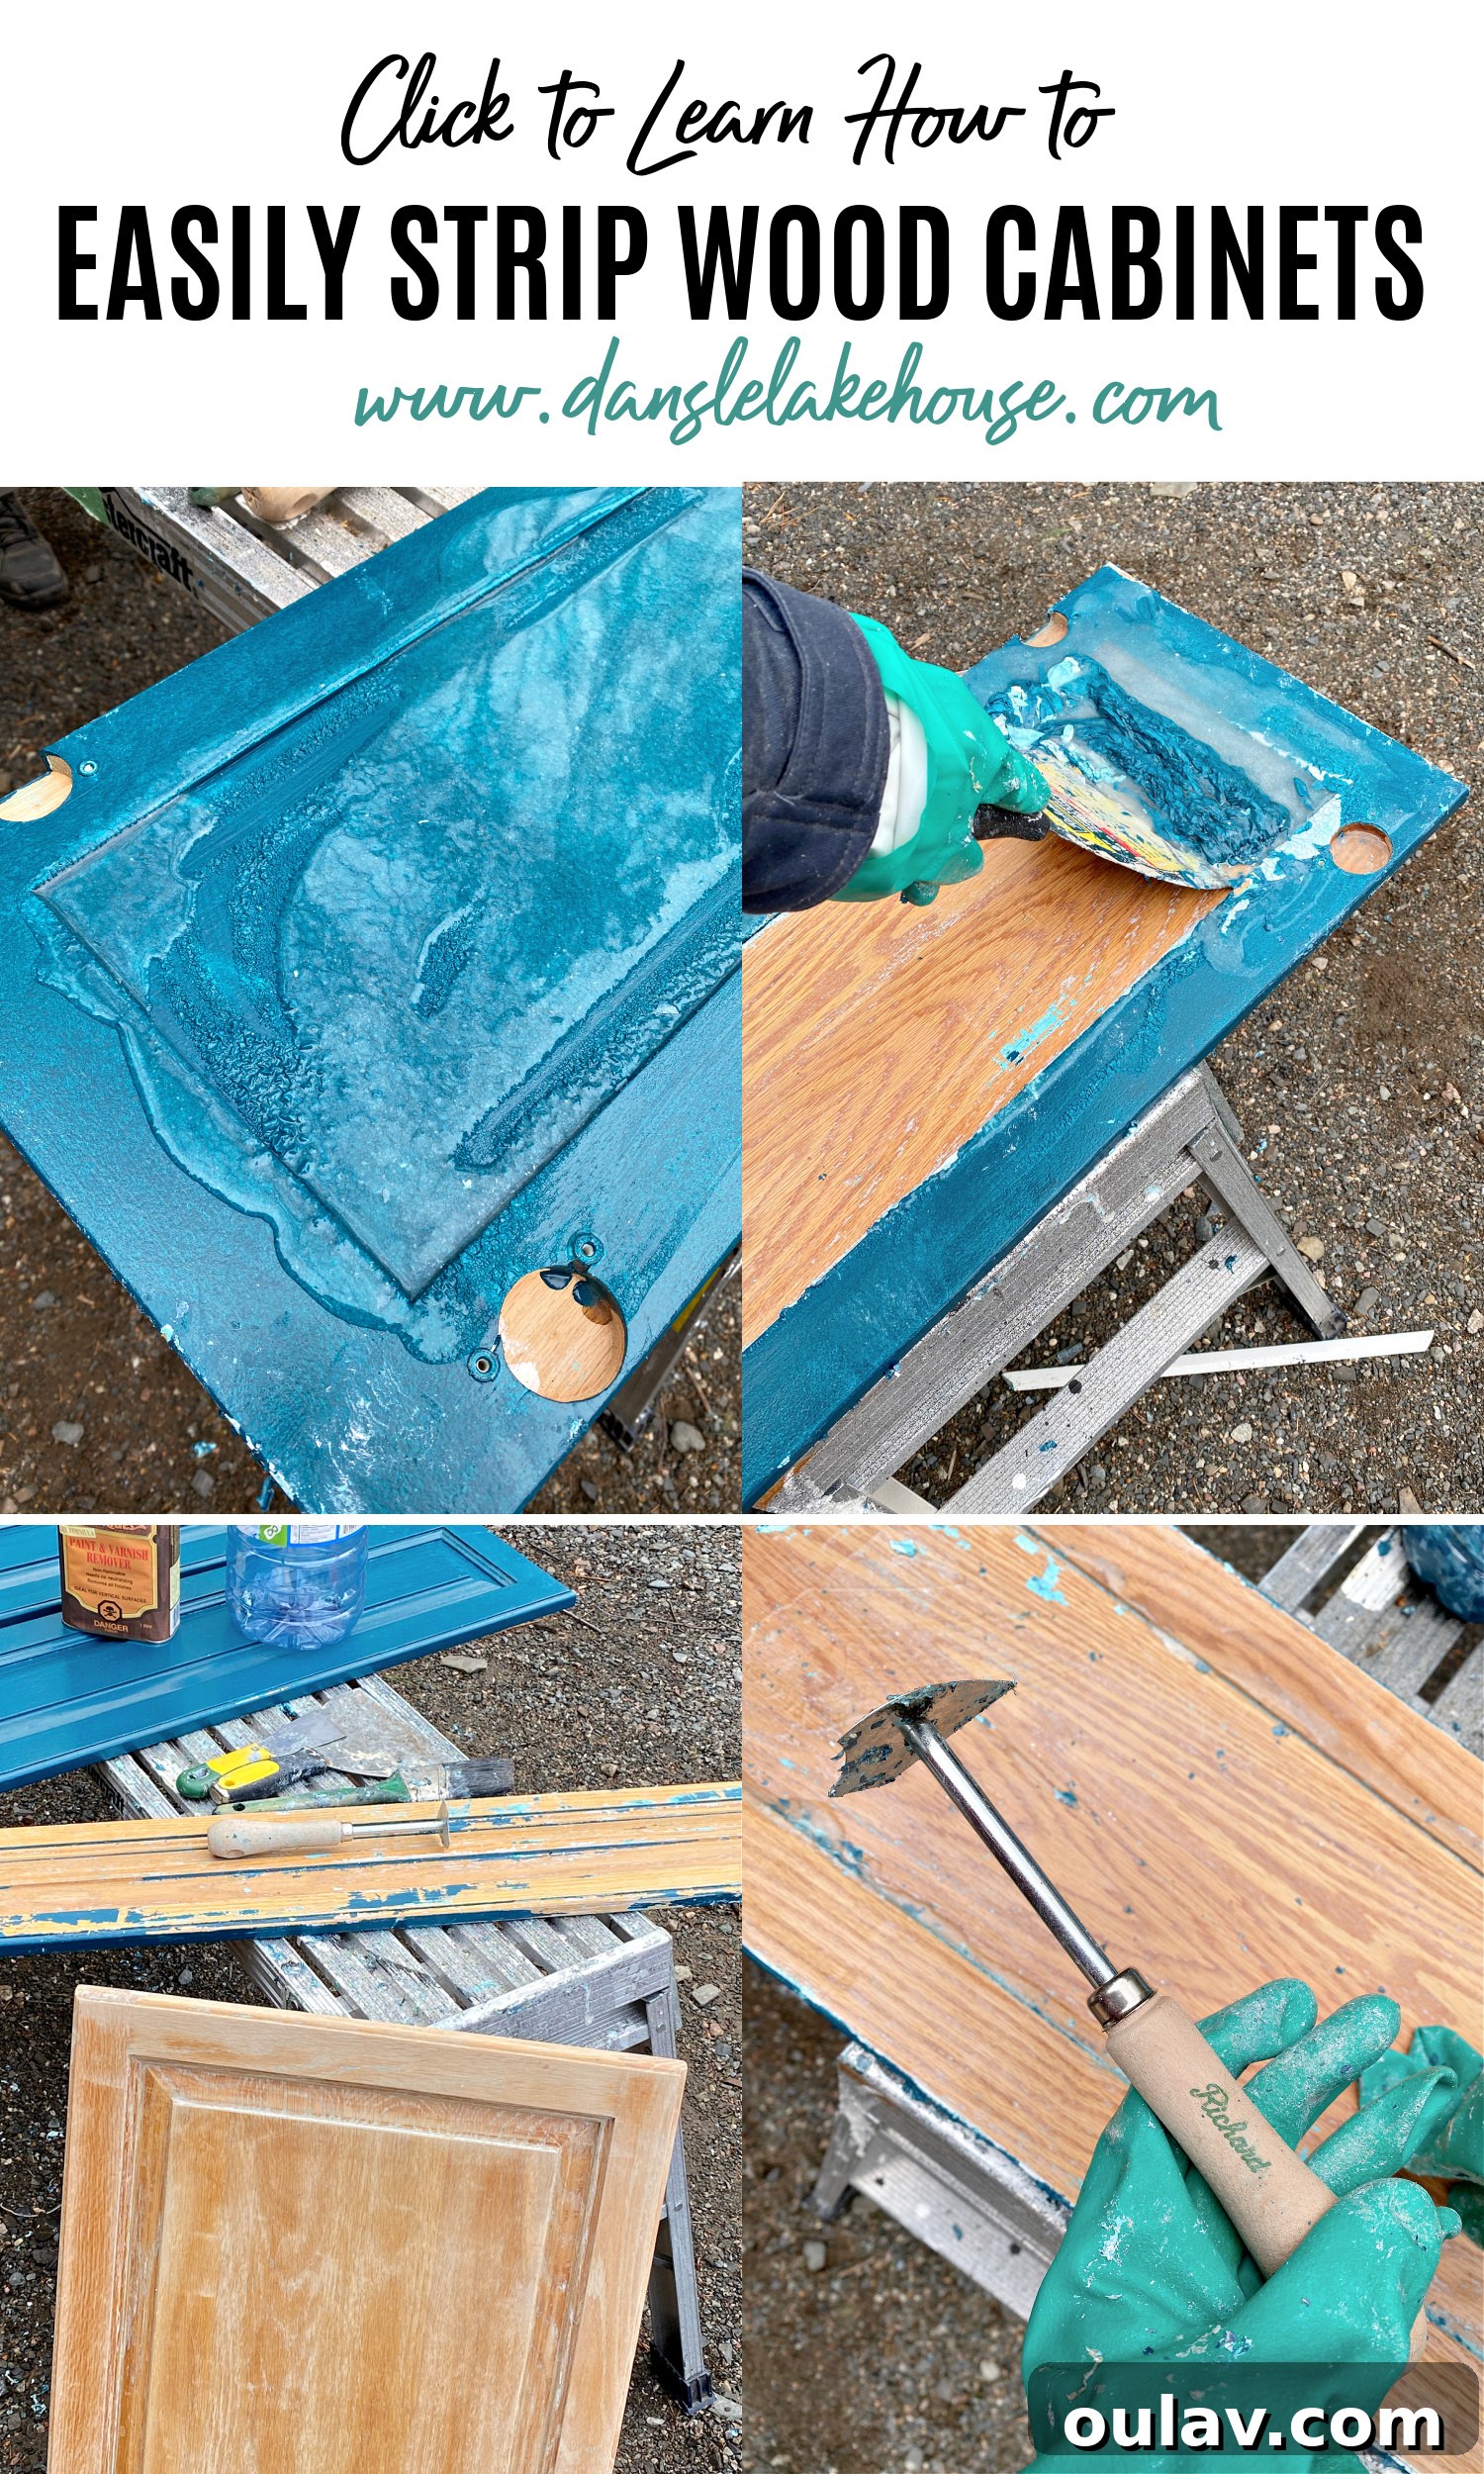
Effortlessly Strip Wood Cabinets: The Ultimate Guide to Removing Old Paint and Varnish
Are you dreaming of transforming your outdated wood cabinets or furniture back to their natural glory? Many DIY enthusiasts attempt to strip paint or varnish, only to encounter endless frustration, messy plastic wraps, and hours of tedious scraping. Social media is rife with “hacks” that promise miracles but often fall short, leaving you with stubborn, half-removed finishes. If you’re looking for a genuinely effective and surprisingly easy method to strip cabinets, you’ve come to the right place. Forget the struggles; I accidentally discovered a powerful combination – an exceptional chemical paint remover and a game-changing tool – that allows you to strip cabinets to natural wood in one remarkably smooth, efficient process. Get ready to reclaim the beautiful wood beneath those layers of old paint!
From Teal to Timeless: My Kitchen Cabinet Transformation Journey
Witnessing the dramatic shift from a vibrant teal to the clean slate of natural wood was truly gratifying. This transformation wasn’t just about changing a color; it was about starting fresh and preparing for a finish that would truly elevate my kitchen’s aesthetic.
Why I Chose to Strip My Kitchen Cabinets Instead of Repainting
One of the most frequent questions I receive on social media is, “Why did you strip your kitchen cabinets?” It’s a valid question, especially since we had meticulously sanded, primed, and painted them back in 2013, achieving what I considered a perfect finish. However, a few years later, I craved a change. I scuffed the existing paint, primed again, and applied a second coat of a different brand. Unfortunately, I wasn’t happy with the quality of this new paint, and the color didn’t quite hit the mark. I wanted to achieve a lighter cabinet color, but there was a significant hurdle: the accumulated layers of paint.
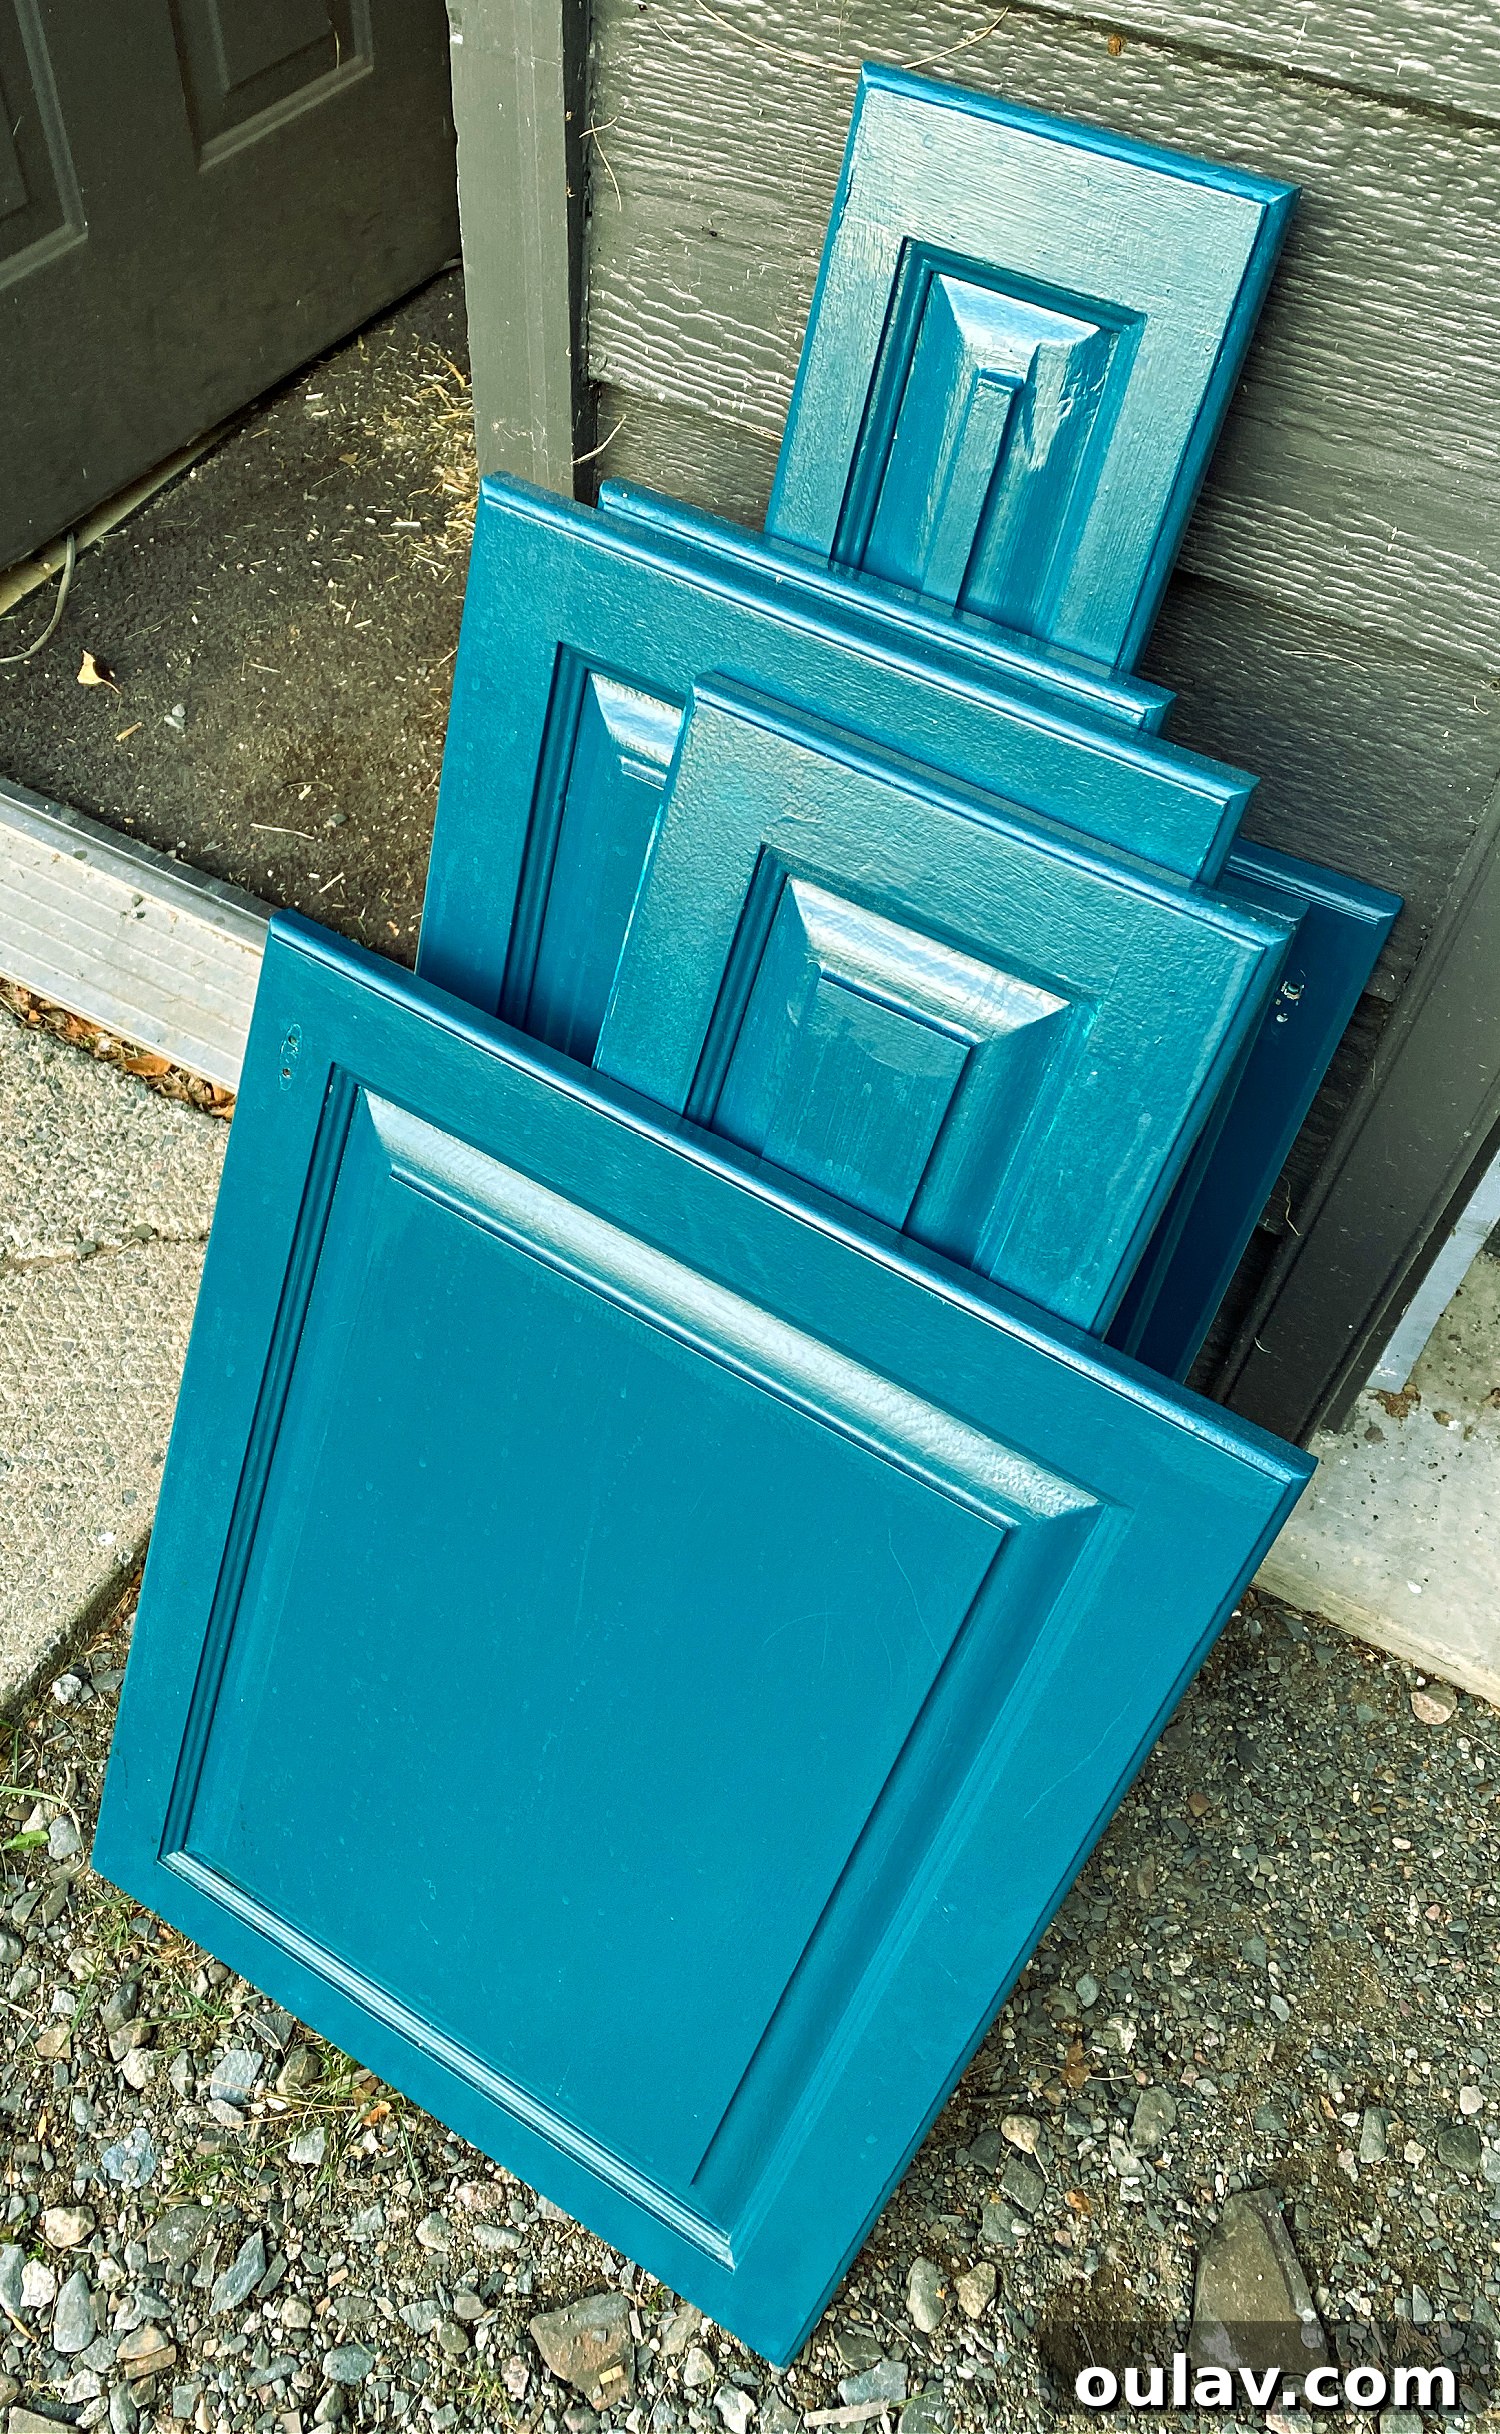
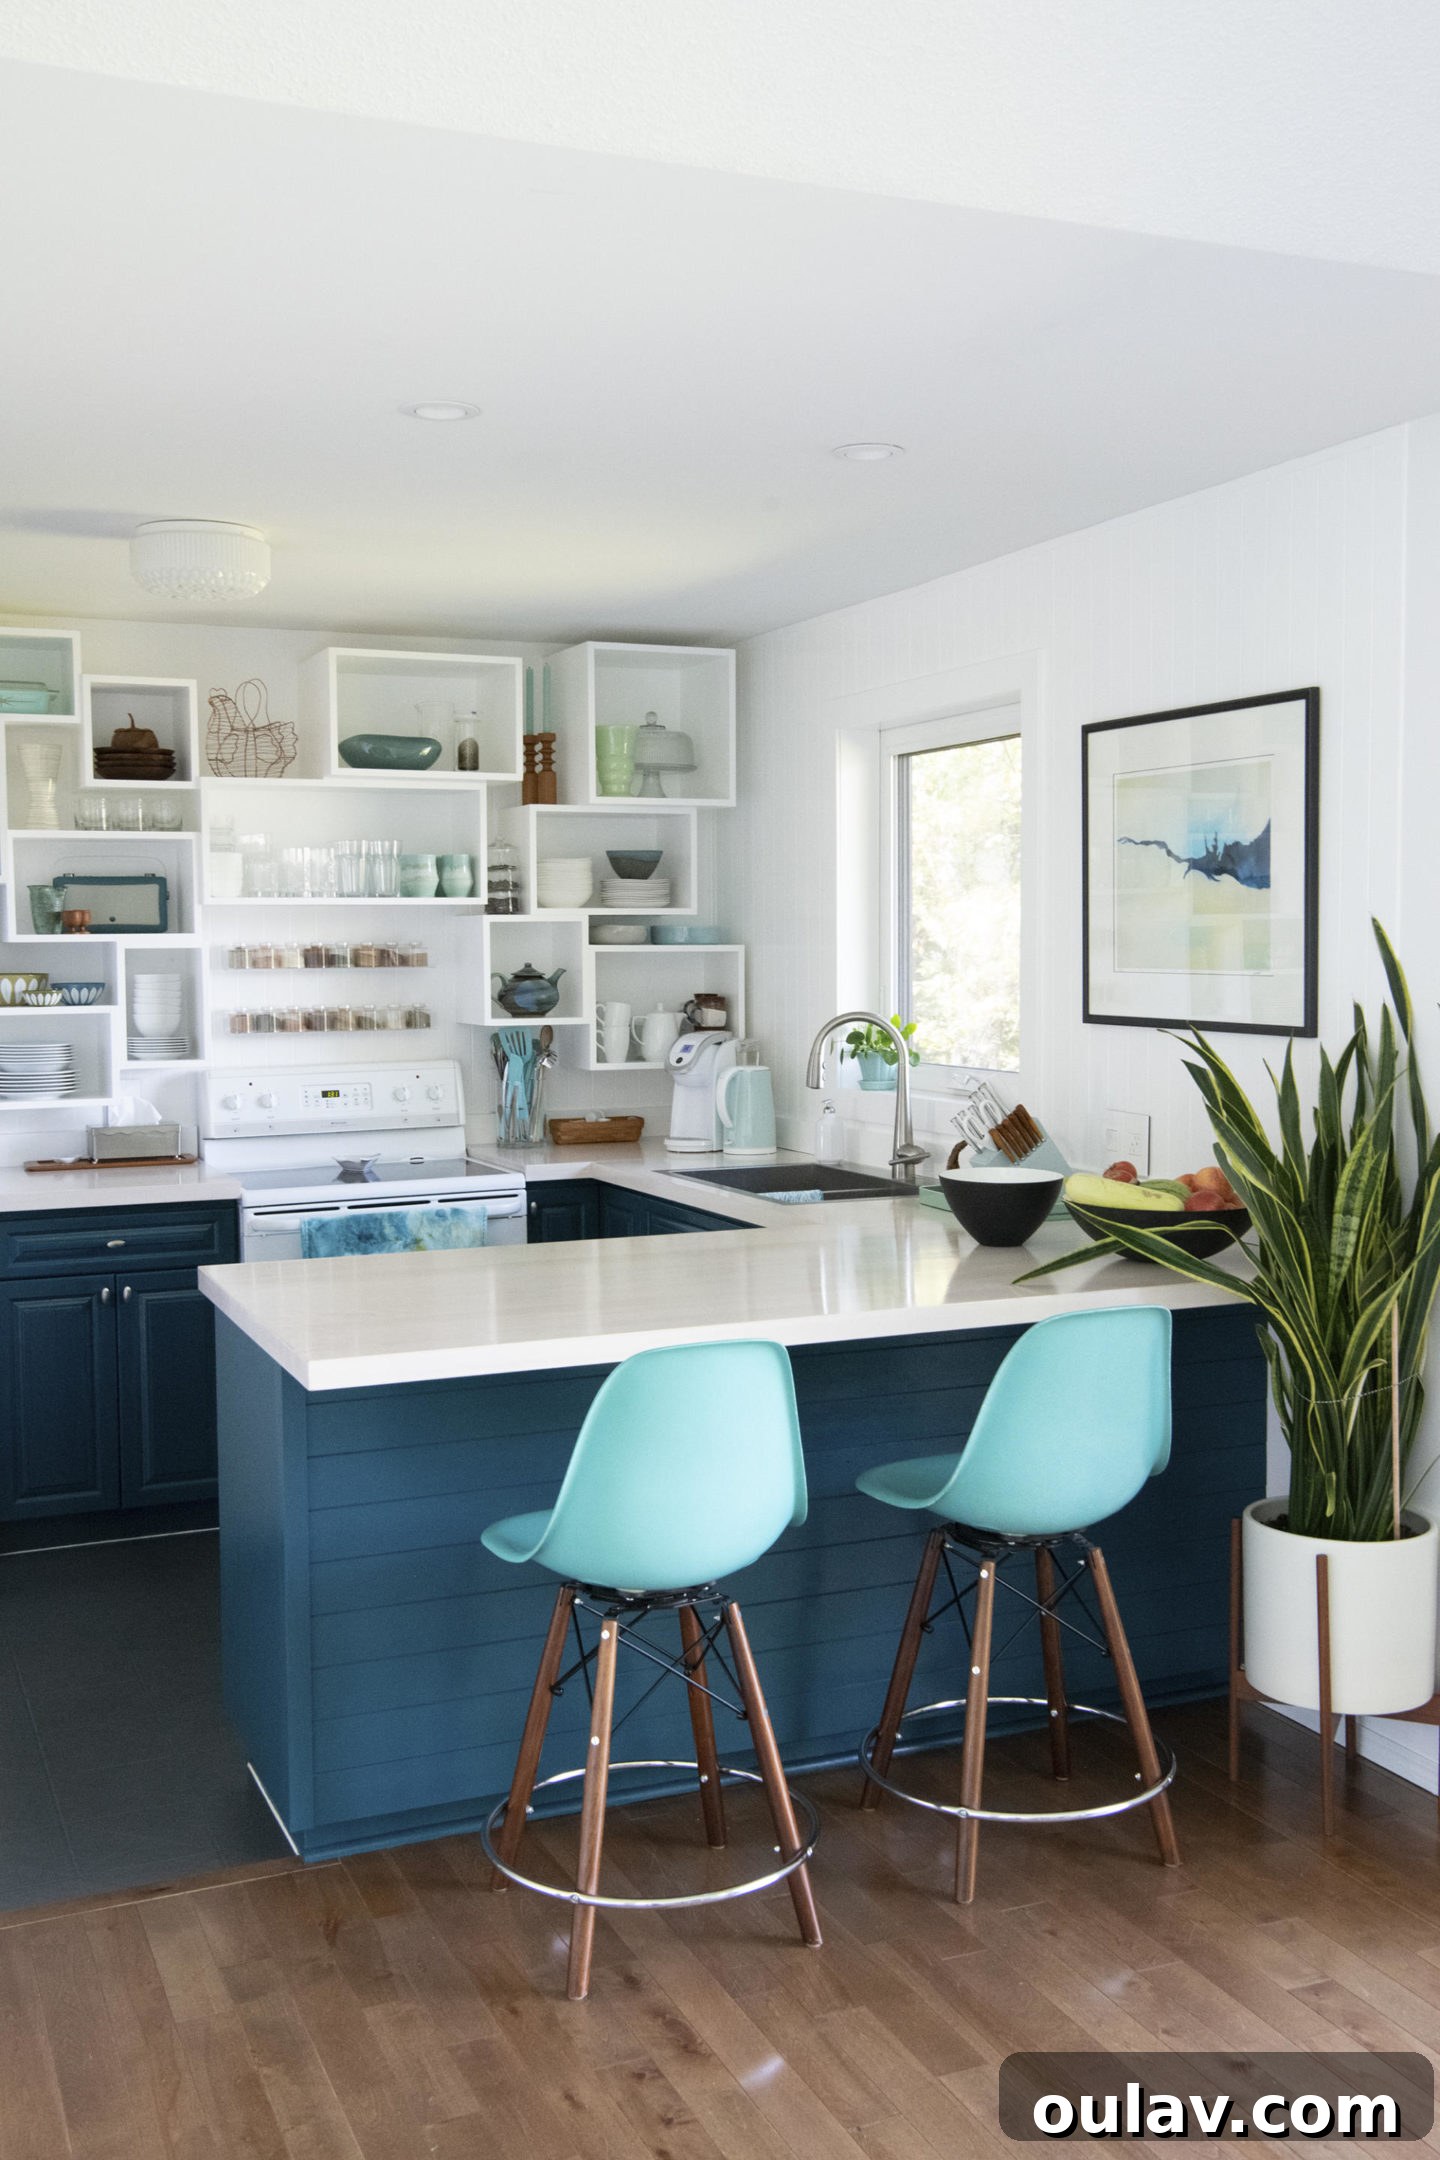
My kitchen cabinets were not ideally designed, with some closing with only millimeters to spare. Adding yet another layer of paint would have made them too thick, potentially preventing them from closing properly and creating an overall clumsy appearance. This realization sealed my decision: it was time to strip the cabinets back to their natural wood. This approach offered a true reset, allowing for a fresh, flawless foundation for a new finish without adding bulk. It was a commitment, but the promise of a superior result made it entirely worthwhile. Here’s a final look at the previous teal cabinets:
Unveiling the Best Paint Stripper for Wood Cabinets: My Secret Weapon
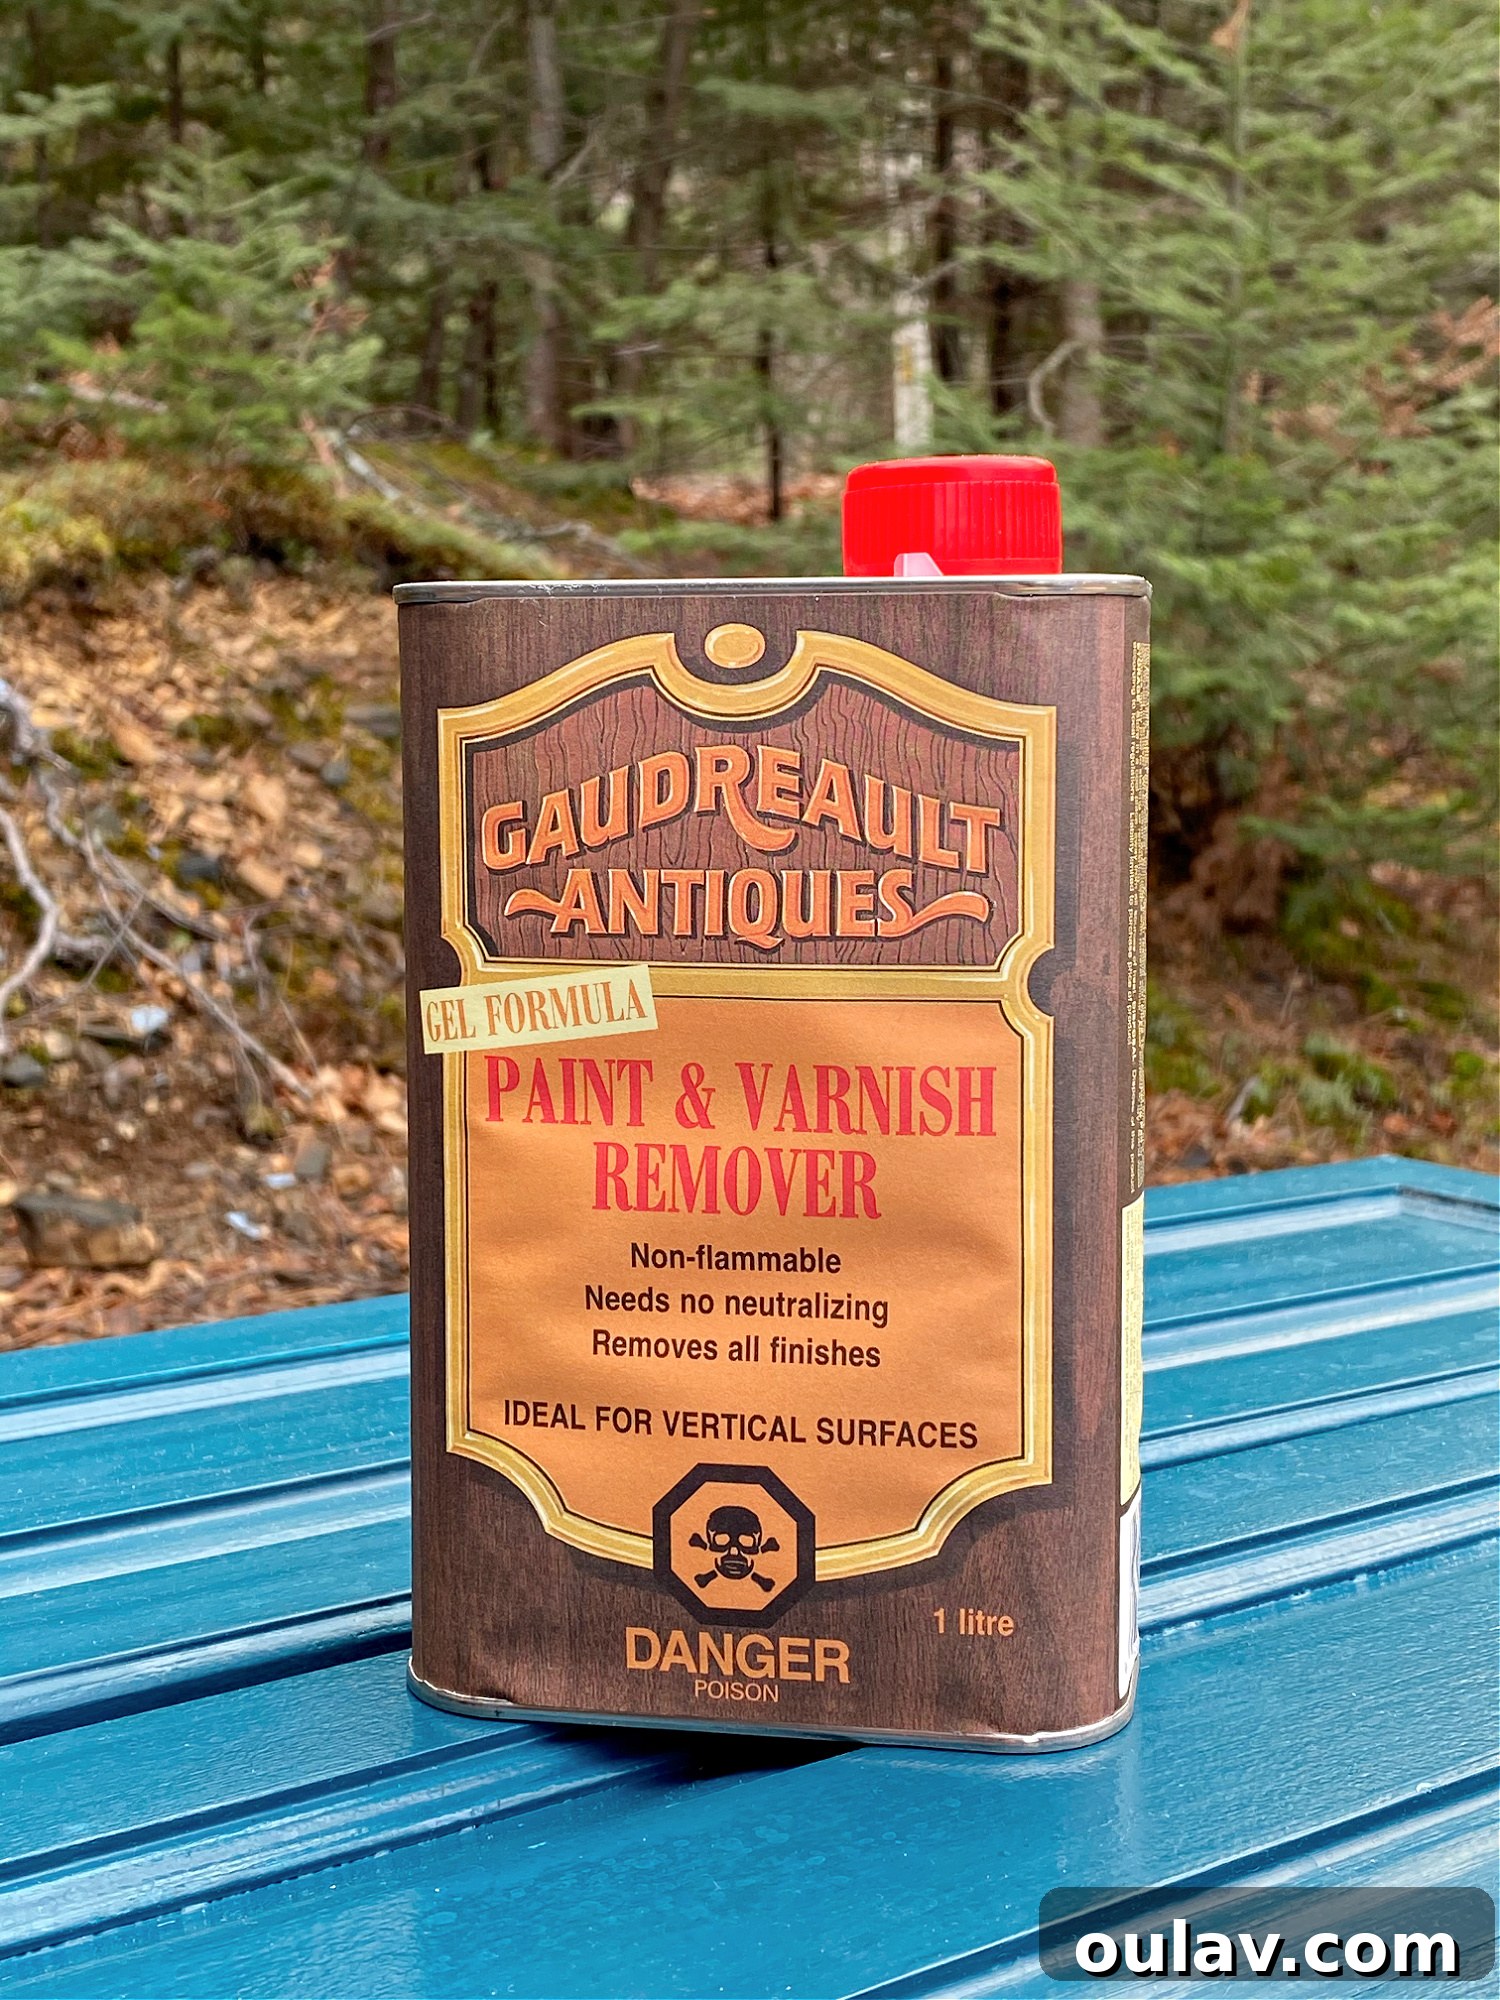
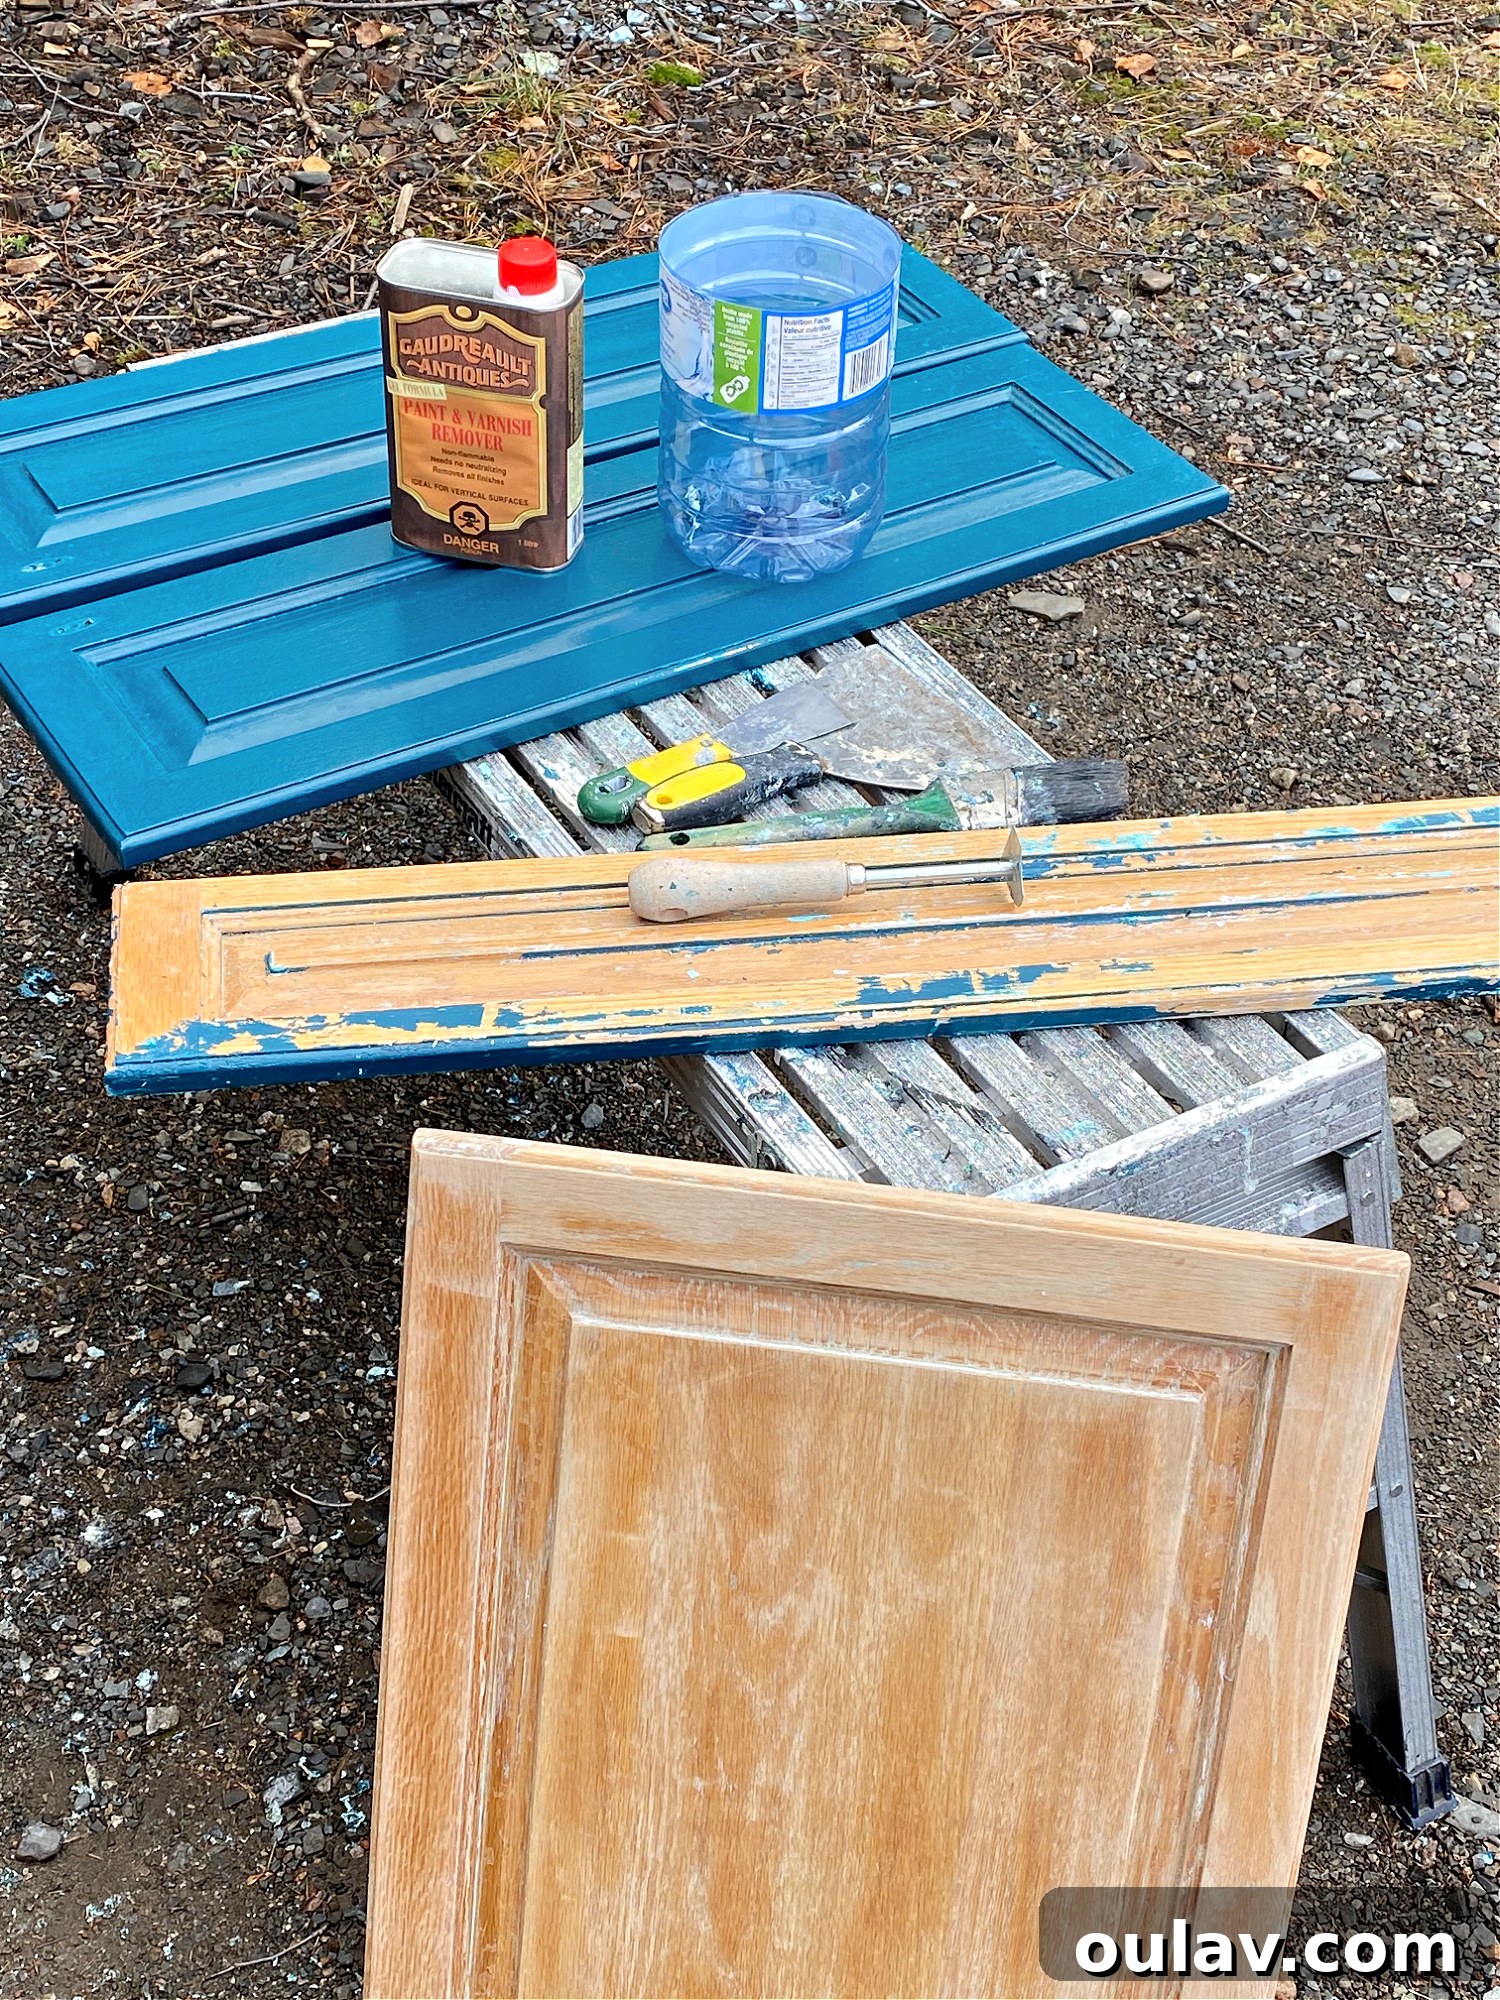
In my experience, after trying several decent but unremarkable brands, I stumbled upon what I believe is truly the best paint and varnish remover. While I won’t name the specific brand here due to potential regional availability issues, I can tell you its key characteristics that make it stand out: it’s non-flammable, requires no neutralizing after use, and is incredibly effective at removing all types of finishes – from old varnish to multiple layers of paint. This product transformed what could have been a grueling task into a surprisingly manageable one.
I purchased this incredible paint stripper locally, but if you’re struggling to find it or a similar high-performance product, here’s my best advice: seek out independently owned, small paint stores in your area. Unlike large chain retailers, these specialized shops often carry professional-grade products that are superior in quality and effectiveness, especially for intricate refinishing projects. The staff at these stores are also usually highly knowledgeable and can guide you toward an equally magical solution tailored to your needs. Don’t underestimate the power of expert advice and niche products when tackling a significant project like cabinet stripping.
Essential Tools and Supplies for a Flawless Cabinet Stripping Project
Having the right tools is paramount to making your cabinet stripping project as smooth and efficient as possible. Investing in quality supplies not only saves you time but also minimizes effort and ensures superior results. Here’s a comprehensive list of what you’ll need, along with explanations of why each item is crucial:
- Paint Stripper: As discussed, choose a high-quality, non-flammable, no-neutralizing formula for maximum effectiveness and safety.
- Chemical-Resistant Rubber Gloves: These are non-negotiable. Paint stripper is a harsh chemical; protecting your skin is vital. Ensure they are specifically rated for chemical resistance, not just household gloves.
- Protective Footwear: Ditch the flip-flops! Wear sturdy, closed-toe shoes to protect your feet from accidental spills or dropped tools.
- Protective Eye Wear: Safety goggles or glasses are essential to shield your eyes from splashes and fumes.
- Work Bench / Work Surface: A dedicated, stable surface makes the process much more comfortable and organized. Preferably, set this up outdoors or in a well-ventilated area.
- Belt or Palm Sander: After stripping, a sander is crucial for smoothing the wood surface and removing any lingering residue, preparing it perfectly for its new finish.
- Sandpaper: Various grits will be needed – coarser for initial smoothing, finer for a polished finish.
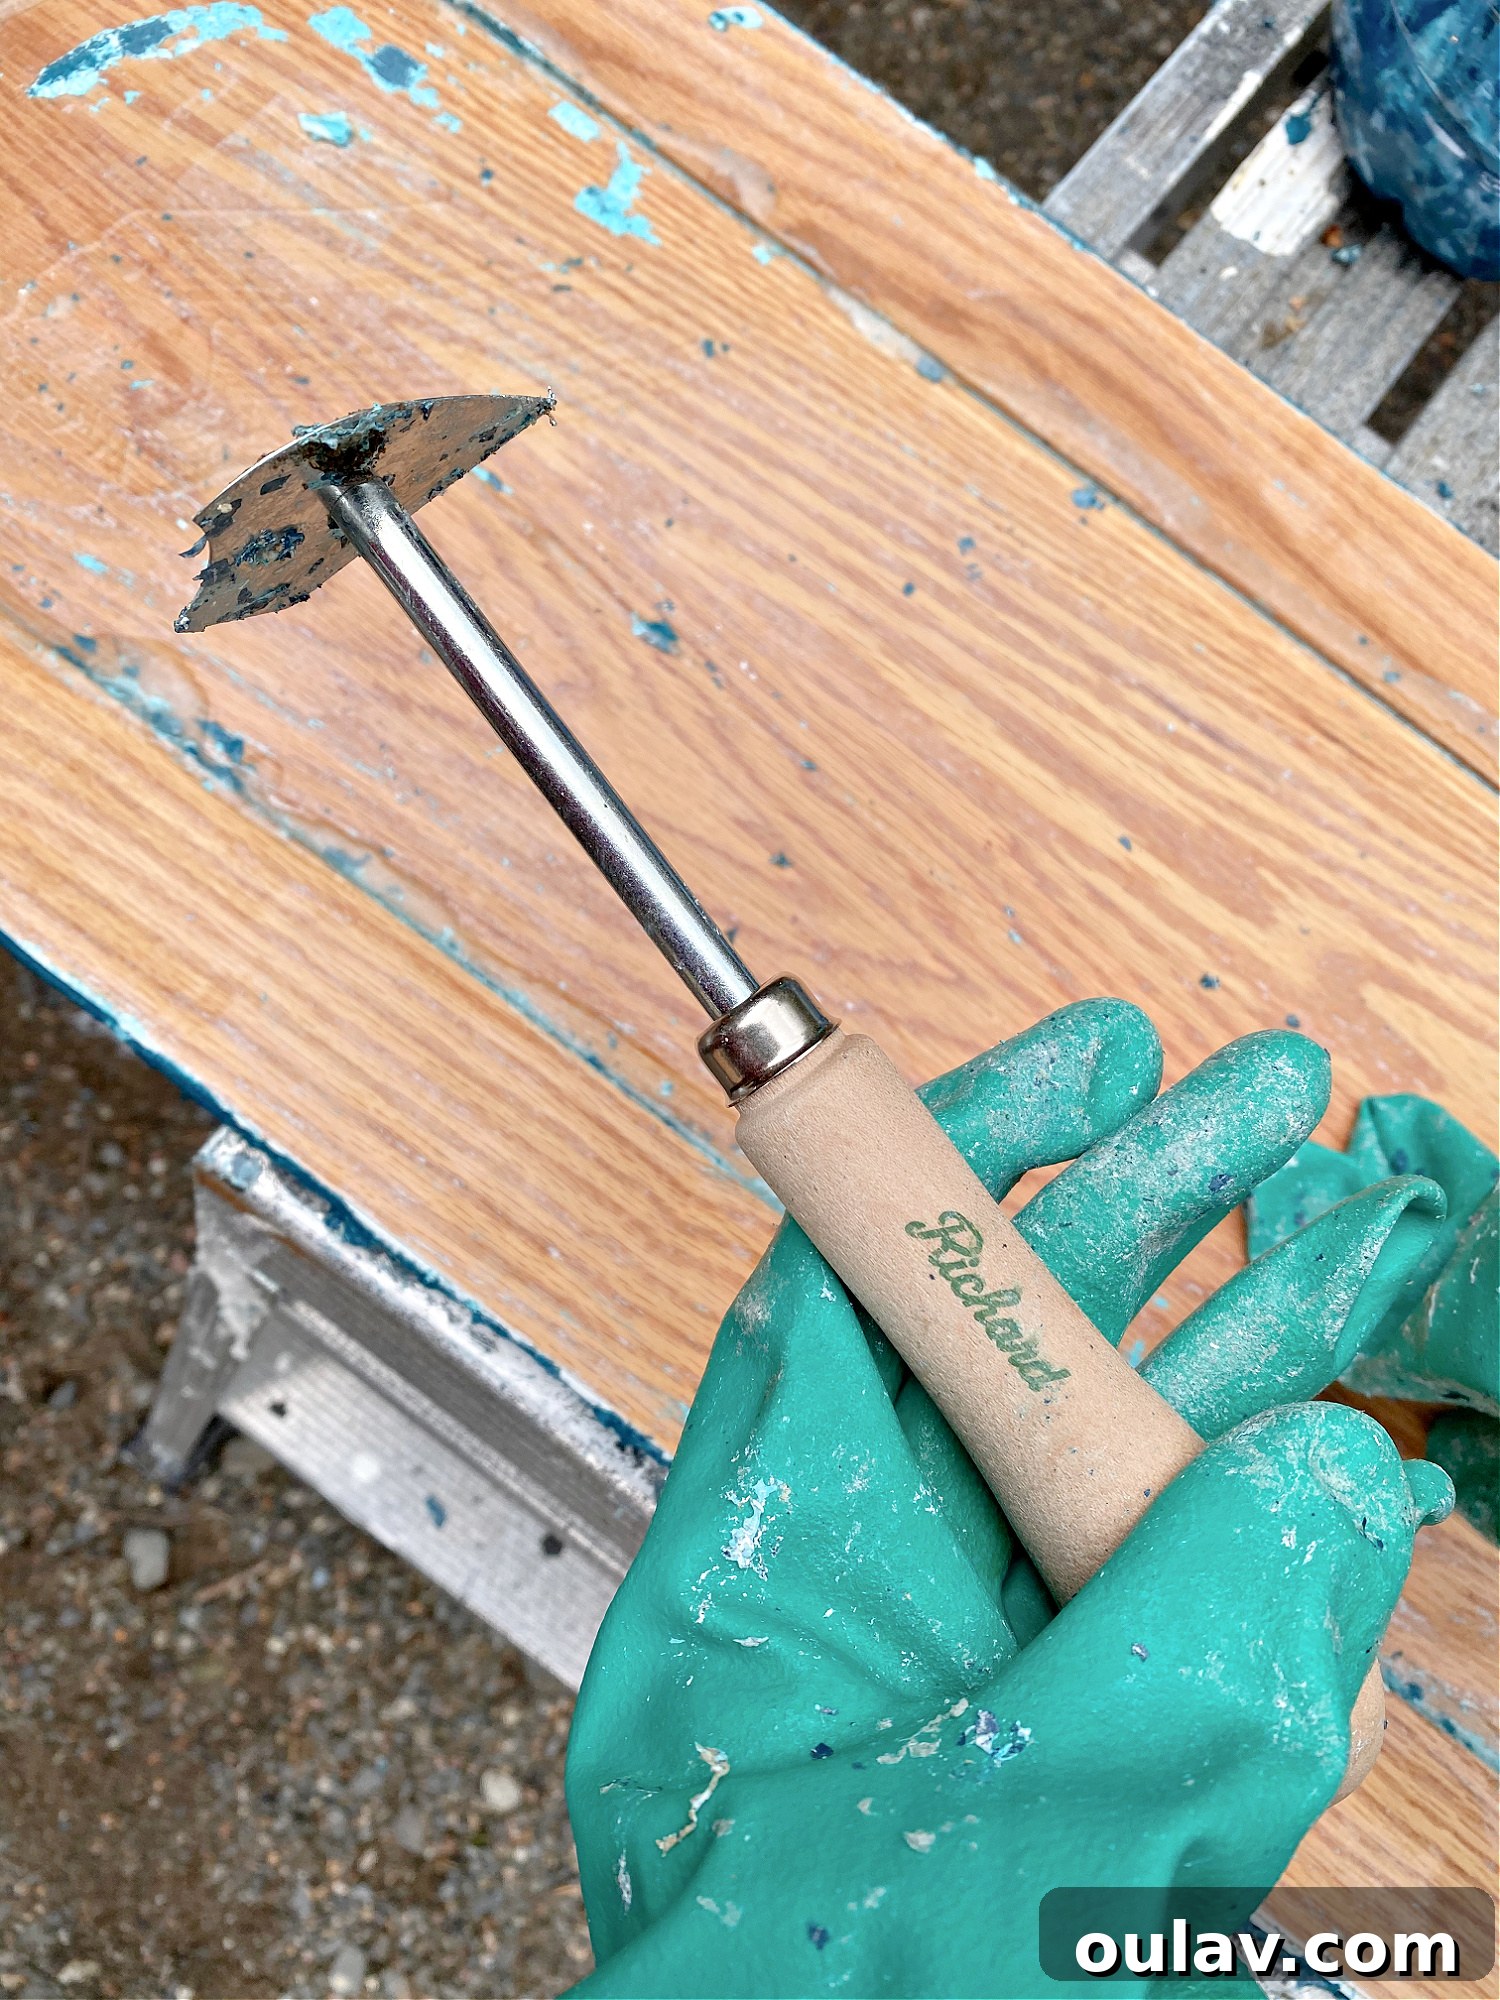
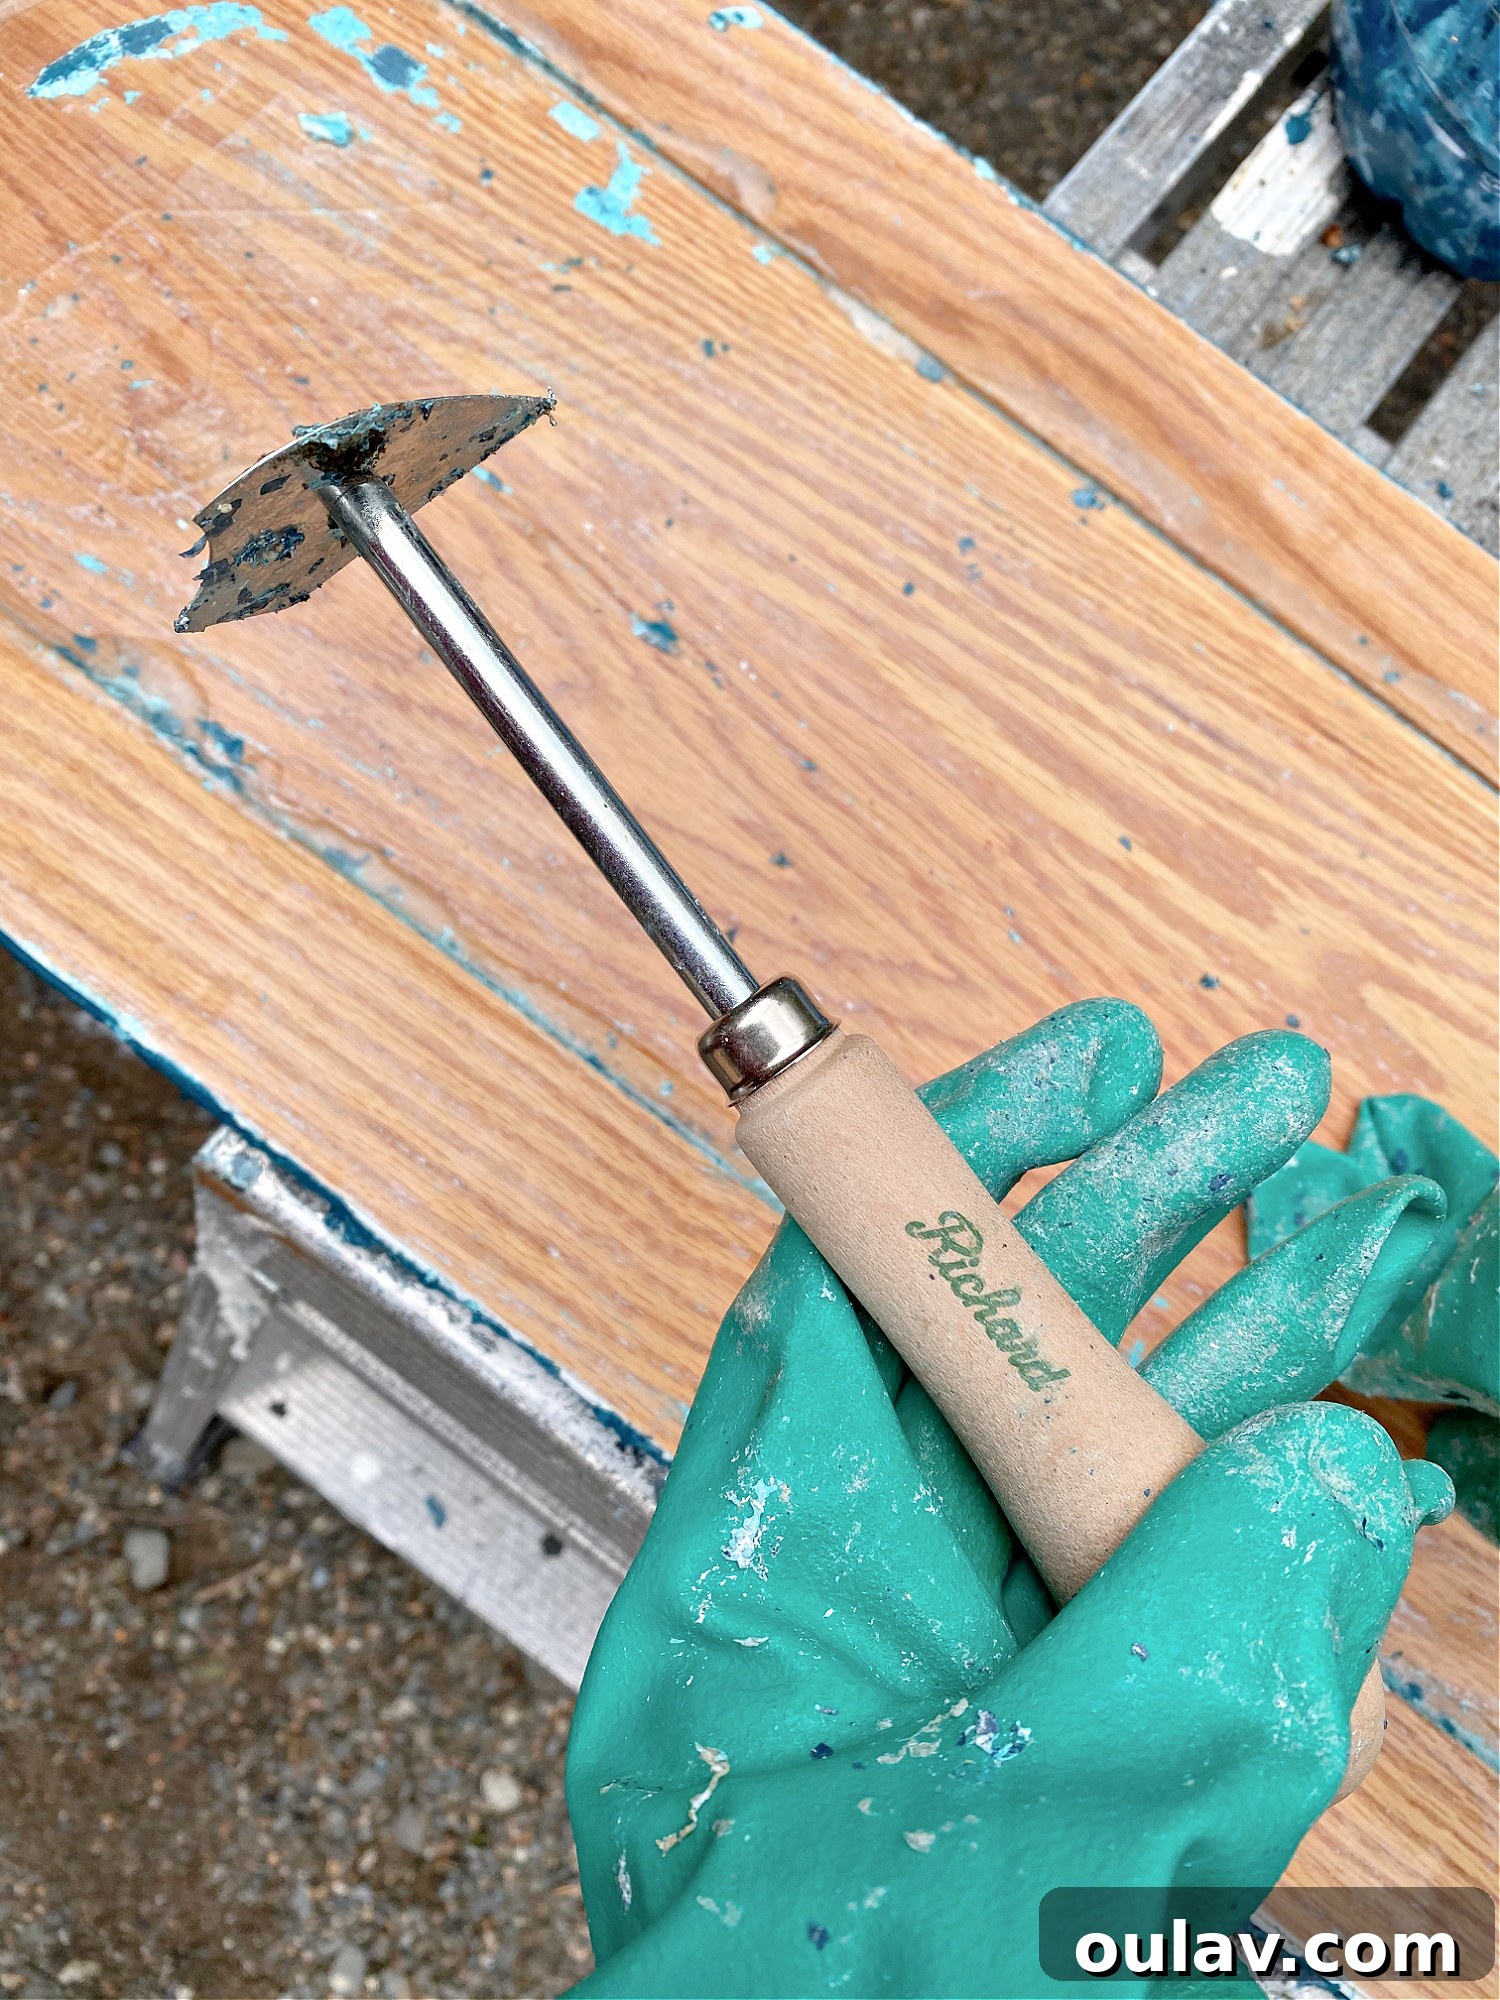
- Shave Hook Scraping Tool: This was a absolute game-changer, especially for cabinets with raised profiles or intricate details. Its unique design allows it to dig into grooves and corners where flat scrapers can’t reach, significantly reducing the effort needed for detailed areas.
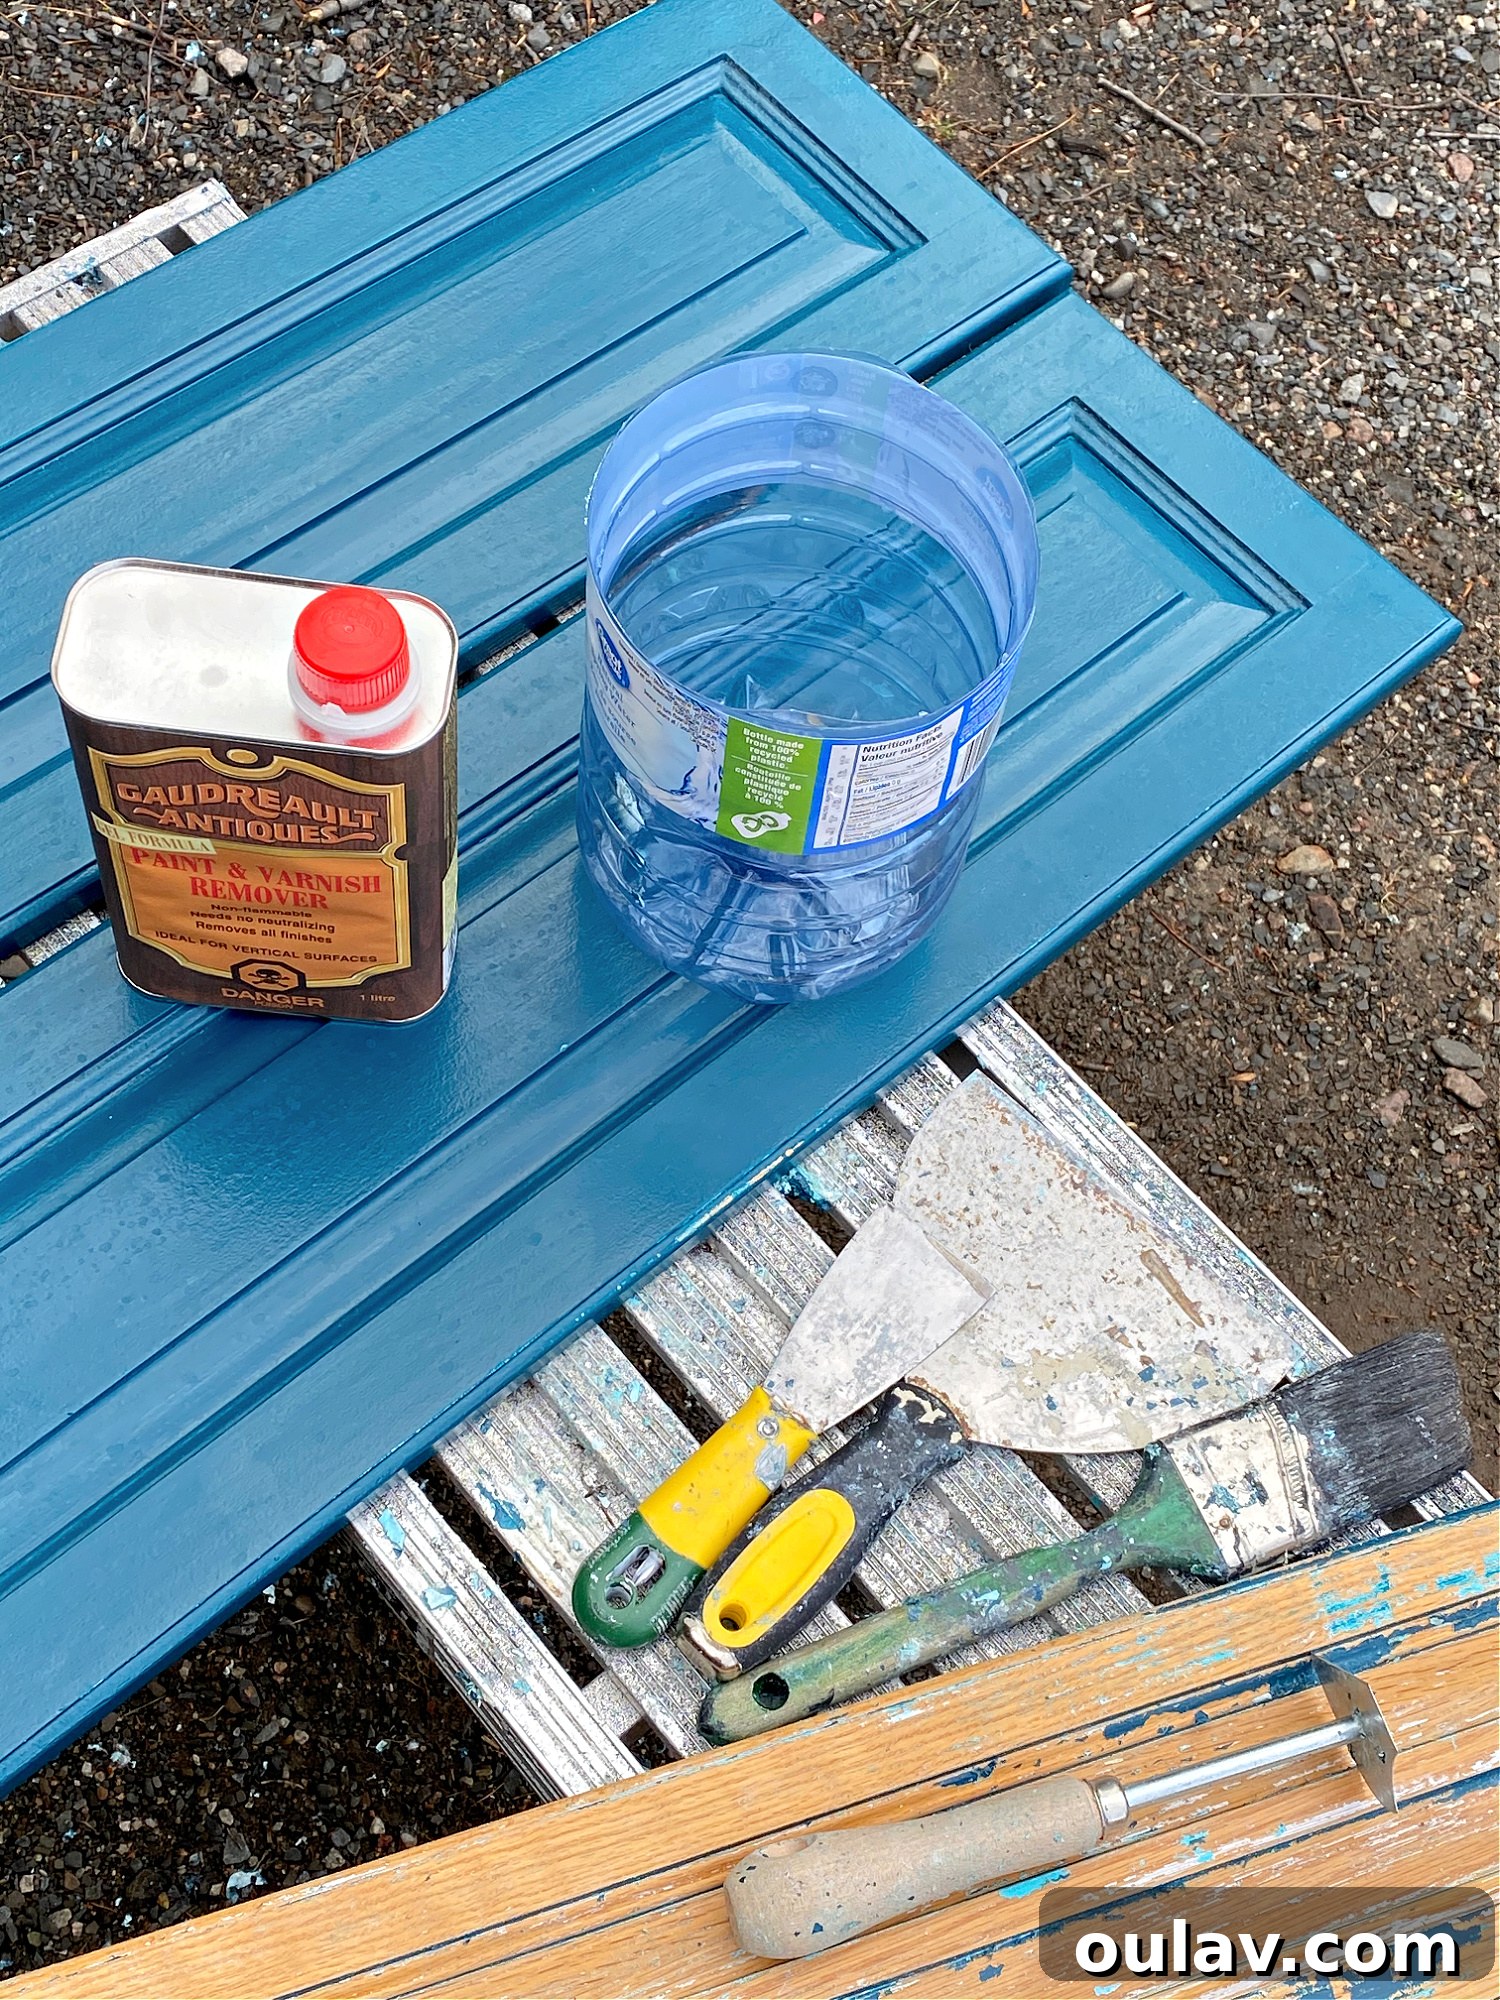
- Stiff Scrapers (Wide and Narrow): A wide scraper is ideal for large, flat surfaces, making quick work of bubbling paint. A narrower scraper is perfect for tighter spots and edges.
- Lint-Free Rags: For wiping away residue and cleaning surfaces, preventing lint from sticking to your newly stripped wood.
- Old Paint Brush: For applying the paint stripper. Don’t use your good brushes; the stripper will damage them.
- Old Metal Container for Goop: A sturdy, non-plastic container (like an old metal paint can or glass jar) is essential for safely collecting the removed paint and stripper residue. Plastic containers can melt from the chemicals.
Because my cabinets featured a raised profile, the old finish had a particular fondness for getting stuck in those intricate grooves. This is precisely where the shave hook scraping tool proved to be an invaluable asset, truly a GAME CHANGER in tackling those stubborn areas!
For the broader, flat sections of the cabinet doors, I found a wide scraper to be most efficient, allowing me to cover more surface area quickly. For the smaller, more confined spaces, a smaller, narrower scraper was indispensable, adapting perfectly to the unique style and details of my cabinets.
If you’re a visual learner, I highly recommend checking out my Instagram Story highlight titled “Cabinet Strip.” There, you can tap through the stories from this project and see more of the stripping process in action. Alternatively, you can watch my popular Instagram Reel, which vividly demonstrates just how easily the paint comes off using this method. For those who prefer detailed written instructions with accompanying photos, keep reading for my comprehensive, step-by-step tutorial on how to strip cabinets to natural wood.
Step-by-Step Guide: How to Strip Kitchen Cabinets Like a Pro
Stripping kitchen cabinets can be a rewarding project when approached with the right strategy and tools. Follow these detailed steps to achieve a beautifully stripped surface, ready for its next finish.
- Prepare Your Workstation and Ensure Safety:
Begin by carefully removing all cabinet doors and hardware (handles, hinges, etc.). Relocate them to a suitable workstation, ideally outdoors or in a very well-ventilated indoor space. Chemical paint strippers emit strong fumes, so proper ventilation is crucial for your health and safety. Lay down durable drop cloths or old cardboard to protect the ground or surrounding surfaces from chemical spills and paint goop. Before you touch any chemicals, don your full safety gear: chemical-resistant rubber gloves, protective eyewear, and sturdy, closed-toe footwear. - Apply a Generous Coat of Paint Stripper:
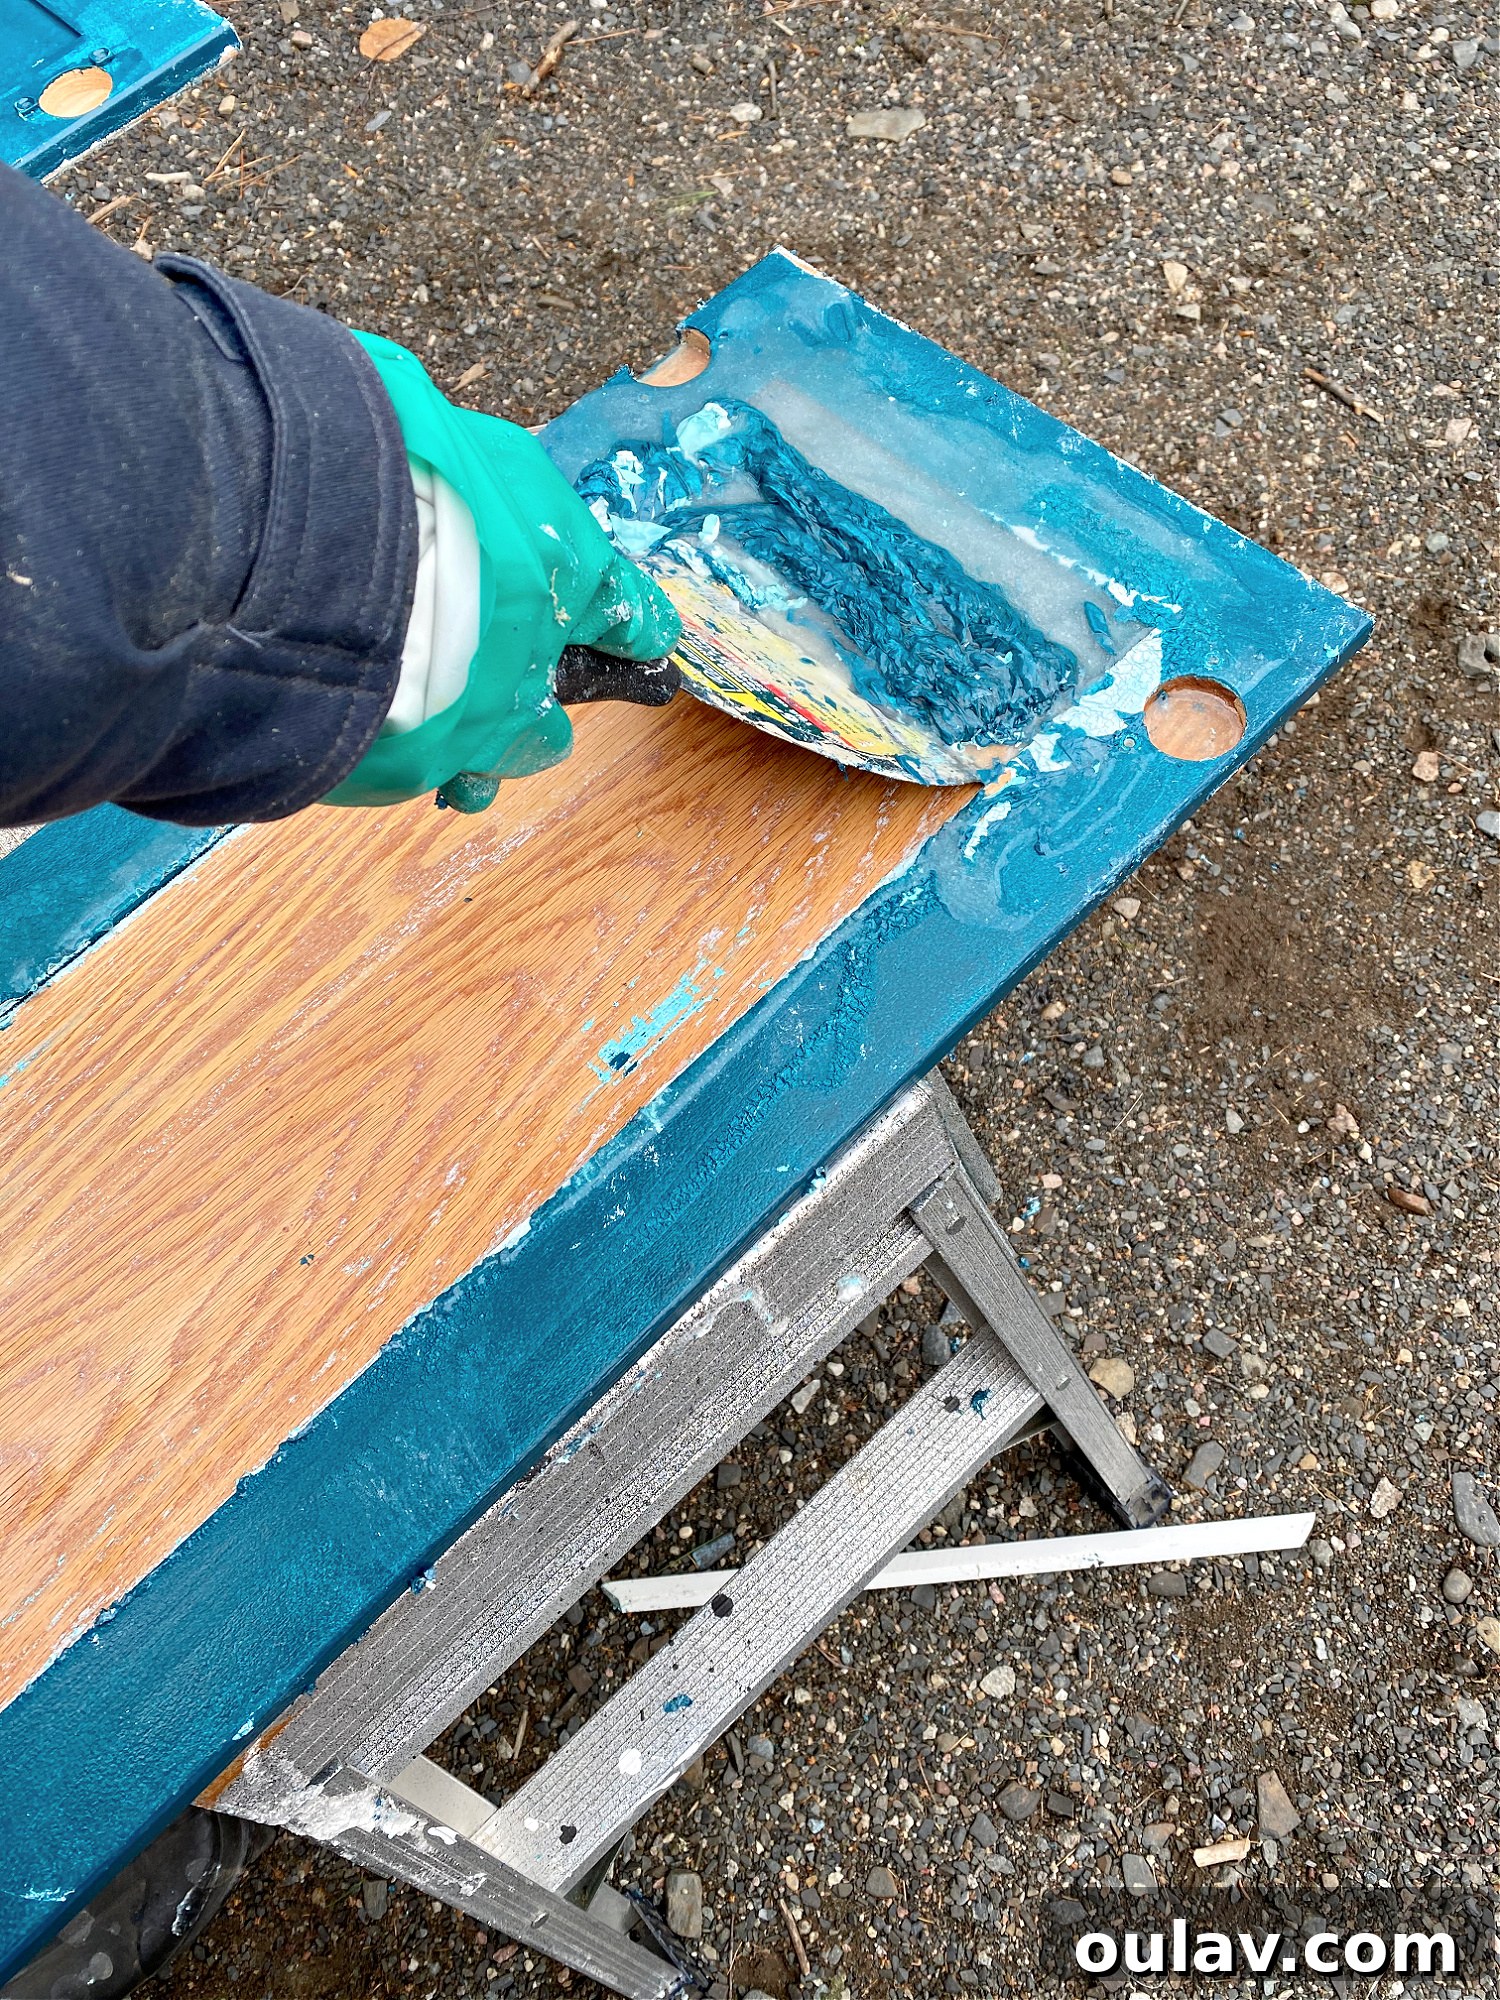
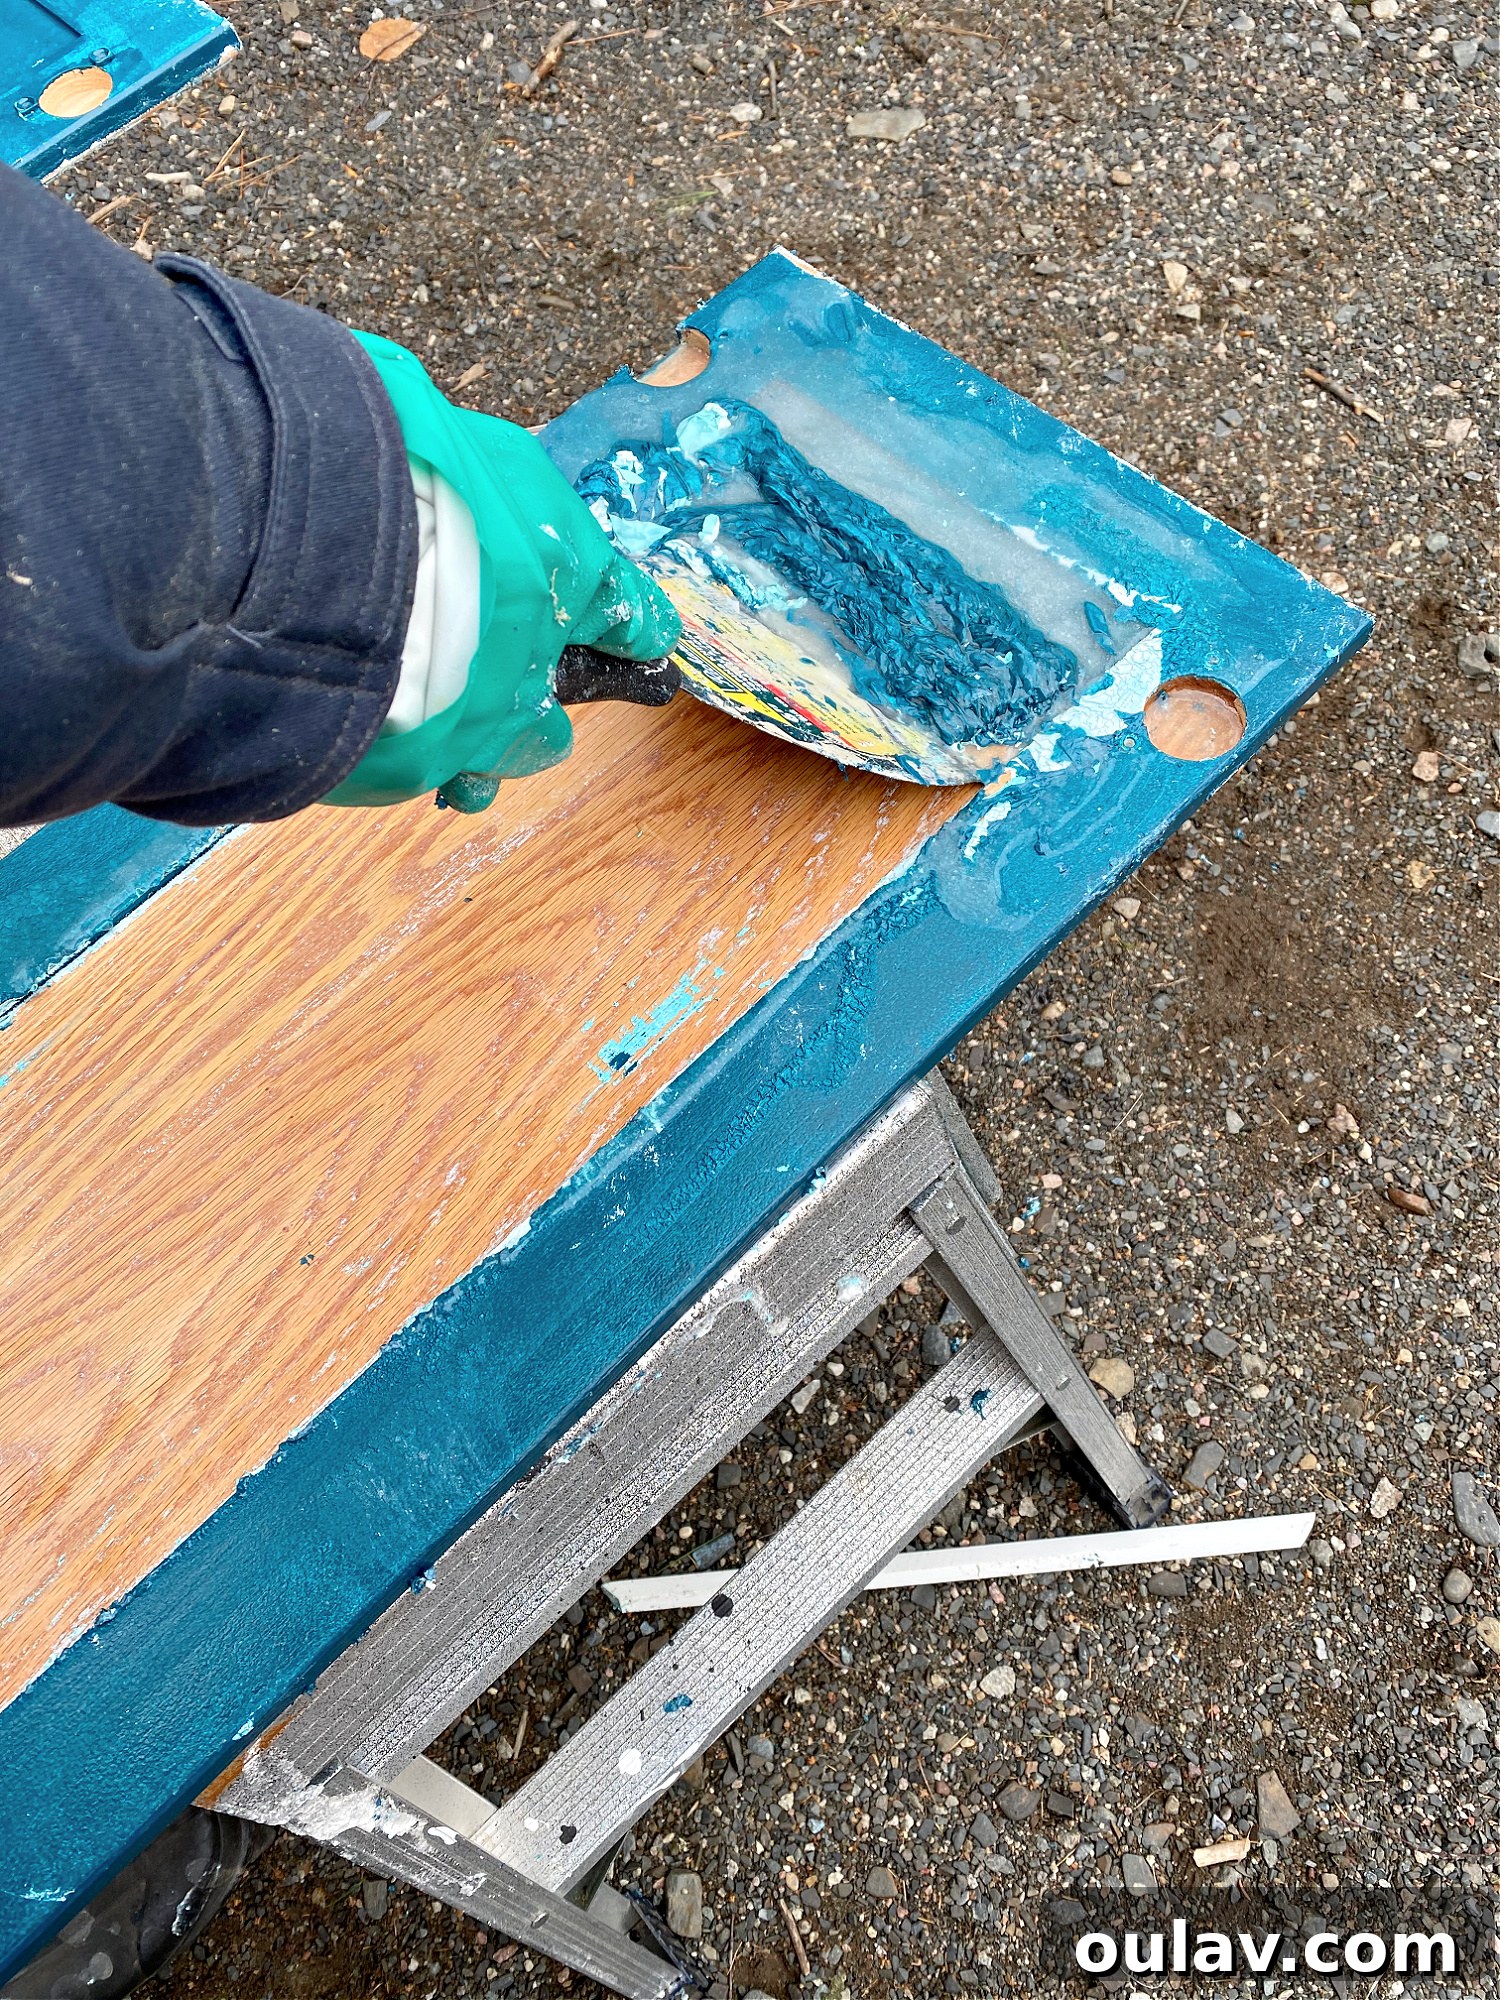
Using an old paint brush, gently pour or brush a generous, thick, and even coat of the paint stripper onto the cabinet surface. Don’t be shy with the application; a liberal amount allows the chemical to work more effectively, minimizing the need for excessive scrubbing later. Ensure the entire surface you intend to strip is thoroughly saturated. - Observe and Wait for the Paint to Bubble:
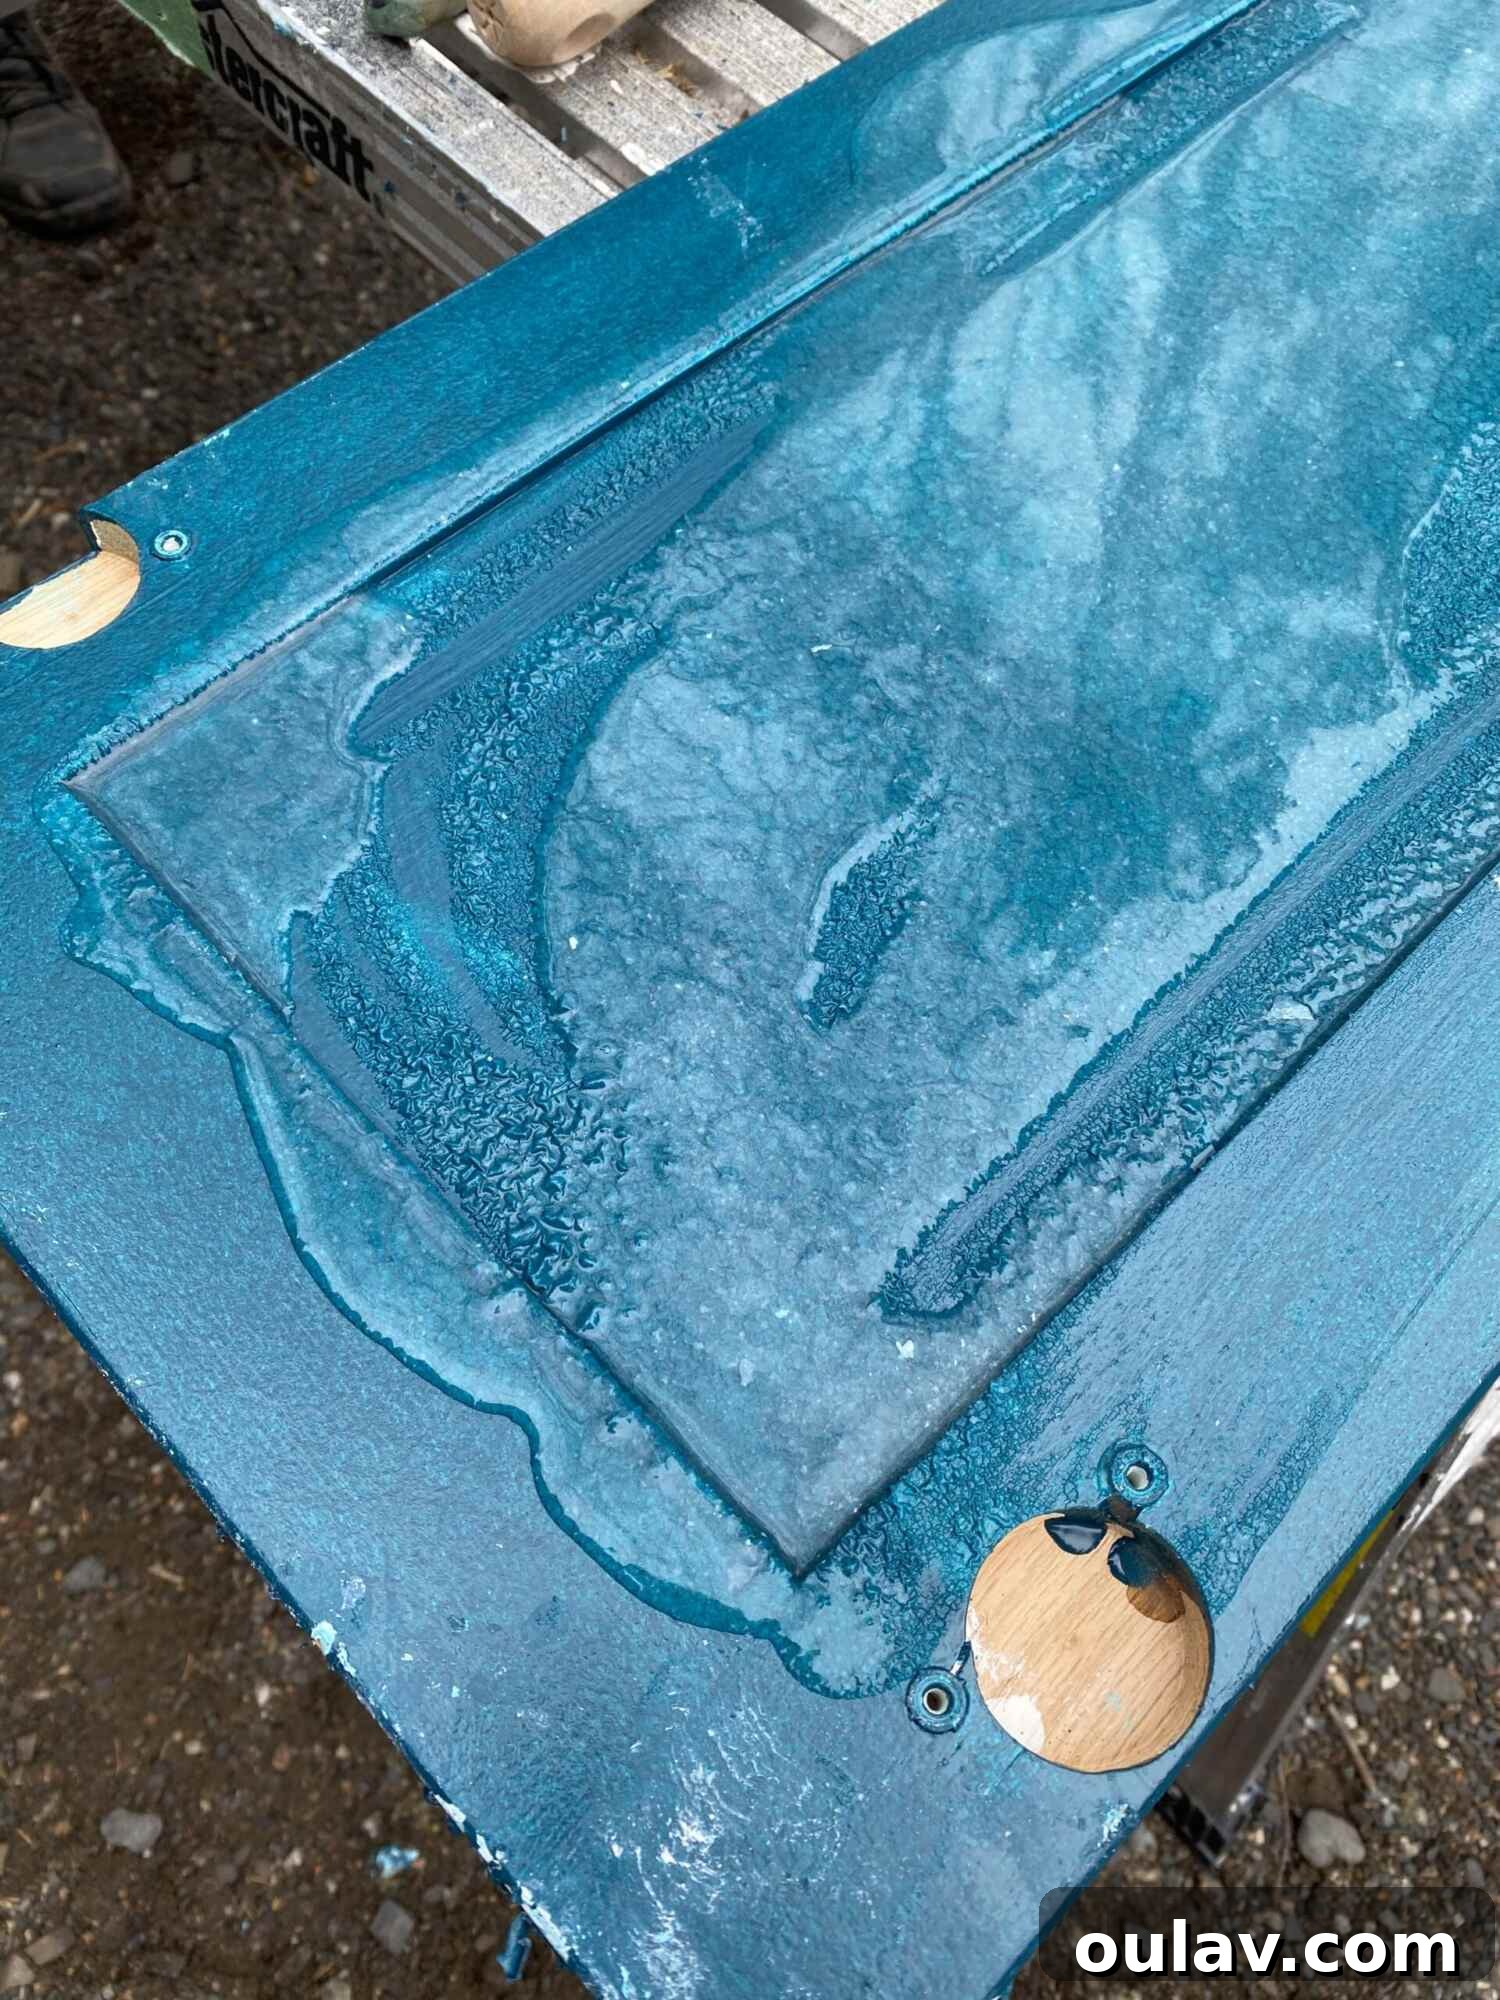
Now comes the critical waiting game. The paint stripper will begin to react with the old finish, causing it to bubble, blister, and soften. This chemical reaction is your signal that the stripper is working. The exact waiting time can vary depending on the paint type and stripper strength, but generally, you’ll see visible bubbling within 10-20 minutes. Keep a close eye on it. - Scrape Off the Softened Paint Promptly:
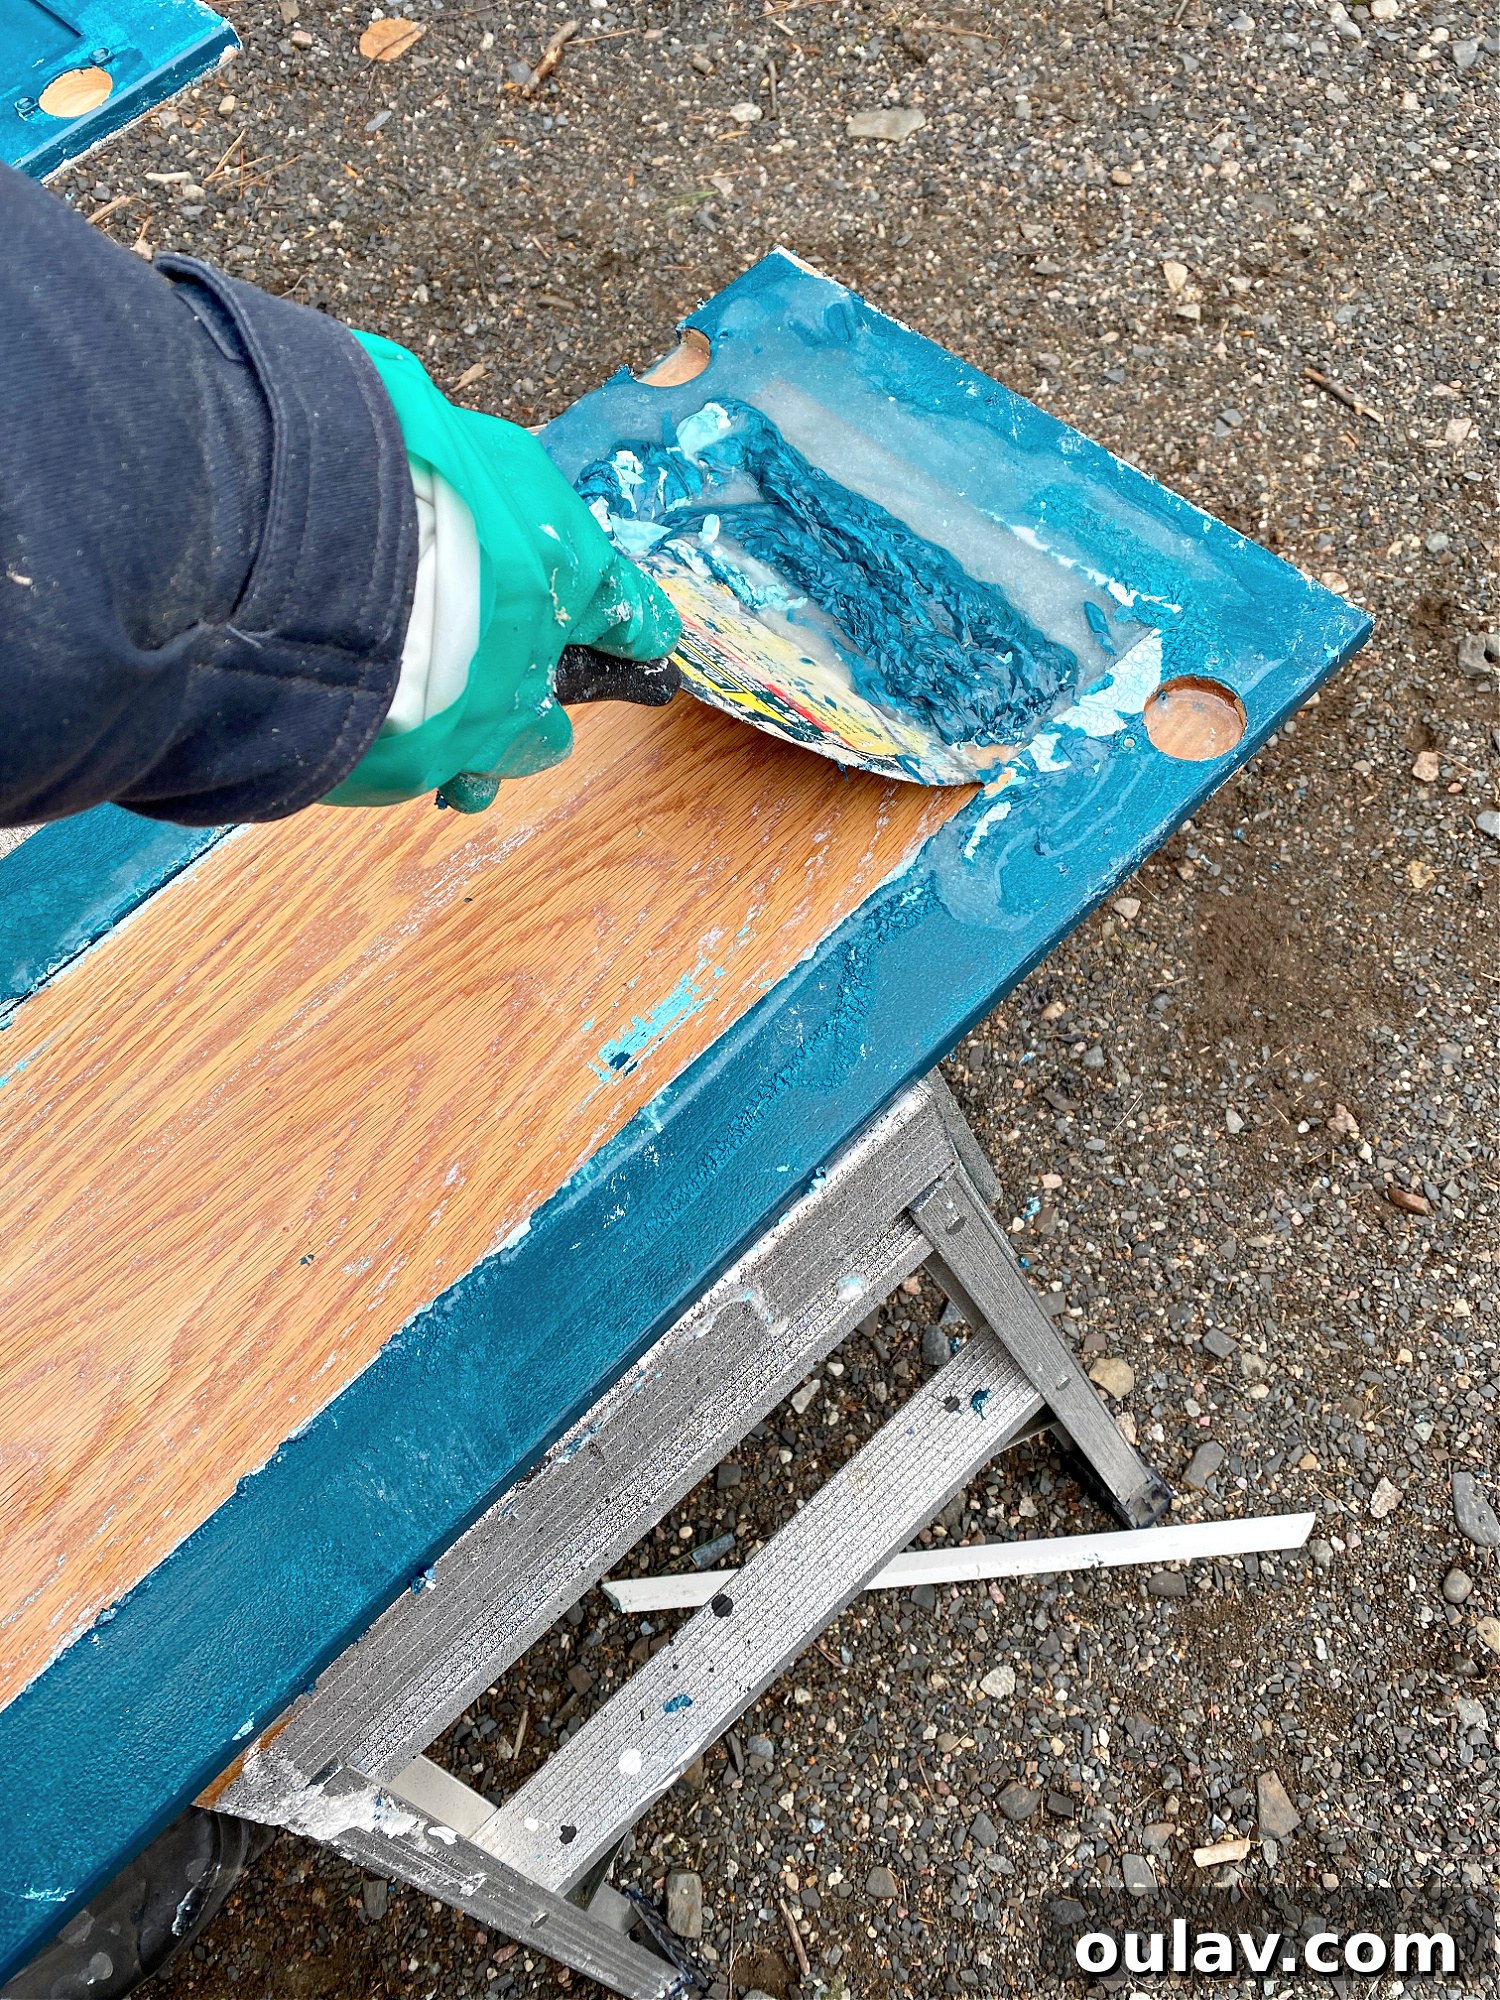
As soon as the paint starts bubbling vigorously, quickly begin to scrape it off using your chosen scrapers (wide for flat areas, narrow for details). The goal is to scrape while the stripper is still active and wet. You want to avoid the stripper drying out, as its effectiveness significantly diminishes once dry. If you notice any areas drying, reapply a small amount of stripper to reactivate it. Collect the scraped-off “goop” (paint and stripper residue) into your old metal container for safe disposal. - Repeat for Stubborn Areas and Residue:
For areas with multiple layers of paint or stubborn spots, you’ll likely need to repeat the application and scraping process. Apply more stripper to the remaining paint, allow it to bubble again, and then scrape. Once most of the paint is removed, use a damp cloth (not soaking wet) to wipe away any residual stripper or loose paint particles. Allow the cabinets to dry thoroughly. - Sand to Smooth and Prepare the Surface:
Paint stripper excels at removing finish, but it won’t magically create a perfectly smooth surface. After the cabinets are dry, use a belt or palm sander to smooth out any rough areas, minor imperfections, or remaining paint residue. Start with a medium-grit sandpaper and move to a finer grit for a silky-smooth finish. For intricate grooves or raised profiles, hand sanding with fine-grit sandpaper or even a small rotary tool like a Dremel with a sanding attachment can be incredibly effective. This sanding step is crucial for preparing the wood for a new stain, varnish, or paint, ensuring a professional-looking result.
Watch the Magic Unfold: Cabinet Stripping in Action!
Seeing is believing! For a dynamic demonstration of just how effectively paint can be removed from cabinets using these techniques and products, be sure to check out this video here. It perfectly illustrates the ease and satisfaction of the stripping process.
Mastering the Art of Removing Thick Paint from Kitchen Cabinets
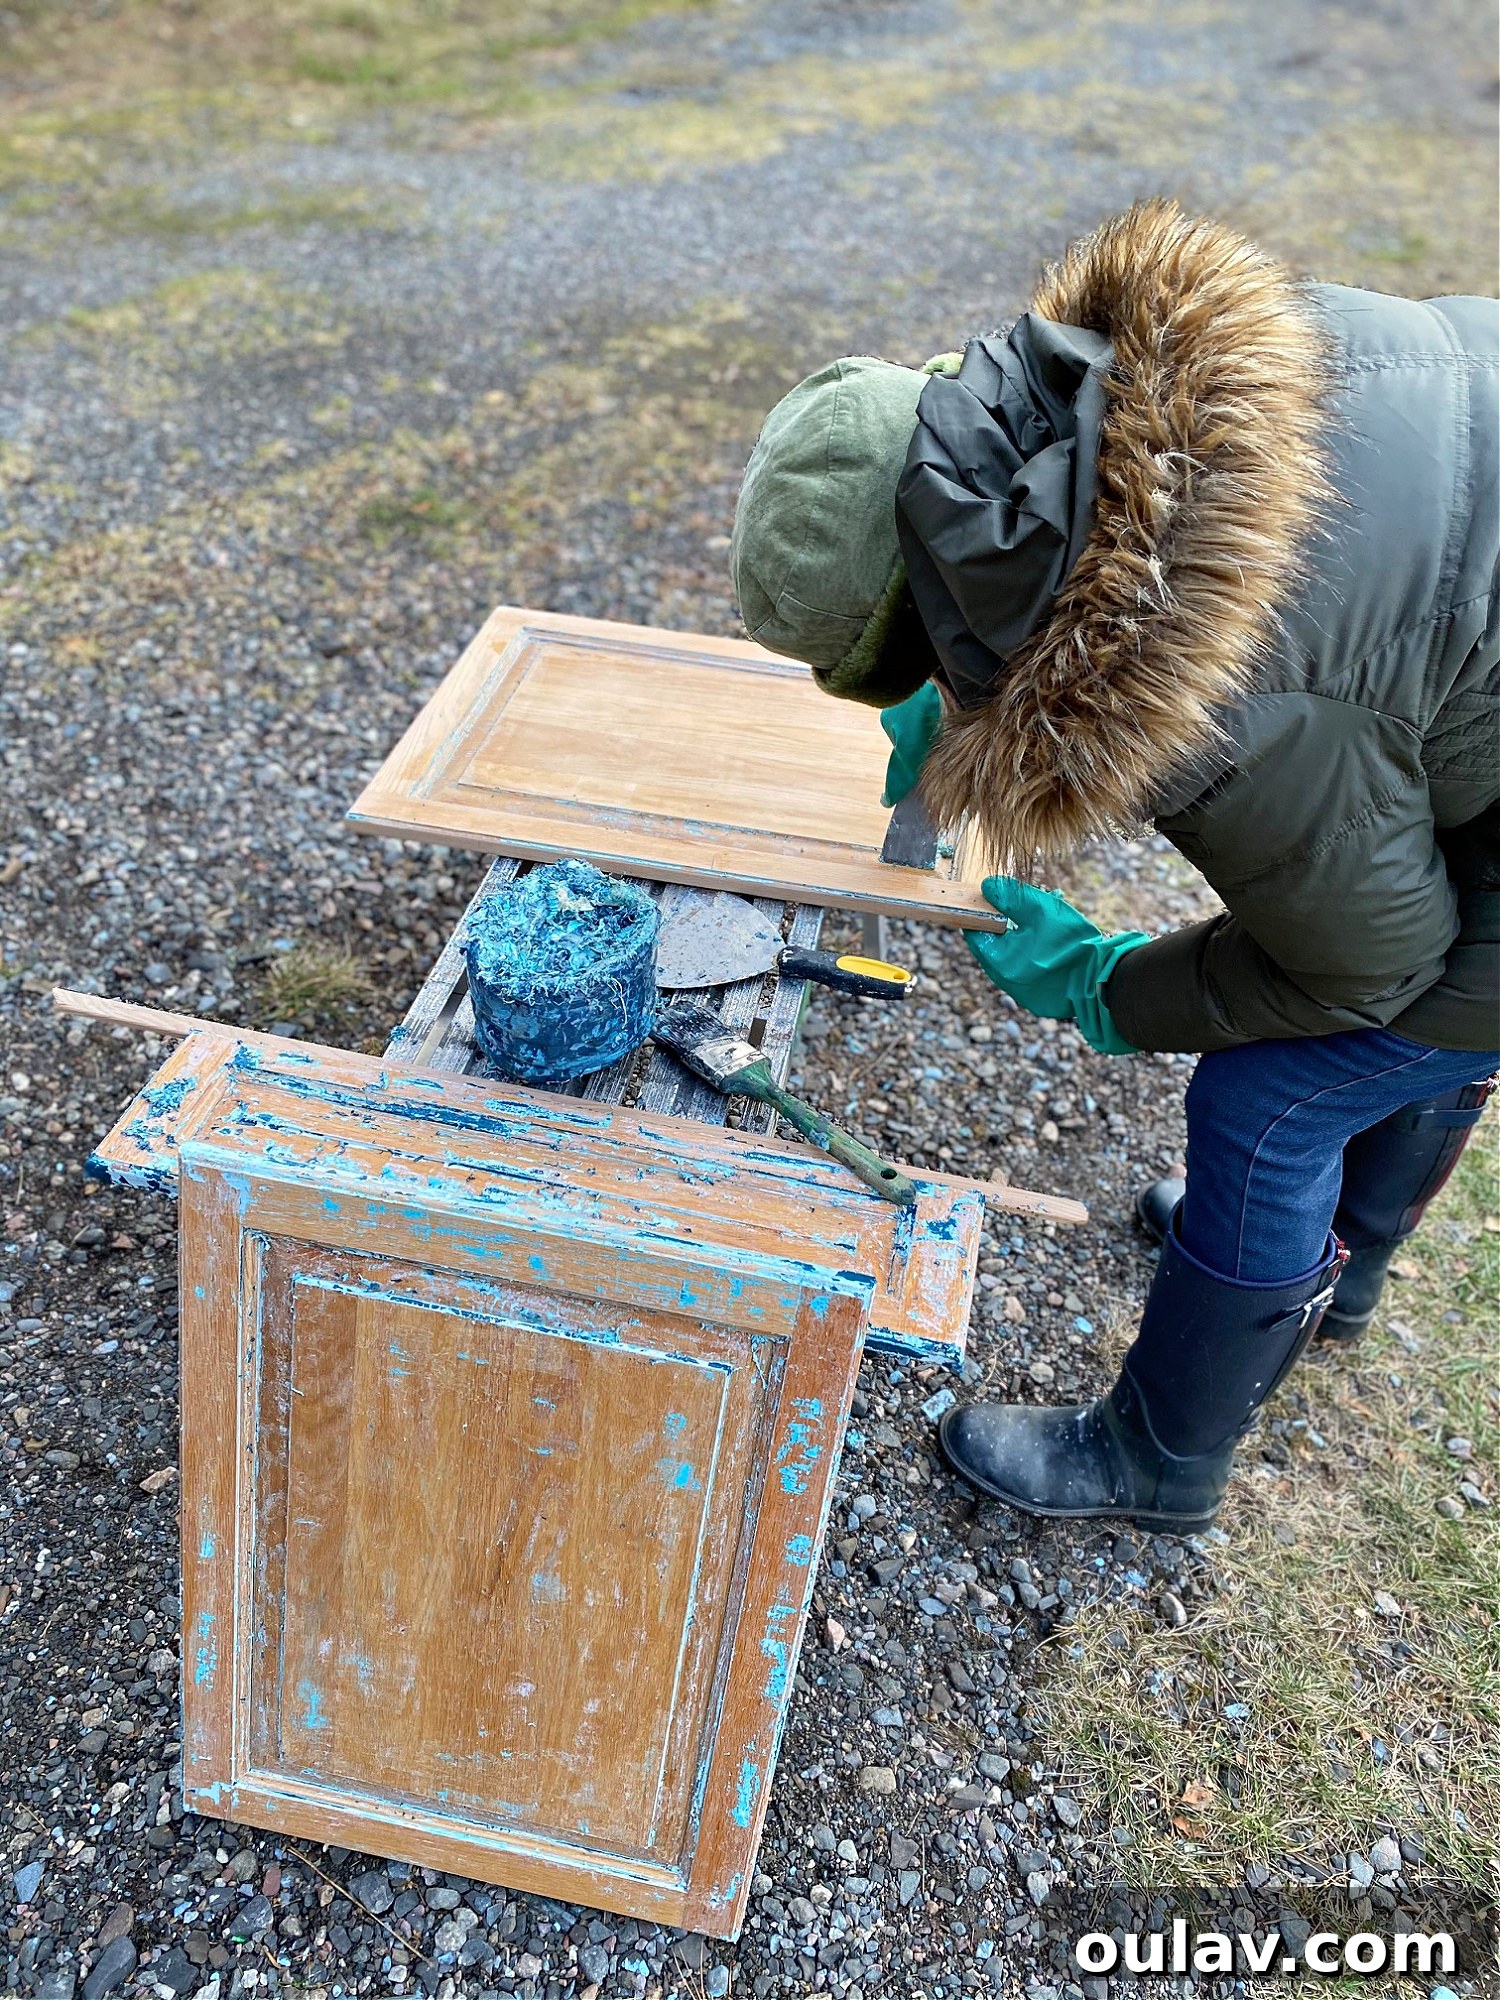
Dealing with multiple, thick layers of paint can seem daunting, but with the right approach, it’s entirely manageable. Always begin by removing all cabinet doors and relocating them to an outdoor workspace. Indoor use of chemical paint stripper is generally not recommended due to strong fumes and safety concerns. When applying the stripper, be very generous. Pour or brush on a thick, even coat. The key to efficiency is to allow the paint to bubble up sufficiently. As soon as you observe this bubbling, begin scraping immediately. The stripper is most effective when it’s wet and active. If it starts to dry out, its efficacy diminishes significantly, making your job much harder. Should an area dry prematurely, simply reapply a bit more stripper to reactivate it. For collecting the scraped paint and chemical residue, I initially used an old plastic water bottle out of convenience. However, a crucial lesson learned is that chemical strippers can eventually cause plastic to melt. Always opt for a sturdy, old metal container or a glass jar for safe collection. Remember to dispose of this chemical-laden goop responsibly; many landfills have designated areas for hazardous waste like paint and stripper residue.
Pro Tips for Optimal Cabinet Stripping Results
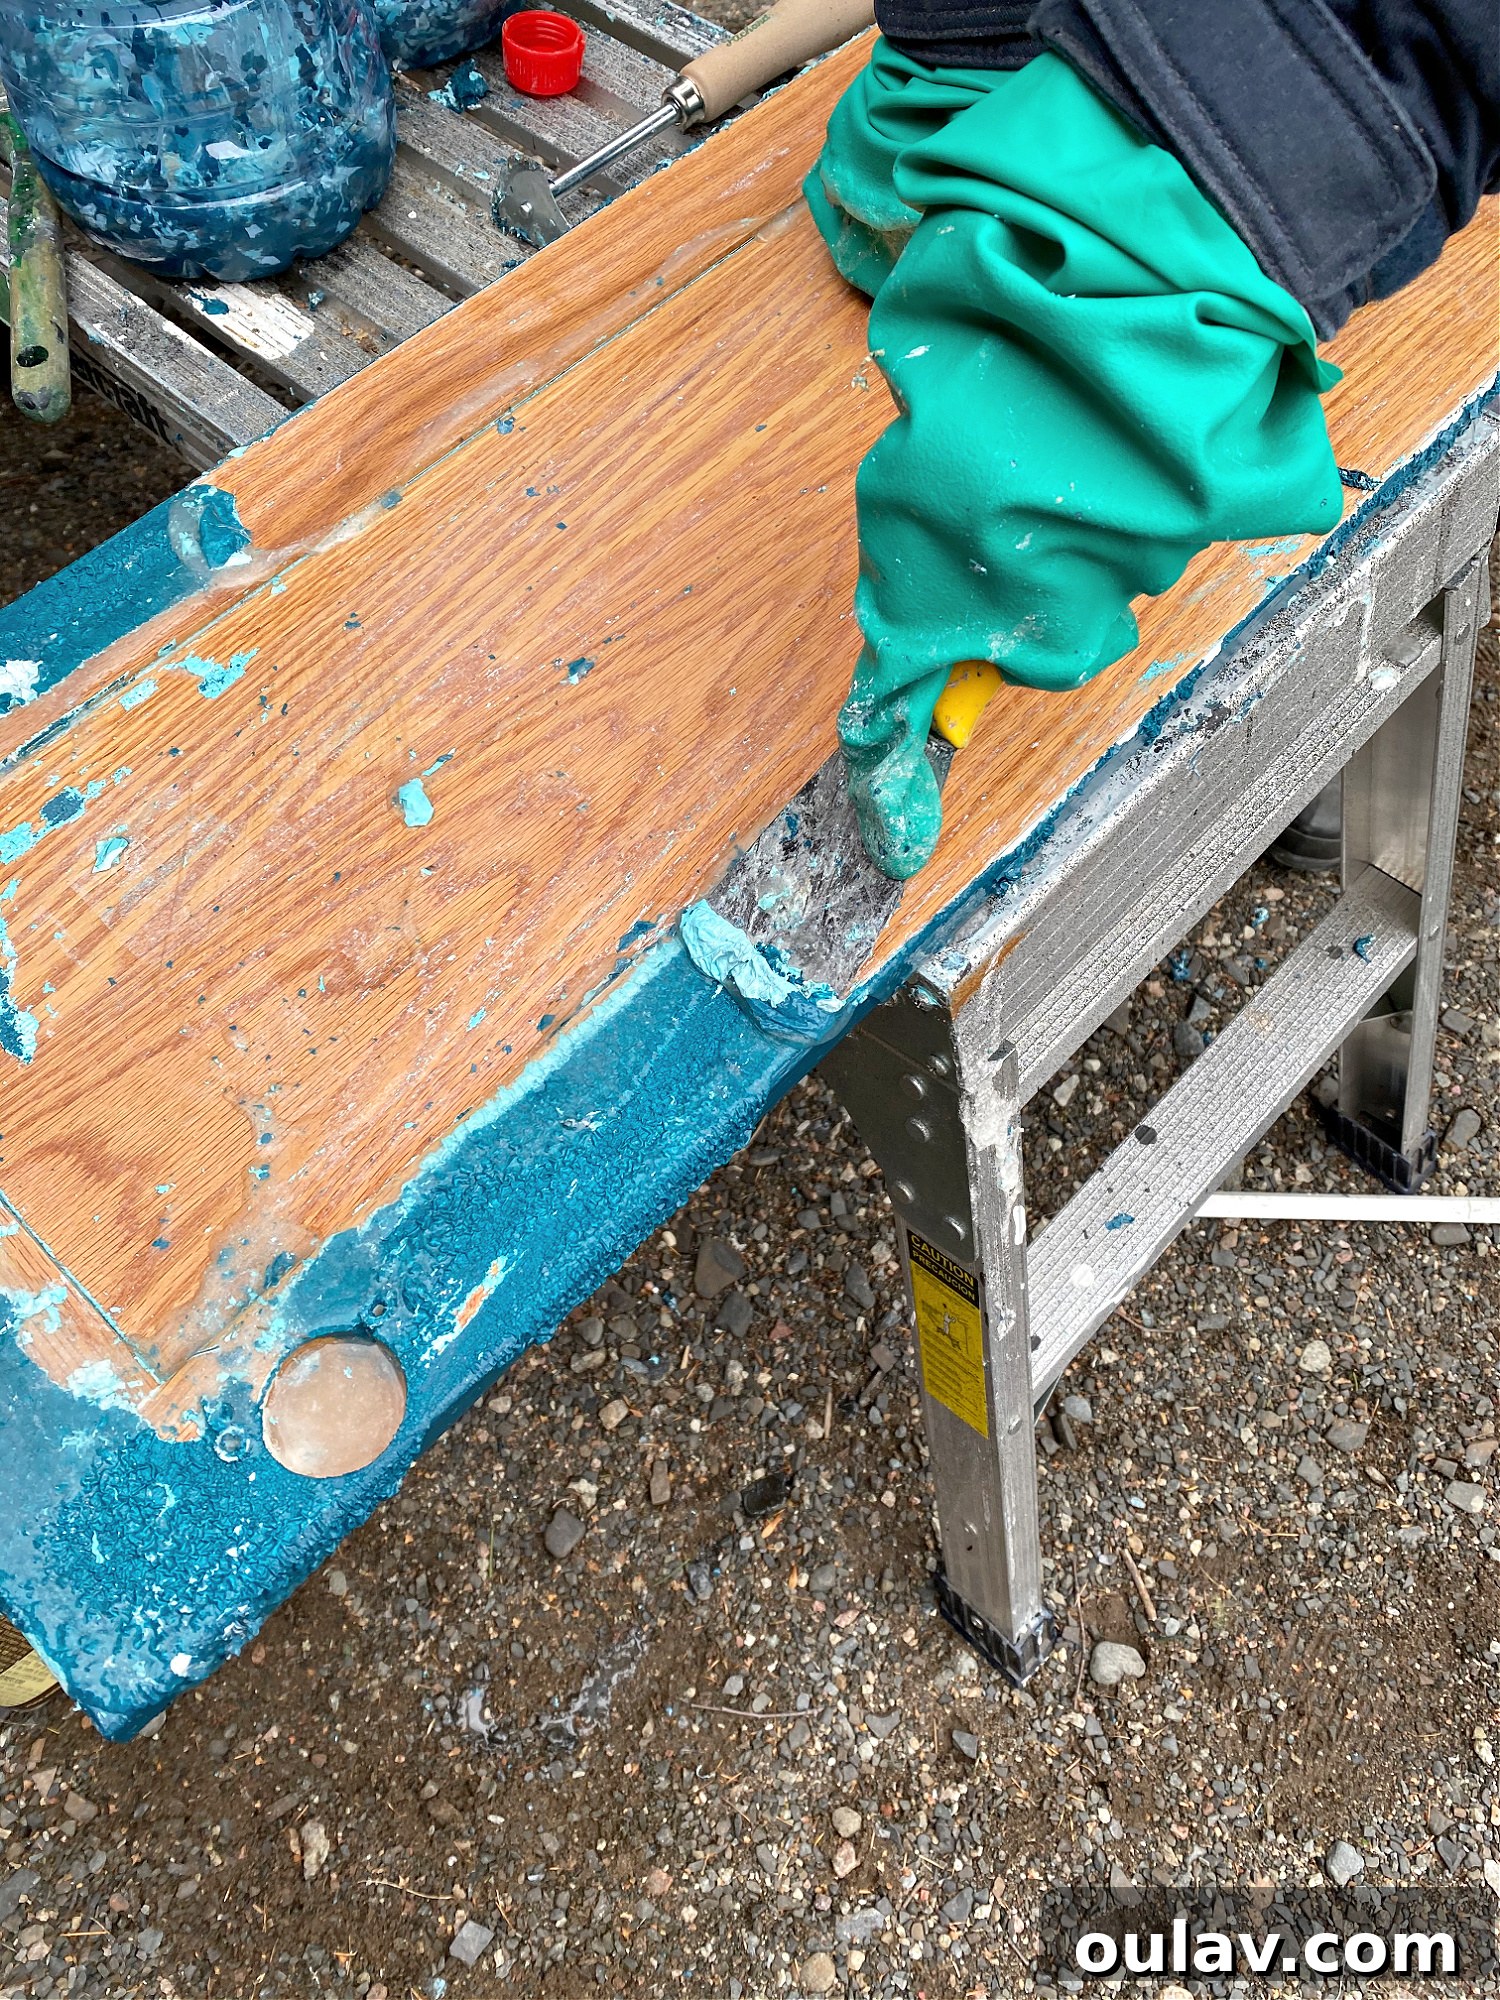
Through trial and error, I quickly learned that being exceptionally generous with the paint stripper in the initial application saved me immense amounts of “elbow grease” later on. In one of my early attempts (as seen in the photo below), I was still being conservative, resulting in a significant amount of paint residue left behind even after two applications. This meant more re-applications of stripper and considerably more sanding. Once I adopted the strategy of applying a thick, liberal coat on the very first pass, I found virtually no stubborn bits of paint remaining, streamlining the entire process and reducing overall effort.
Navigating Raised Profiles: Stripping Intricate Cabinet Designs
If my cabinet doors had been completely flat, the stripping process would have been incredibly swift. However, the presence of decorative grooves and raised profiles added an extra layer of complexity, demanding more focused scraping and time. When tackling cabinets with such intricate designs, the strategy is key: ensure you pour extra paint stripper directly into those grooves. This allows the chemical to thoroughly penetrate and soften the paint in hard-to-reach areas. Once the paint in these detailed sections has bubbled up and softened, immediately utilize your shave hook scraping tool. Its unique shape is specifically designed to fit into contours and corners, making it exceptionally effective at cleanly removing paint from these challenging, non-flat surfaces.
The Indispensable Role of Sanding After Using Paint Stripper
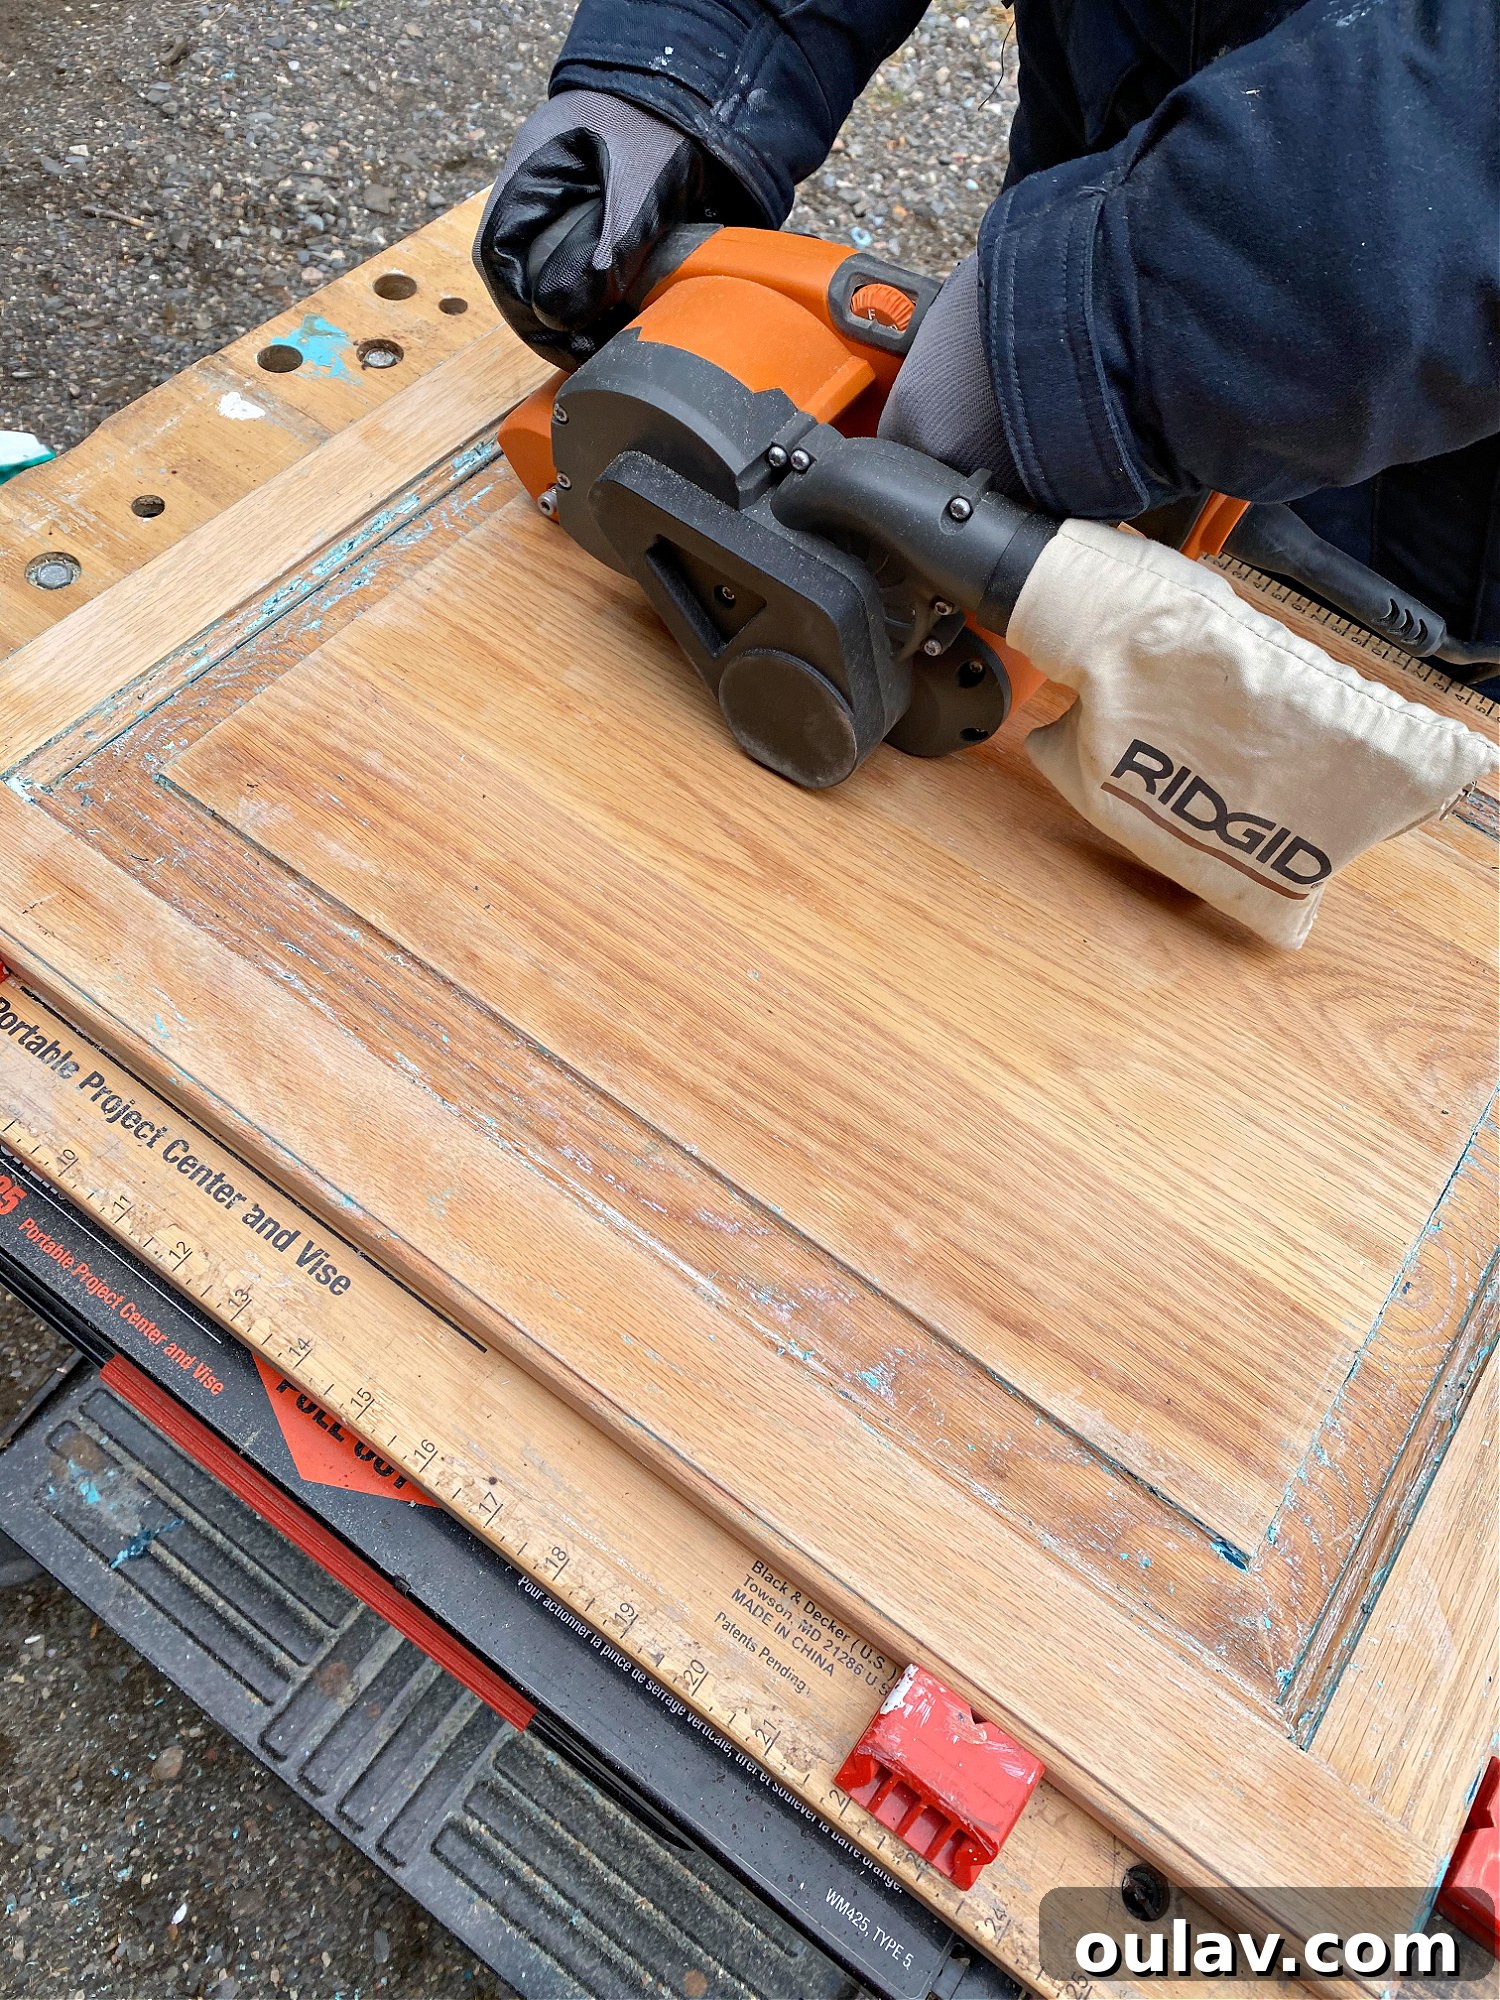
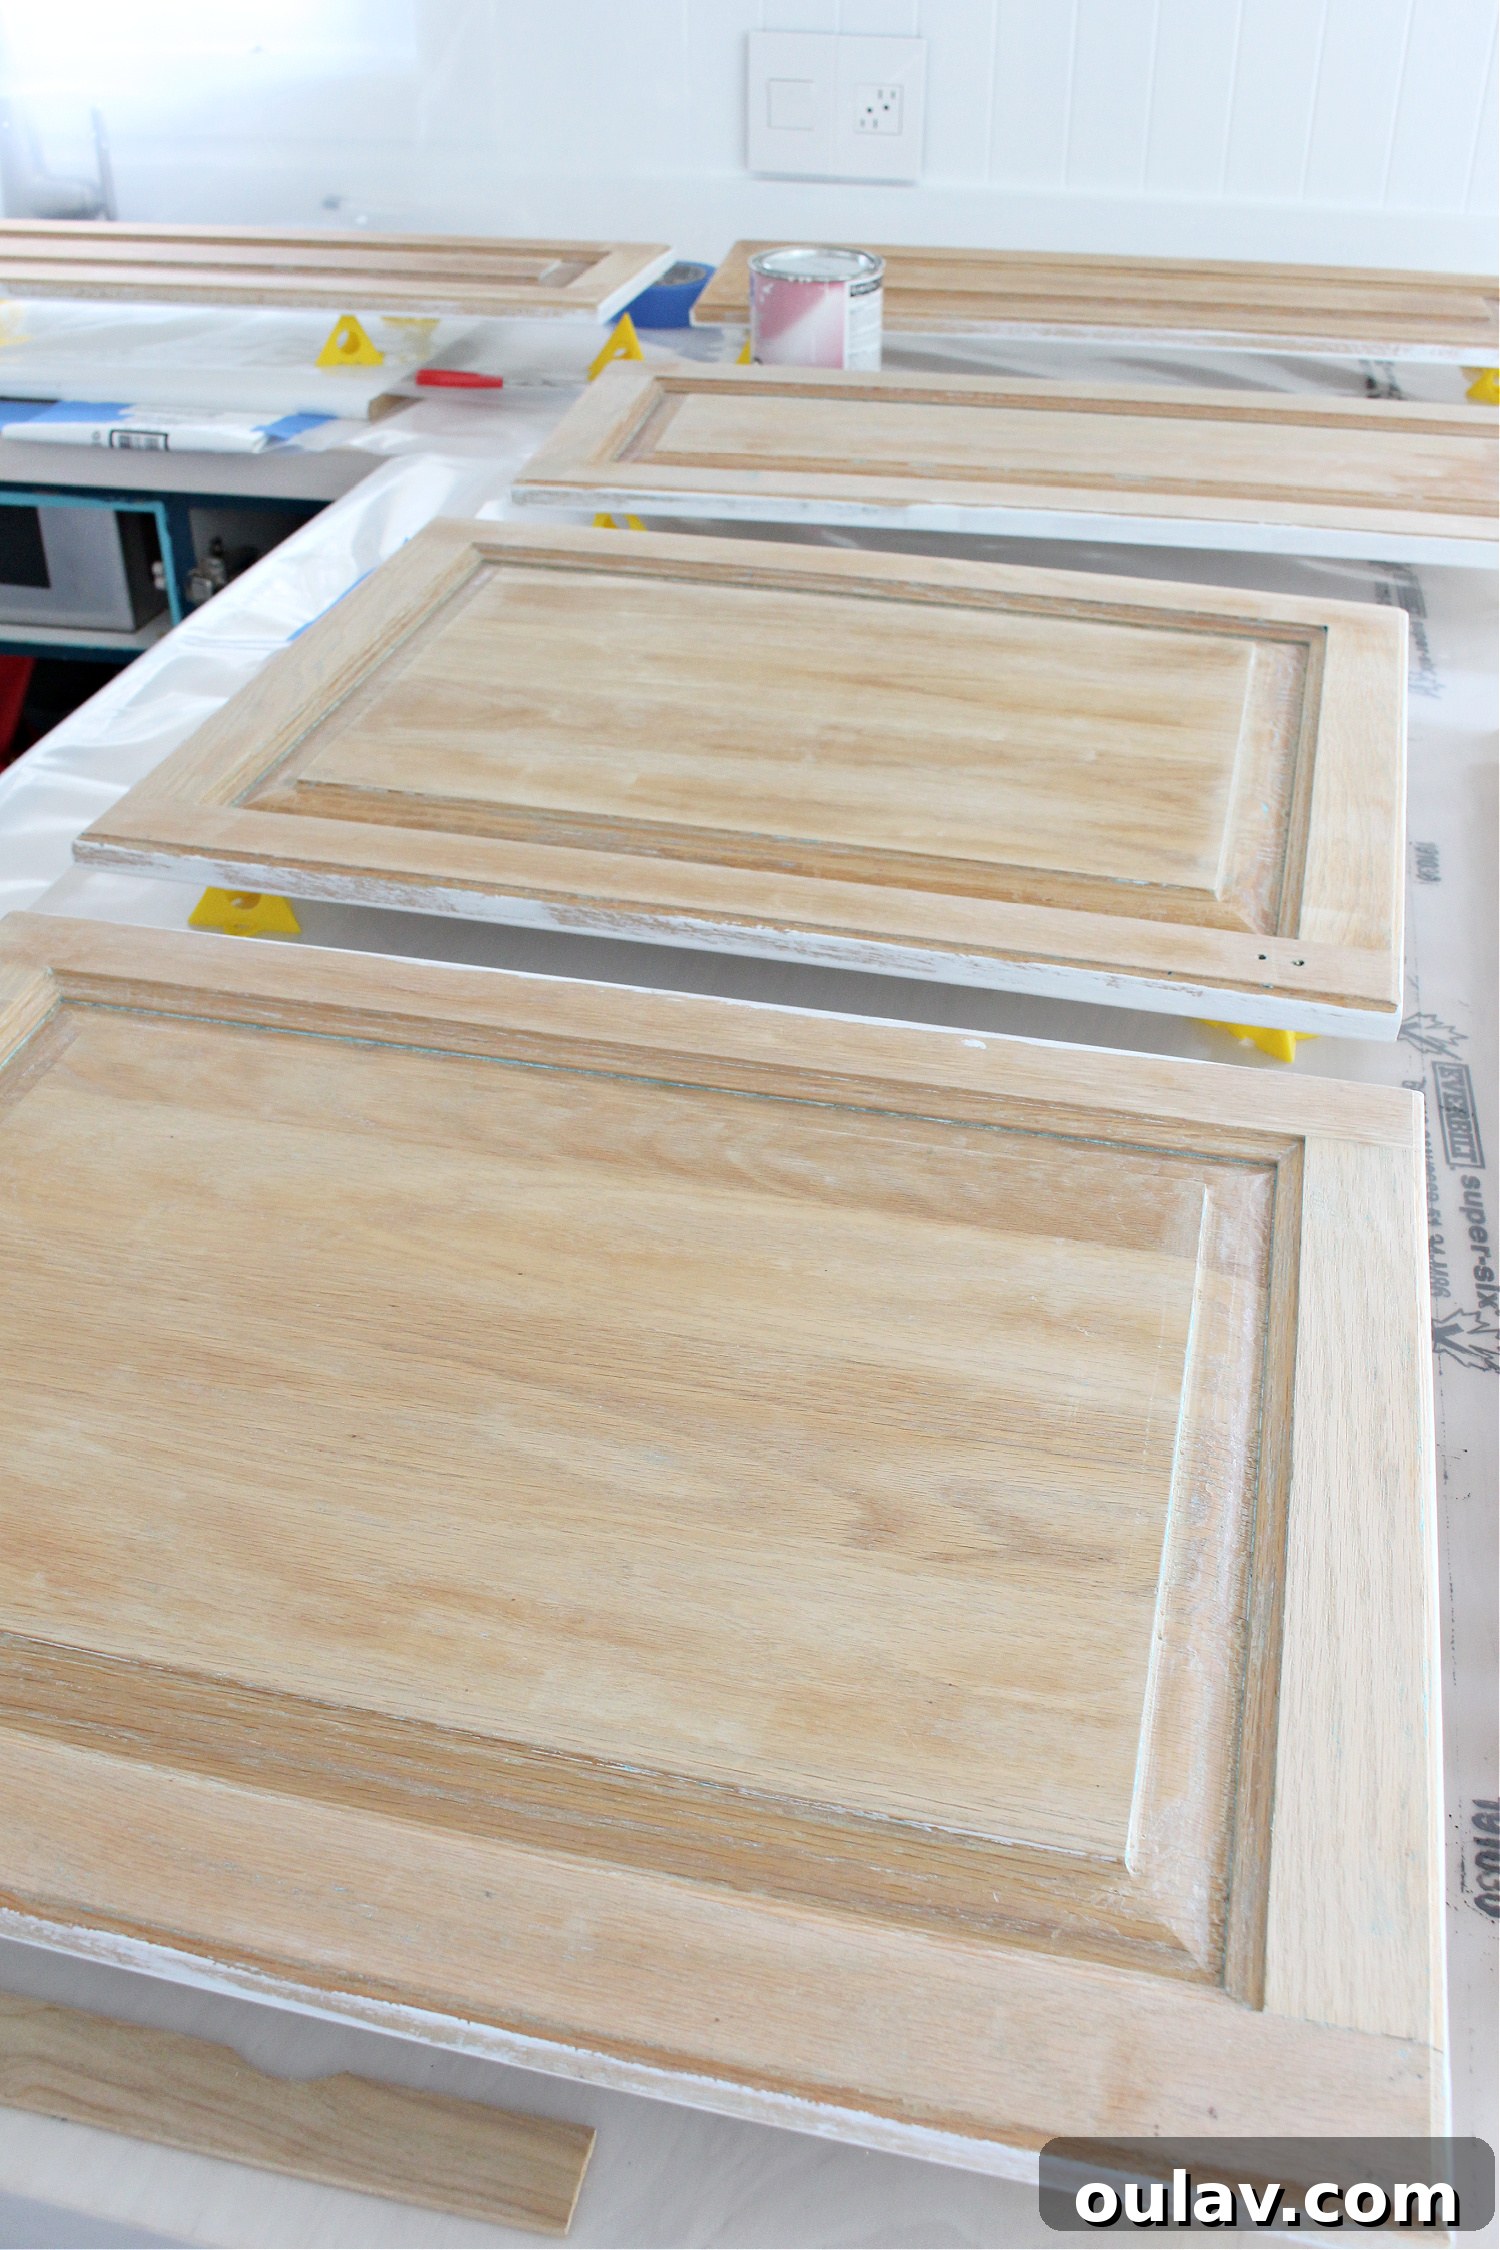
While paint stripper is a miracle worker for dissolving old finishes, it’s crucial to understand its limitations: it removes paint, but it does not smooth the surface of the wood. This is where sanding becomes an absolutely indispensable step in the refinishing process. After successfully removing the bulk of the paint, I followed up with my trusty belt sander to achieve a uniformly smooth surface. This step is vital for eliminating any remaining microscopic paint particles, slight imperfections, or rough patches left by the scraping process.
Subsequently, I performed a bit of hand sanding in areas that required more delicate attention. My ultimate goal wasn’t to achieve 100% bare wood, as I planned to repaint the cabinets anyway, and a perfectly clean, smooth surface was sufficient. However, if your objective is to completely restore your cabinets to bare, natural wood for staining or clear coating, these steps, combined with a bit more diligent sanding and a Dremel tool for intricate grooves, will easily get you there. Sanding ensures that your new finish adheres beautifully and looks professional.
Revealing the Natural Beauty: Stripping Cabinets to Natural Wood
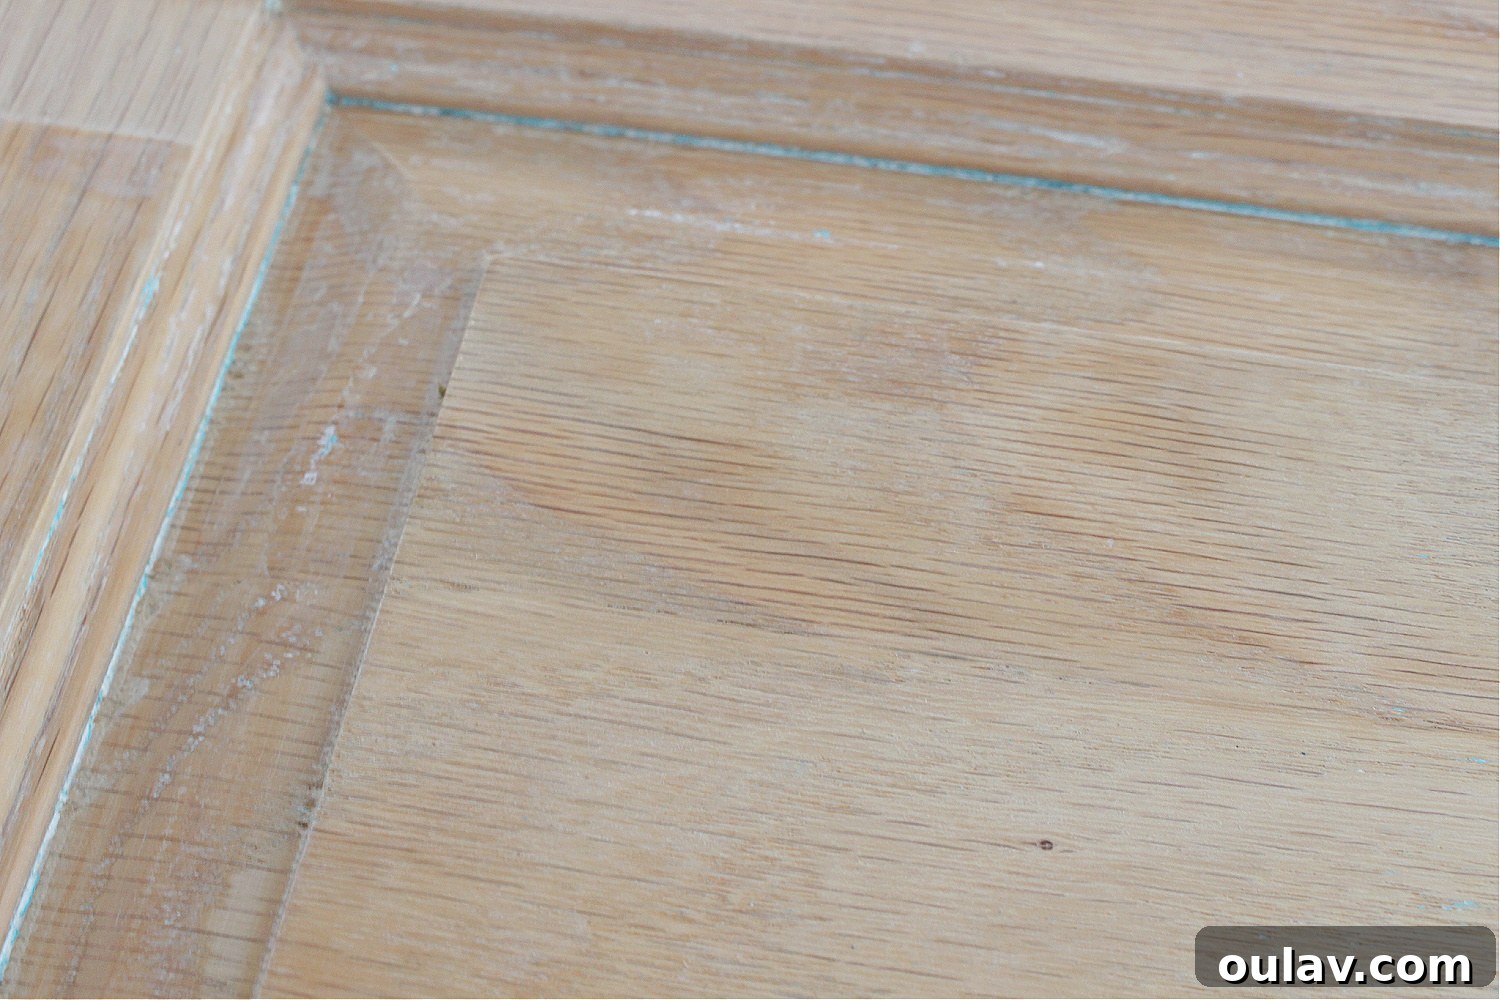
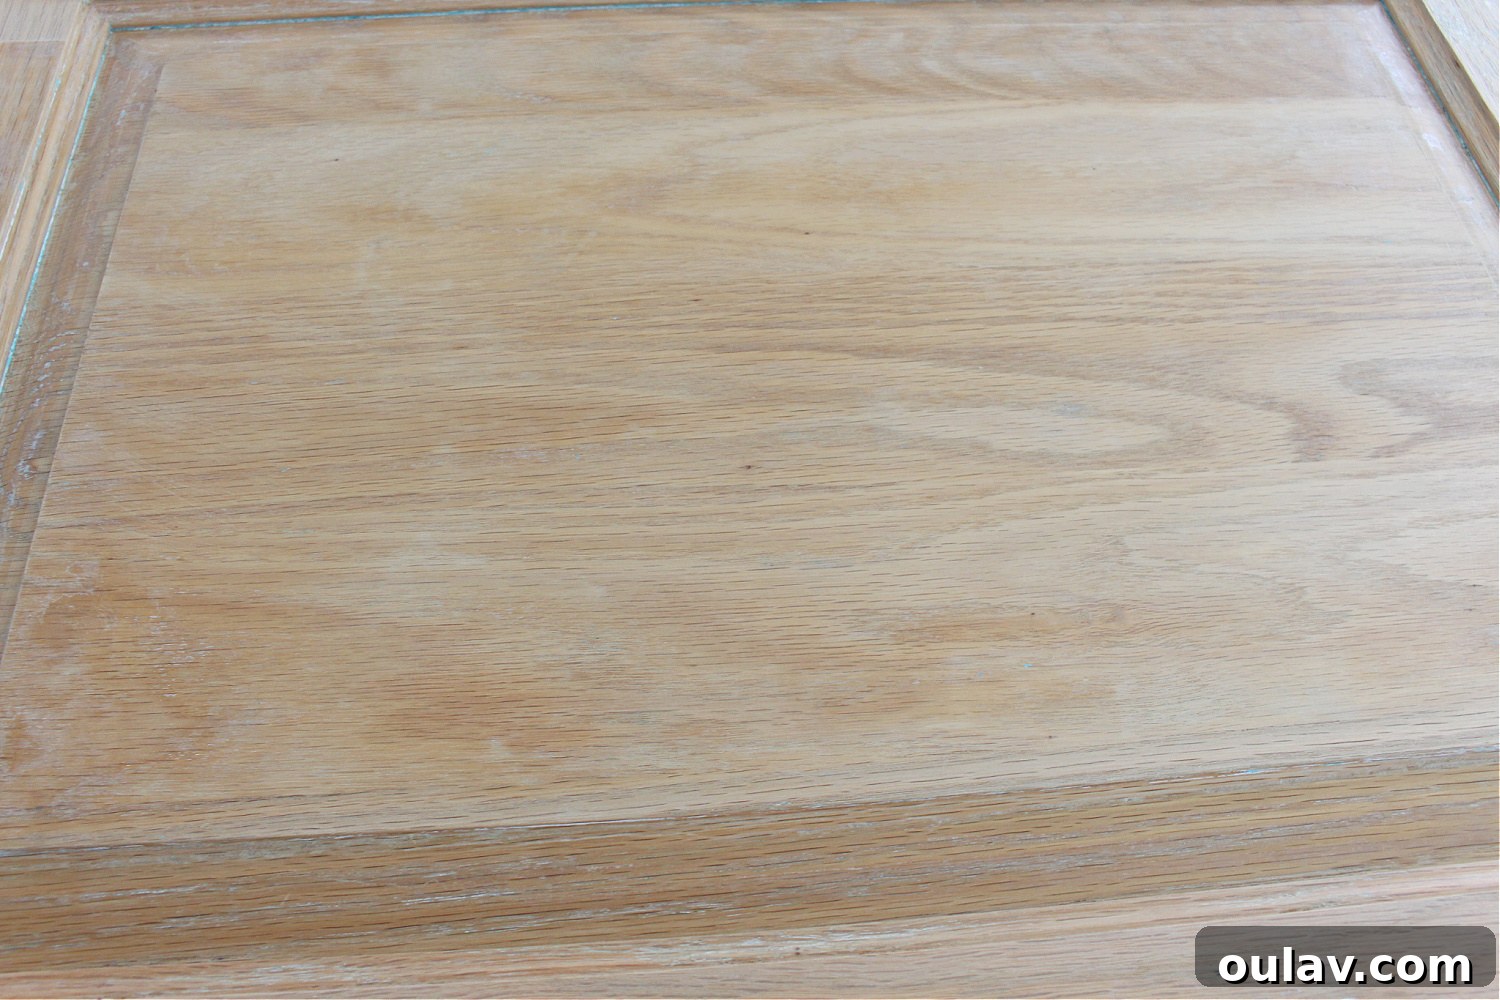
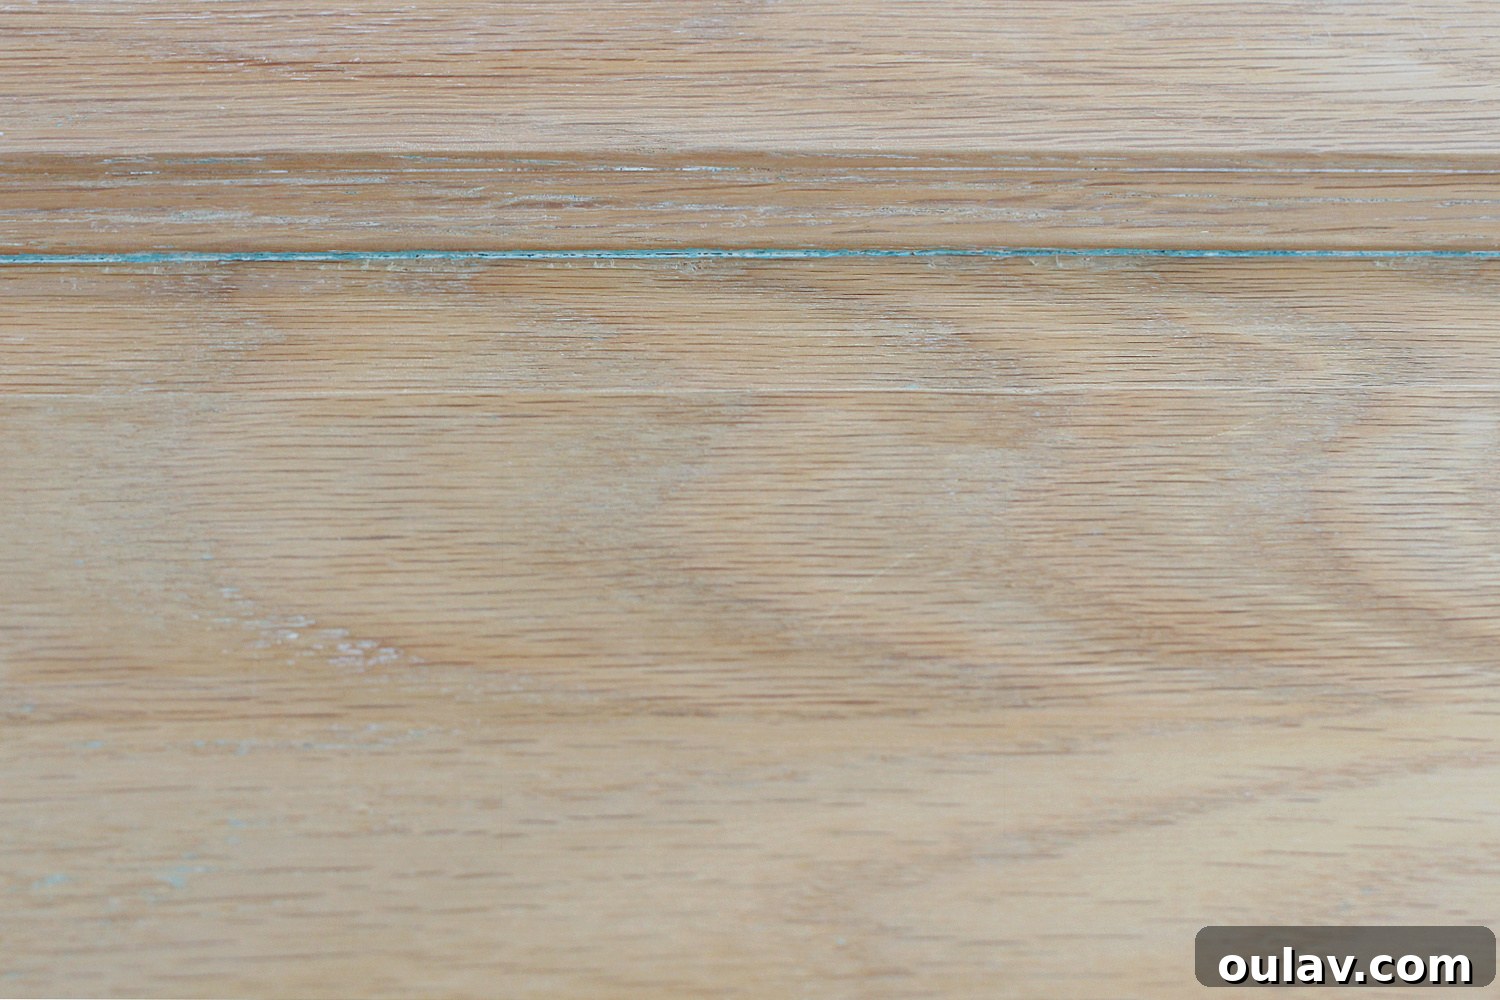
The moment of truth, when the layers of old paint finally peel away to reveal the raw, natural wood beneath, is truly exhilarating. This “magic” paint stripper proved its worth, cutting through the original finish, multiple coats of primer, and several layers of paint with astonishing efficacy. For a fleeting second, I was almost swayed to continue the process and embrace a bleached oak aesthetic, which would have been stunning! However, I’m incredibly glad I stuck with my original plan because I absolutely adore the new color I chose. As you can see in the photos below, a very small amount of paint still lingered, indicating that one more targeted application of stripper would have achieved perfect bare wood, a testament to the stripper’s power even against the toughest finishes.
Beyond Stripping: Preparing for a Fresh New Look with Paint and Primer
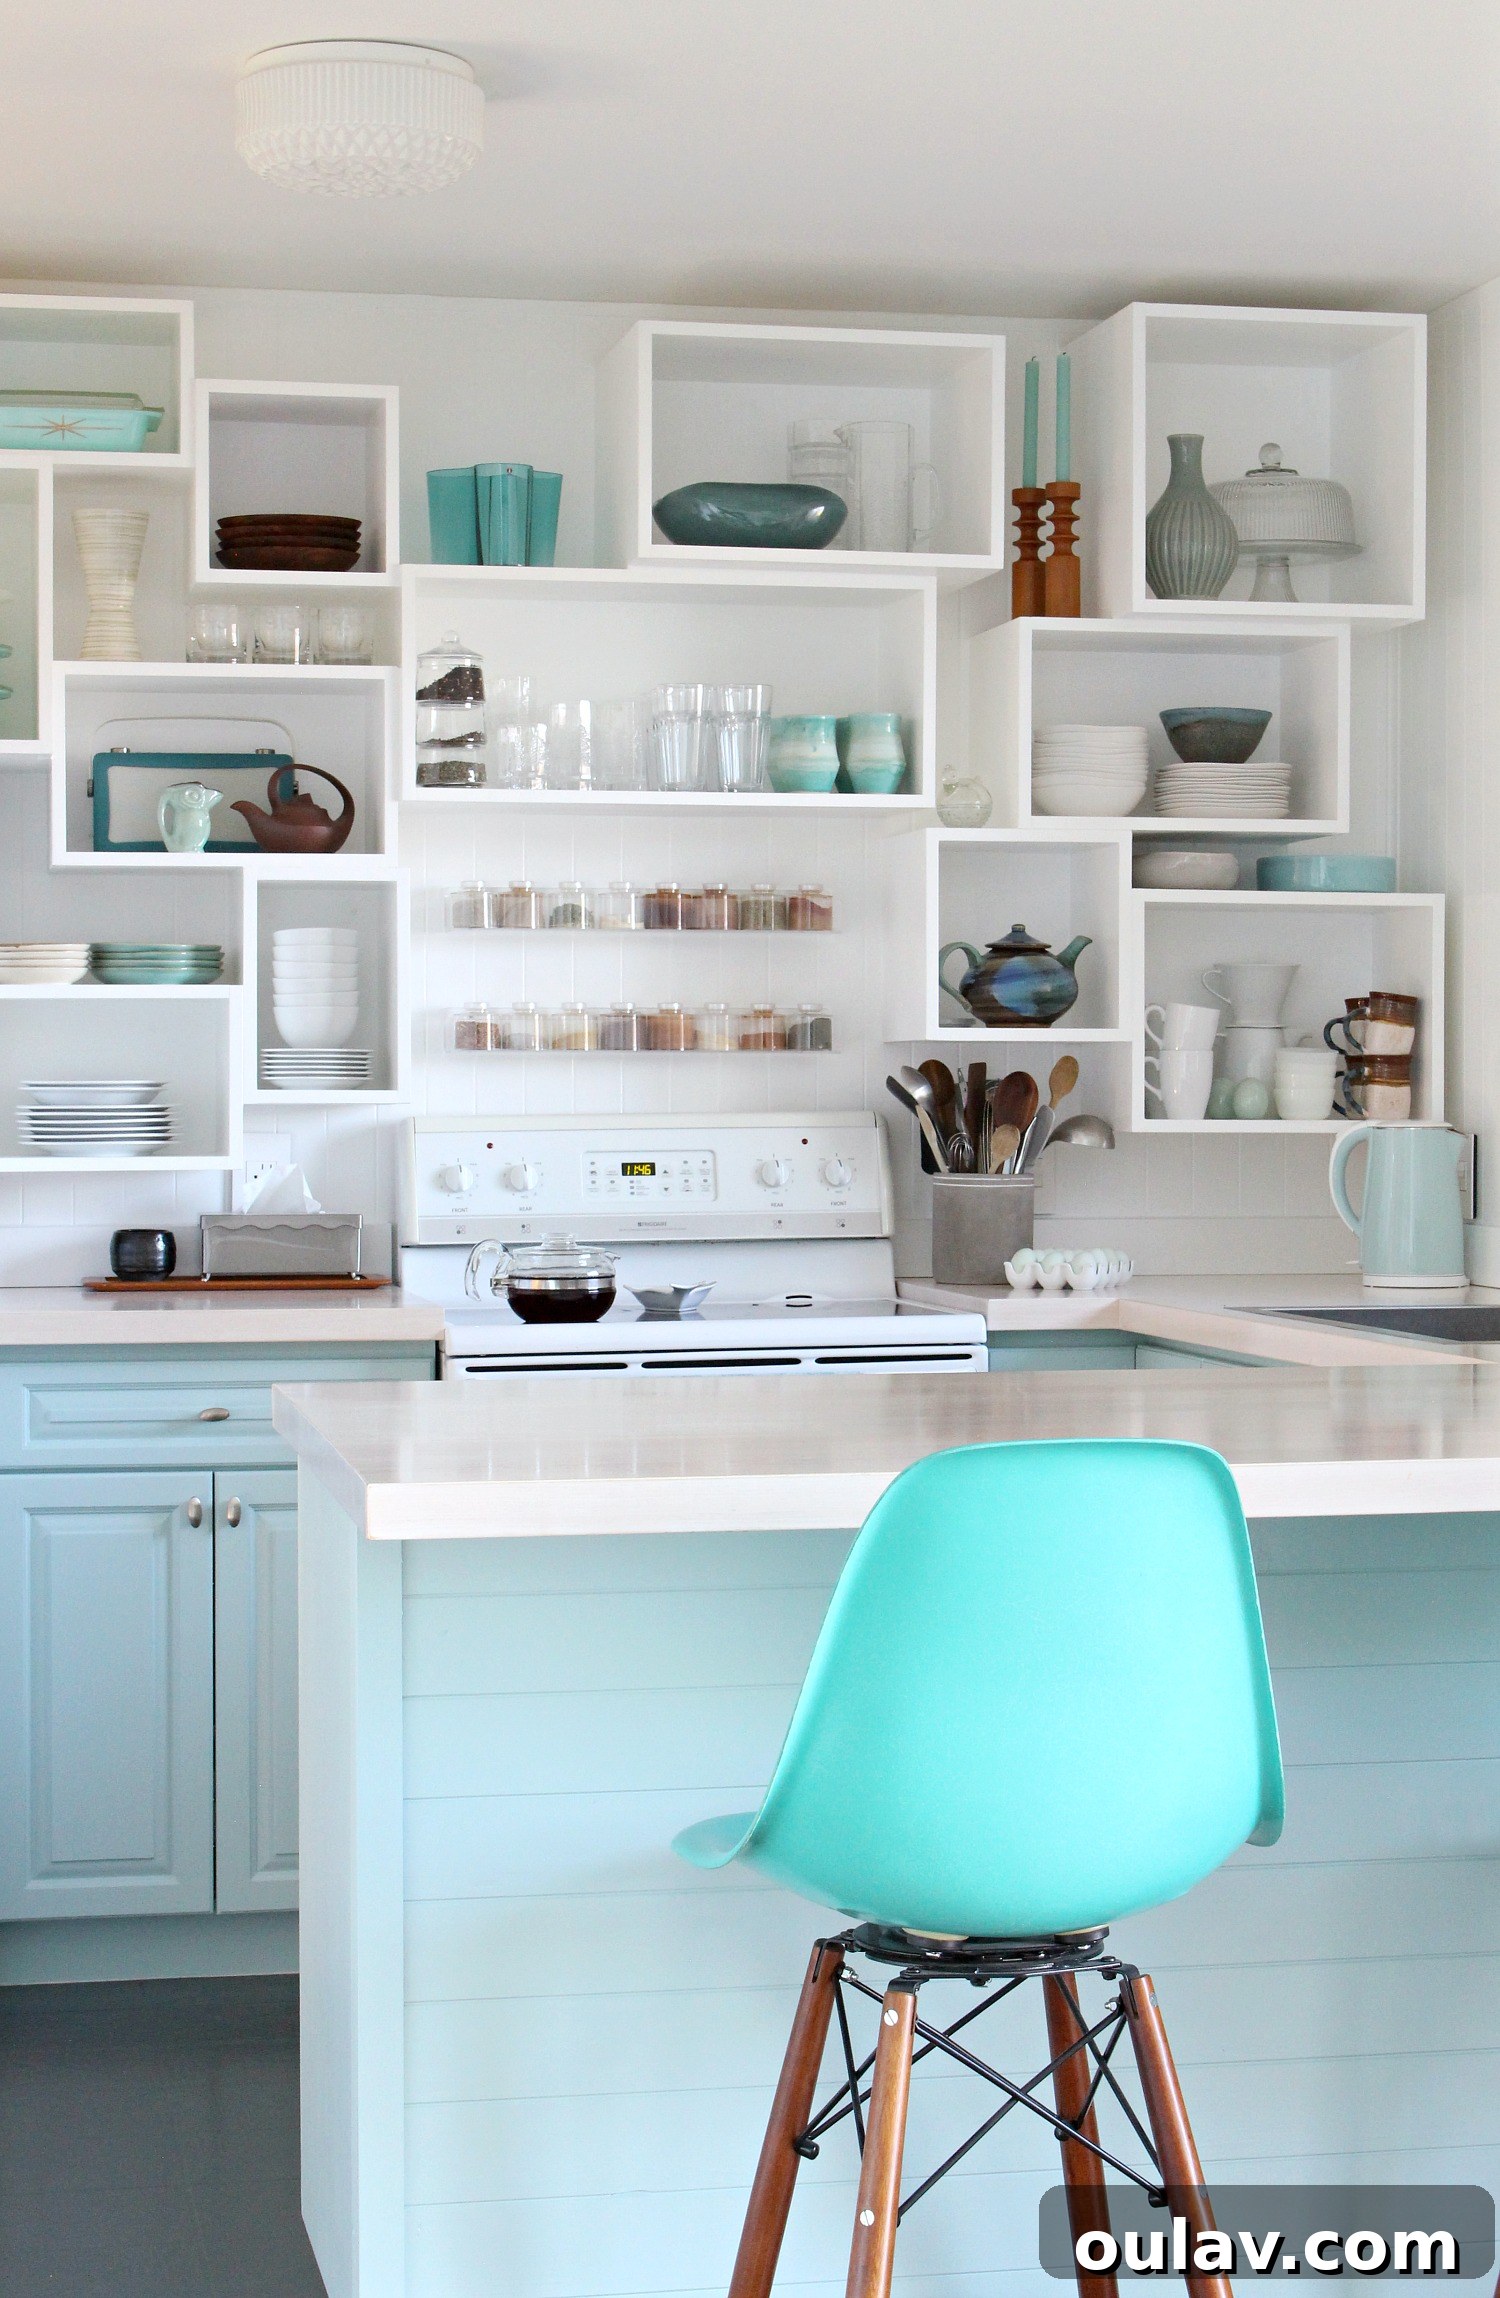
Once your cabinets are perfectly stripped and sanded, they’re a blank canvas ready for their next beautiful finish! If you’re planning to repaint, the preparation continues with priming and painting. Check out this comprehensive post to learn exactly how to prime and paint cabinets, ensuring a durable, stunning finish. Plus, you’ll find my honest review of Sherwin Williams Emerald Urethane Trim Enamel paint, a fantastic choice for kitchen cabinets.
Explore More Cabinet Refinishing Solutions and Ideas
I sincerely hope this detailed tutorial for removing paint from cabinets has been incredibly helpful for your next DIY project! The secret to successfully stripping kitchen cabinets truly boils down to arming yourself with the right products and tools, which are designed to make the job as straightforward and efficient as possible. If you’re looking for more inspiration or different approaches to cabinet refinishing, I’ve got you covered. Dive into these additional posts for a wealth of ideas and step-by-step guides:
- How to Paint Cabinet Doors with a Paint Sprayer: Discover the benefits and techniques of using a paint sprayer for a smooth, professional-grade finish.
- Comparing Different Methods of Painting and Re-Finishing Cabinets: Weigh the pros and cons of various refinishing options to choose the best one for your home and style.
- How to Re-Finish Cabinets with Rust-Oleum Cabinet Transformations: Explore an all-in-one kit solution for transforming your cabinets without the need for extensive stripping.
- How to Re-Varnish Cabinet Doors: Learn the proper steps to re-varnish your cabinet doors for a durable and beautiful natural wood look.
- Sherwin Williams Emerald Urethane Trim Enamel on Kitchen Cabinets: Get an in-depth review of this top-rated paint, perfect for high-traffic areas like kitchens.
P.S. Don’t Forget to Pin for Later!
Save this valuable guide so you can easily reference it when you’re ready to tackle your next cabinet or furniture stripping project!