
Unleash Your Inner Artist: An Easy & Fun DIY Abstract Art Tutorial
Are you ready to dive into the vibrant world of abstract art? Today, I’m thrilled to share a super fun and incredibly easy DIY abstract art tutorial, complete with step-by-step photos and clear instructions designed to inspire even the most hesitant beginner. If you’ve ever felt a tug towards painting but weren’t sure where to start, abstract art is your perfect gateway. It’s all about expression, intuition, and letting go of rigid rules, making it an incredibly liberating and rewarding creative endeavor.
My own journey with painting began many years ago in a high school art class – a memory that, surprisingly, now dates back over a decade! I remember approaching each canvas with such unbridled enthusiasm, pouring my energy into every stroke. In fact, one memorable ‘incident’ involved me getting so carried away with a painting (the striking black tree in my office, to be precise) that I managed to get paint not just in my hair, on my glasses, and all over my school uniform, but also accidentally splattered a delicate watercolor masterpiece belonging to the student next to me. My youthful interpretation of a “good artist” involved a lot of dramatic flair – which, at 18, meant a lot of flailing arms!
Following this memorable artistic ‘explosion,’ I was kindly relocated to paint alone in a small, windowless supply room. This wasn’t a punishment; it was a revelation. In that secluded space, I felt truly free to experiment, to splash paint around without inhibition, and to simply create. I ended up earning a fantastic grade for my final project (a testament, I believe, to pure enthusiasm, plus some incredible custom stretchers and frames lovingly crafted by my then-Buildy Boyfriend, now Handy Hubby). Art class was a cherished luxury – dedicated time to simply create – something I perhaps took for granted back then.
Today, I wholeheartedly recommend painting as an exceptional form of stress relief and a powerful creative outlet. Many readers, however, have expressed some hesitation about getting started, often citing a lack of natural talent or fear of making mistakes. I truly believe that once you pick up a brush, you’ll quickly and effortlessly develop your own unique style. You’ll soon find yourself composing beautiful abstract pieces without overthinking, allowing your intuition to guide you.
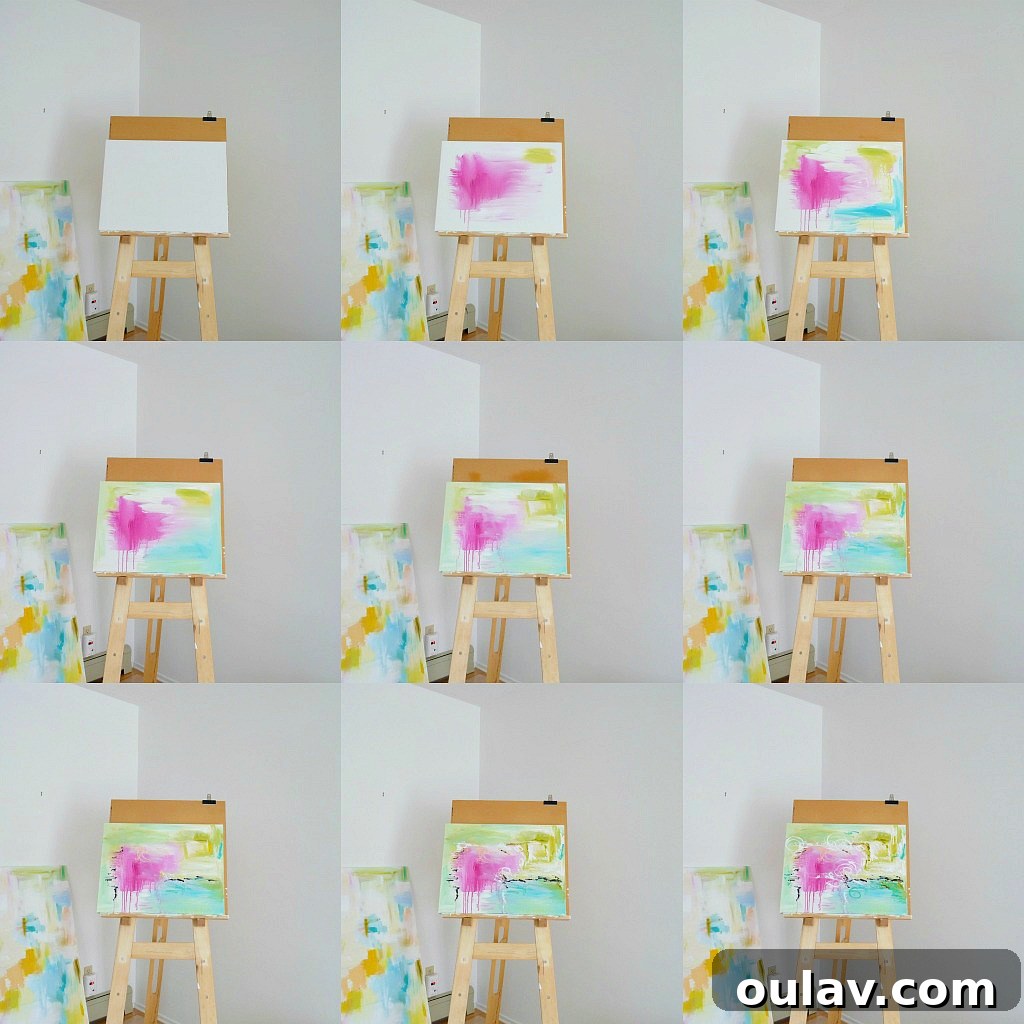
To kickstart your artistic adventure, let’s take a closer look at how a recent abstract painting of mine came to life. Hopefully, these detailed steps and practical tips will inspire you to embrace the joy of abstract painting and discover the artist within!
Getting Started: Essential Materials for Your Abstract Art Project
Before you begin your painting journey, gathering the right materials is key. While abstract art encourages improvisation, having these basics on hand will set you up for success and a smooth creative process. Don’t feel pressured to buy the most expensive supplies; beginner-friendly options work perfectly when creating your own DIY abstract art.
- Acrylic Paints: Choose a variety of colors you love. Acrylics are ideal for beginners because they dry quickly, are water-soluble (easy cleanup!), and can be layered or painted over. Consider a few primary colors, black, white, and a few complementary or analogous shades for your acrylic abstract art.
- Canvas: A stretched canvas or canvas board in any size you prefer. Starting with a medium size (e.g., 16×20 inches or 20×24 inches) can be comfortable for beginner abstract painting.
- Brushes: A few different sizes and shapes. For this tutorial, a dry, flat brush is particularly useful for applying initial layers and creating texture.
- Plant Mister Bottle: Filled with clean water. This is a game-changer for achieving those beautiful, drippy, watercolor-like effects with acrylics, a vital abstract art technique.
- Palette: A ceramic plate, plastic palette, or even a piece of wax paper or aluminum foil works perfectly for mixing paints.
- Water Container: For rinsing brushes. An old cup or jar is ideal.
- Paper Towels or Rags: For blotting brushes and cleaning up spills.
- Old Clothes & Drop Cloth: Painting can get messy (especially with enthusiasm!), so protect your clothing and workspace.
Setting Up Your Creative Space for Stress Relief Painting
Creating an inspiring and functional workspace is an important first step. Choose an area with good lighting, preferably natural light, and ample space to move around your canvas. Lay down a drop cloth, old newspapers, or a plastic sheet to protect your floor or table. Ensure you have easy access to all your paints, brushes, and water. Most importantly, create an atmosphere where you feel comfortable, relaxed, and ready to experiment. Put on some music, clear your mind, and prepare to immerse yourself in the process of stress relief painting. This dedicated space helps foster your creative outlet and allows for undisturbed artistic exploration.
Step-by-Step Guide: How to Create Your Own Abstract Masterpiece
This abstract painting tutorial focuses on achieving a beautiful, loose, and organic look using a combination of controlled application and fluid effects. Remember, there are no mistakes in abstract art, only opportunities for discovery! This step-by-step art guide will make the process enjoyable and accessible.
1. Laying the Foundation: The Dry Brush and Mister Technique for Easy Abstract Art

To begin your easy abstract art, I started by applying acrylic paint directly to the canvas using a relatively dry brush. The key here is not to saturate your brush with water, allowing for more textured, broken strokes. Load a small amount of acrylic paint onto your dry brush and apply it with broad, sweeping movements. Don’t overthink your placement; let your hand move freely across the canvas, laying down initial patches of color. This dry application creates a textured base, perfect for what comes next.
Immediately after applying a section of paint, grab your plant mister filled with water. Lightly spray the painted areas. This technique is fantastic because it gives you more control over the fluidity than dipping a wet brush directly into paint. The water reacts with the acrylic, causing it to drip, bleed, and soften its edges. This creates gorgeous translucent washes and blends colors in an organic, unpredictable way. Continue this process, applying patches of color and misting, to create a light, watery, and ethereal foundation across your canvas. Observe how colors gently mix and flow, allowing accidents to become beautiful elements of your composition. This is a fundamental abstract art technique for achieving a dynamic starting point.


2. Building Layers and Adding Depth for Modern Abstract Art

Once you have your initial misty layers, it’s time to continue building depth and complexity, transitioning your piece towards a truly captivating modern abstract art creation. Keep working around the canvas, intuitively applying more paint where you feel it’s needed. This is where the “play” truly begins! You’ll notice that as some areas of your painting begin to dry, you can layer fresh paint over them. This technique allows underlying colors to subtly peek through, creating a sense of history and dimension within your artwork. The dried layers act as barriers, preventing complete blending and adding visual interest.
Conversely, in other spots, you might choose not to let the paint dry completely. Applying wet paint onto still-wet paint will cause the colors to blend more fluidly and create new, softer hues and transitions. This creates a more sheer and integrated look. Experiment with both approaches – layering over dry paint for distinct separation, and blending wet-into-wet for seamless color shifts. Pay attention to how the colors interact and how the composition evolves. This stage is all about listening to your canvas and responding to what you see, allowing intuition to guide your choices of color and placement. Don’t be afraid to add more water with your mister to reactivate areas or create new drips if desired, deepening the unique character of your original artwork.

3. Introducing Contrast and Definition with Sharp Lines for Home Decor Art

As a final, impactful step, consider adding elements that introduce contrast and definition. For my painting, I chose to incorporate some black and white paint in sharper, more deliberate lines. This technique provides a striking visual counterpoint to the soft, diffused, and often blended layers created by the misting technique. The crispness of these lines draws the eye and can help to define areas, add structure, or introduce a sense of dynamic energy to the composition, making it ideal as captivating home decor art.
Think about where these lines would be most effective. They don’t have to be perfectly straight; organic, somewhat gestural lines can also work beautifully. You might use a smaller, finer brush for this, or even the edge of a palette knife for bolder marks. Besides lines, consider adding small, dense shapes or even subtle splatters of black or white to punctuate the softer background. This stage is about refining the overall balance of your piece, ensuring there’s enough visual interest and tension between the flowing colors and the more defined elements. It’s an opportunity to add your unique signature to the artwork, transforming it into a truly personal statement.

Embracing the Process: It’s All About Experimentation and Fun!
The most important takeaway from this entire process is that abstract art should be an experiment, and above all, a ton of fun! Don’t let the fear of “getting it wrong” hold you back. Abstract painting for beginners is a journey of discovery, not a pursuit of perfection. Every stroke, every drip, and every color choice contributes to a unique narrative on your canvas. This is your personal creative outlet, free from judgment.
Don’t Like Your Result? No Problem!
One of the many wonderful aspects of working with acrylic paint is its forgiving nature. If you reach a point where you don’t love how your painting is turning out – or if you simply want to try something different – it’s incredibly easy to paint right over acrylic layers once they’ve dried. Think of it as having multiple chances to create something you adore, making acrylic abstract art particularly beginner-friendly.
I’ve certainly revisited and reworked my own pieces many times. Remember how I tweaked a bedroom triptych, completely falling in love with its second version? Or how I reworked this geographic painting to achieve a much more satisfying result? Each revision isn’t a failure; it’s a step closer to realizing your artistic vision and an opportunity to learn and grow. Embrace the iterative process, and you’ll find immense satisfaction in transforming your artwork, proving that anyone can create stunning original artwork.
Beyond the Canvas: Displaying and Continuing Your Artistic Journey
Once your painting is complete and fully dry, consider how you want to display it. A simple frame can elevate an abstract piece, or you might prefer a frameless, contemporary look. Don’t underestimate the power of your own handmade artwork to transform a space and add a personal touch to your home decor art. Your unique creation will be a conversation starter and a constant reminder of your creative spirit.
This DIY abstract art tutorial is just the beginning. The more you paint, the more you’ll develop your own style, discover preferred color palettes, and experiment with new abstract art techniques. Let each painting be a learning experience, a moment of mindful creation, and a testament to the joy of making. Keep exploring, keep experimenting, and most importantly, keep having fun! Your journey into abstract painting is a personal one, full of endless possibilities.
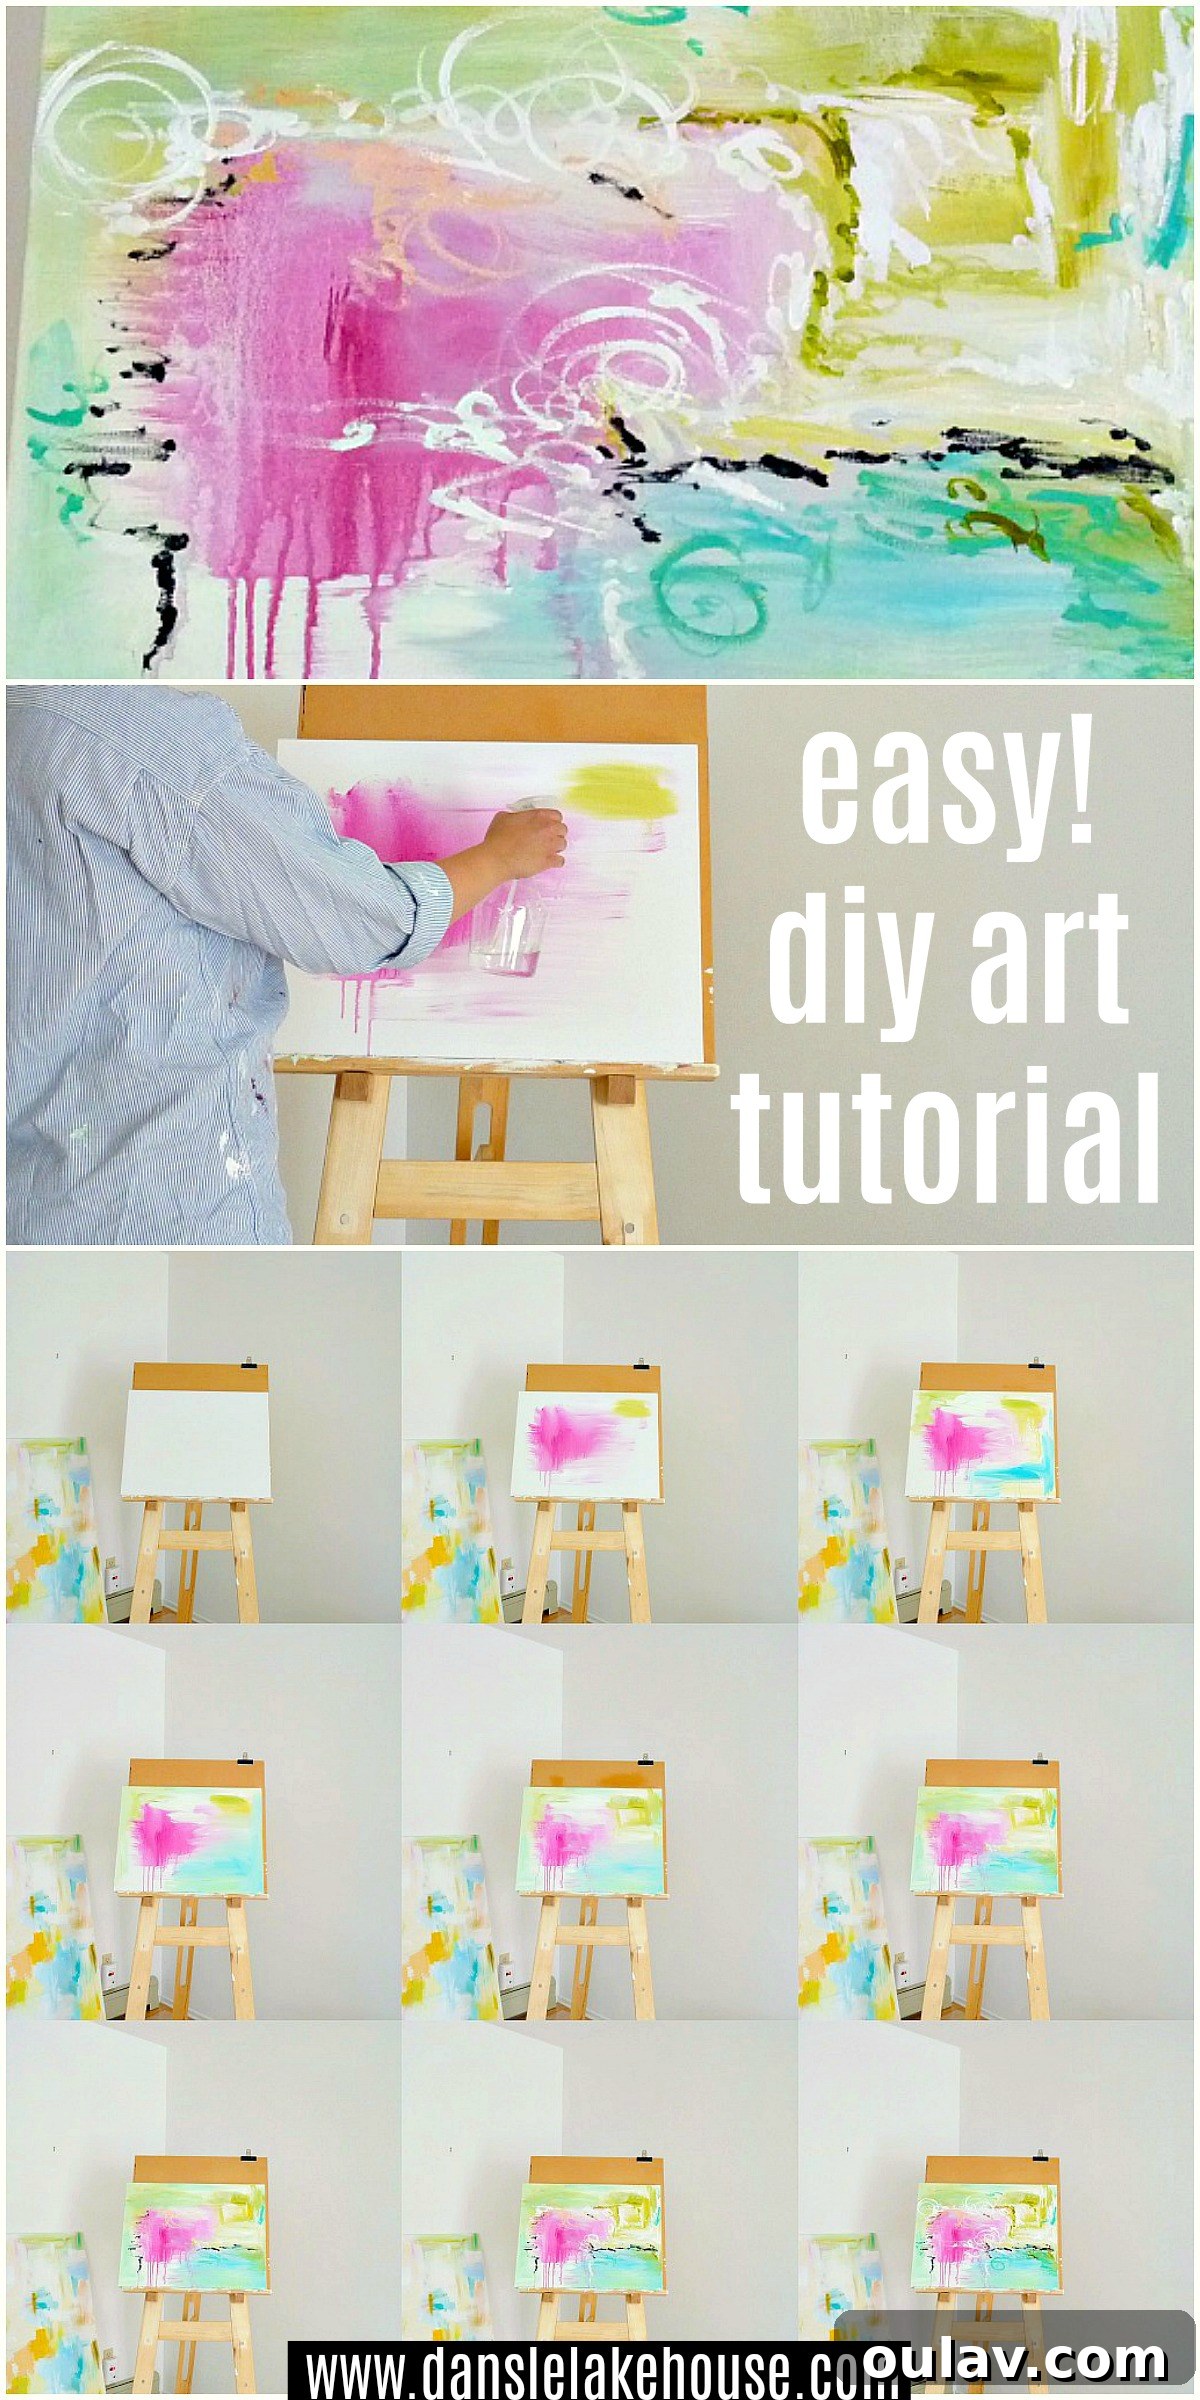
I genuinely hope you enjoyed this DIY abstract art tutorial and feel empowered to pick up a brush and create your own stunning abstract painting. You truly won’t be disappointed by the creative journey and the beautiful results you can achieve! And for those looking for extra validation, this very abstract art tutorial was proudly featured by Domino and In Style, proving that anyone can create art worthy of recognition and transform their home with unique, original artwork.