
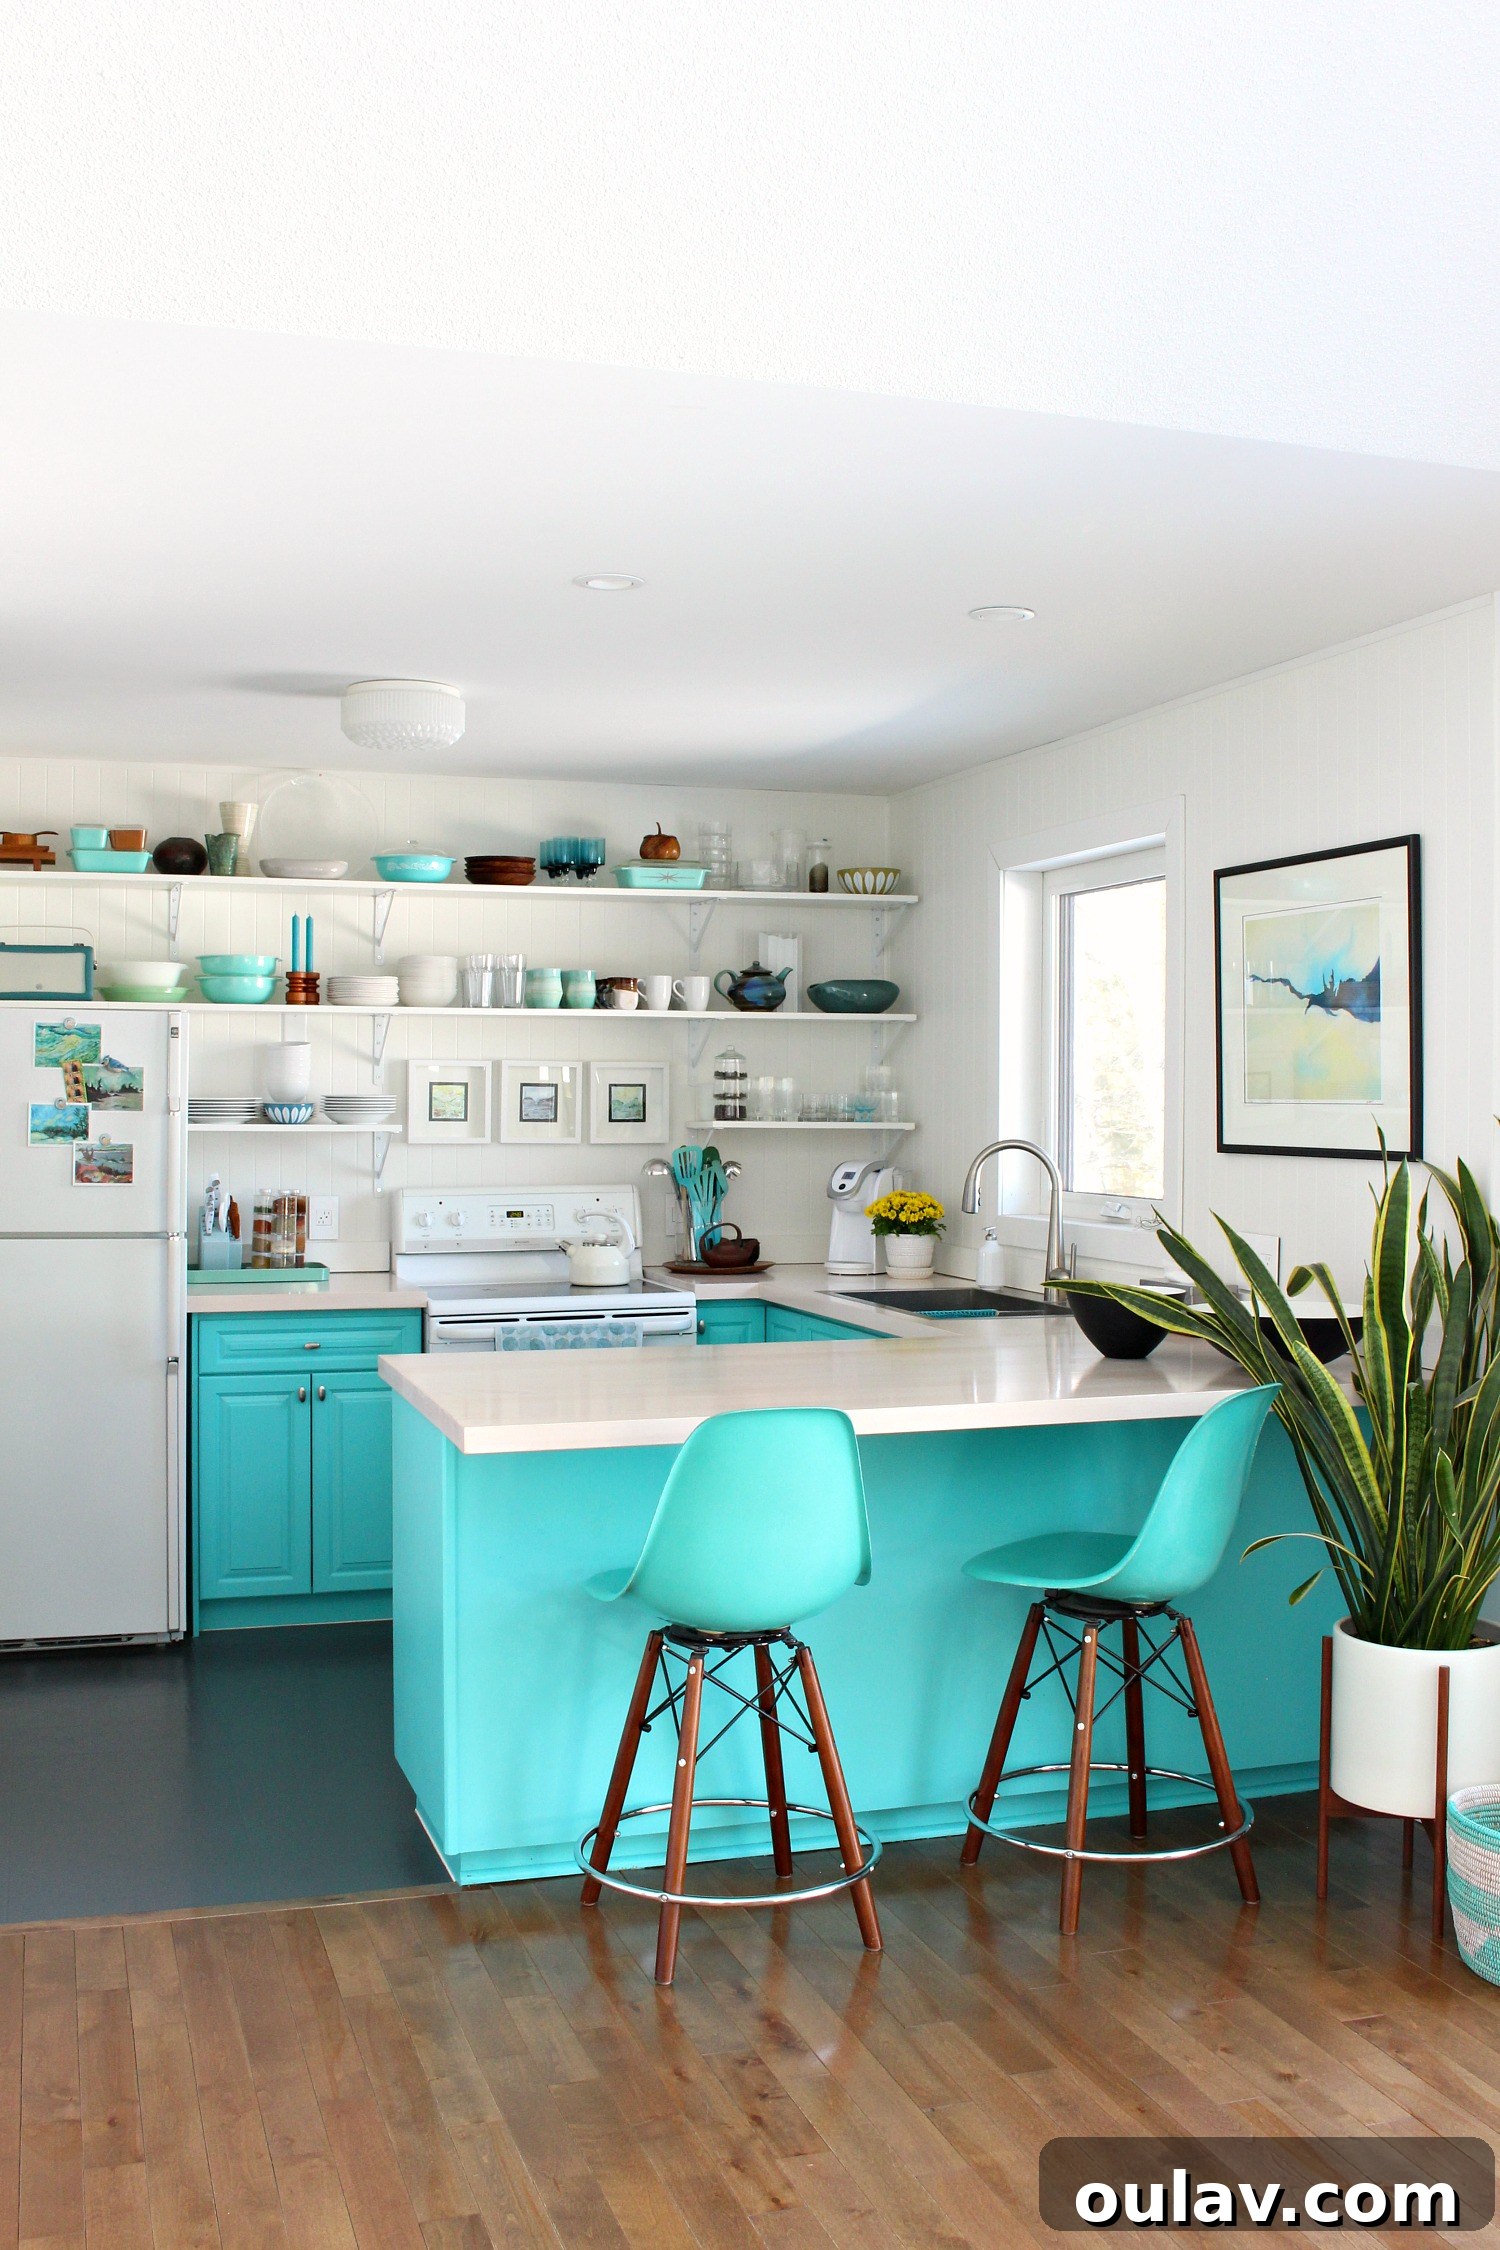
Embarking on a cabinet refinishing project can feel overwhelming, given the myriad of choices available. From the classic debate of latex paint vs. stain, to specialized products like Rust-Oleum Cabinet Transformations, or the unique appeal of varnish, chalk paint, or even a simple wood conditioner – how do you choose the best approach? The ultimate goal for many DIY enthusiasts is to find the most effective way to refinish kitchen cabinets or transform bathroom cabinets so they not only look fantastic but also stand the test of time. Perhaps you’re wrestling with deciding the best paint for cabinets, or you’re wondering if a wood conditioner alone is sufficient to breathe new life into your existing cabinetry. This comprehensive guide aims to demystify the process and help you make an informed decision for your next cabinet makeover.
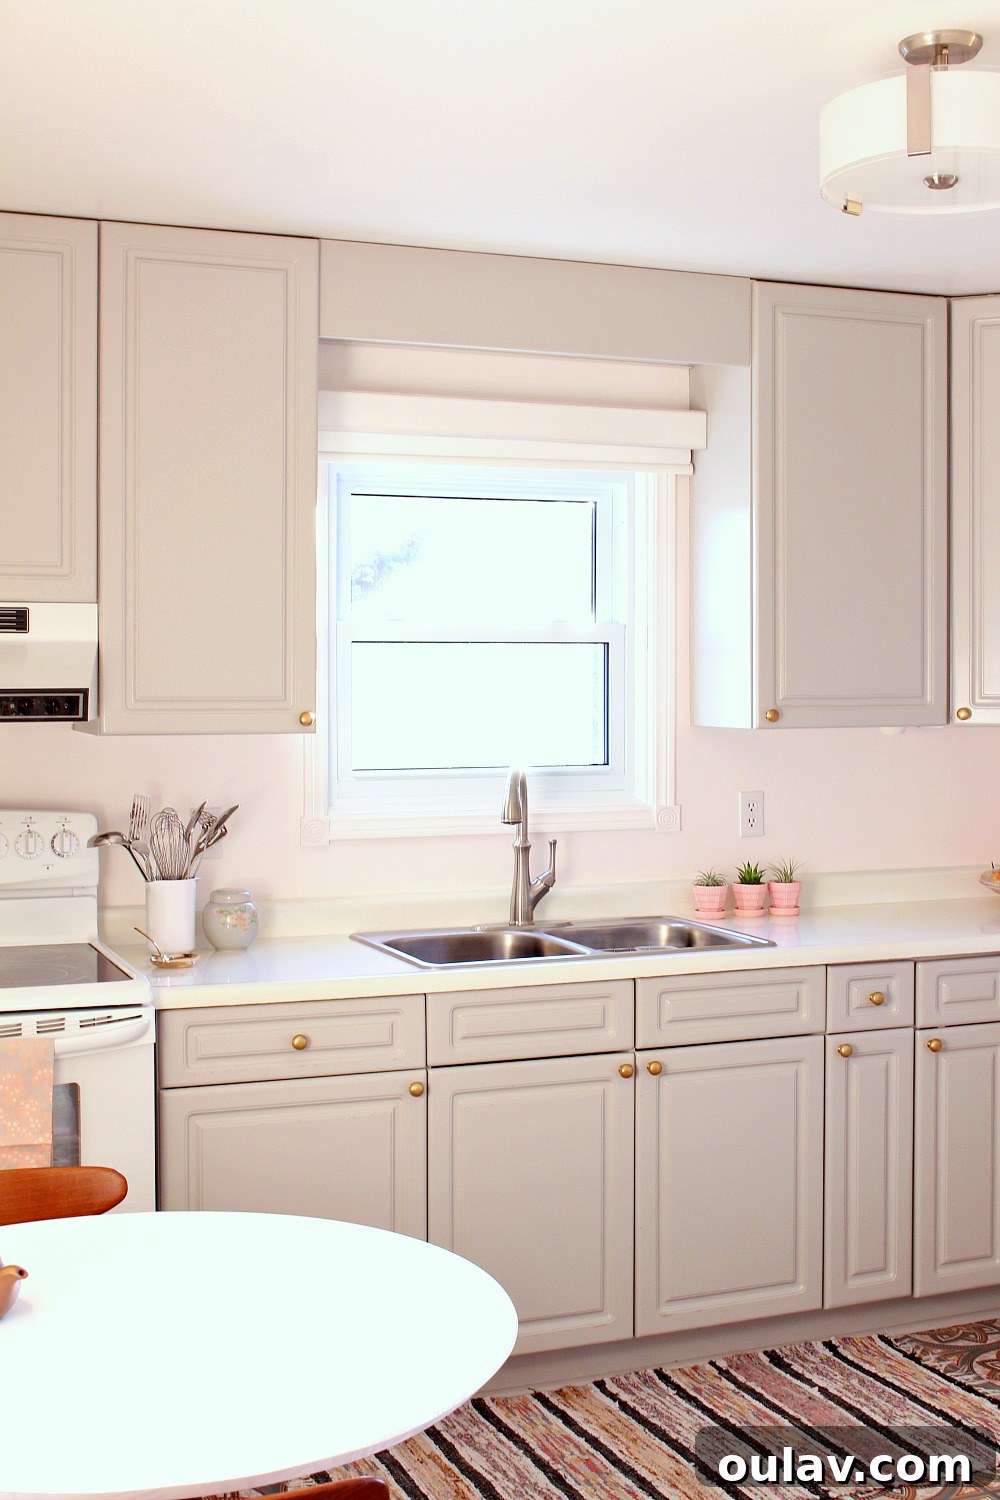
Having undertaken several cabinet makeovers and accumulated considerable cabinet refinishing experience, I’ve experimented with various methods and supplies across diverse projects. Many DIY newcomers have reached out, seeking advice on the optimal strategy for cabinet refinishing. Therefore, I decided to consolidate my insights into this detailed post, complemented by links to other inspiring cabinet transformations. My research, combined with hands-on experience, allows me to share the pros and cons of the most popular cabinet refinishing methods suitable for DIYers. While I’ll provide a clear overview of the steps involved, please note that these are intended as a practical guide, not an exhaustive tutorial for every single detail. For in-depth instructions, follow the provided links to full tutorials. A quick disclaimer: these recommendations are based purely on my personal experience and research. If your journey has been different, whether positive or challenging, I encourage you to share your valuable perspectives in the comments section!
CABINET REFINISHING WITH LATEX OR OIL-BASED PAINT:
Painting cabinets remains one of the most popular and versatile options for a dramatic transformation. I’ve personally tackled three sets of cabinets using latex paint: the half-bathroom cabinet in my townhouse and the extensive kitchen cabinetry in the lakehouse. For the townhouse bathroom, I utilized leftover primer and eggshell paint from the wall project. Given the minimal usage of this bathroom, chipping was never an issue, but the eggshell finish proved difficult to clean effectively. Despite the subtle change, I successfully updated the cabinet color from a dull cream to a fresh pale grey.
The lakehouse kitchen makeover was, understandably, a far more ambitious undertaking and served as my second significant lesson in how to paint cabinets effectively.
For the lakehouse kitchen cabinets, I opted for Zinsser primer followed by CIL Premier Latex paint in a semi-gloss finish. Other DIY experts, like Sherry and John from Young House Love, successfully used a satin finish (Benjamin Moore Advance) for their kitchen renovation. Personally, I am a huge advocate for the semi-gloss finish because it offers exceptional durability and is incredibly easy to wipe down and keep clean. In my experience, it provides a subtle sheen without appearing overly glossy, striking a perfect balance between aesthetics and practicality. More recently, I refreshed a powder room cabinet with a soft aqua, using only leftover primer and an economical sample pot of semi-gloss paint, proving that beautiful results don’t always require a hefty investment.
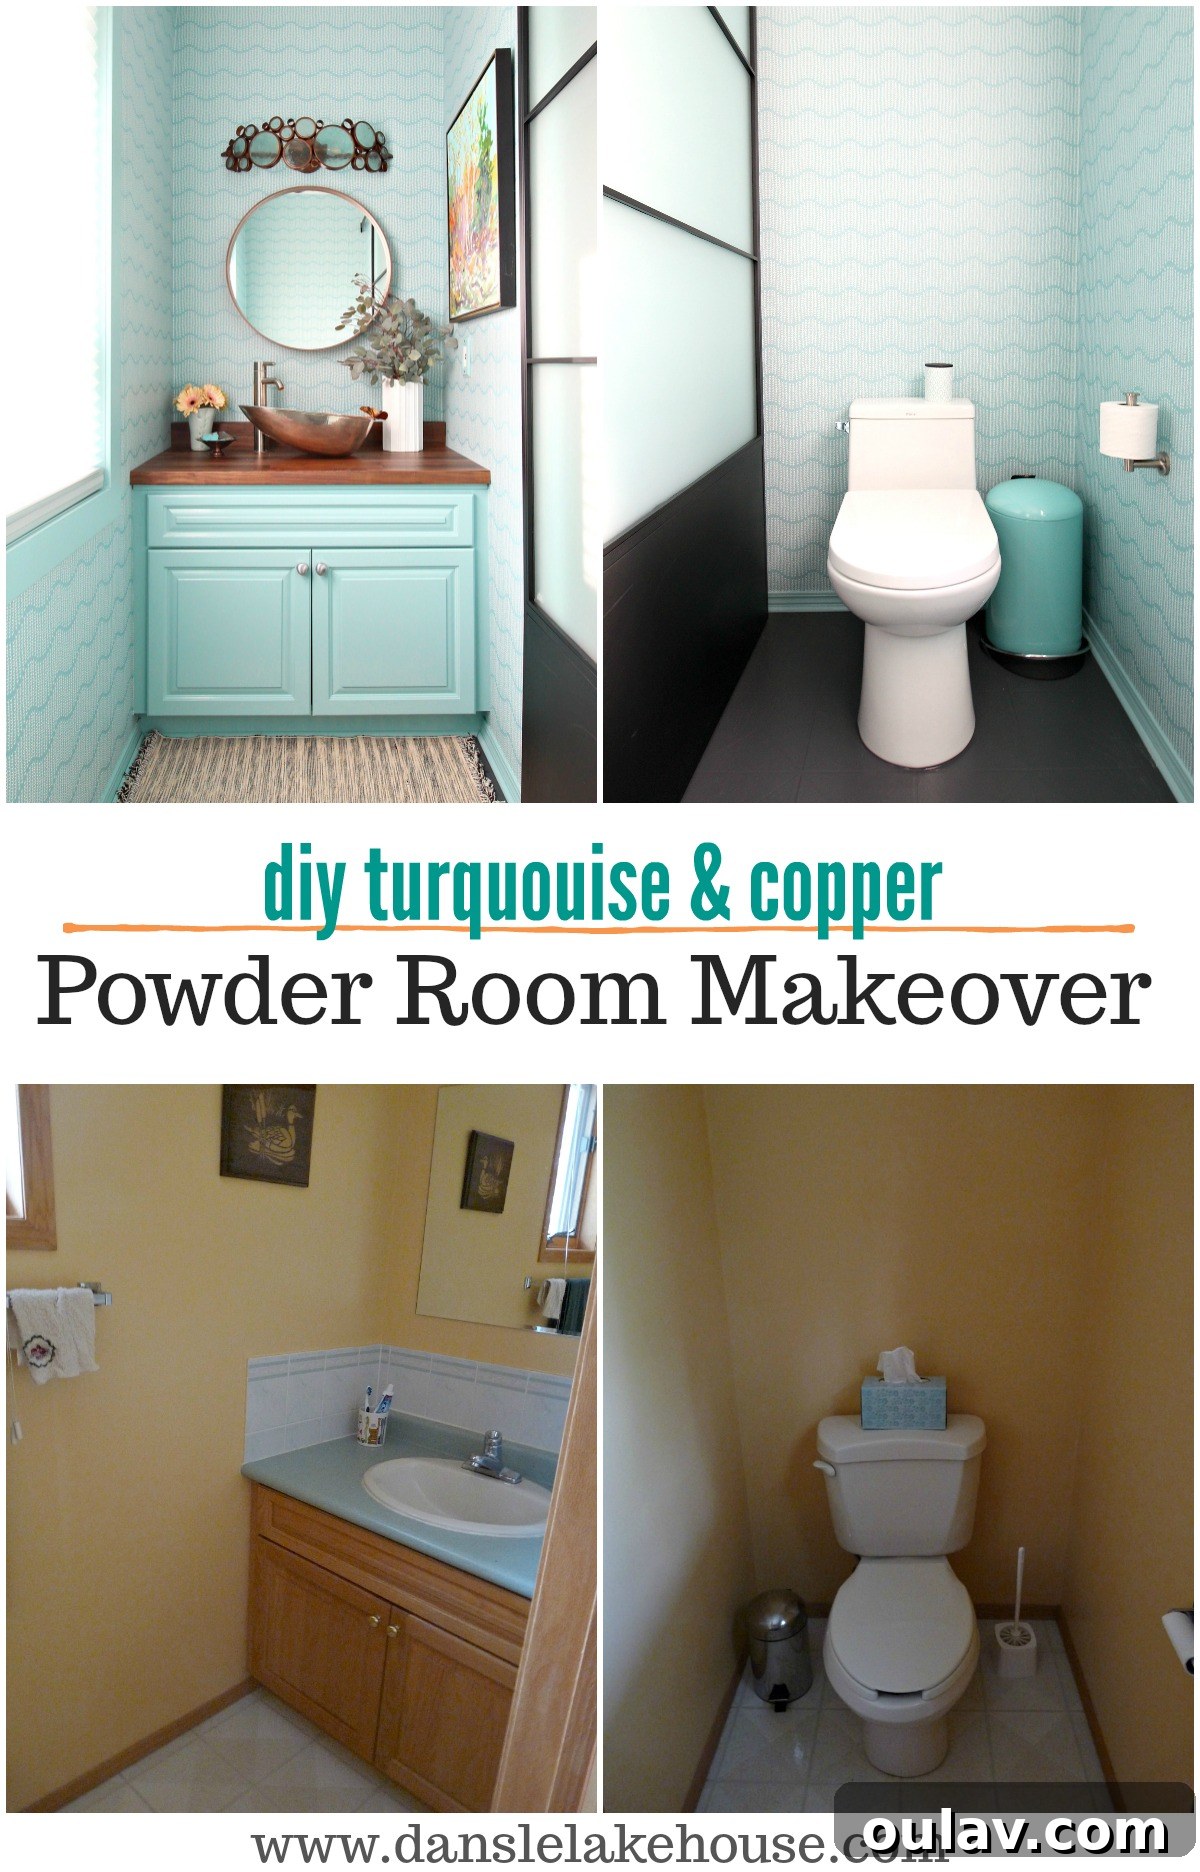
ESSENTIAL STEPS FOR PAINTING CABINETS WITH LATEX OR OIL-BASED PAINT:
- Preparation is Key: Begin by carefully removing all cabinet fronts (doors and drawer faces) and detaching all hardware (hinges, pulls, knobs). Labeling each piece as you remove it will save immense time and frustration during reassembly.
- Repair Imperfections: Fill any existing holes, dents, or minor damage with a good quality wood filler. Allow it to dry completely according to manufacturer instructions.
- Smooth the Surface: Once the wood filler is dry, sand the patched areas smooth. You may also want to lightly sand the entire surface of the cabinets to ensure optimal adhesion for the primer, even if your chosen primer states it’s unnecessary. This step helps de-gloss the old finish and creates a “tooth” for new paint.
- Thorough Cleaning: Clean all surfaces meticulously with a degreaser. A simple solution of dish soap and warm water, applied with a chore boy scrub pad or similar abrasive sponge, works wonders. Rinse thoroughly to remove all residue.
- Dust Removal: Vacuum away any sanding dust. Follow up with a tack cloth to pick up finer particles, ensuring a pristine surface.
- Final Wipe Down: Wipe down all surfaces with a damp cloth and allow them to dry completely before proceeding.
- Primer Application: Apply a high-quality primer using a brush, roller, or spray gun. Primer is crucial for blocking stains, ensuring uniform paint adhesion, and creating a durable base. Allow adequate drying time.
- Sanding Between Coats (Optional but Recommended): Lightly sand any imperfections or raised brush marks after the primer dries, using a fine-grit sandpaper (e.g., 220-grit). This creates a super smooth base for your topcoat. Clean off dust.
- Paint Application: Apply thin, even coats of your chosen paint using a brush, high-quality foam roller, or spray gun. For larger, flat areas like breakfast bars, a roller can be efficient. Multiple thin coats are always better than one thick coat.
For more detailed insights, explore this post on how we used a paint spray gun for cabinet fronts, and here’s how I tackled painting the cabinet boxes. A comprehensive list of all the supplies we used can also be found through the link.
REVIEW OF PAINTING CABINETS WITH LATEX PAINT:
Despite my thorough preparation, including sanding before priming and using a high-quality primer, I did observe a few minor spots of paint loss after accidental impacts during our move-in period. However, this damage was exceptionally minimal and easily touched up. It’s crucial to remember that paint can take up to a month to fully cure and reach its maximum hardness, so extra care during that initial period is highly advisable. Some tutorials, like one on Curbly, even advocate for a very rigorous sand/prime/prime/prime/sand/paint system for maximum adhesion and durability, though this does involve considerable effort. (Update in 2020: my chosen method worked remarkably well and has proven perfectly durable over many years, underscoring that a balanced approach to prep can yield excellent long-term results).
PROS: Offers virtually unlimited color choices, a wide range of finishes (matte, eggshell, satin, semi-gloss, high-gloss), supplies are readily available at any hardware store, and it can dramatically alter the aesthetic of your space.
CONS: Requires extensive preparation work (sanding, priming, and careful paint application for optimal adhesion), needs a significant amount of time to fully cure, and brush strokes can be visible if not applied correctly or with the right tools.
PURCHASE: While I sourced my supplies from Canadian Tire, you can easily find excellent options like Zinsser primer on Amazon. This brand provides a reliable foundation for almost any furniture or cabinet painting project.
CABINET REFINISHING WITH CHALK PAINT:
Chalk paint has garnered immense popularity in the DIY world, largely due to its remarkable characteristic of often allowing you to skip the laborious sanding step. When I initially planned my kitchen makeover, I visited an Annie Sloan stockist, drawn in by the promise of effortless application. However, I found that even custom-mixed, the available colors tended to lean towards an “antique” aesthetic, which wasn’t quite what I envisioned for my modern lakehouse kitchen. For those intrigued, an entire website is dedicated to guiding you through the nuances of using chalk paint. A quick search on Google or Pinterest will reveal a treasure trove of charming chalk paint kitchen makeovers. Simply Rooms offers a particularly good tutorial, and I must confess, I adore the color they chose! My own experience with updating a cabinet with chalk paint from a rattle can left me thoroughly impressed by the ease of achieving a beautiful finish and its surprising durability, making it a viable option for cabinet refinishing.
| Photo Source: Bella Tucker |
STEPS FOR PAINTING CABINETS WITH CHALK PAINT:
- Initial Disassembly: As with most cabinet projects, start by removing all cabinet doors, drawer fronts, and existing hardware.
- Surface Preparation: While sanding is often skipped, a thorough cleaning with a good degreaser is essential to remove grime and oils. Allow the surface to dry completely.
- Ensure Cleanliness: Before painting, confirm that the surface is entirely free of lint, dust, or any debris that could compromise the finish.
- Paint Application: Begin painting! The beauty of chalk paint lies in its minimal prep, often requiring no sanding or priming. However, be aware that in some instances, especially with very dark or stained wood, bleed-through might occur. In such cases, even experienced professionals have sometimes found it necessary to apply a primer to prevent discoloration.
- Sealing for Durability: Once the paint is dry, seal the piece using clear wax or a furniture paste. This step is critical for protecting the chalky finish, enhancing durability, and allowing for easy cleaning.
PROS: Offers a decent selection of unique, often muted colors, significantly reduces the required preparation time (often no sanding or priming), makes distressing for a charming cottage-inspired look incredibly easy, and inherently provides a distinctive chalky finish that many people adore.
CONS: Achieving a perfectly smooth finish with the wax can be tricky, especially with certain brands like Annie Sloan, potentially making it more challenging for beginners. Chalk paints can be more expensive than traditional latex paints, and availability may be limited to specific stockists in some regions. Additionally, the chalky finish (without wax) might not appeal to everyone.
PURCHASE: Most cities host stockists for various chalk paint brands. If you’re unable to find it locally, a wide array of tools and different brands of chalk paint are readily available on Amazon, offering convenience and choice.
CABINET REFINISHING WITH RUST-OLEUM CABINET TRANSFORMATIONS SYSTEM:
For the main bathroom and half-bathroom cabinets at the lakehouse, I turned to Rust-Oleum’s Cabinet Transformations system in the color “Castle.” This kit presented a different approach compared to traditional painting, yet delivered a similarly impressive result. A major advantage was the elimination of sanding (a huge relief!), as the system incorporates a deglosser instead. This feature alone makes it incredibly appealing for those who want to avoid the mess and labor associated with sanding.
STEPS FOR PAINTING CABINETS WITH RUST-OLEUM CABINET TRANSFORMATIONS:
- Disassemble Cabinets: Remove all cabinet fronts and hardware. Keeping them organized and labeled will simplify reassembly.
- Deglosser Application: Thoroughly clean the cabinets using the provided deglosser solution. This chemical effectively removes the existing finish’s gloss and prepares the surface without sanding. After the recommended dwell time, carefully remove the deglosser residue with a clean, damp rag and water, ensuring all chemicals are neutralized.
- Bond Coat Application: Apply thin, even coats of the specialized “Bond Coat” paint. This proprietary paint is designed for superior adhesion and coverage.
- Layering Coats: Allow 2-3 hours of drying time between coats. Most projects will require 2-3 coats to achieve optimal coverage and a uniform finish.
- Decorative Glaze (Optional): If desired, apply the Decorative Glaze coat for added depth or an aged look. I personally skipped this step for a cleaner finish.
- Protective Top Coat: Crucially, apply the Protective Top Coat. This clear, durable layer seals the bond coat, providing protection against wear, moisture, and cleaning.
- Curing and Use: Allow the cabinets to dry completely and follow the manufacturer’s instructions regarding the full cure time before light use and cleaning. This ensures maximum durability.
REVIEW OF RUST-OLEUM CABINET TRANSFORMATIONS:
I genuinely loved this cabinet finishing system. The fact that nearly everything required was included in the kit made the process incredibly streamlined and user-friendly. While applying and washing off the deglosser was time-consuming, it was significantly less messy than traditional sanding and priming. This is a huge benefit, especially if you’re working indoors or without access to a garage. The bond coat paint applied beautifully – it was remarkably smooth and provided wonderfully even, consistent coverage. Honestly, it’s a superb product. The clear top coat was the only slightly challenging aspect, as touch-ups are almost impossible. Therefore, it’s vital to achieve an even coat on the first try. Carefully inspect the finished pieces from all angles to catch any matte or uneven areas before it fully cures. Additionally, the clear coat dries rapidly, necessitating quick and precise application. Once cabinet bumpers were installed, we experienced absolutely no paint loss, chips, or scuffs, and the finish cleans with remarkable ease. I’ve even had to scrub stubborn grime off, and the finish remained perfectly intact. I’ve also successfully tested it on melamine, where it performed well, requiring just an extra coat for even coverage – a minor consideration for the excellent results it delivers.
I documented the entire budget-friendly bathroom makeover, including the durability of the Rust-Oleum cabinetry transformations, in this detailed post. My satisfaction with the system was so high that I even used it for my Mom’s budget-friendly kitchen makeover, specifically to paint her melamine kitchen cabinets, with equally fantastic results.
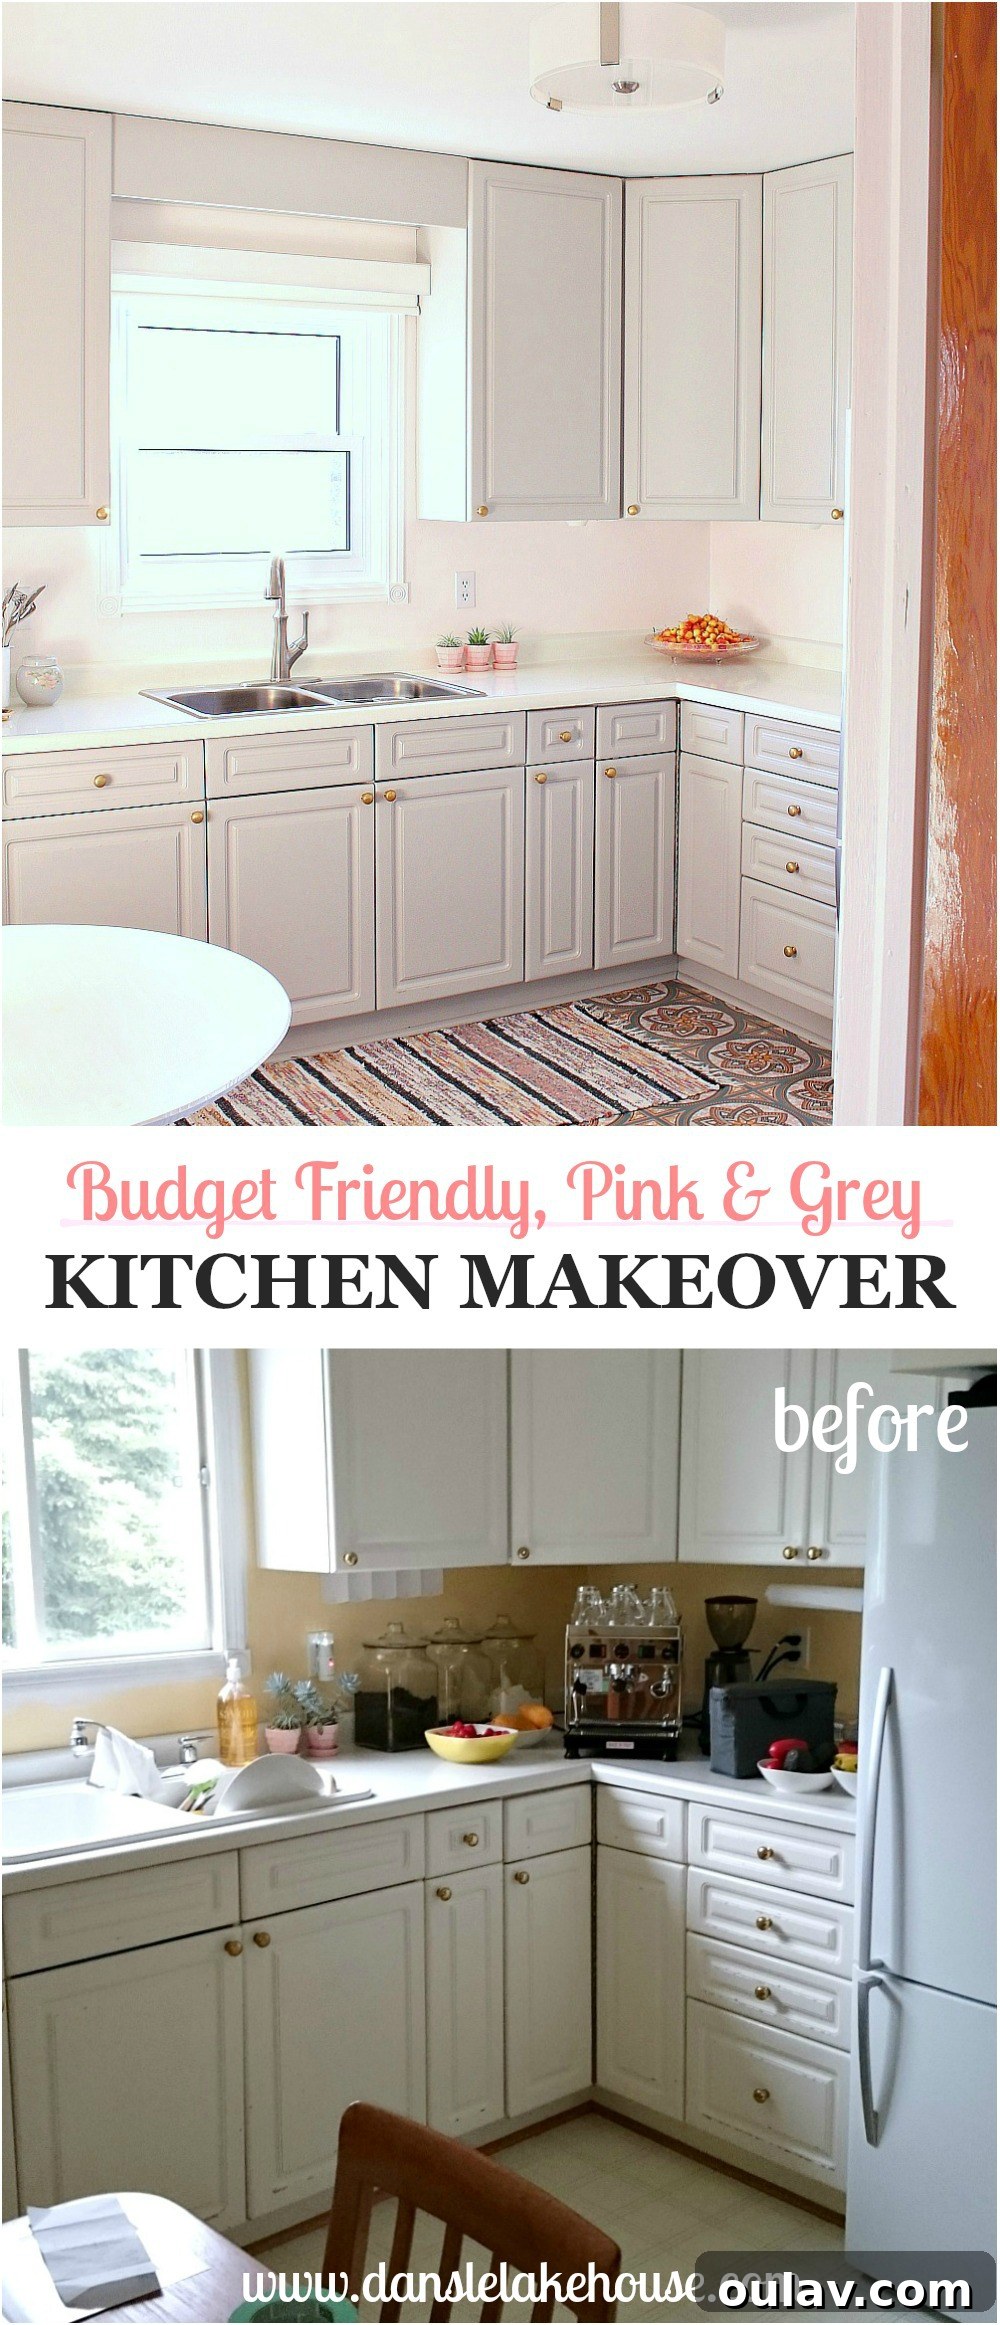
PROS: Features easy application, results in a highly durable finish, completely eliminates the need for sanding, and is ideal for beginners due to being a comprehensive kit with clear educational materials and instructions.
CONS: The clear top coat can be challenging to apply evenly, the deglosser process is time-consuming (though still preferable to sanding for some), involves working with chemicals, offers a limited selection of colors compared to traditional paints, and is not the most budget-friendly option.
PURCHASE: Most major home improvement stores now stock this system. Alternatively, you can conveniently find the Rust-Oleum Cabinet Transformations system on Amazon.
CABINET REFINISHING WITH STAIN:
While I’ve extensively stained various furniture pieces and other wood projects, including our kitchen counters, I have yet to apply stain to kitchen or bathroom cabinetry. A significant challenge with traditional water-based stains is the necessity of stripping the existing finish down to the bare wood, especially if your goal is to achieve a lighter stain color. Chemical strippers are highly effective for this, particularly on veneered fronts where accidental over-sanding could cause irreversible damage. Finishing the preparation with sandpaper and a sanding block is time-consuming but crucial for a smooth, even finish. For solid wood cabinets or those with a sufficiently thick veneer, an orbital or palm sander can significantly speed up the sanding process.
During my research for this article, conversations with local paint and stain shop experts delivered the somewhat disheartening news: currently, there isn’t a stain on the market that entirely eliminates the need for sanding when refinishing wood. However, a promising alternative is gel stain. I’ve heard that gel stain can be applied directly over an existing finish with only minimal sanding, simply enough to dull the sheen and create a bonding surface. While I haven’t tried it myself yet, it sounds like an excellent, less fussy option for restaining cabinetry. Essentially, you just need to remove the gloss layer. Jen from The Creative Cubby provides a fantastic tutorial with very clear, step-by-step photos that demonstrate this process. It appears infinitely simpler to stain cabinets a darker hue than it is to lighten them. Erin from Magenta & Lime, for instance, did a fabulous job staining her kitchen cabinets a rich espresso color.
| Photo Source: Magenta and Lime |
STEPS FOR REFINISHING KITCHEN CABINETS WITH STAIN:
- Preparation and Disassembly: Start by meticulously removing all cabinet fronts and hardware.
- Remove Existing Finish: Depending on the type of stain you’re using and the desired outcome, you’ll need to either sand the surface down to bare wood or use a chemical stripper. This step is the most labor-intensive part of the process.
- Thorough Cleaning: After stripping or sanding, thoroughly clean the surface to remove all residue, dust, and gunk. A product like TSP (trisodium phosphate) is highly effective for this.
- Pre-Stain Conditioning: If required for your chosen stain type and wood species (especially softwoods or those prone to blotching), apply a pre-stain wood conditioner. This helps ensure an even absorption of the stain.
- Allow to Dry: Ensure the conditioned surface is completely dry before moving on.
- Stain Application: Apply the stain using a foam brush, clean rag, or even a sock for controlled application. For larger projects, a spray gun can also be used for a more even finish. Apply in the direction of the wood grain.
- Adhere to Drying Times: Always follow the manufacturer’s suggestions for drying times between coats and before applying a topcoat.
- Apply Protective Top Coat: Finish with a sealant or protective top coat (e.g., polyurethane, varnish) to guard against wear and moisture.
PROS: Can dramatically transform the look of cabinetry while highlighting the natural beauty of the wood grain; many people perceive stained cabinets as looking more expensive or custom, which can be beneficial for resale value.
CONS: Stain can sometimes appear blotchy on certain wood types if not prepped or applied correctly; the cleanup process can be quite messy due to the nature of stain. Achieving a uniform finish requires careful technique.
PURCHASE: For best results, consult with the professionals at your local paint or stain store. They can provide expert advice on selecting the right product and supplies tailored to your specific wood type and desired outcome.
CABINET REFINISHING BY RE-VARNISHING:
When my husband expressed his strong preference for the natural wood veneer of our townhouse kitchen cabinets, I, as any supportive spouse would, embraced his vision, temporarily setting aside my dreams of a painted kitchen. I meticulously stripped the old varnish and sanded both the cabinet fronts and boxes until they were perfectly smooth, before applying a fresh satin clear coat. My husband rarely vocalizes decor preferences, so allowing him to have natural wood cabinets felt like a fair compromise. While this cabinet refinishing method wasn’t about dramatic color changes, it significantly freshened up the space and made the cabinets appear much newer, all while preserving the beloved natural wood grain. The entire process of stripping and re-varnishing took several days, but the effort was well worth it for a refreshed and durable finish.
STEPS FOR RE-VARNISHING KITCHEN CABINETS:
- Disassembly: Remove all cabinet fronts and hardware for easier and more thorough work.
- Strip Old Finish: Apply a chemical stripper to remove the previous varnish or finish. Follow the product instructions carefully: apply, wait for it to work, then scrape off the softened finish. Repeat if necessary.
- Clean Residue: Wipe down the surface thoroughly to remove all chemical stripper residue and dissolved finish.
- Sanding for Smoothness: Start with 80-grit sandpaper to remove any stubborn remnants or minor imperfections, then progress to 220-grit sandpaper using a sanding block. This achieves a perfectly smooth surface. (For solid wood, a belt or orbital sander can be used, but these are NOT recommended for veneer, as you risk sanding through it).
- Final Cleaning: Clean the surface once more with TSP (trisodium phosphate) to remove any remaining dust or oils, then let it dry completely.
- Apply Varnish: Using a high-quality brush, apply a thin, even coat of varnish. I used a water-based semi-gloss for its durability and ease of cleanup. Allow it to dry overnight as per manufacturer instructions.
- Light Sanding Between Coats: Lightly sand the dried varnish surface with 180 or 220-grit sandpaper. This creates a bond for the next coat and smooths out any minor imperfections or dust particles. Wipe clean.
- Additional Coats: Re-apply the clear coat. Typically, 2-3 thin coats are sufficient for optimal protection and a beautiful finish.
REVIEW OF REFINISHING CABINETRY BY RE-VARNISHING:
For a complete, in-depth tutorial on this method, refer to this post. My personal experience with this process was admittedly colored by a moment of extreme ridiculousness. I stubbornly insisted on wearing flip-flops, leading to repeated chemical stripper drips onto my exposed feet, almost searing my toes off – all because I refused to put on proper shoes. My memory of this project is therefore largely associated with pain! Despite this, the cabinets undoubtedly looked 98% better. However, one slightly water-damaged area prevented them from achieving 100% perfection. It was a significant amount of work, and initially, I desired a more dramatic aesthetic change. Yet, both real estate agents and prospective buyers universally praised the kitchen’s natural wood finish. For four years, I contemplated various painted looks for the cabinetry but never truly regretted the decision to re-varnish, as it perfectly preserved the original charm my husband loved.
PROS: Does not require sanding to the same meticulous degree as staining (especially if you’re just refreshing the existing varnish type); the finish is typically foolproof against streaking or chipping once properly applied; the impact can be anything from a subtle refresh to a noticeable change (e.g., from matte to high-gloss).
CONS: Can be a very messy process, especially with chemical strippers; doesn’t alter the look as dramatically as painting or staining; involves working with chemicals and/or laborious sanding; won’t effectively disguise existing flaws or damage as a dark stain or opaque paint can.
PURCHASE: Any reputable paint store will carry a variety of varnishes, and most will have display samples allowing you to visualize the final finish and sheen.
CABINET REFINISHING WITH WOOD CONDITIONER / POLISH:
For those seeking a less intensive and more temporary solution, a wood conditioner or polish offers an excellent alternative to a full refinish. Products like Restor-A-Finish are designed for simplicity, typically wiping on and wiping off with minimal effort. While this method won’t create a dramatic change in color or style, it excels at removing minor blemishes, scratches, and, as the name implies, restoring the existing finish to its former glory. There’s a wide array of one-step products and even homemade solutions available that can similarly refresh wood cabinetry that has become a bit worn or beat-up over time. It’s an ideal way to maintain the original aesthetic while revitalizing the feel of your cabinetry by effectively erasing many signs of age and everyday wear. Centsational Girl provides a great post on restoring wood furniture, and the same fundamental tips and techniques are directly applicable to wood cabinets.
SIMPLE STEPS FOR USING WOOD CONDITIONER / POLISH:
- Clean Surface: Ensure cabinets are clean and free of dust and grime. A mild cleaner can be used, but allow to dry completely.
- Apply Product: Apply the wood conditioner or polish with a clean, soft cloth according to the manufacturer’s instructions. Work in small sections.
- Buff: After allowing the product to penetrate for the recommended time, buff off any excess with a clean, dry cloth to reveal the restored finish.
PROS: Perfect for renters or those who desire a fresher-looking kitchen without making permanent changes; the process is typically simple, quick, and foolproof, requiring minimal skill or specialized tools.
CONS: Will not significantly alter the overall look or color of the cabinetry; involves working with chemicals, albeit usually milder ones; has limitations in what it can fix – it won’t repair deep scratches, chips, or significant damage.
PURCHASE: Restor-A-Finish is a brand I personally trust, and it’s available in various finishes to perfectly match your specific wood tone. While trying to find a sample in stores is ideal, if local availability is an issue, you can reliably find it on Amazon.
ESSENTIAL MISCELLANEOUS TIPS FOR REFINISHING CABINETRY:
No matter which method you choose, a few universal tips will significantly smooth your cabinet refinishing journey. Always remove all cabinet doors, drawer fronts, and hardware. This step, though seemingly tedious, will make your life incredibly easier, allowing for unhindered access and a much cleaner, more professional finish. Invest in quality painter’s tape to meticulously tape off any areas you wish to protect from paint or stain, like cabinet interiors or adjacent walls. And without fail, lay down plenty of drop cloths to safeguard your floors and surrounding surfaces from drips and spills.
Setting up an optimal workspace is paramount for success. Choose a dust-free area with excellent lighting and proper ventilation. Creating a streamlined assembly line for cleaning, sanding, priming, and painting will dramatically increase efficiency. Consider using painter’s pyramids or triangles to elevate cabinet doors. While I’ve often improvised with empty yogurt containers or scrap building materials, these specialized pyramids offer a neater, more stable, and undoubtedly easier solution for drying wet surfaces.
For achieving a flawlessly smooth, factory-like finish on cabinet door fronts, utilizing a paint spray gun is highly recommended. However, don’t despair if you only have an angled brush; with proper technique, it can still deliver a beautiful, albeit slightly less uniform, result. A tiny foam roller with a low pile, often sold for trim work, is another excellent option for flat areas, minimizing brush marks. The golden rule for any cabinet refinishing project is to always use a brand-new, high-quality brush or a fresh, fine-nap foam roller for the best possible outcome.
For those intricate, narrow, or hard-to-reach areas, a small artist’s brush will be your best friend, allowing for precise application of paint or stain.
Resist the temptation to accelerate drying times with a fan, especially during the initial stages of painting, staining, or varnishing. This can inadvertently blow dust and airborne particles onto your freshly applied, still-wet surface, which will then adhere firmly and mar your finish. Always keep a damp cloth or rag readily available for quickly addressing inevitable drips, smudges, and spills. Staying prepared will minimize frustration and save time in the long run.
Whew, that’s a lot of information, but it covers a lot of ground!
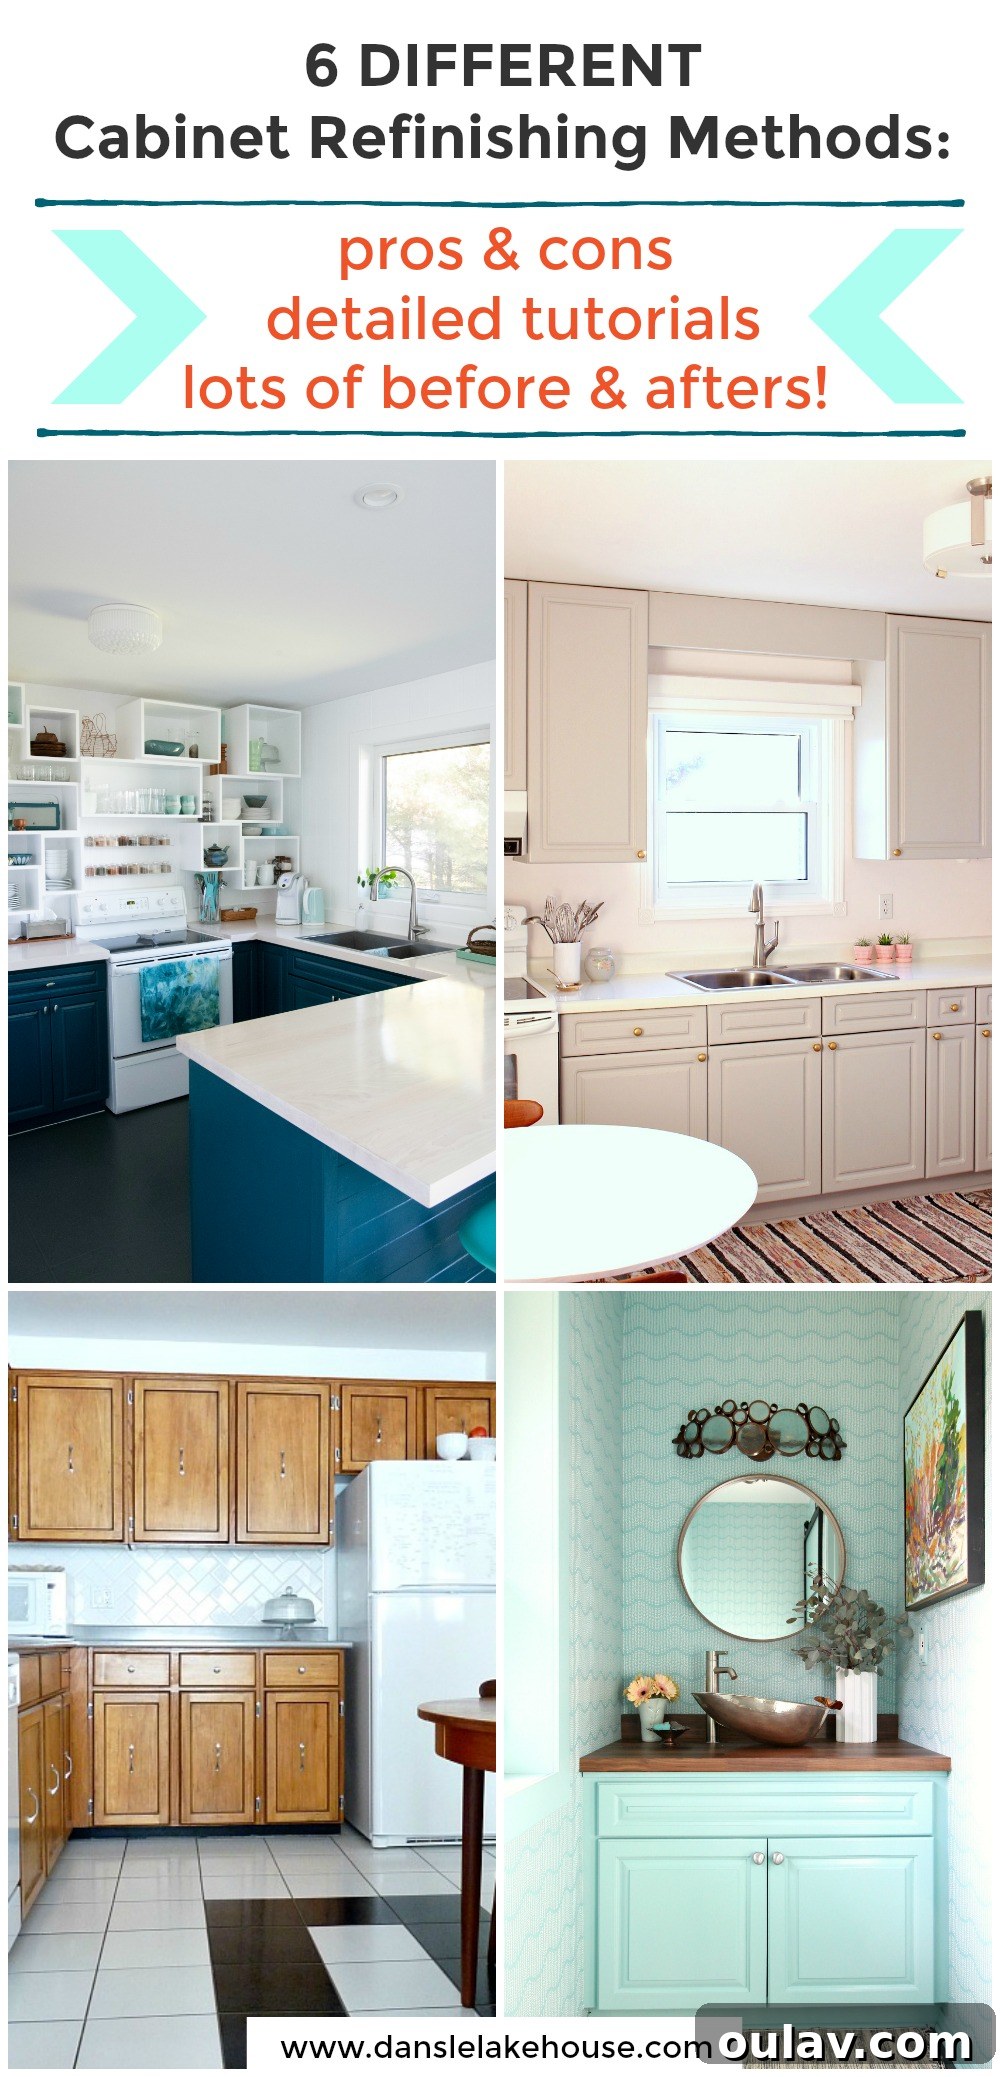
Hopefully, this detailed review comparing stain, paint, chalk paint, varnish, Rust-Oleum Cabinet Transformations, and wood conditioner serves as a valuable starting point for anyone contemplating a cabinet makeover. Regardless of the cabinet refinishing method you ultimately choose, dedicating ample time to thorough preparation is paramount – you will undoubtedly thank yourself later for the effort. Most importantly, do not be intimidated by the scope of the project! There’s very little that cannot be remedied in DIY. If you encounter a snag, you can almost always sand it down and begin afresh. Should a staining or re-varnishing attempt not meet your expectations, simply regroup and opt for painting instead. The beauty of DIY lies in the ability to learn and adapt.
In my personal experience, no matter the method I’ve employed, I’ve consistently been thrilled with the final result, primarily because it always represents a significant improvement over the starting condition. Good luck with your cabinet transformation! And please, feel free to share your own advice, experiences, or questions in the comments section below – every bit of shared knowledge benefits our DIY community!