Welcome back to the thrilling saga of our kitchen renovation! If you’re just joining us, you can catch up on my initial kitchen design plan here (which I’ve updated to include our final lighting selections). This exciting journey is part of my guest participation in the Spring One Room Challenge, an incredible motivator that keeps me accountable for sharing weekly progress reports. And trust me, when you’re knee-deep in drywall dust and design decisions, a little external motivation goes a long way!
Before any real work could begin, we faced the Herculean task of emptying an entire kitchen. You wouldn’t believe the sheer number of days it took to meticulously pack up every pot, pan, dish, and utensil. It felt like an endless procession of boxes! To make matters even more challenging, we also packed up our credenza, transforming it into a temporary storage hub for a few essential basics – because even amidst chaos, one still needs a functional coffee maker and a few plates!
The Heart of the Home: From Demolition to Drywalling
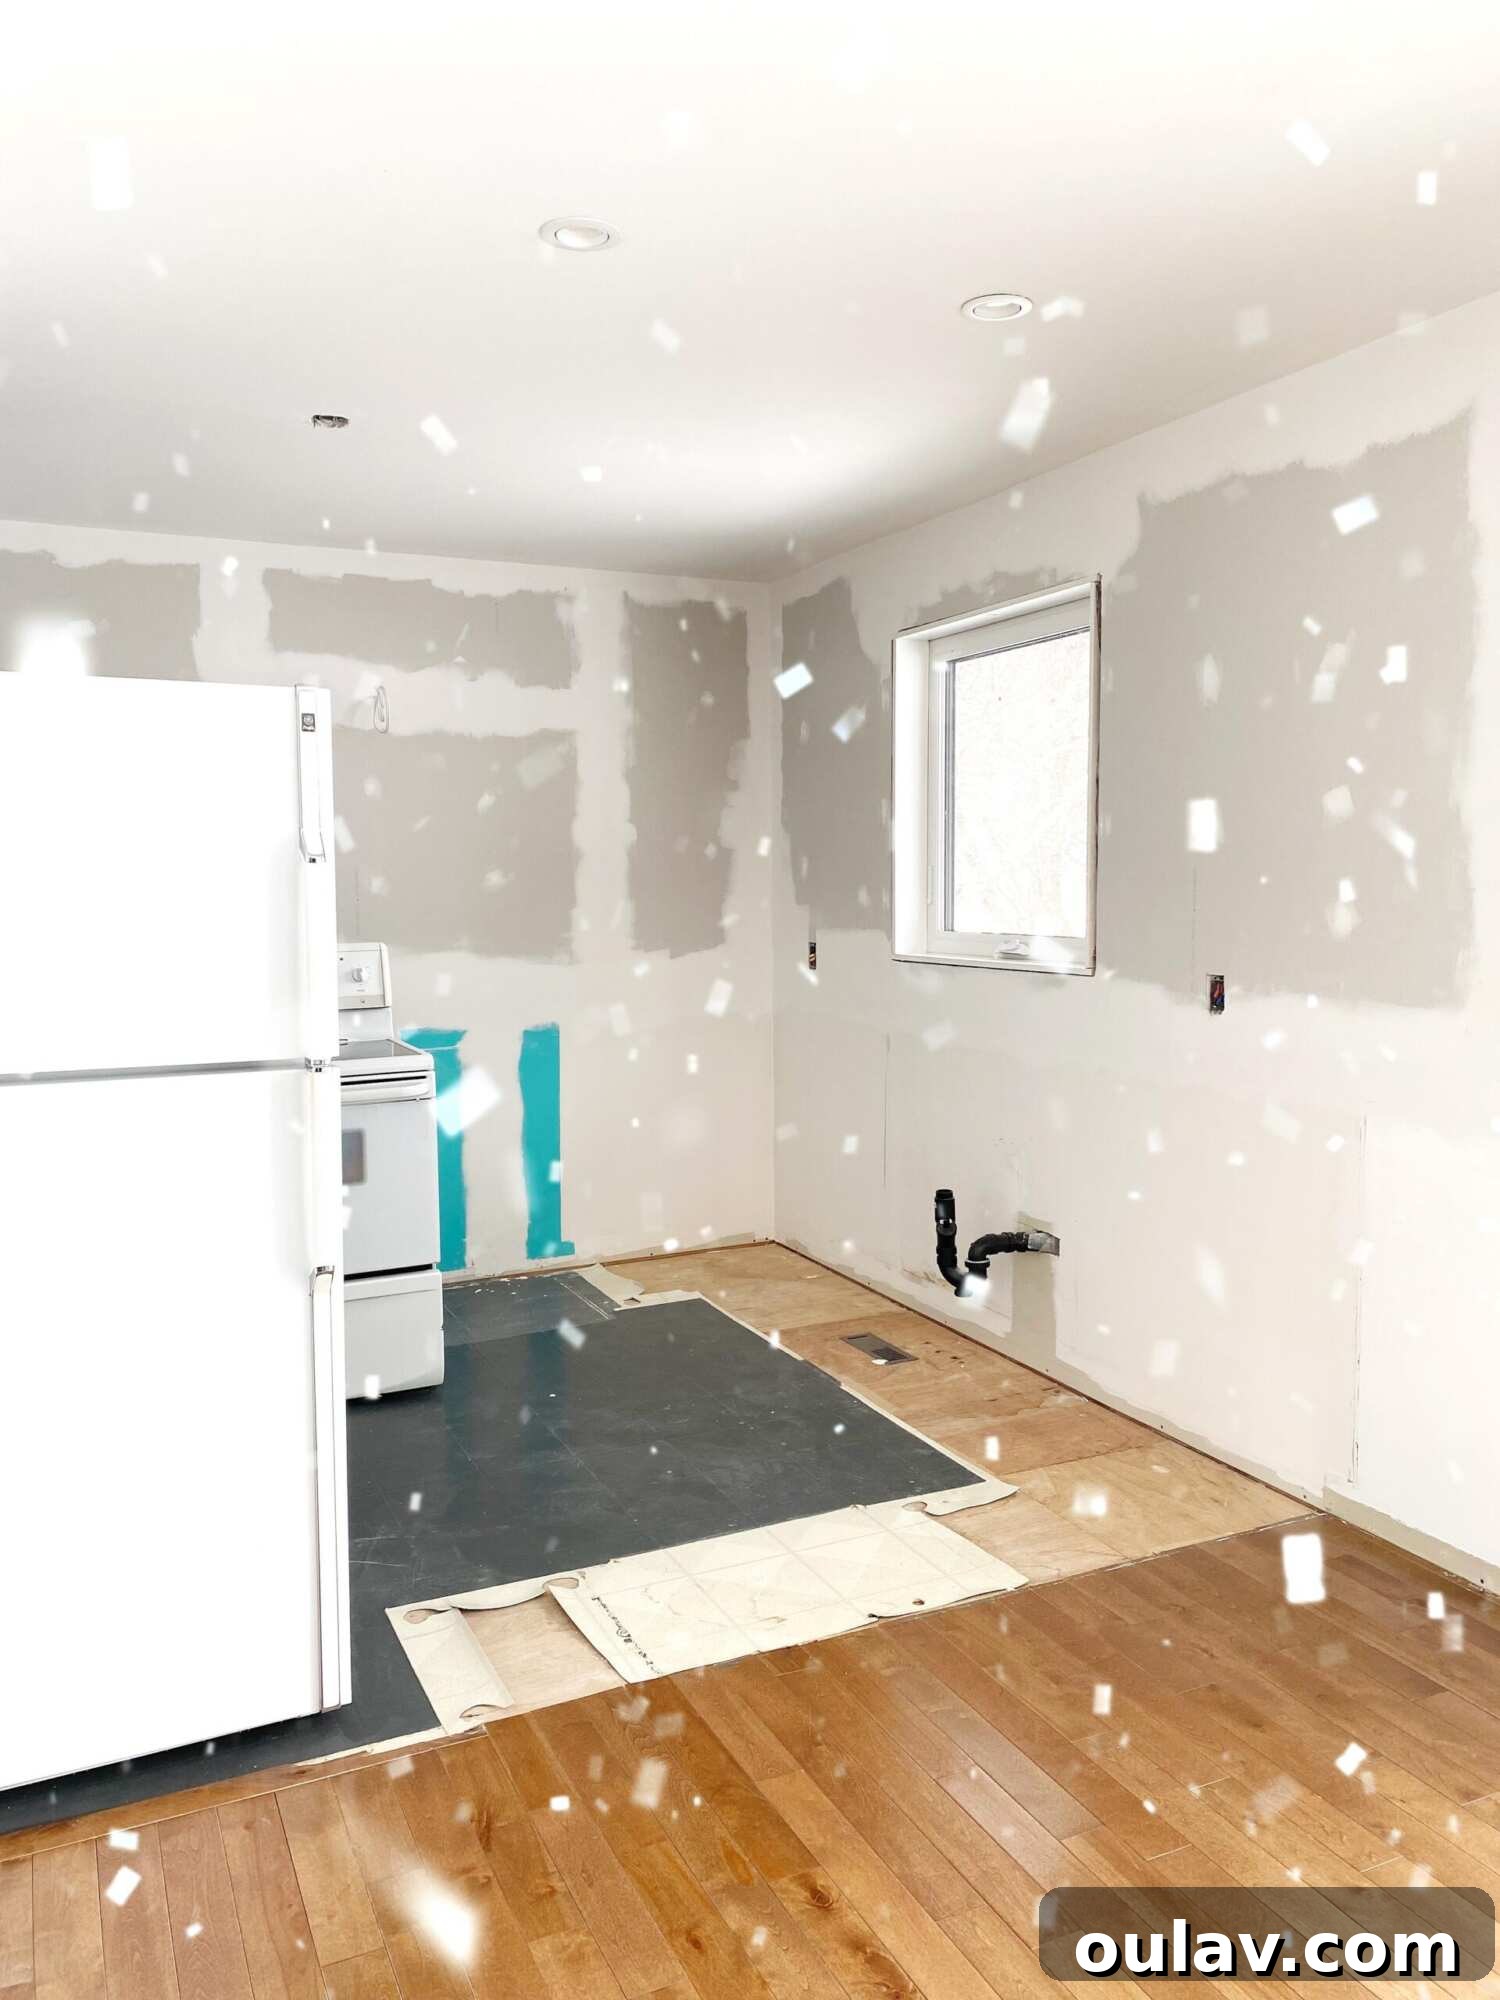
Renovation progress, though sometimes feeling glacially slow, is undeniably happening. The kitchen, once bustling with life, has been stripped down to its bare bones. The old cabinets and counters were the first to go, followed swiftly by the removal of our beloved cubbies and the existing wall paneling. With them went the old drywall, leaving us with a blank canvas and a whole lot of dust.
Then came the truly transformative part: installing new drywall. This stage marked a significant personal milestone for me – I learned how to drywall! While my husband has handled smaller drywall repairs in the past, often while I focused on other tasks, this time, I dove in headfirst. I was responsible for screwing in the new sheets, meticulously taping the seams, and applying endless layers of mud. It’s safe to say this particular DIY task doesn’t exactly fill me with unbridled joy, but the sense of accomplishment that comes with mastering a new skill is truly rewarding. It’s physically demanding, messy, and requires a surprising amount of patience, but watching those uneven surfaces transform into smooth, paint-ready walls is incredibly satisfying.
However, the drywall journey is far from over. I’m still battling the final touches, and with Monday’s cabinet installers looming large on the calendar, a tiny bit of panic is starting to set in. My to-do list before their arrival is daunting: finish the drywall, prime and paint both walls and ceiling, install the sub-floor, and carefully cut away some of the existing hardwood flooring to accommodate the new cabinetry. I’m currently working on the kitchen solo until the weekend, and I’m desperately hoping I can cross everything off in time. It’s a true race against the clock, but the vision of our dream kitchen keeps me motivated.
Navigating the Unexpected: Minor Snags, Major Solutions
Every renovation project, no matter how meticulously planned, inevitably throws a few curveballs. Thankfully, so far, we haven’t encountered any catastrophic issues, just a few annoying little things that required on-the-fly adjustments.
Rethinking Kitchen Lighting: Sconces to Pot Lights
One of the first design pivots involved our kitchen lighting above the window. Our initial plan called for a charming sconce, but upon opening up the walls, we discovered a rather giant header directly where the sconce was meant to be installed. This structural impediment made the original plan unfeasible. Rather than trying to force a square peg into a round hole, we quickly adapted. Instead of a single sconce, we’re now opting for two additional pot lights above the window. And honestly, I’m perfectly happy with this change! While a sconce felt like an easy solution initially, I wasn’t deeply committed to the idea. Pot lights offer a clean, modern aesthetic and provide excellent ambient lighting, ensuring our kitchen will be beautifully illuminated.
Prioritizing Functionality: Skipping Under-Cabinet Lighting
Another minor adjustment involved the under-cabinet lighting. While often touted as a “must-have” for task lighting, I ultimately decided to skip this feature in our current renovation phase. Again, my commitment to it wasn’t absolute, and sometimes, making practical decisions about what truly adds value versus what might be an unnecessary expense or complexity is key during a renovation. Our primary lighting scheme will be robust enough to ensure a well-lit workspace, and should we ever feel the need for accent lighting, it’s a relatively simple addition down the line.
The Appliance Delivery Predicament: Cost vs. Convenience
Perhaps the most frustrating “snag” has been the logistics surrounding our new kitchen appliances. We’ve finally secured quotes for their delivery, but it wasn’t without considerable annoyance. The store where we purchased them, despite being only an hour away, deemed us too far for their standard delivery service. This forced us to seek an external delivery company, the one suggested by the store. The quote? A rather steep $165 an hour! I’m estimating a minimum of four hours for delivery, and potentially more if there are any unforeseen delays or if their team takes a leisurely pace. While the cost is certainly a sting, the peace of mind that comes with insured professional delivery outweighs the risk. My biggest fear is damaging our brand-new appliances if we attempt a DIY delivery, which was my husband’s initial, brave but risky, plan. To add another layer of complexity, this is all theoretical anyway – the appliances haven’t even arrived at the store yet, highlighting the widespread supply chain challenges impacting renovations everywhere.
So, while these little hurdles have added some wrinkles to the plan, we’re successfully navigating them without any major derailments. Each challenge becomes an opportunity to refine the design and prioritize what truly matters for our dream kitchen.
The Creative Touches: Design Decisions & Backsplash Dreams
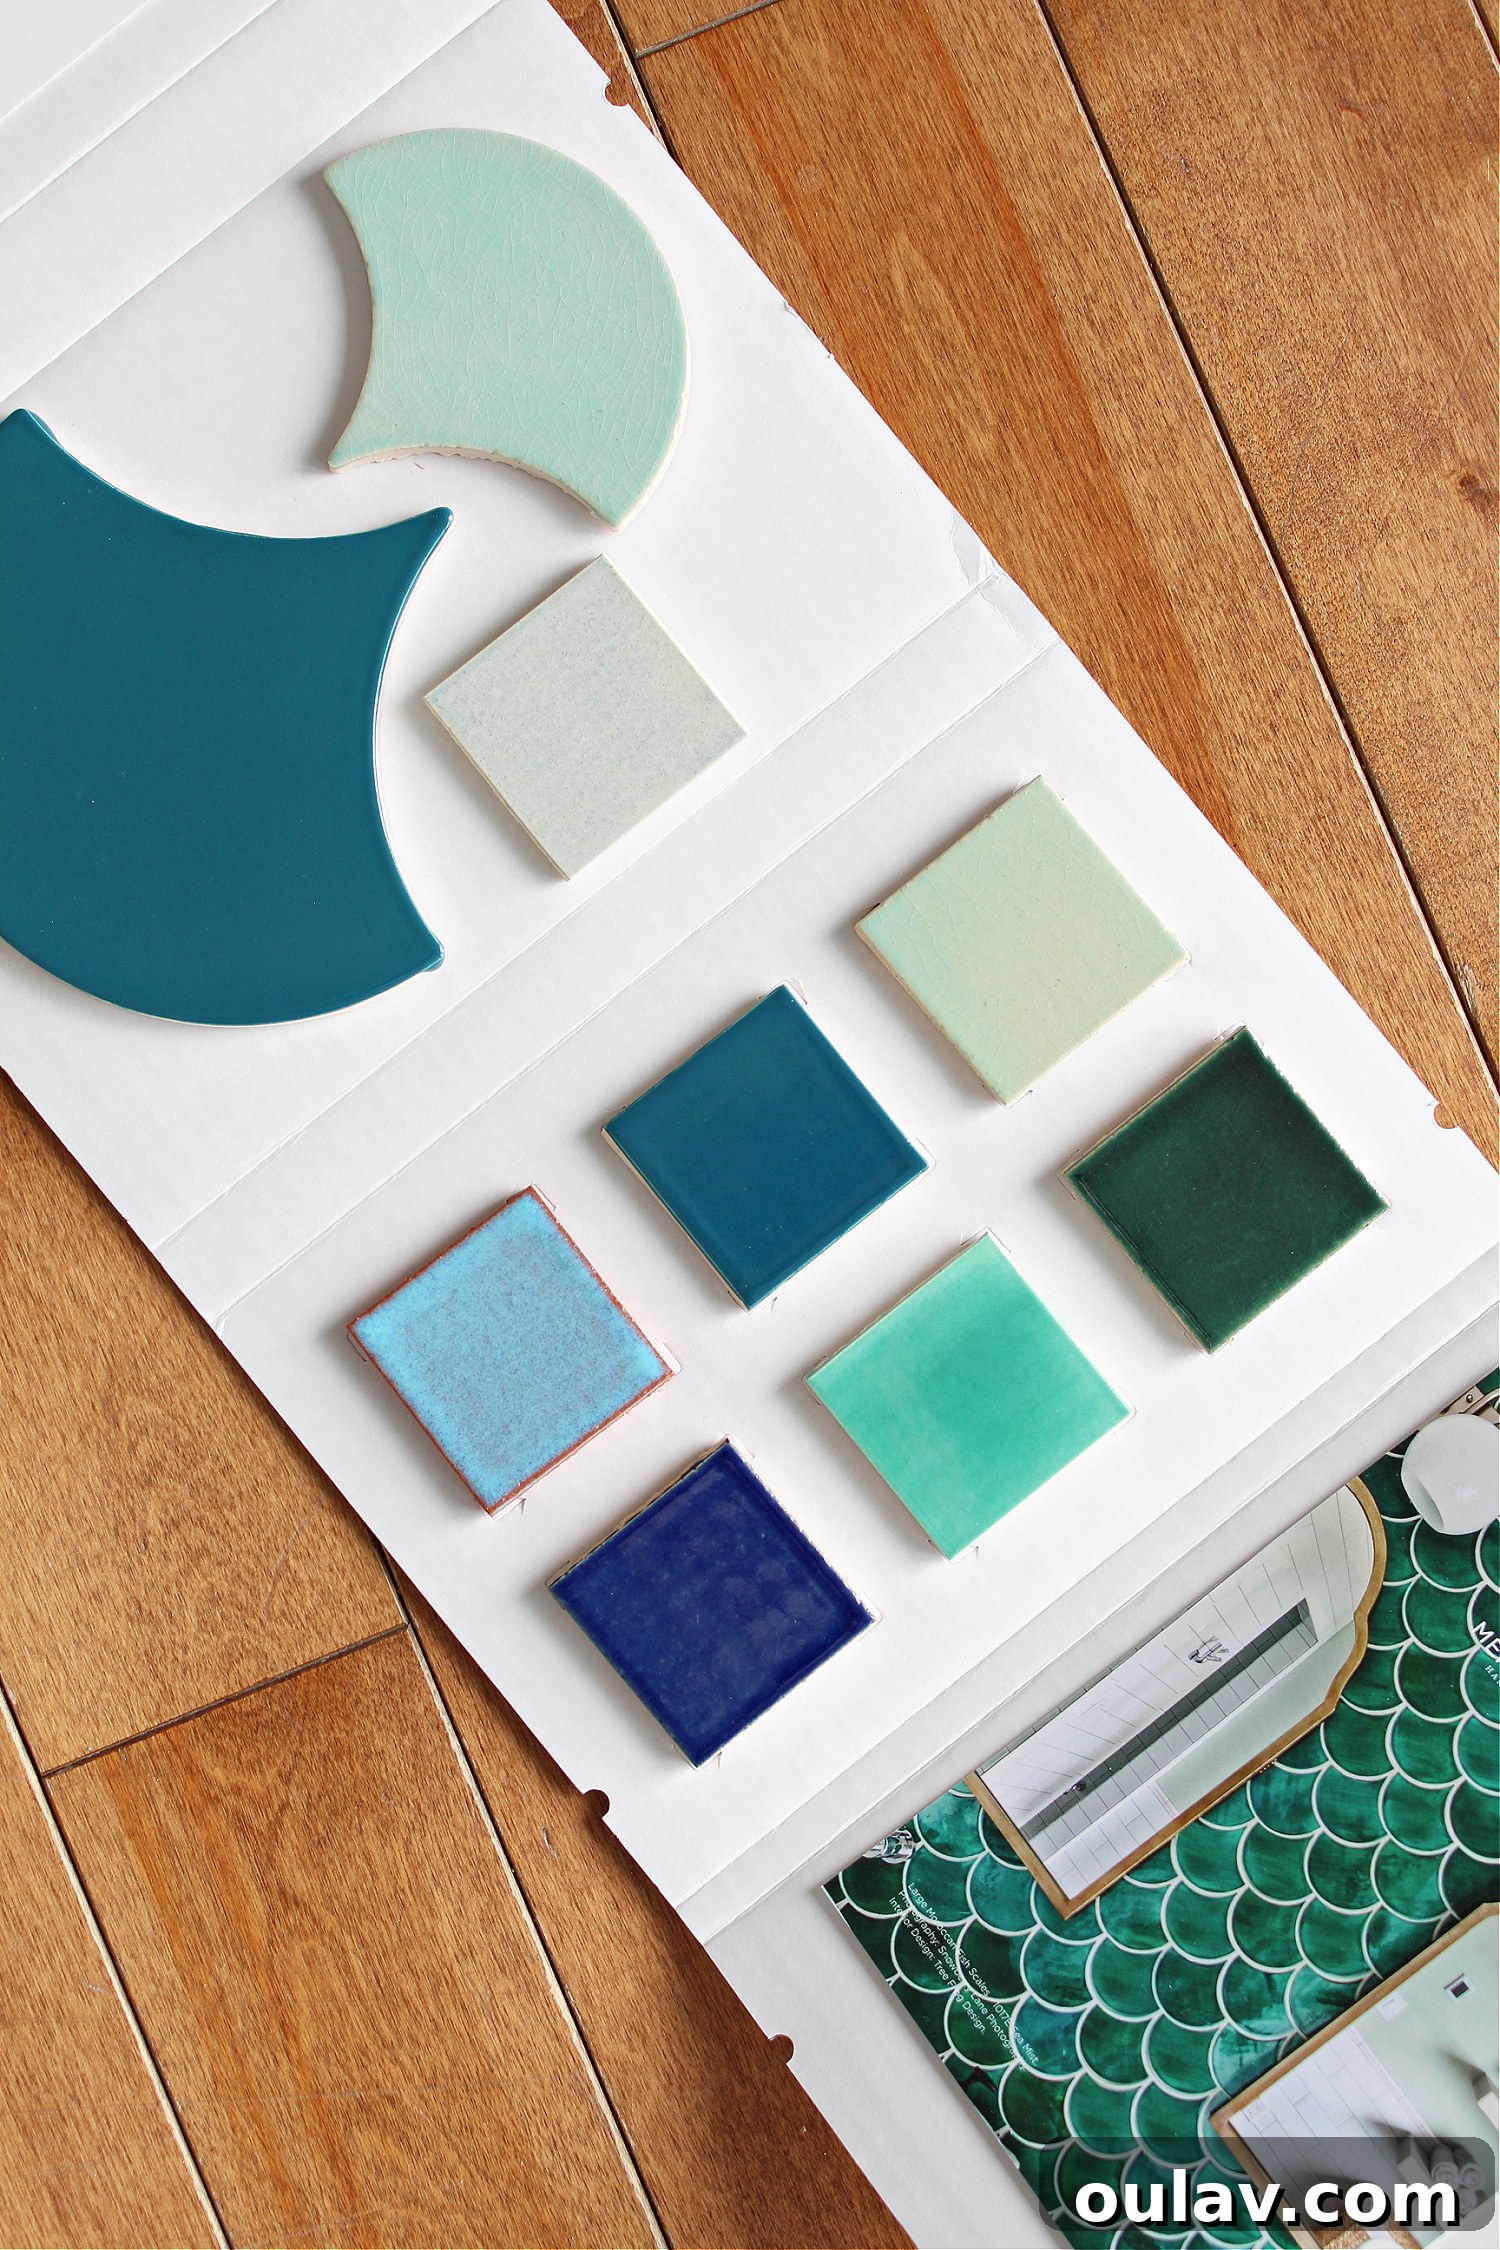
Amidst the dust and structural changes, there’s always the excitement of the aesthetic elements coming together. In truly happy news, I recently picked up my tile samples from Mercury Mosaics, and they are absolutely stunning! Mercury Mosaics is renowned for its handcrafted, artisan tiles, and seeing them in person only amplified my admiration. Each tile feels like a small piece of art, promising to add incredible character and depth to our kitchen.
I genuinely love every single sample, which makes the decision-making process incredibly difficult – but in the best way possible! My heart is particularly drawn to the color called ‘Lake Superior,’ presented in a beautiful scallop shape. This shade of blue-green perfectly captures the serene, natural essence I envision for our lakehouse kitchen. It evokes a sense of calm and sophistication, and I’m hopeful it will be the perfect complement to our soon-to-be-installed counters. However, I’m holding off on making a final decision until the countertops are in place. It’s crucial to see how the lighting, counter material, and tile samples interact in the actual space before committing. Which one do you think best suits a modern lakehouse aesthetic? I’ll be sure to share more intricate details about the tile choices once I’m able to make my definitive selection. For now, the insistent call of drywall mud still demands my immediate attention!
The Final Sprint: Countdown to Cabinet Installation
The next few days are critical. Finishing the drywall is paramount, ensuring a smooth, flawless foundation for paint. Once the walls and ceiling are painted, the next big task is preparing the floor for the incoming cabinetry. This involves installing the sub-floor and then carefully cutting away a section of our existing hardwood flooring to create a precise footprint for the new cabinets. This step requires precision and careful planning to ensure a seamless transition between the old and new elements.
The anticipation is building rapidly, as our cabinet installers are scheduled to arrive bright and early on Monday morning. Seeing the cabinets installed will be a monumental step, marking the true beginning of our kitchen taking its final shape. Despite the current state of exhaustion and the seemingly endless list of tasks, I’m incredibly excited about what’s to come. Every swing of the hammer and every stroke of mud is bringing us closer to a beautiful, functional, and deeply personalized kitchen.
Stay Tuned for More Kitchen Renovation Updates!
If you’re eager to watch this kitchen renovation unfold in real-time, with all its daily triumphs and tribulations, be sure to follow me on Instagram! I’m constantly sharing behind-the-scenes snippets, mini-tutorials, and real-time progress reports in my stories. It’s the best way to get instant updates and see the transformation as it happens. I’ll have more detailed updates and exciting reveals in the blog posts to come, but for now, thank you for joining me on this incredible One Room Challenge journey!