
This DIY painted soffit and fascia project is a collaborative effort with Rust-Oleum, a brand I trust implicitly for high-quality, durable paints. However, rest assured that all insights, opinions, and perhaps a few spirited, unconventional ideas shared within this guide are authentically my own.
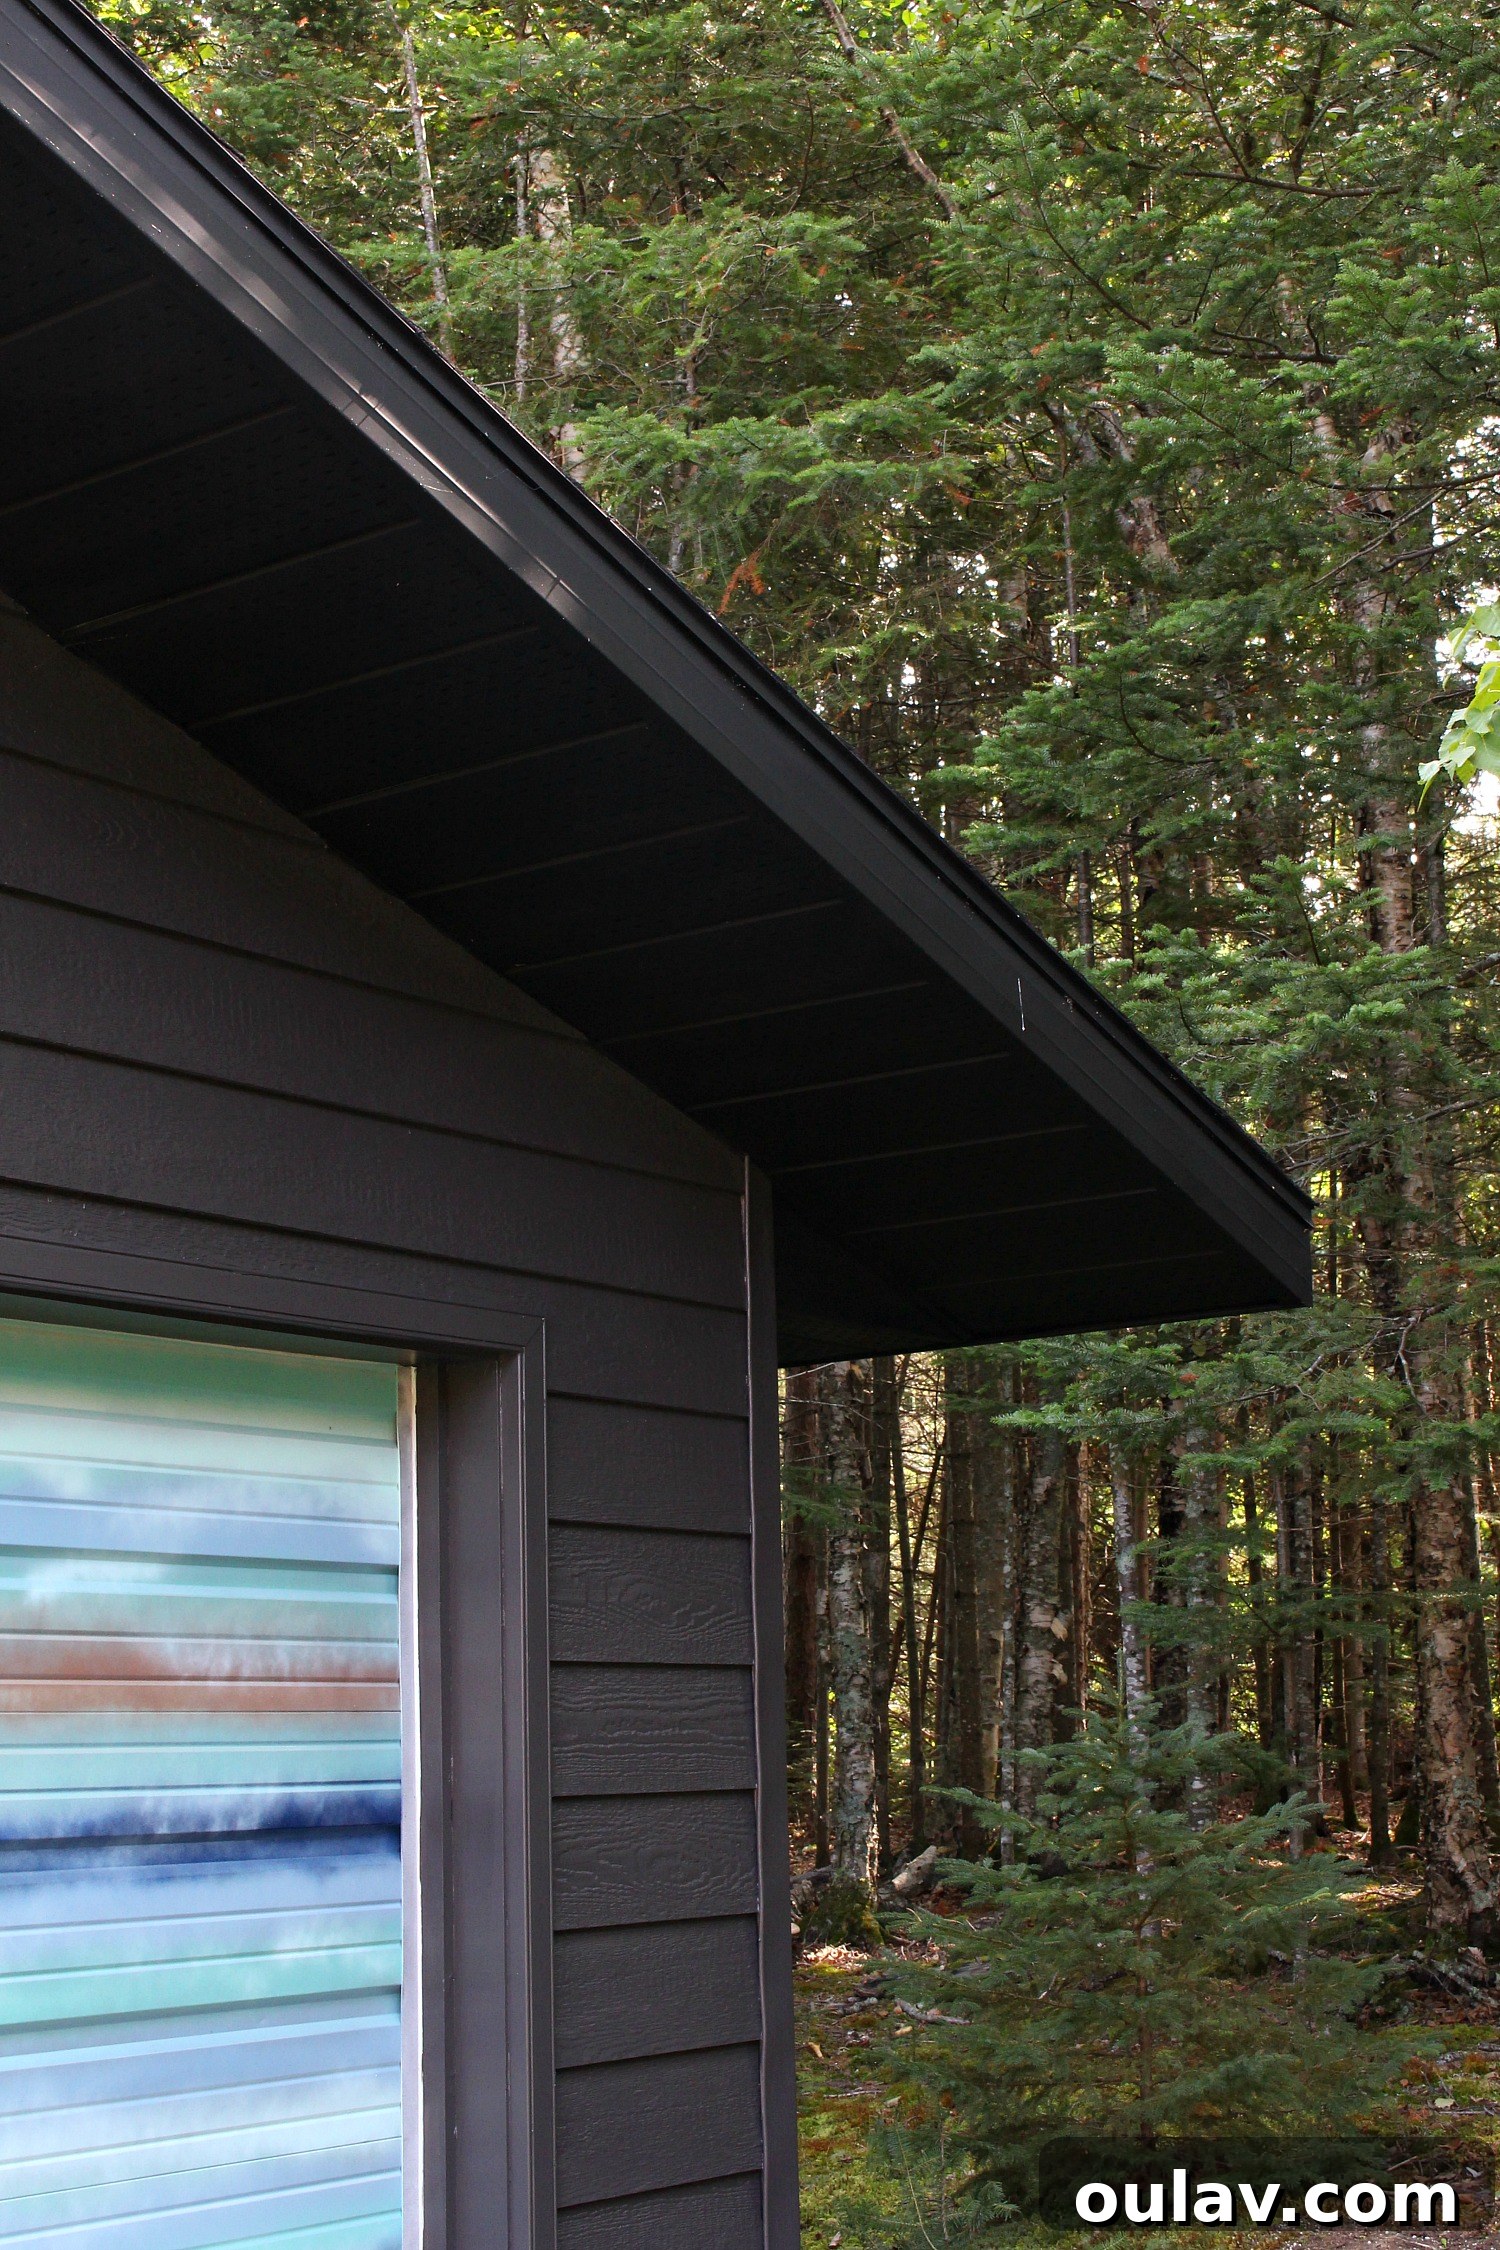
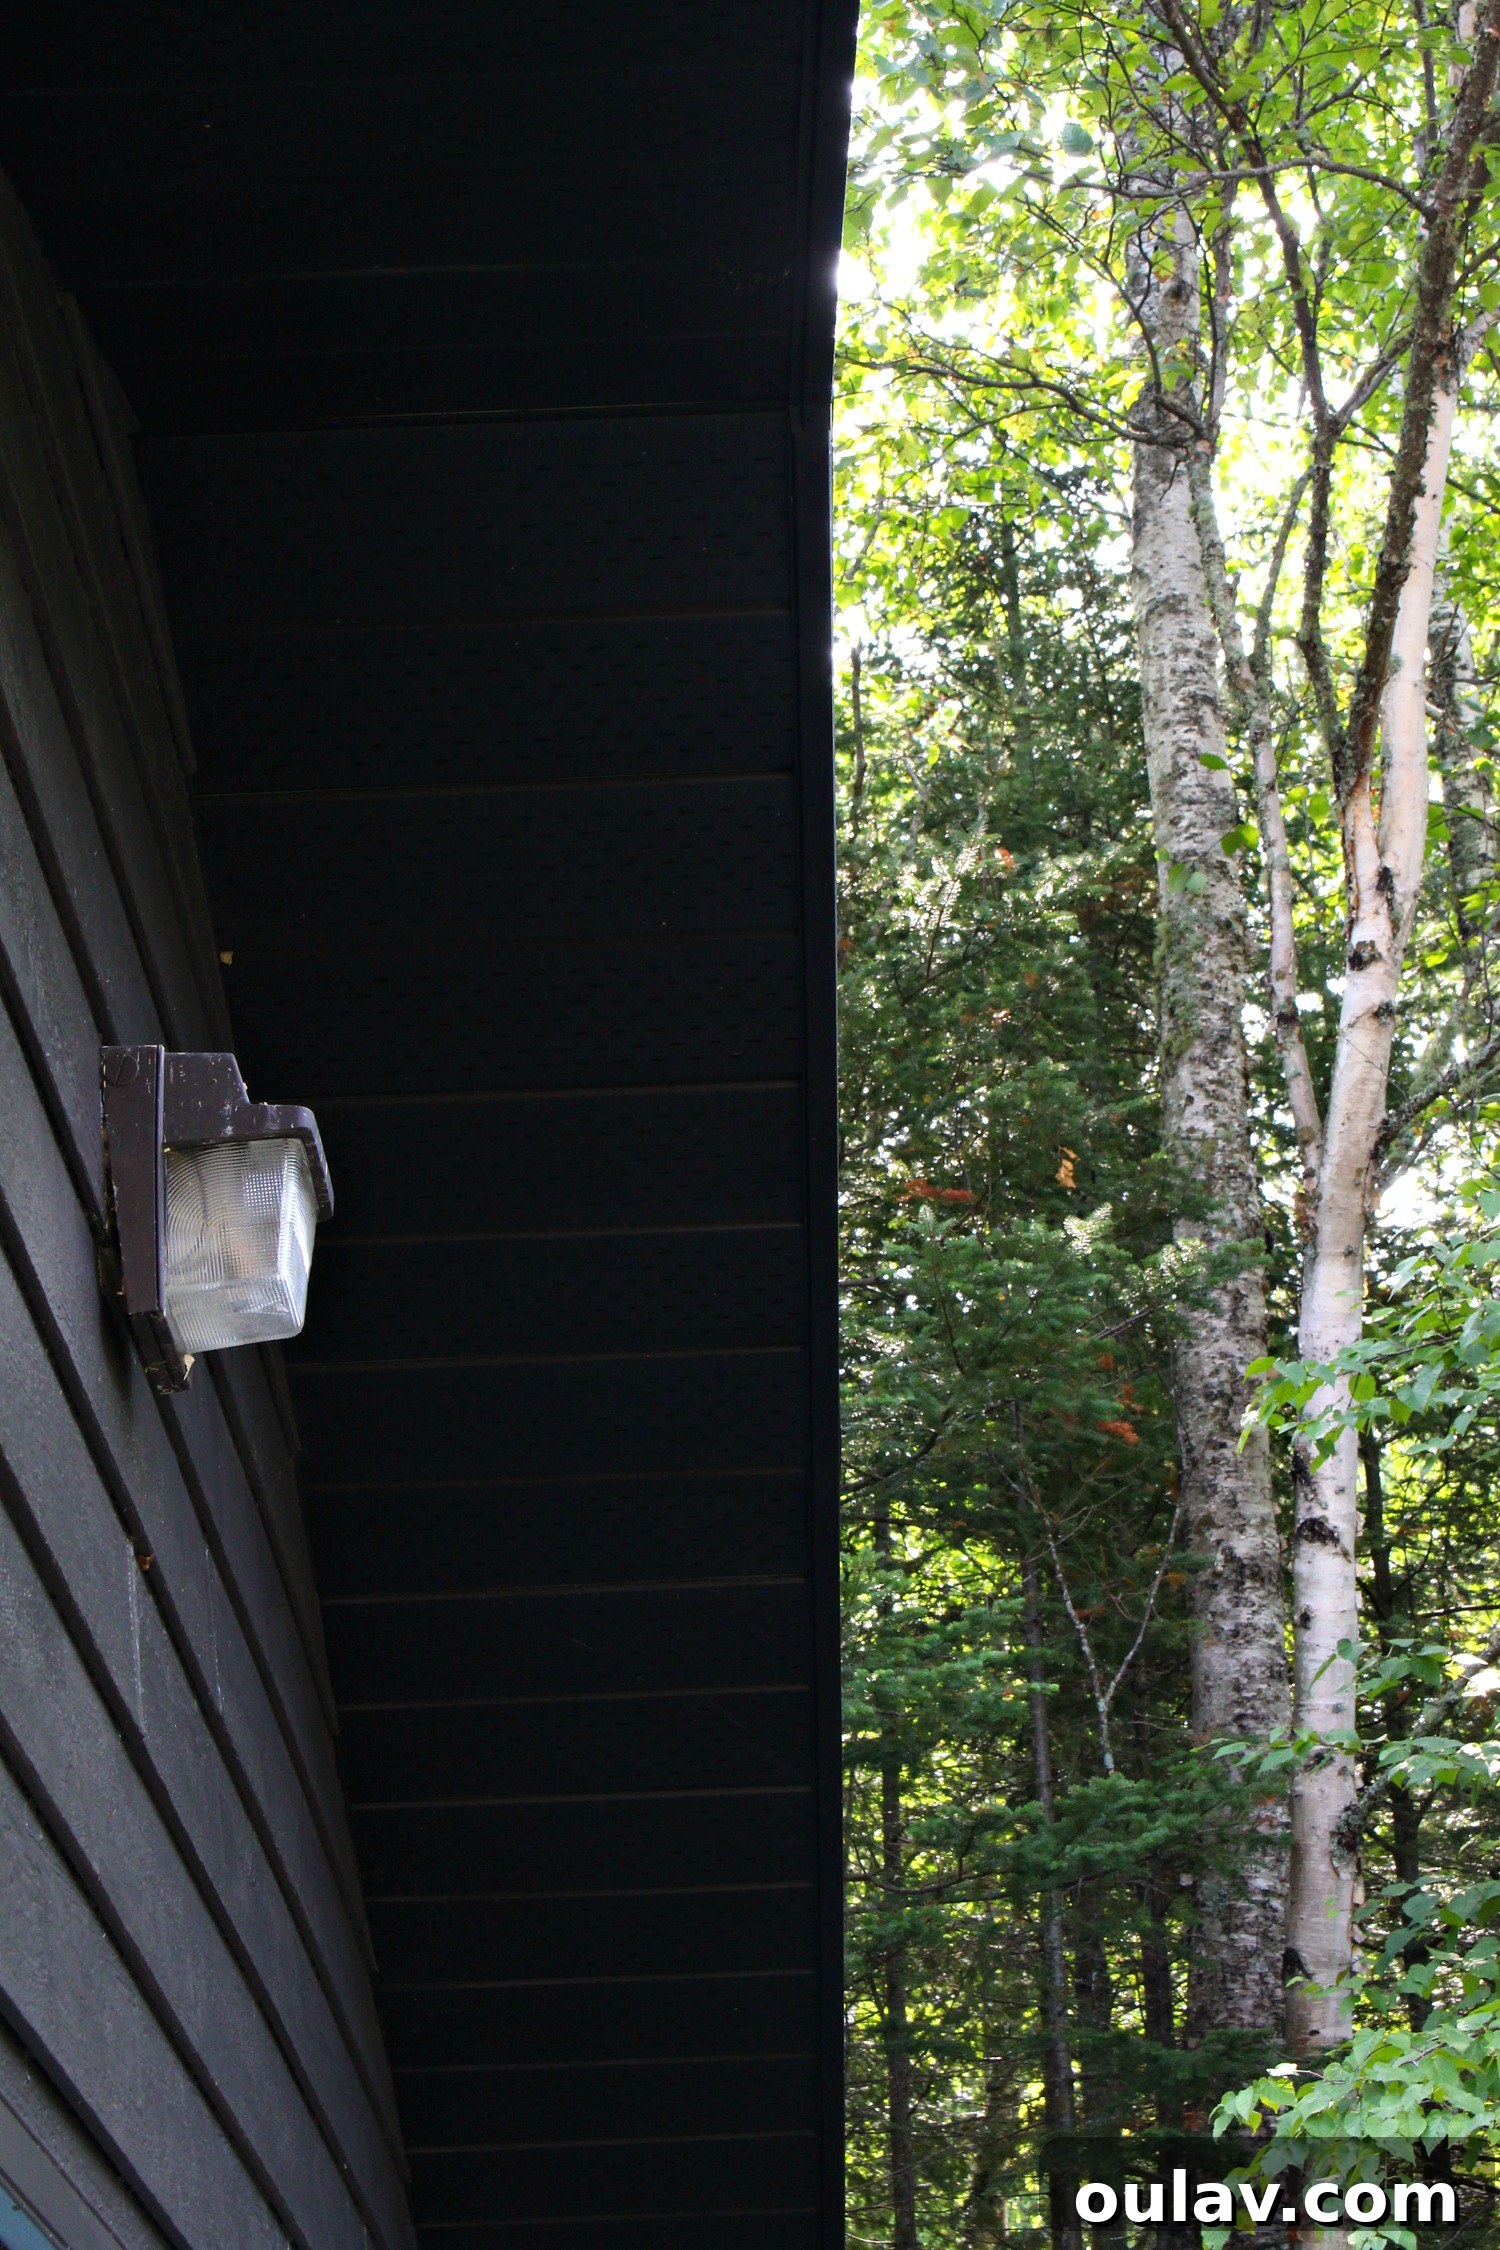
DIY Painted Soffit and Fascia: The Ultimate Guide to an Affordable Exterior Makeover
Get ready to witness the incredible power of paint and a little bit of DIY magic! Yes, you absolutely read that correctly – I took on the ambitious task of painting my home’s soffit and fascia myself. This isn’t a typo, and it’s certainly not an exaggeration; you are indeed about to delve into the ins and outs of my personal journey through a DIY painted soffit and fascia project. When it comes to transforming spaces with inexpensive paint makeovers, my enthusiasm knows no bounds. This particular project proves that even the most seemingly daunting exterior elements can be revamped beautifully and affordably.
If you’ve been following my home renovation adventures on Instagram, you’ll know that while our breathtaking new copper roof is (almost) complete, the broader exterior renovation for the main house hit a minor roadblock and is currently paused. This means the house itself is looking quite “rough around the edges” right now, with exposed insulation and temporarily detached pieces of soffit. But fear not, because amidst this renovation pause, our garage has finally emerged looking absolutely super cute! We’re not quite 100% finished – the garage is still awaiting a new copper light fixture and a sleek black motion light – but it’s incredibly close to completion and looks vastly improved from its previous state. I simply couldn’t wait to share the progress and the work we’ve accomplished so far.
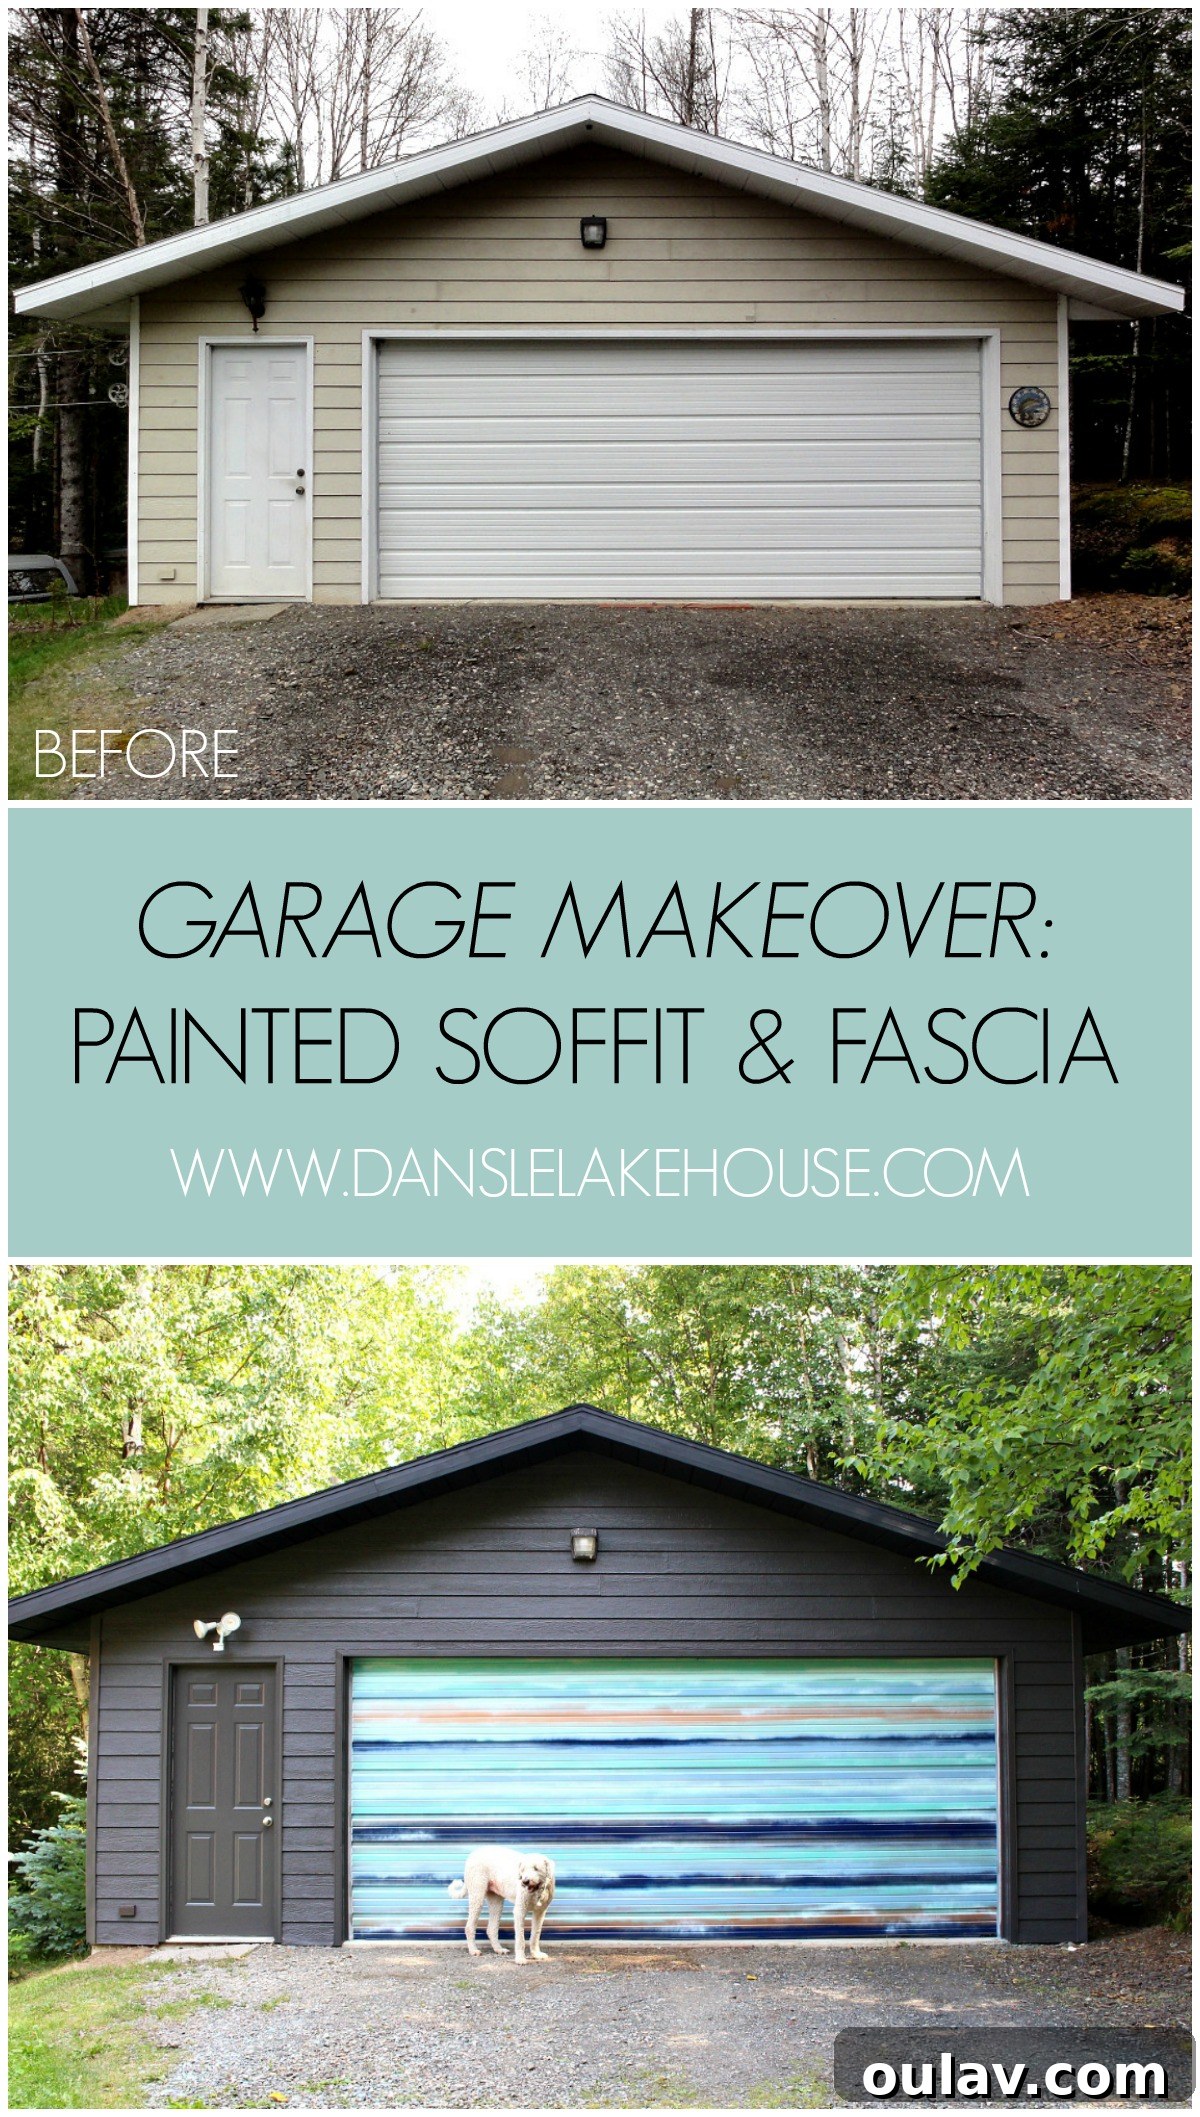
Today, I’m thrilled to unveil our DIY painted soffit and fascia project. Later this week, I’ll be sharing details about my wicked awesome mural, and then on Friday, I’ll provide a full breakdown of how we painted the siding, complete with invaluable tips for speeding up that particular chore. When my husband and I initially decided on the finishes for our home’s exterior, we envisioned a cohesive and modern palette: a stunning copper roof, elegant black windows, rich dark grey/brown siding, and sophisticated black soffit and fascia. This meant saying a firm goodbye to the existing mismatched tapestry of beige vinyl siding, weathered cedar wood siding, and dated grey manufactured stone. My ultimate life goal with this house is to achieve the novel concept of having the same siding material and color on all four sides – a true dream for consistency! To push this vision forward, I even painted the existing stone dark grey.
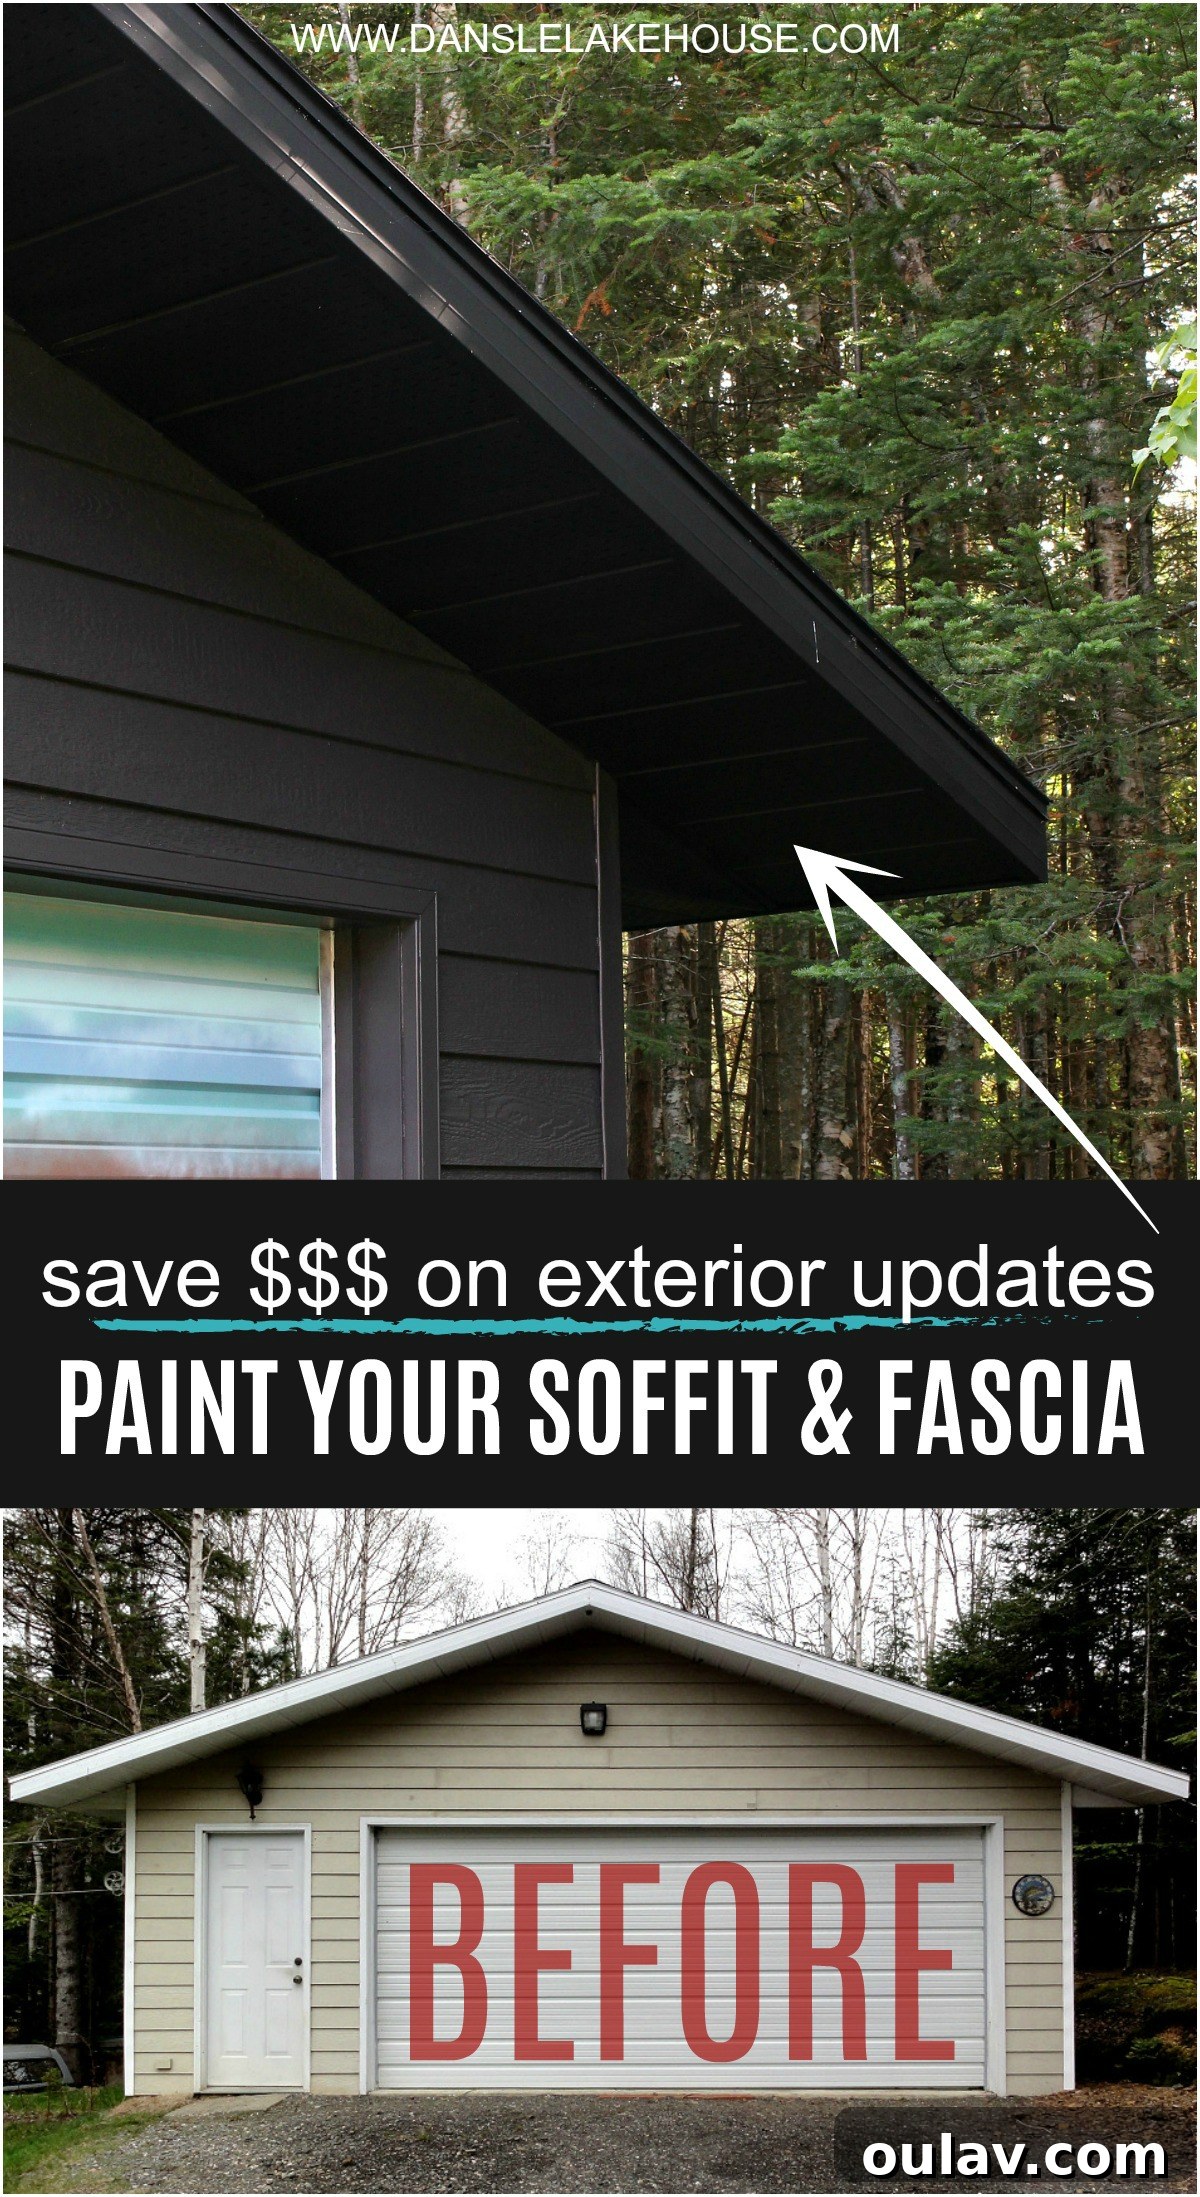
Despite the garage being older than the house and originally featuring a different type of siding, its previous color had somewhat matched the old house, as did its soffit and fascia. As we embarked on upgrading our main house exterior, I was determined to maintain that sense of “matchy-matchy” goodness for the garage. However, the harsh reality of renovation budgets meant we absolutely did not have the funds to replace the garage siding or its soffit and fascia. I desperately wanted the garage to complement the new, sophisticated facade of the house, but with approximately $0 allocated for these specific garage elements, I knew I would have to embrace my DIY spirit and paint my little heart out. That’s precisely how a person lands on an ambitious yet incredibly effective plan like DIY painted soffit and fascia – a testament to creativity in the face of budget constraints.
Understanding Soffit and Fascia: More Than Just Exterior Trim
Before grabbing your paint cans, it’s beneficial to understand what soffit and fascia are and why they’re so vital to your home’s structure and aesthetics. The soffit is the finished surface found underneath the eaves of your roof, extending from the house wall to the outer edge of the roofline. Its primary function is to provide essential ventilation for your attic, allowing air to circulate, which helps regulate temperature and prevent moisture buildup, mold, and rot. Proper soffit ventilation is crucial for your home’s structural integrity and energy efficiency. The fascia, on the other hand, is the vertical board that runs along the edge of your roof, where the gutters are typically attached. It covers the ends of your roof rafters, protecting them from weather exposure, insects, and moisture. Together, soffit and fascia complete your home’s roofline, offering a clean, finished appearance and significant protection. Often overlooked, these elements play a massive role in your home’s overall curb appeal, acting as a visual border that can either detract from or enhance your exterior design.
Essential Supplies for Painting Soffit & Fascia: Your DIY Toolkit
A successful and long-lasting paint job hinges on meticulous preparation and the right tools. For painting your soffit and fascia, gathering these supplies is the first crucial step:
- Premium Cleaning Solution: Start with TSP (Trisodium Phosphate) or a powerful alternative like Prepaint Krud Kutter. These industrial-strength cleaners are indispensable for cutting through years of accumulated dirt, grime, mildew, and chalking, providing an impeccably clean surface for optimal paint adhesion.
- Mixing Bucket: A standard bucket for diluting your cleaning solution as per product instructions.
- Stiff Scrub Brush: Essential for manually scrubbing away stubborn moss, mildew, and deeply embedded dirt, ensuring every nook and cranny is clean.
- Pressure Washer: For efficiently rinsing the cleaning solution and all dislodged debris from the surfaces. Exercise extreme caution, especially around windows, vents, and any delicate exterior features, to prevent water intrusion.
- Sturdy, Stable Ladder: Safety when working at heights cannot be overstated. Invest in or rent a ladder that is tall enough for the highest points of your soffit and fascia, ensuring it’s stable, rated for your weight, and placed on firm, level ground. Consider a step ladder for lower sections and an extension ladder for higher ones.
- Comprehensive Safety Gear:
- Latex or Nitrile Gloves: Protect your hands from harsh chemicals during cleaning and paint during application.
- Impact-Resistant Safety Glasses or Goggles: Crucial for safeguarding your eyes from cleaning solution splatter, paint particles, and any airborne debris.
- NIOSH-Approved Dust Mask or Respirator: Absolutely essential, especially when spray painting. It protects your lungs from inhaling fine paint particles and harmful fumes.
- Long-Sleeved Shirt and Pants: Recommended to protect your skin from overspray, ladder scrapes, and sun exposure.
- Painter’s Tape and Plastic Sheeting: For meticulously masking off and protecting any adjacent surfaces you don’t want painted, such as siding, window frames, doors, and light fixtures. A robust vapor barrier works wonderfully for covering larger sections of siding.
- High-Quality Exterior Spray Paint: For this particular project, we achieved fantastic results with TREMCLAD Oil-Based Rust Spray Paint in a Flat Black finish. When selecting your paint, ensure it’s specifically formulated for exterior use, offering excellent durability, weather resistance, and strong adhesion to the material of your soffit and fascia (common materials include aluminum, vinyl, and wood). Spray paint is often preferred for these applications due to its ability to provide an incredibly smooth, even finish and its efficiency in covering ventilated areas.
How to Paint Soffit and Fascia: A Detailed Step-by-Step Process
Painting your soffit and fascia is a gratifying project that yields dramatic results for your home’s exterior. While the ultimate test of durability is time, I confidently embarked on this journey, happy to be the “guinea pig” to demonstrate the effectiveness of this DIY method. Here’s a thorough breakdown of how we transformed our garage’s roofline:
Step 1: The Essential Deep Clean – Preparing for Perfection
The success and longevity of any paint job begin with an impeccably clean surface. Soffit and fascia are constantly exposed to environmental elements, making them prone to accumulating dirt, stubborn mildew, unsightly moss, and cobwebs over the years. Our first task was to thoroughly scrub every inch of the surface using a potent solution of TSP (Trisodium Phosphate) or Prepaint Krud Kutter. We paid extra attention to areas showing visible signs of organic growth. Following the vigorous scrubbing, we used a pressure washer to rinse everything meticulously. A word of caution: when pressure washing your home, be extremely careful, especially around windows and existing vents, as high-pressure water can force its way into unwanted crevices. After rinsing, it’s paramount to allow the soffit and fascia to dry completely for several days. This extended drying period is crucial for ensuring optimal paint adhesion and preventing any moisture from becoming trapped beneath the new paint, which could lead to peeling or bubbling. We also diligently monitored the weather forecast, choosing a day with minimal wind to reduce potential overspray issues.
Step 2: Prioritizing Protection – Safety and Masking
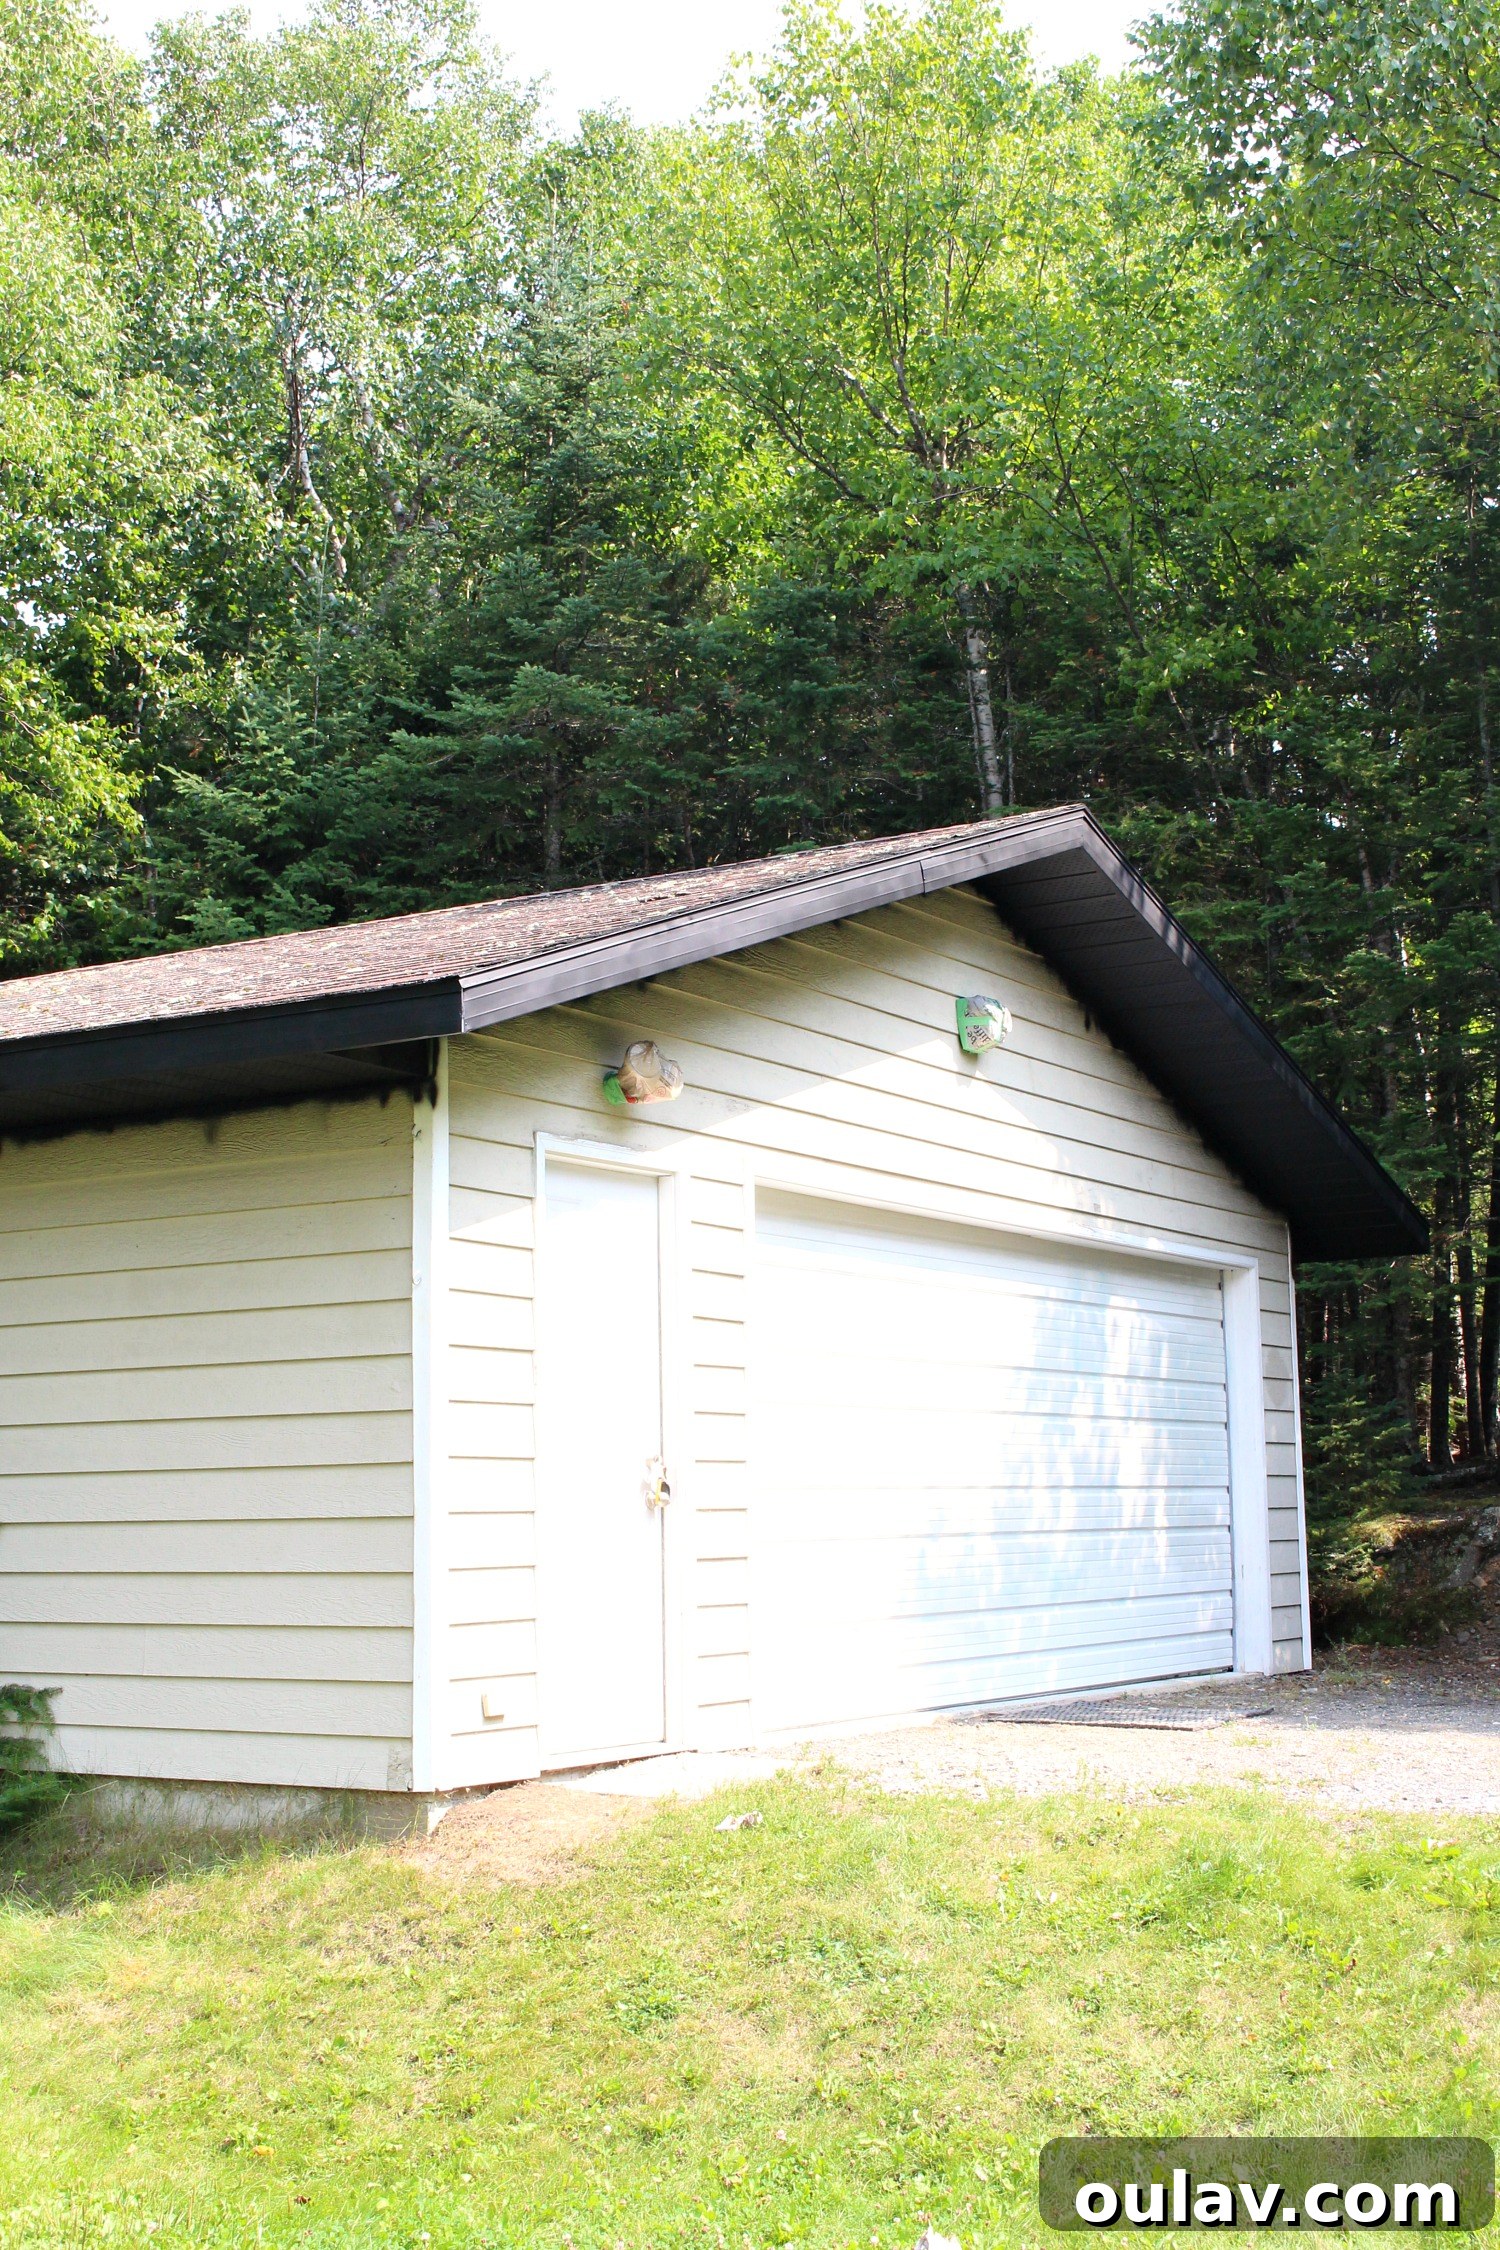
Before even thinking about applying paint, safety and protecting adjacent surfaces were our top priorities. My husband and I carefully wrapped all existing exterior light fixtures with plastic bags, securely taping them in place with painter’s tape to shield them from any paint. We then geared up in our essential personal protective equipment: durable latex gloves, wrap-around safety glasses, and a reliable dust mask or respirator. This comprehensive protection is absolutely non-negotiable, particularly when spray painting in the somewhat enclosed area beneath the soffit. The likelihood of paint overspray returning onto you in such conditions is significantly higher than when painting furniture in an open driveway on a windy day, making eye and lung protection paramount. I also strongly recommend wearing long-sleeved shirts and long pants to protect your skin from paint residue and potential scrapes from ladder work.
Step 3: The Painting Process – Achieving a Flawless Finish
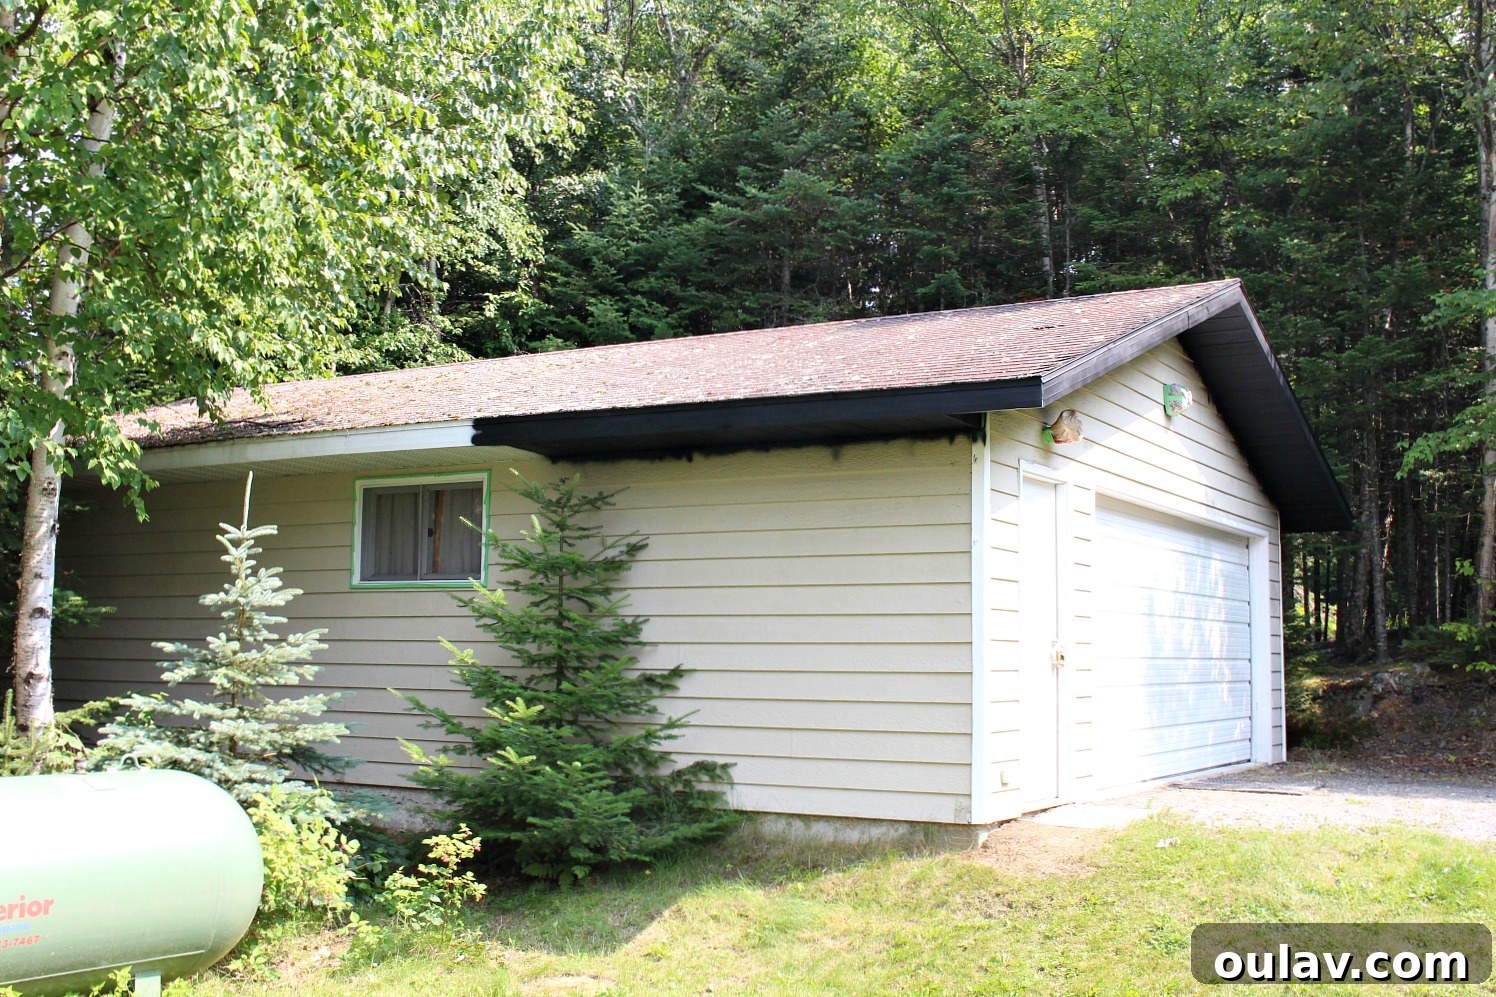
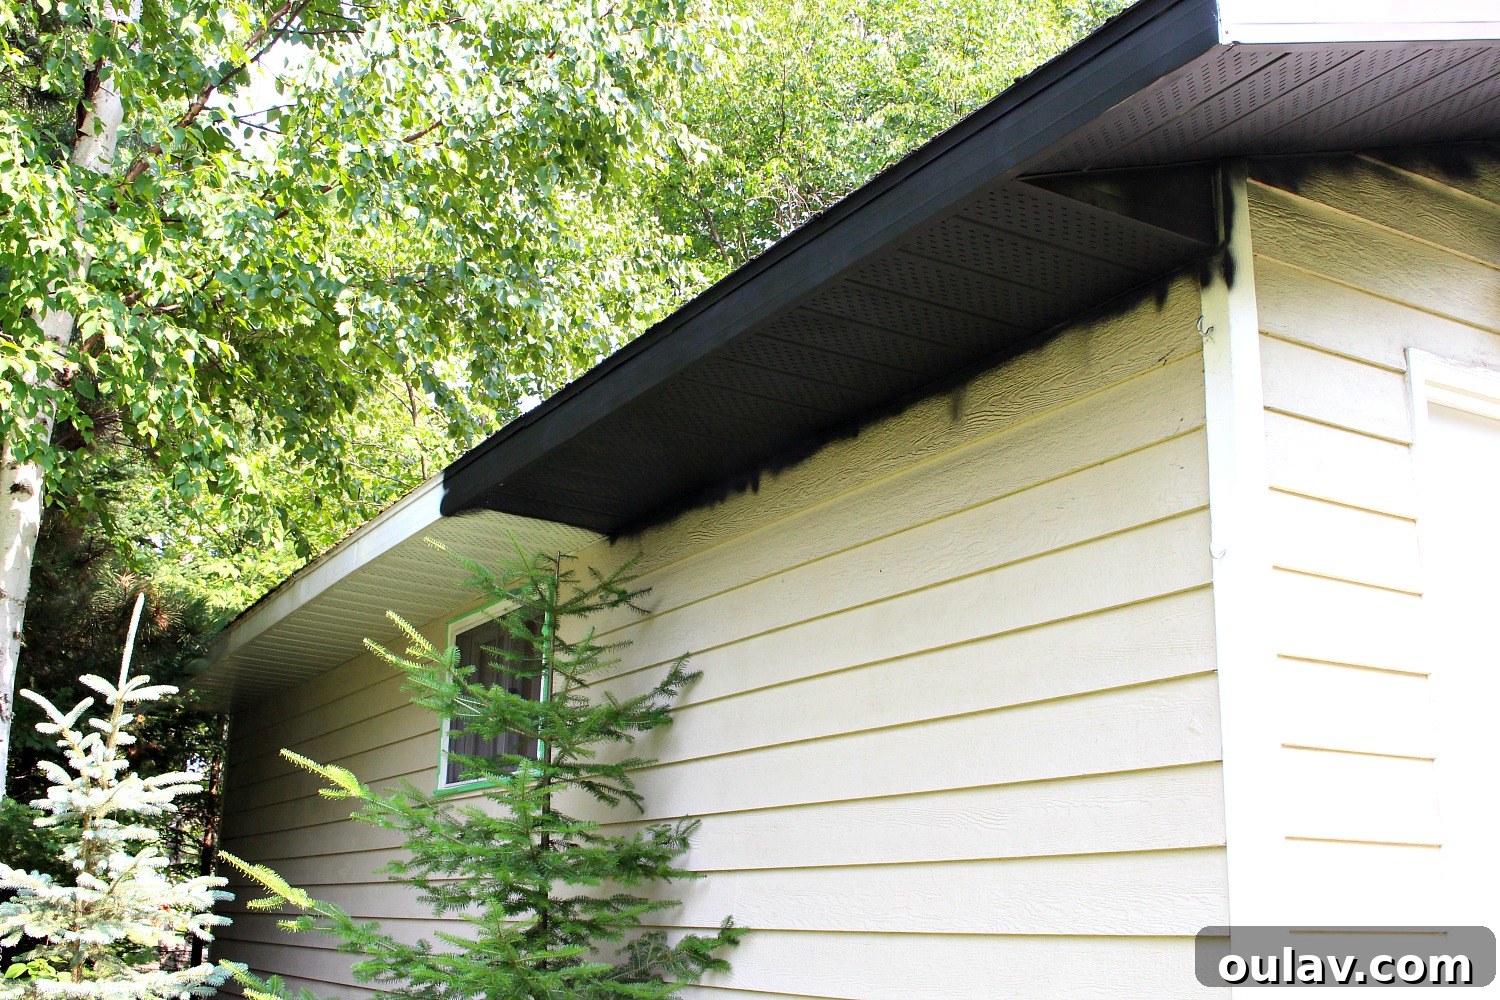
Working on ladders isn’t our favorite pastime, so my husband and I strategically took turns ascending to the various peaks and sections of the garage. Once safely positioned, the actual painting task itself proved quite straightforward. We applied the TREMCLAD Oil-Based Rust Spray Paint using consistent, sweeping motions, always striving for thin, even layers. The secret to achieving a professional, drip-free finish is to build up the color with multiple thin coats rather than attempting one thick, heavy application. For the soffit areas, especially those featuring ventilation perforations, we discovered it was crucial to spray from multiple angles and directions. This technique ensures that every surface of the perforated material is thoroughly coated, preventing any unsightly little white spots from showing through where the vents are.
A valuable lesson we quickly learned was the importance of avoiding extremely hot days for this project. When we painted on a super-hot day, the metal soffit and fascia expanded considerably due to the heat. As the metal subsequently cooled and contracted, tiny white lines occasionally appeared along the seams or edges where the paint had stretched. While these were minor and easily touched up, planning your painting day for moderately warm temperatures can help circumvent this additional step. We were pleasantly surprised by how minimal the overspray on the adjacent siding was, even without extensive masking. This observation solidified our decision to tackle the soffit and fascia *before* painting the siding itself. As we plan to replace the roof in the near future, we opted not to tape off the shingles, and reassuringly, very little paint managed to get onto them.
Step 4: Drying, Curing, and Final Touches for Lasting Beauty
The entire project required approximately two days of active painting time, consuming around 12 cans of spray paint. (Full disclosure: I didn’t keep an exact count, as some cans were also utilized for other small, concurrent projects.) However, the true reward lies in the immense financial savings realized compared to the cost of completely replacing the soffit and fascia. This effort was, without a doubt, exceptionally well worth every minute.
The Undeniable Benefits of Painting Your Soffit and Fascia
Embarking on a DIY project like painting your soffit and fascia offers a multitude of advantages, particularly for homeowners eager to make a significant visual impact without overspending:
- Significant Cost Savings: Replacing soffit and fascia can be an extraordinarily expensive undertaking, involving substantial material costs, professional labor fees, and potentially disposal charges. Painting, in stark contrast, requires a much smaller investment in materials and allows you to leverage your own labor, resulting in monumental savings that free up your budget for other renovation priorities.
- Dramatic Curb Appeal Enhancement: A fresh, cohesive color on your soffit and fascia can utterly transform the entire aesthetic of your home’s exterior. It meticulously defines the roofline, expertly frames the house, and seamlessly ties together disparate architectural elements, culminating in a polished, sophisticated, and incredibly inviting facade. This project, especially when transitioning from outdated colors to a bold, modern black, can instantly elevate an older home’s visual appeal to contemporary standards.
- Low-Commitment Color Experimentation: If you’re contemplating a bold new color palette for your home’s exterior trim but are hesitant about a permanent change, painting the soffit and fascia is an ingenious way to test the waters. It provides a substantial enough area to accurately gauge the color’s impact and how it harmonizes with other elements, all without the significant financial commitment or permanence of full replacement, allowing you to confidently fine-tune your ultimate exterior vision.
- Boosted Property Value: An updated and meticulously maintained exterior is a key factor in significantly enhancing your home’s overall market value. Prospective buyers are often profoundly influenced by strong curb appeal, and a thoughtfully executed, modern color scheme on your soffit and fascia can make your property exceptionally attractive and highly desirable in a competitive market.
- Added Protection and Longevity: Employing high-quality exterior paints, such as Rust-Oleum’s TREMCLAD, provides an invaluable additional layer of protection for your existing soffit and fascia materials. This protective barrier shields them from the damaging effects of harsh UV rays, incessant moisture, and general weathering. This proactive measure can substantially extend the lifespan of these critical components, further validating the effort and investment in your DIY project.
- Profound Personal Satisfaction: There is an immeasurable sense of pride and accomplishment that arises from successfully completing a significant DIY home improvement project. Witnessing the remarkable transformation unfold before your very eyes and knowing that you achieved it with your own hands is an incredibly rewarding experience that delivers value far beyond mere monetary savings.
Final Thoughts and Renewed Excitement for What’s Next
Had I harbored any lingering doubts about integrating black soffit into our home’s exterior design, this project served as the perfect, low-risk proving ground. I am absolutely thrilled with our DIY painted soffit and fascia; the sleek black finish provides a sophisticated contrast and a cohesive, modern look that aligns perfectly with our overarching renovation vision. This success has truly reignited my excitement and motivation for the main house renovation to pick up speed again, knowing the immense potential for transformative results that lies ahead.
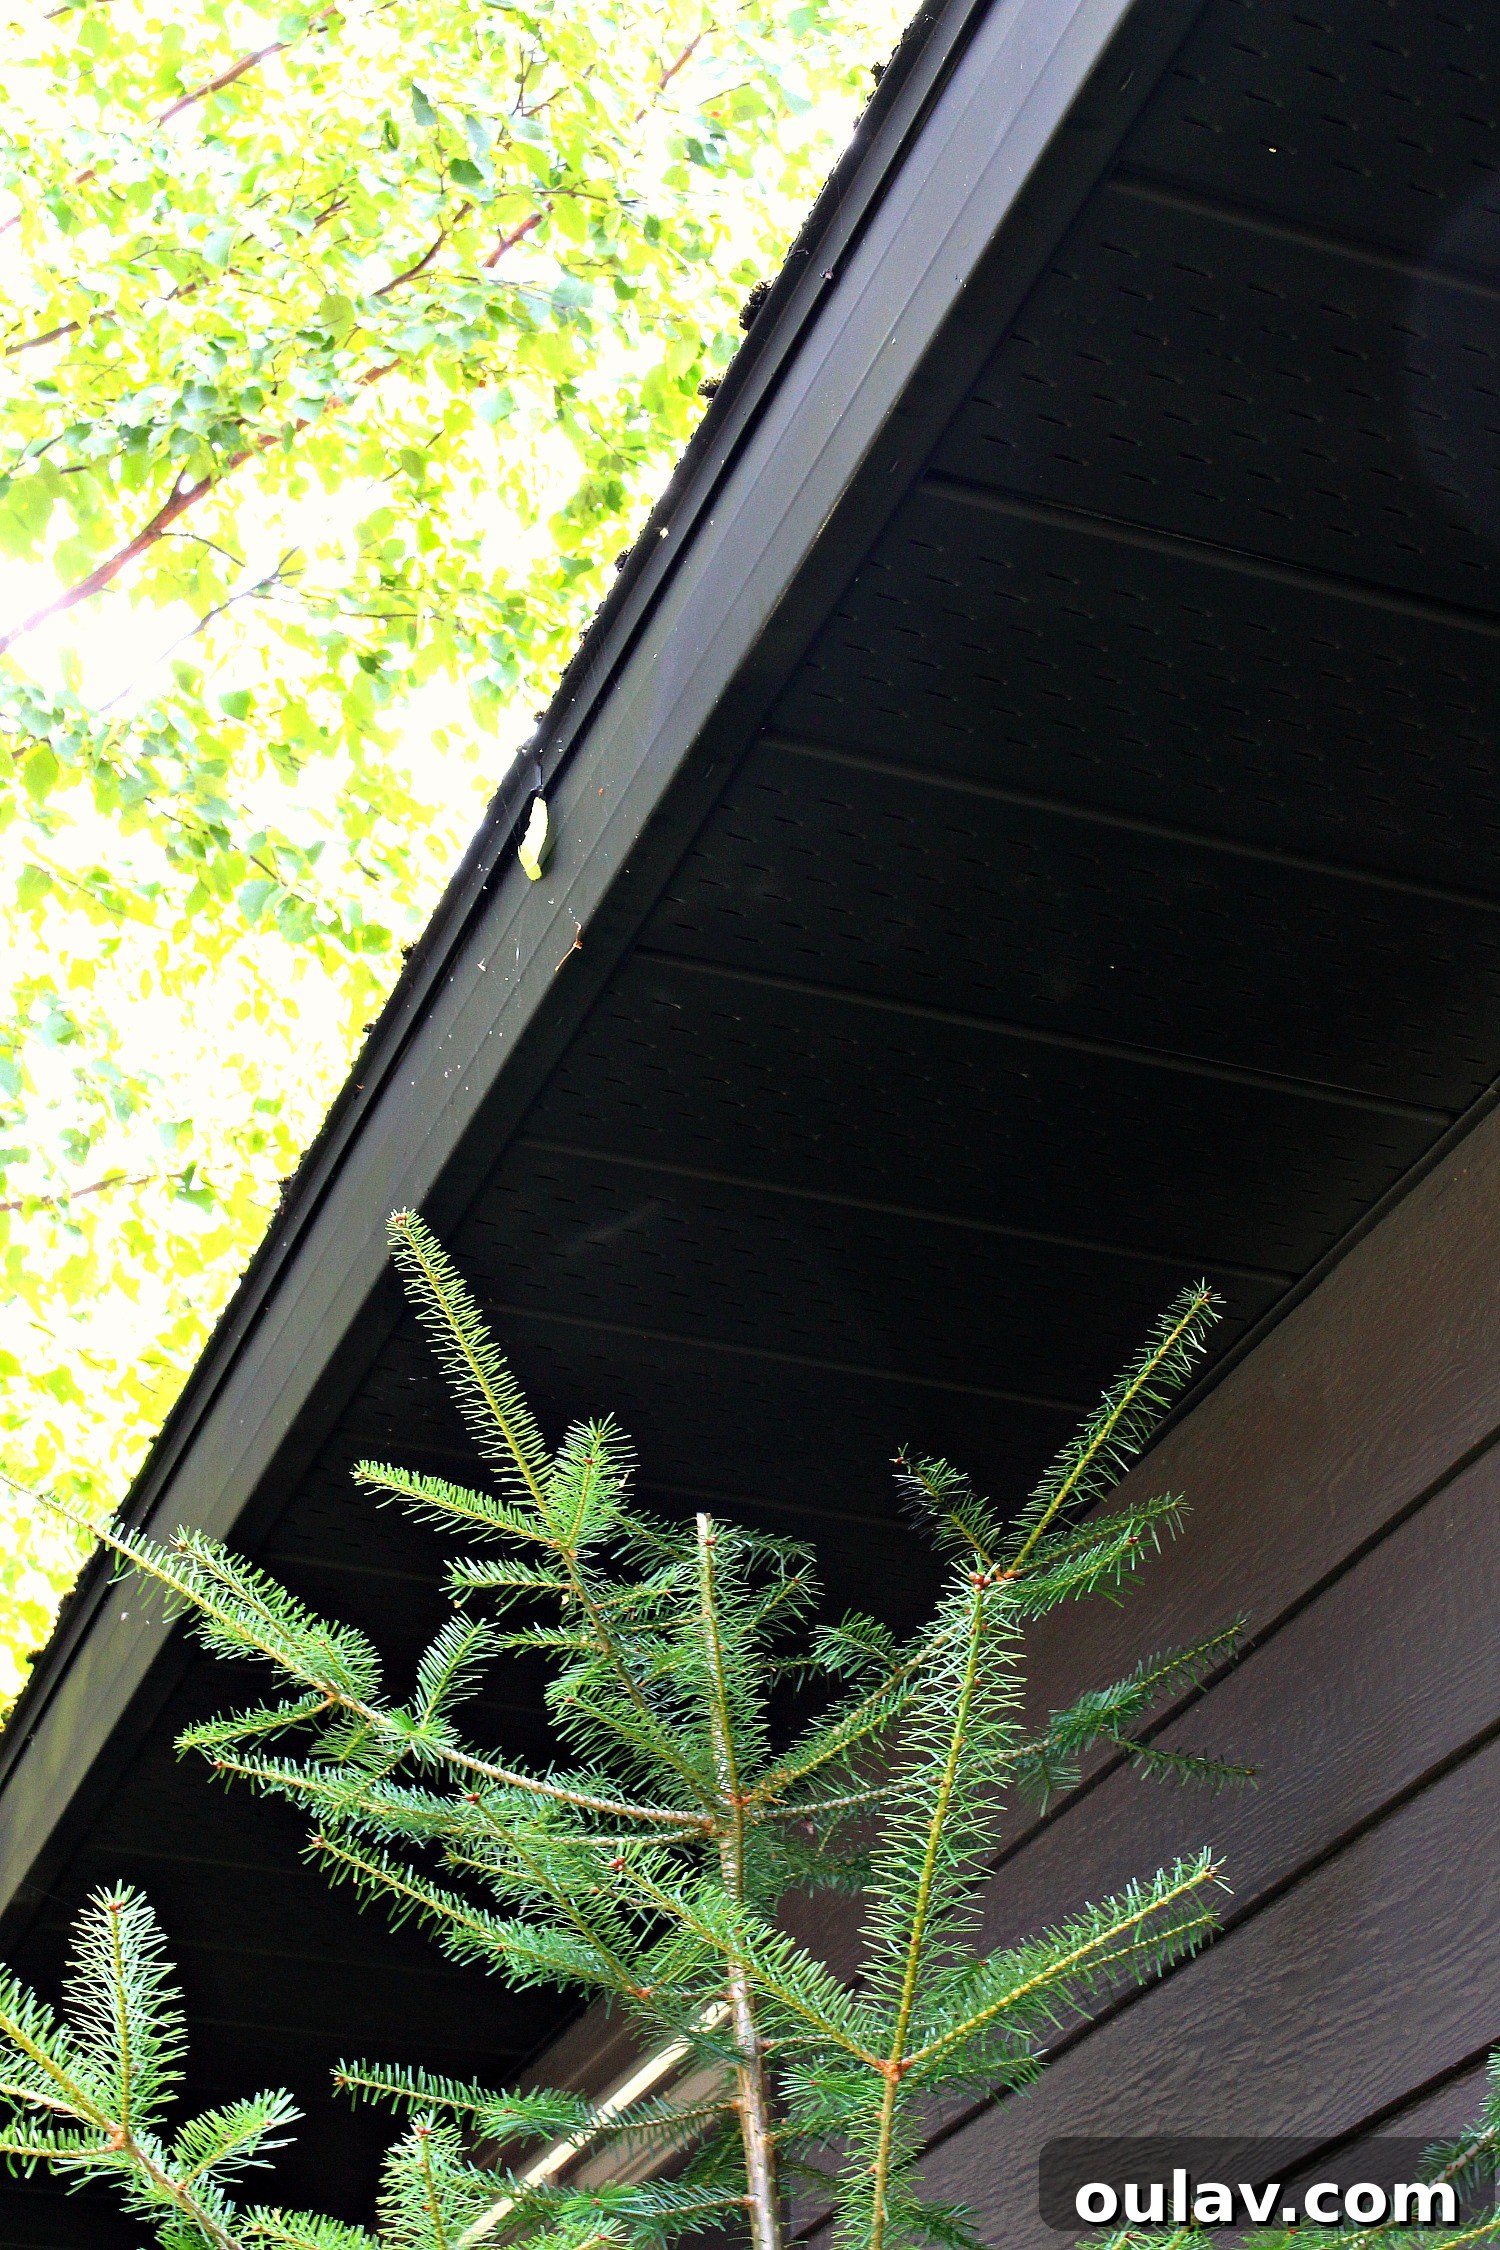
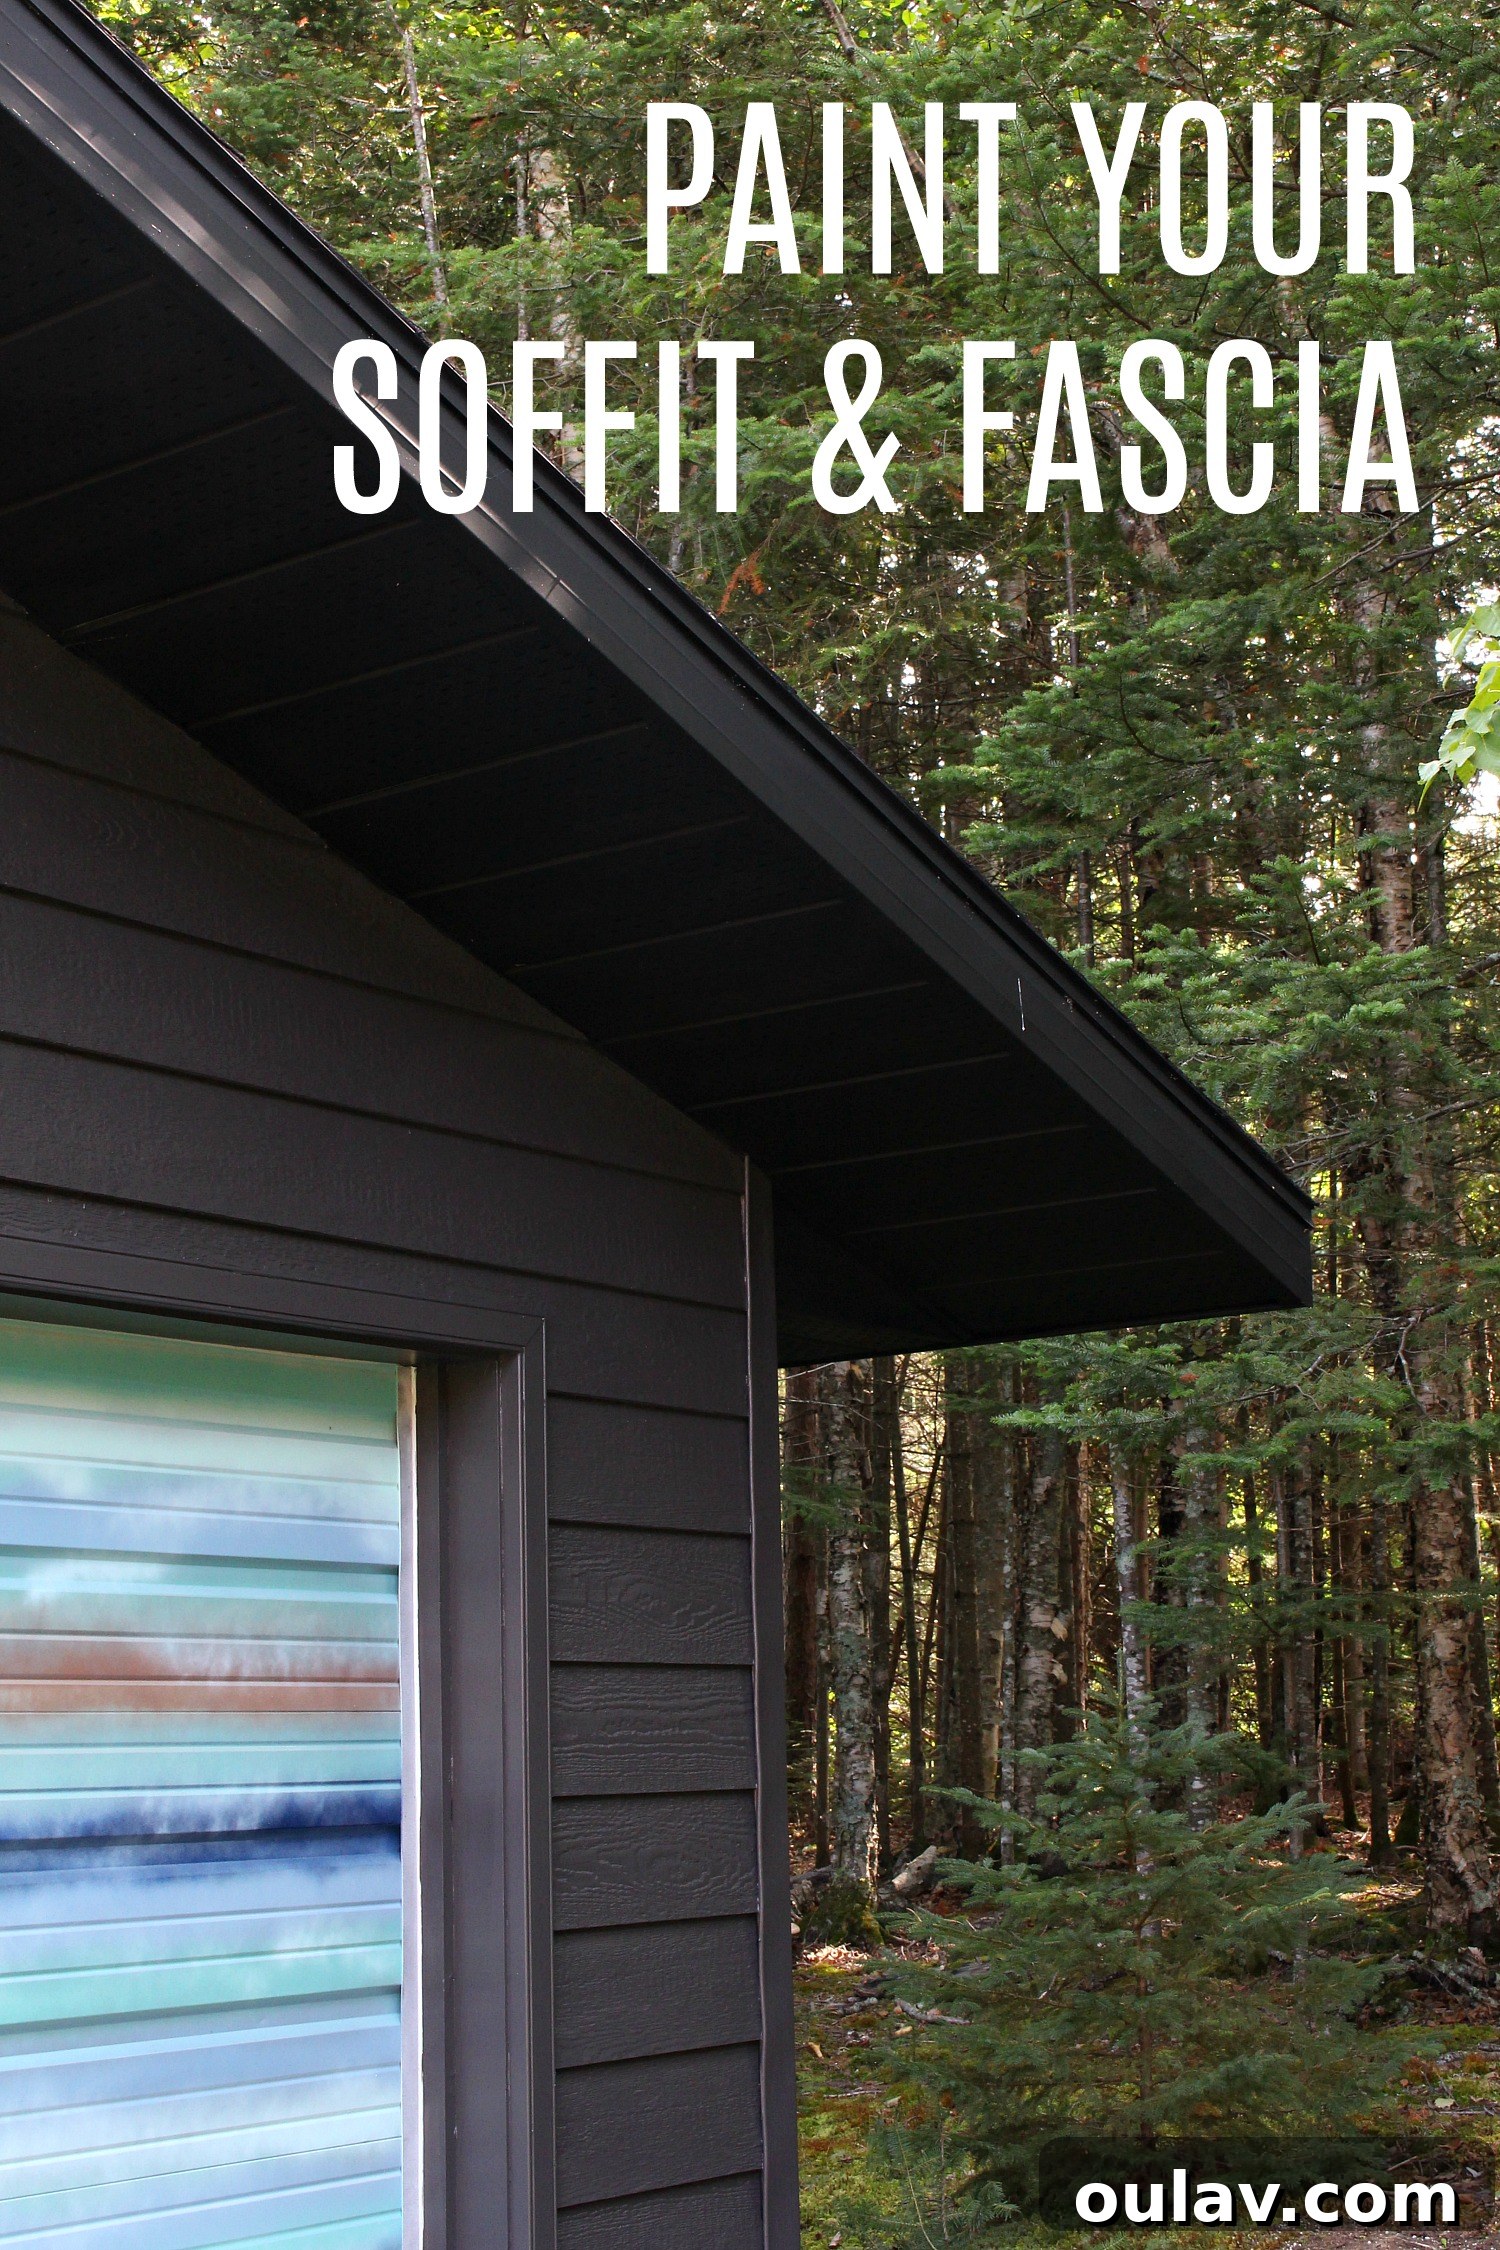
Just a quick, humorous observation about those glistening spots you might notice in some of the finished photos: it literally took only a couple of seconds for nature’s tiny architects, the spiders, to move back in and start spinning their intricate webs! What might initially appear to be slight cracking in the paint is simply the delicate work of our persistent eight-legged friends catching the light. It serves as a charming reminder that even with a stunning new look, nature always finds a way to blend into its surroundings.