
Maximize Your Small Kitchen: Clever Storage Solutions and Organization Hacks
Stepping into the heart of our home, I’m thrilled to unveil some of my most effective small kitchen storage ideas. It feels a little vulnerable to share the raw, unpolished reality behind the neatly staged photos, but my hope is that this honest peek into the ‘guts’ of my kitchen will inspire and genuinely help others grappling with limited space.
In a world where sprawling, commercial-grade kitchens often dominate home design aspirations, our humble kitchen with its modest footprint is a refreshing contrast. With only four lower cabinets, two of which are frustrating corner units, it presented a significant organizational challenge. My husband and I now cook almost every meal from scratch, which means this small space is constantly in use. While a full renovation to reconfigure for smarter storage is a dream for the future, I’ve dedicated myself to making the most of what we have. This journey has not only taught us invaluable lessons in efficiency but has also proven that even the tiniest kitchen can be incredibly functional and a joy to cook in. We’ve managed to put the “FUN” in functional, and I’m excited to share how.
If you’ve ever wondered how we keep everything in its place, or how we manage to thrive in such a compact cooking environment, you’re in the right spot. These small kitchen storage ideas are born from real-life challenges and practical solutions, designed to help anyone looking to streamline their own limited kitchen space.
Step One: Cultivating a Mindset Shift – Embracing Your Small Kitchen
Before any physical changes, the most profound transformation occurred in my perspective. It’s easy to get caught up in the allure of expansive kitchens, complete with endless cabinetry and professional appliances. I’ll admit, the thought of a massive kitchen is tempting! However, I’ve learned to fully embrace our small space, drawing inspiration from my family’s incredible cooks who prepared magnificent, homemade meals in truly tiny kitchens. My travels to Hungary further solidified this appreciation; I witnessed relatives preparing elaborate, scratch-cooked dishes in kitchens that were a fascinating mix of antique hutches, vintage appliances, and minimal counter space – a far cry from North American norms. My friend Dora, for instance, could whip up delicious crepes in a kitchen barely larger than a powder room, driven by the European ethos that guests must always be fed.
Compared to those experiences, my kitchen now feels quite spacious, and I’ve come to cherish its unique attributes: the beautiful lake view, the open layout, the incredibly efficient work triangle, and its natural ability to become the convivial hub of any gathering. This shift in outlook from “I wish I had more space” to “How can I maximize the beauty and efficiency of what I have?” was foundational. My husband and I have also fine-tuned our collaborative cooking dance: one handles sous-cheffing at the wide counter end with its picturesque view, while the other skillfully navigates the U-shaped interior. This positive mindset has truly unlocked the creative potential for storage solutions.
Step Two: The Power of Decluttering – Purging and Prioritizing Essentials
The second critical step in optimizing our small kitchen was a rigorous decluttering process during our move. It was astounding to discover how many bulky kitchen gadgets and rarely used serving pieces I had accumulated, simply because I felt I “should” own them. Items like the ice cream maker, bread machine, and even the microwave (which we literally never used!) were all banished. While giving up the microwave often draws online commentary, its absence has been incredibly liberating, freeing up precious counter and cabinet space. Any rarely used but essential items were relocated to the basement, ensuring the kitchen only houses what we truly use and love on a regular basis.
This isn’t a one-time event; I continually reassess and pare down, especially as new items (like my beloved Veggetti) find their way in. A key strategy has been embracing items that serve multiple purposes. Vintage Pyrex, for example, is hardy and charming enough for baking, cooking, serving, and storing leftovers. Our glass cake stand cleverly transforms into a punch bowl, and elegant cutting boards double as trivets or serving platters. This multi-functionality drastically reduces the number of items needed.
We even streamlined our food staples. Instead of a pantry overflowing with five types of cereal, we now have one. Rather than countless boxes of flavored oatmeal, a single canister of plain oats awaits personalization with fresh fruit and nuts. This focused approach not only saves space but also minimizes food waste, as we no longer “forget” about random items that inevitably go stale – a huge benefit for someone who stresses about throwing away food. Streamlining was the non-negotiable foundation; only after this could I effectively tackle how to store the essentials that remained.
Step Three: Transforming Cabinets into Functional Drawers with Pull-Out Organizers
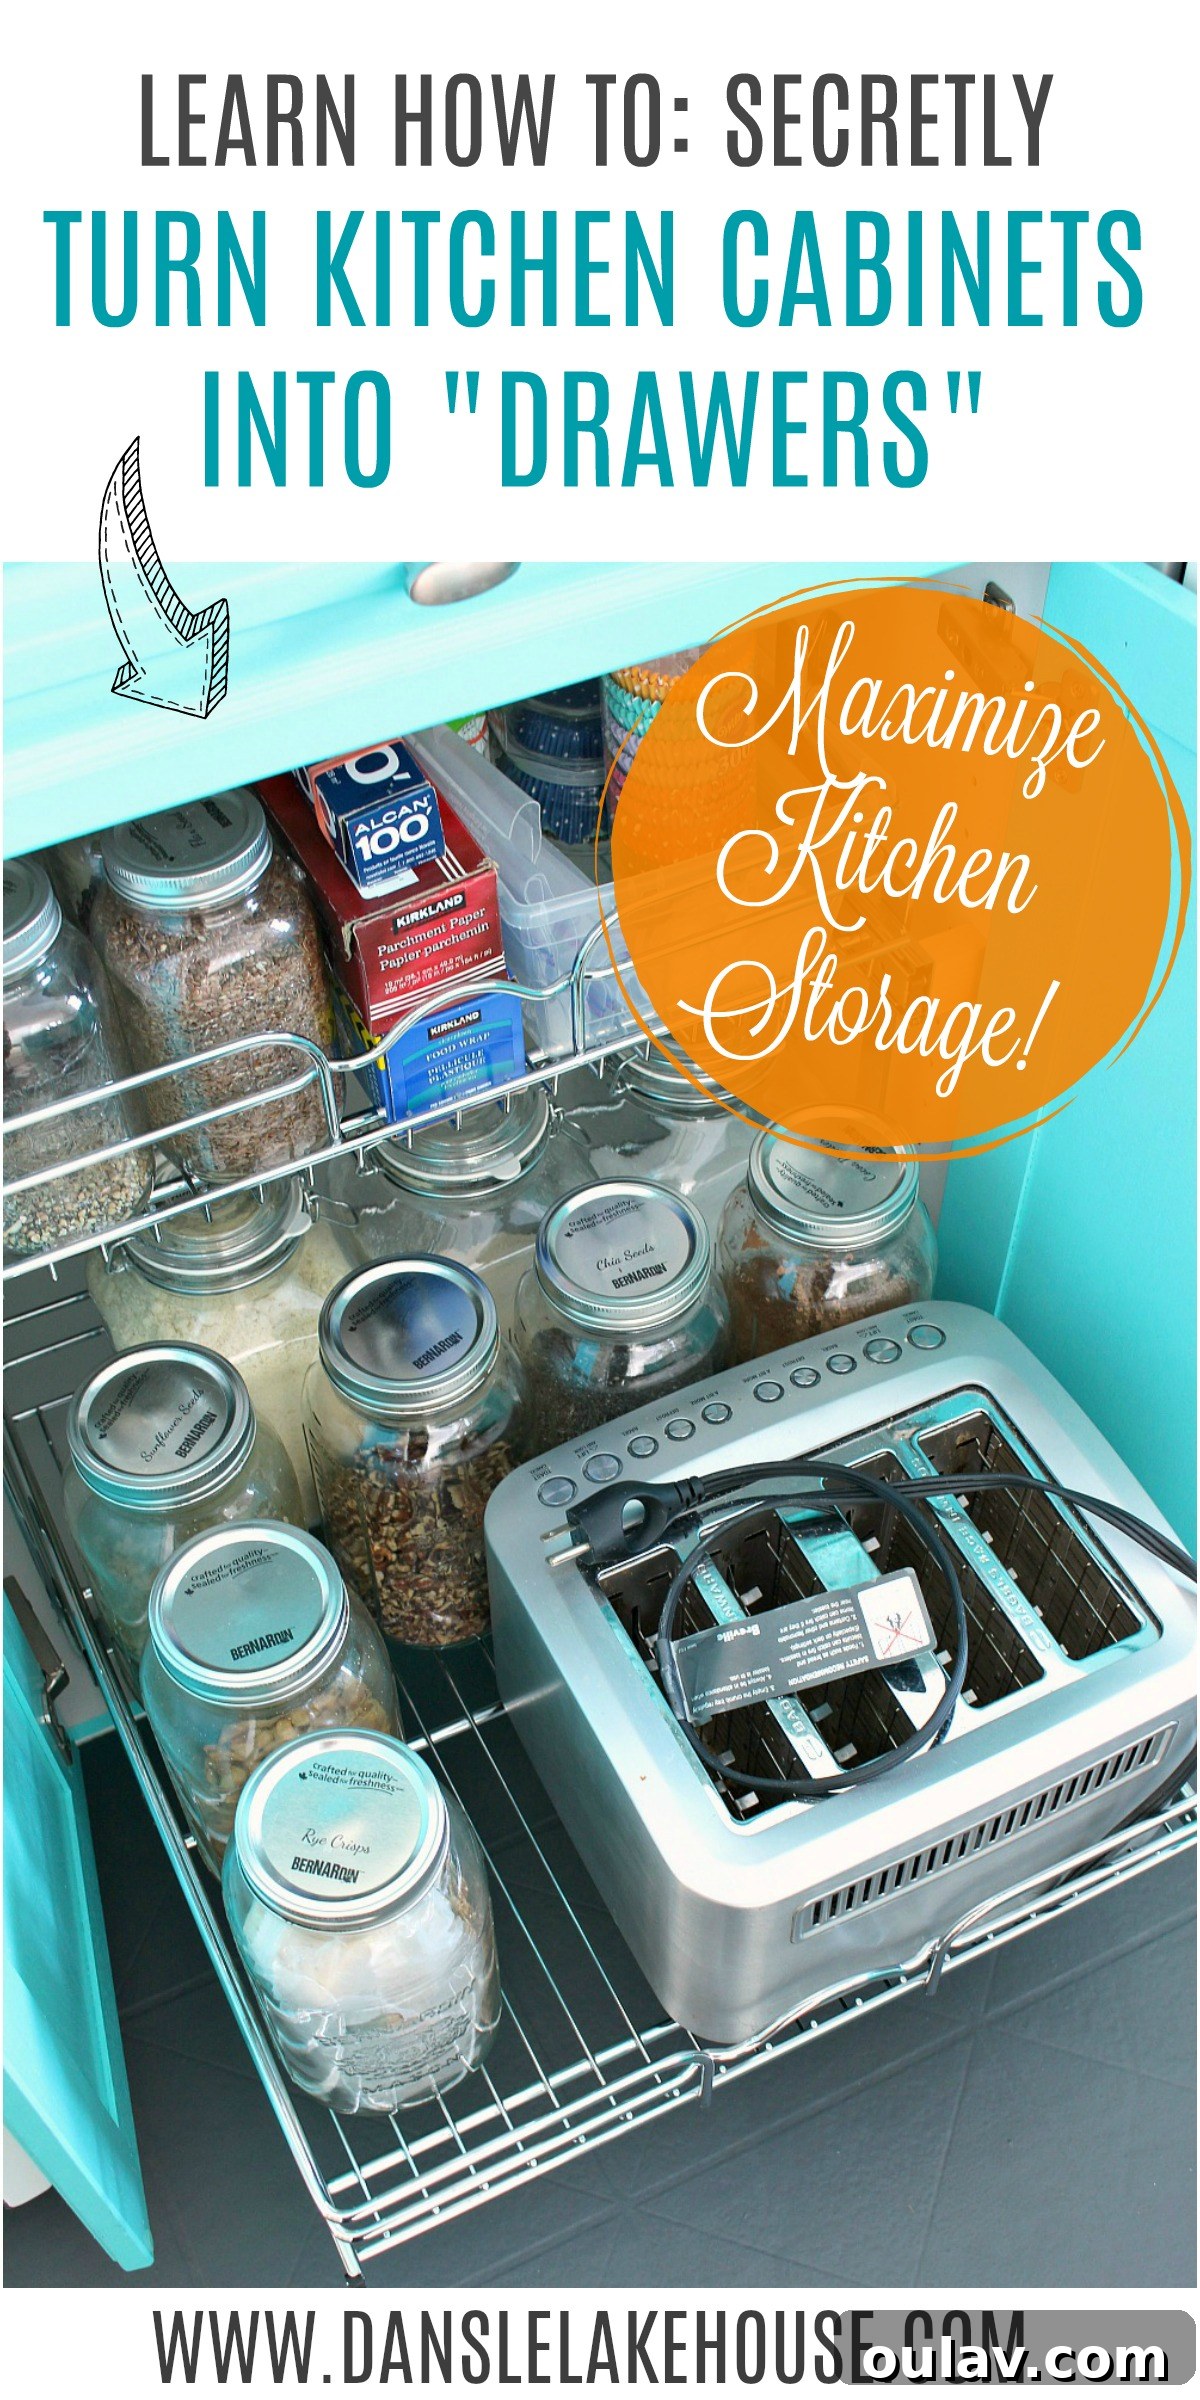
This is arguably the single biggest game-changer we implemented: converting standard lower cabinets into highly accessible “drawers” using pull-out organizers. The cabinet directly to the left of our stove, once a deep, frustrating cavern, now features two incredible pull-out shelves. This innovation has fundamentally changed how we interact with our kitchen. The days of awkwardly crouching, rummaging through items, and losing things at the back of the cabinet are over. I am genuinely obsessed with kitchen drawers, and these organizers replicate that functionality perfectly.
These pull-out drawer organizers are available in various sizes and finishes, and their installation is surprisingly straightforward. They provide full visibility and effortless access to everything, even items previously relegated to the back. This simple modification has effectively maximized 100% of our limited cabinet space, making our daily cooking routine significantly more efficient and enjoyable. No more bending, kneeling, or digging – just smooth, easy access.
Step Four: Decanting Dry Goods – The Aesthetic and Practical Benefits of Glass Jars
As you might have noticed in the transformed “drawers,” my dry goods are neatly lined in uniform Mason jars. This practice of decanting everything possible into consistently sized containers is a small kitchen game-changer. Awkwardly shaped boxes and bags of flour, sugar, pasta, and rice were once a storage nightmare, creating wasted space and an untidy appearance. Switching to identical jars instantly creates a cohesive and organized look, making the most of every cubic inch.
Beyond aesthetics, there are significant practical benefits. Tightly sealed glass jars keep ingredients fresher for much longer, preventing staleness and crucially, deterring pantry pests. This added layer of protection is invaluable in a small space where quick detection and management of any infestation are paramount. It also makes inventory management incredibly easy – a quick glance tells me when it’s time to restock, avoiding last-minute grocery runs during cooking. The uniformity also allows for denser packing, effectively increasing our storage capacity without adding a single new cabinet.
Step Five: Creating Makeshift “Drawers” with Bins – Smart Solutions for Corner Cabinets
Directly opposite our new pull-out drawers, I have another lower cabinet, which houses spices, canned goods, and cooking oils. This area presented its own challenges, especially with its deep, somewhat awkward layout. My solution? Leveraging the power of bins to create makeshift “drawers” that slide in and out with ease. For instance, I use two plastic bins – one for savory spices and another for baking essentials. These act just like mini pull-out drawers, transforming a chaotic jumble into an easily accessible, organized system.
My cooking oils, pepper mill, and frequently used condiments are kept together on a dedicated plastic tray. This not only protects the cabinet interior from any drips or spills but also allows me to grab everything I need for cooking in one swift motion. The tray itself is multi-functional, being oven-safe, adding another layer of versatility to our kitchen tools. When I’m ready to cook, I simply slide out the relevant spice bin and the oil tray, and I’m good to go.
This bin strategy extends to other challenging areas, particularly our despised corner cabinets. Baking ware (cookie cutters, sifters, shakers), hot drink supplies (teas, coffee, filters), Magic Bullet accessories, and Tupperware are all contained within larger bins. This ingenious method allows me to simply slide out an entire bin to access what I need, rather than having to awkwardly crouch and sift through teetering piles. Even pot lids, notorious for creating clutter, are corralled into bins, allowing pots to stack neatly and save valuable space.
Seriously, integrating “drawers” – whether purpose-built or cleverly faked with bins – is the future of efficient kitchen storage and one of my top small kitchen storage ideas. Stackable sets of bins, like this one, are another smart way to maximize vertical space within smaller cabinets, ensuring no inch goes to waste.
Step Six: Maximizing Vertical Space – The Strategic Use of Open Shelving and a Floor-to-Ceiling Pantry
Our original upper cabinets were notoriously problematic: too low, awkwardly placed, and deceptively small. It was impossible to open the cabinets to the right of the window without physically climbing onto the counter. Furthermore, the combination of a wall-mounted microwave and a decorative “fake” cabinet above the stove created the illusion of storage that simply didn’t exist. To add to the frustration, the corner upper cabinets were so narrow they couldn’t even accommodate a standard dinner plate or mixing bowl – a glaring design flaw in a kitchen.
Our decision to tear out these antiquated upper cabinets and install open shelving was a pivotal moment for functional storage. This brave move liberated the space, leaving us with beautiful, long shelves that offer uninterrupted storage for plates, glasses, mixing bowls, and casseroles. While a frustrating building code prevented us from extending the shelving entirely above the stove as originally planned (a minor annoyance that still bugs me!), the overall improvement in accessibility and storage capacity was immense.
Open shelving is a polarizing design choice, but I’ve previously shared my honest thoughts on its pros and cons, including my strategies for keeping it clean. Although I make an effort to tidy up before photos, what you see is generally how our kitchen looks – unless I’m in the midst of cooking, baking, crafting, or repotting plants, all of which happen here! It might look like a disaster mid-task, but it’s always restored to its organized state. And yes, I do use the items on the top shelves; being slightly taller than average helps, though a stepladder is always within reach from the laundry room. Opting for pretty, functional items like our vintage Pyrex made the transition to open shelving seamless, but eclectic displays can look equally fantastic. My ultimate dream kitchen will eventually feature floor-to-ceiling cabinetry that genuinely maximizes storage, but for now, this system works wonderfully.
In addition to the open shelving, a true game-changer was the floor-to-ceiling open pantry situated to the left of the fridge. This dedicated area provides crucial storage for additional serving pieces, our cooler for summer grocery trips, and prominently features 12 massive glass jars for bulk dry goods like cereal, various flours, oatmeal, pasta, rice, quinoa, and yes, even marshmallows! It’s our command center for all major kitchen staples.
We recently added a door to that lower cabinet, cleverly concealing the cooler and making this area even more visually appealing. Even if tearing out cabinets isn’t an option, adding just a row or two of open shelves for dry goods stored in identical canisters, or installing a simple shelf under existing cabinets for plates and charming mugs, can significantly enhance storage in even the smallest kitchen. Plus, it’s a wonderful opportunity to display items you love and infuse personality into your space.
Step Seven: The Art of Pretty Storage – Blending Functionality with Style
One of the most enjoyable aspects of small kitchen organization is discovering how much visual impact “pretty” storage can have. Those massive food jars, for instance, don’t just store cereal and flour; they make them look appealing! This is a powerful trick in a compact space: when things look good, you’re more inclined to store them in unconventional, yet accessible, ways, rather than trying to hide them away.
Another prime example is our kitchen utensils. Instead of a jumble of mismatched, worn-out tools hidden in a drawer, we invested in a vibrant new set of colorful KitchenAid utensils. These are now proudly displayed in a simple glass vase on the counter. This not only makes them easily accessible during cooking but also frees up a valuable drawer for other items. It’s a win-win: functional aesthetics that enhance both efficiency and decor. This philosophy underpins many of our purchasing decisions – prioritizing kitchen items that are as visually pleasing as they are practical.
Even spices and tea bags can transcend purely functional storage. Decanting them into prettier containers, like a sleek modern spice tower, allows them to be kept conveniently on the counter. This frees up crucial cabinet space for less aesthetically pleasing but equally essential items.
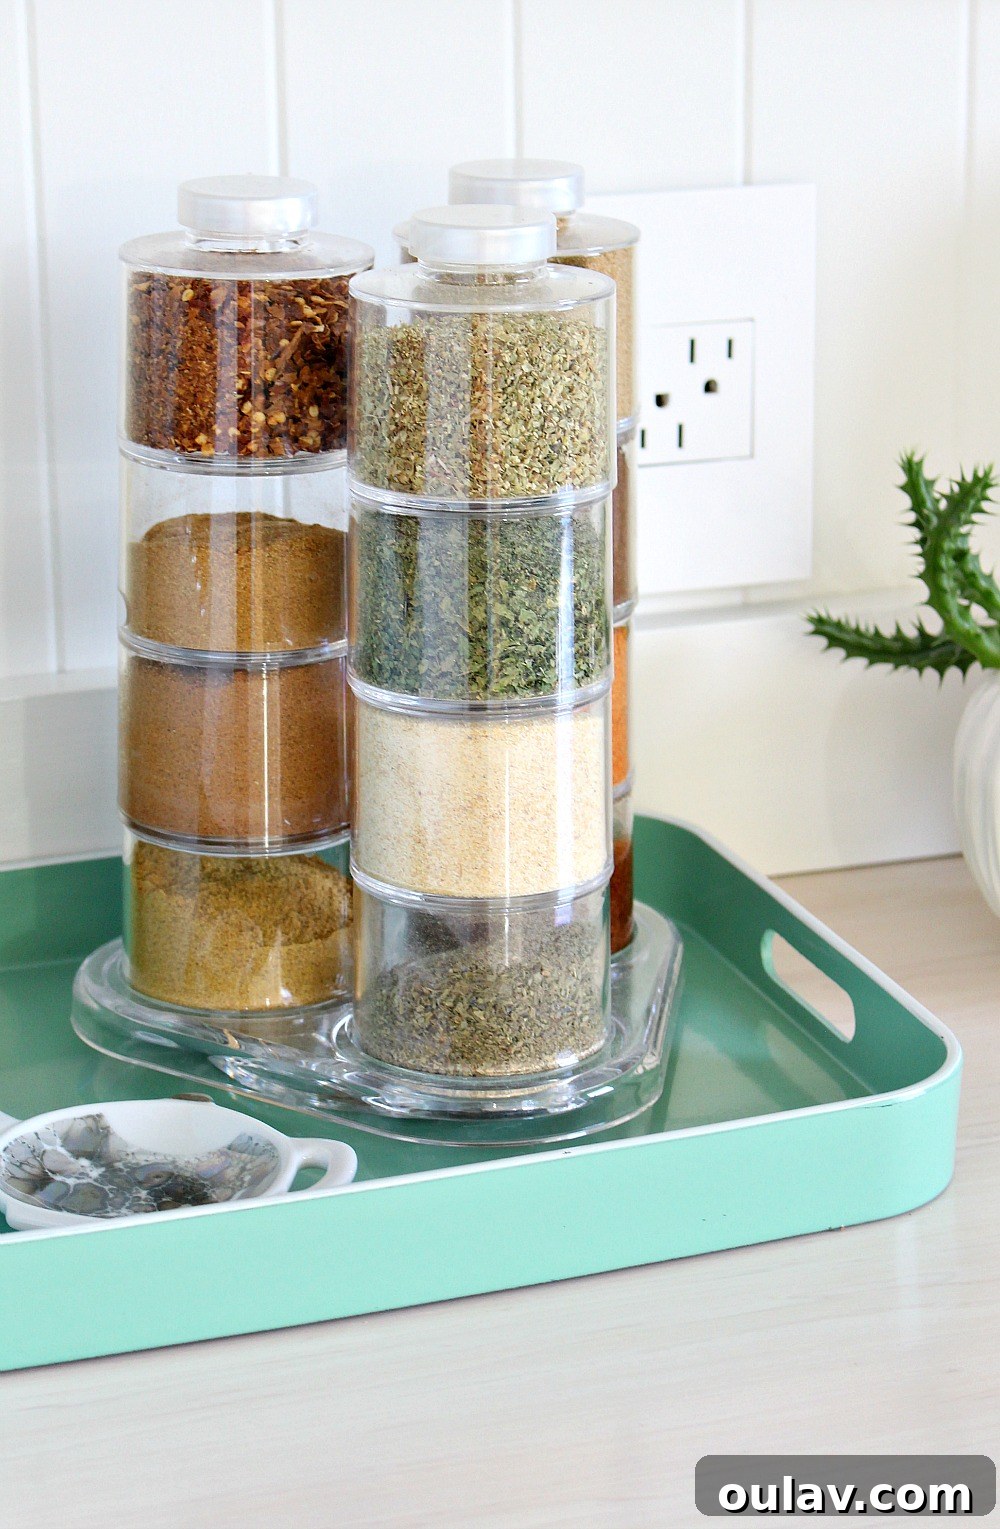
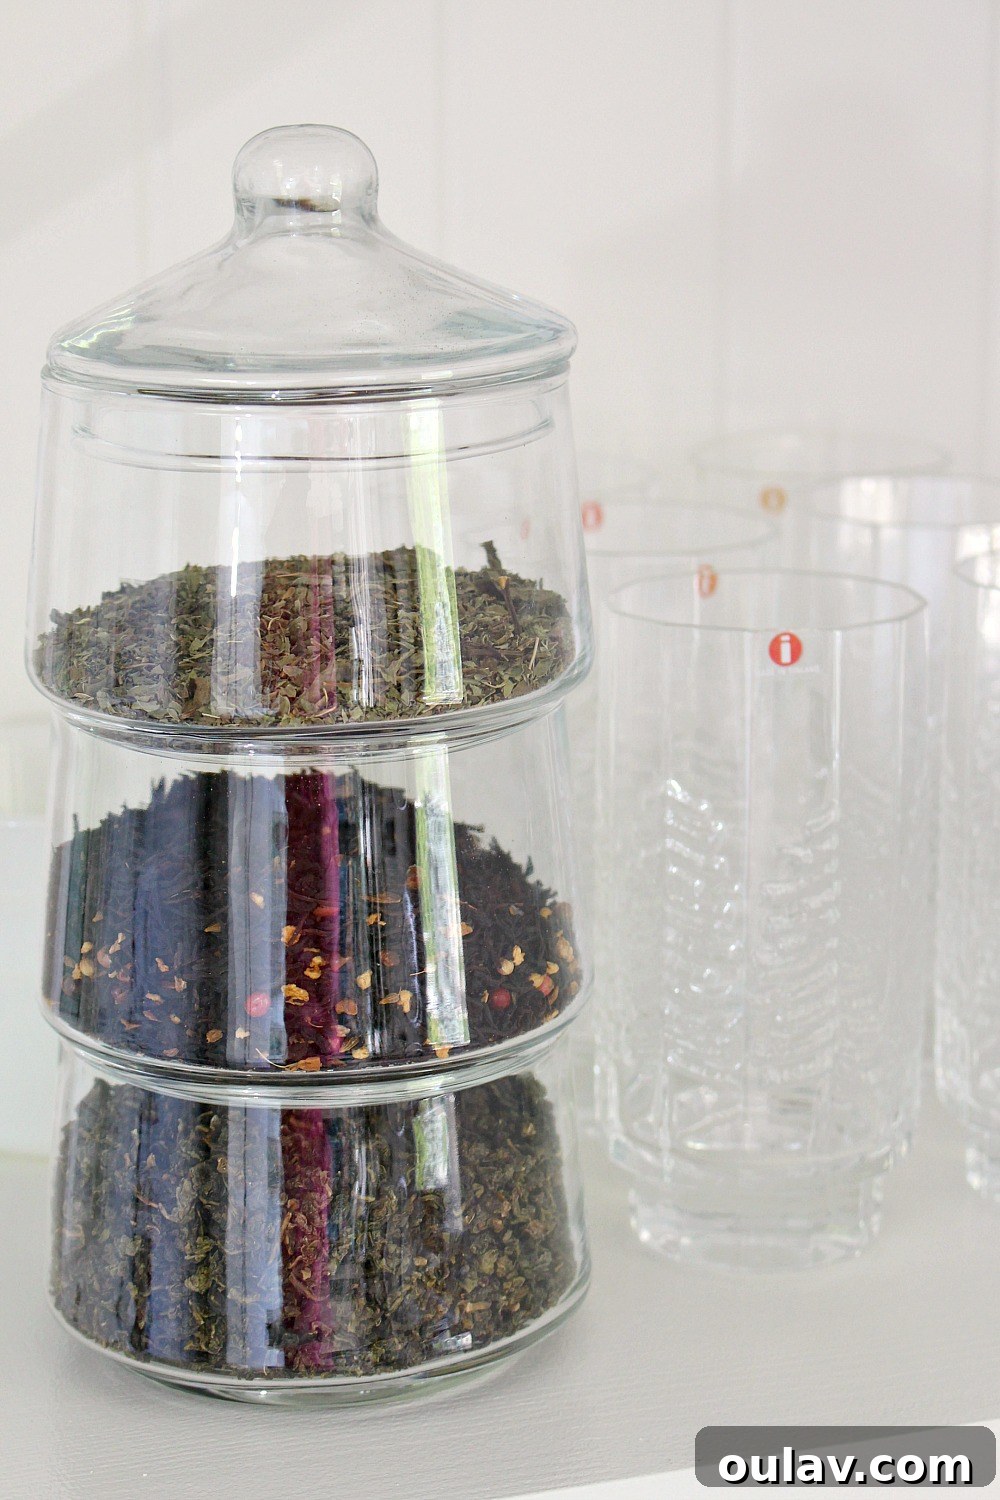
While an ideal world might mean every single item is tucked away, in our small kitchen, embracing beautiful counter-top storage is a highly effective strategy. The market now offers an incredible array of attractive kitchen staples – items once only found in basic black or white are now available in every color, style, and luxurious finish, like this super cute turquoise drain rack for dishes. Even just investing in a few large, stylish canisters or creating a charming coffee station that showcases a beloved mug collection can significantly alleviate clutter in overflowing cabinets and drawers.
Step Eight: The Magic of Micro-Organization – Small Bins for Every Niche
Beyond the larger storage solutions, I’ve found immense value in micro-organizing with small bins, especially when it comes to specific challenges like my “flatware habit.”
Confession: I currently have two sets of flatware, which is a major space hog. My goal is to acquire more pieces of my grandmother’s vintage silver set and then either sell the brass set or relocate it to the basement with blog props. To manage this, I rely on standard cutlery organizing trays, supplemented by inexpensive long, narrow trays from a discount store to keep every fork, spoon, and knife neatly sorted and separated. This precise organization ensures that even with two sets, the drawer remains functional and clutter-free.
A small, sentimental vintage bin at the back of one drawer serves as a special spot for tiny treasures I can’t part with: a nostalgic Pez dispenser, a few rarely used serving pieces, and forks designated for road trips. These small bins aren’t just for drawers; I’ve extended their use into the refrigerator to categorize produce, snacks, and condiments, preventing chaos and ensuring every item has a home. This micro-level organization allows me to “cram” more into our limited space while maintaining impeccable functionality.
Step Nine: Reclaiming the Junk Drawer – Strategic Relocation for Kitchen Freedom
The infamous kitchen junk drawer is often an unavoidable fixture in many homes. However, in a small kitchen, such a drawer consumes incredibly valuable real estate that could be far better utilized. My solution was to eliminate it entirely and relocate its contents. I purchased one of these practical “Really Useful Box” storage systems, which now lives in a cupboard in our laundry room. This system perfectly organizes those odds and ends – rubber bands, twist ties, stray keys, and other miscellaneous items – that once cluttered a prime kitchen drawer.
By moving these non-kitchen specific items out of the kitchen altogether, I freed up an entire drawer that is now used for cooking essentials. This might seem like a minor adjustment, but in a small space, every drawer counts. It’s about consciously deciding what truly belongs in the kitchen and what can find a more appropriate home elsewhere, enhancing the kitchen’s efficiency and dedicated purpose.
Step Ten: Leveraging Adjacent Spaces – Expanding Storage Beyond Kitchen Walls
One of the most impactful strategies for coping with a small kitchen is to recognize that storage doesn’t have to be confined solely within its four walls. We extensively utilize adjacent spaces to house items that, while kitchen-related, don’t need to be *in* the kitchen at all times. For instance, our DIY fauxdenza in the dining room serves as a vital storage hub. This credenza handily stores table linens, candles, cloth napkins, and the plates and glasses we exclusively use for outdoor dining on the patio.
Before we adopted this approach, these items would have cluttered our kitchen cabinets and drawers, making the space feel even smaller and less functional. By rethinking where these less-frequently accessed or context-specific items are stored, we’ve effectively expanded our kitchen’s perceived and actual usable space. It’s about being strategic with every square foot of your home, allowing the kitchen to focus on its primary function without being overwhelmed by peripheral items. This careful shuffling and thoughtful allocation of items across different rooms significantly reduces the burden on the small kitchen, making it feel considerably larger and more organized.
My Top Small Kitchen Storage Tips: A Recap for Ultimate Organization
Reflecting on our journey to optimize our small kitchen, two ideas stand out as universally impactful. First, making dry goods storage both practical and beautiful by decanting nearly everything into uniform jars. This not only maximizes space and keeps items fresh but also adds a pleasing aesthetic touch. Second, the transformation of standard cabinets into accessible drawers – particularly using pull-out metal organizers – has been our single favorite purchase and a true game-changer for daily kitchen efficiency.
Beyond specific products, the most profound impact came from a thorough re-evaluation of everything we owned. Critically examining what we truly need and love – from seldom-used kitchen gadgets to everyday grocery staples – and committing to keeping only those cherished and useful items, laid the essential groundwork for all other organizational successes. This process revealed how much unnecessary clutter we were holding onto, simply out of habit or perceived necessity.
As I continuously envision our future kitchen renovation (a constant pastime!), I would love to hear your absolute best kitchen storage tips! I’m always on the lookout for clever ideas for cleaning, organizing, and maximizing space. Your unique tips and tricks could be invaluable as I plan to start this kitchen from scratch one day. Share your wisdom in the comments below!
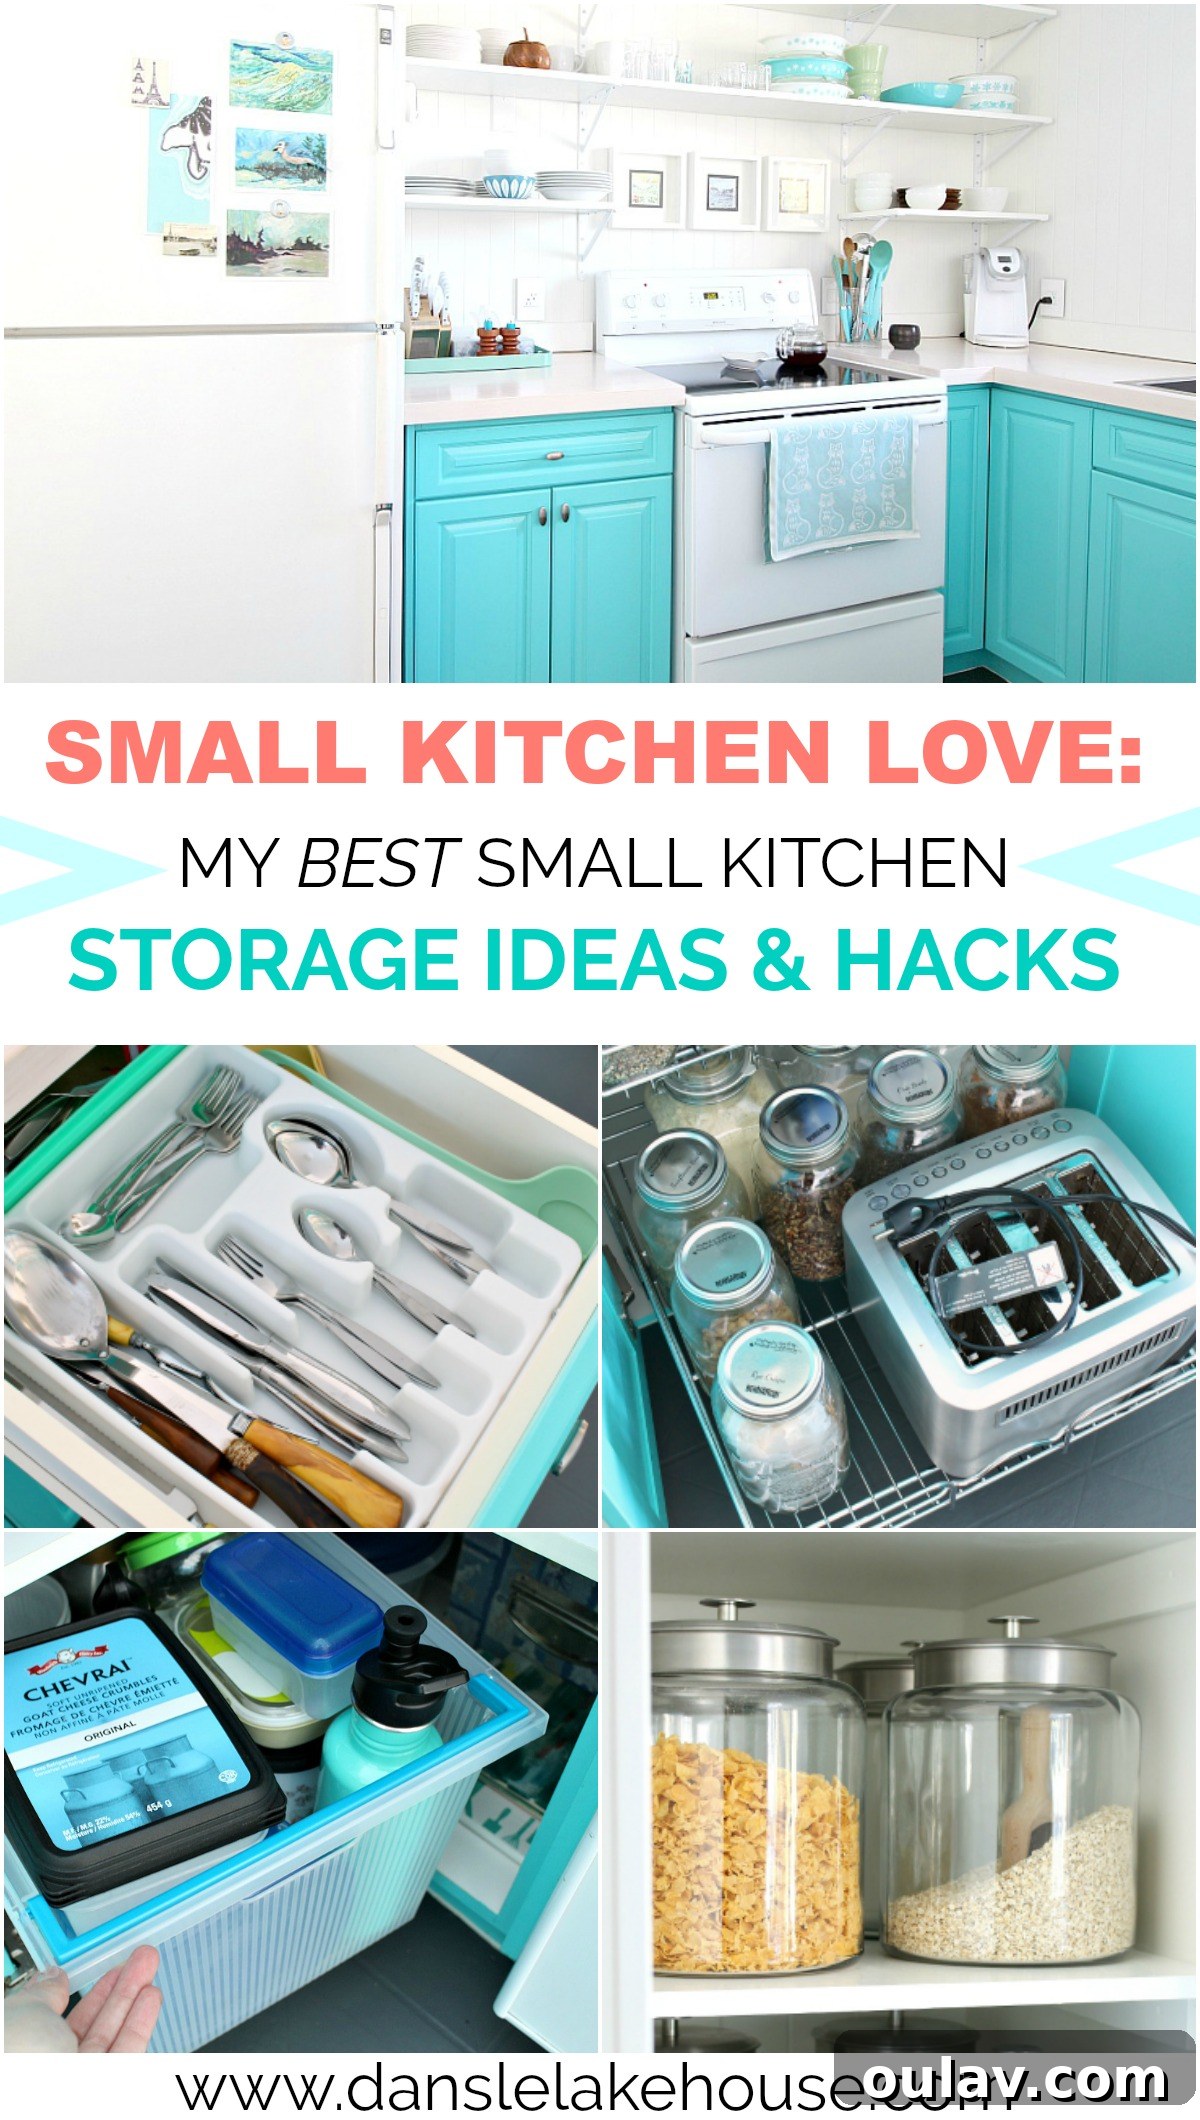
Featured Kitchen Storage Solutions & Sources:
- Modern Spice Tower
- Pull-Out Drawer Organizers
- Mason Jars (for decanting)
- Large Anchor Hocking 2 Gallon Jars for Dry Goods
- Colorful KitchenAid Kitchen Utensils
- Cutlery Organizing Trays