
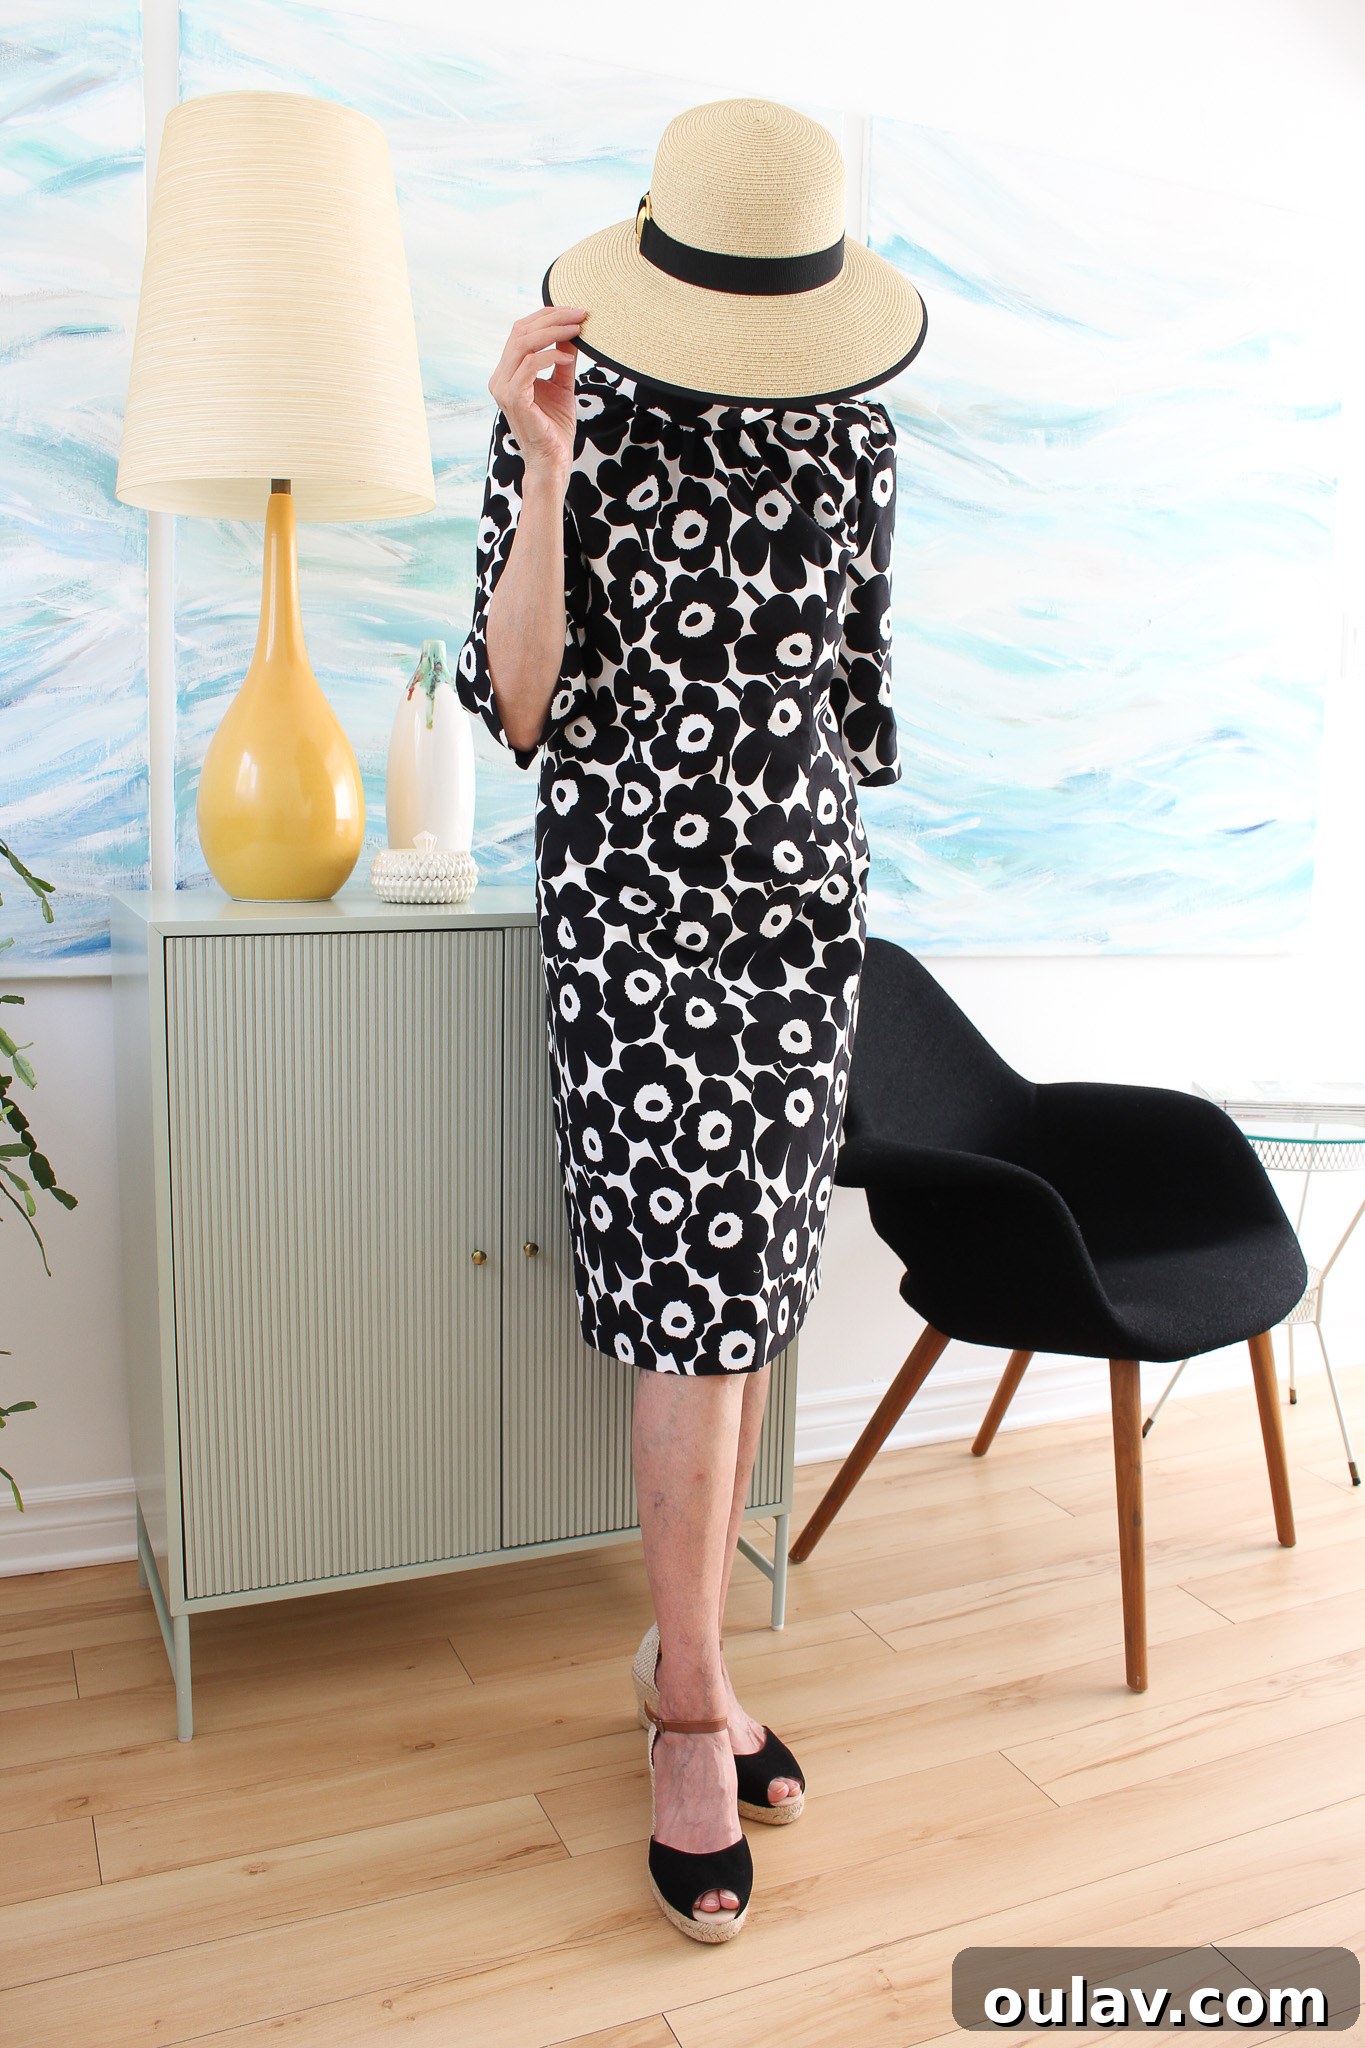
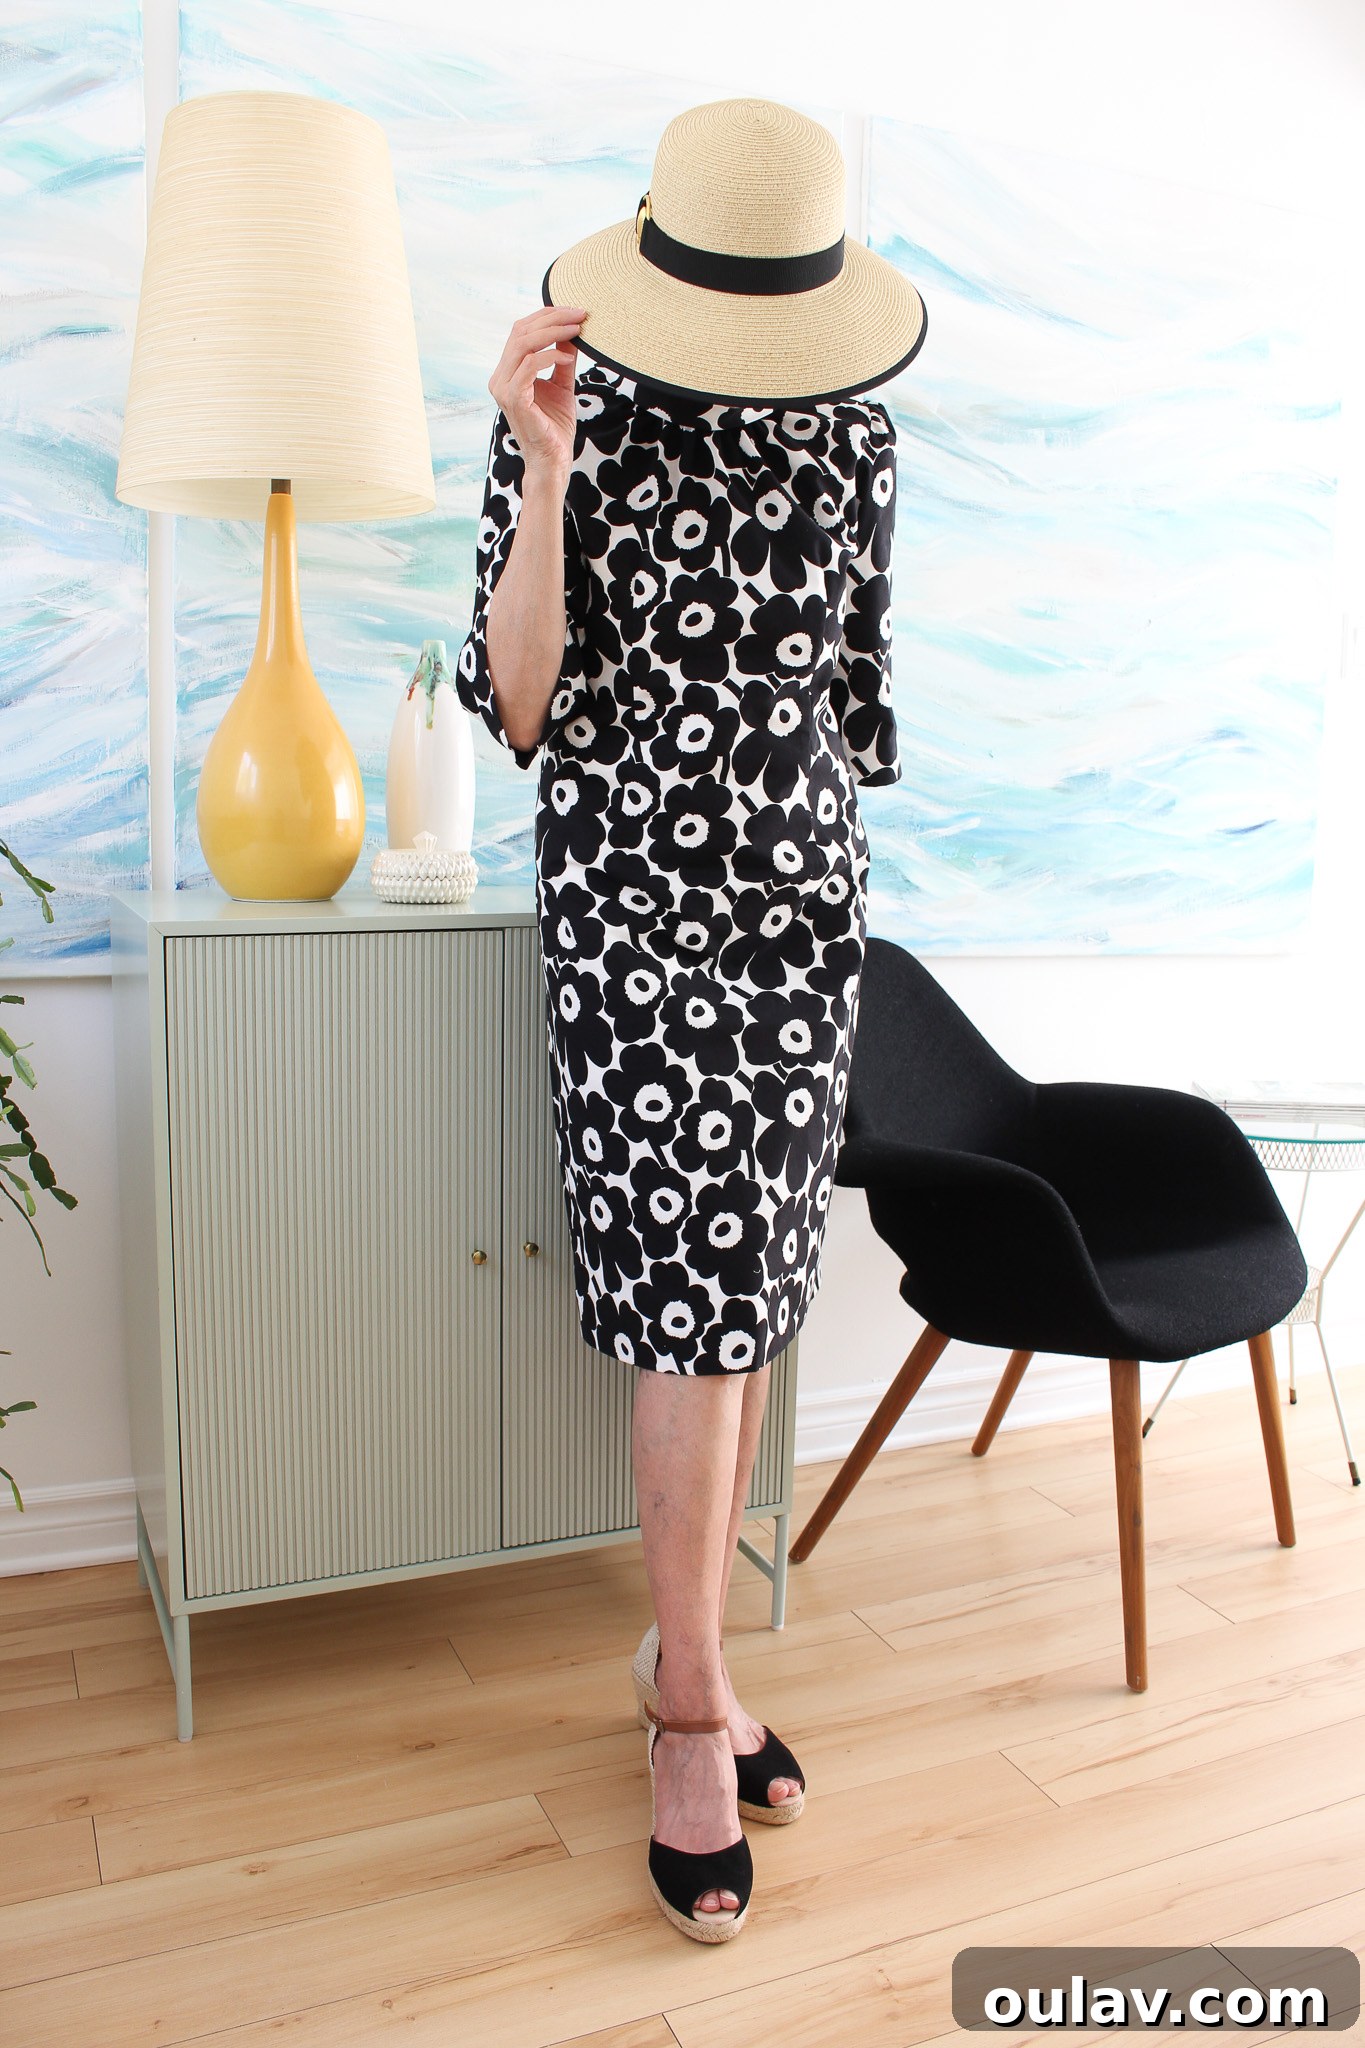
Witnessing a vision brought to life through dedicated craftsmanship is truly inspiring, and my mother’s latest creation is a testament to timeless style and skilled sewing. She meticulously crafted a stunning DIY dress, complete with a professional underlining, using an authentic 1960s dress pattern and the iconic black and white Marimekko Unikko fabric. The result is a piece of wearable art that beautifully blends vintage charm with contemporary flair. Take a moment to appreciate the elegant outcome:
Celebrating 60 Years of Marimekko’s Iconic Unikko Print: A Timeless Design Journey
This year marks a monumental occasion for design enthusiasts worldwide – the 60th Anniversary of Marimekko’s beloved Unikko print. Introduced in 1964, this bold and joyful floral pattern has captivated hearts for six decades, becoming a symbol of Finnish design and a testament to enduring beauty. To honor this significant milestone, my wonderful friends at FinnStyle, a premier destination for Finnish design, generously offered me my choice of any Marimekko Unikko fabric from their extensive collection, empowering me to sew anything my heart desired. The decision was immediate and heartfelt. For years, my mother had admired a Marimekko dress I had acquired from FinnStyle, expressing a quiet longing for a similar piece. This anniversary presented the perfect opportunity to gift her a bespoke creation of her own. Given Unikko’s debut in 1964, it felt profoundly fitting to pair this vibrant fabric with a sewing pattern from the same decade, creating a truly authentic vintage-inspired garment.
My mother once possessed an extensive and cherished collection of vintage sewing patterns, some of which you can glimpse here. Sadly, a considerable portion of this collection was lost to water damage. However, she managed to salvage several treasured pieces, and we’ve continued to expand her collection, albeit it’s still a fraction of its former glory. Among the saved patterns are some truly special ones that belonged to my grandmother, adding an invaluable layer of family history to our sewing projects. We spent enjoyable days sifting through various 1960s options, meticulously searching for a pattern that would not only embody the era’s aesthetic but also elegantly showcase the large, dramatic blooms of the Unikko print without disrupting its visual impact. The goal was to create a dress where the fabric’s artistry could truly shine.
Choosing the Perfect Vintage Sewing Pattern: Butterick 4312
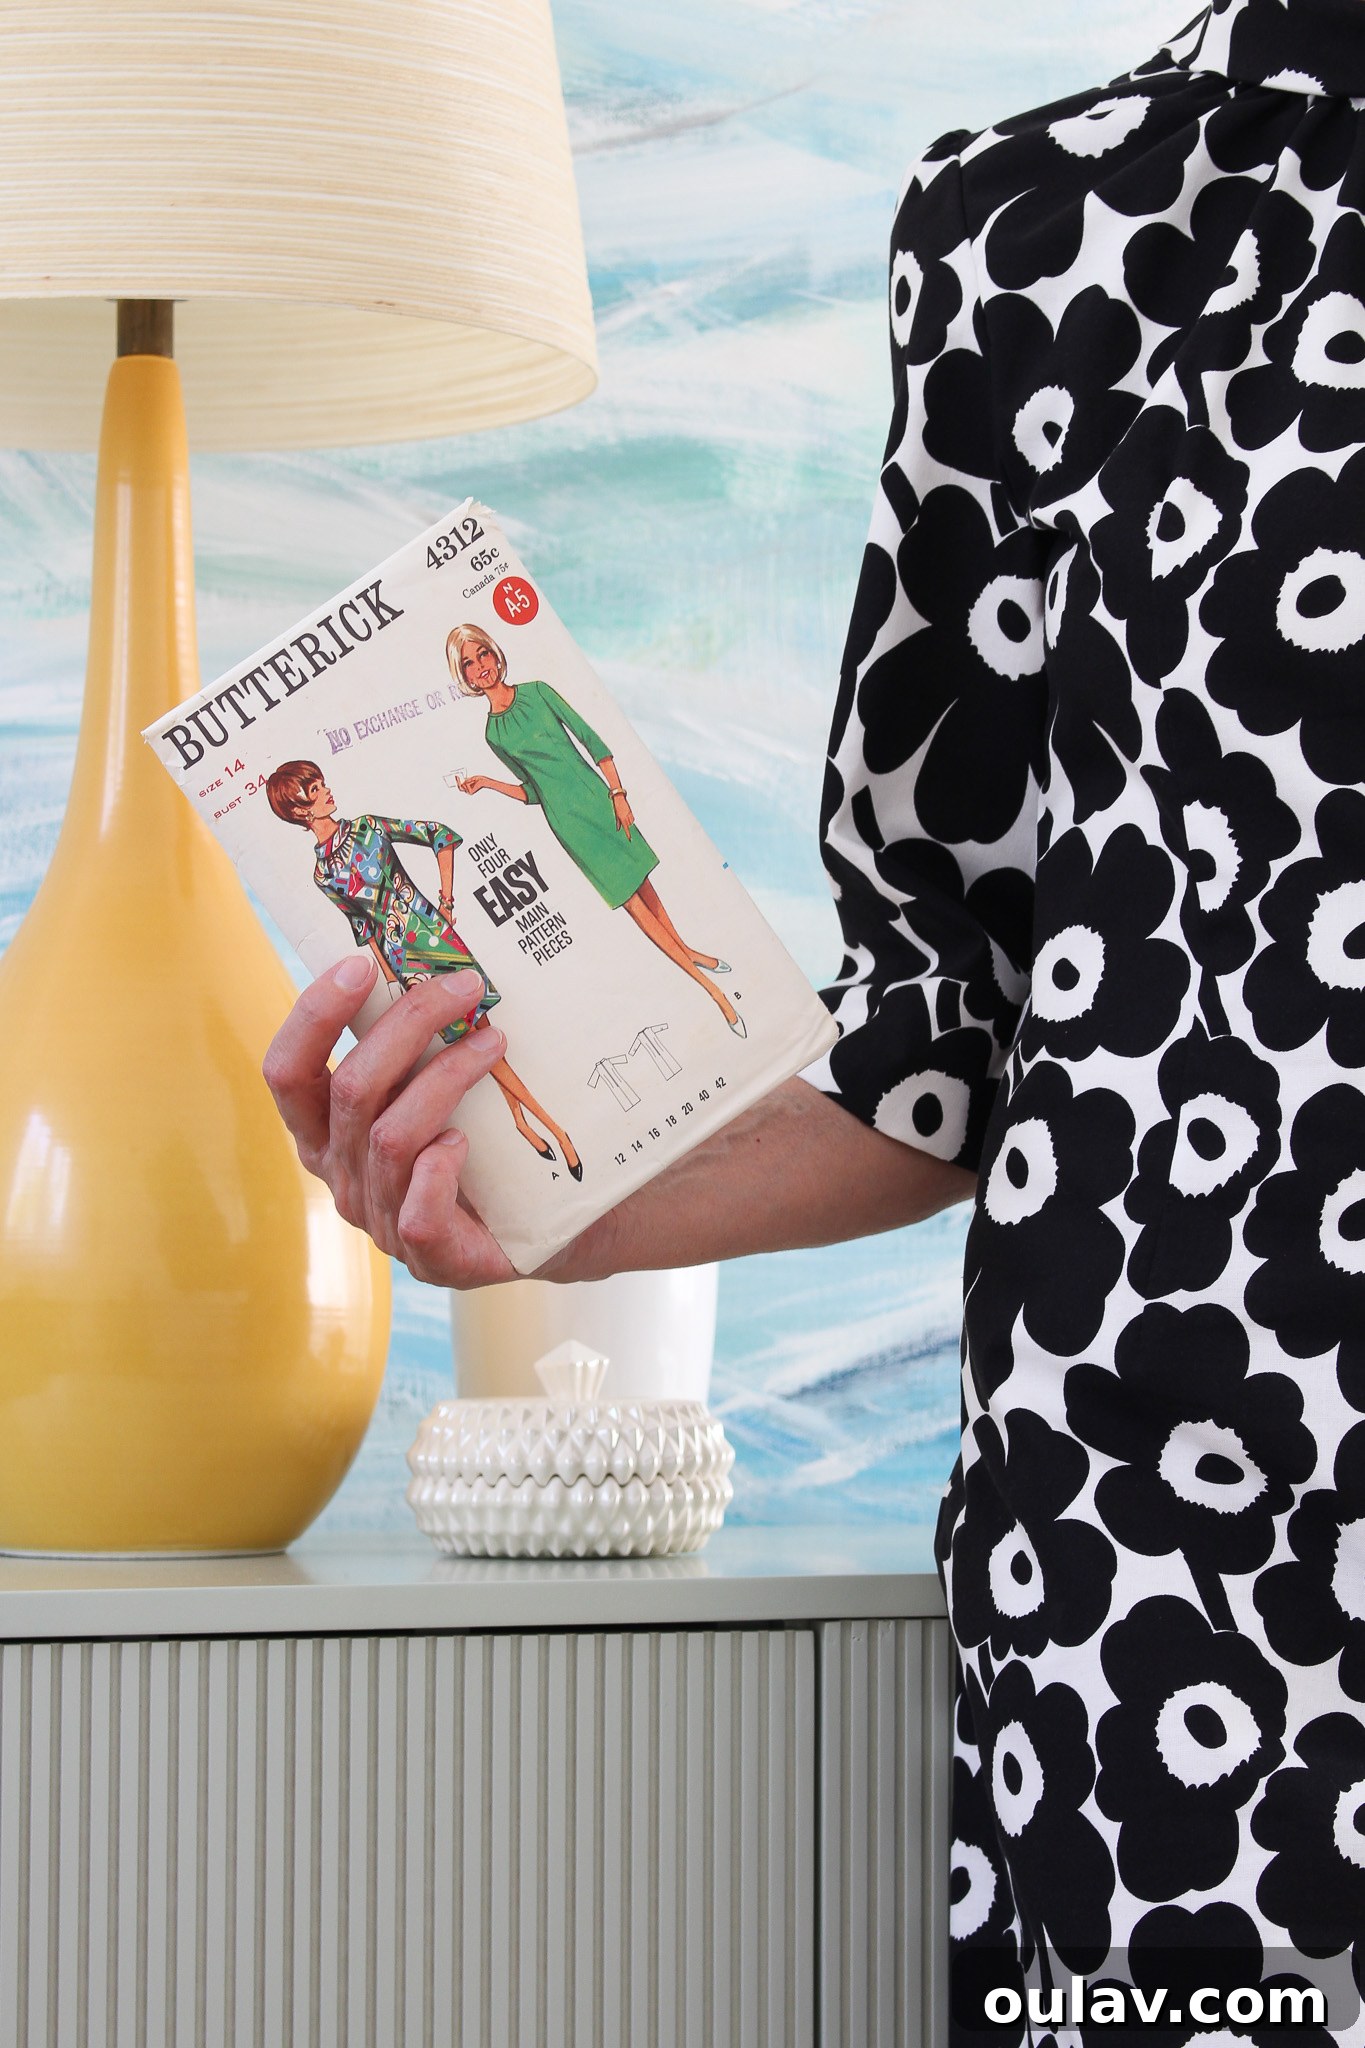
After much deliberation and joyful reminiscing over design possibilities, we finally settled on vintage Butterick Pattern 4312. This specific pattern, dating back to approximately 1964, was absolutely perfect for celebrating the Unikko print’s 60th Anniversary. The serendipity didn’t stop there; this very pattern had belonged to my Finnish grandmother (Mummu), making the choice incredibly meaningful and a beautiful tribute to our heritage. It was truly a full-circle moment, connecting generations through a shared love for sewing and design.
Upon inspecting the pattern, we discovered it had already been cut out, indicating that my Mummu had previously used it. This added an extra layer of charm and authenticity to our project. Luckily, the adjustments she had made to the pattern were precisely the modifications my mother intended to make herself, saving us time and effort. This happy coincidence highlights a valuable tip for anyone considering purchasing vintage patterns: always check if they’ve been used before. Sometimes, previous alterations can align perfectly with your own needs, making the sewing process even smoother.
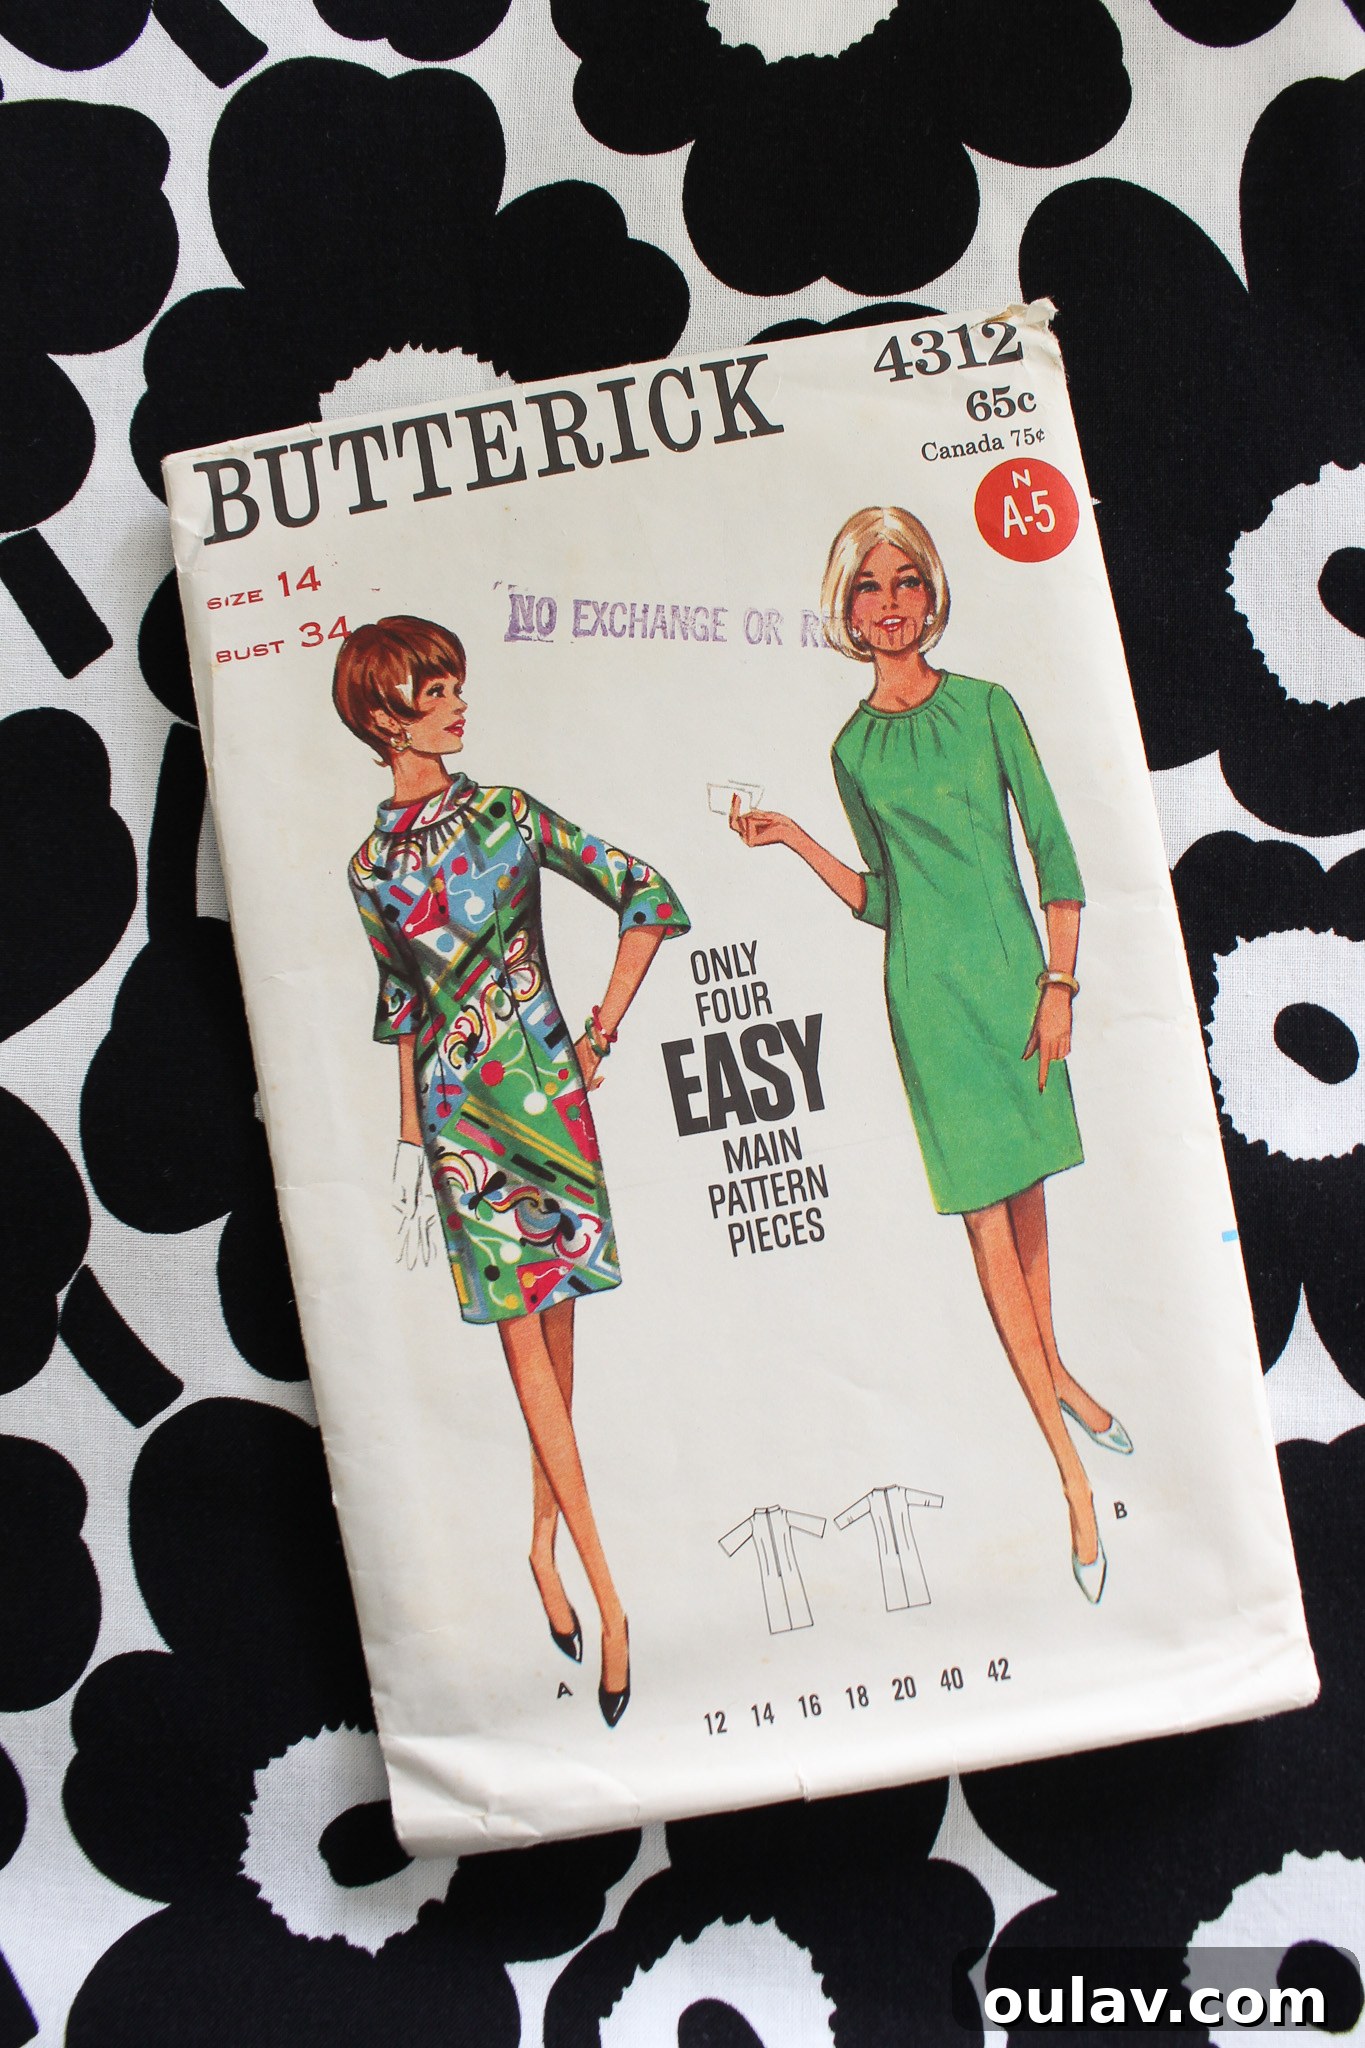
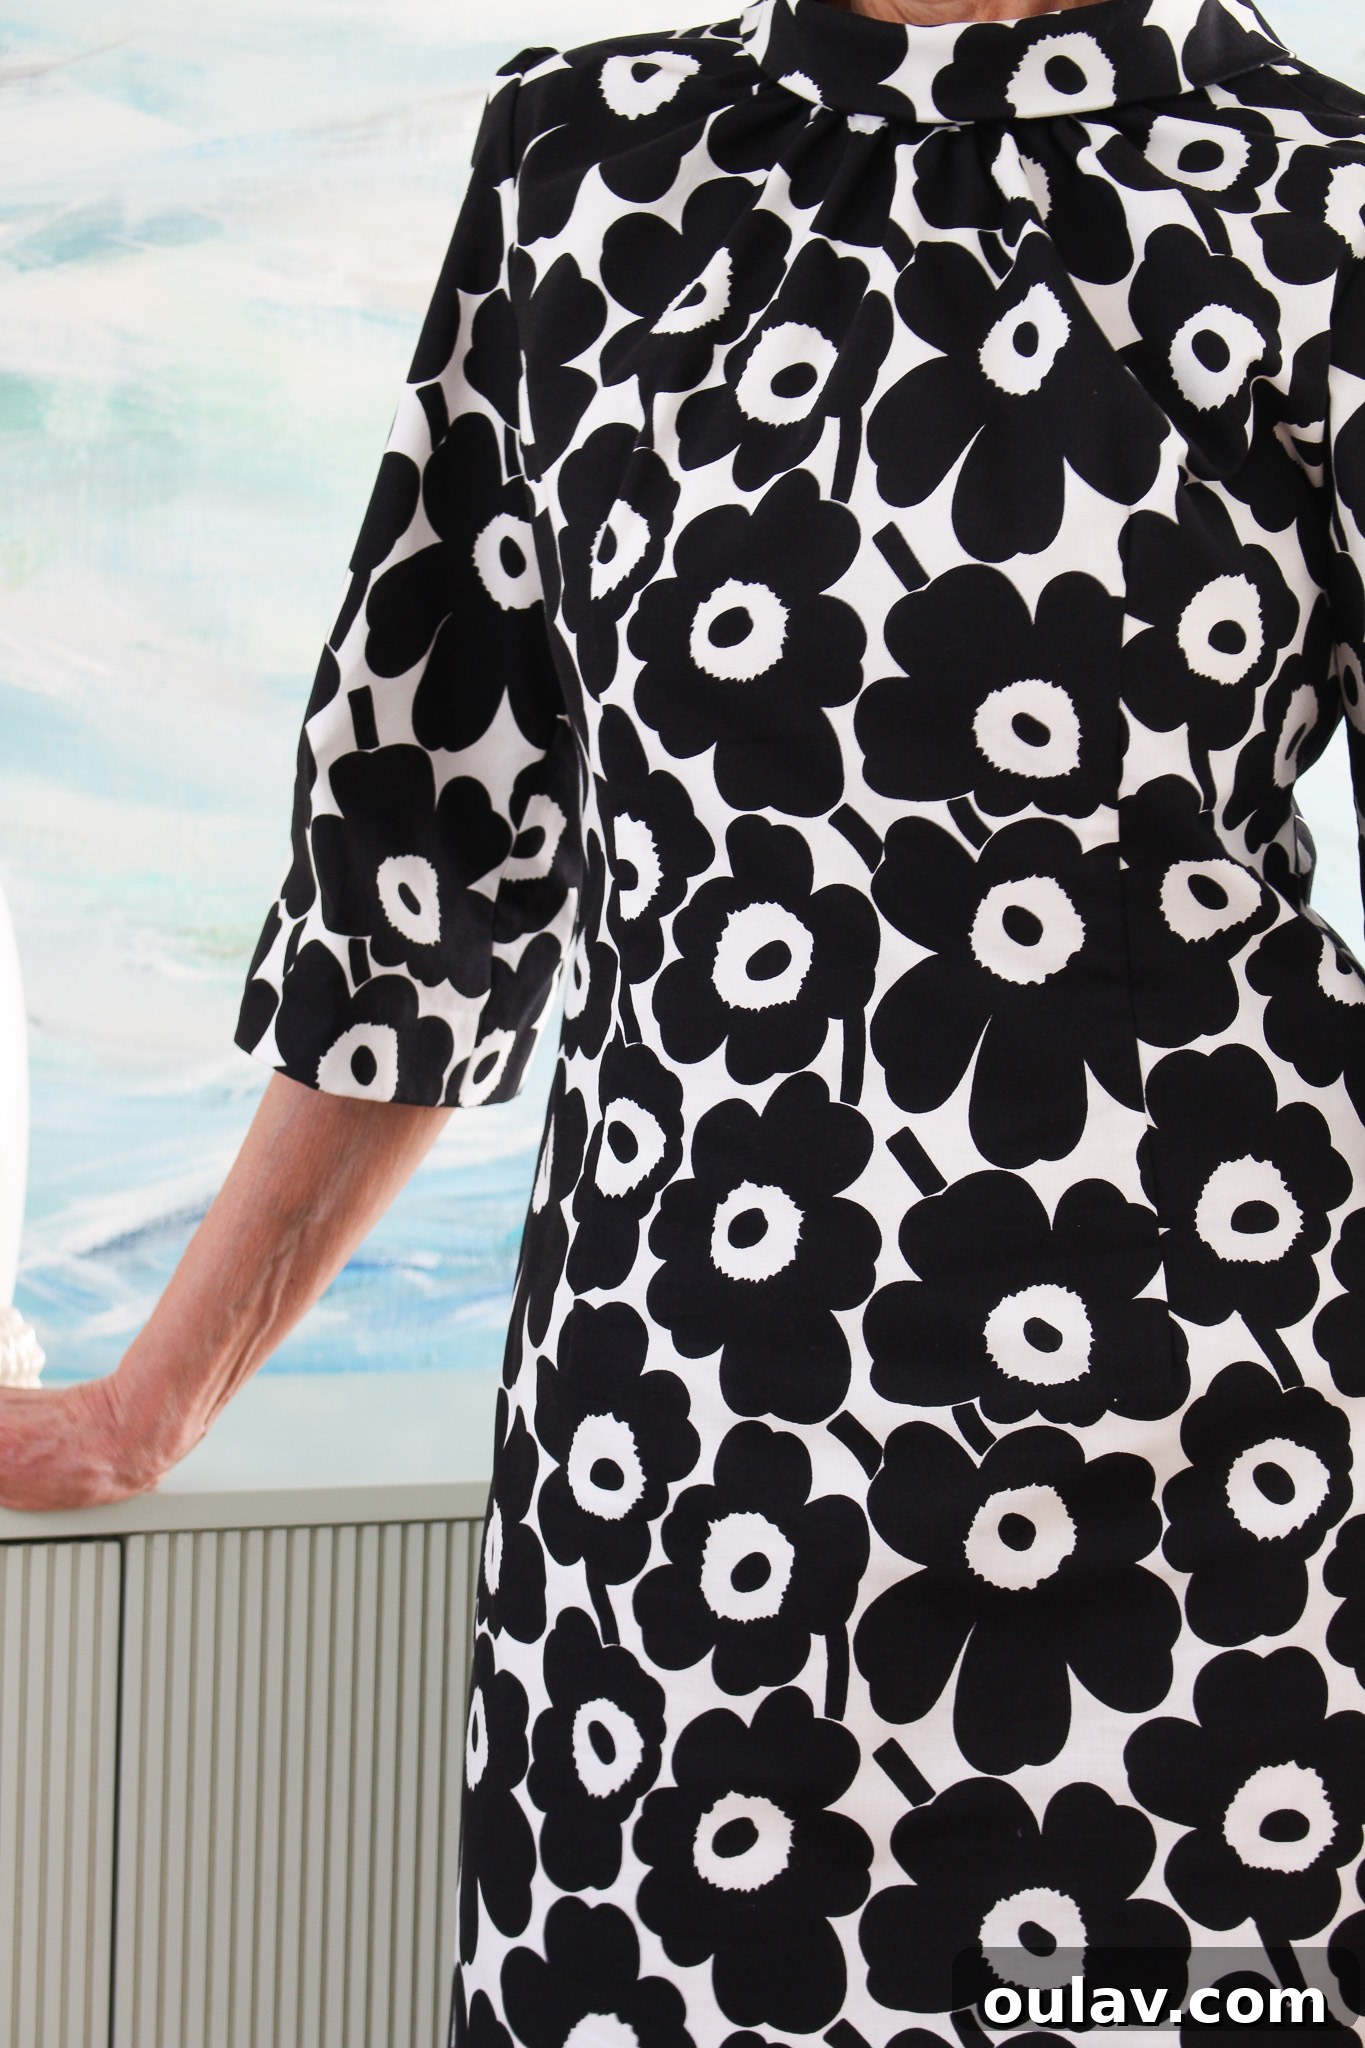
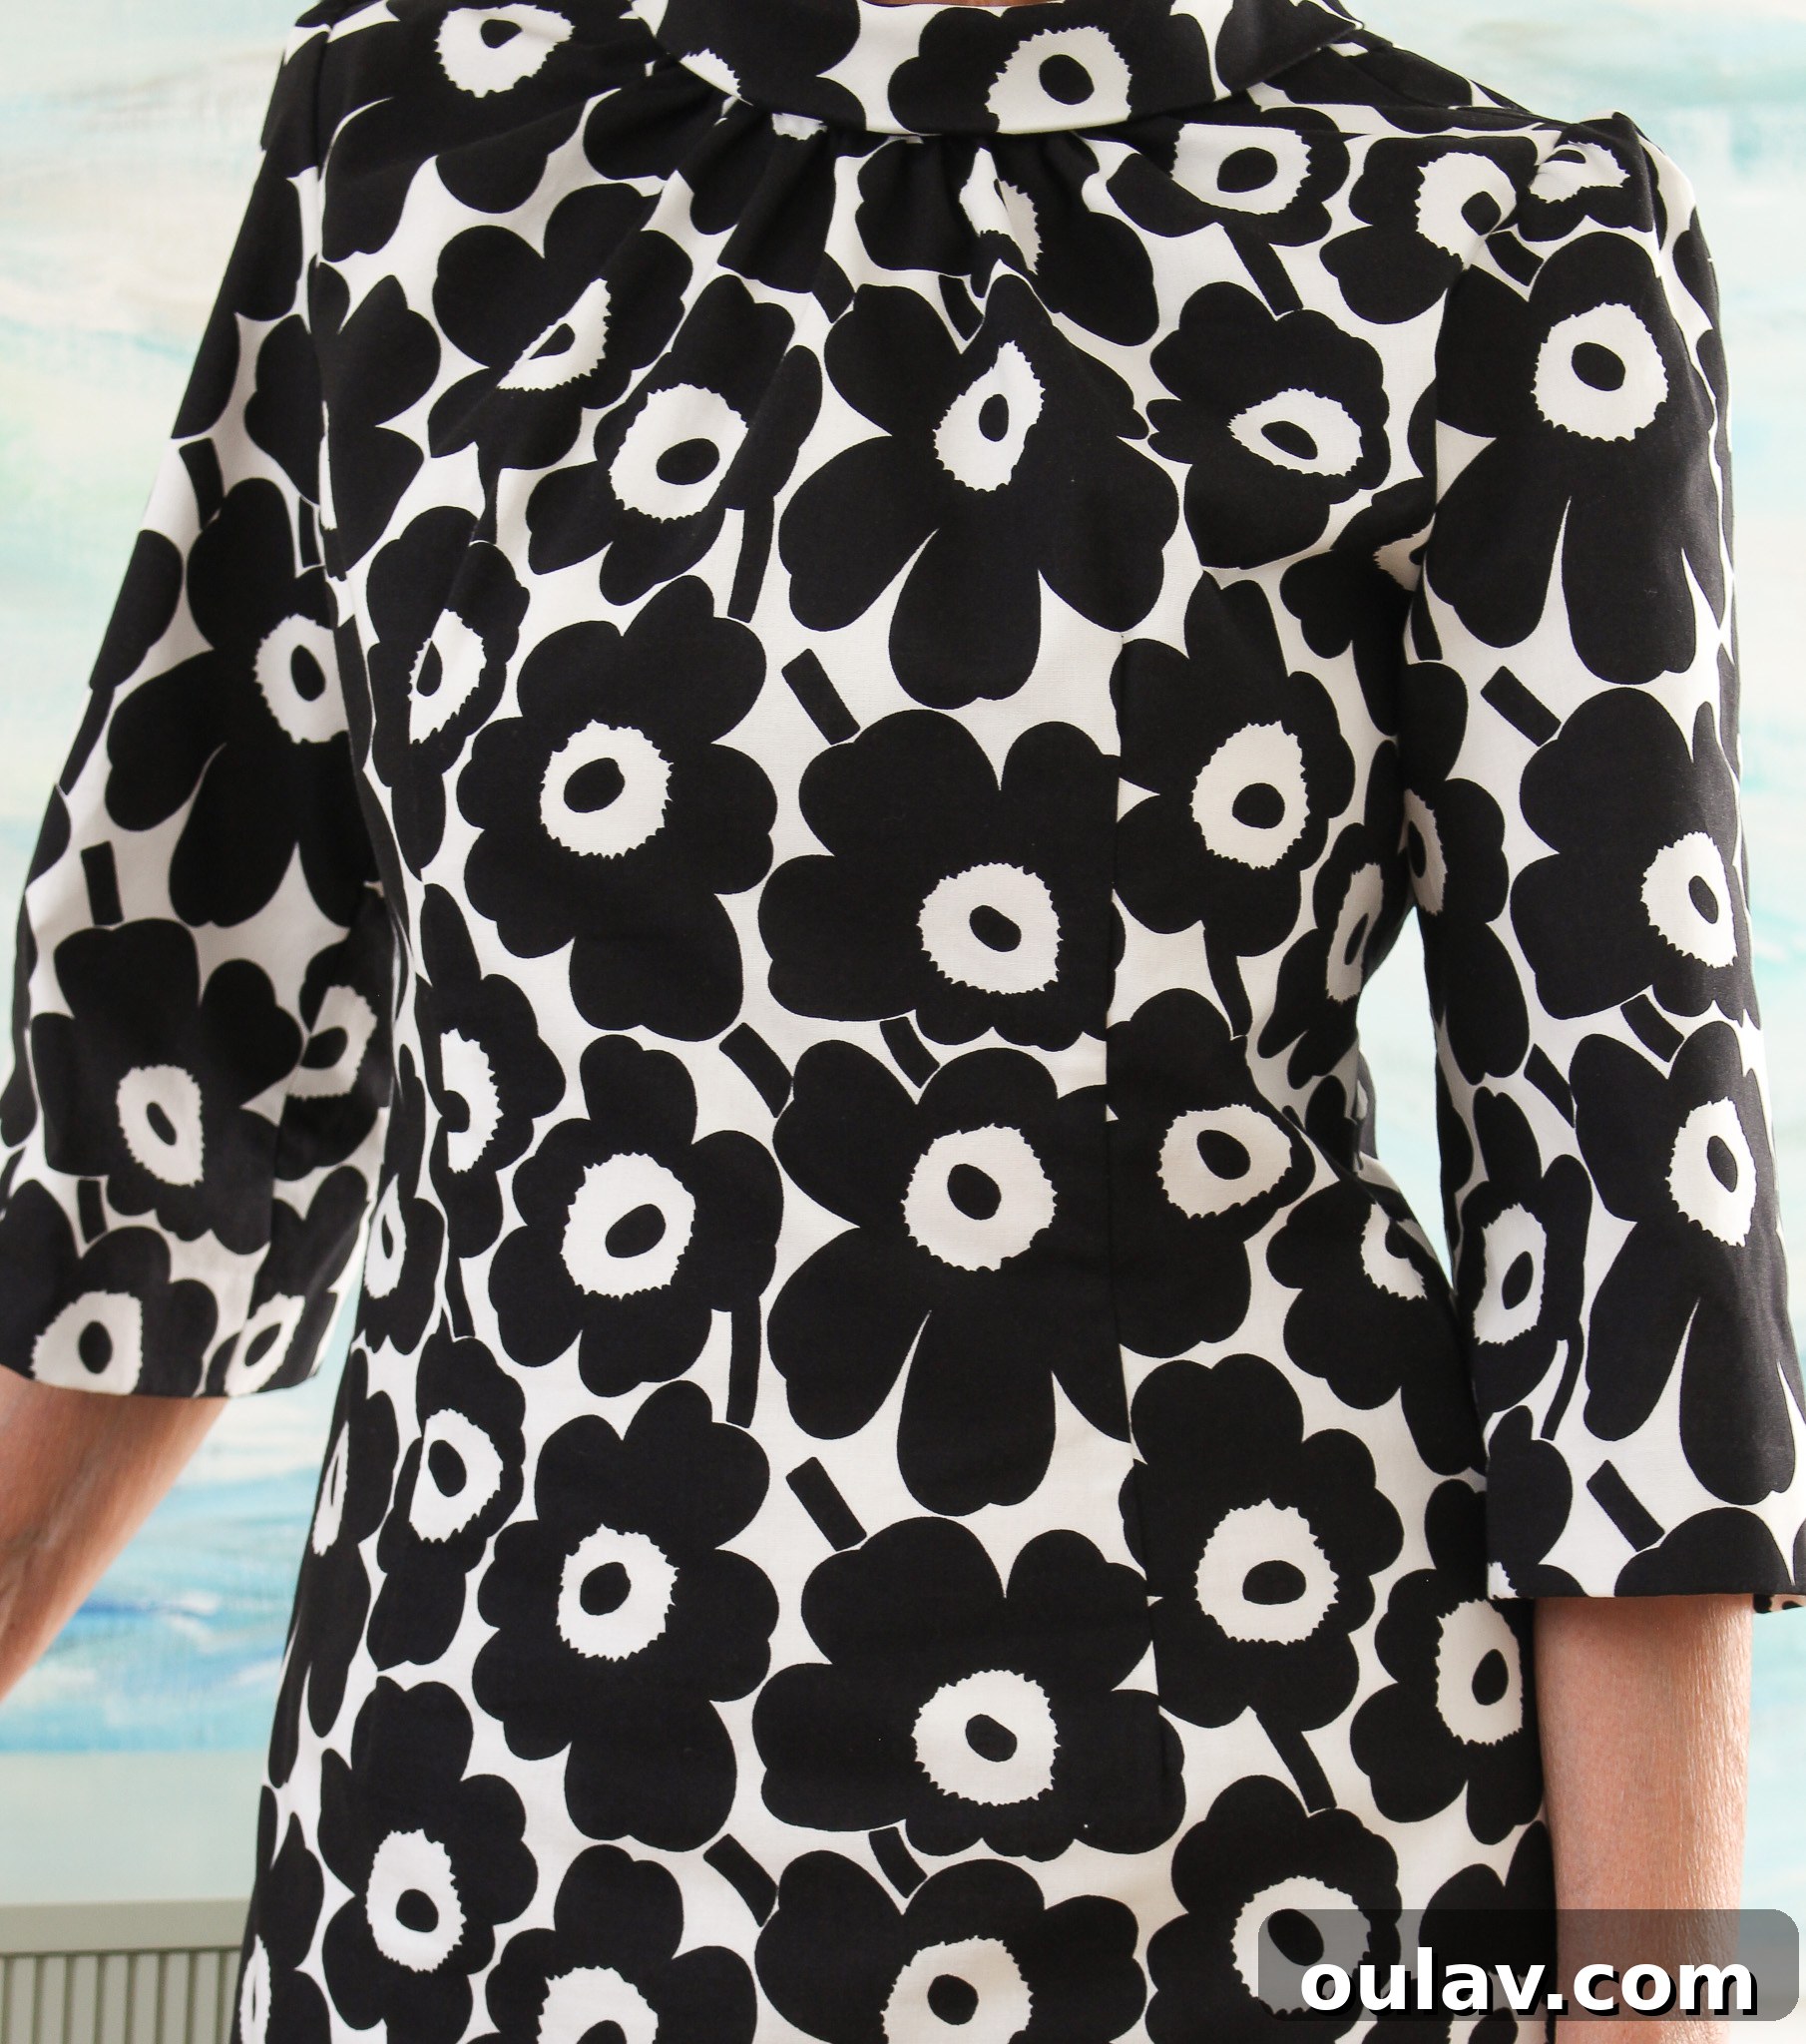
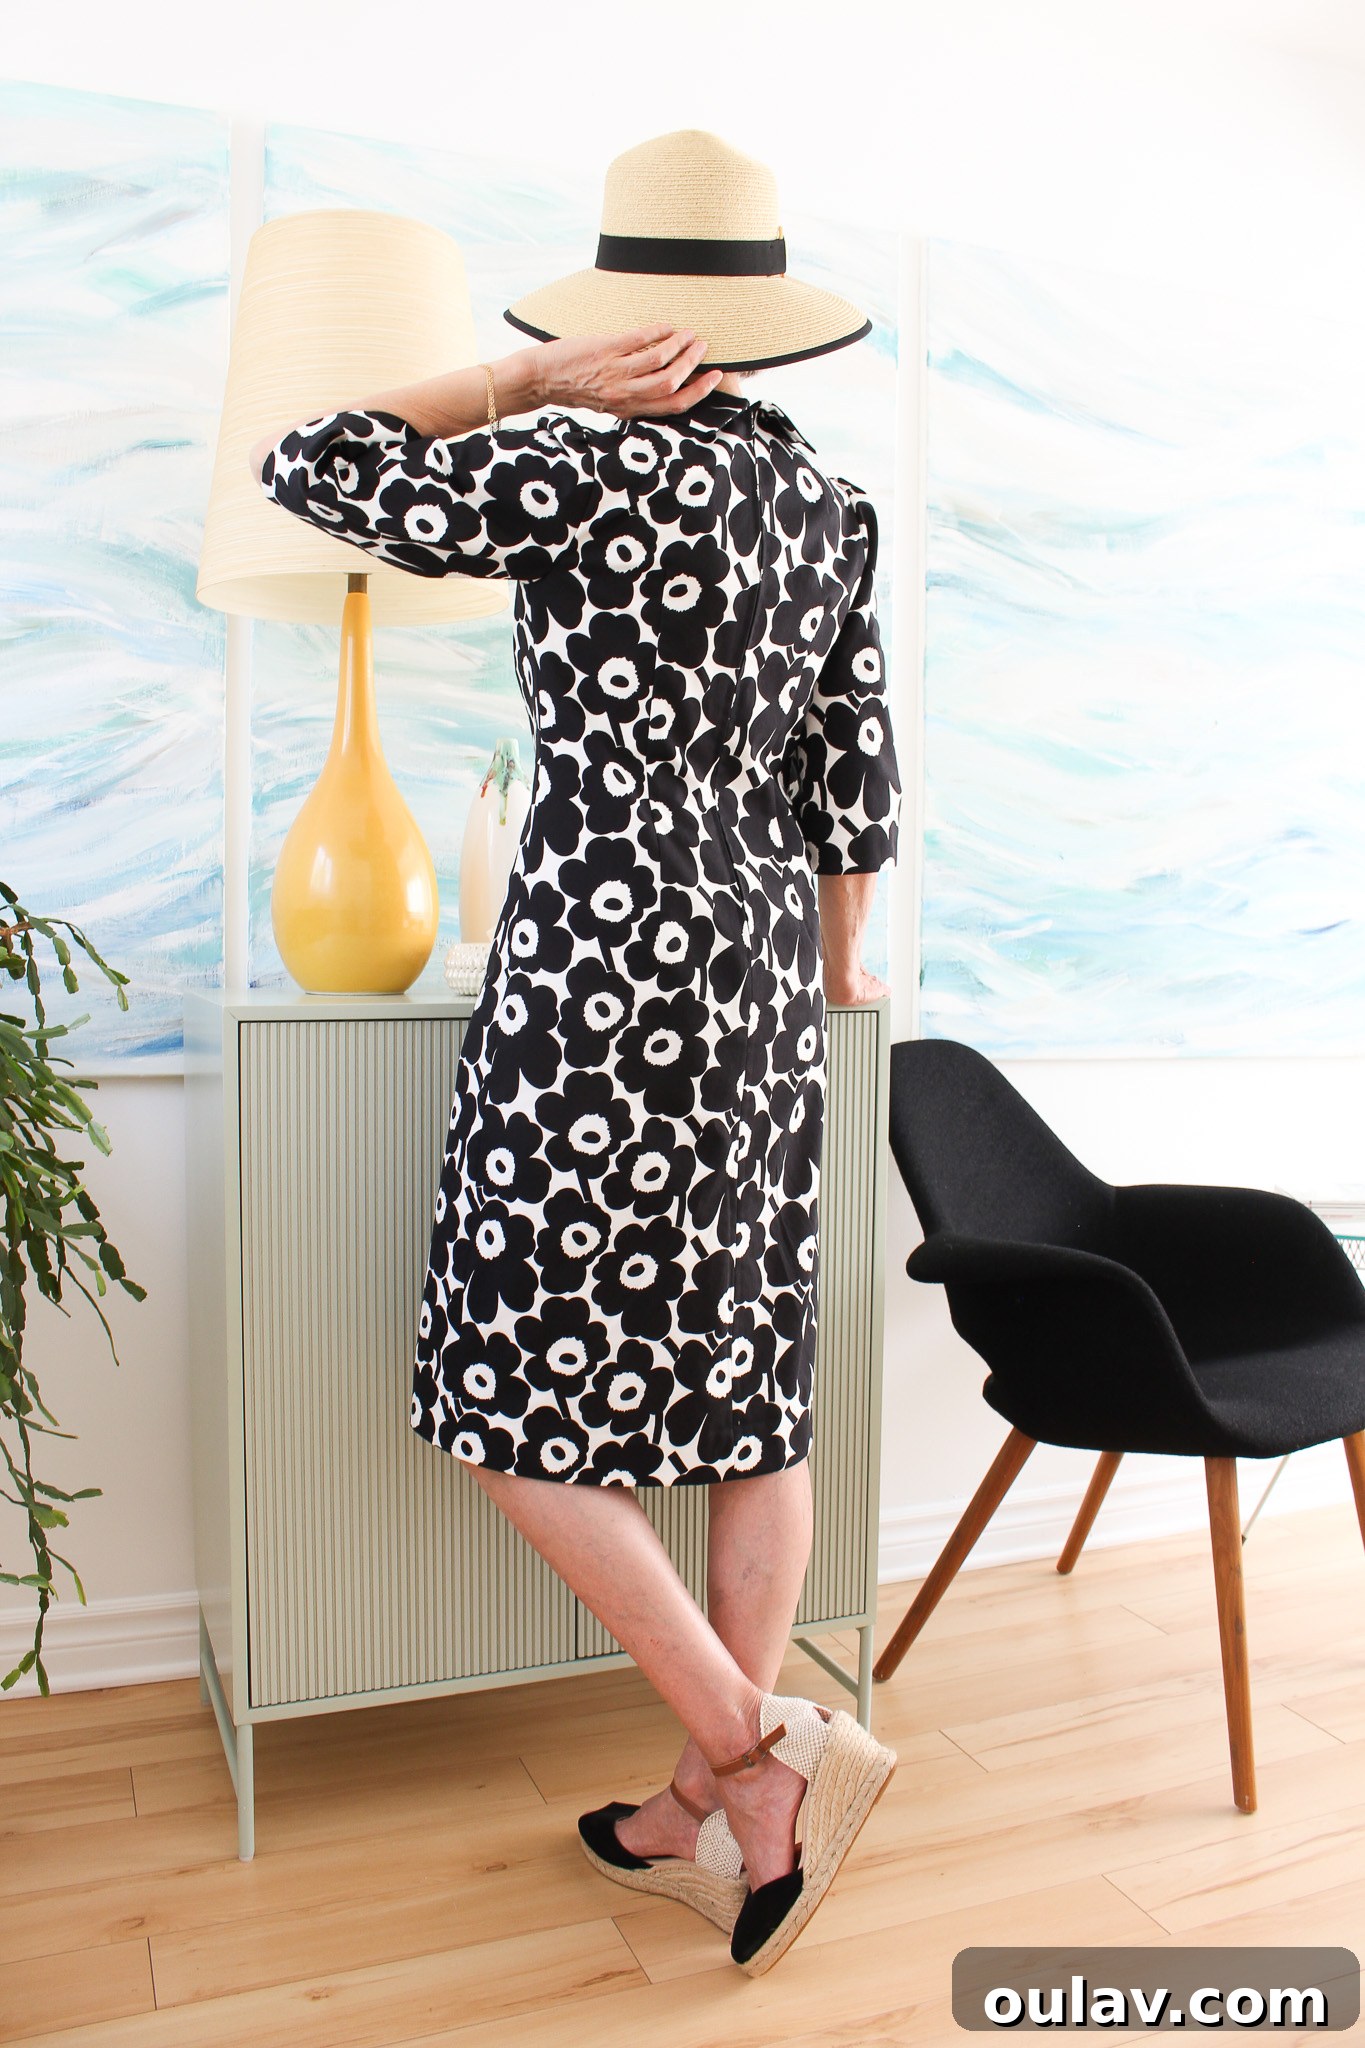
Our primary reason for selecting Butterick 4312 for this particular project was its clever design, which features minimal cuts and seams. This was crucial for showcasing the large, expressive blooms of the Marimekko Unikko print in their entirety. Some dress patterns can inadvertently “chop up” a fabric’s design, especially with bold and dramatic prints, diminishing their intended impact. This pattern, however, allowed the Unikko flowers to flow seamlessly across the garment, embodying the iconic mod 1960s aesthetic that perfectly complements the Unikko design itself. Despite being a vintage pattern, its clean lines and silhouette felt incredibly fresh and contemporary, much like the timeless Marimekko print. Furthermore, the dress’s design – featuring subtle bell sleeves and a versatile knee-length hem – makes it suitable for almost every season, excluding only the very coldest. It can be effortlessly styled with anything from elegant wedge sandals and chic sneakers to opaque tights and fashionable boots, offering remarkable versatility for various occasions and climates.
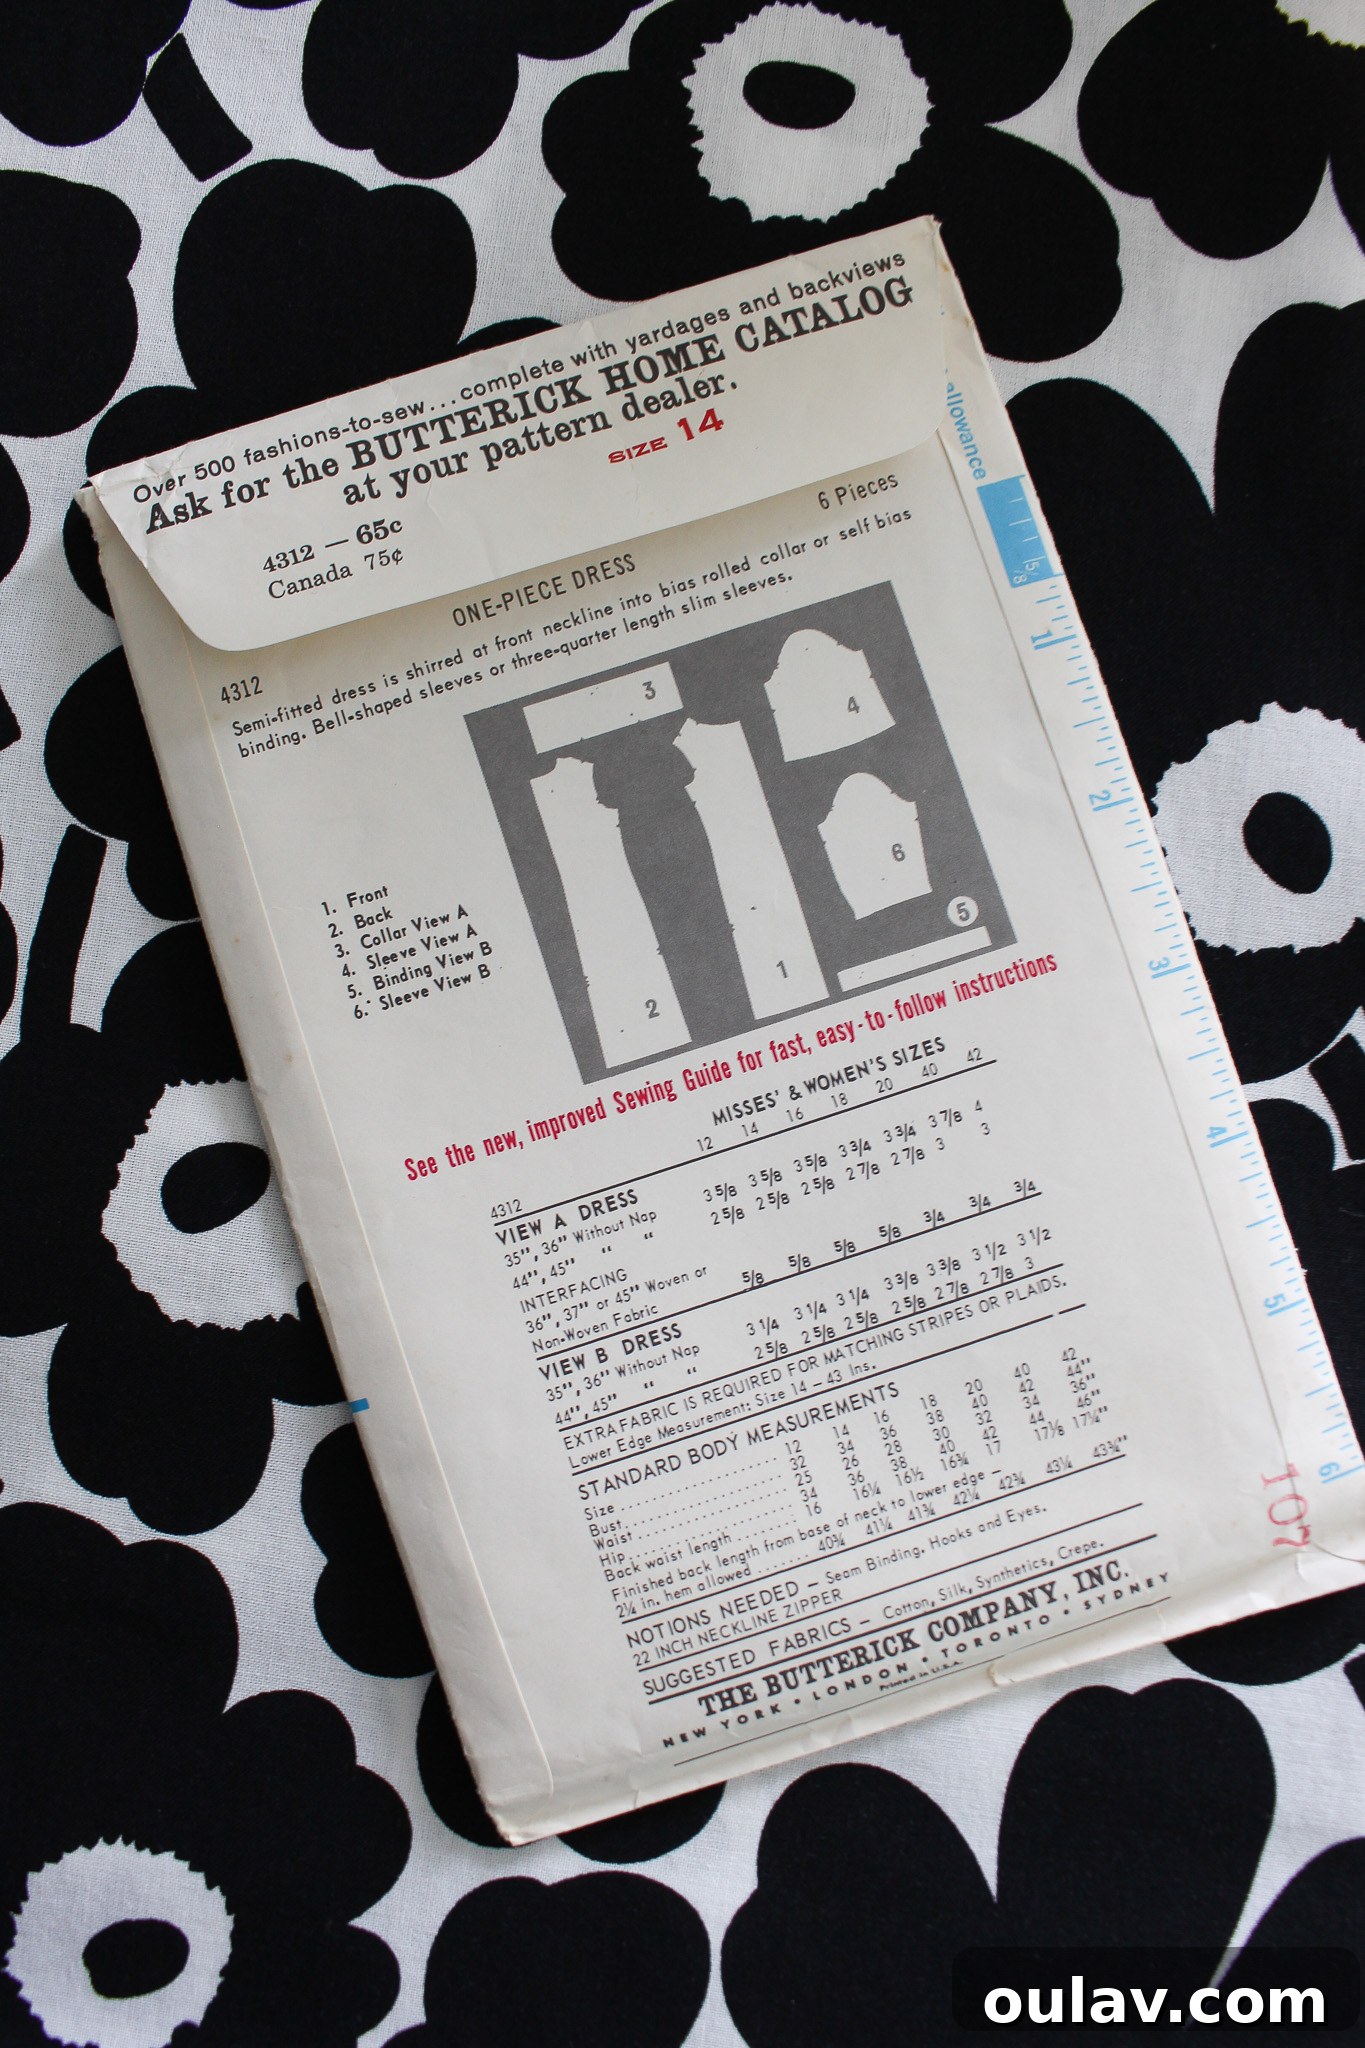
While this article won’t provide a comprehensive, step-by-step tutorial on how to construct the entire dress (as detailed instructions are thoughtfully included within the vintage pattern itself), I will offer a concise overview of the sewing process. My focus will primarily be on sharing essential tips for preparing cotton fabric for sewing, a crucial first step for any garment. More importantly, I’ll delve into the specific technique of “underlining” that my mother incorporated. This specialized finishing touch truly elevated the dress, lending it a professional, high-quality finish that is often overlooked in many online sewing tutorials. I believe this technique deserves more recognition for the exquisite results it yields. Additionally, I’m excited to share a collection of photographs of the completed DIY dress, not only as a source of inspiration but also for the sheer joy of admiring my mother’s exceptional work!
Essential Guide: How to Prepare Cotton Fabric for Sewing
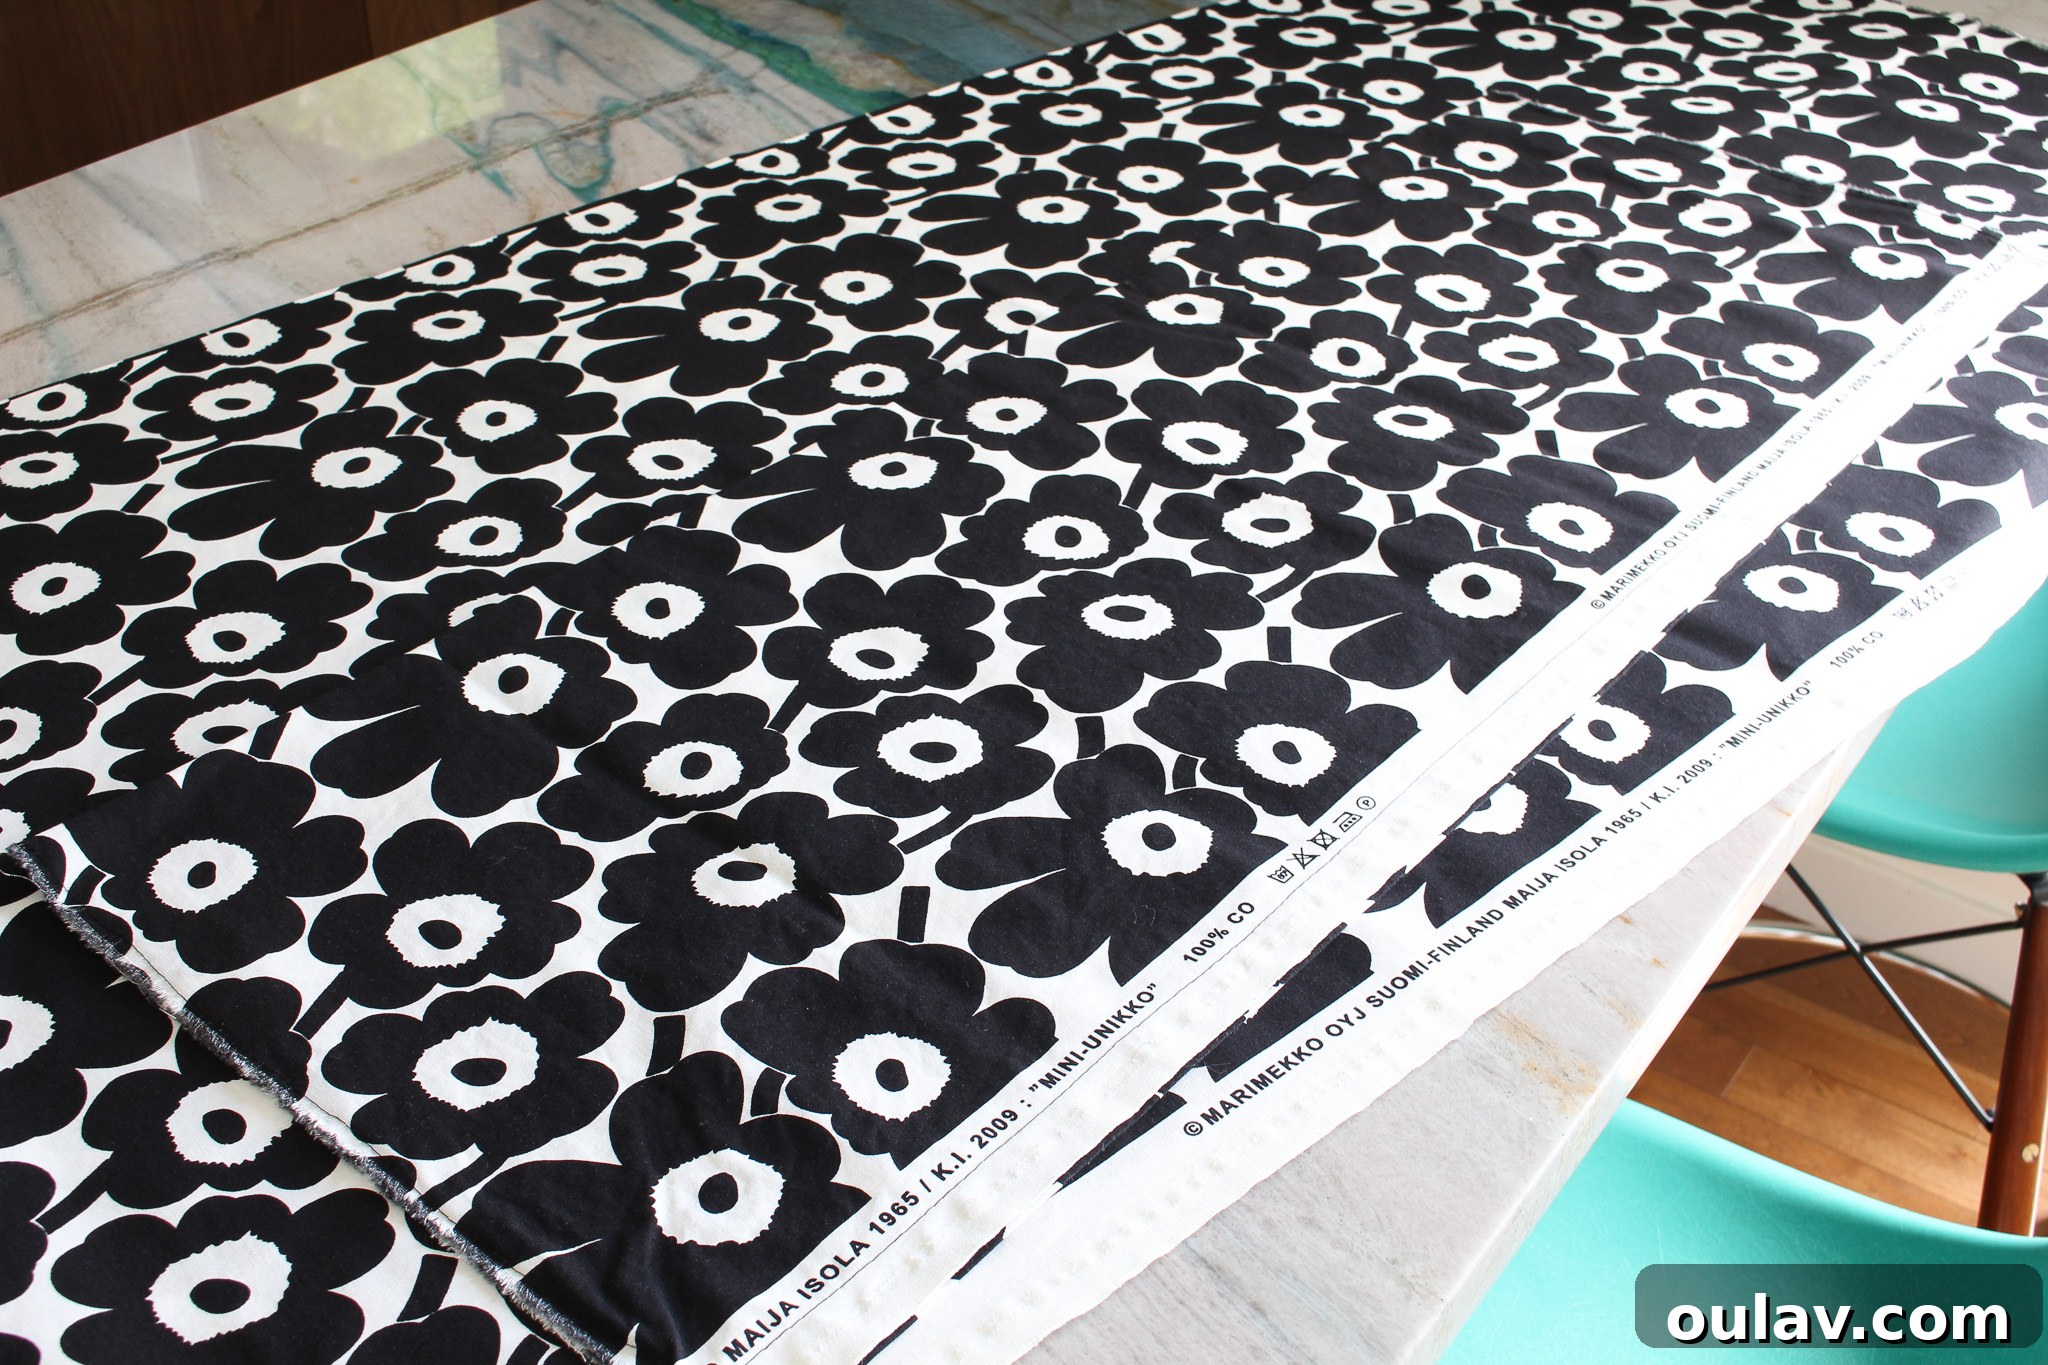
Proper preparation is the cornerstone of any successful sewing project, especially when working with beautiful and often expensive fabrics like Marimekko cotton. This fabric typically comes off the bolt folded in half, presenting two selvage sides. To safeguard your fabric from excessive fraying, wrinkling, or twisting during the crucial laundering process, it’s highly recommended to perform a simple but effective step: sew across each cut end and down the open side where the two selvages meet, using the largest stitch setting on your sewing machine (a basting stitch). Essentially, you are temporarily creating a closed piece of fabric. This preventative measure might seem minor, but it’s invaluable for protecting your investment and ensuring the fabric emerges from the washing machine perfectly intact and manageable.
Once secured, wash the fabric in cold water with a minimal amount of gentle detergent. This initial wash serves several vital purposes: it effectively removes any sizing, residual chemicals, or manufacturing impurities that might be present, and crucially, it pre-shrinks the fabric. Pre-shrinking is essential to prevent future shrinkage of your finished garment, ensuring it maintains its intended size and shape after subsequent washes. After washing, you have two options for drying: line dry the fabric if you intend to launder your finished garment this way, or tumble dry on a low heat setting. Always choose a drying method that mimics how you’ll care for the final dress, to minimize any surprises down the line.
Understanding Underlining in Garment Construction
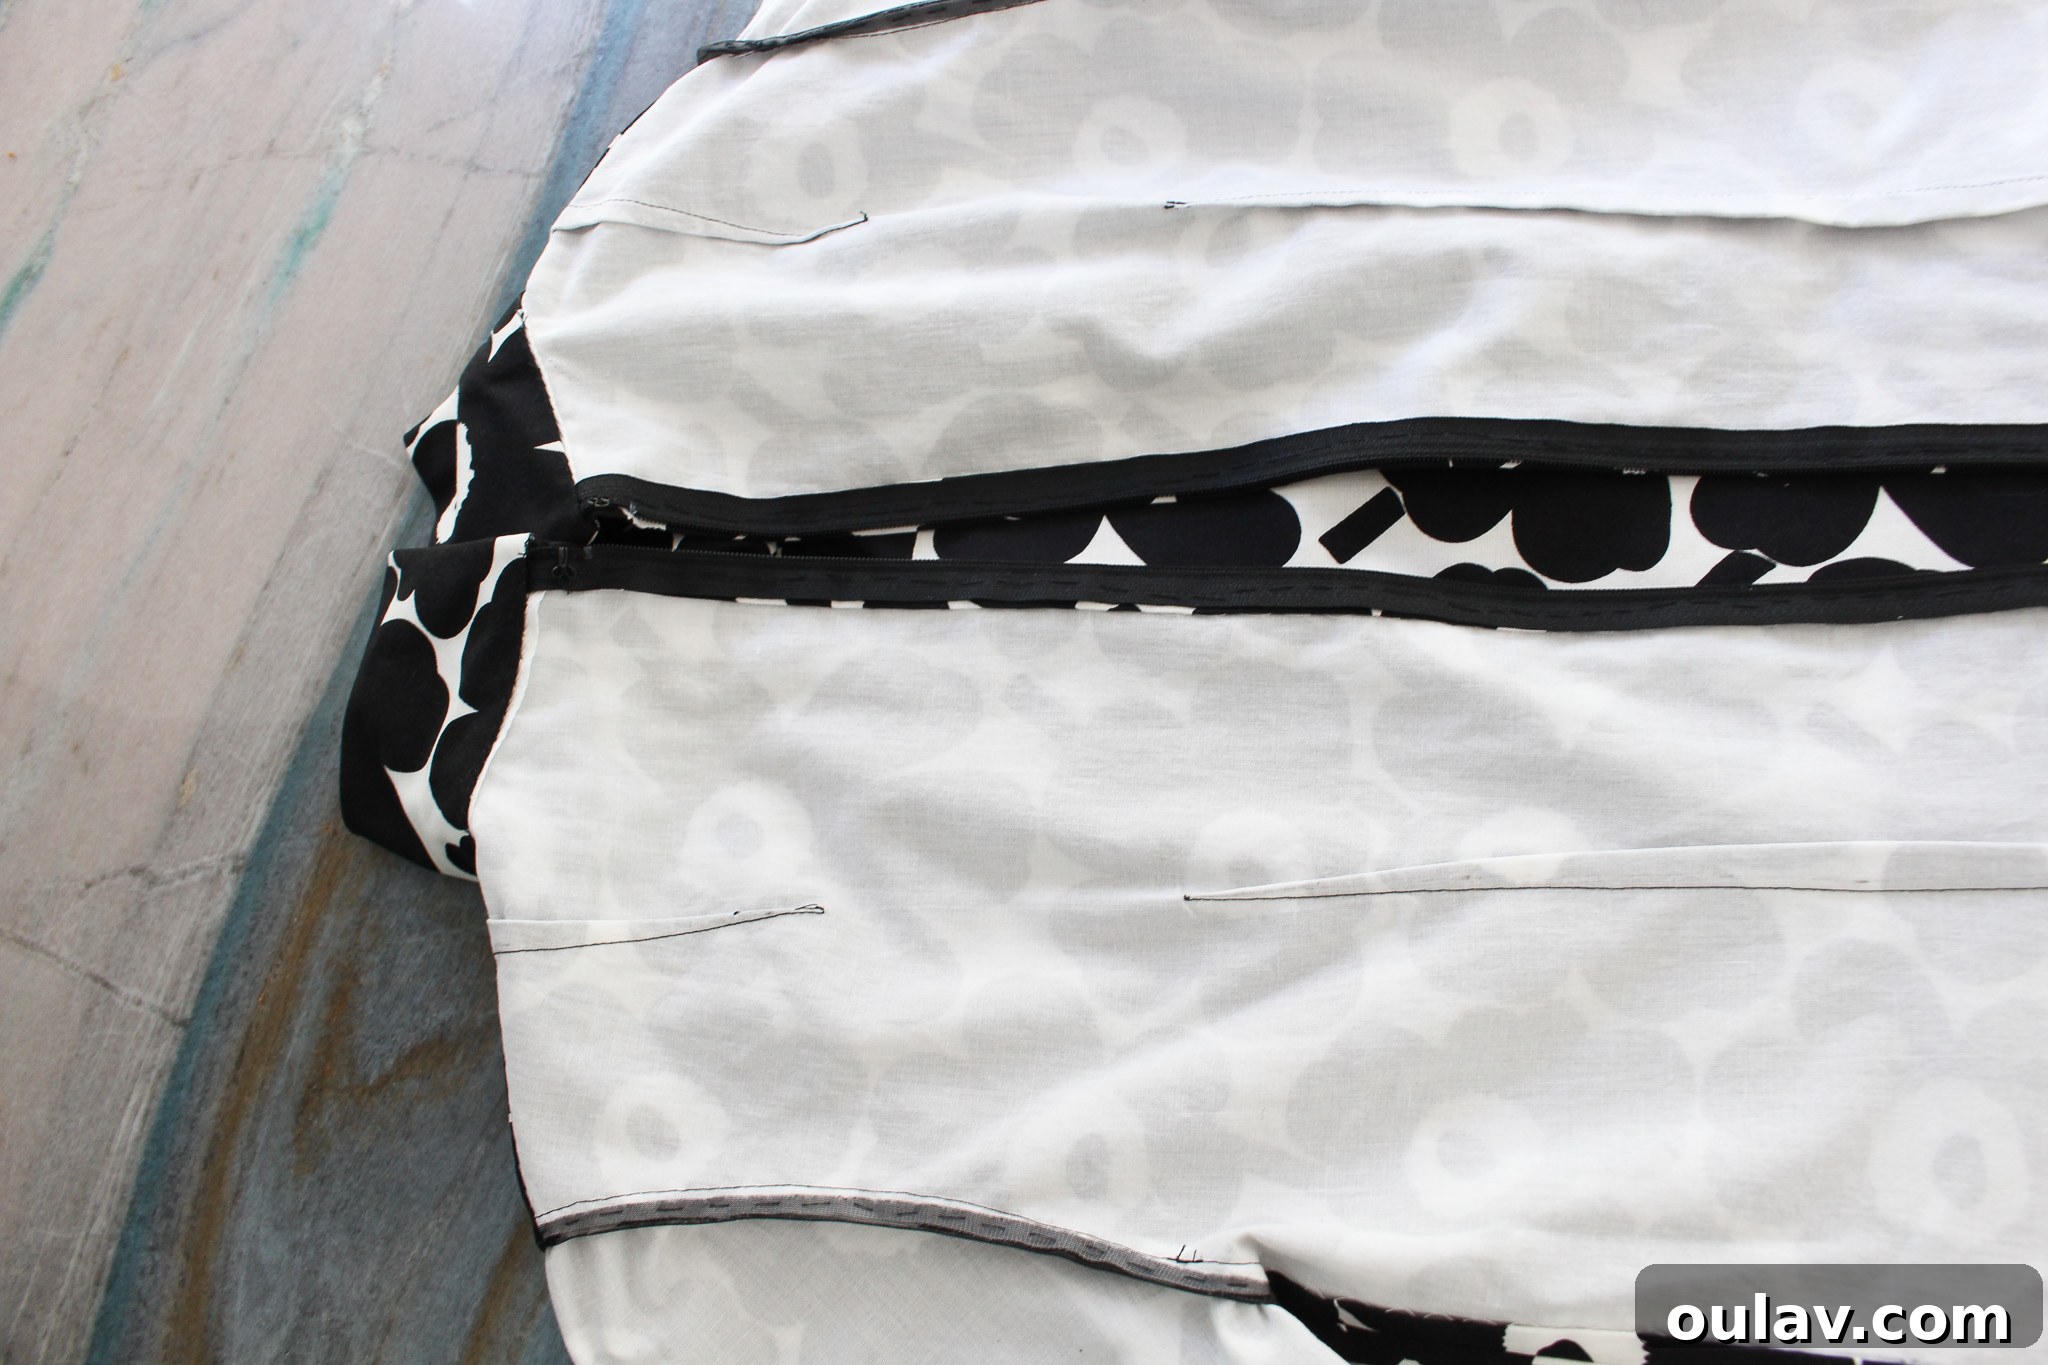
What truly sets my mother’s DIY dress apart, imparting a sense of bespoke quality often found in high-end garments, is her masterful use of underlining. Underlining a garment is a distinct and refined sewing technique that involves essentially creating a “two-ply” fabric. It means adding a secondary fabric layer beneath your main garment fabric. However, it’s crucial to distinguish underlining from a traditional lining. While a lining is typically constructed as a separate garment layer and then loosely attached within the main garment (allowing you to typically reach between the lining and the outer fabric, as seen in the interior of a skirt), underlining is treated as one with the main fabric during most of the construction process. The two layers are sewn together at their edges, effectively becoming a single, integrated piece of fabric for construction purposes. This integration means that once the garment is complete, you cannot easily separate or reach between the layers; they function as one unit.
For this specific Marimekko dress project, my mother meticulously chose a plain white cotton voile as the underlining fabric. Cotton voile is an excellent choice for underlining due to its incredibly lightweight and semi-sheer nature, providing support without adding bulk. Another popular and effective option often favored by sewers for underlining is cotton batiste, which shares similar desirable qualities. The selection of a white underlining was particularly intentional here, as it plays a significant role in enhancing the visual vibrancy of the black and white Unikko print, ensuring the white areas appear crisp and bright.
The Undeniable Benefits of Adding Underlining to a Dress
The decision to incorporate underlining, as my mother did, is a mark of skilled craftsmanship and offers a multitude of benefits that profoundly enhance the quality and longevity of a handmade garment. Understanding these advantages can inspire any sewer to elevate their projects:
- Enhanced Body and Stability: Underlining provides critical body and stability to the main fabric. This additional layer helps the garment maintain its intended shape and structure, resulting in a more polished and professional drape. It transforms softer fabrics into more substantial pieces, giving the finished dress a refined silhouette.
- Wrinkle Minimization: Natural fabrics, especially cotton, are prone to wrinkling, particularly in areas of stress like sitting. Underlining acts as a subtle support system, significantly reducing the tendency of the fabric to crease and wrinkle. This ensures the dress looks smoother and more pristine throughout the day, minimizing the need for constant adjustments.
- Concealed Construction Marks and Seams: One of the most practical benefits of underlining is its ability to provide an invisible base for all internal construction marks. Darts, waistlines, and other pattern markings can be transferred solely onto the underlining, eliminating any possibility of them showing through to the right side of the main fabric. Furthermore, for high-contrast fabrics or those with a loose weave, underlining effectively hides the raw edges of seams, presenting a clean and neat interior finish.
- Couture-Level Invisible Hems: Underlining is a secret weapon for achieving truly invisible hems, a hallmark of couture sewing. When hand stitching is performed directly onto the underlining, the stitches become completely imperceptible from the garment’s exterior. This technique elevates the finish, making the hem appear seamless and lending an exquisite, professional quality to handmade clothing.
- Color Enhancement and Opacity: Depending on the color of the underlining chosen, it can subtly shift and enhance the hue of the main fabric. In the case of this Marimekko Unikko dress, a crisp white cotton voile underlining dramatically intensified the contrast of the bold black and white print, making the white areas appear even more vibrant and striking. Moreover, underlining significantly increases the opacity of the fabric. This is a game-changer for lighter or thinner materials, ensuring the garment is never see-through, thereby eliminating the need for slips or carefully selected neutral undergarments. This added confidence in wear is invaluable.
In essence, underlining transforms a well-sewn dress into a beautifully constructed, durable, and truly professional piece that stands the test of time and wear.
Step-by-Step Guide: How to Sew a DIY Dress with Underlining
Embarking on a sewing project with underlining adds a layer of refinement that is truly rewarding. Follow these steps to create a beautiful, structured garment:
- Pre-Treat Both Fabrics: Begin by properly pre-treating both your main fabric (the Marimekko cotton in this case) and your chosen underlining fabric (e.g., cotton voile or batiste). Refer to the “How to Prepare Cotton Fabric for Sewing” section above for detailed instructions on pre-washing and basting the edges to prevent fraying and shrinkage.
- Cut Pattern Pieces (Main Fabric): Carefully lay out your main fabric. If you’re using a multi-size pattern, accurately determine and select your desired size. Pin the pattern pieces securely onto the main fabric, paying close attention to grain lines, fabric direction (if applicable, using “with nap” instructions), and any specific print placement you desire. Cut out all necessary pattern pieces.
- Cut Pattern Pieces (Underlining Fabric): Using the same pattern pieces, cut an identical set from your underlining fabric. Ensure precision in cutting, as these layers will be treated as one.
- Make Pattern Adjustments: Before proceeding, make any necessary adjustments to your pattern pieces, such as lengthening or shortening the hem, modifying sleeve length, or adjusting for fit. Apply these adjustments to both the main fabric and underlining pieces before moving to the next step.
- Mark Construction Details: Transfer all essential construction marks – including darts, waistlines, button placements, and pocket guides – onto your underlining fabric. A key advantage of underlining is that you generally do not need to mark directly onto your beautiful main fabric, preventing any potential ghosting or marks showing through.
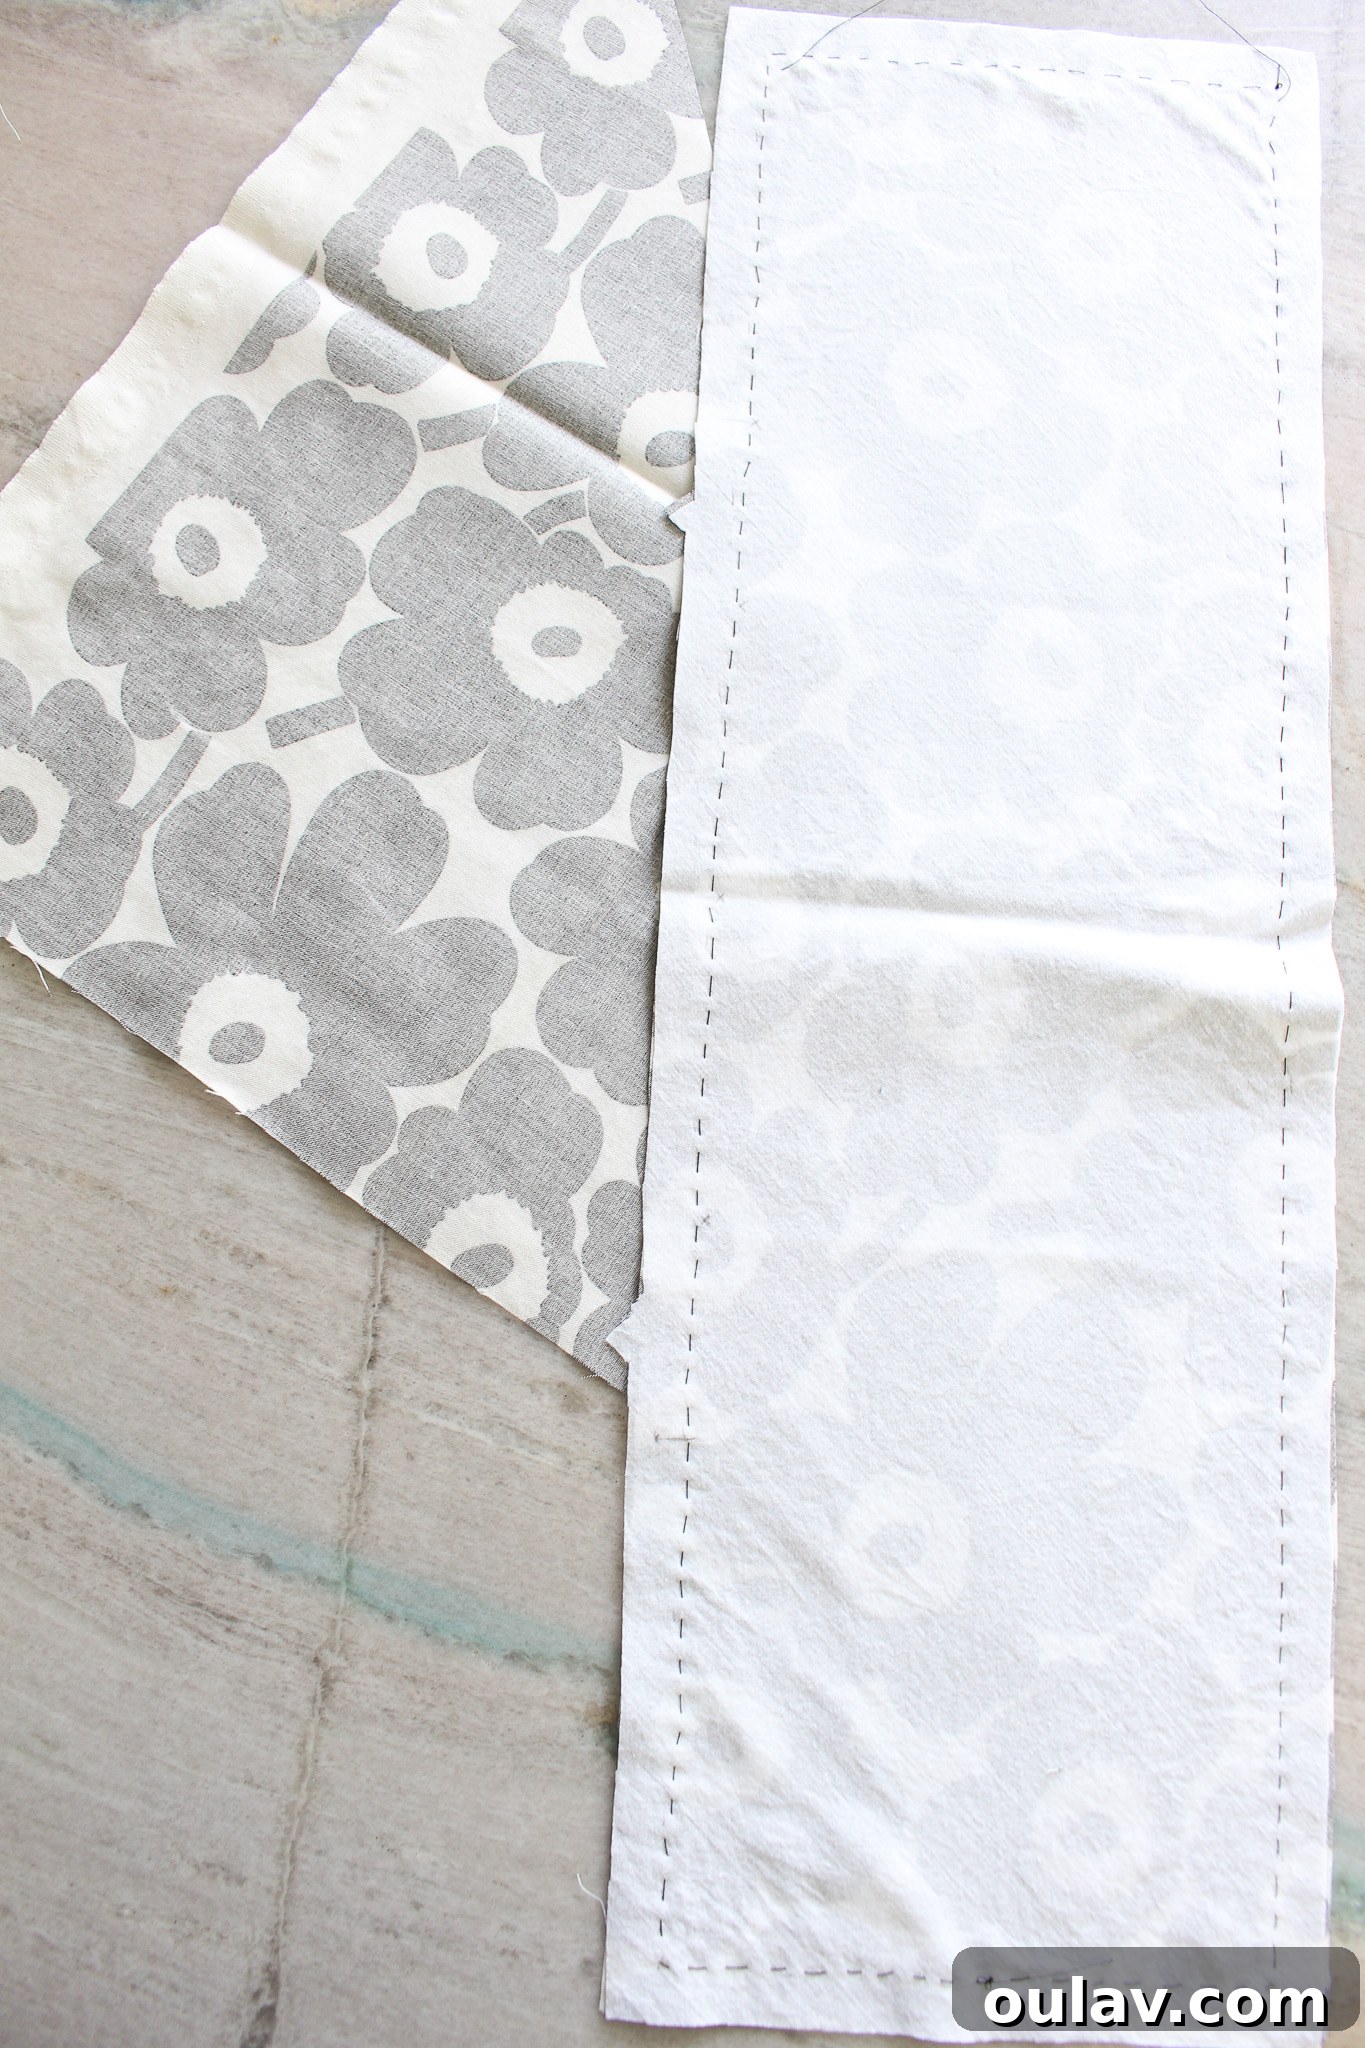
- Baste Underlining to Main Fabric (Hand Basting Recommended): This is a crucial step. Lay each main fabric piece flat with its corresponding underlining piece directly on top. Align all edges perfectly. Now, carefully baste the underlining to the main fabric. It is highly recommended to do this by hand, using a long, running stitch, positioning the basting stitches *between* the seam line and the raw edge of the fabric (i.e., close to the seam line, within the seam allowance).
- Basting Tip: For the best results and to prevent puckering, baste each side of a pattern piece separately. Avoid stitching continuously around corners. Instead, stop your basting at a corner and begin a new line of basting on the next side. This ensures both layers lie perfectly flat.
- Treat as One Layer: Once the underlining is thoroughly basted to each corresponding main fabric piece, you can now treat these two layers as if they are a single, unified piece of fabric. This significantly simplifies the subsequent construction steps.
- Follow Pattern Instructions: Proceed to follow the garment construction instructions provided with your vintage pattern as normal. Sew all seams and details, treating the basted main fabric and underlining as one.
- Remove Basting Stitches: After the garment’s primary construction is complete and the seams are sewn, carefully remove the temporary basting stitches that held the underlining to the fabric.
- Refine Interior Seams (No Serger Needed): With underlining, you have an elegant option for finishing interior seams without needing a serger. Trim the raw edges of the underlining layer slightly, then fold the inside seams (of the main fabric) over the trimmed underlining. Hand stitch these folded seams down, creating a neat, enclosed finish that adds a touch of couture quality to the garment’s interior, free from frayed edges and visible machine stitching.
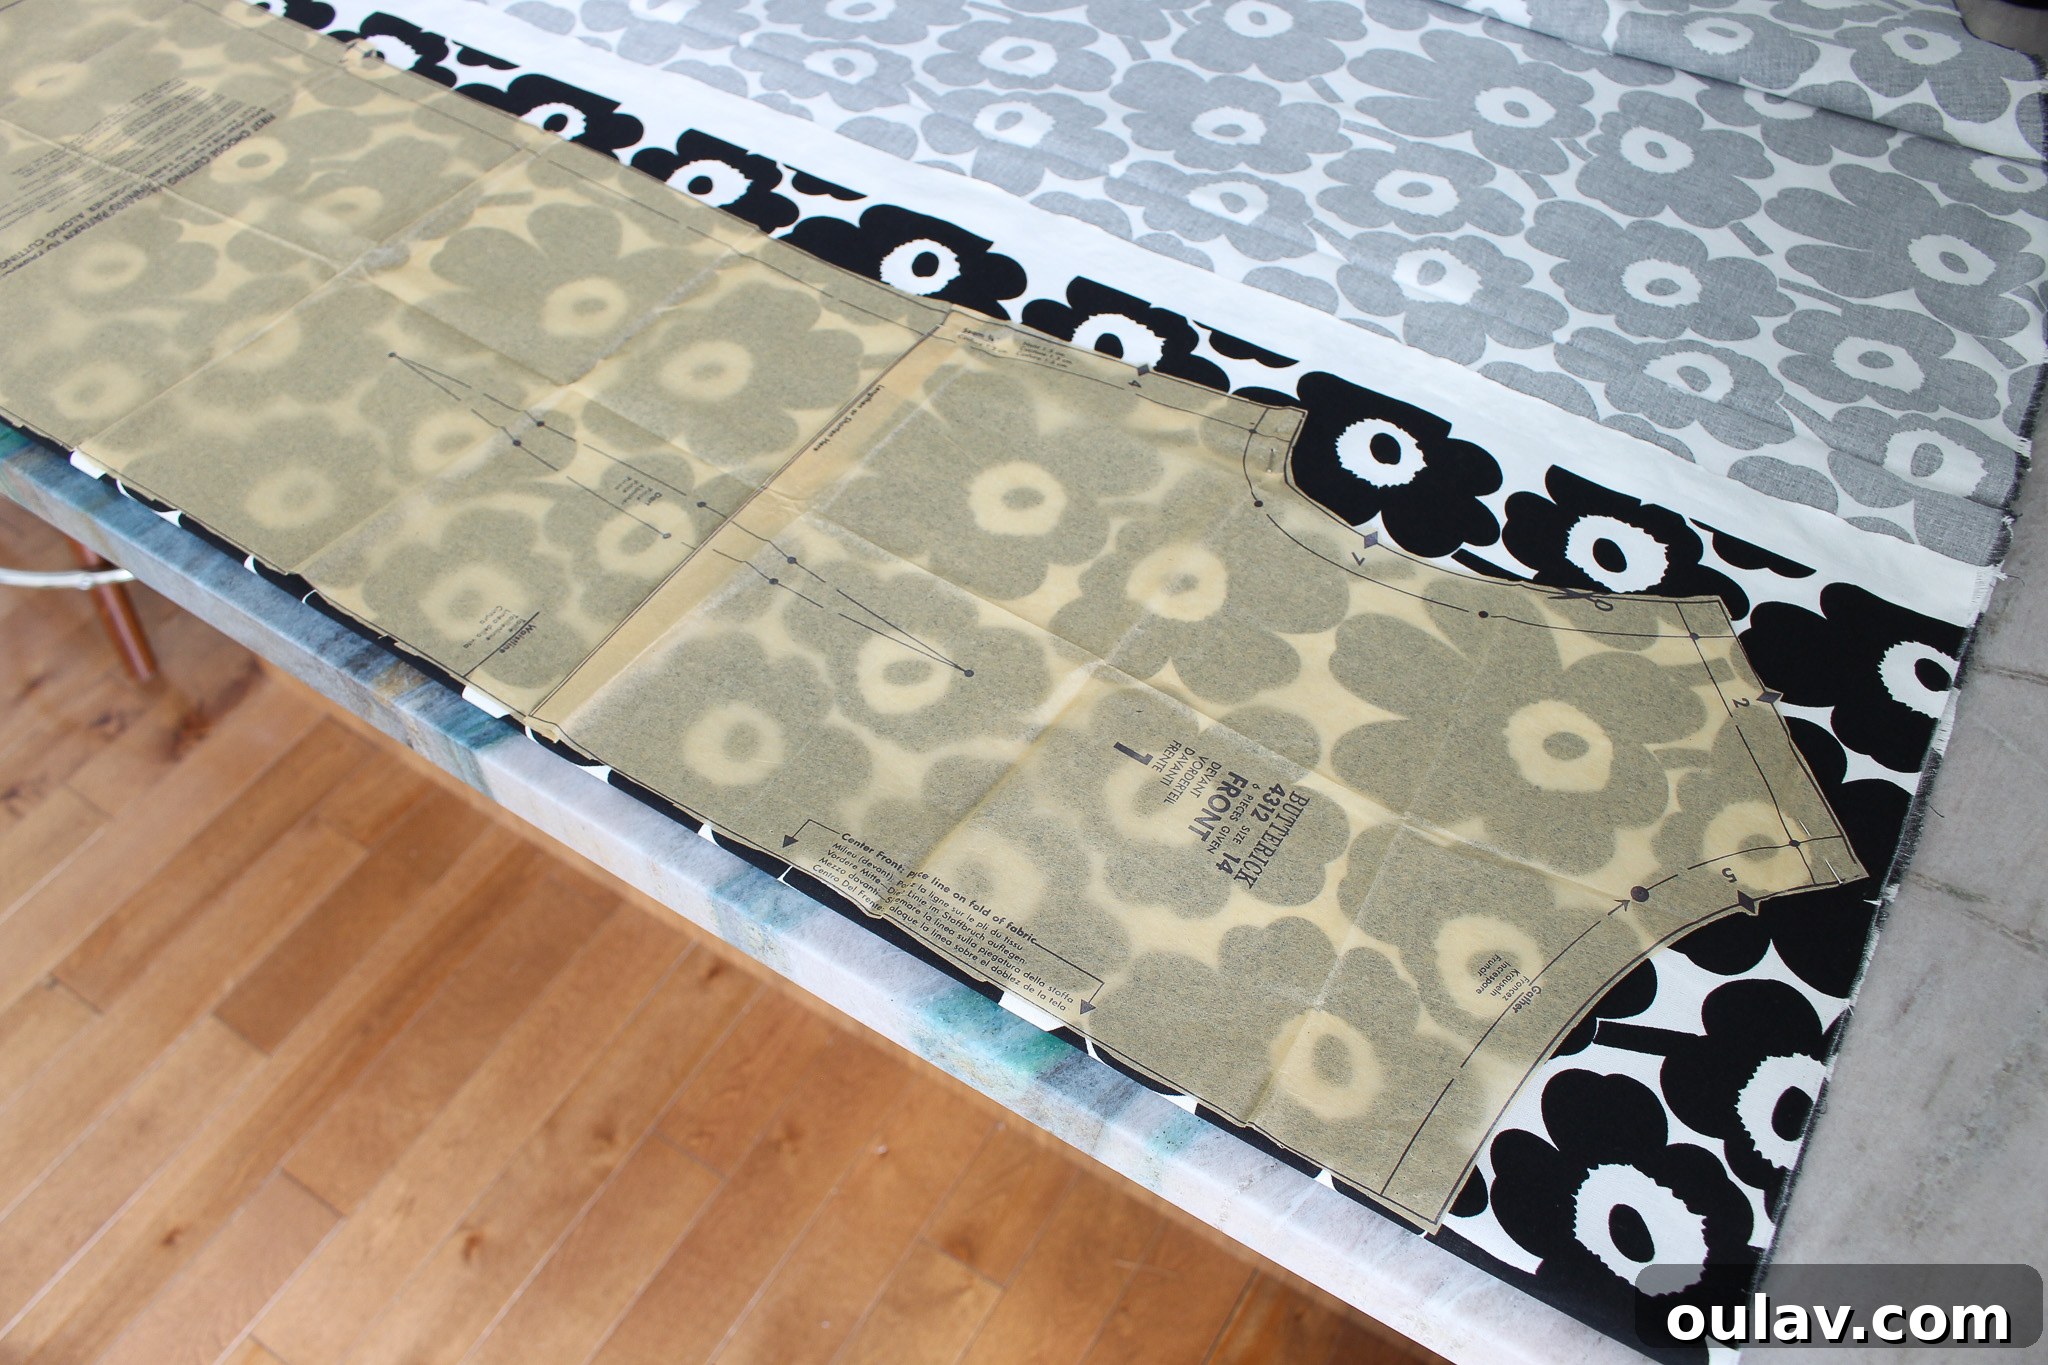
Cut out your pattern pieces, making sure to select the correct size if it’s a multi-size pattern.
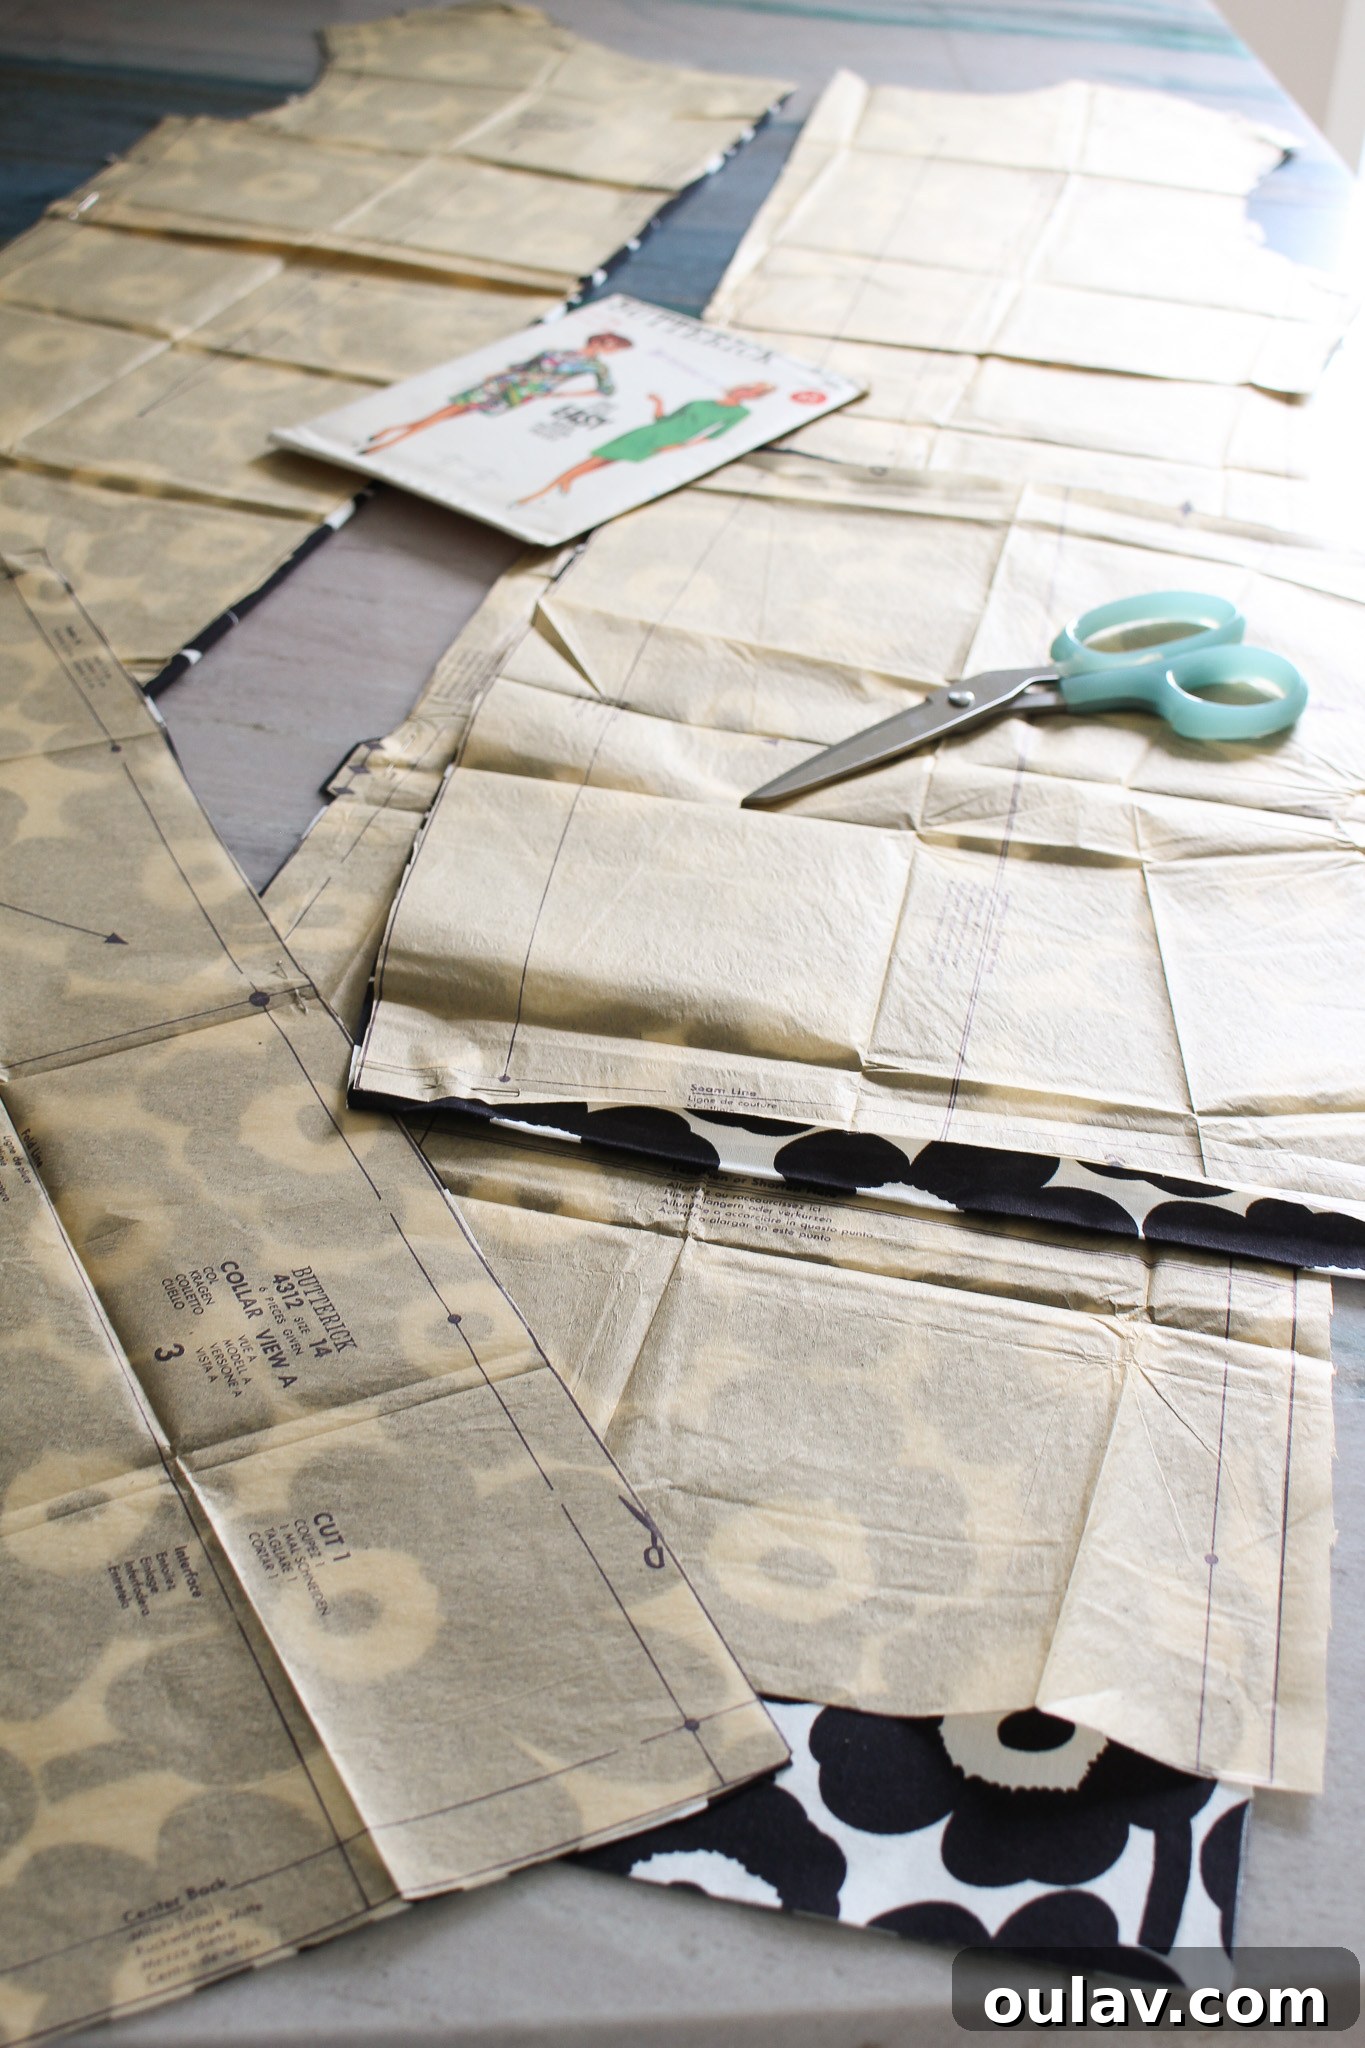
Carefully lay the pattern pieces on the fabric, meticulously following grain lines and fabric direction (consult “with nap” instructions if applicable).
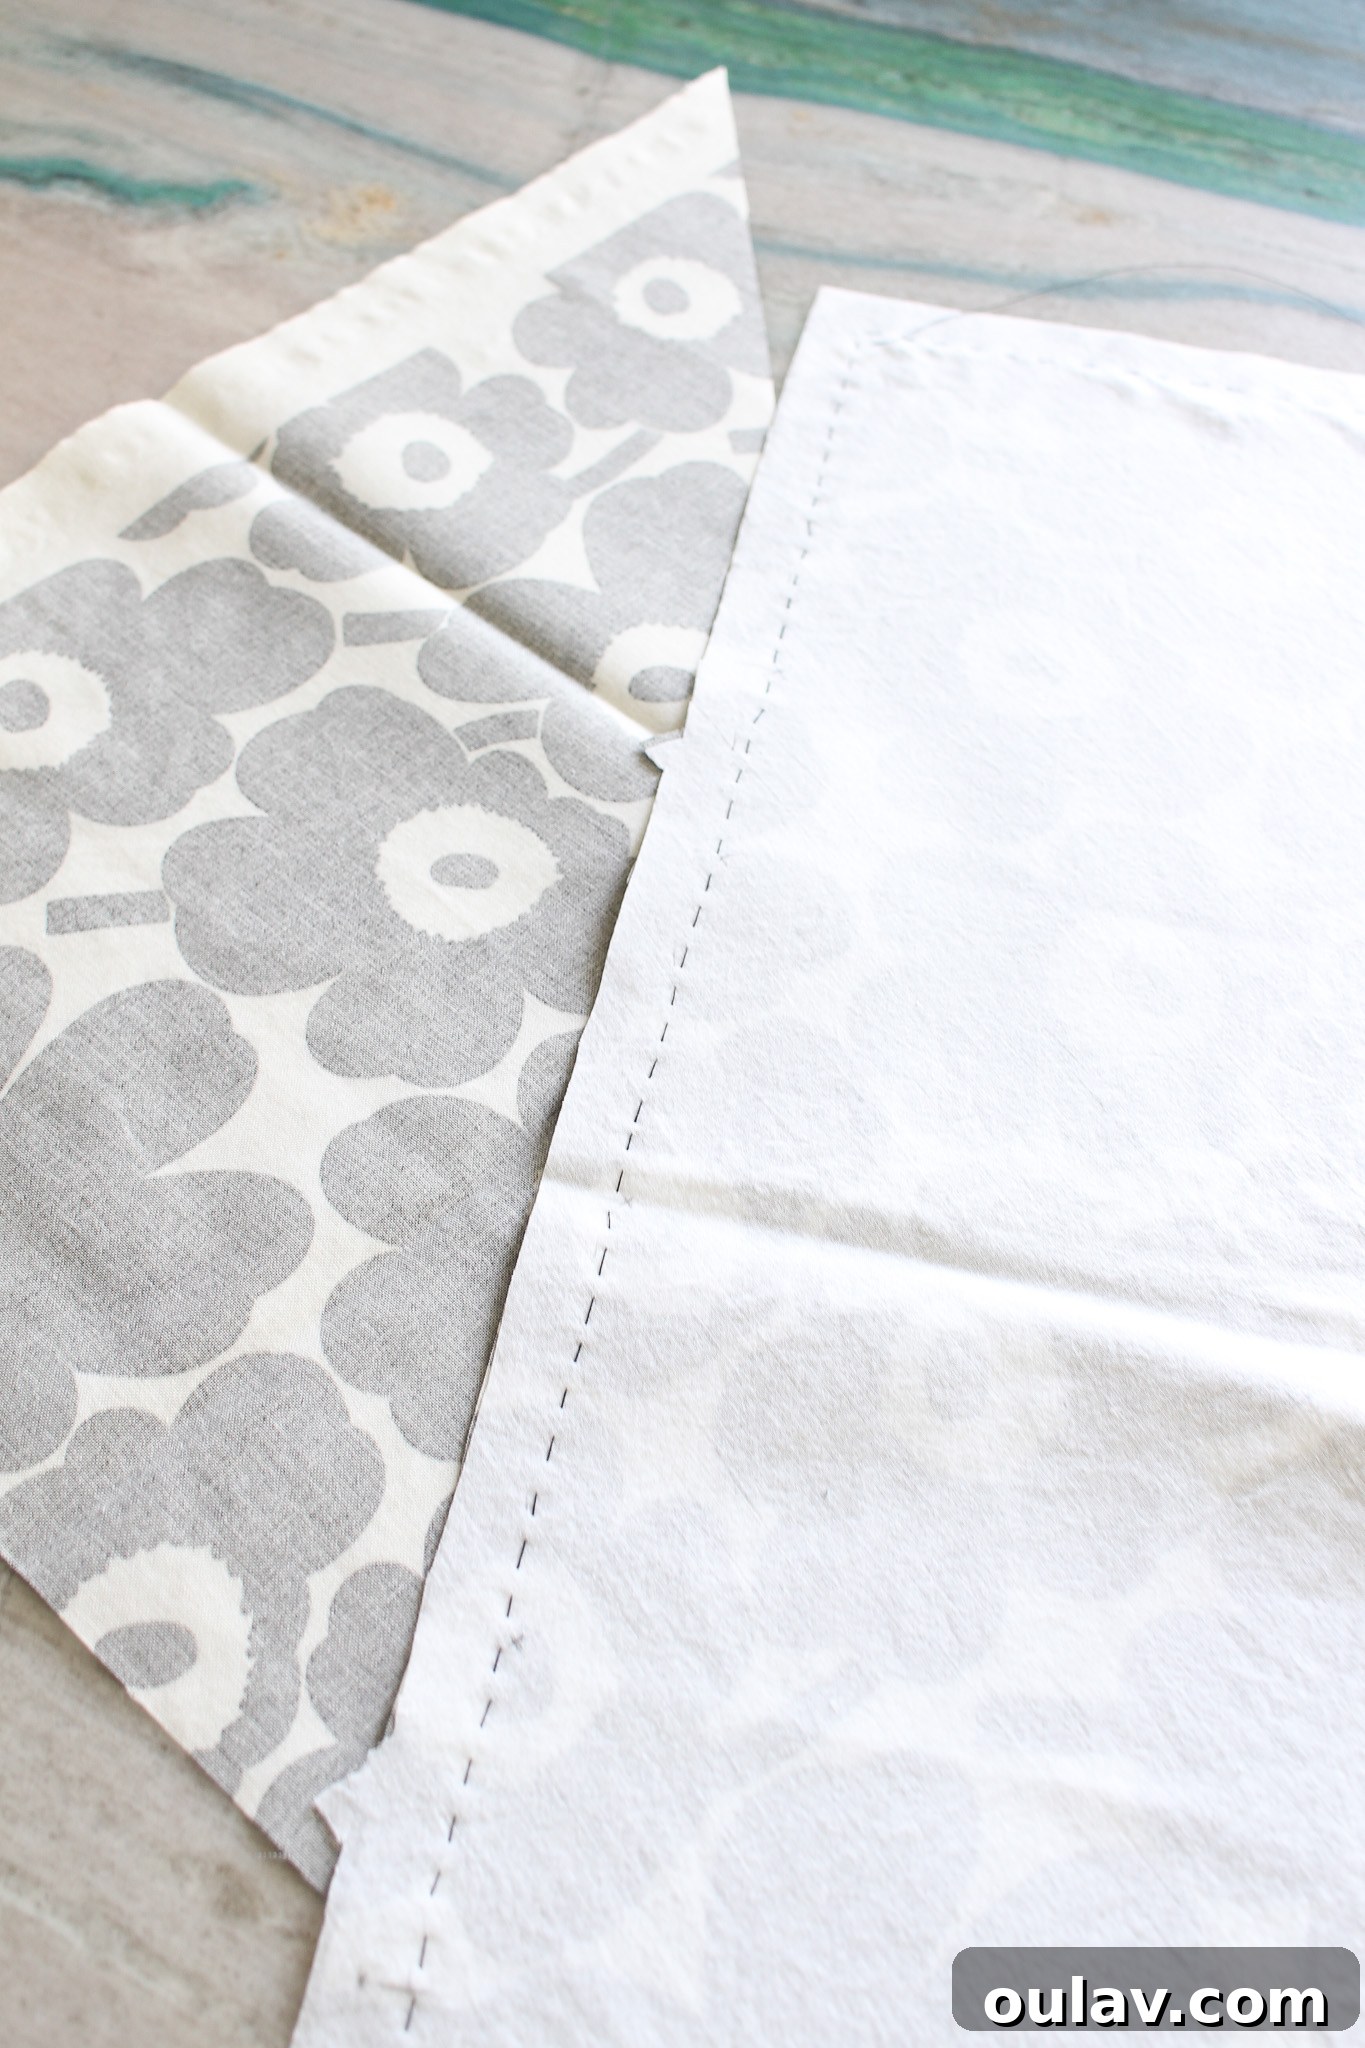
Hand baste the underlining to the main fabric, carefully placing stitches between the seam line and the fabric’s raw edge.
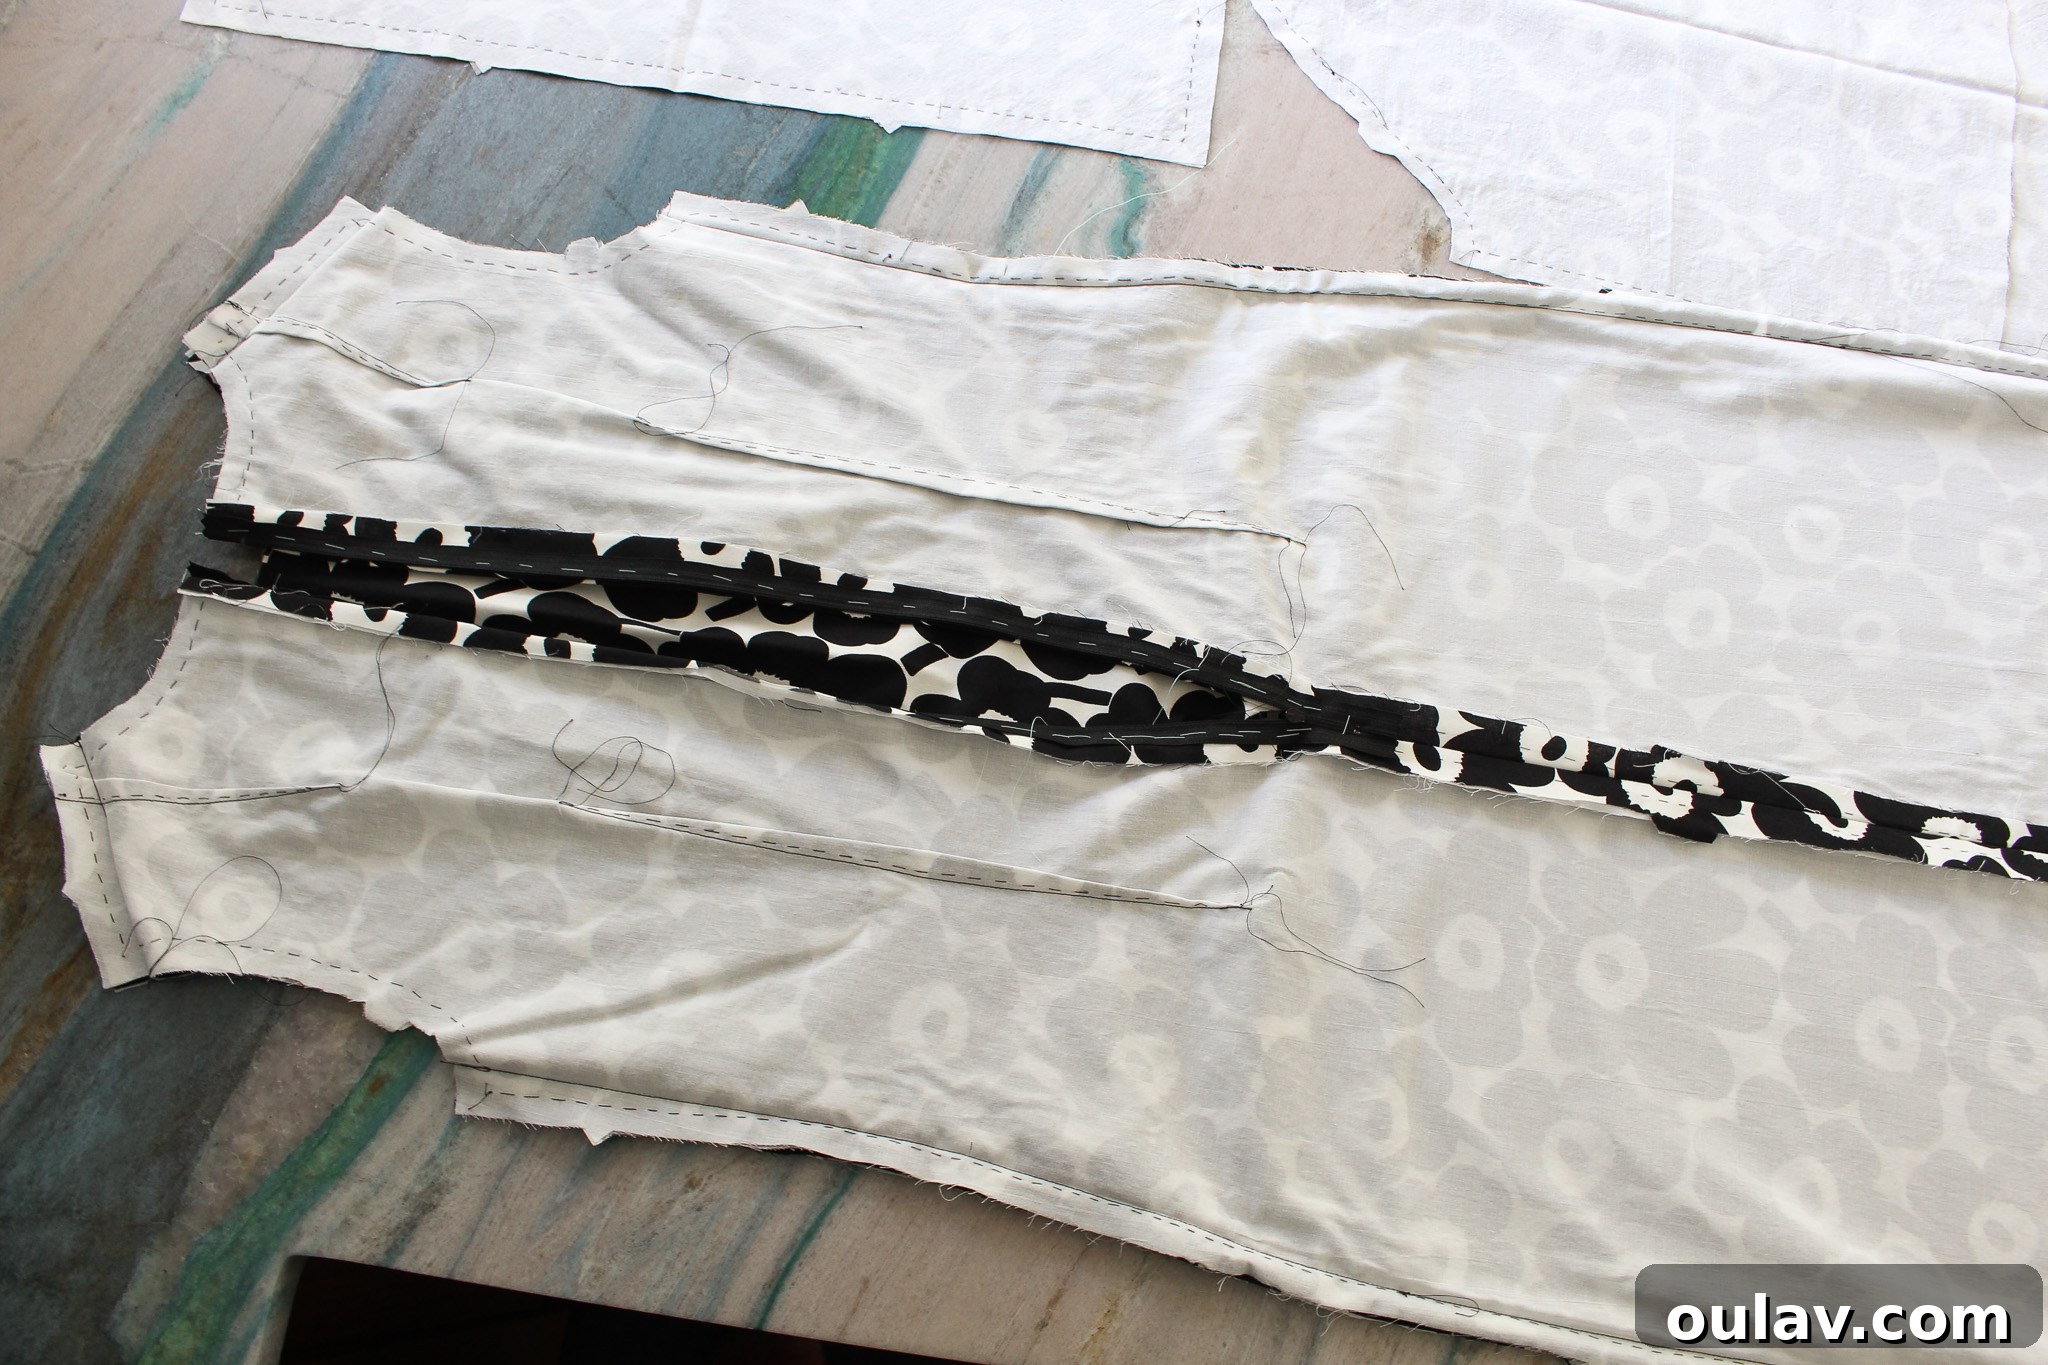
Once the underlining is securely basted, treat both layers as a single piece of fabric and proceed with the pattern instructions.
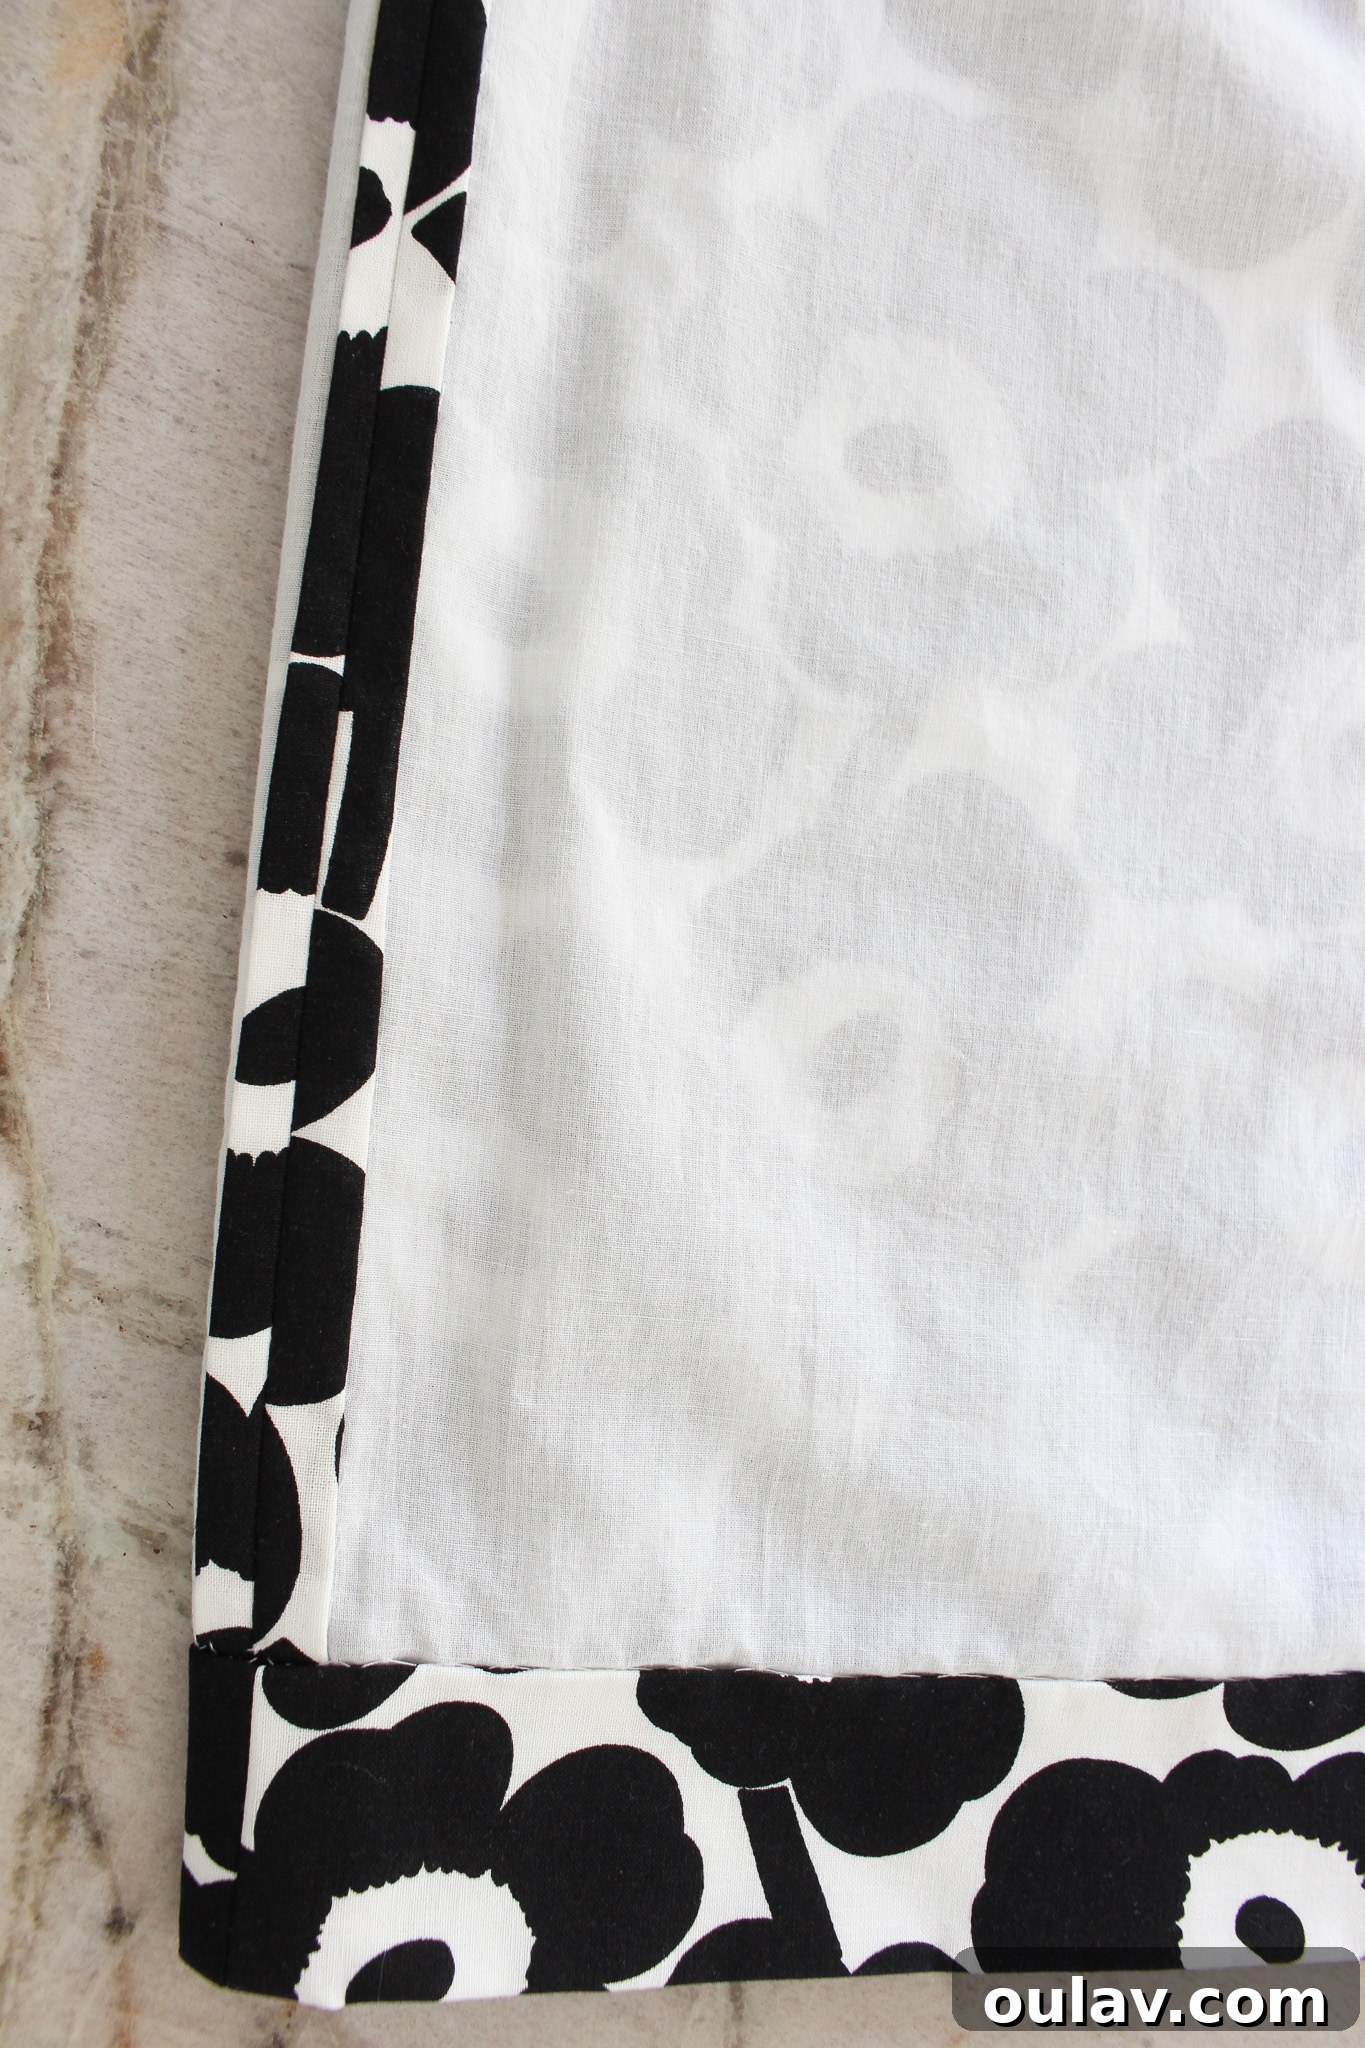
With underlining, you can achieve a beautifully clean interior finish by trimming and hand-stitching inside seams over the underlining, eliminating the need for a serger.
The Finished Masterpiece: A DIY Dress with Impeccable Underlining
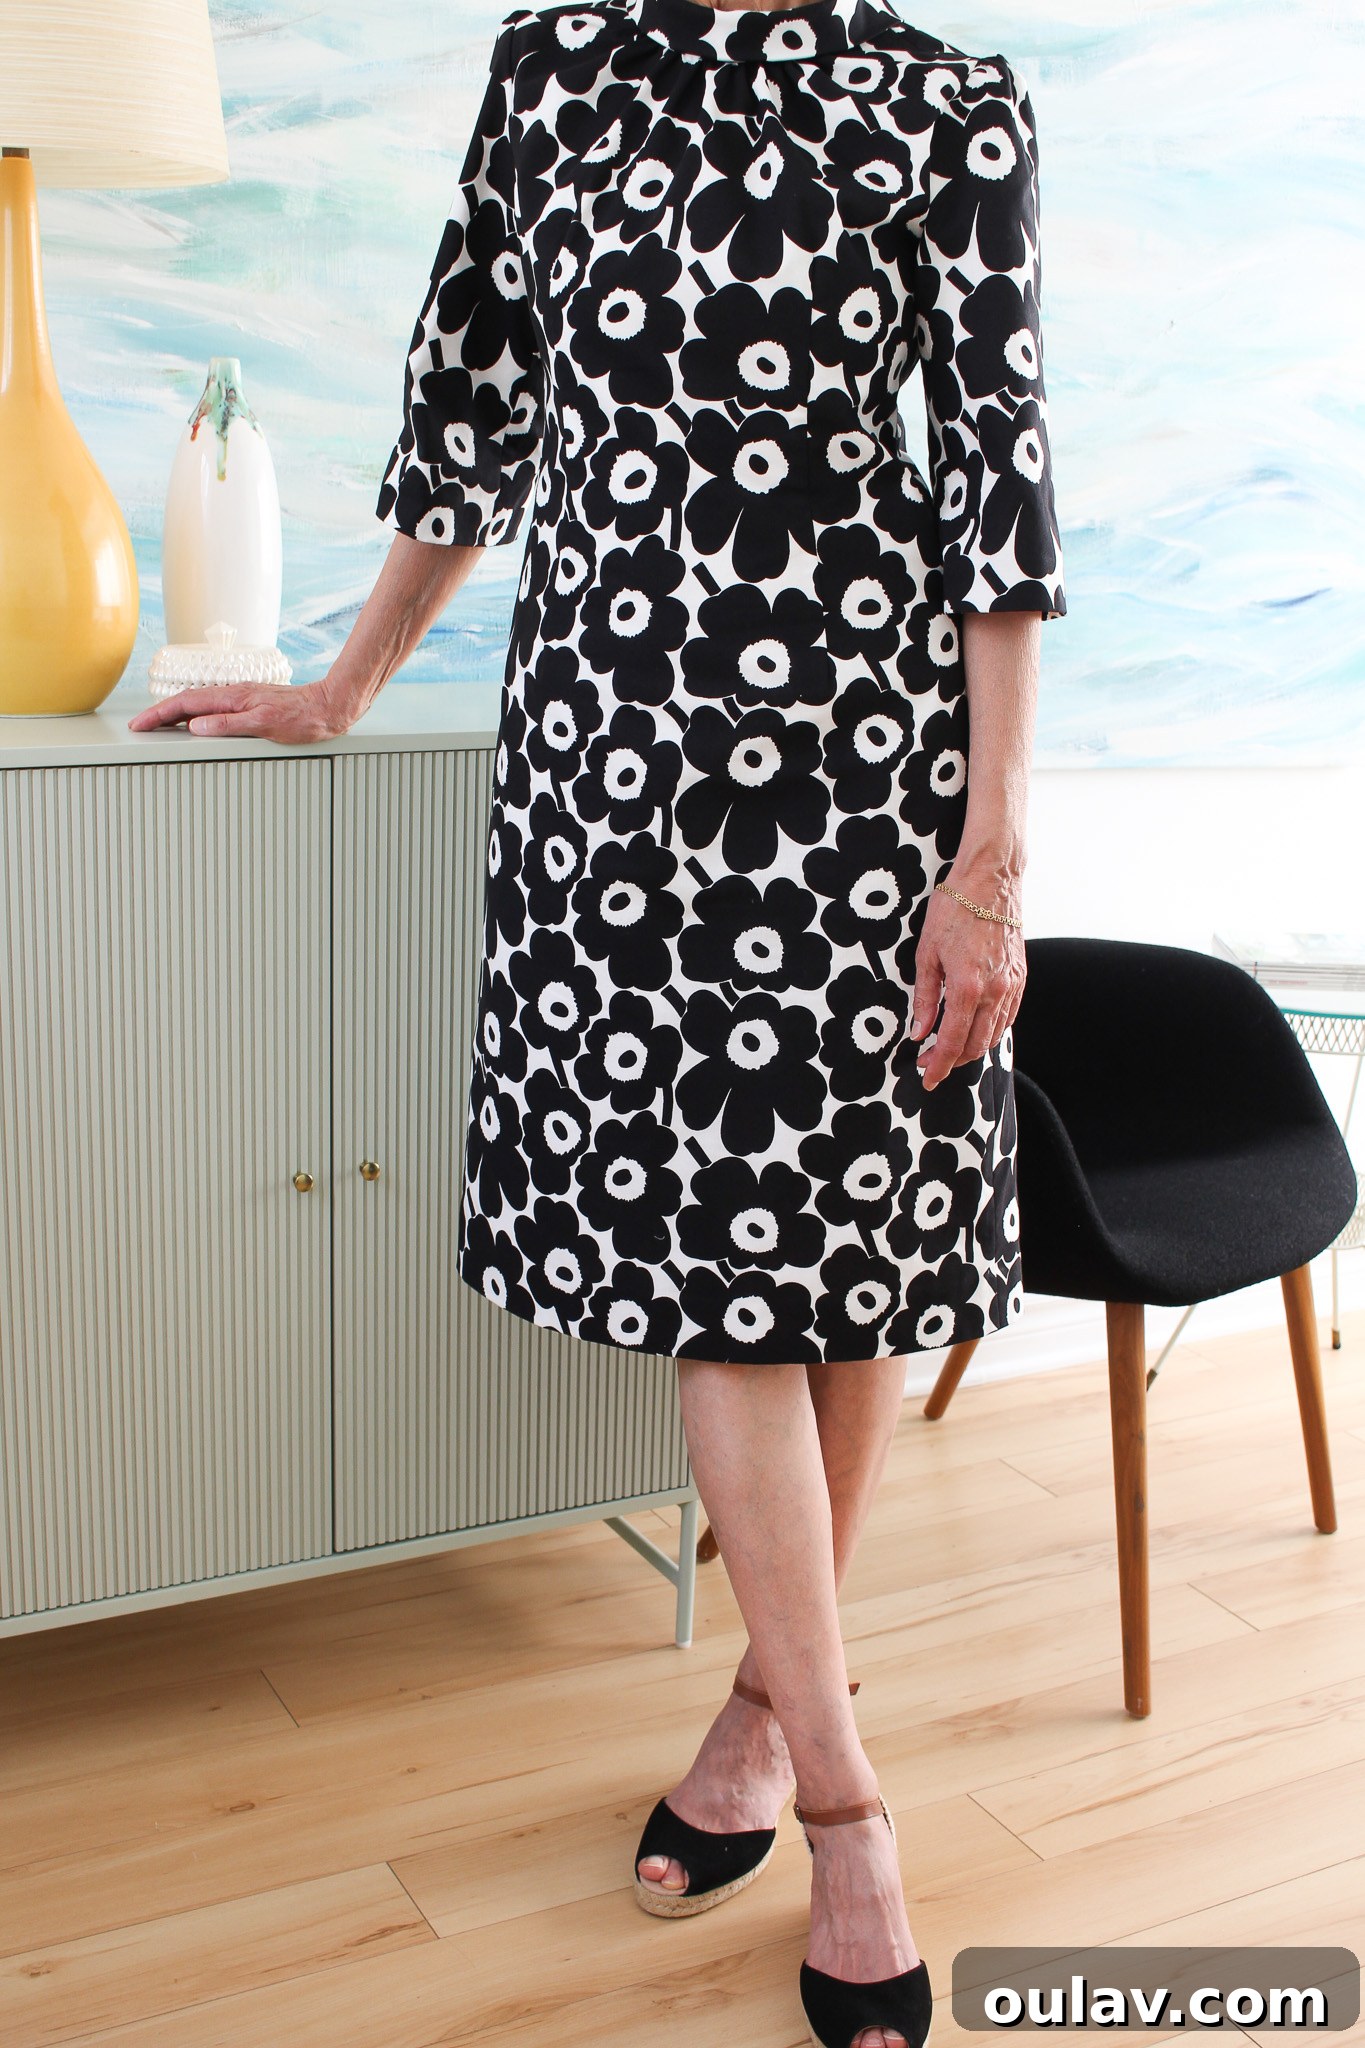
And here it is – my mother’s beautifully completed DIY dress, a stunning testament to her skill and the thoughtful inclusion of underlining. Thanks to the meticulous method outlined above, there is absolutely no machine stitching visible on the exterior of the dress. The interior is equally impressive, presenting a wonderfully neat and clean finish, entirely free from any unsightly frayed edges. The precision of the underlining technique truly elevates the garment, providing a polished, high-quality look and feel that rivals professional craftsmanship.
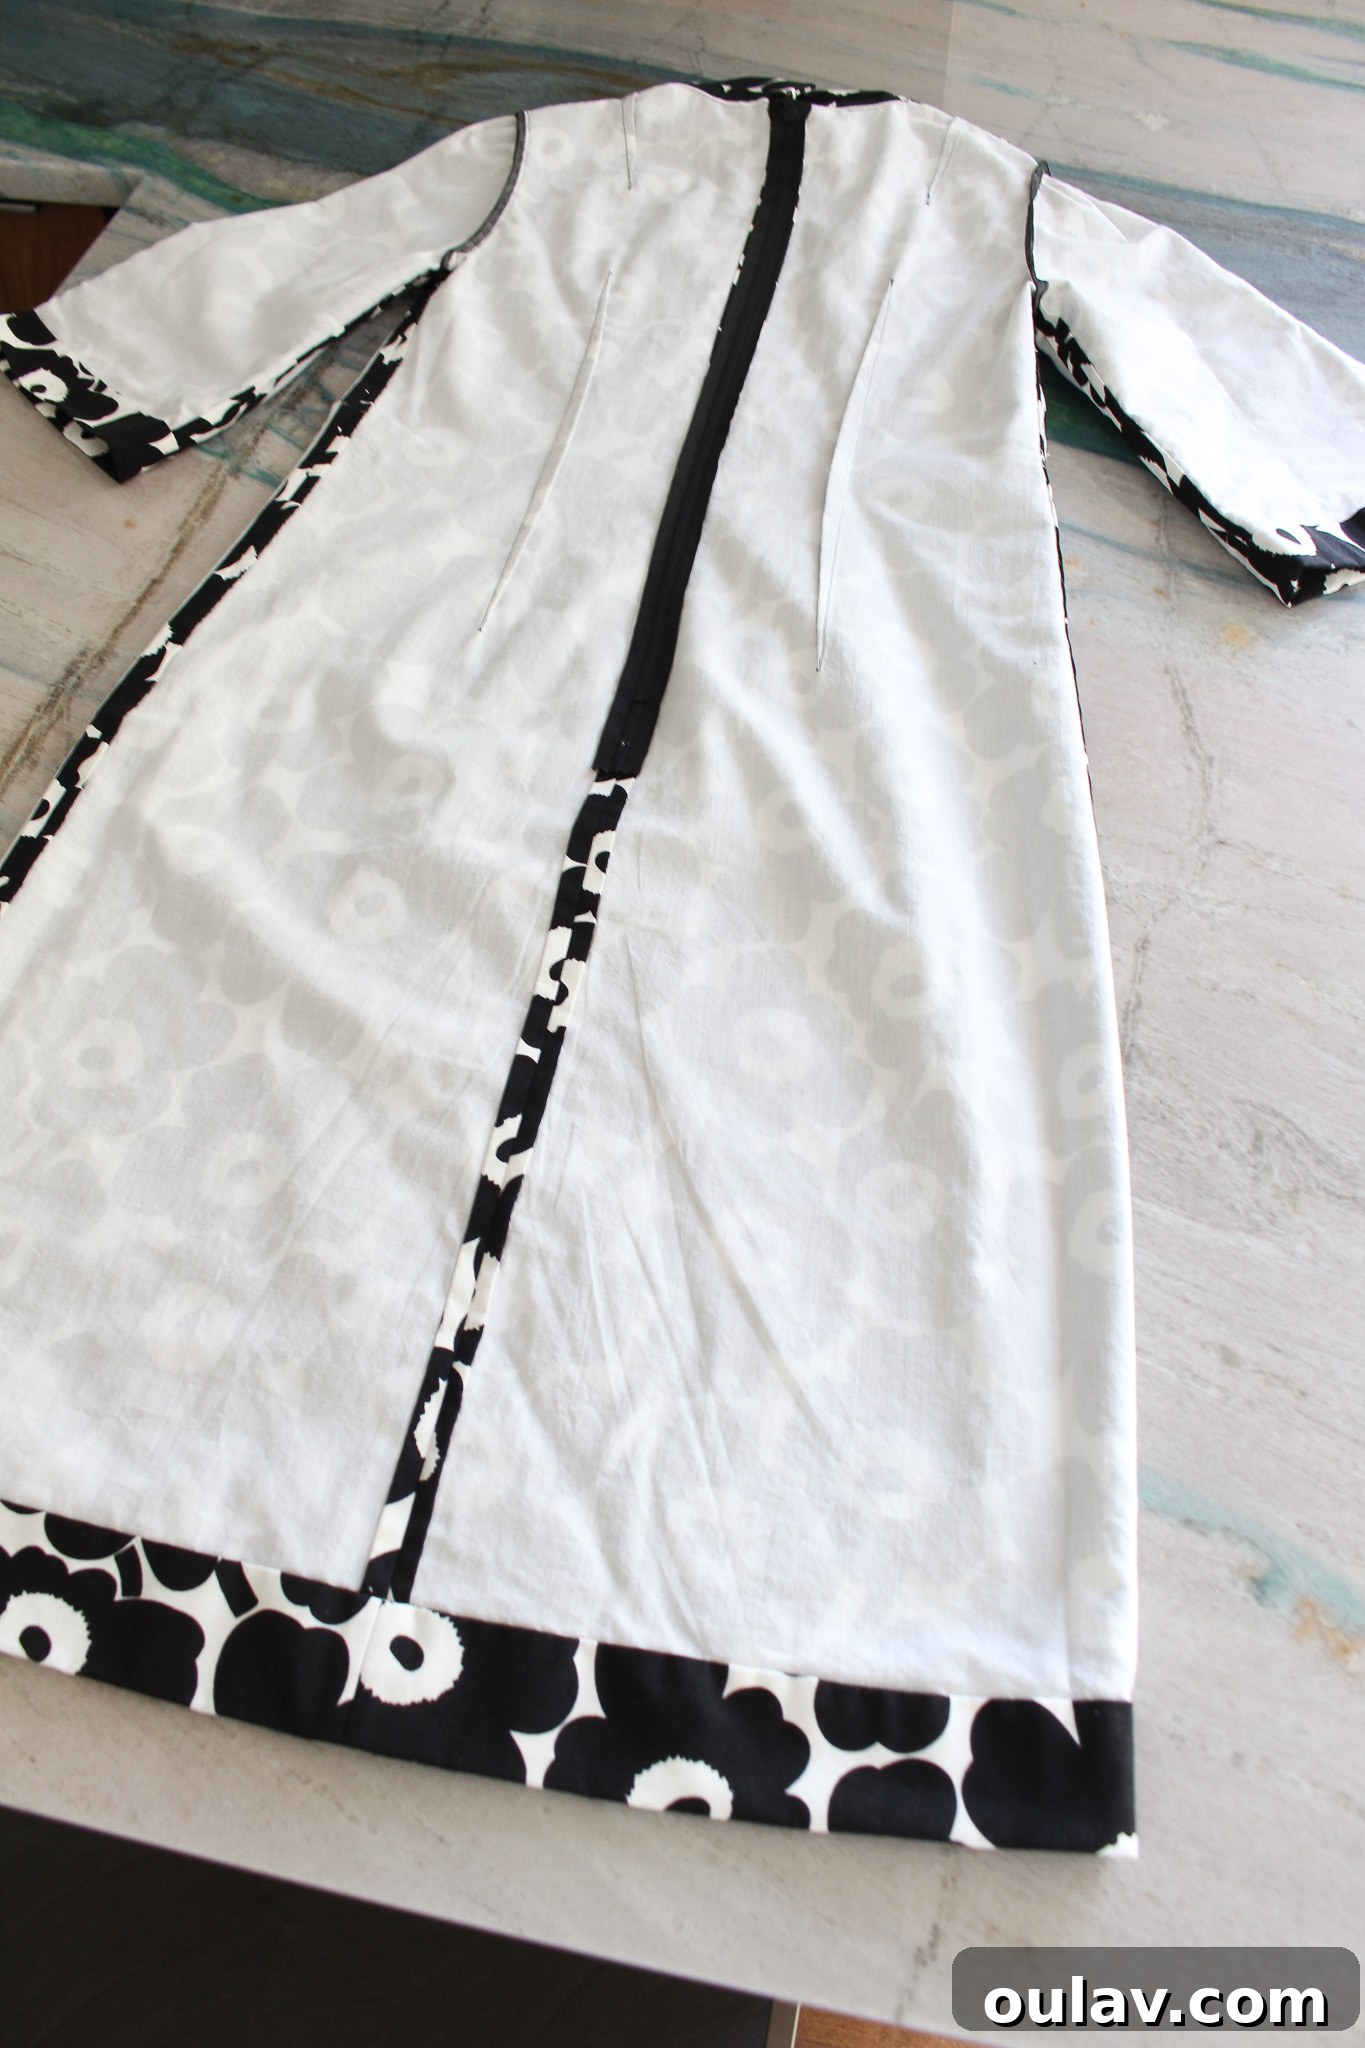
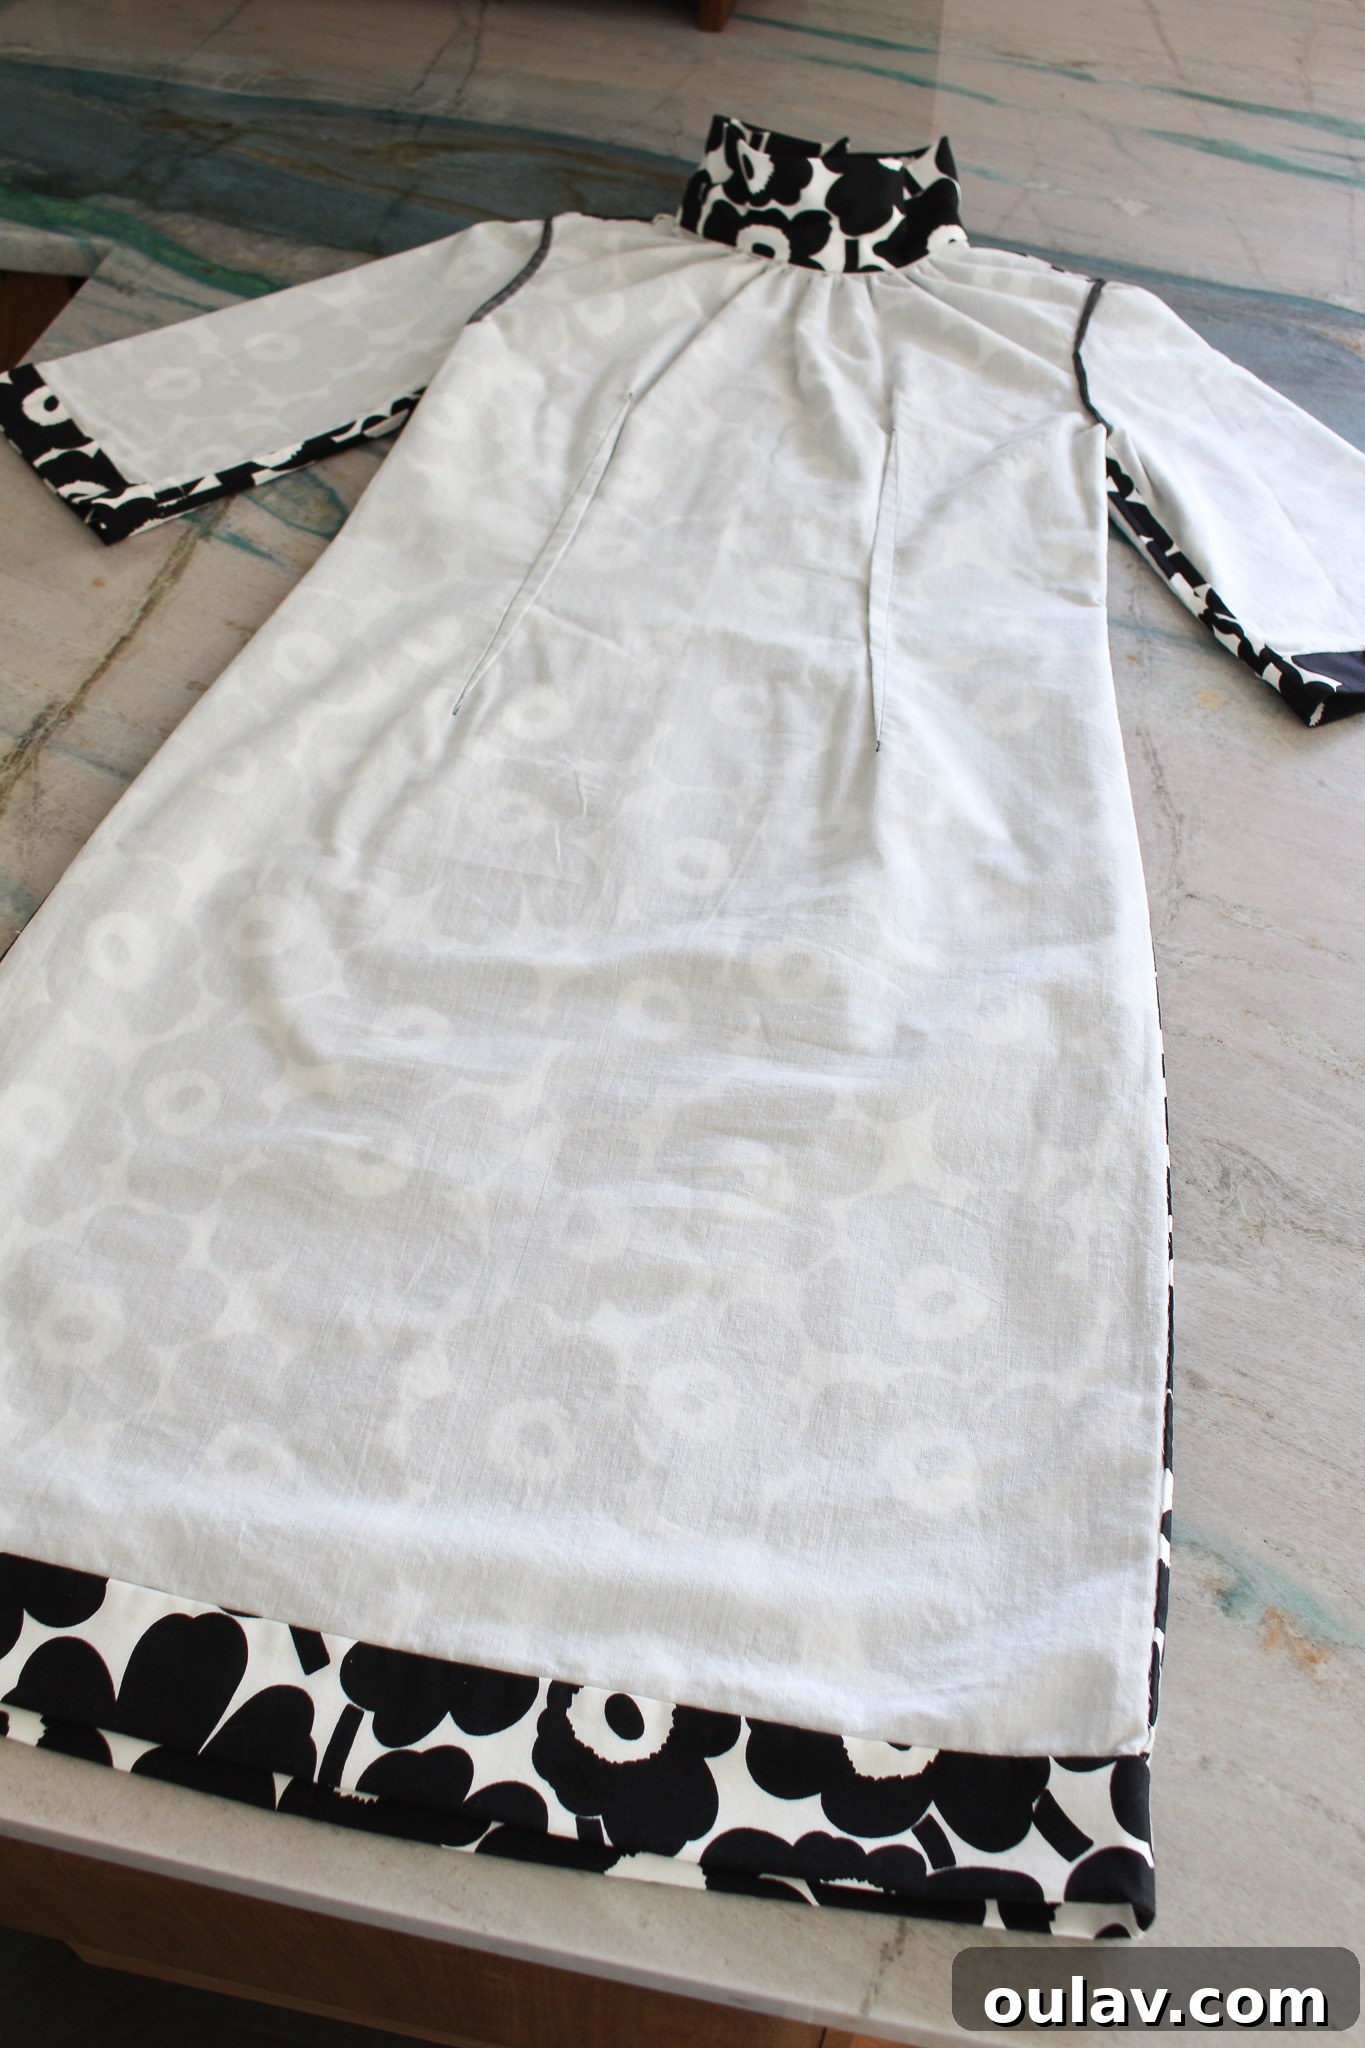
A Harmonious Blend: DIY Dress with Vintage Pattern and Marimekko Unikko Fabric
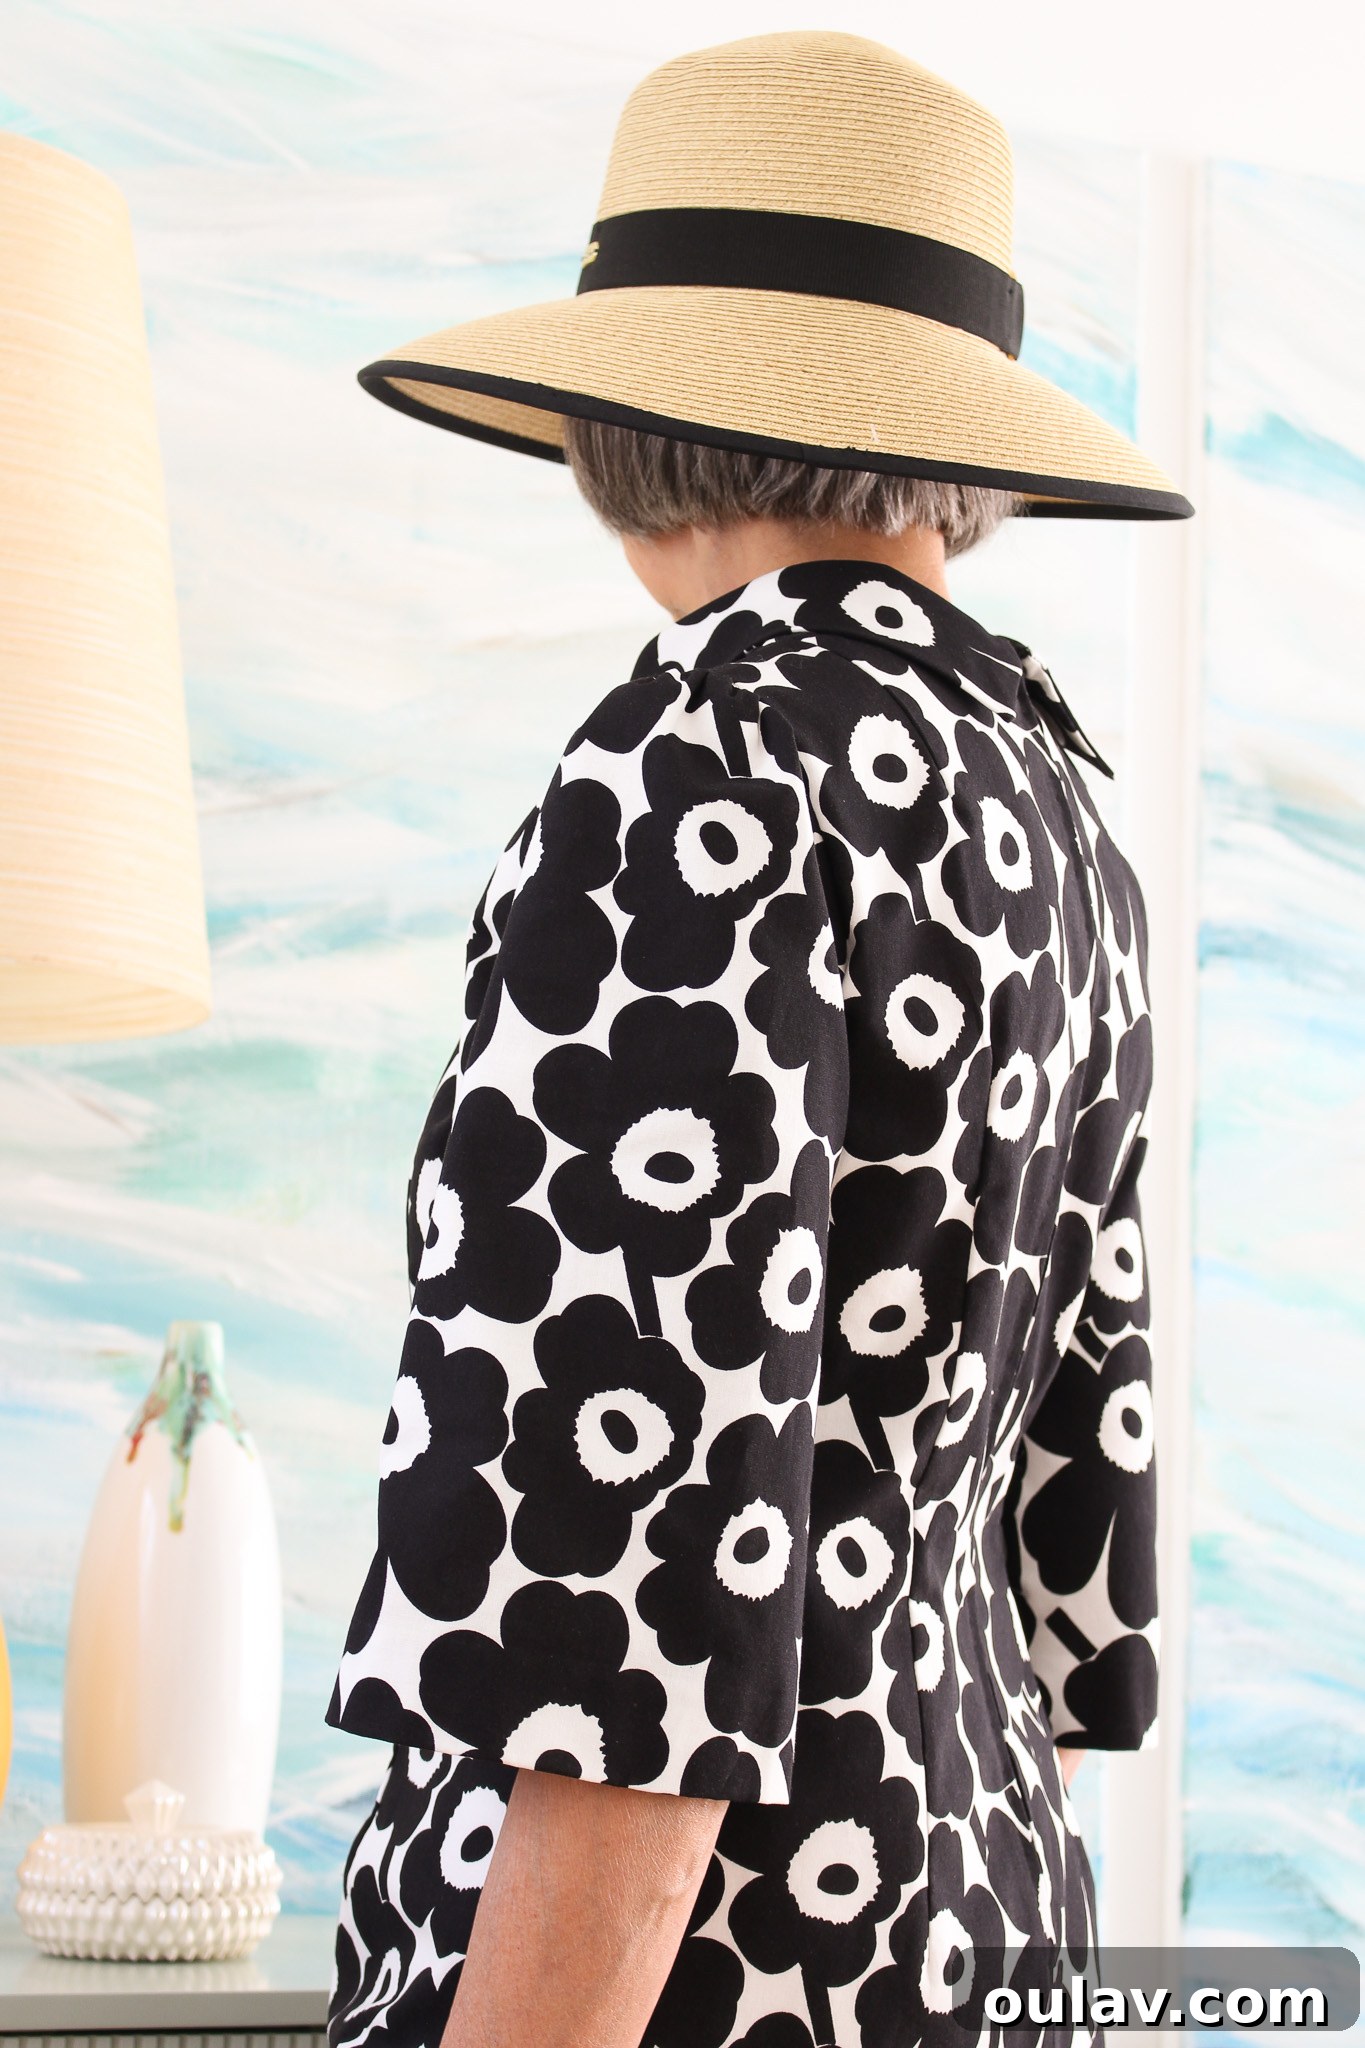
Once turned right side out, the completed dress reveals its full splendor – it is utterly stunning! I absolutely adore that my mother chose one of my Mummu’s (grandmother’s) cherished patterns for this project. It creates such a strong, beautiful connection across generations. My only wish is that we had a photograph of my grandmother wearing her original version of this dress. Although she is no longer with us, I can only imagine her delight and pride if we could have shown her how this finished dress turned out. Nevertheless, I am incredibly happy and proud to be able to share this beautiful creation with all of you!
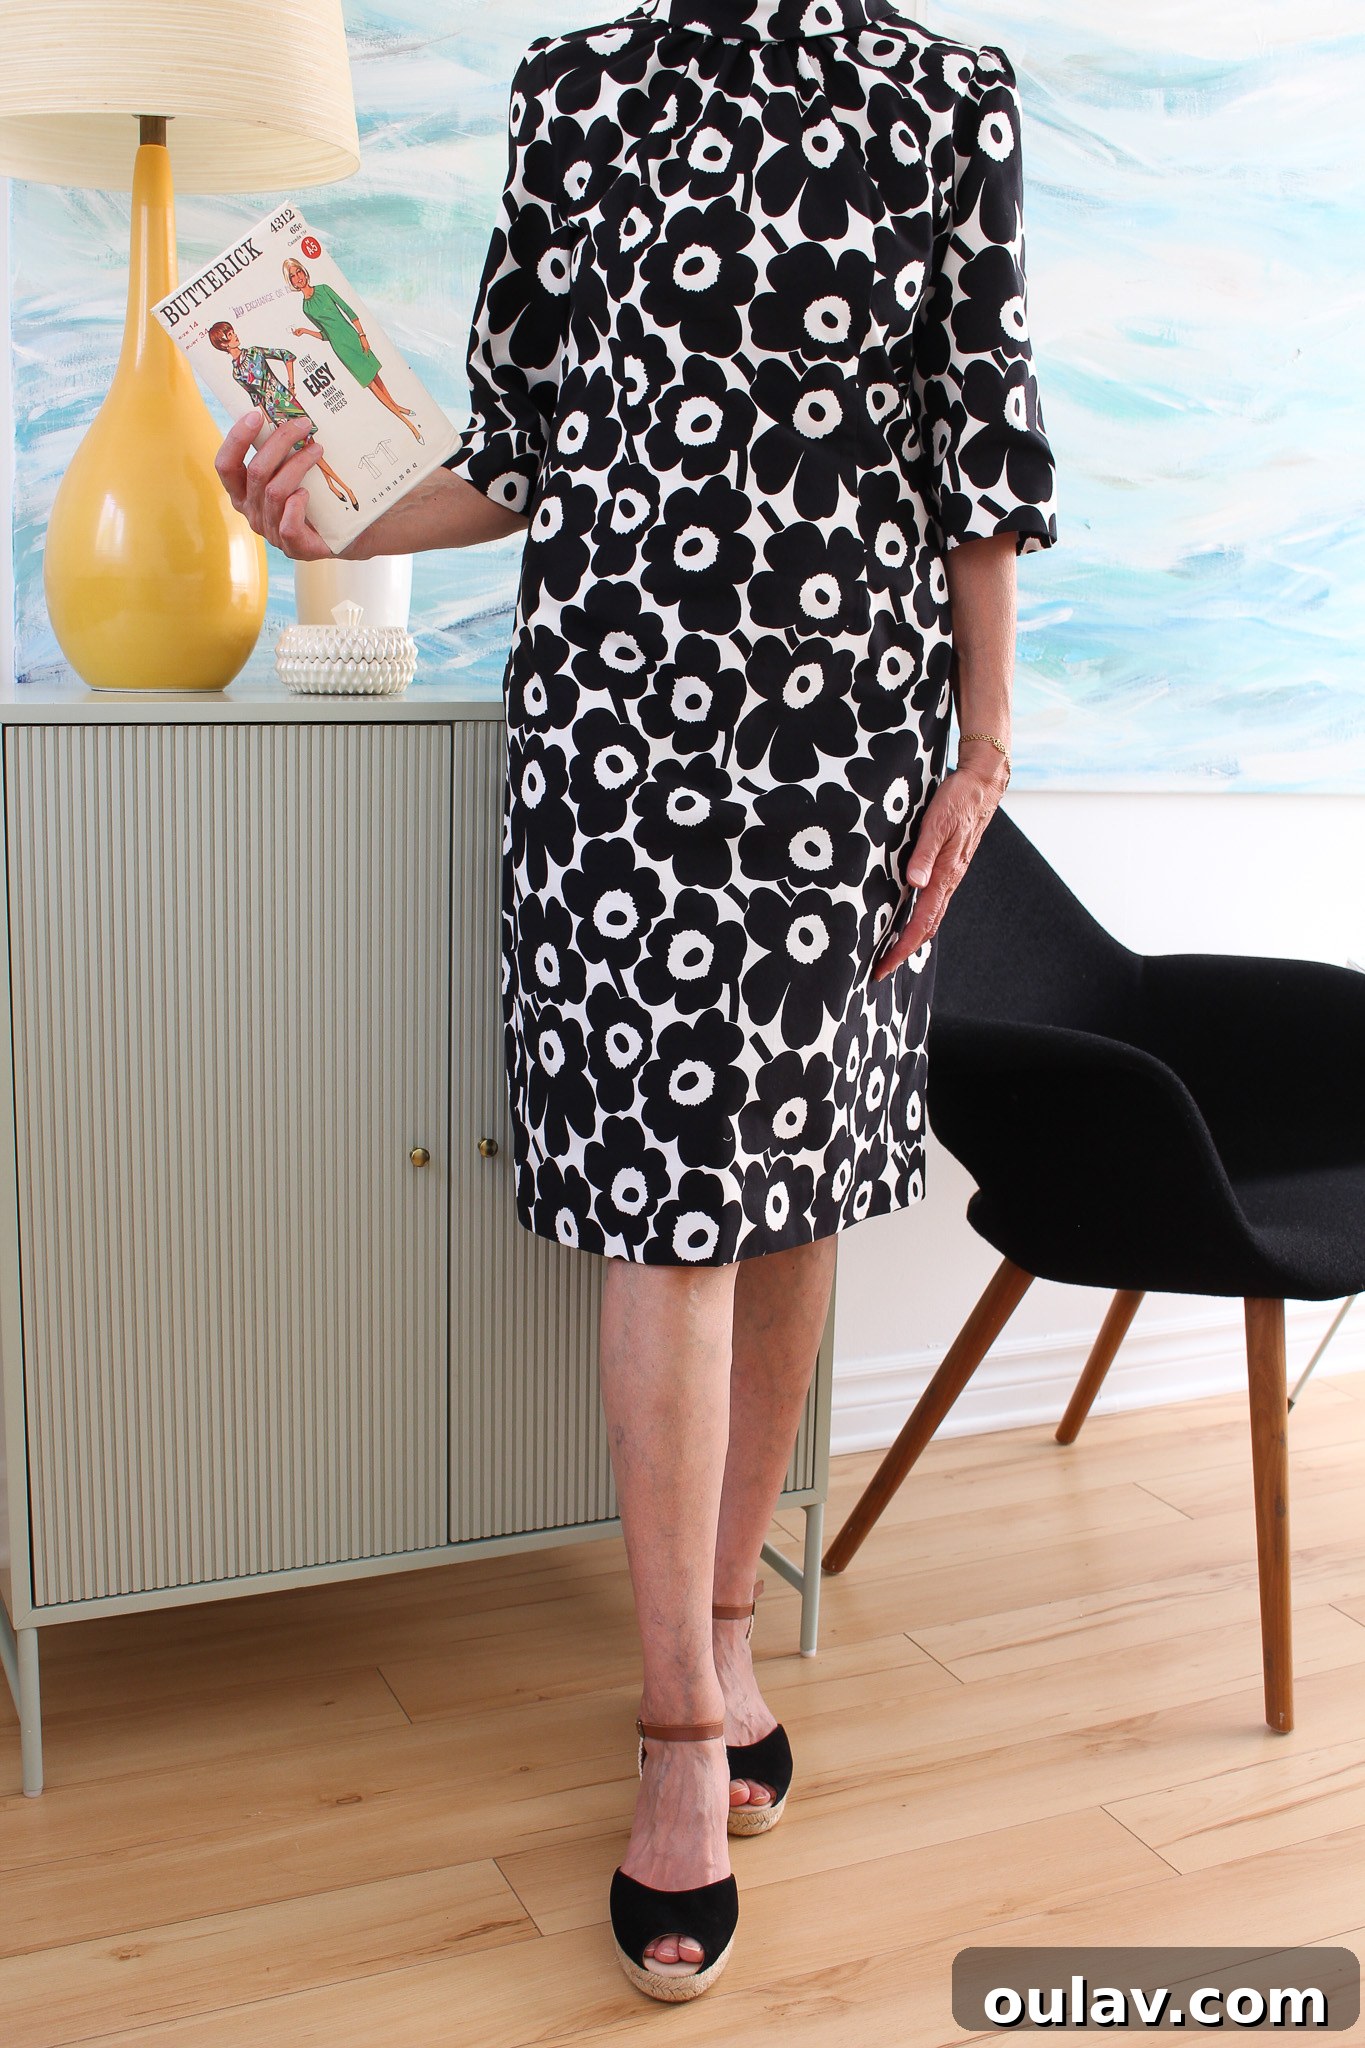
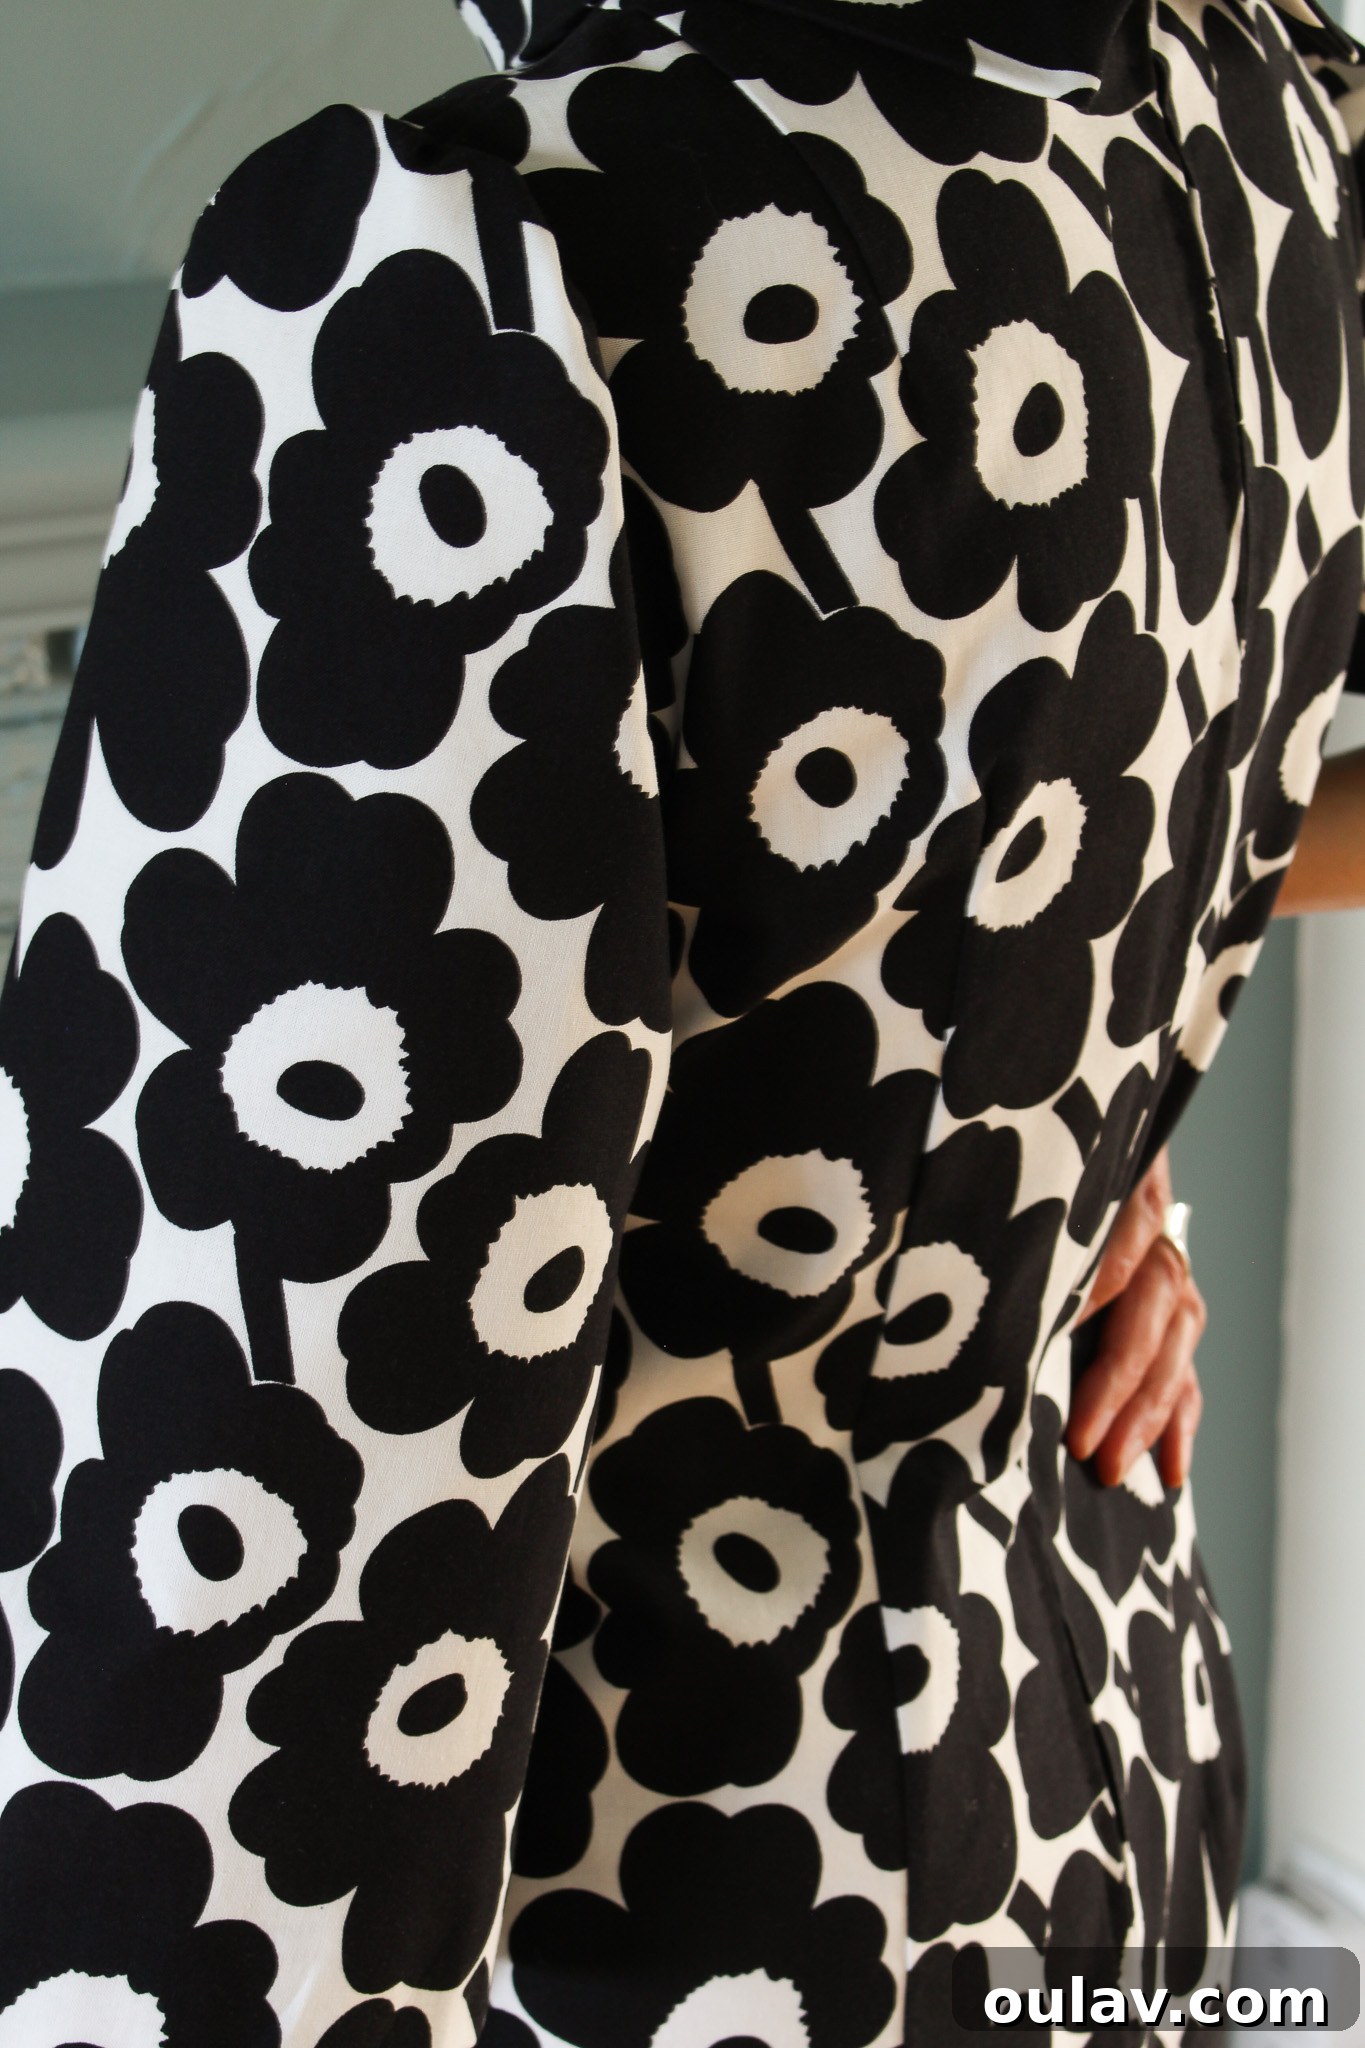
The pattern’s design, featuring a delicately gathered neck and strategically placed darts, introduces a subtle shaping that beautifully complements the otherwise mod and free-flowing silhouette typical of 1960s dress patterns. These thoughtful design elements provide definition without detracting from the relaxed elegance of the era. These photographs clearly illustrate what I meant earlier about this particular vintage pattern being ideal for large prints; it avoids excessive cuts or seam lines that could disrupt the magnificent Unikko blooms, allowing the fabric’s pattern to be enjoyed in its full, uninterrupted glory.
The Enduring Appeal: Why Marimekko Fabric Stands Apart
The exceptional quality of Marimekko fabric, much of which is proudly printed in Finland, is a distinctive characteristic that sets it apart in the world of textiles. Having personally handled and sewn with a vast array of fabrics – my mother having sewn professionally, and both of us having completed numerous DIY sewing projects for our homes and wardrobes – we can confidently attest that sewing with high-quality fabric like Marimekko is always a profound pleasure. We have had the privilege of working with Marimekko fabric on previous occasions, and its superior quality has consistently remained excellent over the years. The cotton fibers themselves are of premium grade, expertly spun to create a durable yet soft textile.
My mother is thoroughly enjoying wearing her new dress. The high-quality cotton contributes to a lovely drape that moves elegantly with her. Functionally, the fabric proved incredibly practical: it dried remarkably quickly and smoothly after laundering, showing no noticeable shrinkage, which speaks volumes about its stability and manufacturing integrity. Furthermore, it required minimal ironing, a huge convenience for everyday wear. For this particular dress, we selected the exquisite Marimekko Pieni Unikko Black / White Cotton Fabric. While the fabric’s inherent quality meant underlining wasn’t strictly essential for opacity, its inclusion offered distinct advantages. It provides an absolute guarantee that the white background will not be remotely sheer, offering complete confidence in wear. Additionally, as noted earlier, the white underlining subtly enhances the contrast, making the iconic Unikko pattern pop even more vibrantly against its background.
This project, combining a sentimental vintage dress pattern from my mother’s cherished collection with the celebratory Unikko fabric, was an absolute joy and a truly memorable experience. It’s surprising to realize that while we often admire and collect these beautiful vintage patterns, we don’t always *use* them! This experience has certainly reignited my desire to delve back into her collection, meticulously pore over the options, and choose another pattern to create something special for myself. I sincerely hope this journey has inspired you to explore the wonderful world of vintage patterns and custom sewing as well. A heartfelt thank you goes out to FinnStyle for providing such exquisite fabric and the wonderful motivation behind this project. If sewing a DIY dress isn’t quite your passion, I highly recommend visiting their website to discover their stunning selection of Marimekko Unikko home wares and accessories – there’s something beautiful for everyone to celebrate this iconic print.